


Shifting to the cloud transforms your workflow and allows you to be productive from anywhere. One of the setbacks, though, is vulnerabilities that are present, like PrintNightmare. As a result, many still prefer traditional printouts and do not trust digital documents. Why not go for Azure Universal Print as your cloud-based modern print solution?
Azure Universal Print seeks to provide a resolution, not only innovative but also satisfies the traditional need for paper. Print is the last remaining bastion of local infrastructure and is difficult to replace. And in this tutorial, you will learn how to mitigate PrintNightmare with Azure Universal Print to manage your print infrastructure through cloud services.
Read on to start securing printing experiences with Azure Universal Print!
Prerequisites
This tutorial contains hands-on demonstrations. To follow along, ensure you have the following in place:
- An Azure Active Directory Tenant – no subscription is required
- Universal Print Licenses are available for each user designated to use the Universal Printing service.
💡 Universal Print is included in the commercial and educational Microsoft 365 and Windows 10 subscriptions but can also be purchased as a standalone subscription.
- A Universal Print ready Printing Device.
- One Global Admin or Printer Administrator account.
- A Windows 10 Build version 1903 or later as the client. The client device can be Azure Active Directory (AAD) joined, Hybrid AD joined, or AAD registered.
- Windows 10 64-bit (Pro or Enterprise), version 1809 or later, as the connector.
- Windows Server 2016 64-bit or later.
- NET Framework 4.7.2 or later installed.
- Universal Print connector installed.
What is Azure Universal Print?
Universal Print provides an enjoyable user experience with its centralized print management capabilities. All these, without maintaining traditional on-premises print servers and AD or installing printer drivers.
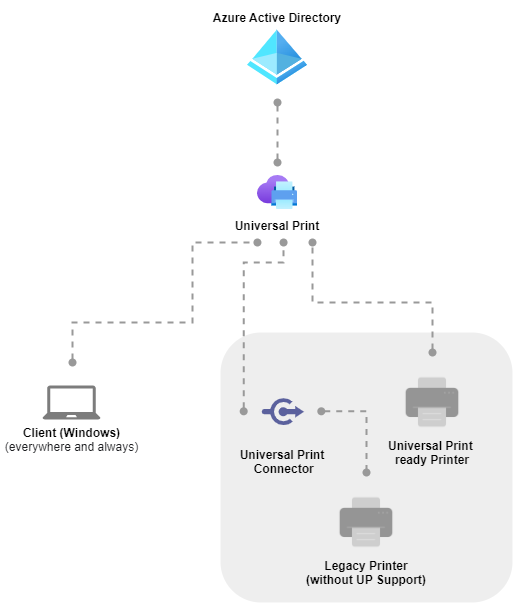
Universal Print, a multi-tenant print solution service hosted on Azure, can be explained in the architecture shown below. At the heart of this architecture are two Platform as a Service (PaaS) services hosted in the cloud.
| PaaS | Function |
|---|---|
| Azure Active Directory (AAD) | Azure’s cloud directory service. Provides user and license management. |
| Universal Print | A Microsoft 365 subscription-based service that organizations use to centralize print management through the Universal Print Azure Portal. |
Creating a New Group in Azure Active Directory
Since other users need access to the Universal Print service, your first task is to work on permissions. How? Create a group and add users to that group. Doing so lets you grant or limit access and permissions to a group of users instead of to each user.
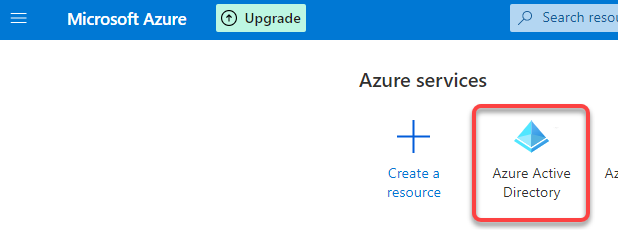
1. Open your favorite web browser, and log in to your Azure Portal.
2. On the Azure Portal, click the Azure Active Directory icon to access your Azure AD service overview page (step three).
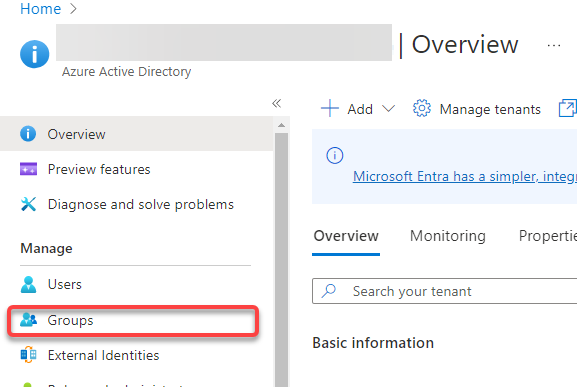
3. Next, click on Groups to enter the group management interface.
4. Now, click All groups (left panel) → New group, as shown below, which opens a page where you can fill up information about the new group.

5. Lastly, configure the following to define the group parameters:
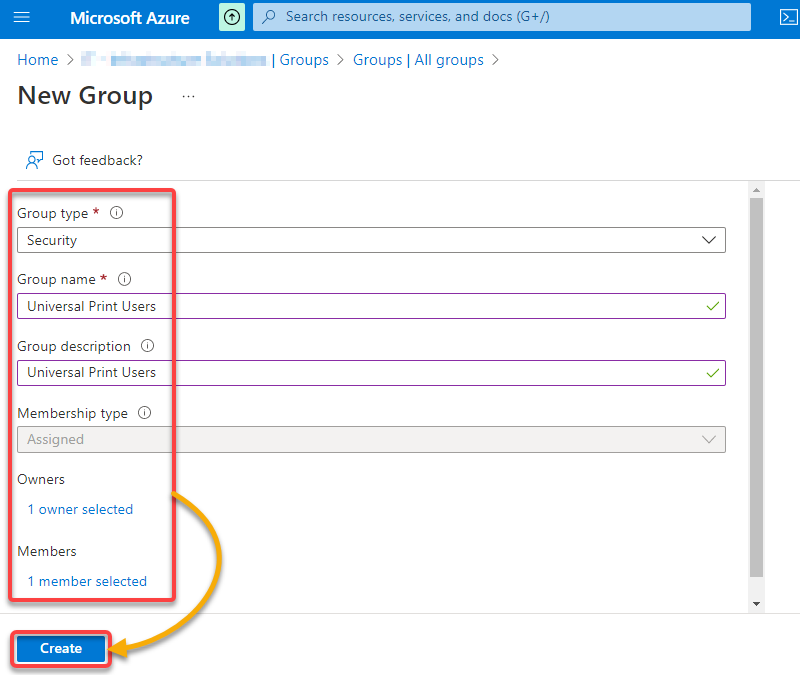
The notification below confirms the group has been created successfully.

Assigning Universal Print Licenses to Users
Now that you have a group available, you will need to assign the necessary license to the group. Assigning the license at the group level lets you avoid having to do so to each user manually.
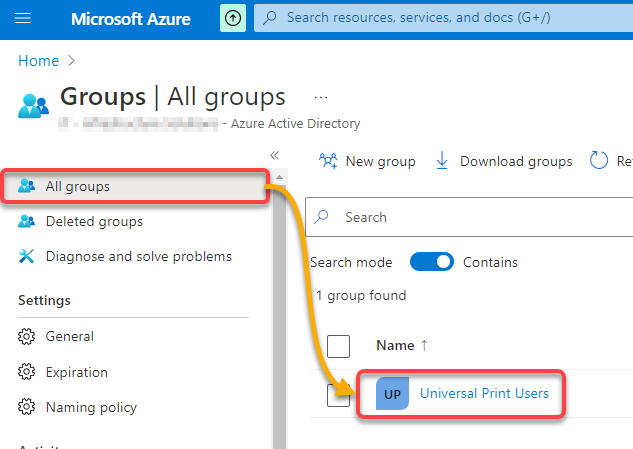
1. On the Groups page, click All groups (left panel), look for and click the newly-created group (Universal Print Users), as shown below. Your browser redirects to a page where you can see the group’s information overview (step two).
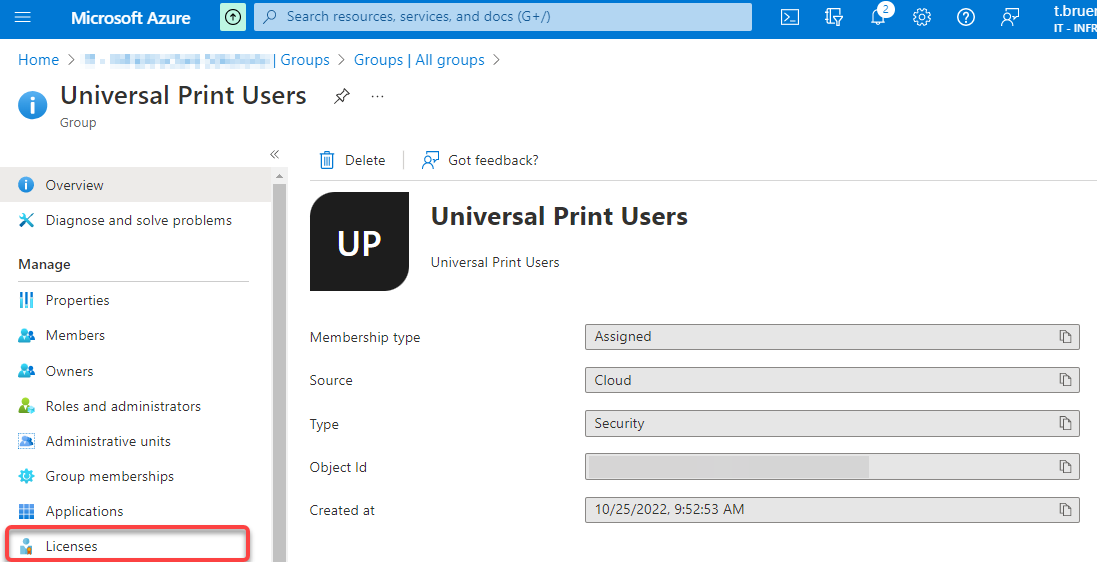
2. Next, click Licenses (left panel) under the Manage section to see the active license assignments.
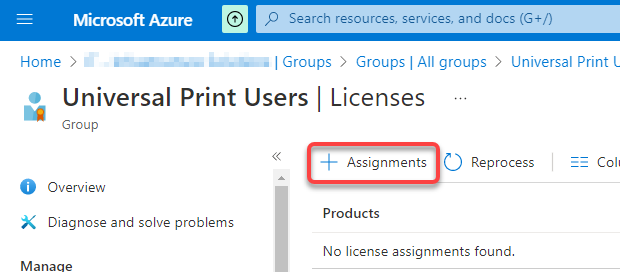
3. On the Licenses page, click Assignments to create a new assignment
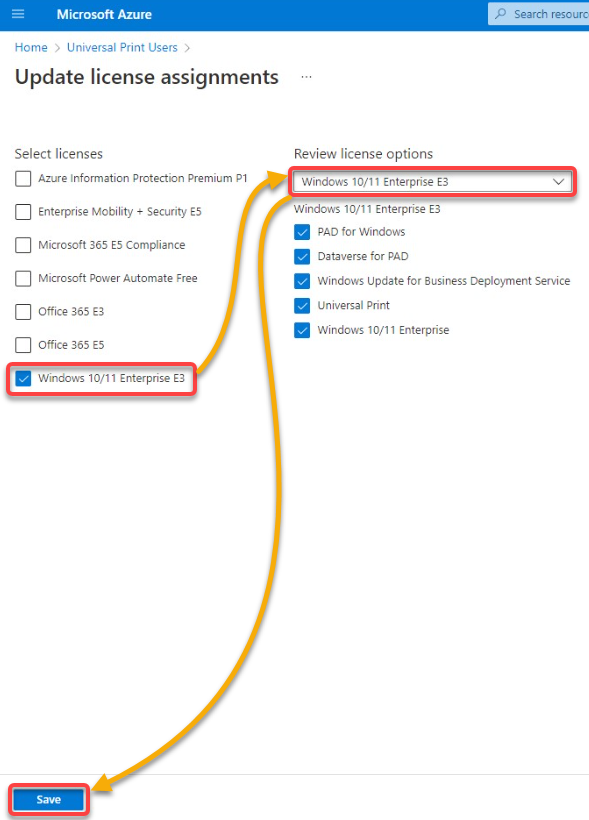
4. Now, select the license in which the Universal Print feature is included, and click on Save to save the license assignment settings. Note that this tutorial uses the Windows 10/11 Enterprise E3 license.
The output below confirms the license assignment is a success.

Registering Printers with the Universal Print Service
With the license successfully assigned, you can register a printer in the Azure Universal Printer Portal, starting with a Universal Print-ready device.
Printers can be connected to the Universal Print service in two different ways, as follows:
| Connection | Requirements |
|---|---|
| Direct Connected | Requires a Universal Print-ready printer. |
| Connected via the Universal Print Connector | Requires a device (laptop, client desktop, server, VM) on which the Universal Printer Connector can be installed and has a connection to the printer. |
You will connect the Universal Print-ready printer directly to Azure without a connector as a middleman. This tutorial uses a Lexmark brand printer (Lexmark C3224dw), which can be configured via a web portal.
Once the printers are registered in the Universal Print Azure Portal, they can be accessed via a suitable client from anywhere in the world.
💡 The configuration shown in this tutorial is only an illustration and is not feasible for every printer. Depending on the manufacturer, the process may differ.
1. Open your favorite web browser, and visit the printer’s IP address (i.e., ) to access the printer’s configuration portal.
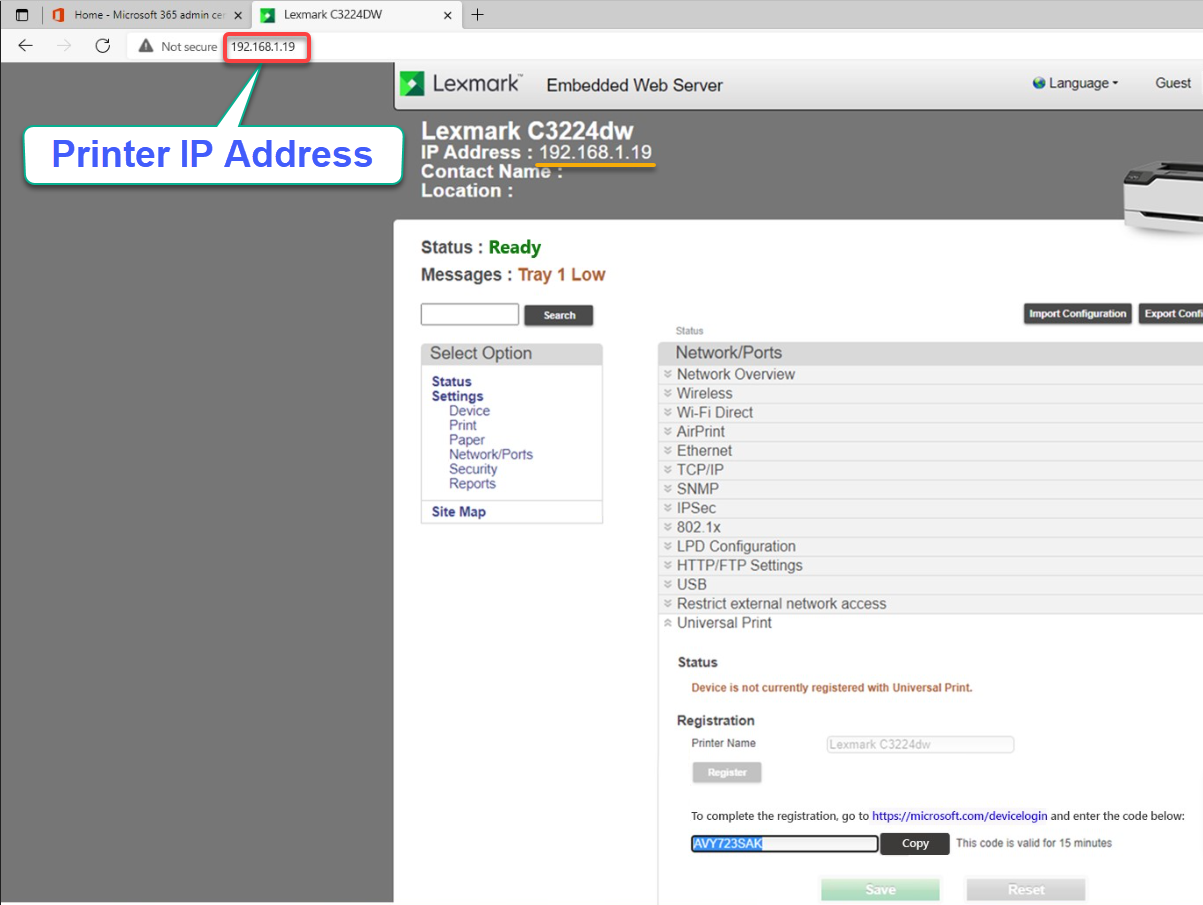
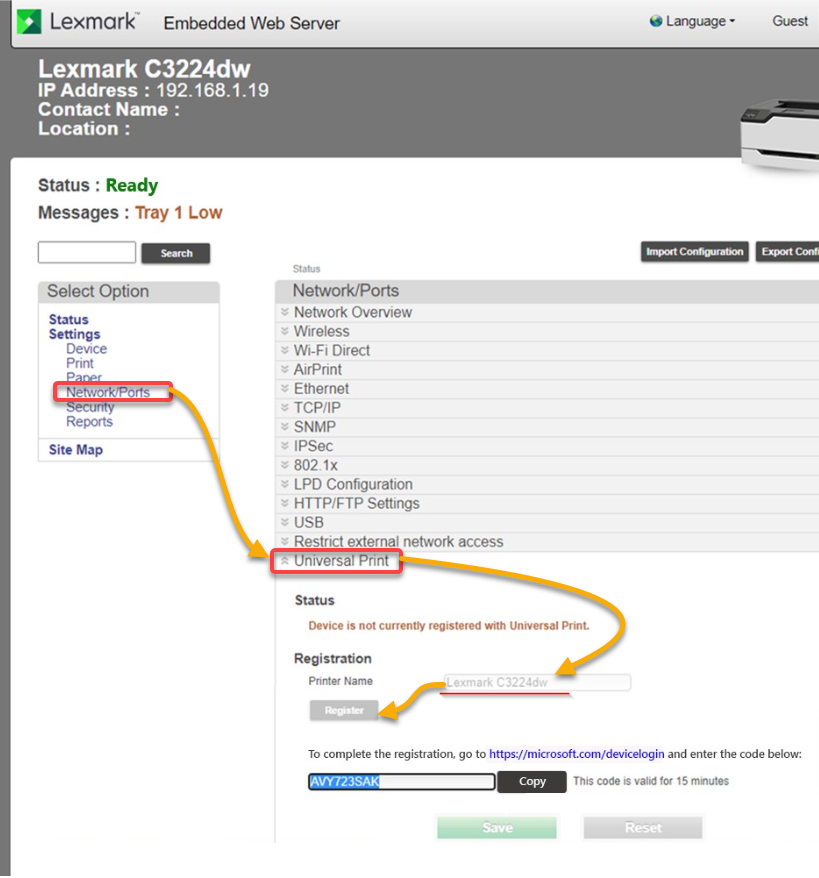
2. Click Network/Ports under Select Option (left panel) and register the printer with the following:
- Look for and expand Universal Print to access the Universal Print configuration.Provide a meaningful Printer Name.Click on the Register button to register the printer.
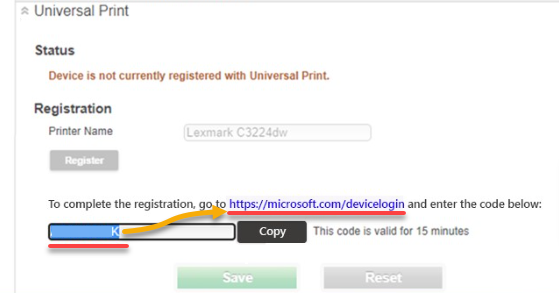
3. Once registered, copy the code, and click the link, as shown below, which opens a new browser tab.
4. Now, switch to the newly-opened tab, paste the code you copied in step three, and click Next to confirm the input.
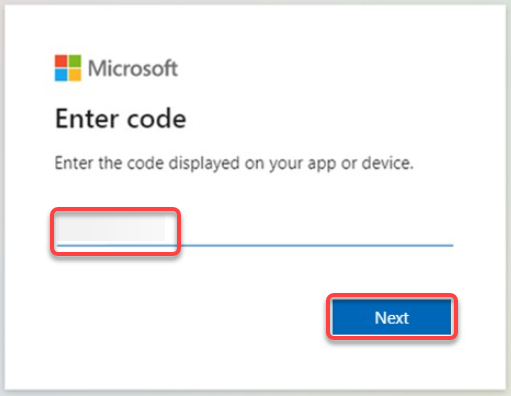
5. After entering the code, choose an Account to sign in to so you can authorize registering the printer.
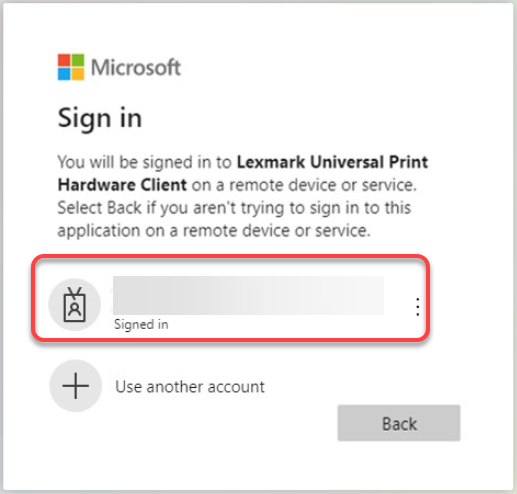
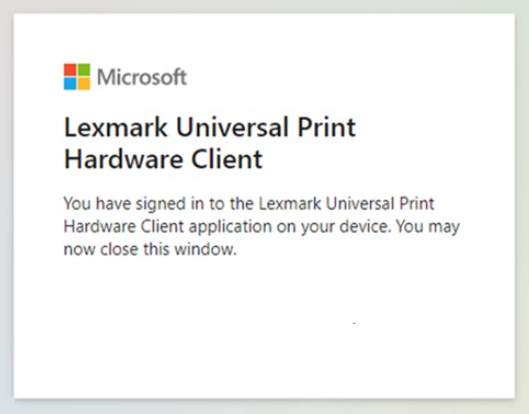
If successful, you will get a confirmation message, as shown below.
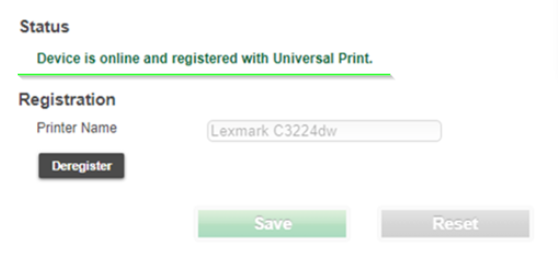
Back in the printer’s control panel, you can also see the registration process has been completed successfully.
Registering a Printer via the Universal Print Connector
You have successfully registered a Universal Print-capable printer, but what about a printer that is not Universal Print-capable? In this case, you must connect the printer via the additional available Connector application.
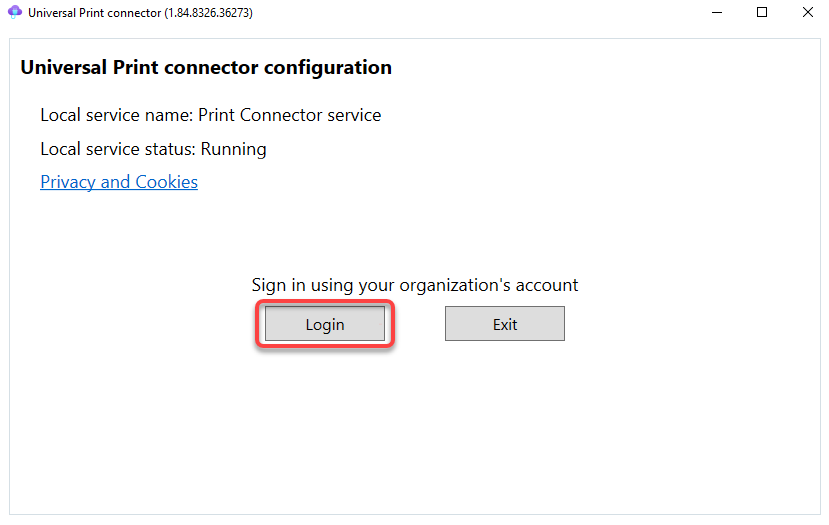
1. Launch the Universal Printer connector, and click Login to link the connector to your Azure tenant.
2. Next, define a Connector name, which can be anything, in the provided field and click Register.
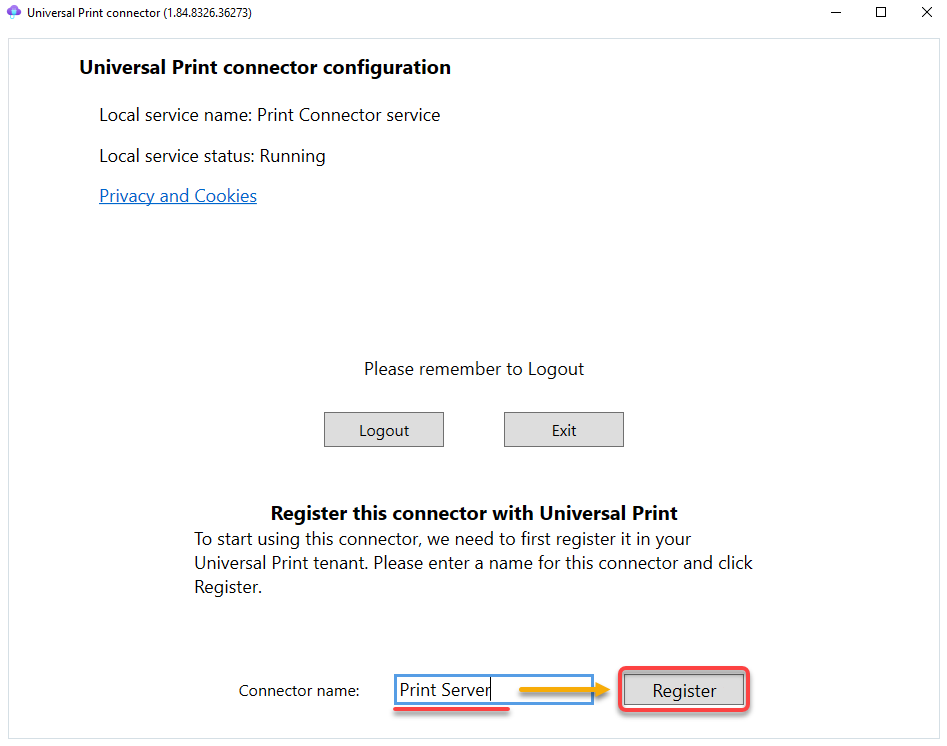
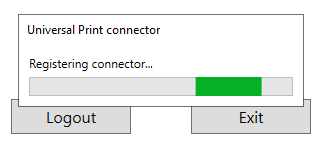
Below, you can see the connector is being registered.
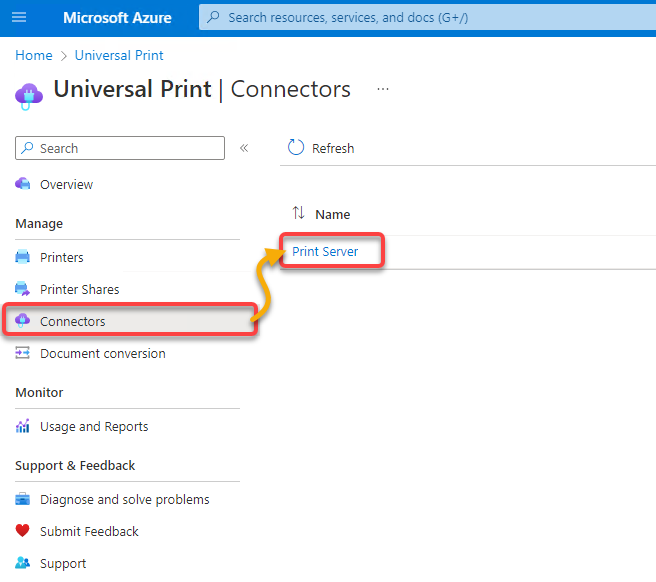
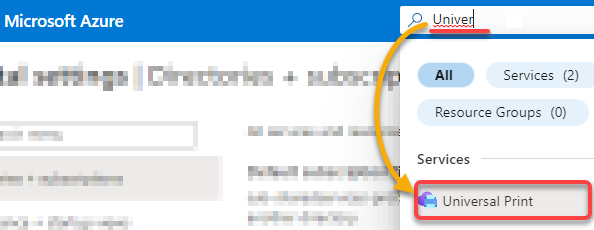
3. Once registered, search for and select the Universal Print service in the Azure Portal, as shown below, to access the Connectors Overview page.

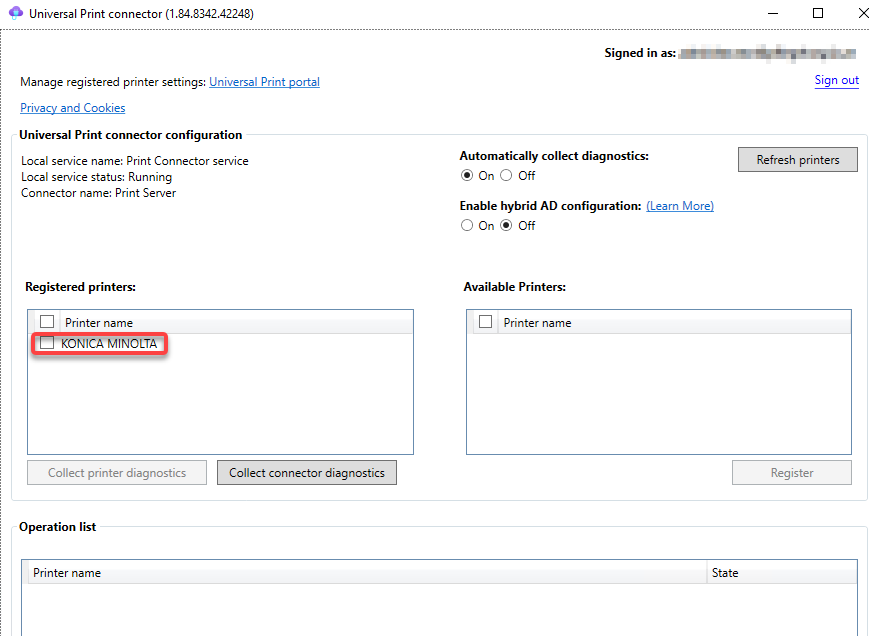
4. Now, click Connectors (left panel) → your newly-registered connector (Printer Serve), which opens its configuration window.
5. In the list of Available Printers, tick the box in front of your local printer’s name, and click Register to assign a printer to the connector completely.
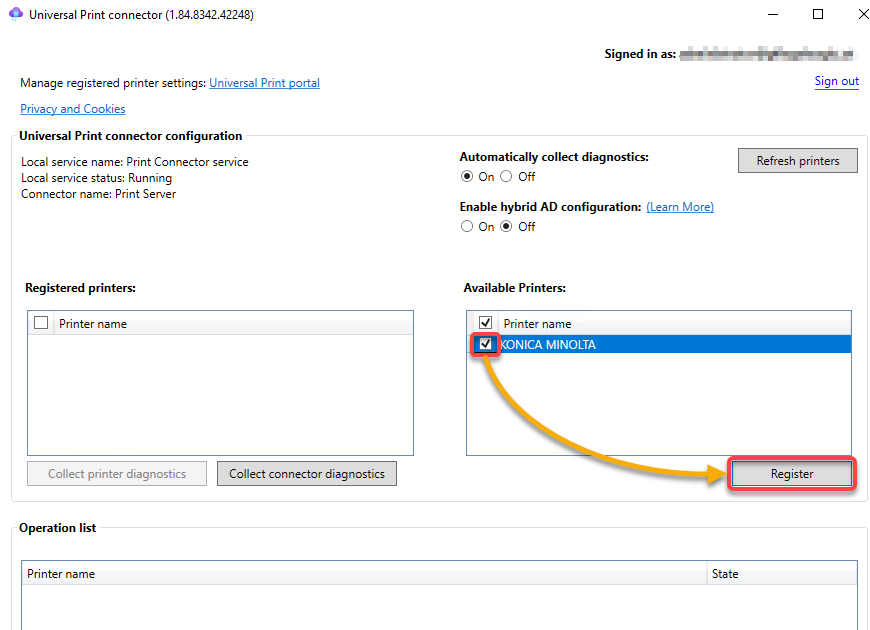
If the registration is successful, the local printer’s name moves in the list of Registered printers, as shown below.
Sharing Printers to Group Members
Now that the printers are connected to the cloud, you can use them as usual. But how about the other members of the group? Worry not. Azure Universal Print lets you share them with other people in the organization.
To share the printers, follow these steps:
1. Navigate to the Universal Print service page again.
2. Next, click Printers (left panel) under the Manage section to see the list of available printers.
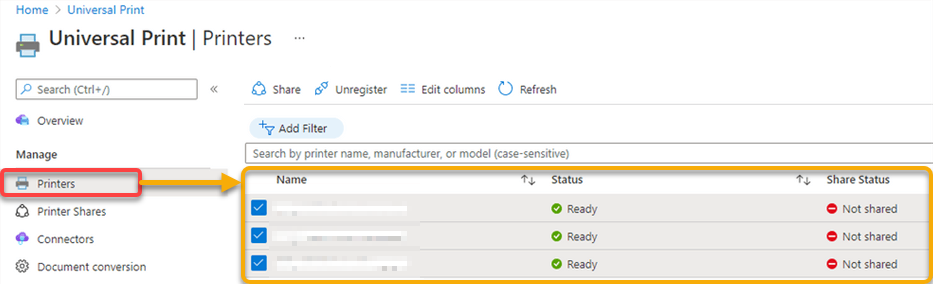
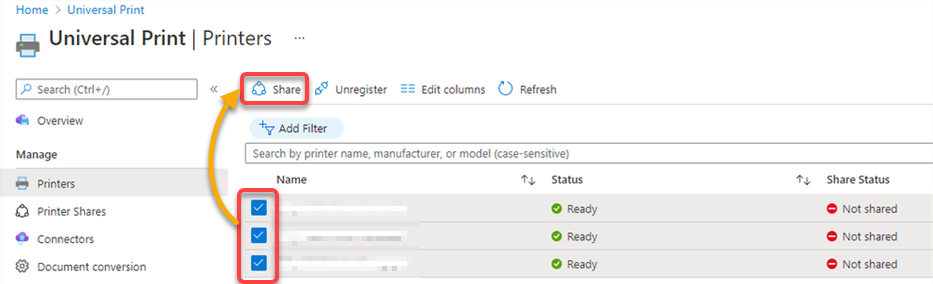
3. Tick the boxes in front of all the printers you wish to share to select them, and click Share.
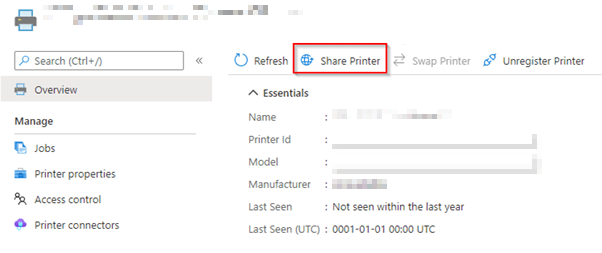
But if you only plan to share one printer, click on the printer, and your browser redirects to the page below. In the Overview page, click Share Printer to share the selected printer.
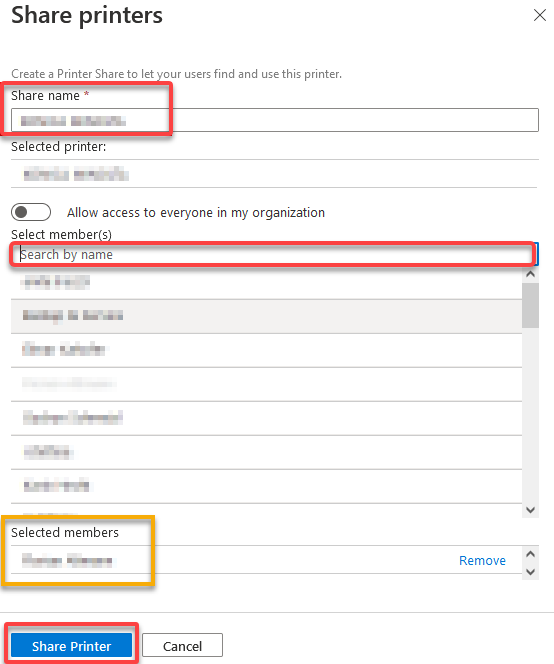
4. Now, configure the printer-sharing settings with the following:
- Share name – Provide a name that other users can find to use the printers.Select member(s) – Select the group to which the printers should be distributed.Click Share Printer to finish your selection.
Provisioning Printers on Client Devices (Windows)
You have shared the printers successfully with all members (users) in your group. Now all you need is to add the printers on the client devices so other people can securely use the registered printers.
To provision the printers on client devices:
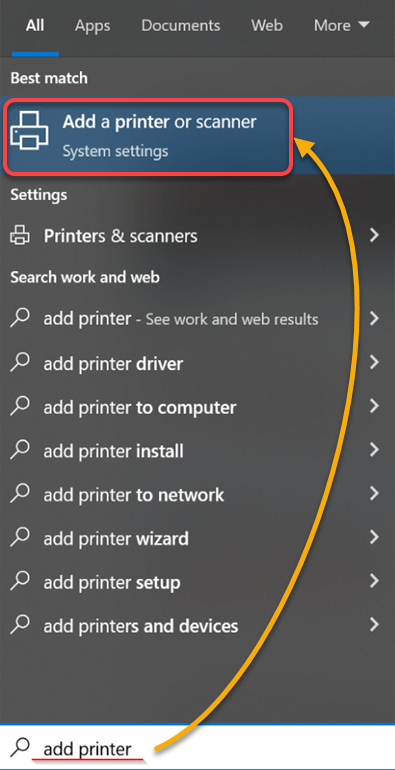
1. Search for add printer in the Windows search bar, and click on Add a printer or scanner, which opens the Printers & scanners settings (step two).
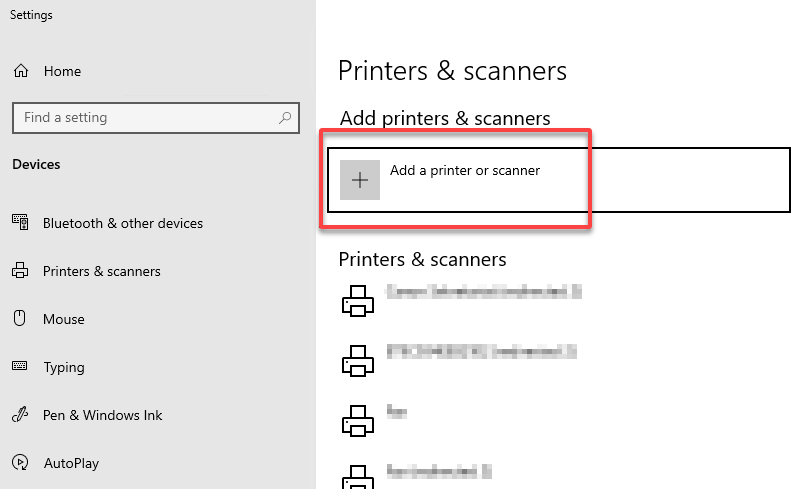
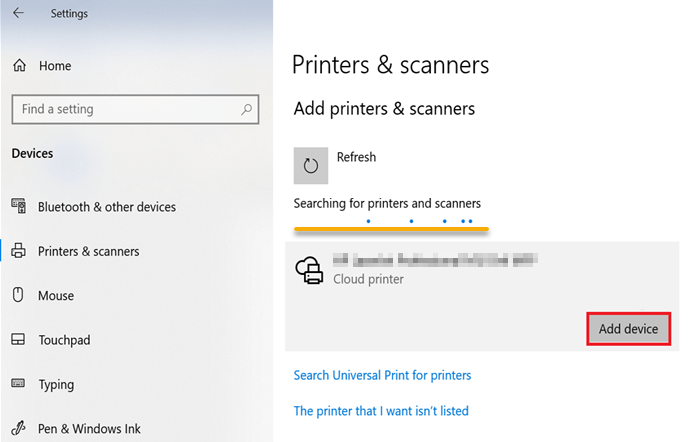
2. Next, click on Add a printer or scanner to scan for available printers.
3. Lastly, click Add device in the corner of your desired printer to add to the client.
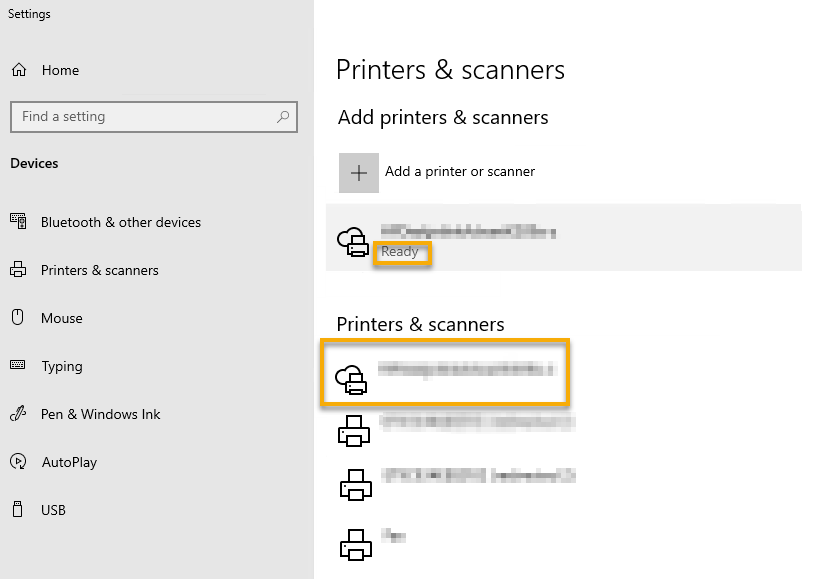
Once added, you will see the printer in the list of locally available printers with a Ready status, as shown below.
Generating Printout Data Reports
From an administrative point of view, getting an overview of the number of printouts made and who made them is often necessary. How? Azure Universal Print lets you generate reports for these printouts.
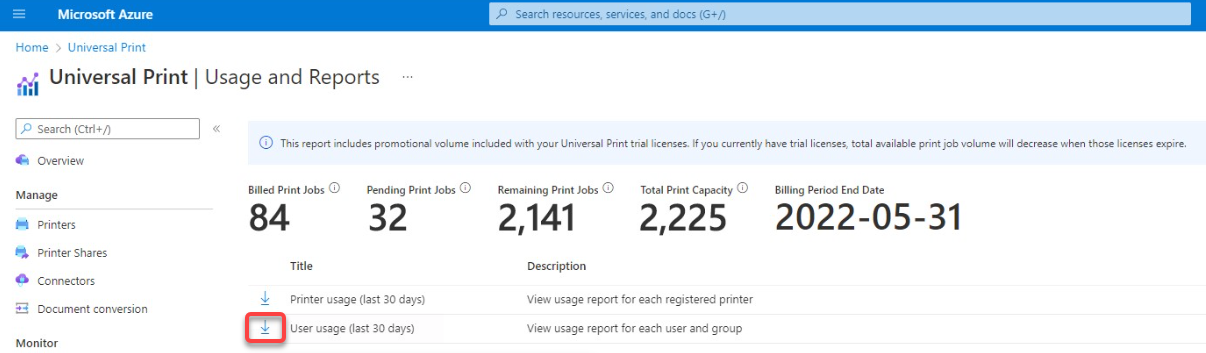
1. In the Universal Print portal, look for and select Usage and Reports (left panel) under the Monitor section.

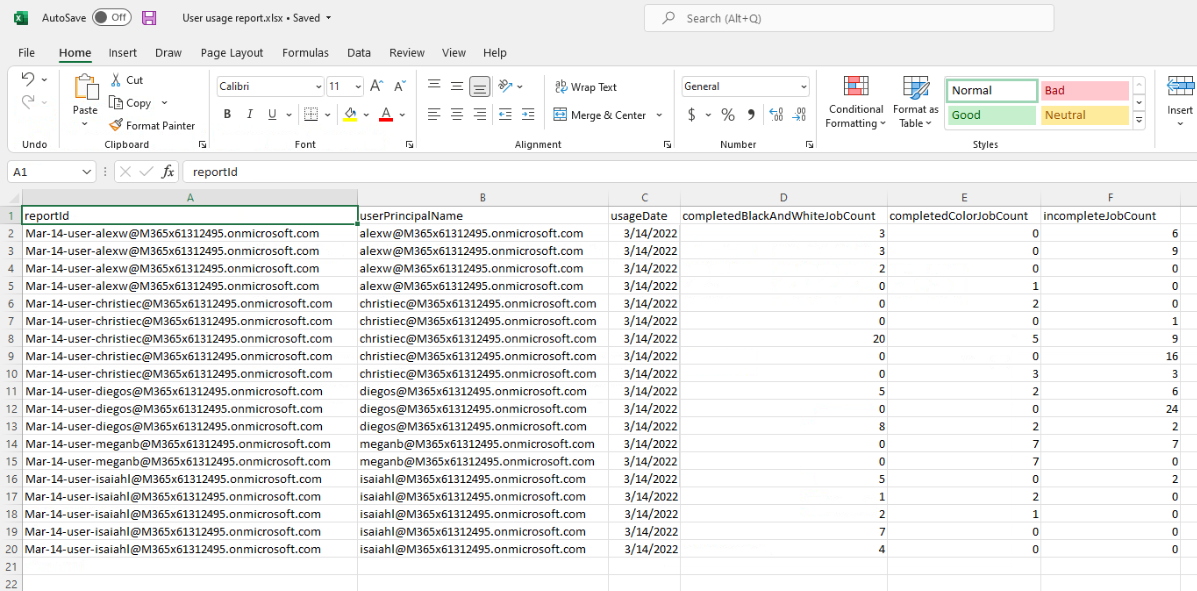
2. Next, choose a report type, either Printer Usage Report (last 30 days) or User Usage Report (last 30 days). But in this tutorial, you will generate the User Usage Report. Click on the download icon next to the respective usage report to download the report.
3. Once downloaded, open the file to see the report data.
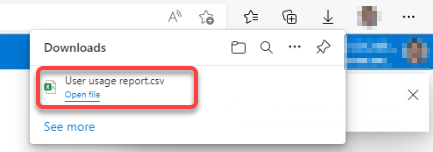
As shown below, you will see a clear representation of the executed print jobs on your CSV file viewer, like Microsoft Excel. report
Conclusion
In this tutorial, you have discovered how to put your printer infrastructure on a new foundation and turn it into a highly available cloud service by leveraging Azure Universal Print. You have learned how to assign the required licenses in a scalable manner. As a result, you avoid manually assigning licenses to each user — the boring stuff.
You have touched on registering printers of different ages and technical maturity connected to Azure without any problems. Thank goodness using dot matrix printers is still possible.
Now, are you ready to modernize your printing infrastructure? Get rid of your old print servers and print from anywhere at any time with Azure Universal Print!


