


Nowadays, small and even large companies are confronted with the question of the right IT strategy and how to start evolution towards the cloud. The good news is that Microsoft comes with a suitable product, Azure Stack HCI.
This tutorial covers how you can get started with Azure Stack HCI. You will build a virtual test environment and install a four-node cluster to onboard in Azure.
Read on and get started deploying VMs with Azure Stack HCI!
Prerequisites
This tutorial comprises hands-on demonstrations. To follow along, be sure you have the following:
- A client or server operating system with Hyper-V enabled. (Windows 10 or 11) – This tutorial uses Windows 10.
- 32 GB RAM and a processor with at least four cores (if you provision only two nodes instead of a four-node lab, 16GB RAM should be enough).
- MSLab scripts downloaded.
- A Windows Server ISO either from MSDN Downloads, Eval Center, or VLSC Portal.
What is Azure Stack HCI?
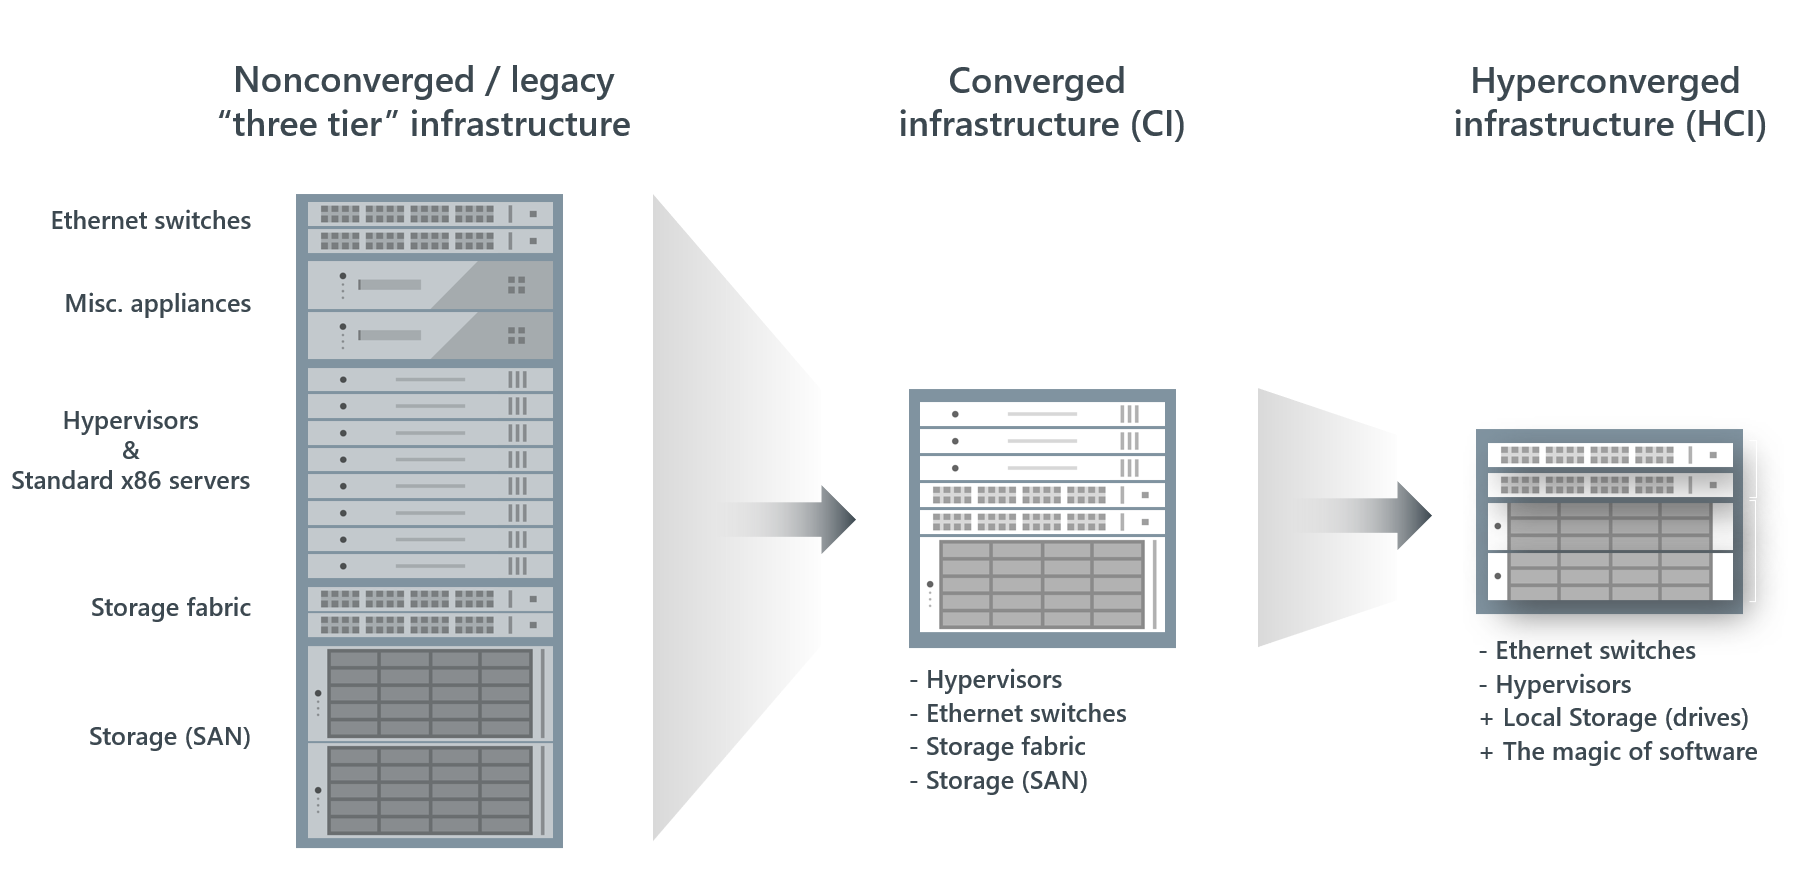
Before diving in, you may wonder, what is Azure Stack HCI anyway? Azure Stack HCI provides a Hyper-Converged Infrastructure (HCI) failover cluster. This cluster host virtualized Windows and Linux workloads and their storage in an on-premises hybrid environment. The environment is, therefore, also connected to services in the cloud.
The easiest way to explain this infrastructure is with the illustrations below. In other words, HCI is a transformed and compressed hardware stack with a simplified and centralized administration interface.
Preparing the LAB and Creating the Windows Server Parent Disks
In most cases, a cloud-only approach is not practical, especially regarding data protection. In other cases, there is still high-quality hardware around that should not be left unused. In this context, Azure Stack HCI, a hybrid solution, could be just the right option.
To verify this claim, you must build a Proof-Of-Concept (POC) by creating a demo environment. But first, you need to meet some basic requirements, as follows:
- The correct folder structures and some software.
- The parent disks for the required virtual machines (VMs – a domain controller, some Azure Stack HCI nodes, and a Windows Admin Center (WAC) Gateway server).
To create the Windows Server Parent Disks:
1. Extract the files from the downloaded archive (MSLab) into a folder on your machine.
2. Once extracted, look for and open the LabConfig.ps1 file in your preferred code editor.
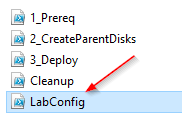
3. Next, modify the marked area shown in the screenshot below of the LabConfig.ps1 file with the following code.
The code below specifies the Domain-Admin’s name (‘LabAdmin’) and the corresponding password (‘P@$$w0rd!’).
$LabConfig=@{ DomainAdminName='LabAdmin'; AdminPassword='P@$$w0rd!'; Prefix = 'MSLab-'; DCEdition='4'; Internet=$true ; AdditionalNetworksConfig=@(); VMs=@()}
The original LabConfig.ps1 file contains many well-commented examples in the Help section, which makes customizing the file according to your requirements easier.
4. Now, open PowerShell as administrator and execute the 1_Prereq.ps1 script file to create the required folder hierarchy and required software in place.
The script execution will be restarted automatically if it is not executed with the required permissions. This behavior applies to all executed scripts you see in this tutorial, except where it explicitly states otherwise.
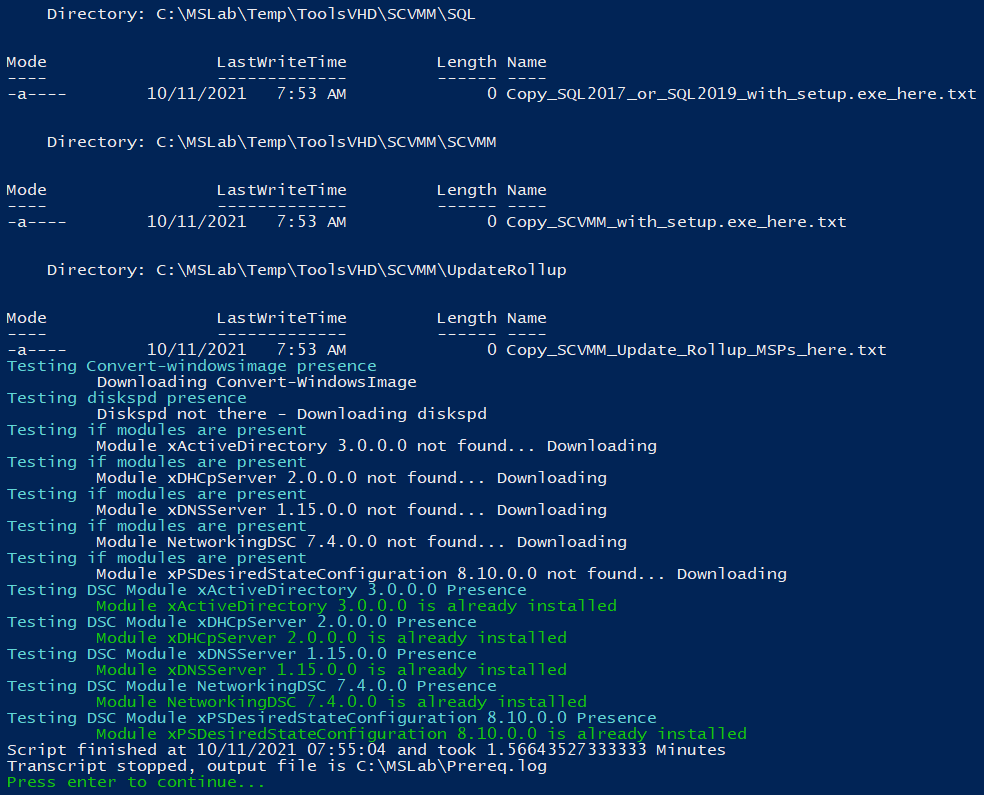
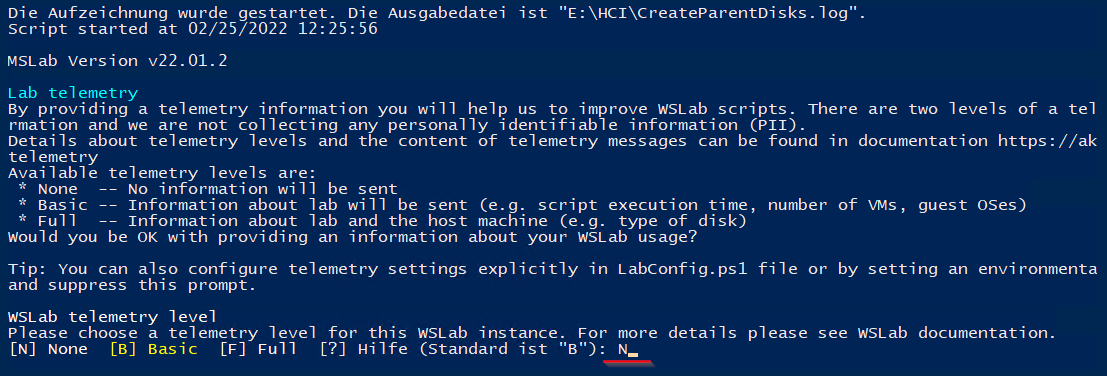
5. Now, execute the 2_CreateParentDisks.ps1 script to prepare all needed disk images for your lab.
Enter N, and press Enter when prompted to avoid telemetry data being sent to Microsoft. You can also make another selection, as explained in the output if you do not mind letting Microsoft process your lab data.
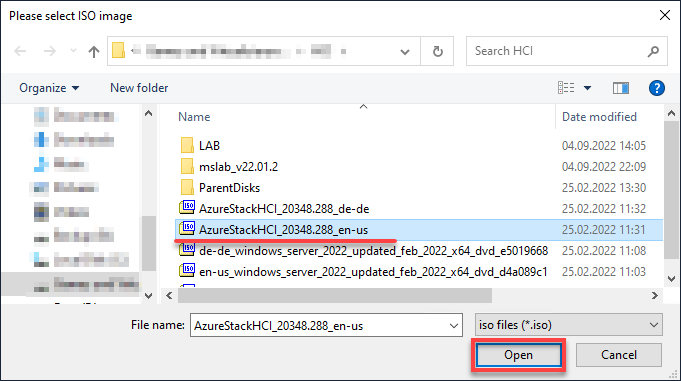
6. Next, select the correct Windows ISO image file. In this case, a Windows Server 2022 image file in the English language, and click Open.

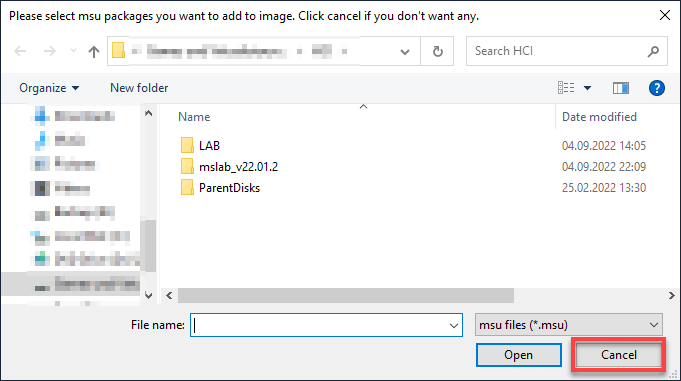
7. Click Cancel when prompted for Windows Server Updates (*.msu) as you have already downloaded and used the latest ISO image.
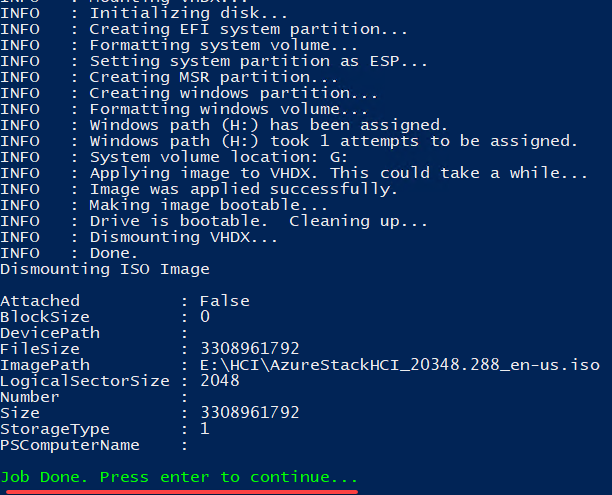
The script now creates a Windows Server 2022 parent disk (about 15-30 minutes) that you will need later for VM deployments.

8. Lastly, type Y and press Enter to clean up unnecessary files and folders.
Once cleaned, press Enter again to finish the script execution.

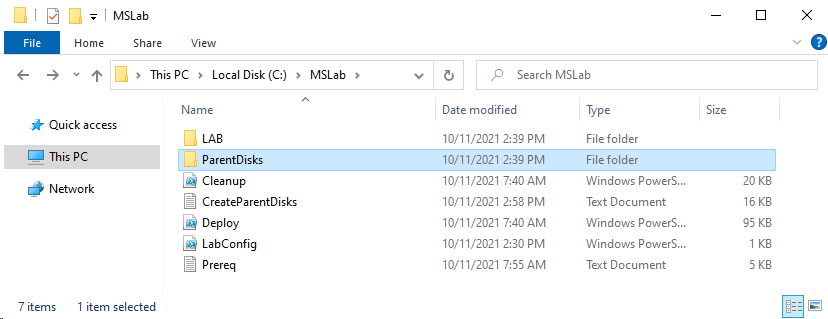
You should now see two new folders (LAB and ParentDisks), three PowerShell scripts, and log files under the MSLab folder.
Creating the Azure Stack HCI Parent Disks
You have prepared one part of your lab skeleton by creating the Windows Server 2022 parent disks. But you are still missing the parent disks for the Azure Stack HCI Node deployment.
To create the Azure Stack HCI parent disks:
1. Navigate to the ParentDisks folder, and execute the CreateParentDisk.ps1 script.
2. Next, select the correct Azure Stack HCI ISO image, and click Open.
3. Click Cancel when prompted for Update Package files (*.msu) since you have already downloaded and used the latest ISO image.
4. Now, hit Enter when asked for a VHD name and size.
If nothing is specified, AzSHCI21H2_G2.vhdx is used for the VDH name and 60 GB for the size by default.

5. Press Enter to finish the script execution.
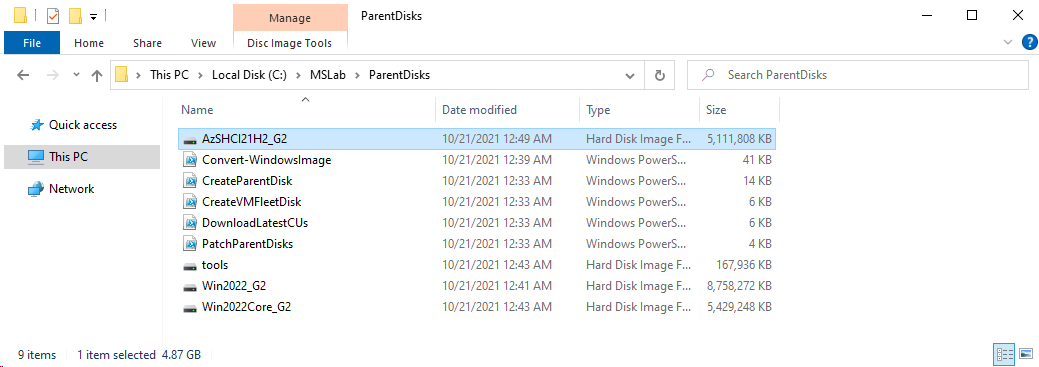
6. Finally, navigate to the MSLab/ParentDisks folder to verify the Azure Stack HCI21H2_G2 disk file exists, as shown below.
Deploying VMs to Hyper-V
Now everything is ready to ship the necessary VMs into the lab. Well, almost. You still need to set some parameters and configuration settings in the LabConfig.ps1 file.
1. Open the LabConfig.ps1 file, and adjust the content with the following code to configure VM deployment.
Since the lab is not supposed to be a black box, you will find a short description of the document’s structure and the stored configuration. All parameter blocks are assigned to the respective VMs (DC, HCI node, WAC Gateway) for a better overview.
In addition, each parameter is described to clarify its function.
# DC + Lab-Environment

$LabConfig=@{ DomainAdminName='LabAdmin'; AdminPassword='P@$$w0rd!'; Prefix = 'MSLab-' ; DCEdition='4'; Internet=$true ; AdditionalNetworksConfig=@(); VMs=@()}

# DomainAdminName - the domain administrator name
# AdminPassword -  the password for the domain administrator
# Prefix - the prefix that the VM-Names should contain in their names
# DCEdition='4' - Windows Edition to be used (4 = Data Center)
# Internet=$true - enables the remote access service (RAS) on the DC
# AdditionalNetworksConfig=@() - Array for additional Network-Configurations
# VMs=@() - VM Array

# HCI Nodes (pre-domain joined)
1..4 | ForEach-Object {$VMNames="AzSHCI" ; $LABConfig.VMs += @{ VMName = "$VMNames$_" ; Configuration = 'S2D' ; ParentVHD = 'AzSHCI21H2_G2.vhdx' ; HDDNumber = 12; HDDSize= 4TB ; MemoryStartupBytes= 4GB; MGMTNICs=4 ; NestedVirt=$true}}

# VMName - VM name
# Configuration = 'S2D' - VM to support Storage Space Direct (S2D)
# ParentVHD - Parent Disk
# HDDNumber - Total amount of disks to be attached
# HDDSize - Disk Size
# MemoryStartupBytes - Startupmemory
# MGMTNICs - Total amount of nics
# NestedVirt - Nested virtualization enabled

# Windows Admin Center Gateway
$LabConfig.VMs += @{ VMName = 'WACGW' ; ParentVHD = 'Win2022Core_G2.vhdx' ; MGMTNICs=1 }

# VMName - VM name
# ParentVHD - Parent Disk
# MGMTNICs - Total amount of nics
2. Next, execute the Deploy.ps1 script to start the VM deployment procedure.
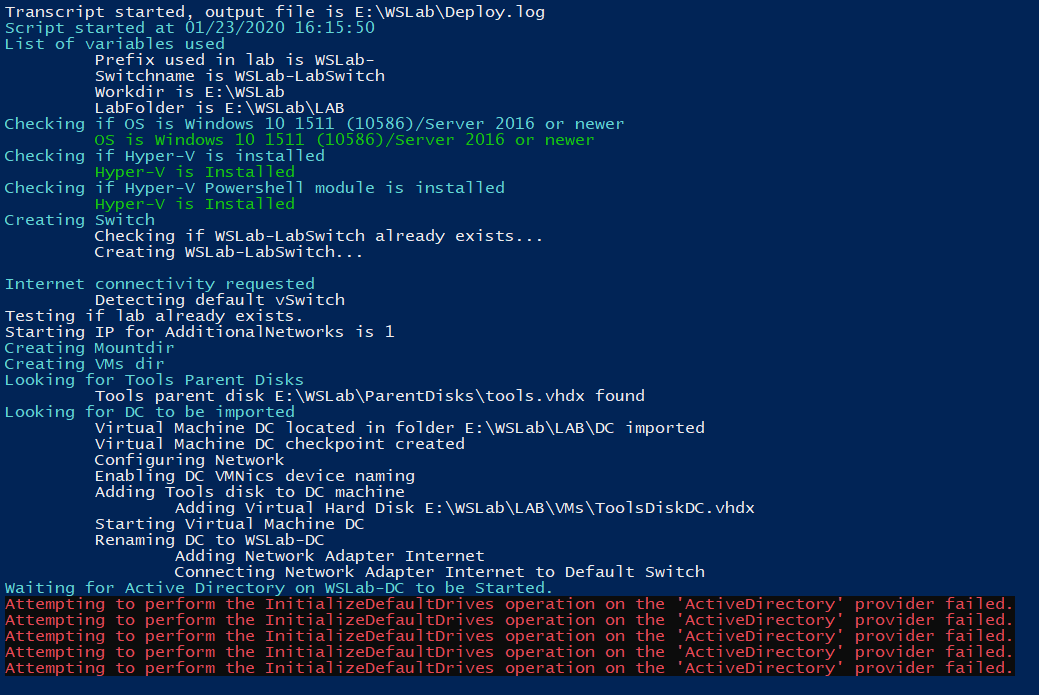
During the deployment, you might see errors like in the screenshot below. These errors result from testing Active Directory availability inside the domain controller but are safe to ignore.
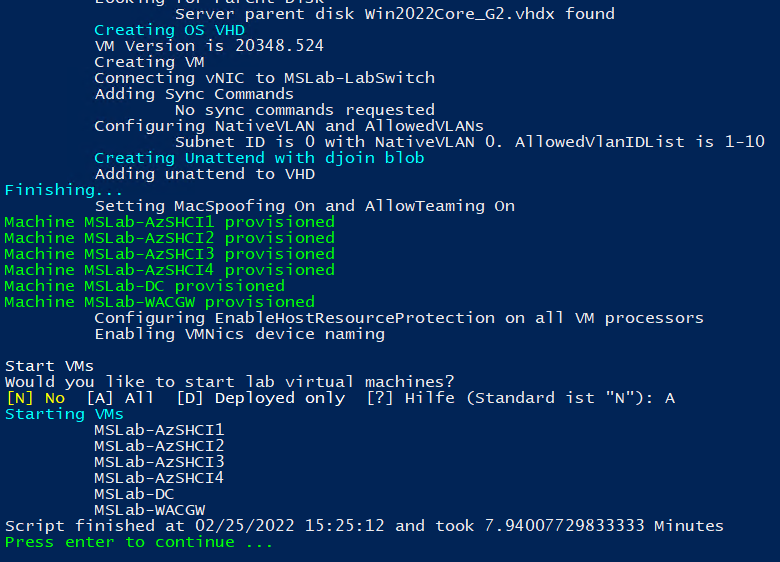
3. After VMs are deployed, input A and press Enter to start all lab VMs.
Once started, press Enter to complete the script execution.
4. Finally, switch to the Hyper-V Manager to ensure the necessary infrastructure is created.
Below, you can see all lab machines running.

Setting up the WAC Gateway
You have successfully deployed your VMs and are now ready to deliver the required software components, the Windows Admin Center (WAC).
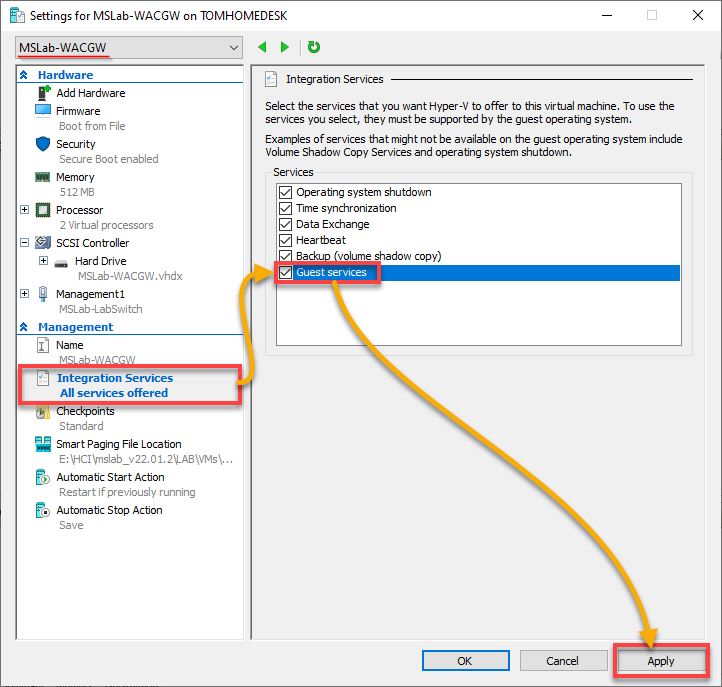
1. On Hyper-V Manager, navigate to the VM Properties of the MSLAB-DC VM and enable the Guest services under the Integration Services section.
Once enabled, click on Apply to confirm the settings.
2. Next, switch to the MSLAB-DC VM (domain controller), and run the following script via PowerShell to download and transfer the required installation package to the target machine.
$GatewayServerName="WACGW"
# Download Windows Admin Center if not present
if (-not (Test-Path -Path "$env:USERPROFILE\Downloads\WindowsAdminCenter.msi")){
    Start-BitsTransfer -Source https://aka.ms/WACDownload -Destination "$env:USERPROFILE\Downloads\WindowsAdminCenter.msi"
}

# Create PS Session and copy the install files to the remote server
Invoke-Command -ComputerName $GatewayServerName -ScriptBlock {Set-Item -Path WSMan:\localhost\MaxEnvelopeSizekb -Value 4096}
$Session=New-PSSession -ComputerName $GatewayServerName
Copy-Item -Path "$env:USERPROFILE\Downloads\WindowsAdminCenter.msi" -Destination "$env:USERPROFILE\Downloads\WindowsAdminCenter.msi" -ToSession $Session

# Install Windows Admin Center
Invoke-Command -Session $session -ScriptBlock {
    Start-Process msiexec.exe -Wait -ArgumentList "/i $env:USERPROFILE\Downloads\WindowsAdminCenter.msi /qn /L*v log.txt REGISTRY_REDIRECT_PORT_80=1 SME_PORT=443 SSL_CERTIFICATE_OPTION=generate"
} -ErrorAction Ignore

$Session | Remove-PSSession

# Add certificates to trusted root certs
start-sleep 10
$cert = Invoke-Command -ComputerName $GatewayServerName -ScriptBlock {Get-ChildItem Cert:\LocalMachine\My\ |where subject -eq "CN=Windows Admin Center"}
$cert | Export-Certificate -FilePath $env:TEMP\WACCert.cer
Import-Certificate -FilePath $env:TEMP\WACCert.cer -CertStoreLocation Cert:\LocalMachine\Root\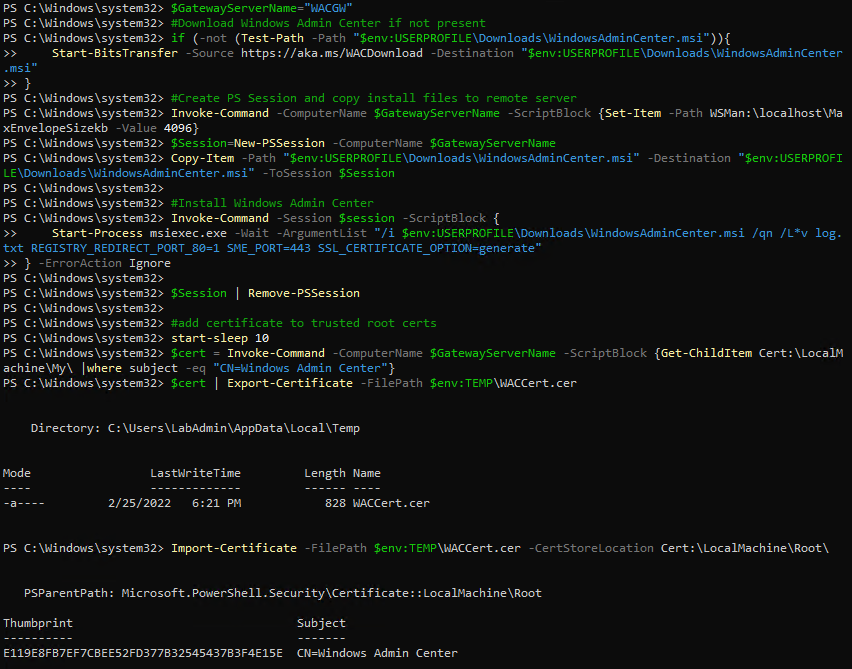
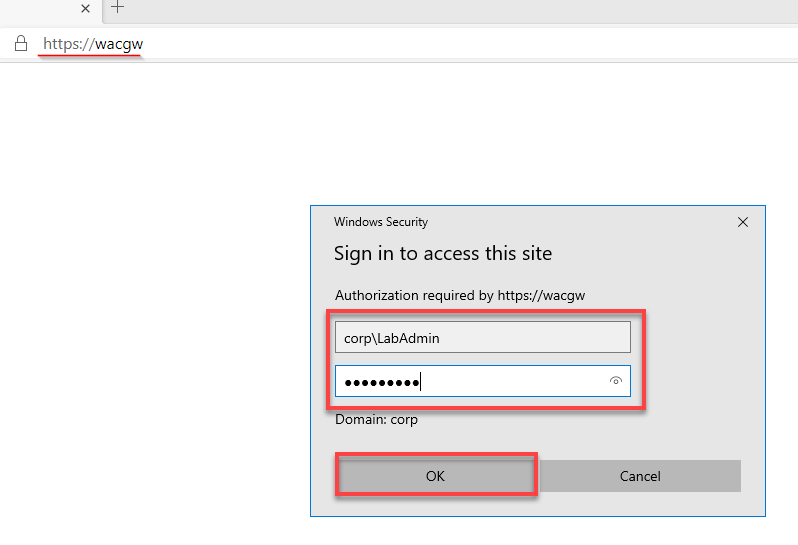
3. Using the domain controller, open a web browser and navigate to https://wacgw to validate the deployment. At this point, use the initially defined/shared credentials to sign in.
Once signed in, your browser redirects to WAC’s overview page, where you can see a list of all onboarded systems (step four).
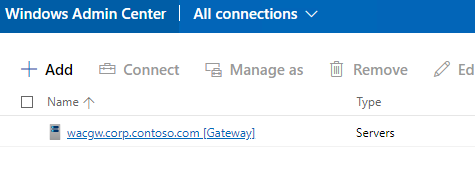
4. Now, verify that the gateway itself was created under the name wacgw.corp.contoso.com [Gateway], as shown below.
5. Further, run the below code directly from the domain controller (MSLAB-DC VM) to establish a Kerberos-constrained delegation between the WAC and the Azure Stack HCI nodes.
This code lets you bypass getting prompted for your credentials when connecting to a remote server.
$GatewayServerName="WACGW"
#Configure Resource-Based constrained delegation
$gatewayObject = Get-ADComputer -Identity $GatewayServerName
$computers = (Get-ADComputer -Filter {OperatingSystem -eq "Azure Stack HCI"}).Name

foreach ($computer in $computers){
    $computerObject = Get-ADComputer -Identity $computer
    Set-ADComputer -Identity $computerObject -PrincipalsAllowedToDelegateToAccount $gatewayObject
}
Setting up the Azure Stack HCI Cluster
After setting up the WAC, you are ready to get down to the nitty-gritty; everything is prepared to create the cluster.
To set up the Azure Stack HCI cluster:
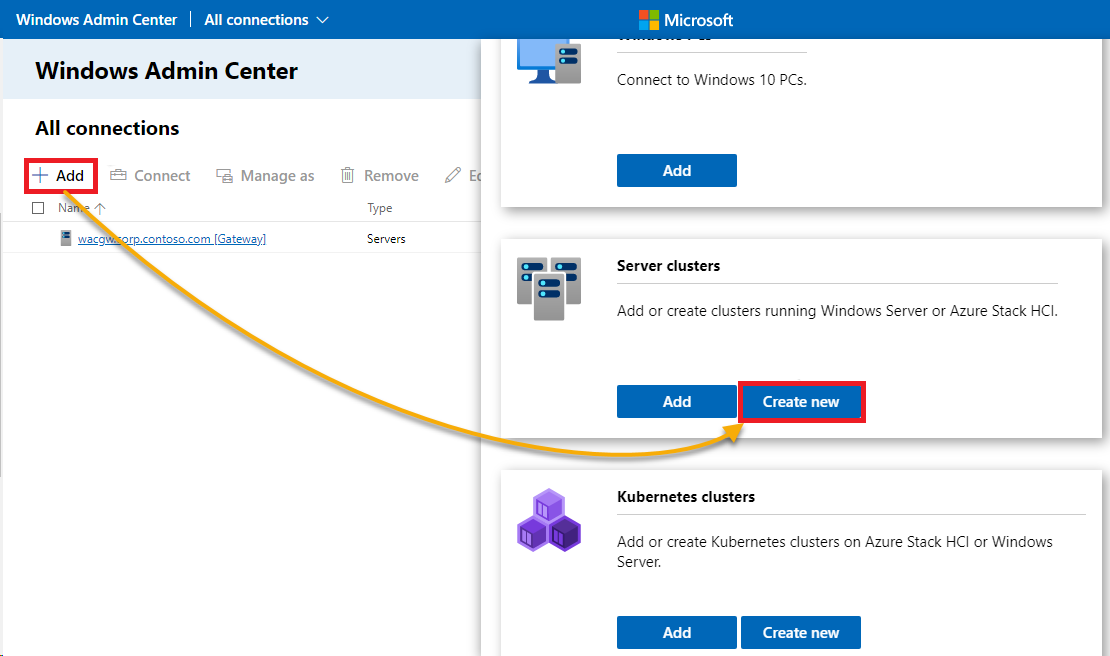
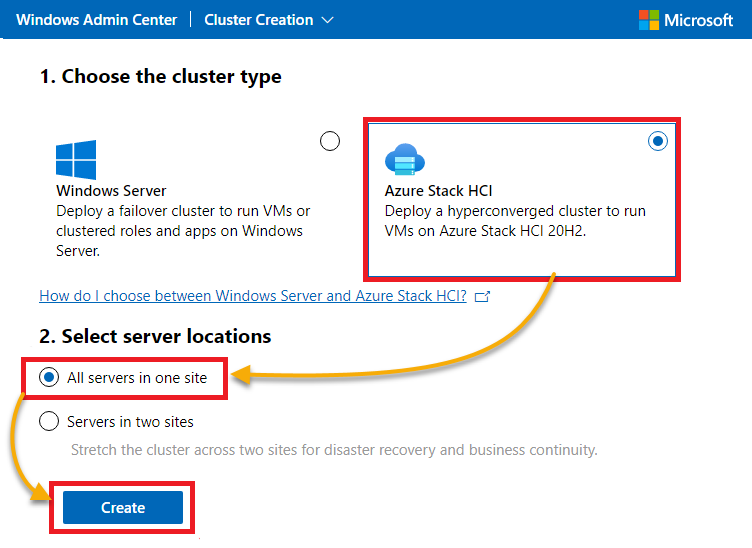
1. On the WAC on your domain controller, click Add, look for Server clusters on the pop-up window and click on Create new to initiate creating a new cluster.
2. Next, select Azure Stack HCI for the cluster type, All servers in one site for the server locations, and click on Create to create the new cluster.
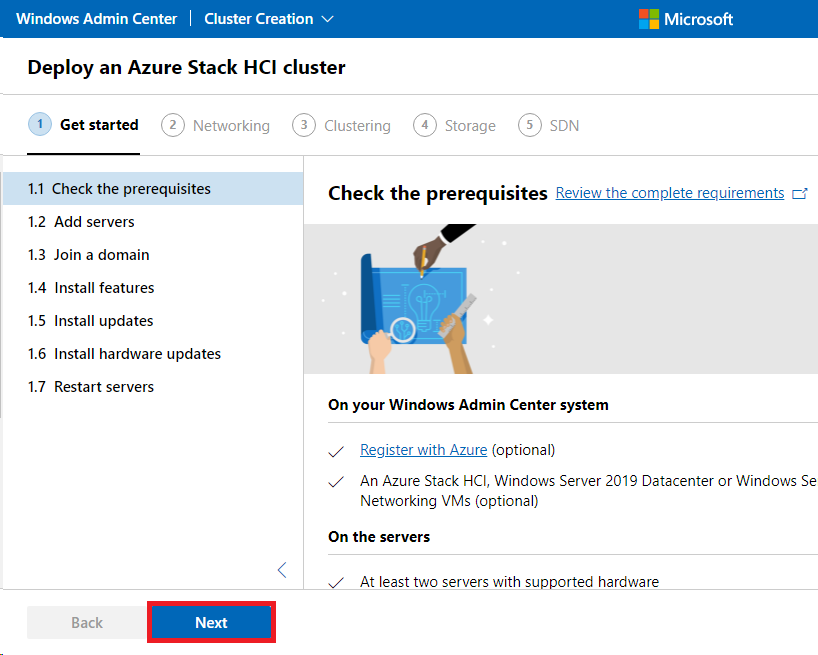
3. Click Next to skip this step (1.1) since you already checked the prerequisites and are on a customized environment made for an evaluation scenario for Azure Stack HCI.
4. Now, enter your credentials when prompted. At this point, use the initial defined/communicated credentials.

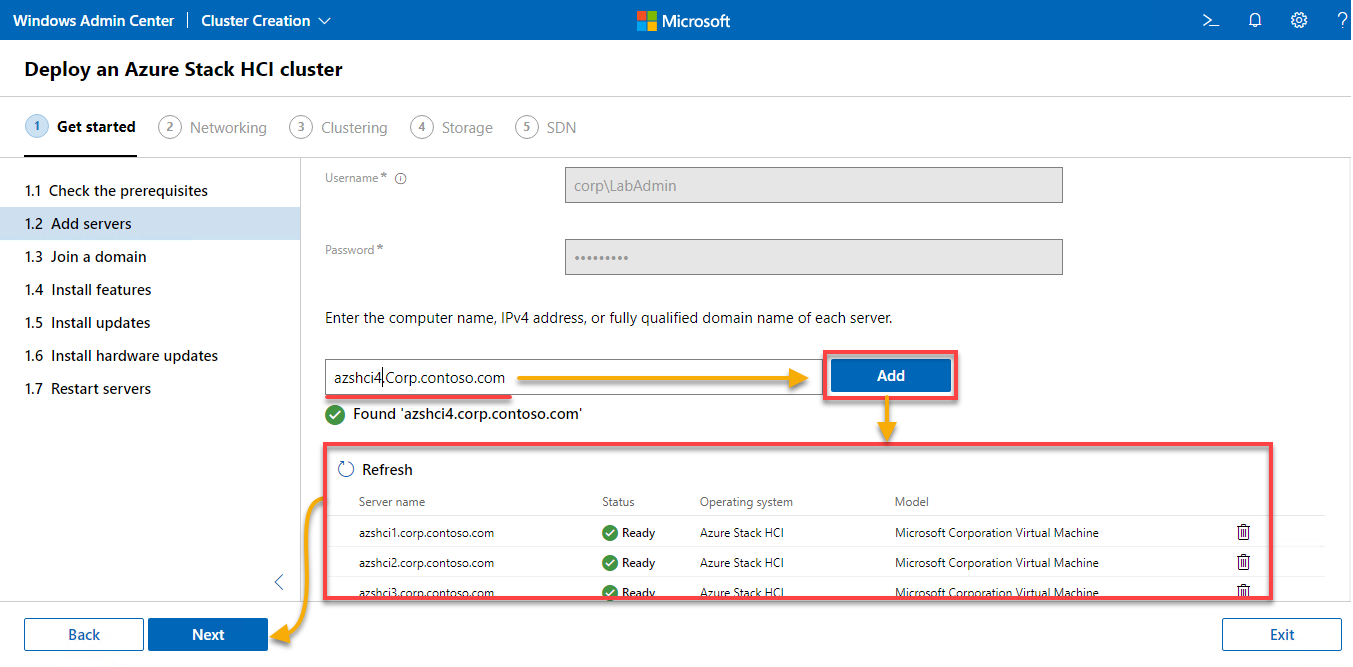
5. Add all the servers/nodes to include in the cluster. This tutorial uses a four-node demo environment. If you are working with an equivalent setup, you must also add four nodes.
Type in the nodes listed below, one at a time, and click Add for each.
# Hostlist
azshci1.Corp.contoso.com
azshci2.Corp.contoso.com
azshci3.Corp.contoso.com
azshci4.Corp.contoso.com
Once you’ve added the nodes, click Next to continue.
A green check mark appears if the node was found successfully, as shown below.
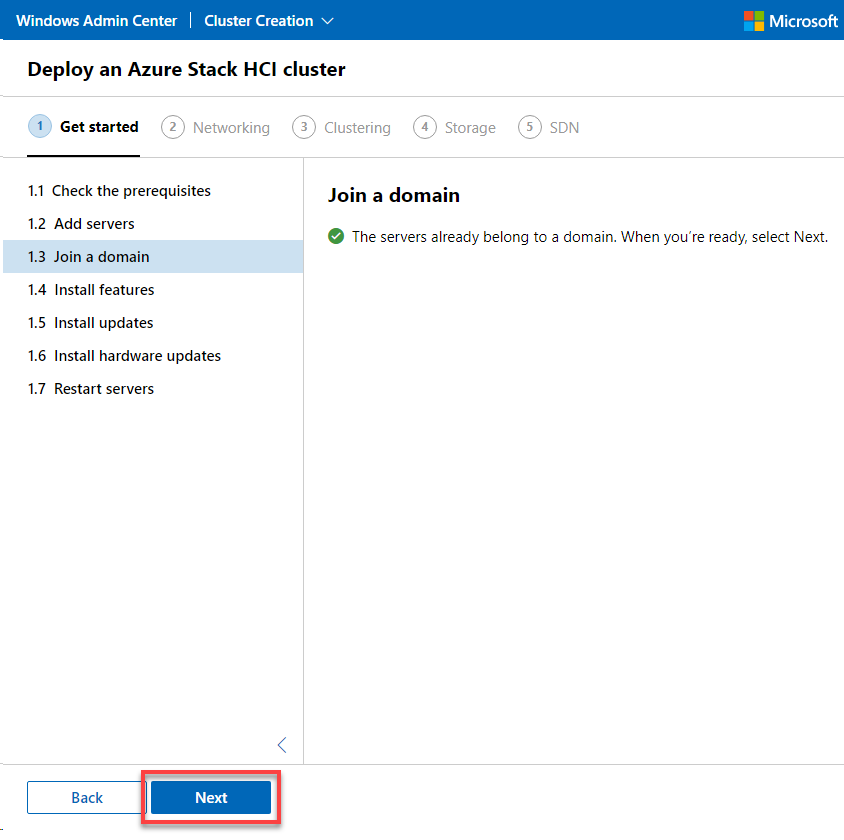
6. Next, click Next to skip this step (1.3) since all nodes are already members of the pre-provisioned domain.
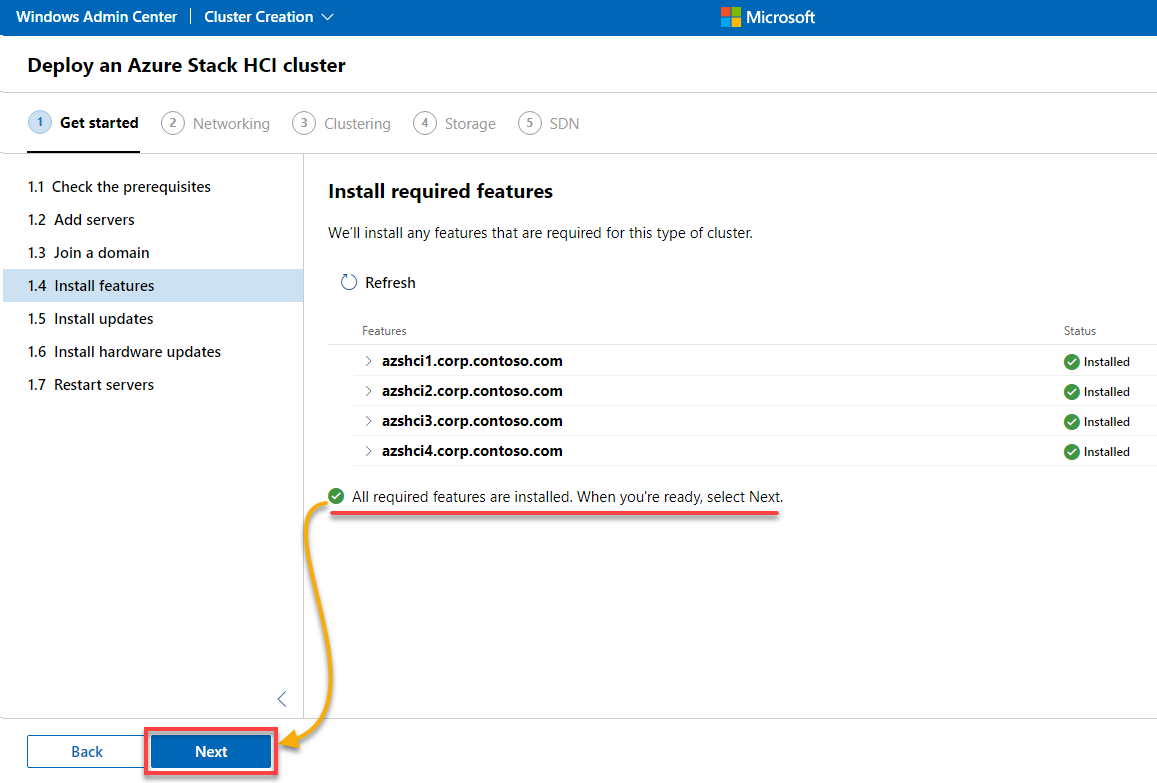
7. Now, click Install features to install the necessary components on all nodes.
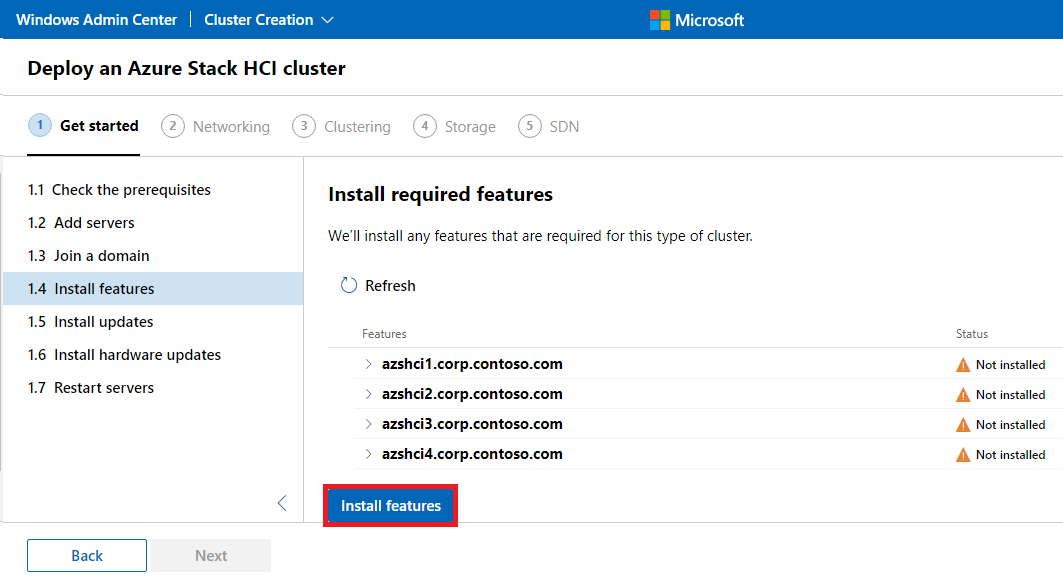
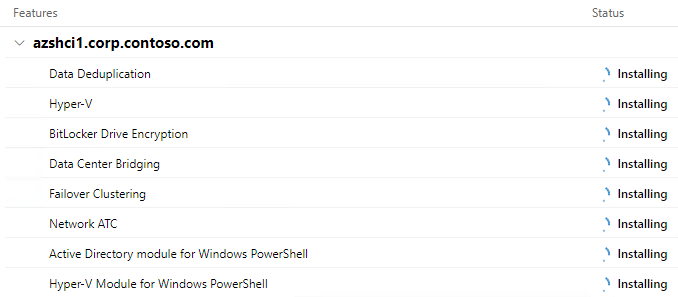
Below is the list of the following features that will be installed.
Did you get a Not installed warning for Hyper-V? Read on and see how to fix it.
Green check marks appear next to the added nodes when everything has been successfully installed.
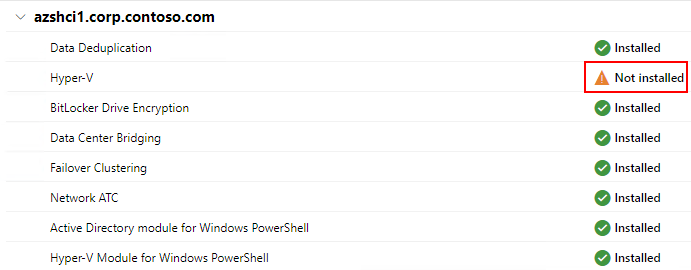
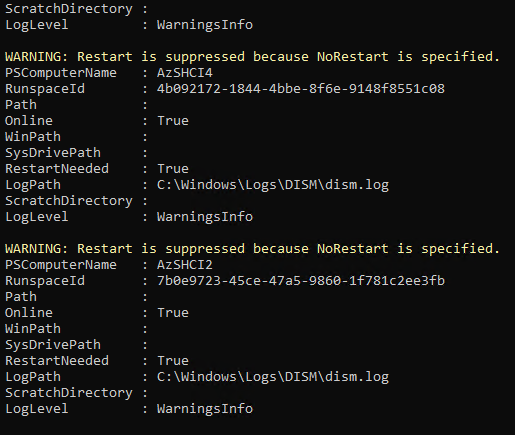
8. Run the following commands (on the domain controller) to fix the Not installed error. This command installs the missing feature (Hyper-V) on all available nodes.
$Servers="AzSHCI1","AzSHCI2","AzSHCI3","AzSHCI4"
Invoke-Command -ComputerName $Servers -ScriptBlock {Enable-WindowsOptionalFeature -FeatureName Microsoft-Hyper-V -Online -NoRestart}
If all goes well, you will see the following messages.
A restart is not required at this point but will be performed later.
9. Back in WAC, click on Refresh to see if all features have been installed. If so, click on Next to continue.
10. Click on the Install updates button to check for any pending updates and install them.
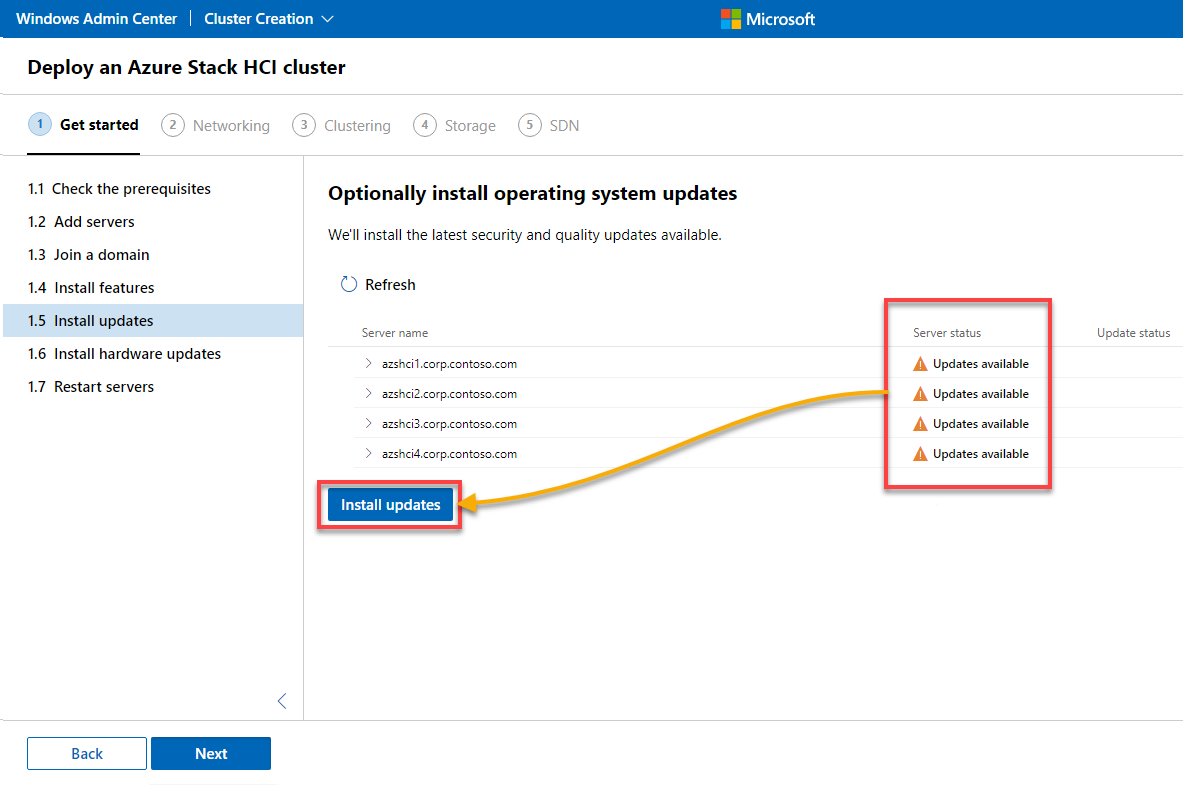
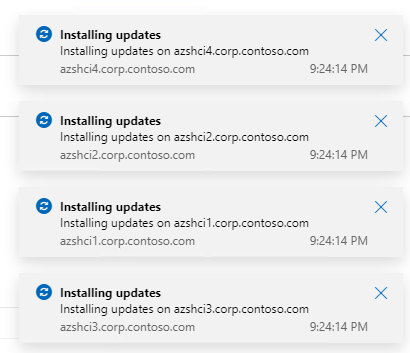
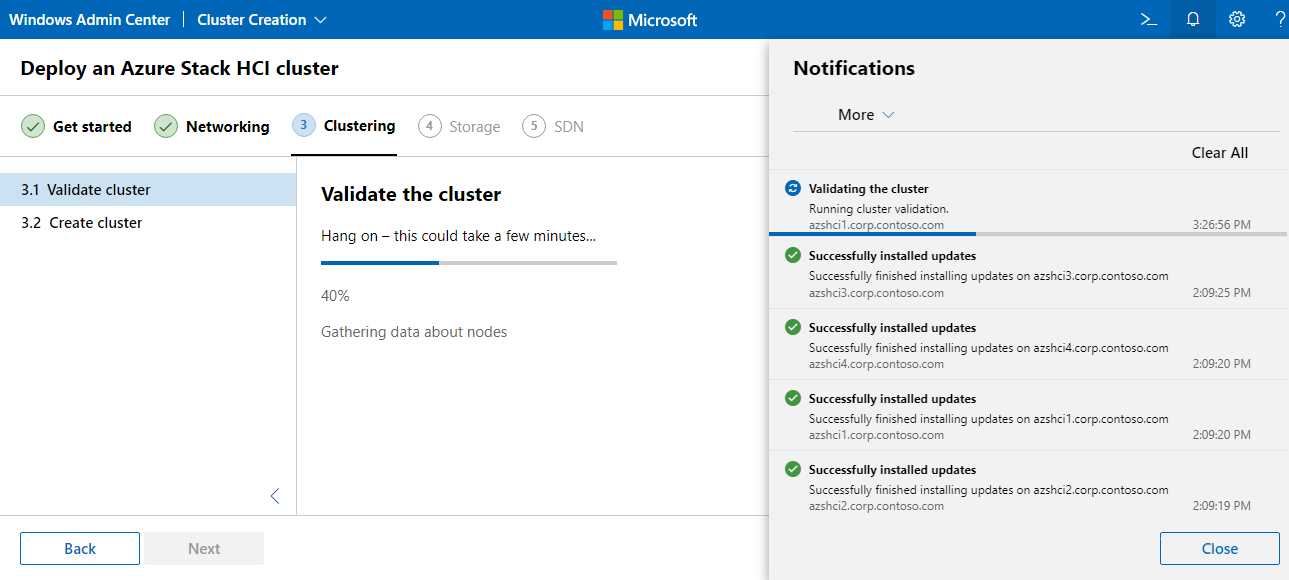
An update deployment notification appears for each node, as shown below.
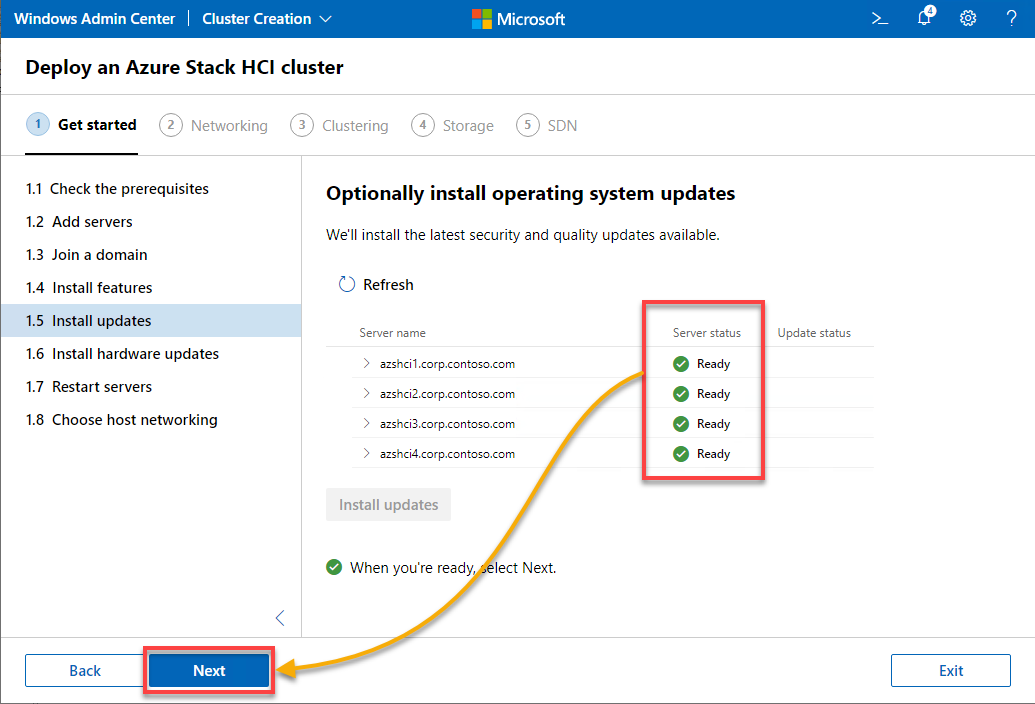
11. Now, click Next to continue after all nodes have been updated and are in Ready mode, as shown below.
12. Click Next to continue as you do not have an integrated system (only a virtualized test lab). An integrated system is a pre-configured system created by a specific vendor (HPE, Dell…) and explicitly designed to run the Azure Stack HCI operating system.
Now, a check for available hardware updates runs without results.
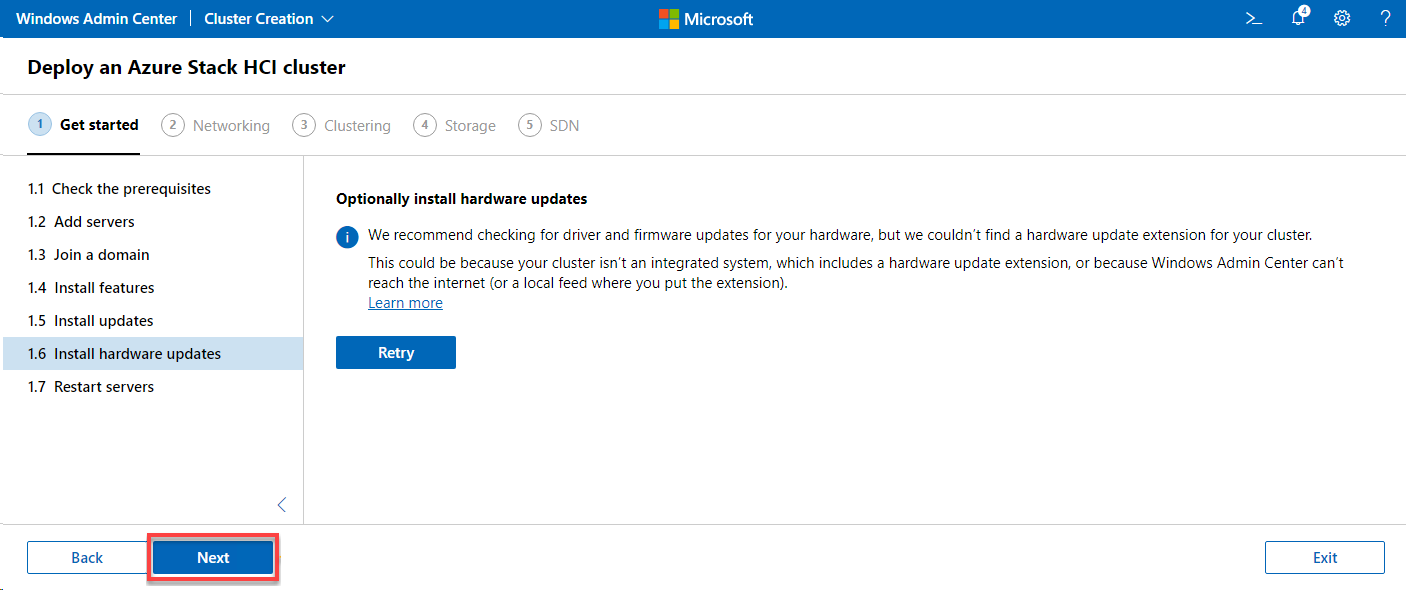
13. After all the installations, click on Restart servers to restart all nodes.
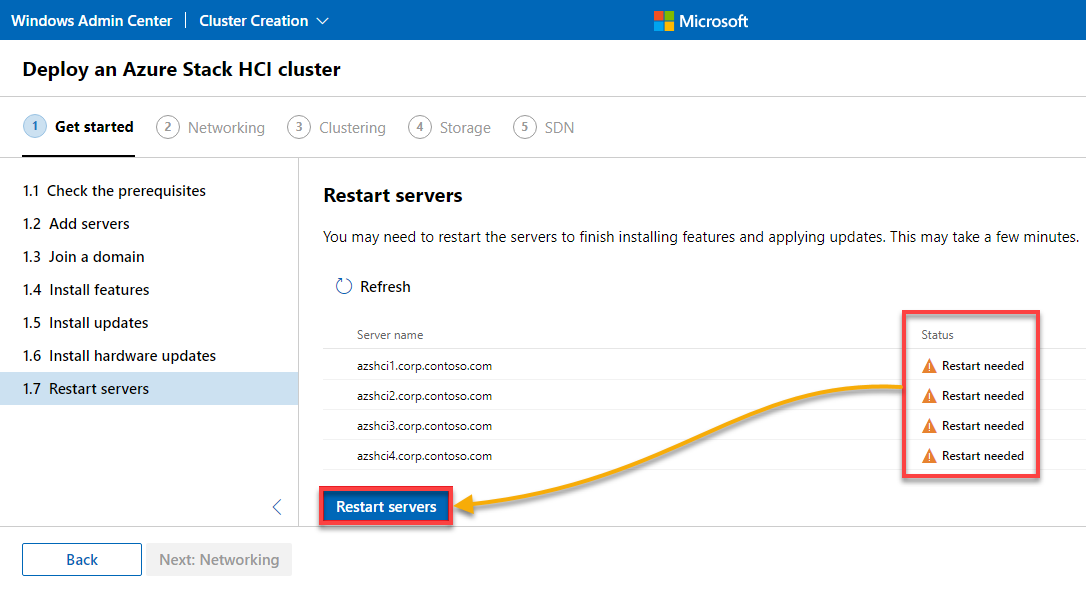
14. Click Next to continue after all nodes are in Ready mode, as shown below.

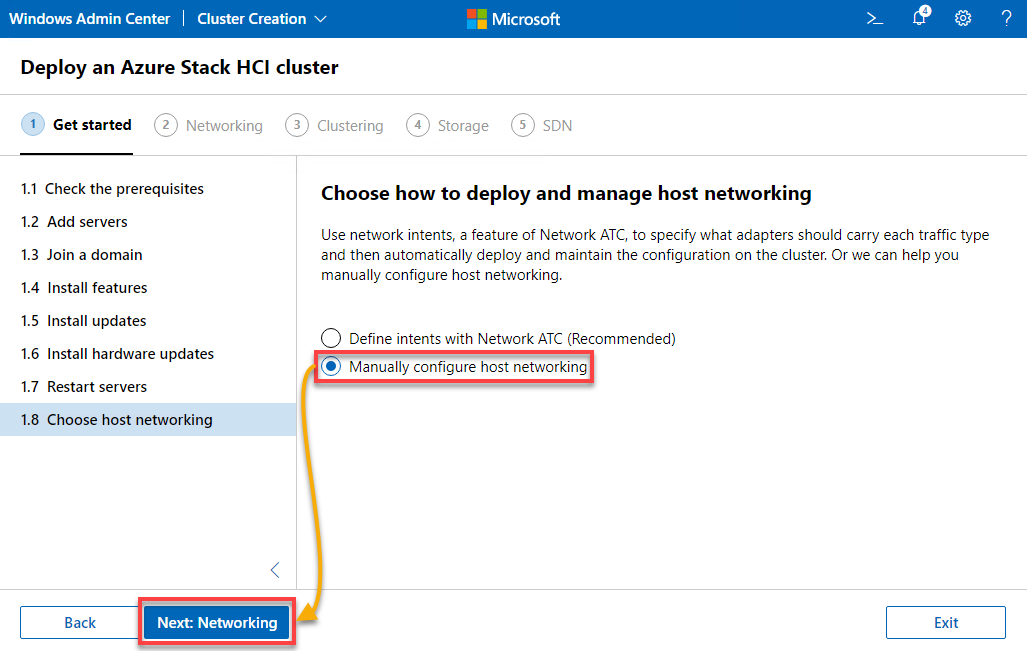
15. Choose how to deploy and manage host networking. There are two options available to proceed. But for simplicity in this tutorial, choose the Manually configure host networking option, and click Next: Networking.
Configuring Host Networking
You have completed the initial part, meeting all the prerequisites of setting up the cluster. But you still have to take care of all the networking aspects.
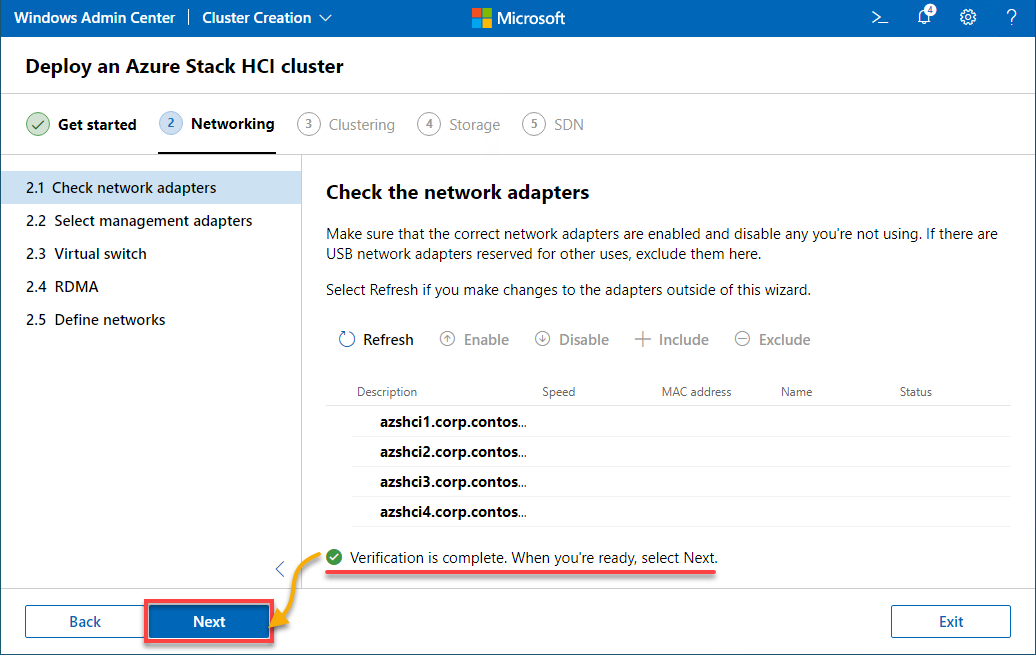
1. Under Networking, wait until the automatic network verification check is complete, and click Next to continue.
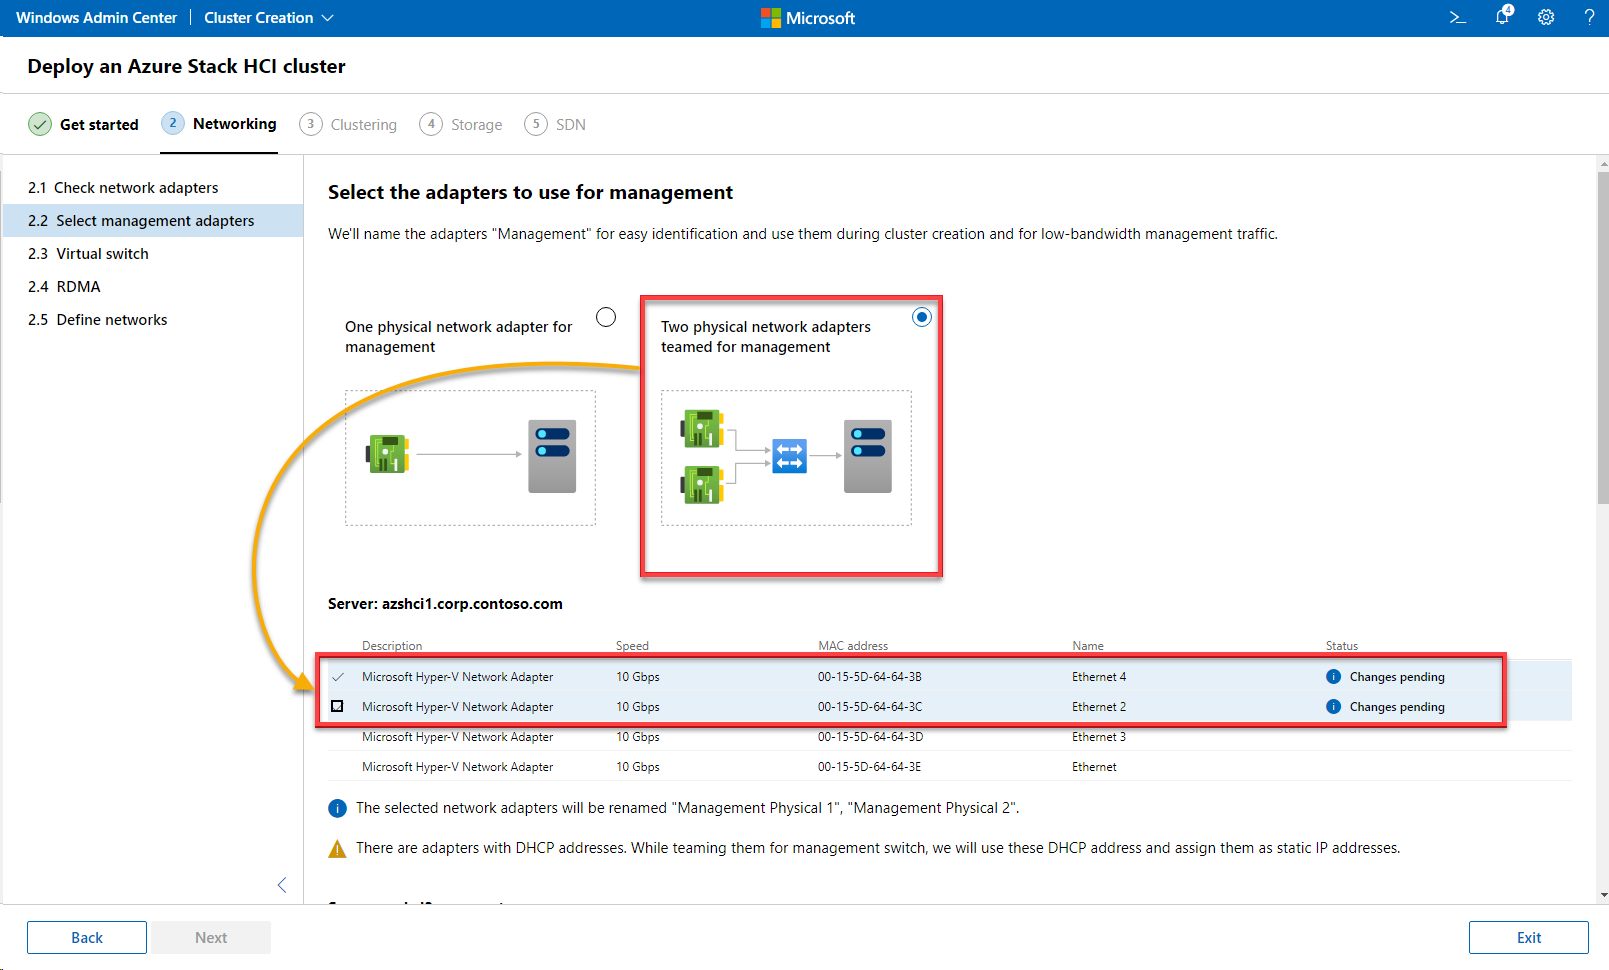
2. Select the network adapters to use for the traffic management, either a single network adapter or team several together.
But since you are connecting two network adapters, select the Two physical network adapters teamed for management option and the respective adapters on each node.
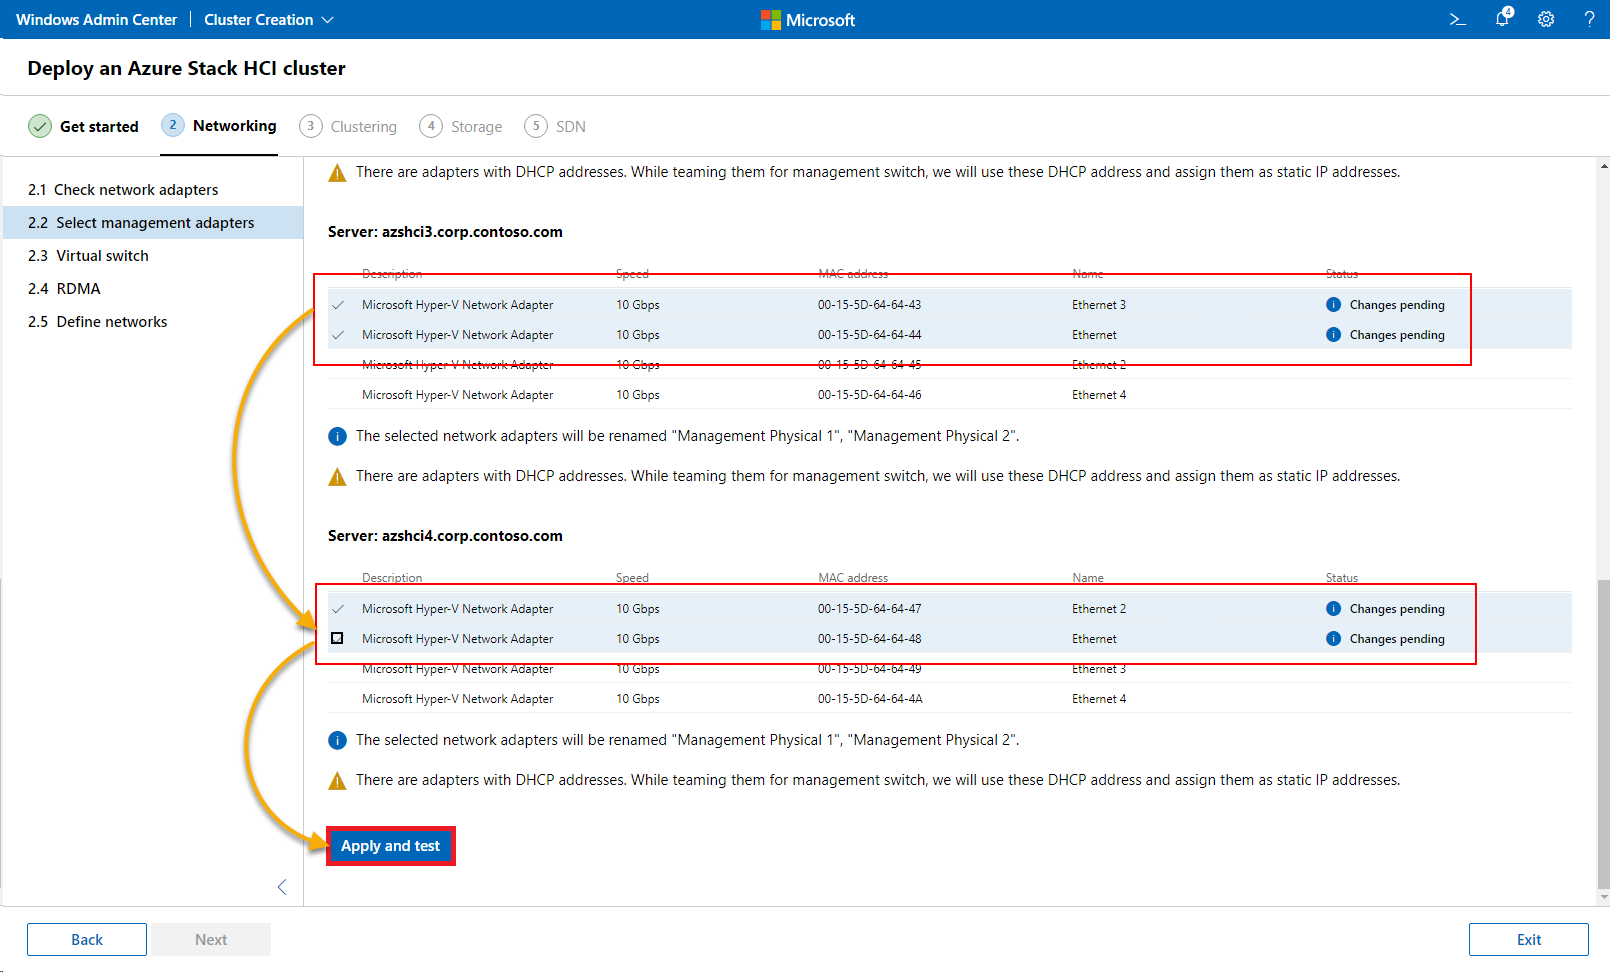
3. Once all network adapters are selected, click Apply and test to test the selected network adapters.
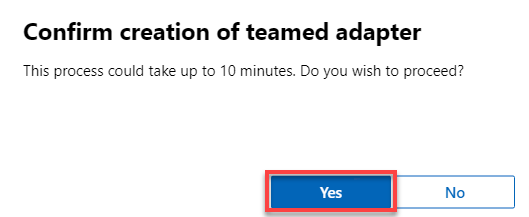
When prompted, click Yes to proceed to create a teamed adapter.
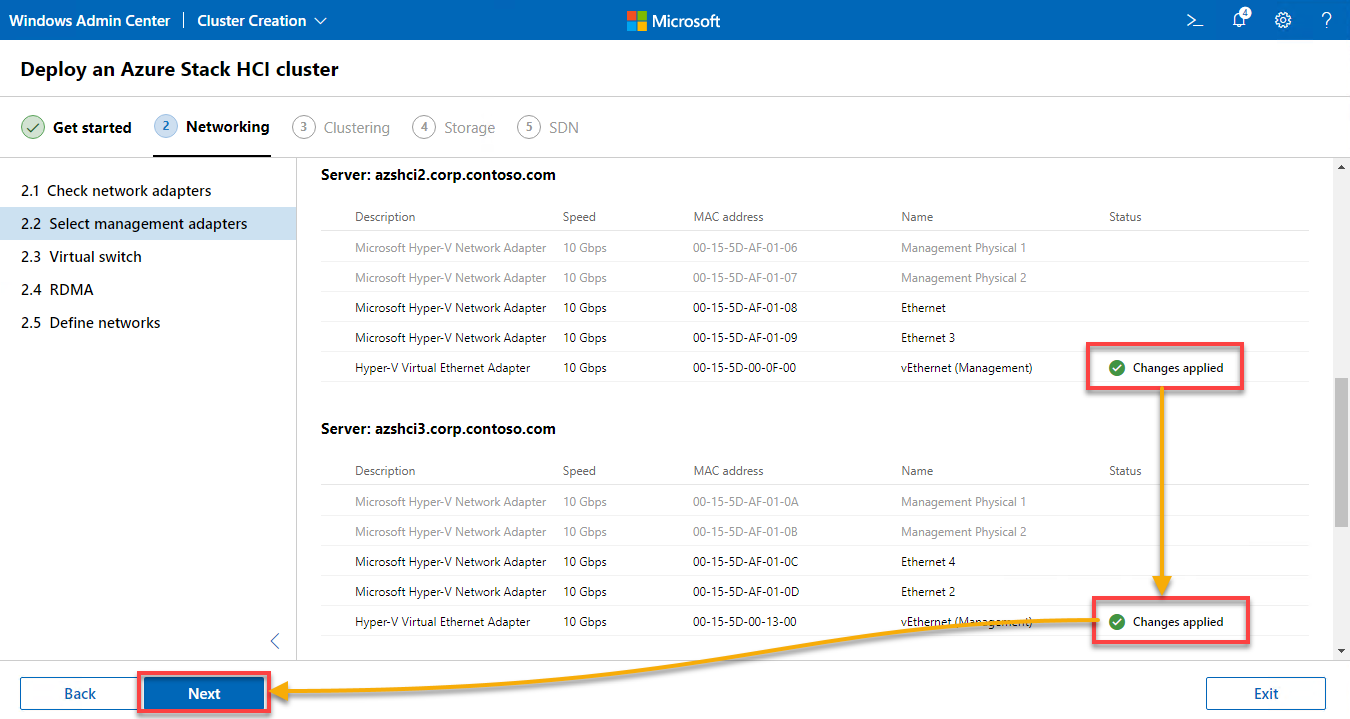
4. Now, wait until the changes are successfully applied, as shown below, and click Next to continue.
5. For the Virtual switch, choose the first available option (Create one virtual switch for compute and storage together), and click Next.
This option lets you take care of the compute and storage traffic, usually routed over a virtual switch.

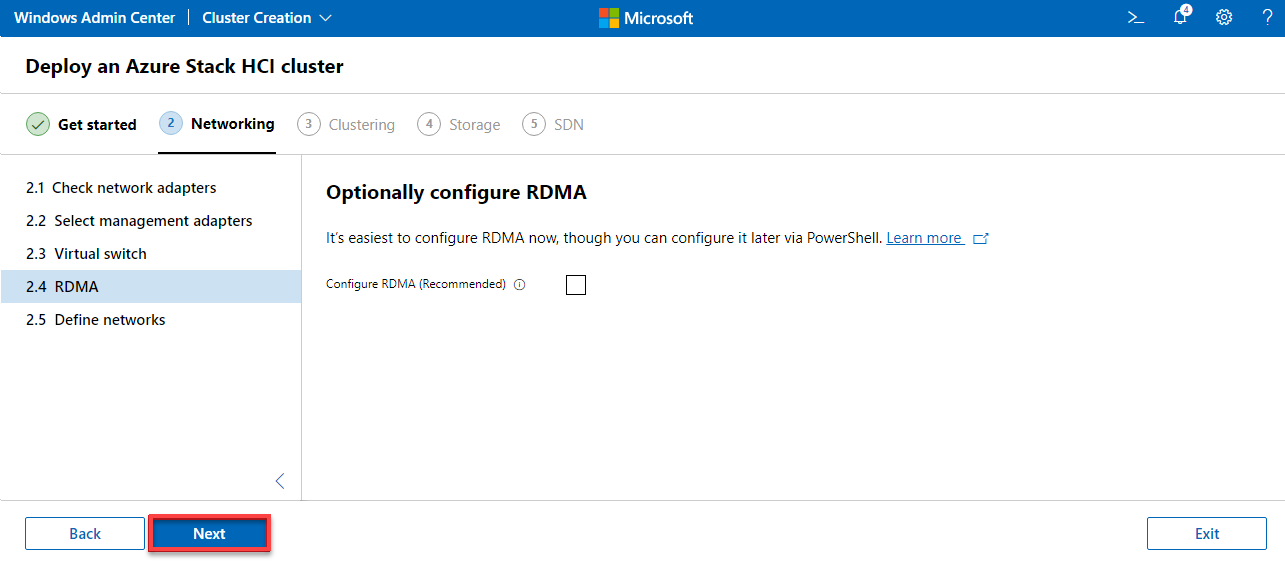
6. Click Next to continue since your virtual environment does not support Remote Direct Memory Access (RDMA).
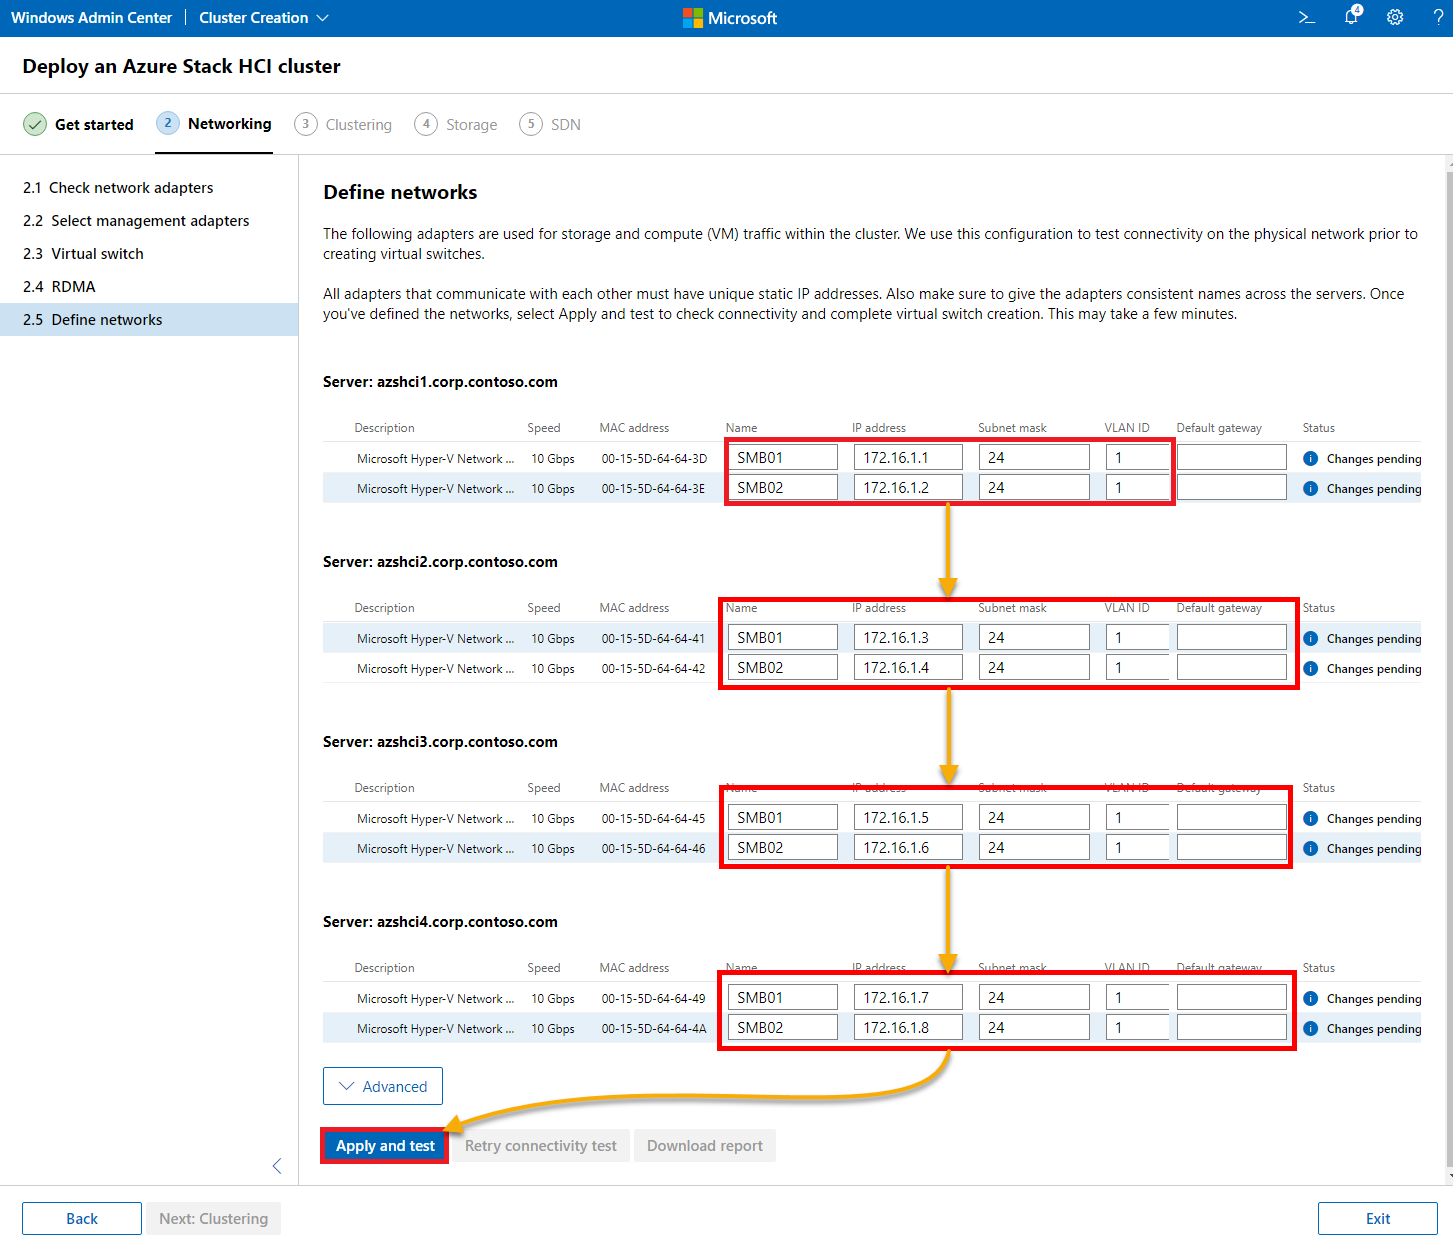
7. Define the network parameters for storage and compute traffic for each node.
# Network definition

# azshci1.Corp.contoso.com
SMB01 | 172.16.1.1 | 24 | 1
SMB02 | 172.16.1.2 | 24 | 1

# azshci2.Corp.contoso.com
SMB01 | 172.16.1.3 | 24 | 1
SMB02 | 172.16.1.4 | 24 | 1

# azshci3.Corp.contoso.com
SMB01 | 172.16.1.5 | 24 | 1
SMB02 | 172.16.1.6 | 24 | 1

# azshci4.Corp.contoso.com
SMB01 | 172.16.1.7 | 24 | 1
SMB02 | 172.16.1.8 | 24 | 1
Once defined, click on Apply and test to check each network parameter.
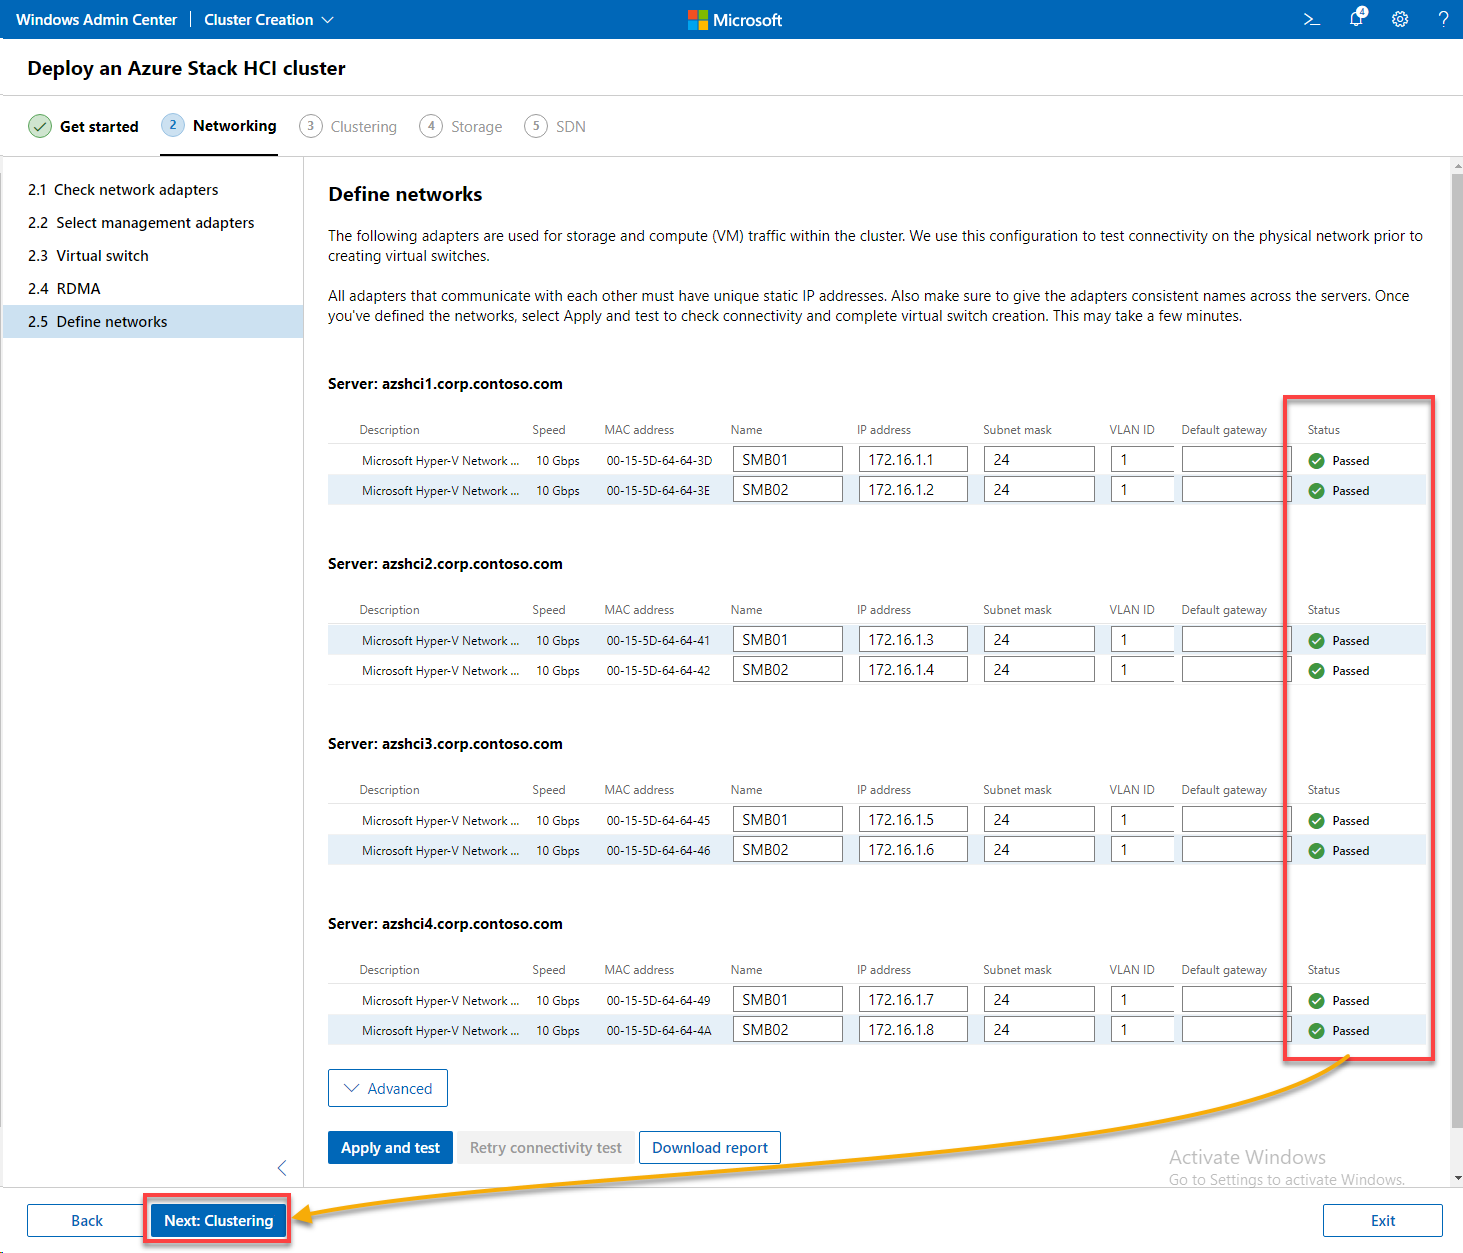
8. Wait until all checks are passed, as shown below, and click Next: Clustering to complete setting up networking and proceed to cluster.
Validating and Creating the Cluster
So far, you have only performed the necessary preparations. This time, you will take on validating and actually creating the cluster.
1. On the Validate the cluster page, click Validate to verify that all prerequisites are met.
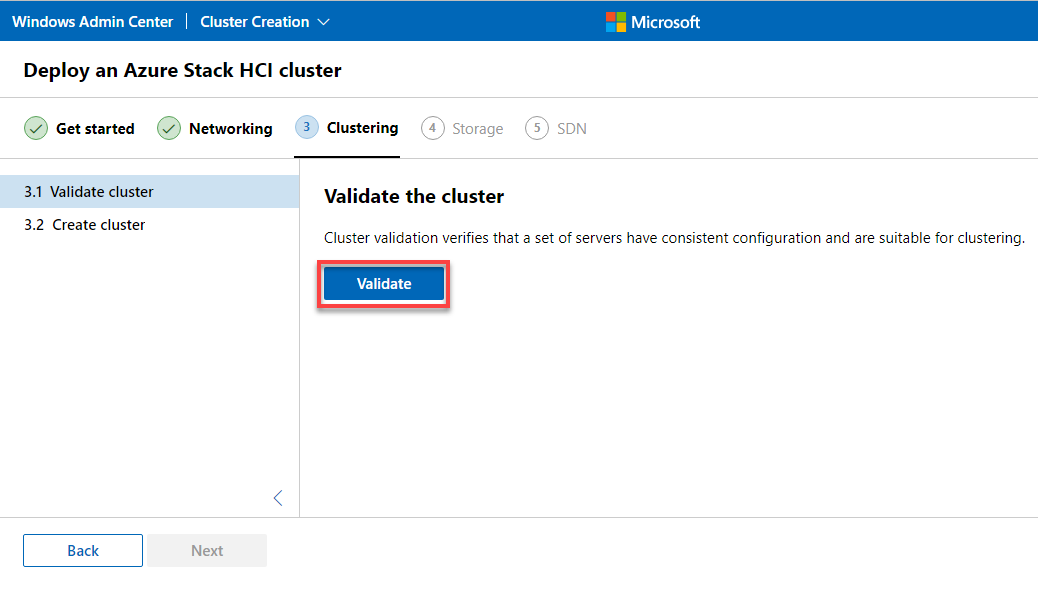
The validation process is shown below, which takes some time to complete.
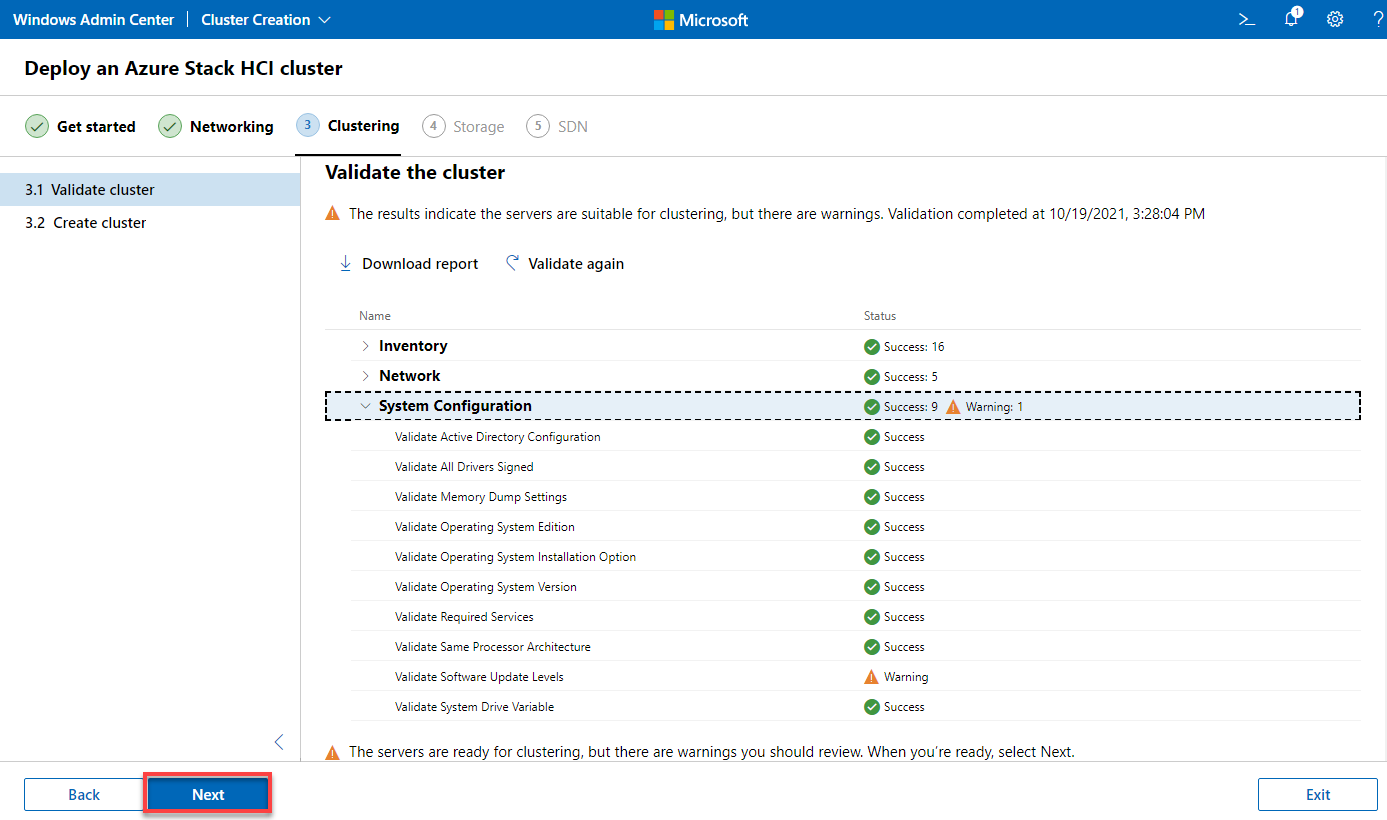
2. Once validated, click Next to continue.
Warnings can usually be ignored and should not block the creation of the cluster.
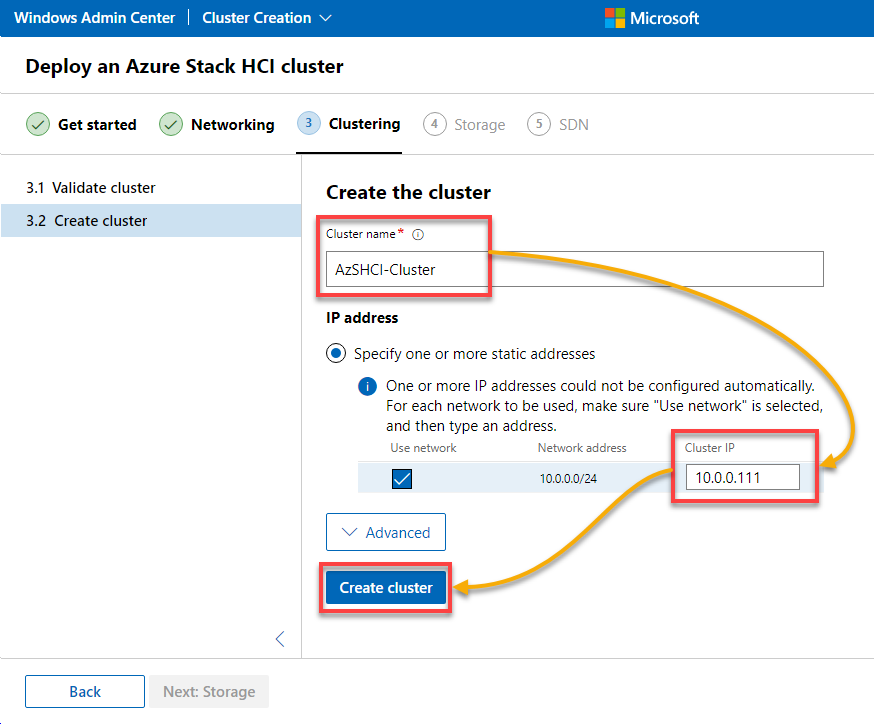
3. Assign the following cluster name (AzSHCI-Cluster) and IP to the cluster (10.0.0.111), and click Create cluster to create the new cluster.
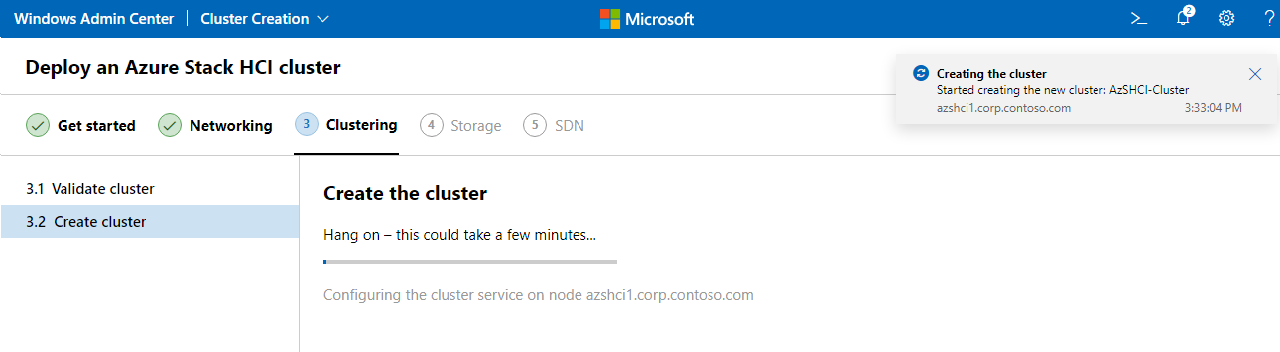
As you can see below, the cluster creation is in progress.
4. Once the cluster is created, click Next: Storage to continue configuring storage settings for the cluster.

Configuring Storage for the Cluster
After creating the cluster, an adequate storage system must be created to provide any workload. Doing so requires some preparations with the hard disks, and the Storage Space Direct (S2D) must be activated.
1. Under the Storage tab, click Erase drive to erase all existing data so you can start with a clean and empty system.
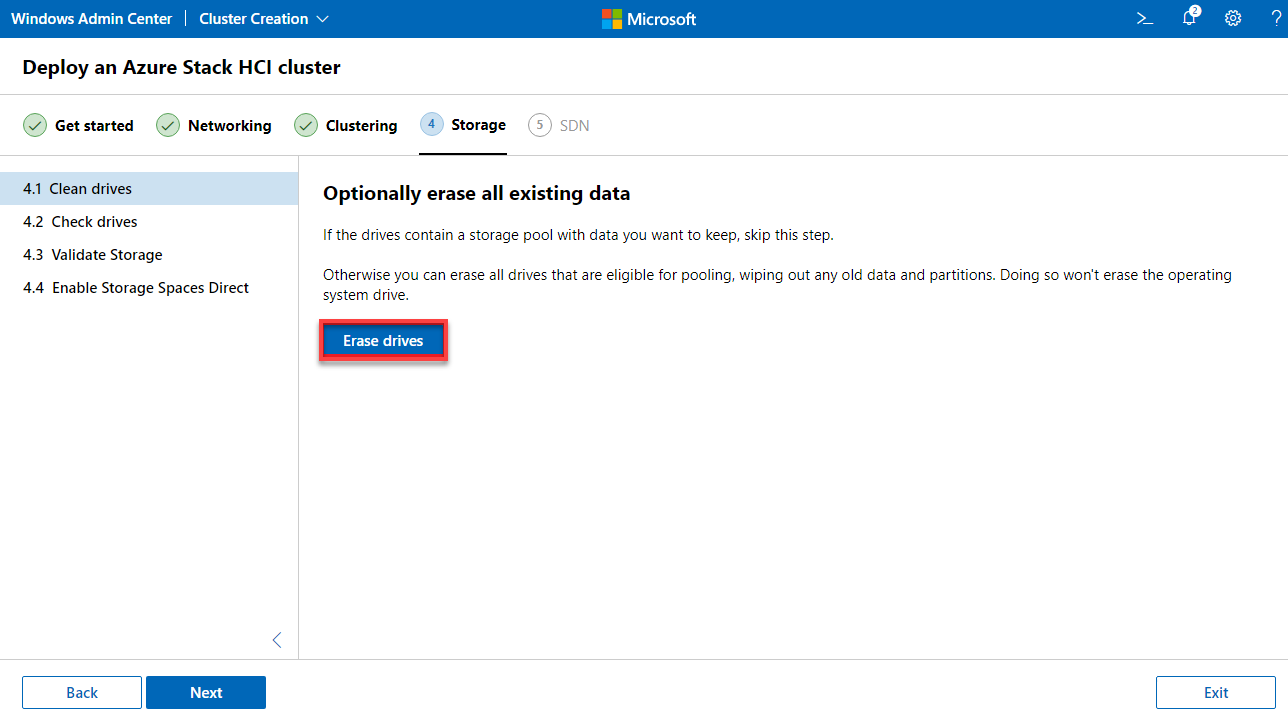
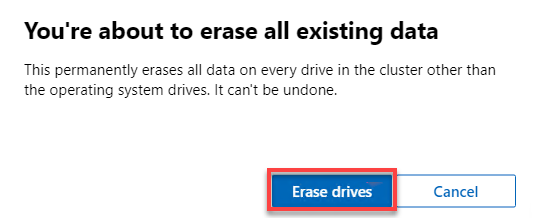
When prompted, click on Erase drives to confirm the action of erasing drives.
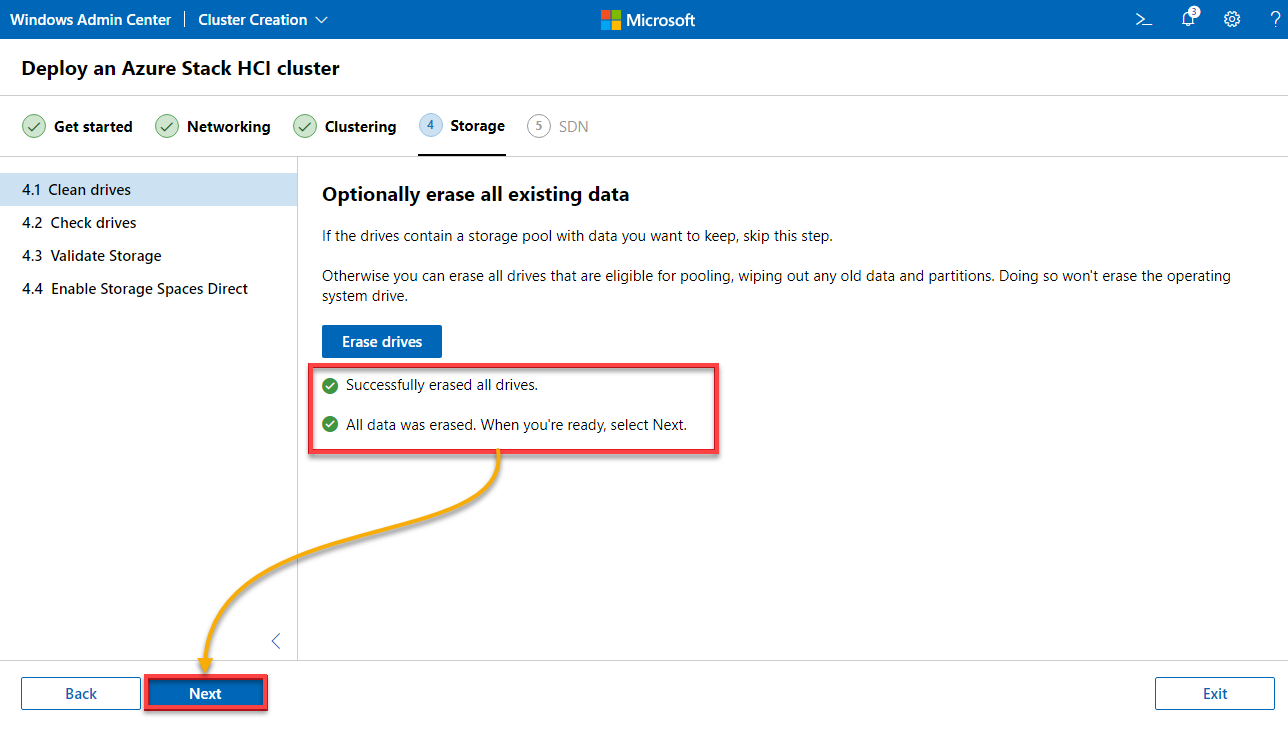
2. Once erased, click Next to continue.
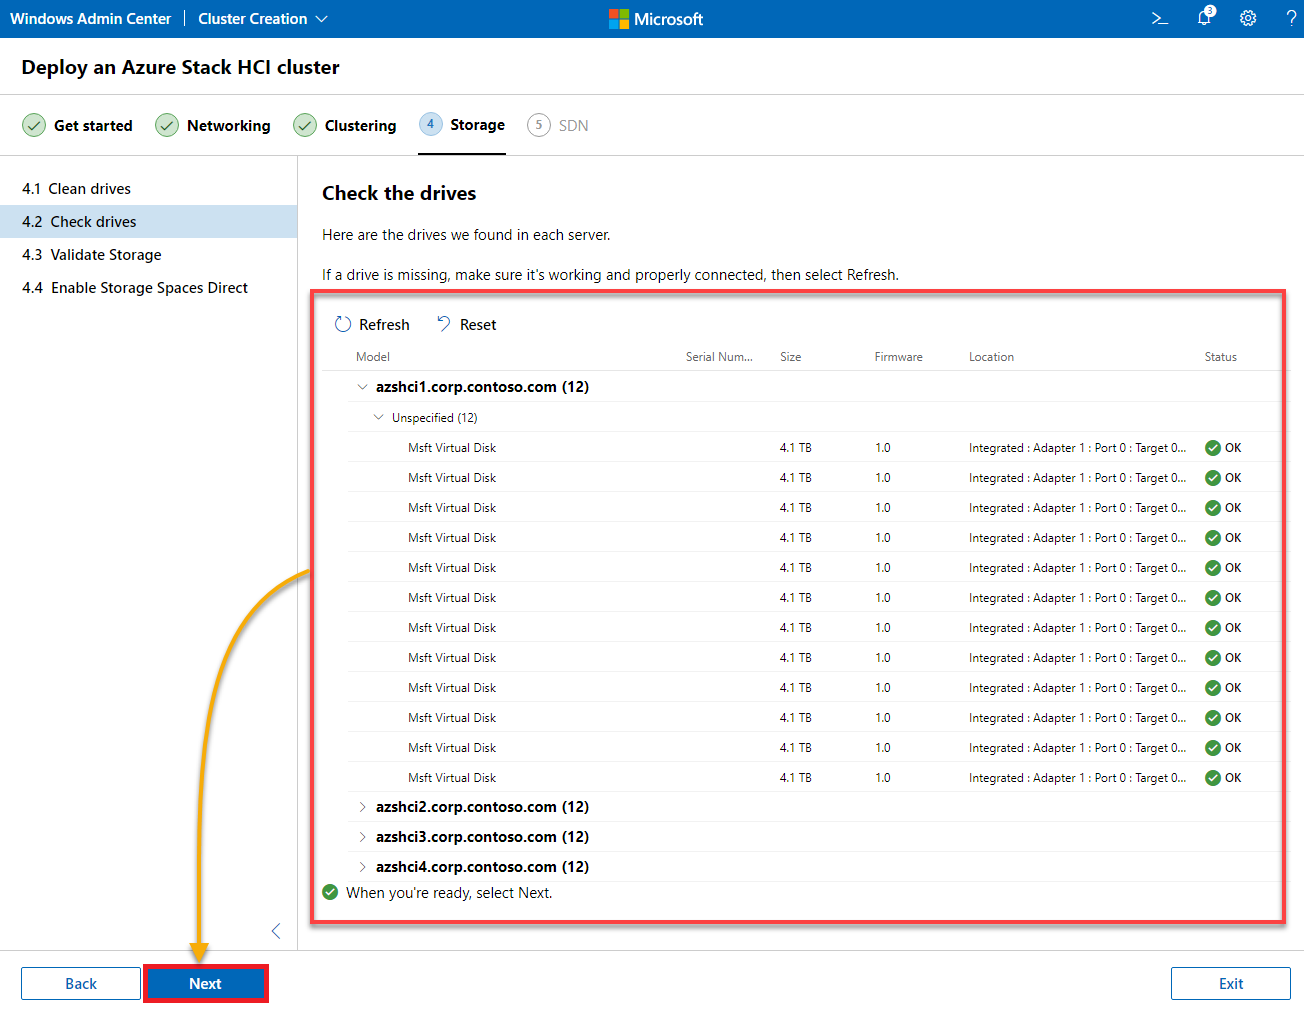
3. Check all available, accessible drives and their compatibility verified in the list, as shown below, and click Next.
The storage was examined for its suitability for Storage Space Direct (S2D) operation.
4. Now, wait until the storage validation process for operating Storage Space Direct (S2D) is complete, and click Next.
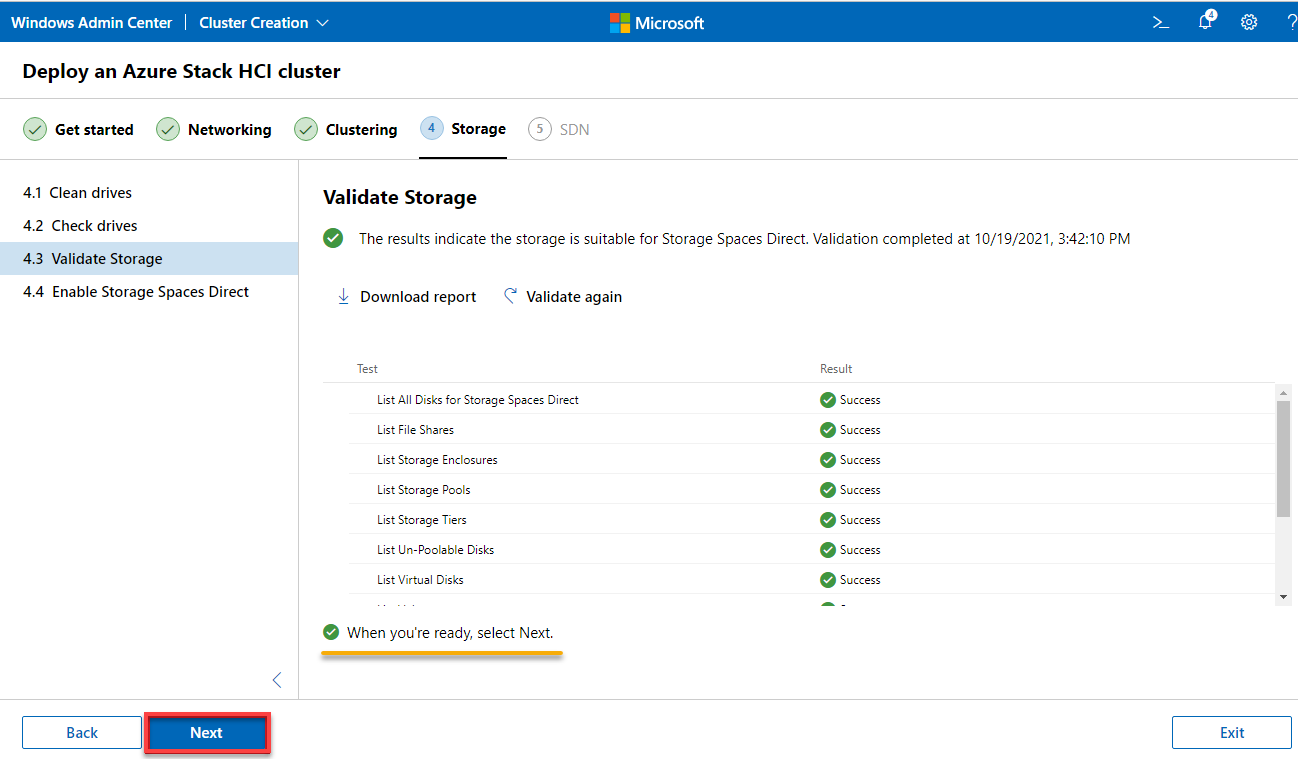
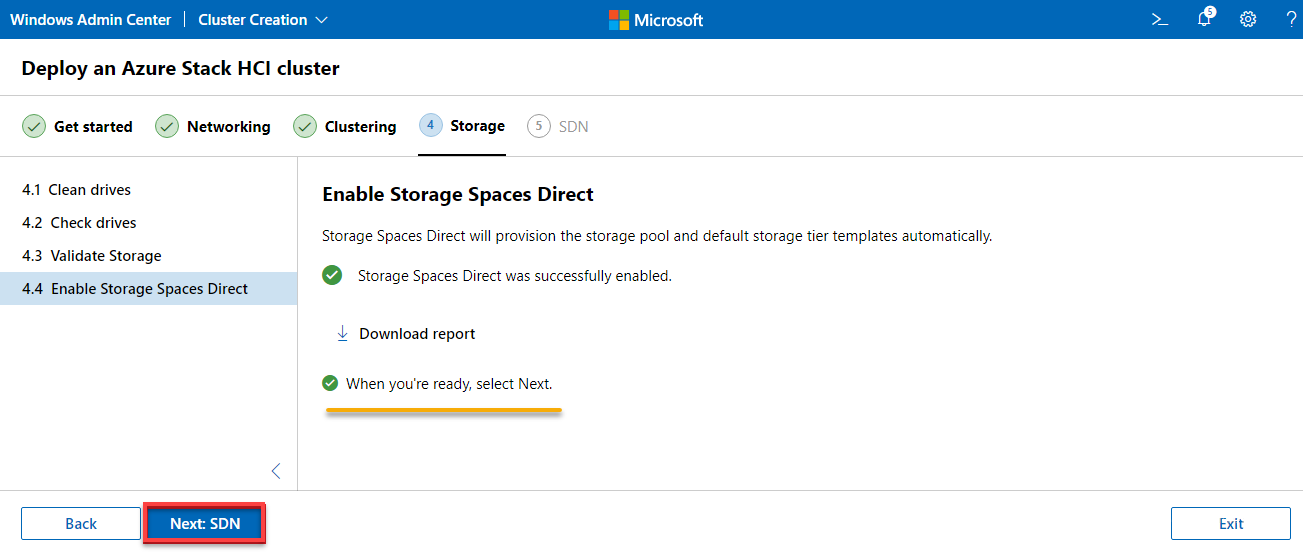
5. Click on the Enable button to enable S2D for the cluster.
Note that provisioning S2D may take a while.

6. After enabling S2D, click on Next SDN.
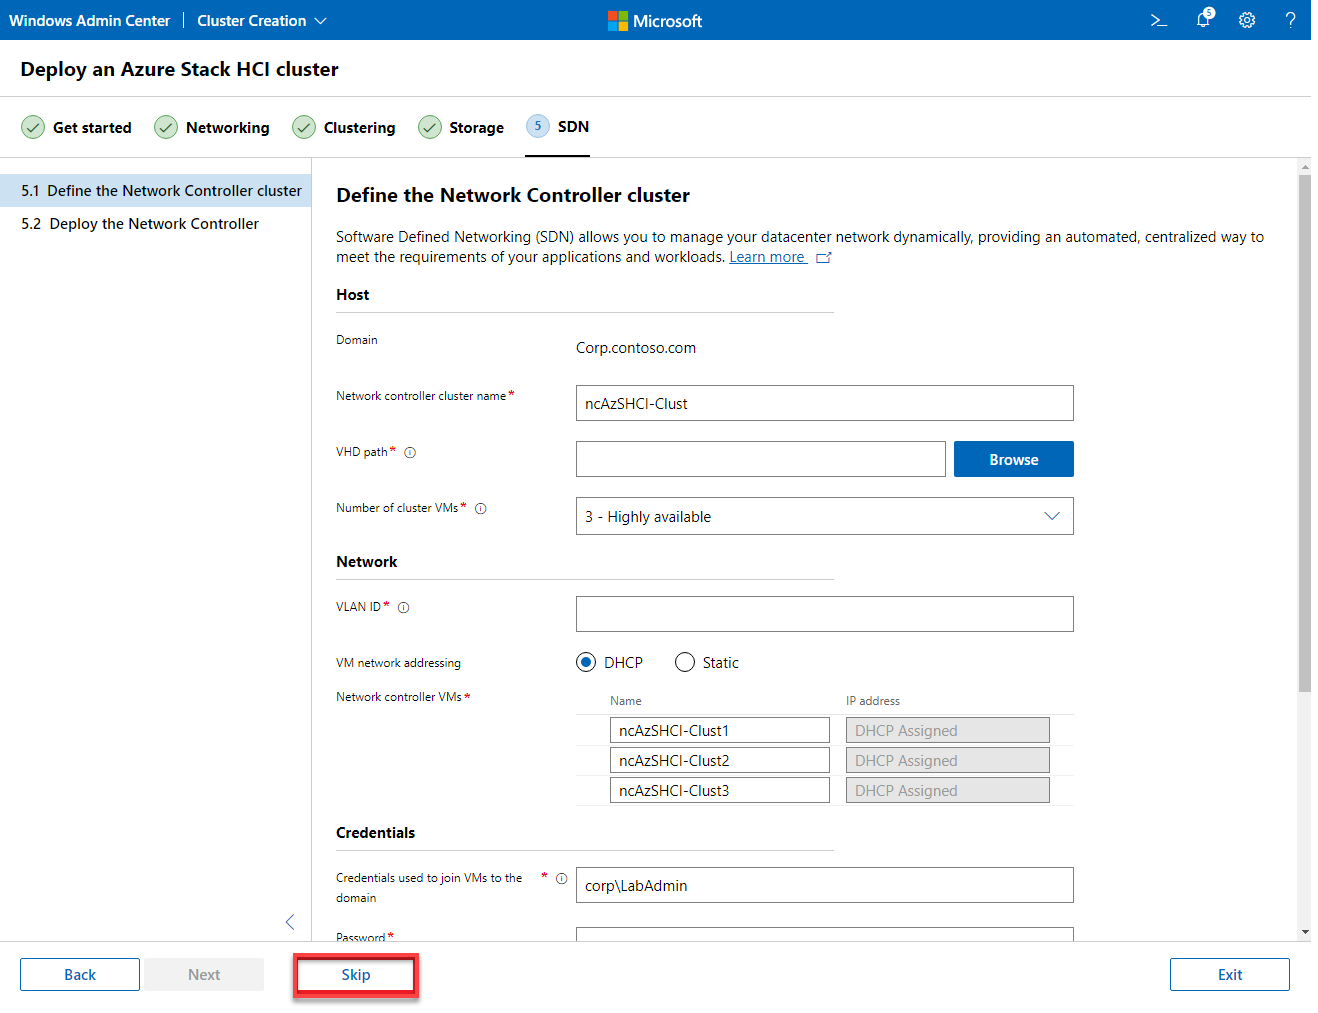
7. Now, click on Skip to bypass a Software Defined Network (SDN) Infrastructure setup.
SDN is quite a complex topic and cannot be covered in this tutorial. So for the sake of simplicity, you will skip this configuration.
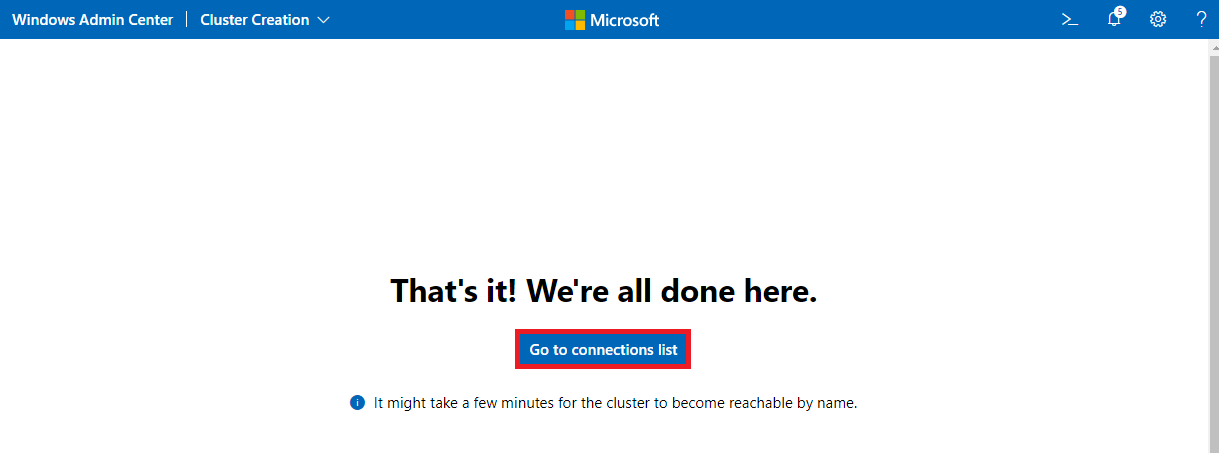
8. Click Go to connection list to access all connections available for your cluster. The output below indicates the cluster is ready for use.
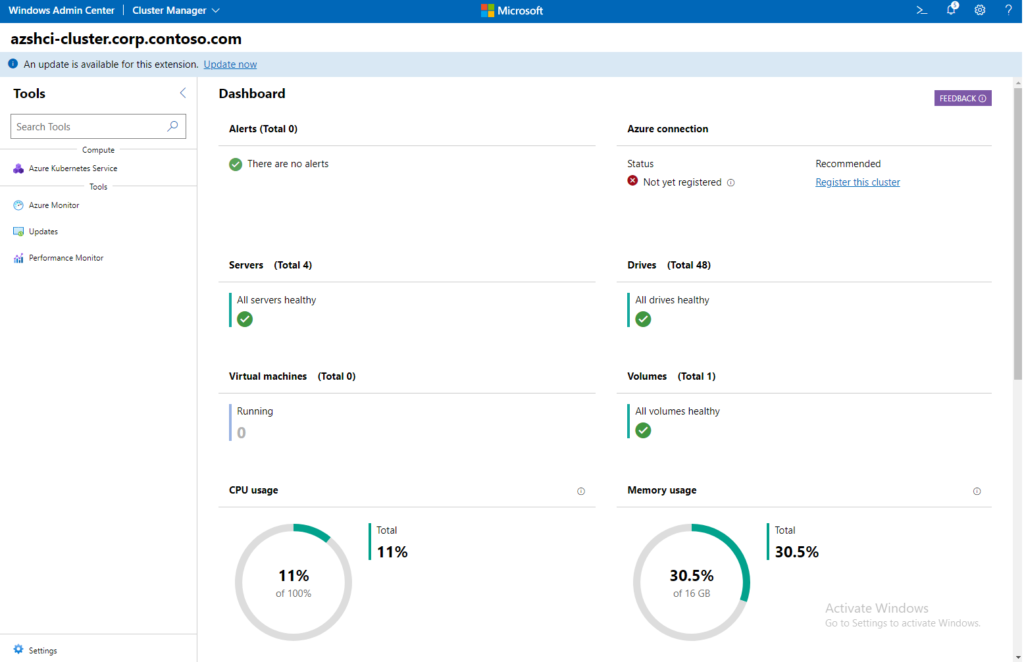
9. Finally, click on your server cluster object (azshci-cluster.corp.contoso.com) to see the cluster’s information.
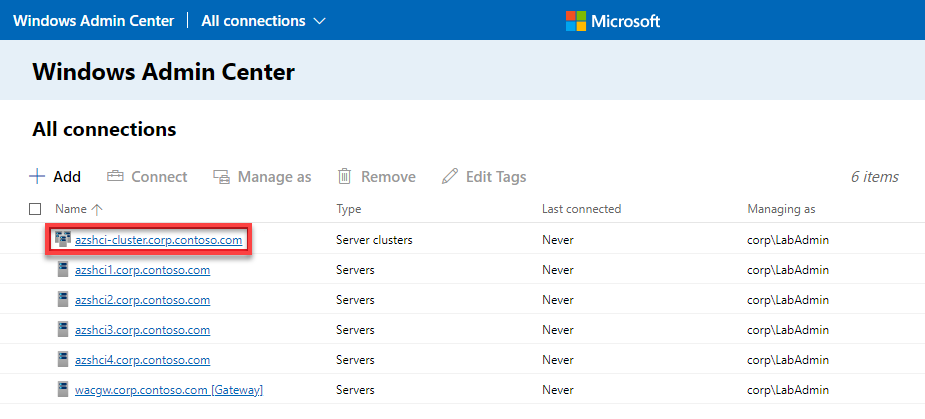
Below is a dashboard where you can see the cluster’s health information.
Conclusion
A properly working test lab is essential before deciding to purchase or integrate a product into operations, especially if the necessary expenses will be relatively high. And in this tutorial, you have learned how to set up an Azure Stack HCI testing environment.
From this point, why not explore a stack’s available functionalities? With Azure Stack HCI, you never have to worry about having the proper hardware.


