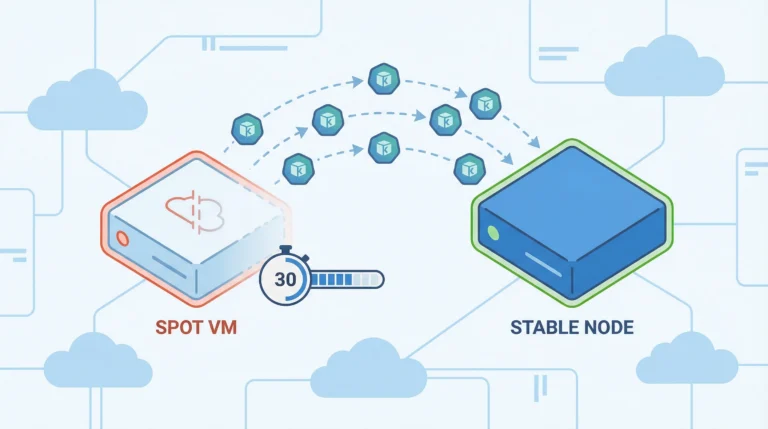

Thirty seconds. That’s all Azure gives you before yanking a Spot VM out from under your workloads. If your AKS cluster doesn’t have an auto-migration system in place, those 30 seconds end with dropped connections, failed jobs, and a 2 AM incident that didn’t need to happen. The savings from Spot instances—up to 90% off pay-as-you-go pricing—aren’t worth much if your workloads crash every time Azure reclaims capacity.
This tutorial walks you through building an automated migration system that detects Spot VM eviction signals, drains affected nodes, and migrates workloads to reliable compute—all within that 30-second window. You’ll configure node pools, set up eviction handling, build autoscaler fallback logic, and test the whole system with simulated evictions.
Prerequisites
Before you start, you’ll need:
-
An existing AKS cluster running Kubernetes 1.27 or later
-
Azure CLI 2.14+ installed and authenticated
-
kubectlconfigured to talk to your cluster -
At least one system node pool running on-demand VMs (Spot instances can’t serve as system pools)
Understanding How Spot Eviction Works
Azure evicts Spot VMs for two reasons: the platform needs the capacity back for pay-as-you-go customers, or the current market price exceeds your configured maximum. Either way, your node gets a 30-second notice via the Azure Instance Metadata Service (IMDS) Scheduled Events API.
IMDS is a REST endpoint built into every Azure VM that exposes metadata about the VM itself—things like its region, size, and tags. The Scheduled Events API is the part that matters here: it gives you advance warning of imminent platform operations, including eviction. When Azure decides to reclaim your Spot VM, it posts a Preempt event to that endpoint before pulling the plug.
| Eviction Trigger | What Happens | Your Window |
|---|---|---|
| Capacity reclaim | Azure needs the resources for standard customers | 30 seconds |
| Price threshold | Spot price exceeds your max price setting | 30 seconds |
The IMDS endpoint lives at http://169.254.169.254/metadata/scheduledevents inside the VM. When eviction is imminent, it returns a Preempt event. Your migration system needs to detect that event and act before the clock runs out.
Step 1: Create the Spot Node Pool
Add a Spot node pool to your existing cluster with autoscaling enabled and the Delete eviction policy:
az aks nodepool add \
    --resource-group myResourceGroup \
    --cluster-name myAKSCluster \
    --name spotnodepool \
    --priority Spot \
    --eviction-policy Delete \
    --spot-max-price -1 \
    --enable-cluster-autoscaler \
    --min-count 1 \
    --max-count 5 \
    --node-vm-size Standard_D4s_v5 \
    --no-wait
A few flags here are worth understanding before you run this:
-
--spot-max-price -1— Sets the maximum hourly price you’ll pay. A value of-1means you accept up to the current on-demand price, so you only get evicted when Azure needs the capacity back—not because the Spot price spiked above your threshold. -
--enable-cluster-autoscaler— Activates the Cluster Autoscaler on this pool so it scales node count in response to pending pods. -
--min-count 1/--max-count 5— Bounds for the autoscaler. Setting min to 1 keeps at least one Spot node always available; max caps the pool at 5 nodes. -
--no-wait— Returns control to your shell immediately instead of blocking until the operation completes. The pool creation continues in the background. Useaz aks nodepool showto check status.
The Delete policy permanently removes evicted VMs and their local disks. The alternative—Deallocate—stops the VM but keeps the disk around, which sounds convenient until those stopped nodes start counting against your compute quota and confusing the cluster autoscaler.
Pro Tip: Set your --spot-max-price to -1 during node pool creation. This tells Azure you’ll pay up to the on-demand price, which means you only get evicted for capacity reasons—not price fluctuations.
AKS automatically applies a taint to your Spot nodes: kubernetes.azure.com/scalesetpriority=spot:NoSchedule. A taint is a key-value marker placed on a node that repels pods from scheduling there unless the pod explicitly declares it can tolerate that condition. Only pods with a matching toleration will schedule on your Spot nodes—everything else lands on the on-demand pool.
Verify the Spot pool was created and the priority is correct:
az aks nodepool show \
    --resource-group myResourceGroup \
    --cluster-name myAKSCluster \
    --name spotnodepool \
    --query "scaleSetPriority"
You should see "Spot" in the output. If it returns "Regular", you missed the --priority Spot flag and created a standard pool instead—a surprisingly common mistake that won’t produce errors until you wonder why your nodes never get evicted.
Step 2: Create the On-Demand Fallback Pool
Your migration system needs somewhere to send workloads when Spot capacity disappears. Create a regular on-demand node pool that serves as the safety net:
az aks nodepool add \
    --resource-group myResourceGroup \
    --cluster-name myAKSCluster \
    --name ondemandpool \
    --node-vm-size Standard_D4s_v5 \
    --enable-cluster-autoscaler \
    --min-count 0 \
    --max-count 5 \
    --no-wait
Setting --min-count 0 means this pool stays empty until the autoscaler actually needs it. You’re not paying for idle on-demand nodes—they only spin up when Spot capacity fails.
Step 3: Configure Your Workloads for Spot Scheduling
Your deployments need tolerations for the Spot taint and affinity rules that prefer Spot nodes but allow on-demand as a fallback. An affinity rule tells the Kubernetes scheduler where a pod prefers—or requires—to run, based on node labels. Using preferredDuringSchedulingIgnoredDuringExecution means the scheduler tries to honor the preference but will still place the pod somewhere else if the preferred nodes are unavailable or full.
apiVersion: apps/v1
kind: Deployment
metadata:
  name: my-workload
spec:
  replicas: 3
  selector:
    matchLabels:
      app: my-workload
  template:
    metadata:
      labels:
        app: my-workload
    spec:
      tolerations:
      - key: "kubernetes.azure.com/scalesetpriority"
        operator: "Equal"
        value: "spot"
        effect: "NoSchedule"
      affinity:
        nodeAffinity:
          preferredDuringSchedulingIgnoredDuringExecution:
          - weight: 1
            preference:
              matchExpressions:
              - key: "kubernetes.azure.com/scalesetpriority"
                operator: In
                values:
                - "spot"
      terminationGracePeriodSeconds: 25
      containers:
      - name: my-app
        image: myregistry.azurecr.io/my-app:latest
        resources:
          requests:
            cpu: "500m"
            memory: "512Mi"
Several fields in this manifest work together to make eviction safe:
-
tolerations— TheNoScheduletoleration explicitly permits this pod to land on Spot nodes. Without it, the scheduler ignores your Spot pool entirely. -
affinity.nodeAffinity— ThepreferredDuringSchedulingIgnoredDuringExecutionblock with aweight: 1preference toward thespotlabel tells the scheduler to favor Spot nodes, but fall back to on-demand if none are available. -
terminationGracePeriodSeconds: 25— Five seconds less than the eviction window. When Kubernetes receives the eviction signal, it sendsSIGTERMto the container and waits up to this duration before sendingSIGKILL. Setting it to 25 gives your app a clean shutdown window while ensuring Kubernetes finishes before Azure pulls the node at the 30-second mark. -
resources.requests— Explicitly requesting CPU and memory allows the scheduler to find a node with sufficient headroom. Pods without resource requests get placed with no guarantees, which makes the autoscaler’s scaling decisions less predictable.
For stateless workloads this configuration is usually sufficient. Stateful jobs that maintain in-memory state need additional checkpoint logic—covered in the final section.
Warning: Spot evictions are involuntary disruptions. Pod Disruption Budgets help during voluntary drains, but if the 30-second timer expires, Azure deletes the node regardless of your PDB settings.
Step 4: Set Up the Autoscaler Fallback
When Azure evicts a Spot node, your pods land in a Pending state—rescheduled, but with nowhere to go if the Spot pool is fully evicted and the on-demand pool has no available capacity. Without autoscaler fallback logic, those pods stay pending until you manually intervene or Spot capacity returns, neither of which is acceptable for production workloads. The autoscaler fallback solves this by automatically provisioning on-demand capacity the moment it detects pods that can’t be scheduled on Spot. Your workloads keep running; you pay on-demand rates only for as long as Spot capacity is unavailable.
You have two options for implementing that fallback. Pick the one that fits your environment.
Option A: Cluster Autoscaler With Priority Expander
The Cluster Autoscaler can prioritize node pools using a Priority Expander. Create a ConfigMap that ranks your Spot pool higher than on-demand:
apiVersion: v1
kind: ConfigMap
metadata:
  name: cluster-autoscaler-priority-expander
  namespace: kube-system
data:
  priorities: |
    50:
      - .*spotnodepool.*
    10:
      - .*ondemandpool.*
Apply it with kubectl apply -f priority-expander.yaml. The autoscaler now tries Spot first (priority 50). When Azure reports no Spot capacity, it falls back to on-demand (priority 10). No manual intervention required.
| Approach | Provisioning Speed | SKU Flexibility | Management Overhead |
|---|---|---|---|
| Cluster Autoscaler + Priority Expander | Moderate (VMSS scale-up) | Fixed to pool VM size | Low—ConfigMap only |
| Node Auto-Provisioning (Karpenter) | Faster (direct VM API) | Selects optimal SKU dynamically | Medium—CRD config |
Option B: Node Auto-Provisioning (Karpenter)
Node Auto-Provisioning (NAP) is the AKS-managed implementation of Karpenter. Instead of scaling predefined node pools, NAP provisions individual VMs on demand and selects the optimal SKU for your pending pods.
Configure a NodePool CRD that accepts both Spot and on-demand capacity:
apiVersion: karpenter.sh/v1
kind: NodePool
metadata:
  name: default
spec:
  template:
    spec:
      requirements:
      - key: karpenter.sh/capacity-type
        operator: In
        values:
        - spot
        - on-demand
      - key: kubernetes.io/arch
        operator: In
        values:
        - amd64
  limits:
    cpu: "100"
    memory: 200Gi
  disruption:
    consolidationPolicy: WhenEmpty
    consolidateAfter: 30s
NAP prioritizes Spot instances when both types are specified. If Spot provisioning fails due to capacity constraints, it immediately tries on-demand—no retry loops, no waiting for the autoscaler to cycle through options. That tighter fallback loop often shaves minutes off recovery time compared to the traditional Cluster Autoscaler path.
Step 5: Verify Eviction Handling
AKS includes a built-in Node Auto-Drain feature that monitors IMDS Scheduled Events and automatically cordons and drains Spot nodes when a Preempt event fires. This is enabled by default—no configuration required.
| Event Type | Auto-Drain Action |
|---|---|
| Preempt | Cordon and drain |
| Terminate | Cordon and drain |
| Redeploy | Cordon and drain |
| Reboot | No action |
| Freeze | No action |
Auto-drain is documented as “best effort”—it won’t save you if the API server is under heavy load or your pods take too long to terminate. For production workloads that need custom notifications (Slack alerts, Prometheus metrics), consider deploying the aks-node-termination-handler DaemonSet, which gives you control over polling intervals and webhook integrations.
Step 6: Test With Simulated Evictions
Don’t wait for a real eviction to find out if your system works. Azure lets you simulate Spot evictions against specific VMSS instances.
First, find your Spot node’s VMSS details. AKS manages node pools as Virtual Machine Scale Sets (VMSS) in a separate resource group named with the MC_ prefix. The following commands query that resource group to identify the scale set backing your Spot pool and retrieve the instance ID of the first VM in it. Run these from your local machine or Azure Cloud Shell—anywhere you have Azure CLI access:
VMSS_NAME=$(az vmss list --resource-group MC_myResourceGroup_myAKSCluster_eastus \
    --query "[?tags.\"aks-managed-poolName\"=='spotnodepool'].name" -o tsv)
INSTANCE_ID=$(az vmss list-instances --resource-group MC_myResourceGroup_myAKSCluster_eastus \
    --name $VMSS_NAME --query "[0].instanceId" -o tsv)
Then trigger the simulated eviction:
az vmss simulate-eviction \
    --resource-group MC_myResourceGroup_myAKSCluster_eastus \
    --name $VMSS_NAME \
    --instance-id $INSTANCE_ID
Watch Kubernetes events in real time to verify the migration:
kubectl get events -w --field-selector reason=Evicted
Key Insight: Run eviction simulations during peak workload hours, not on an idle cluster. You need to validate that your PDBs, graceful shutdown handlers, and autoscaler fallback all function correctly under real scheduling pressure.
You should see the node get cordoned, pods evicted and rescheduled, and—if Spot capacity is unavailable—new on-demand nodes provisioned. If pods don’t reschedule within a few minutes, check your toleration and affinity rules first. That’s where most migration failures hide.
Making Your Workloads Eviction-Proof
The infrastructure handles node replacement, but your applications need to cooperate. Every container running on Spot nodes should trap SIGTERM immediately and checkpoint its state to external storage—Azure Blob, a database, or Redis. Batch jobs that lose 4 hours of progress because they didn’t checkpoint aren’t a Spot problem. They’re an application design problem.
For stateless web services, the migration is simpler: your pod gets terminated, the replica controller notices the missing pod, and the scheduler places a replacement on an available node. The key requirement is that your readiness probes work correctly so traffic doesn’t route to a pod that’s mid-shutdown.
For stateful workloads and batch jobs, implement a checkpoint pattern: persist progress to Azure Blob Storage or a database at regular intervals, and resume from the last checkpoint when the replacement pod starts. The cost of writing checkpoints every few minutes is negligible compared to restarting a multi-hour computation from scratch.
Keep your terminationGracePeriodSeconds at 25 seconds or less. Build your containers to finish cleanup within that window. And run those eviction simulations regularly—not just once during initial setup. Spot availability patterns change with Azure’s capacity demands, and the migration path that worked last month might behave differently when a new region hits peak usage. Infrastructure that works in testing but fails under production load isn’t tested infrastructure.


