


So you’re using Microsoft Azure Site Recovery (ASR) and have already gone to the trouble of setting up replication of a few VMs. Now what? It’s time to learn how to fail those VMs over to your backup site (secondary datacenter) to test it out!
Not a reader? Watch this related video tutorial!To follow along with this tutorial, be sure you’ve already followed the first installment in this two-post series entitled How to Plan, Set Up and Deploy Azure Site Recovery. If you’ve already set up an ASR vault ahead of time to back up VMs, the tutorial will still apply.
Once you’ve set up the ASR vault, the hard part is over with, but there’s no way to know if you can actually use the service until you test it. In this tutorial, you’re going to learn how to failover a site snapshot made with ASR to a secondary site.
Cross your fingers this works!
Running a Test Failover On A Single Virtual Machine In Microsoft Azure Site Recovery
Before performing a real failover, it’s important to do some testing first. After all, if these VMs were in production and something went belly up, you’d have a long day on your hands!
Let’s first run through a test failover of a single Azure VM from the scenario demonstrated in the first instalment of this post series. You failover to the Azure region defined in the first instalment of this series.
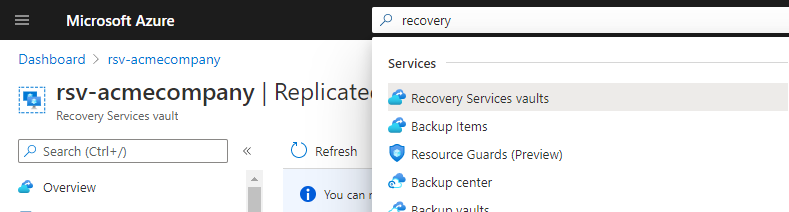
- Using your web browser, navigate to the Azure Portal and search for the recovery services vault in your search bar, and open Recovery Services vaults, as shown below.
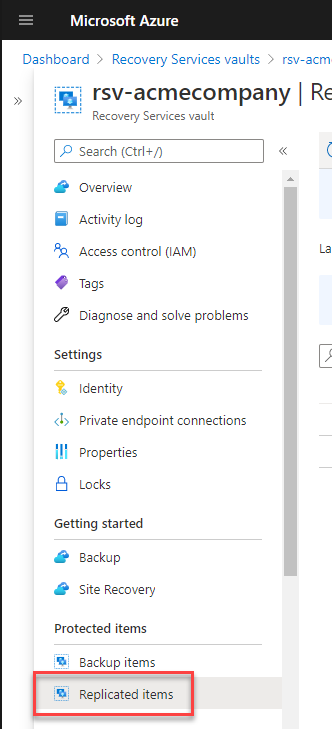
2. Find and open your vault.
3. Click on Replicated Items on the left side of the screen. This place is where you can view the vault that contains your replicated data since inception.
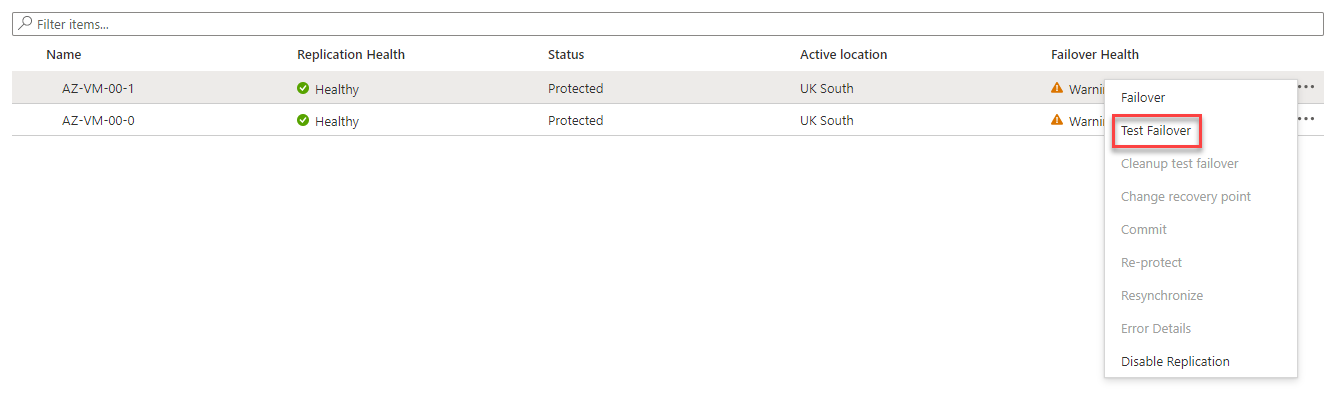
4. On the resources list, select a single VM by clicking on the ellipses. You’ll test failing this one over to the backup site. Click on Test Failover.
5. Now, configure options to perform the failover test, as shown below, and click OK.
Do not failover to a production network or shut down the source virtual machines before testing the failover. Identical virtual machines on the same network won’t be happy virtual machines!
- From – The Azure region where the virtual machine running Windows Server currently resides.
- To – The destination region where ASR will create the virtual machine from the latest snapshot point.
- Choose a recovery point – The list of recovery points that ASR has taken since you’ve created the vault. Choose the latest one to find failover the latest changes.
- Azure Virtual network – The vNet to connect the restored VM to. By default, ASR will connect the VM’s vNic to the destination vNet, using the same internal IP address assigned in the source vNet If, for example, you’d rather not attach the restored VM to a production network, change this here. For this tutorial, leave the default choice.

A test failover does not impact running virtual machines in the source region; your source virtual machines will continue to run and replicate as normal. The virtual machines are not moved.
For the test, a new virtual machine is created with the data that has been replicated and built from the chosen recovery point. The associated resource with that virtual machine, such as Azure storage and vNic is also created in the destination region.
6. Now, navigate back to Replicated Items. You should see that the VM’s status has changed from Protected to Cleanup test failover pending, as shown below and that the Failover Health is showing as Healthy. This information tells you that the failover has been successful, and you can view the resources that the test failover has created in the destination region.

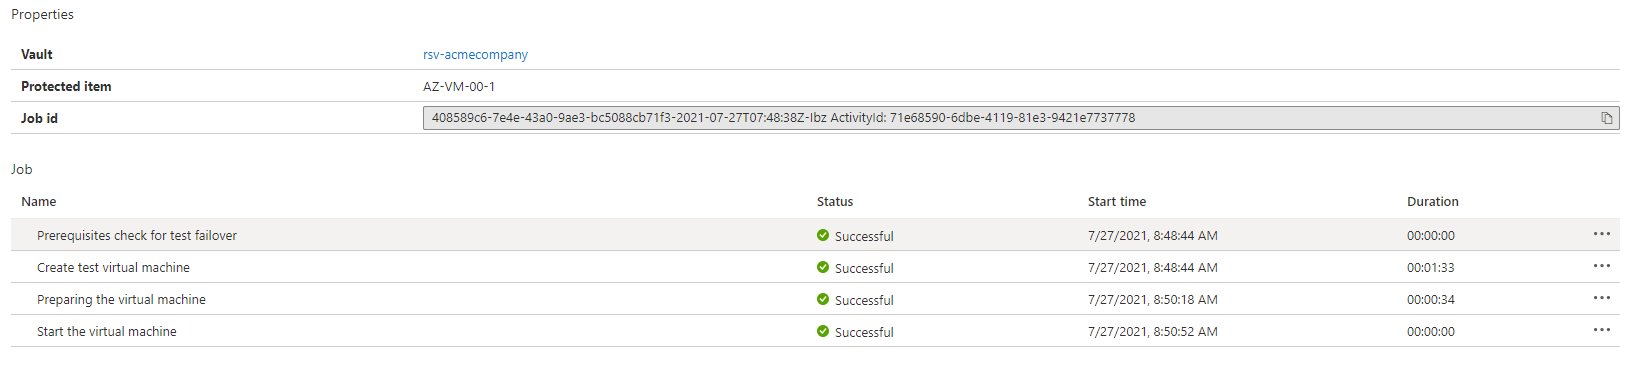
7. After a few minutes, click on the Status of the VM. You should see each job that ASR performed to failover the VM, as shown below.
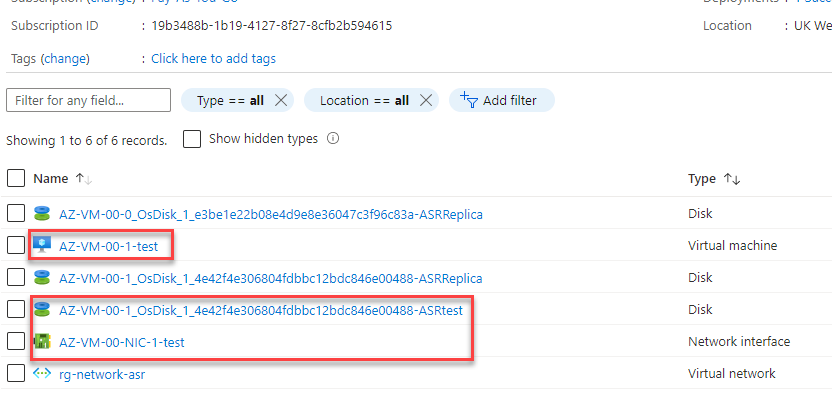
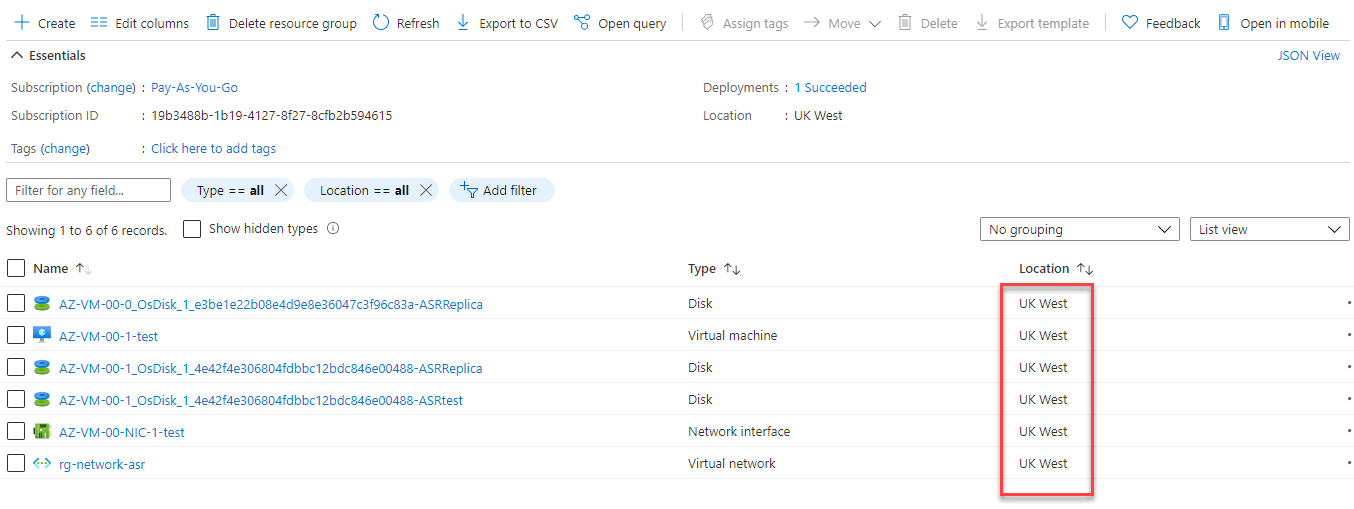
Navigate back to the resource group containing the replicated VM (in this demo, the resource group is rgacmecompany-asr, the destination resource group is appended with -asr). You’ll see that the following resources created in your destination region with a name appended with the word “test”:
- The VM
- VM disk(s)
- vNic
You can also see disks to which your replicated data is being sent; these disks have -ASRreplica appended to them.
9. Finally, it’s time to clean up. Navigate to your recovery services vault and click on Replicated items again.
10. Click on the ellipsis and select CleanUp Test Failover.
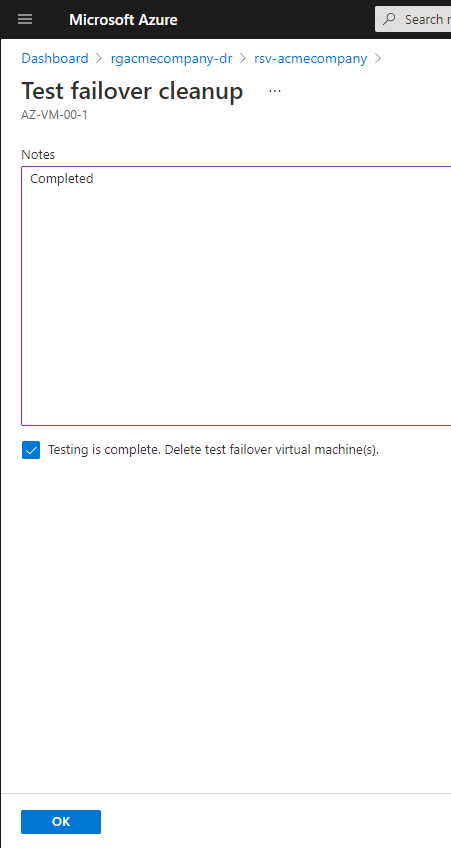
During the failover, resources were created in your destination region, a virtual machine, storage, and a vNic; by selecting CleanUp Test failover, these resources will be deleted from the destination region by the Azure recovery services vault.

You can enter any useful notes on the failover and remove the test virtual machines; for this tutorial, add ‘completed’ to the Notes section and click on the checkbox Testing is complete. Delete test failover virtual machine(s)
Click on OK.
Creating A Recovery Plan for Two Virtual Machines
At this point, if the previous section’s test deployment went well, you can perform a failover of a single VM. But what if you have a set of Azure VMs to failover and require a particular order. Perhaps you have a web server that depends on a database server? In that case, it’s time to create a recovery plan.
A recovery plan allows you to failover more than one virtual machine, failover in a particular order, and add pre and post steps to your disaster recovery.
In this example, you will create a plan to fail over two virtual machines in a certain order.
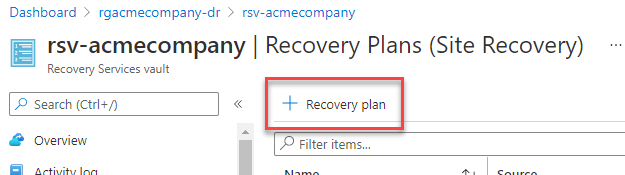
1. On your ASR page and click on Recovery Plans (Site Recovery).
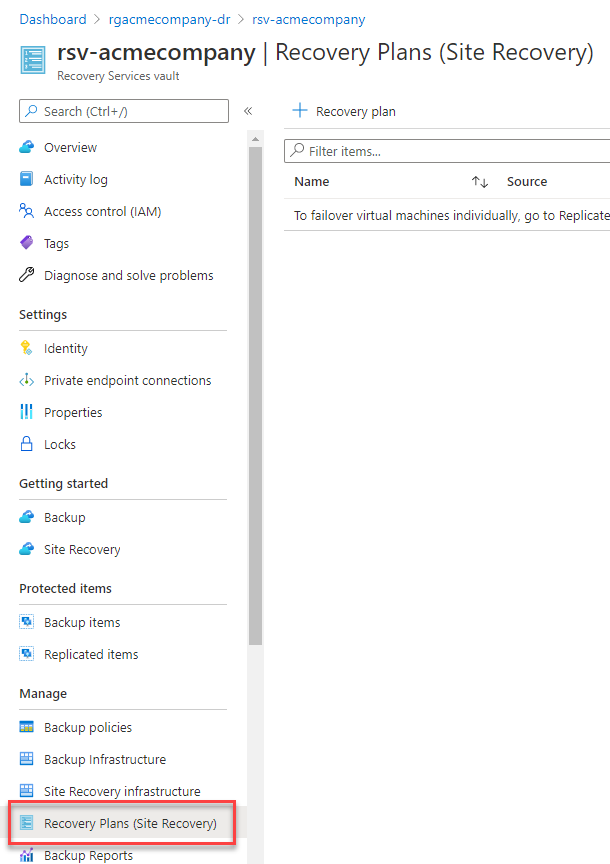
2. Click on Recovery Plan to begin creating a new recovery plan, as shown below.
3. In the Create Recovery Plan blade, provide all of the necessary configurations to create the recovery plan.
- Name – Any name for the recovery plan. This tutorial is simply using the name of recoveryplan.
- Source – The Azure region where the VMs currently reside.
- Target – The Azure region to failover the VMs to.
- Allow Items with deployment model – The deployment model to use when creating the VMs. Choose Resource Manager. Classic is an older type of deployment model.
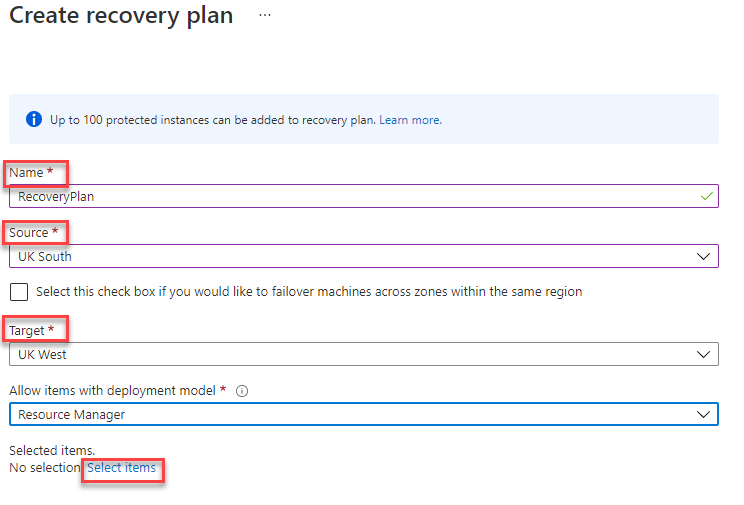
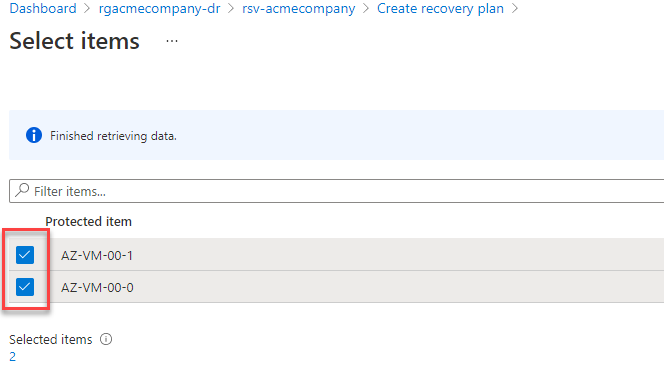
4. Click on Select Items to select the two VMs in the recovery plan, select each VM and click OK.
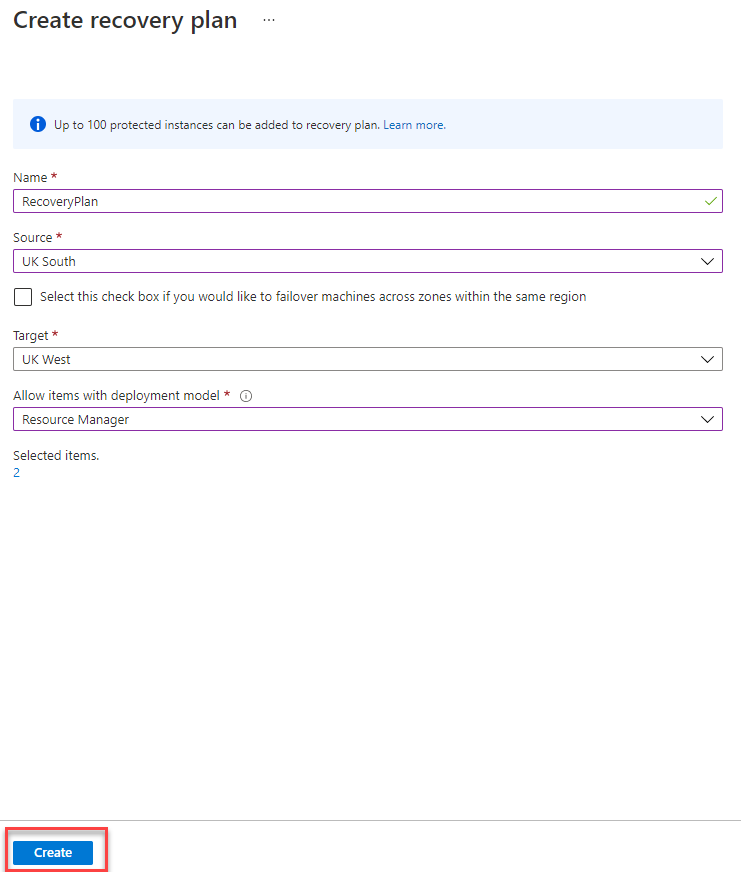
5. Finally, click on Create to create the recovery plan.
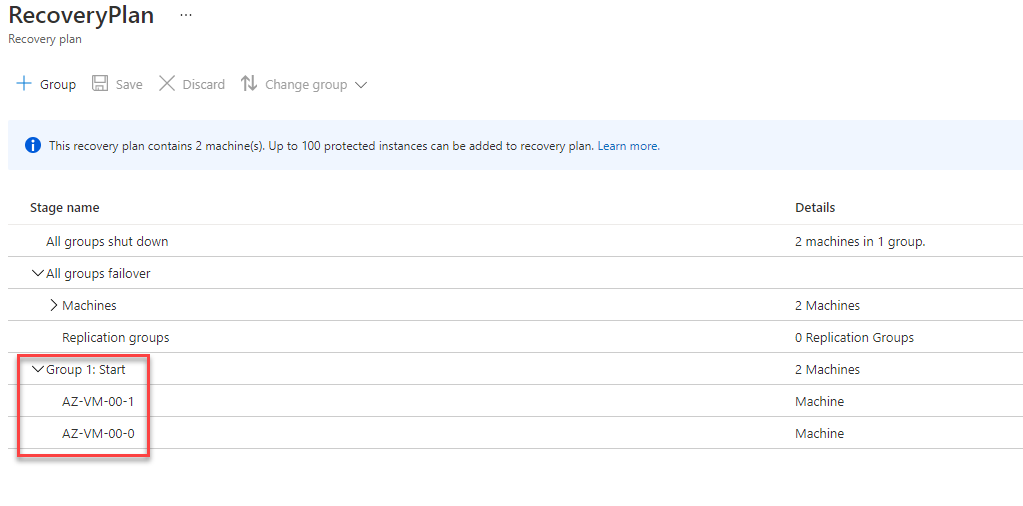
6. Once the plan is created, click on the recovery plan to view its contents below.

On the recovery plan blade, you’ll see various options, including Start groups. A start group is a group of VMs that will failover simultaneously to the destination region. You’ll see below the tutorial only currently has one start group at the moment.
Let’s have a closer look at your plan to understand it better. Click on the customize button, as shown below.
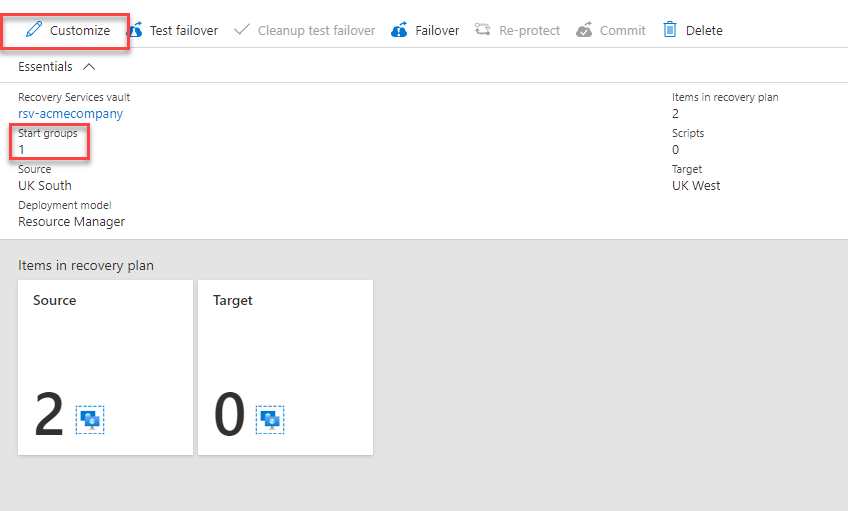
On the recovery plan blade, you’ll see what happens when the recovery plan executes. The virtual machines are shut down in the source site (primary site), and then Group 1 servers are failed over to the destination region.
Executing a Production Recovery Plan
Now the time has come! To failover your virtual machines to the destination region!
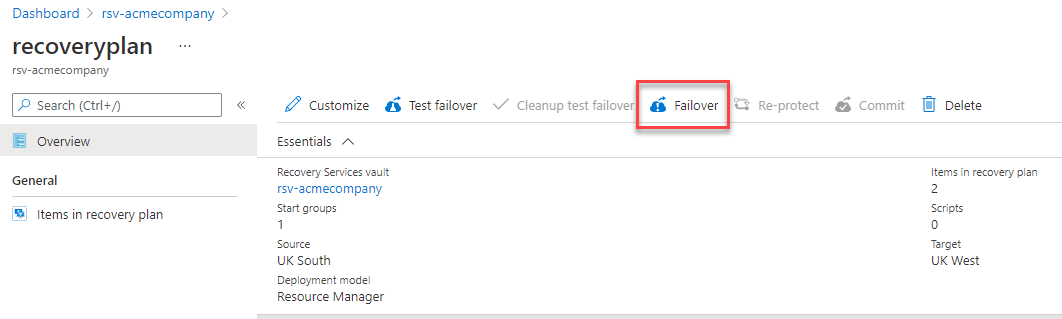
1. Open the recovery plan created above and Click on Failover.
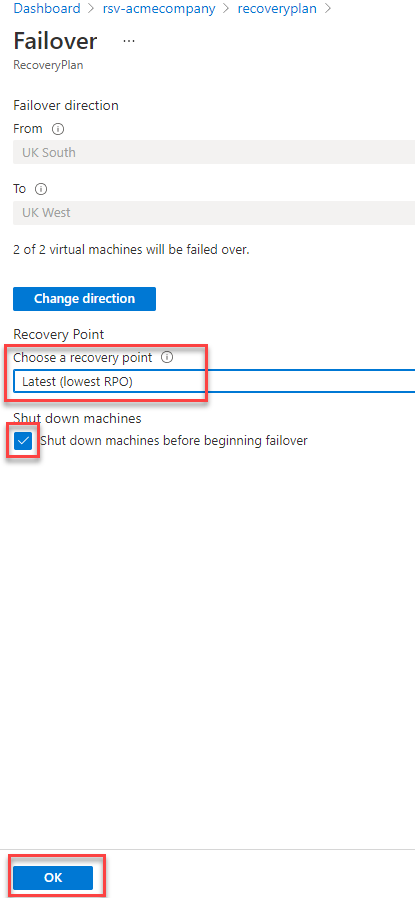
2. Confirm the Failover direction is correct both for the From (source) field and the To (destination) regions. If you need to change them for any reason, click on Change direction.
You’ll also need to Chose a recovery point to indicate what snapshot the production environment machines will failover with. In the drop-down, you’ll see a few options:
- Latest (Lowest RPO) – Processes all the data sent to the site recovery cache to create a recovery point for each virtual machine before failover. For this tutorial, choose Latest (Lowest RPO).
- Latest processed (Lowest RPO) – Uses the latest recovery point processed by ASR; no time is spent processing data.
- Latest app consistent – Fails over using the latest app consistent recovery point.
If you want to ensure a clean failover by confirming all activity is stopped on the destination VMs, select the option to Shut down machines before beginning failover. When finished, click OK.
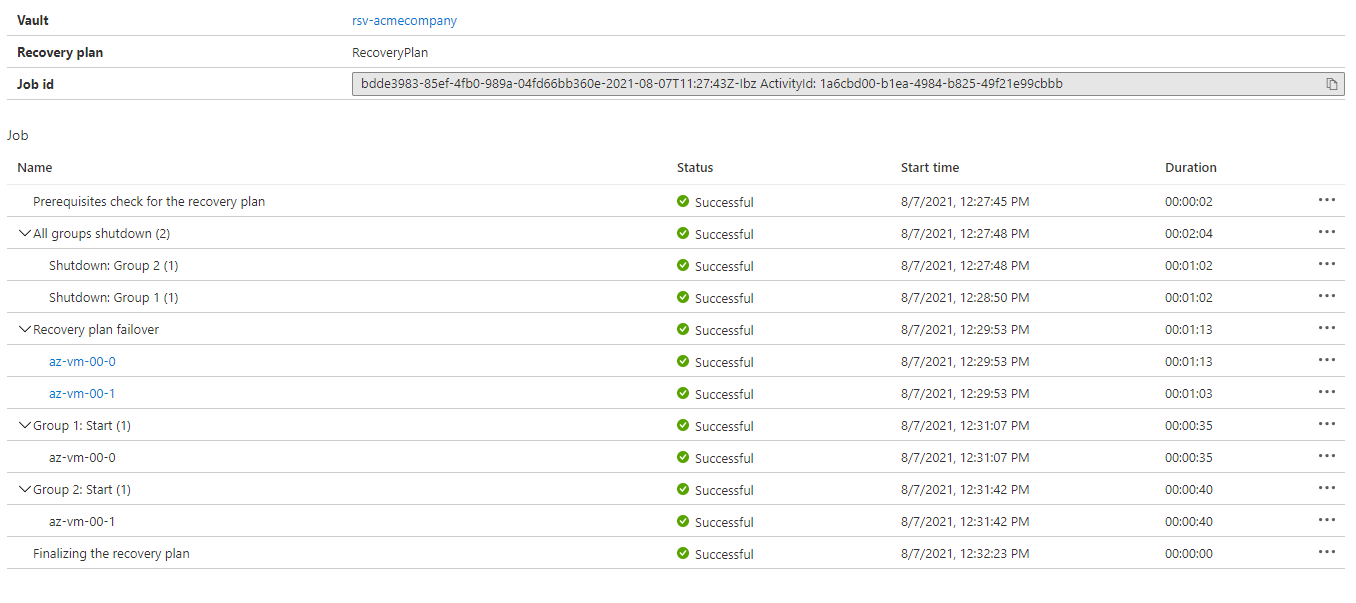
3. Now, navigate back to your recovery plan, and you will see the failover is in progress. Click on Failover in progress to see more detail. As shown below.

You will need to wait and refresh the following blade as the failover progresses; once this blade shows status as successful, you can now navigate to the resource group to view the migrated resources.
4. Once the failover is successful, navigate back to the resource group, and you’ll see each resource has an ASRReplica suffix.

Committing Your Virtual machines
At this point, your VMs have failed over successfully, but you must now commit each VM to remove all recovery points ASR created during the replication of your virtual machines. To do this:
Navigate to your ASR vault and:
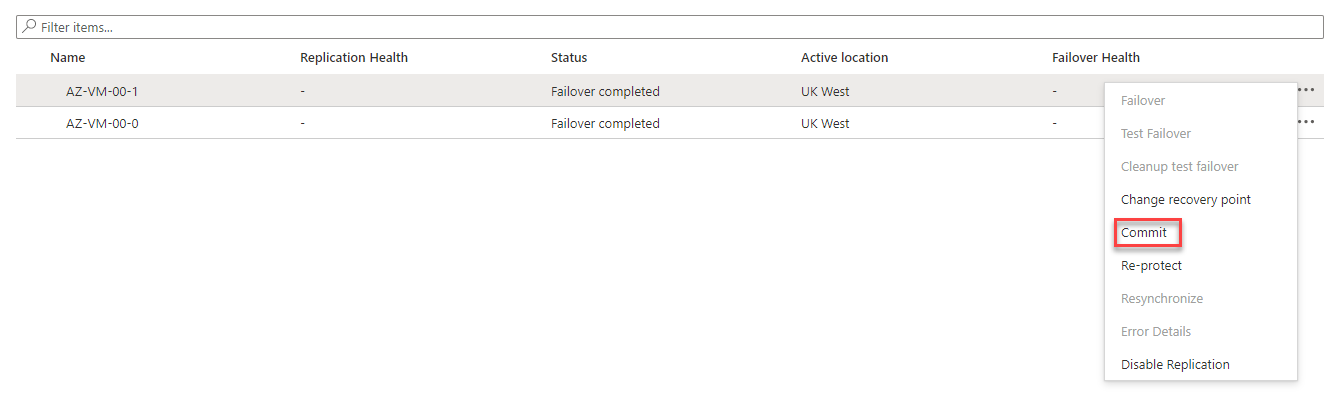
- Click on Replicated Items
- Select a VM.
- Click on the ellipsis and click on Commit.
You will be prompted whether or not you want to commit. Click on OK.

Repeat this process on all virtual machines.
Conclusion
You have now learned how to perform a test failover and then progressed to create a recovery plan with a two-stage failover and finally execute that plan for real. Do you think Azure ASR is the right Recovery As Service model for you?
Has this article given you some ideas on how you can protect your Azure virtual machines? Has it made you think about your recovery plan?


