

Does your disaster recovery solution keep you awake at night, dreaming of data loss? Are you confident that your Azure disaster recovery plan is solid? Are you curious to see what Azure Site Recovery can do? If so, this tutorial is for you.
Not a reader? Watch this related video tutorial!This article will take you on a tour of Azure Site Recovery and work through an example of applying Azure Site Recovery to Azure virtual machines step-by-step.
Prerequisites
If you intend to follow along with the practical demos in this tutorial, be sure you have the following:
- An Azure Cloud account (Free Tier will work)
- Two Azure virtual machines located in the same Azure region – These VMs can be Linux or Windows. This tutorial will be using VMs located in the UK South Azure region and will be failing over to the UK West region.
- An Azure resource group – This tutorial will use a resource group called rgacmecompany-dr.
What is Azure Site Recovery?
Azure Site Recovery (ASR) is known as a DRaaS or Disaster Recovery as a Service solution for Azure virtual machines, hybrid cloud, and related workloads to help you with Azure disaster recovery. Once set up, Azure Site Recovery maintains an up-to-date copy of your data in a separate Azure region or availability zone.
To maintain an always current copy of your data in a separate Azure data center, ASR continuously replicates the data from one site to another in almost real-time (as low as 30 seconds). When that disastrous time strikes and you must use the backup site, AST lets you fail over to the secondary site.
ASR offers various failover options to help with your Recovery Time Objective (RTO) and Recovery Point Objectives (RPO). By allowing you to create recovery groups inside of a recovery plan, you can specify any resource dependencies, such as an application server that depends on a database backend, for example.
Planning Your Site Recovery: Tutorial Overview
Before you can begin using ASR for your Azure disaster recovery needs, you must first create a recovery plan. A recovery plan dictates how you will failover resources and also fail them back.
This tutorial will soon be demonstrating setting up Azure disaster recovery using ASR for two Azure virtual machines sharing the same virtual network (vNet).
The following sections will be a hands-on demonstration of setting up ASR from scratch. This tutorial is going to demonstrate the following:
- Creating an ASR vault.
- Deploying the ASR extension onto each VM to then register with your ASR vault.
- Replicating VM disks to temporary storage in the same region.
- Sending VM disks to the target replica disks or a storage account in the secondary region.
- Building VMs from the replica disks in the secondary region.
VMs are not actually created until the failover completes.
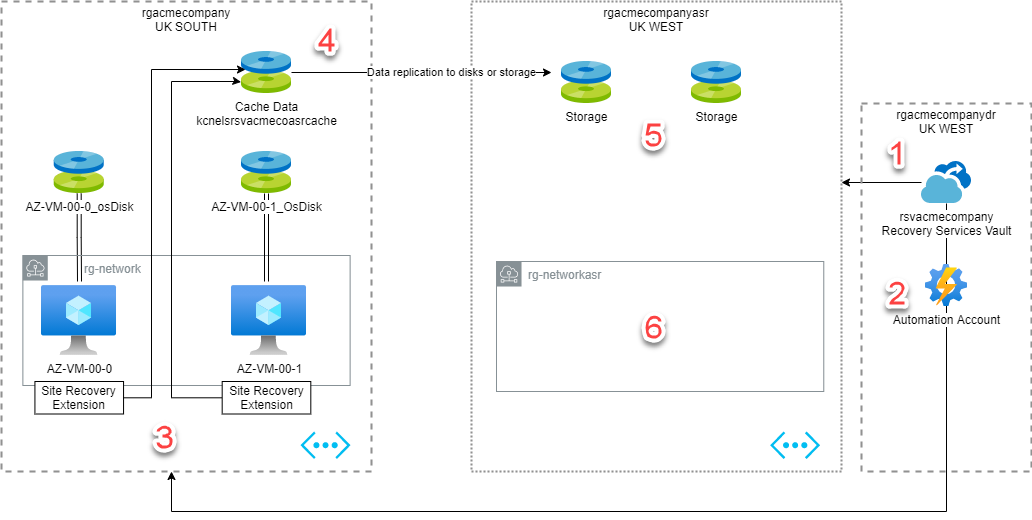
Don’t worry if this looks complicated at the moment; once you start to work through each step, the reference diagram should help in understanding this workflow.
Creating A Recovery Services Vault
In this section, you will create a Services Recovery Vault. The vault contains settings of how the replication will occur and monitors the replication as it’s happening. The vault is located in the backup region to ensure you don’t lose it with your other data should the Azure region explode.
The vault is the conductor of the entire site failover and recovery workflow.
To create the ASR vault:
1. Open the Azure Portal in your web browser and log on to your Azure Cloud Account.
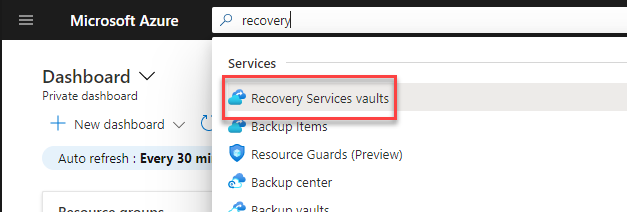
2. Click into the search bar, as shown below, type recovery, and click on Recovery Service Vaults to open the ASR vault page.
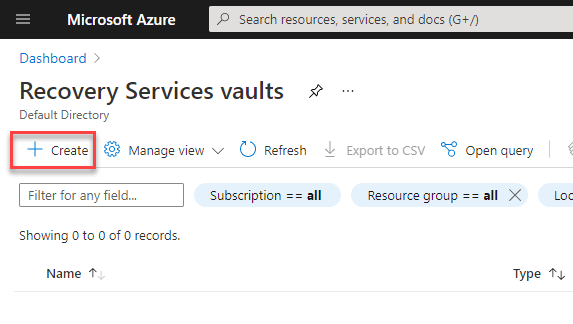
3. On the ASR vault page, click Create.
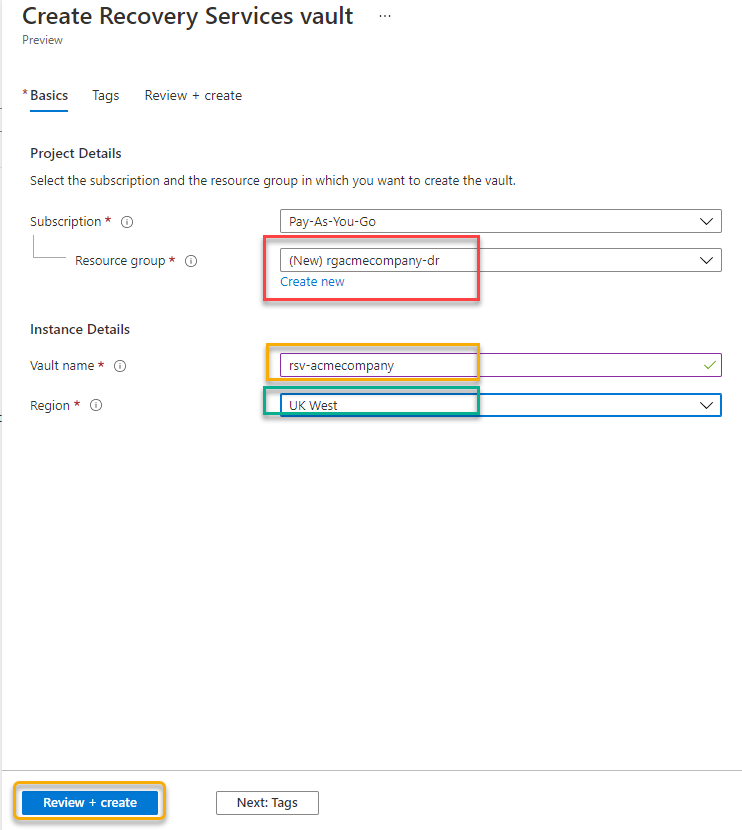
4. Now, provide details for creating the ASR vault and click Review + Create.
- Resource Group – Create a new resource group for your vault or provide an existing one.
- Vault name – Give the vault a friendly name of your choosing. The tutorial will be using a prefix of RSV, then the resource group name based on an organizational requirement.
- Region – Provide the destination region of where you will failover the site. This tutorial will be using UK West.
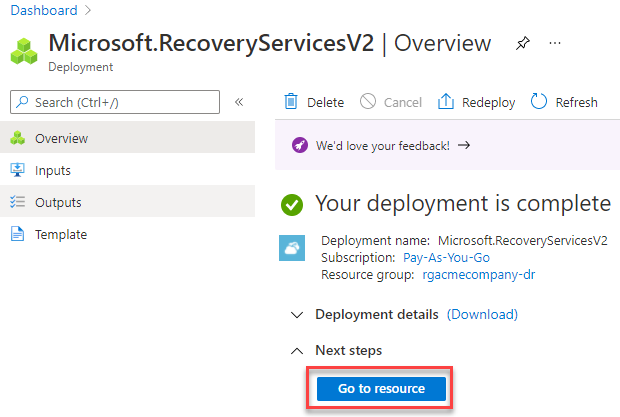
Azure creates a deployment to build and configure the vault to your specifications. After a few minutes, you will notice the deployment is complete.
5. Click on Go To Resource to open the vault for further configuration.
Enabling Replication (Site Recovery)
Once you’ve created a vault, it’s time to configure it by enabling replication, or what the Azure refers to as Site Recovery.
1. While on your ASR vault page, click on Enable Site Recovery, as shown below.
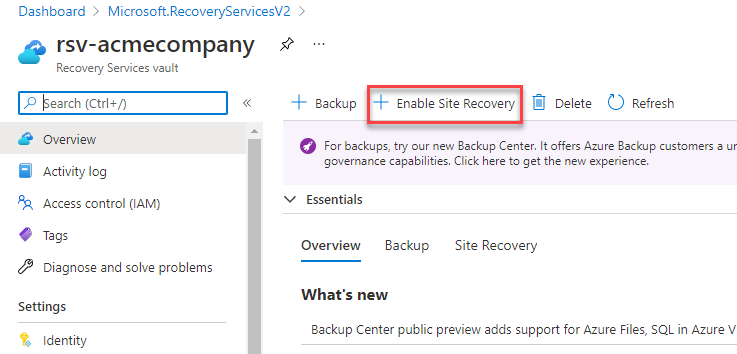
Your Recovery Services Vault will open and present you with the options for replication.
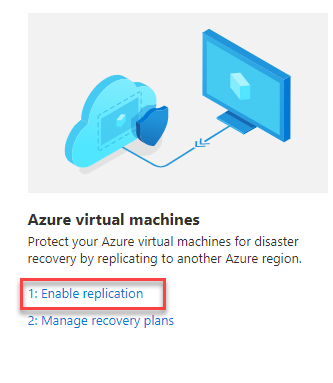
2. Click On Enable replication, as shown below. This tutorial is only focusing on replicating Azure VMs.
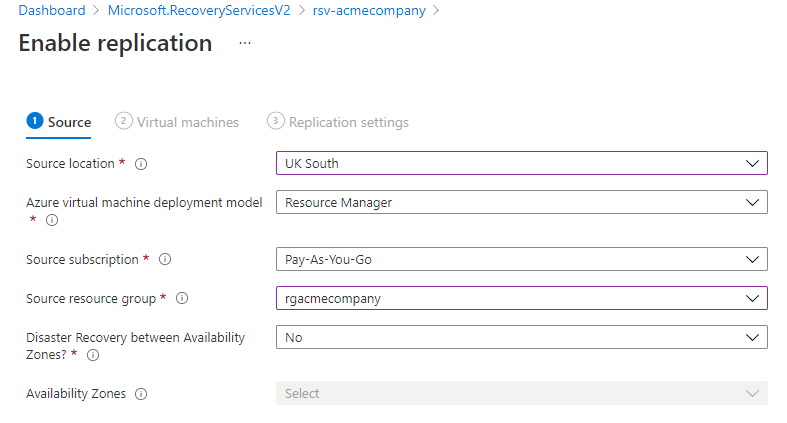
3. Now, provide all of the necessary configuration settings to enable replication.
- Source Location – The Azure region where the VMs currently are located.
- Azure virtual machine deployment model – The method that Azure will use to deploy VMs to the backup site upon failover. You have two options; Classic or Resource Manager. Classic is an older deployment model and not recommended; instead, opt for Resource Manager.
- Source Subscription – The subscription you want to use with this tutorial.
- Source resource group – The resource group where the VMs currently reside.
- Disaster Recovery between Availability Zones? – To configure zone to zone disaster recovery. Choosing Yes here tells ASR to replicate the VMs into the same region. Since this tutorial will be demonstrating cross-region replication, choose No here.
- Availability Zones – This option is greyed out if you choose No for the previous setting. If this setting were enabled, you would select another availability zone.
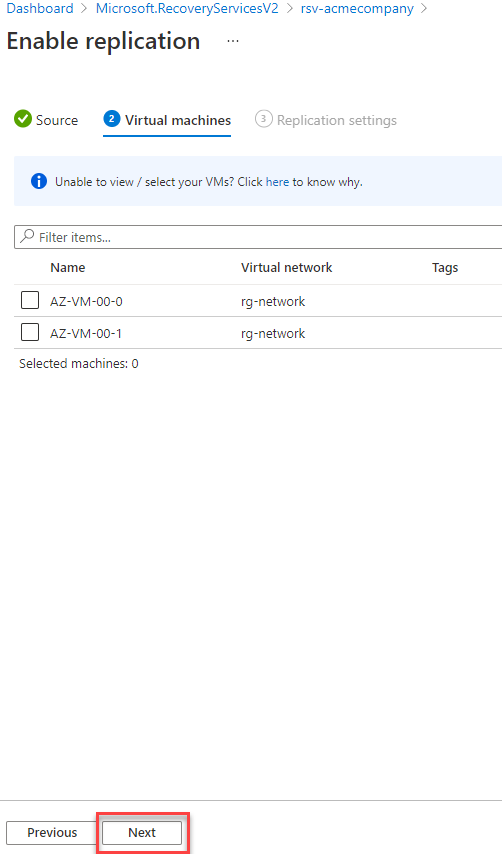
4. Select the virtual machines you wish to replicate in the Source resource group provided above and click Next. This tutorial has two VMs in the source resource group.
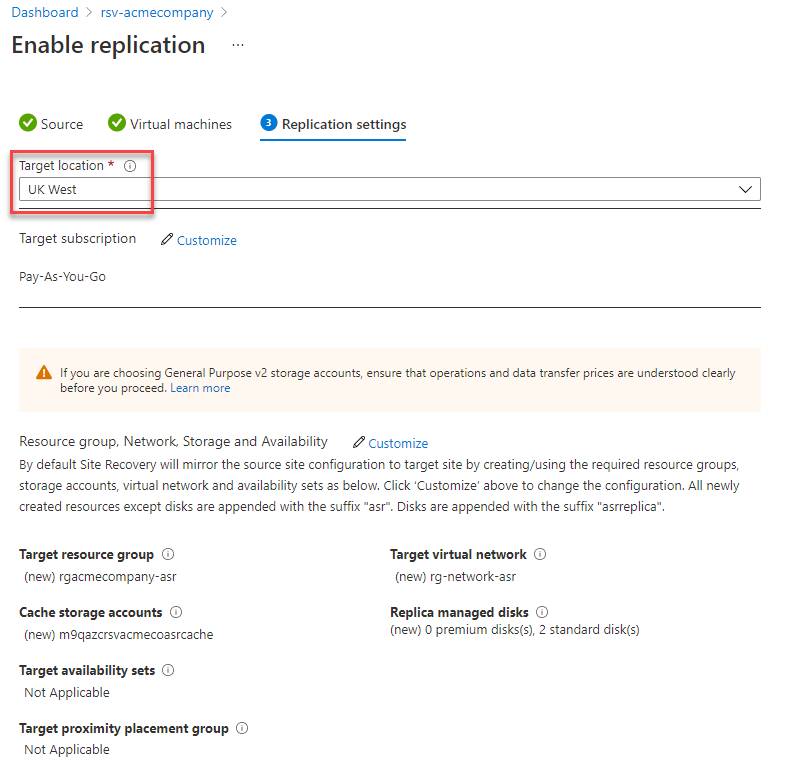
5. Next, choose the region to backup the VMs to. This tutorial will be using UK West.
By default, ASR will replicate the source resource group. If you’d like to change how it replicates resources in the group, you may do so by clicking on Customize.
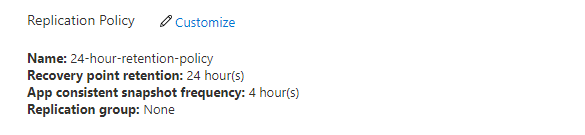
Scrolling down the page a bit, you’ll see the Replication Policy. The replication policy, by default, called 24-hour-retention-policy, defines various replication intervals.
- Name – A configurable name for the replication policy.
- Recovery Point Retention – The maximum time ASR keeps recovery points. A recovery point is a snapshot of when your data was recoverable. In this example, the recovery points will be kept for 24 hours by ASR.
- App consistent snapshot frequency – The interval that ASR takes app-consistent snapshots. App-consistent snapshots capture disk activity, data in memory, and any transactions in process to capture the entire state of a VM.
- Update Settings – This setting can be set to Manual or Allow ASR to manage. For this example, leave this setting as is at Allow ASR to manage. By allowing the ASR to manage updates, the ASR will automatically keep the extension deployed onto each virtual machine up to date.
- Automation Account – This setting is for any automation account you’d like for ASR to carry out various tasks.
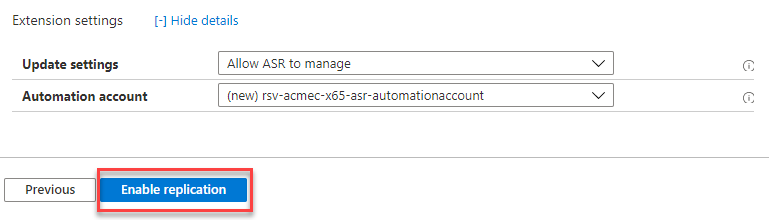
6. Once you’ve configured all replication settings, Click on Enable Replication. Once ASR begins the replication process, a few things happen:
- ASR installs the ASR extension onto each VM to communicate with them.
- The ASR extension registers itself with the Site Recovery vault.
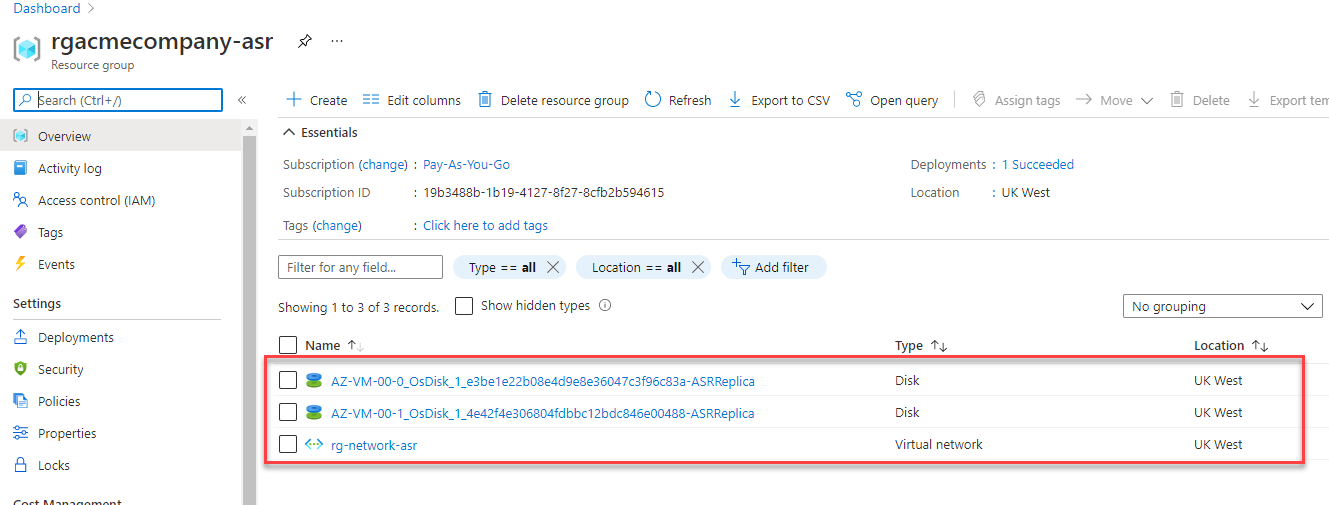
- ASR creates a resource group with the suffix of -asr.
- ASR creates the managed disks for each VM and a vNet, with names appended with “-asr.”
- The vault begins replicating the VMs while in process, disk writes are transferred to a local storage account, which acts as a dedicated cache in the source region. These writes are processed and then sent to your selected region for failover.
- The vault processes the local storage data and sends it to a storage account created by ASR or managed disks in the destination region.
- Every five minutes, ASR creates crash-consistent recovery points. A crash-consistent snapshot contains only what was on the disk at the time of the snapshot. It does not include anything in memory, unlike an app-consistent snapshot.
7. Finally, navigate to the ASR resource group to see all of the resources ASR creates.
Checking Replication Status
Once you’ve enabled replication, it’s time to monitor it to ensure it’s working as expected.
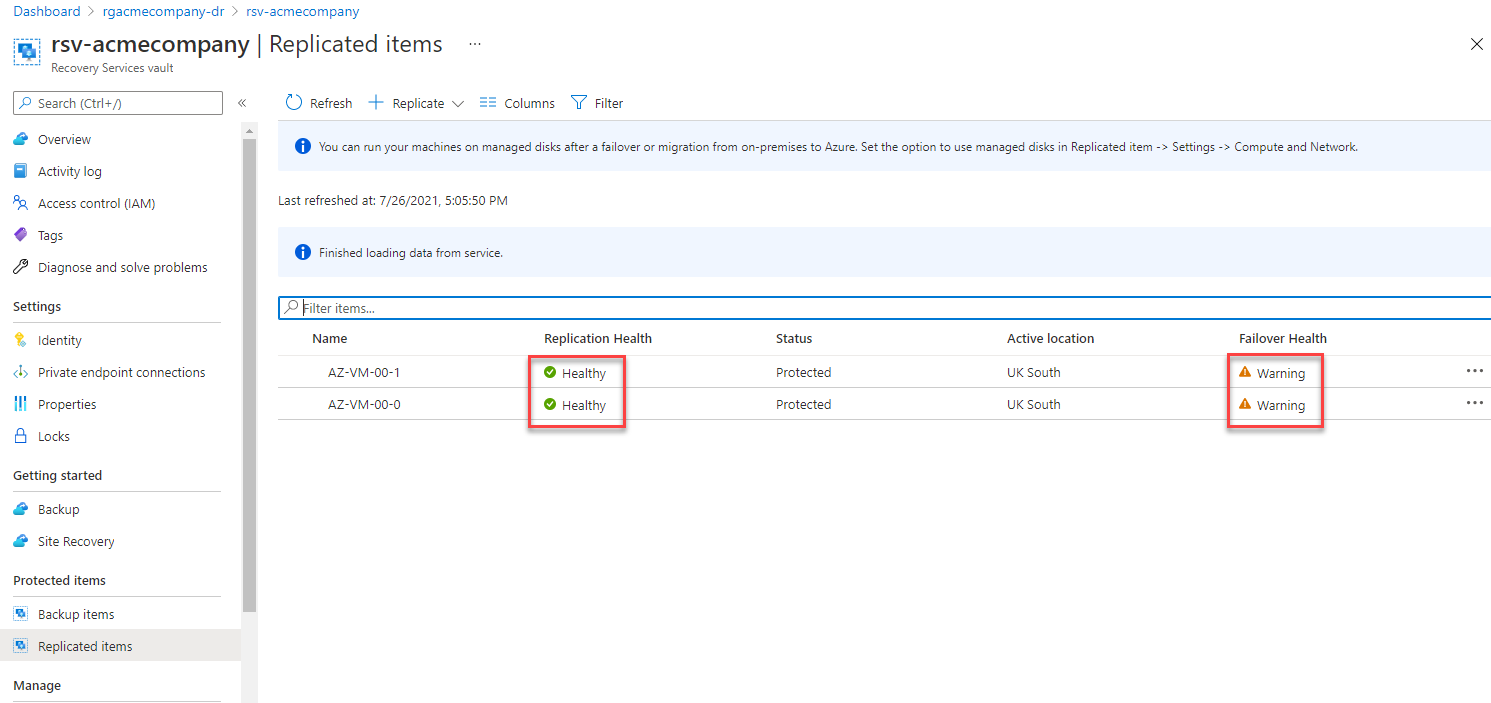
In your dashboard in the Azure Portal, navigate to the recovery services vault by typing the word recovery in the search bar. As the replication of your data is underway, it may take some time before you will see your resources marked as healthy and protected. As shown below.
You will also see a warning in Failover Health (shown below); this indicates that a test failover has not been performed yet.
Conclusion
Now you have a good understanding of how Azure Site recovery works, how do you think this would fit into your current business continuity plan? Sleeping better after having learned about an effective backup and disaster recovery solution?
Now that you’ve set up ASR, you should check out the next installment in this two-post series on how to failover your site! If you don’t plan to learn how to failover the site, be sure to clean up the ASR resources.


