


Azure Automation Desired State Configuration (Azure DSC) functions as a centralized configuration management (CM) service within Microsoft Azure. One of the many benefits of Azure DSC is the ability to apply, monitor, and update configuration using a consistent process across your resources at scale.
Not a reader? Watch this related video tutorial!In this tutorial, you will learn how to onboard and apply a simple Azure DSC configuration that installs and starts the Apache web service on an Azure Virtual Machine (VM).
Related: How to Apply DSC Configurations to VMs in Azure ARM Templates
Prerequisites
If you’d like to follow along with this tutorial, please be sure you have the following:
- PowerShell. This tutorial will be using Windows PowerShell version 5.1.
#Obtain PowerShell version information
$PSVersionTable['PSVersion']- A Microsoft Azure Account.
- The Azure PowerShell module installed and authenticated.
Related: Connect-AzAccount: Your Gateway to Azure with PowerShell
- An Azure Automation Account. This tutorial will be using an Azure Automation Account called dscautouser.
- An Azure VM with the following:
- An Ubuntu operating system. This tutorial will be using Ubuntu 18.04.
- A Public IP Address.
- An associated Resource Group.
This tutorial will be using a Resource Group called DSC_RG and an Ubuntu VM called UbuntuDSC.
Assigning Global Variable Values
The resource Group name, Automation Account name, and VM name are unique to each environment. This tutorial will be using unique names so let’s first assign each name a variable. Feel free to open up a text editor and do the same if you’d like to copy and paste some code examples directly.
#The name of the target Resource Group
#This tutorial will be using a Resource Group by the name of DSC_RG.
$resourceGroupName = 'DSC_RG'

#The name of the Automation Account
#This tutorial will be using an Automation Account by the name of dscautouser.
$automationAccountName = 'dscautouser'

#The name of the target VM
#This tutorial will be using an Ubuntu VM by the name of UbuntuDSC.
$virtualMachineName = 'UbuntuDSC'
Allowing Traffic to the Ubuntu VM
At a point near the end of the tutorial, you’re going to log into the Ubuntu Azure VM and access its Apache web service. To do that, you need access to SSH and HTTP so you’ll need to open up those ports via its Network Security Group (NSG) configuration. To accomplish this:
- Open up a browser.
2. Navigate to Network Security Groups within the Azure Portal.
3. Select the NSG attached to your Ubuntu VM. If you don’t know the NSG, run the below PowerShell code snippet. This snippet gets the Ubuntu VM’s network interface id and uses it to output the interface’s associated NSG.
#Obtain VM Network Security Group
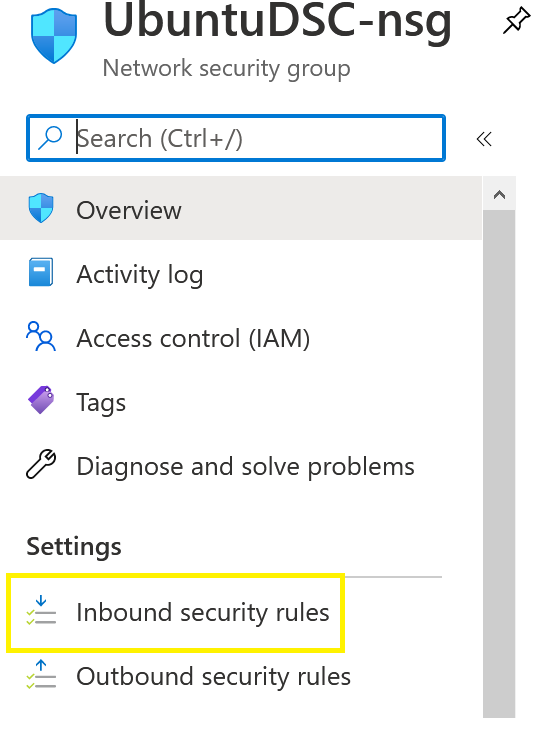
((Get-AzVM -ResourceGroupName $resourceGroupName -Name $virtualMachineName).networkprofile.networkinterfaces.Id | Get-AzNetworkInterface).NetworkSecurityGroup.IdIn the screenshot below, you will see that the NSG attached to this tutorial’s UbuntuDSC VM shows up as UbuntuDSC-nsg:

4. Select Inbound Security Rule from the menu on the left-hand side of the screen:
5. Select Add from the menu:

6. Configure the Inbound Security Rule according to the following sub-bullets:
- Source IP Addresses/CIDR Ranges: Your public-facing IP Address. The following code snippet reaches out to https://ifconfig.me/ip to obtain the local system’s public IP Address.
#Obtain your public IP Address
Invoke-RestMethod -Uri 'https://ifconfig.me/ip'- Source Port Ranges: *
- Destination: Any
- Destination Port Ranges: 22,80
- Protocol: TCP
- Action: Allow
- Priority: Leave as default
- Name: Allow_Inbound_SSH_HTTP
Installing the nx Module
The nx module contains the DSC resources necessary to compile DSC configuration for Linux nodes. Since the Ubuntu operating system is a Linux distribution, it depends on the availability of these DSC resources. Microsoft conveniently makes them available directly within Azure through their Modules Gallery. To import the nx Module:
- Navigate to Automation Accounts within the Azure Portal.
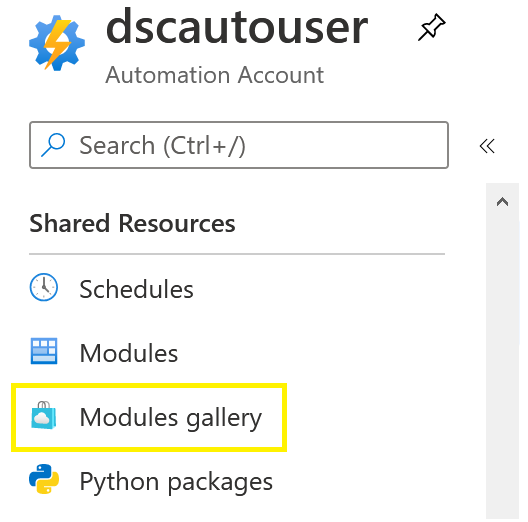
2. Select the Automation Account you will be using to implement your configuration. In the screenshot below, you will see that the tutorial’s dscautouser Automation Account shows up:

3. Select Modules Gallery from the menu on the left-hand side of the screen:
4. Search for, and select, the nx Module:

5. Select Import to import the module:
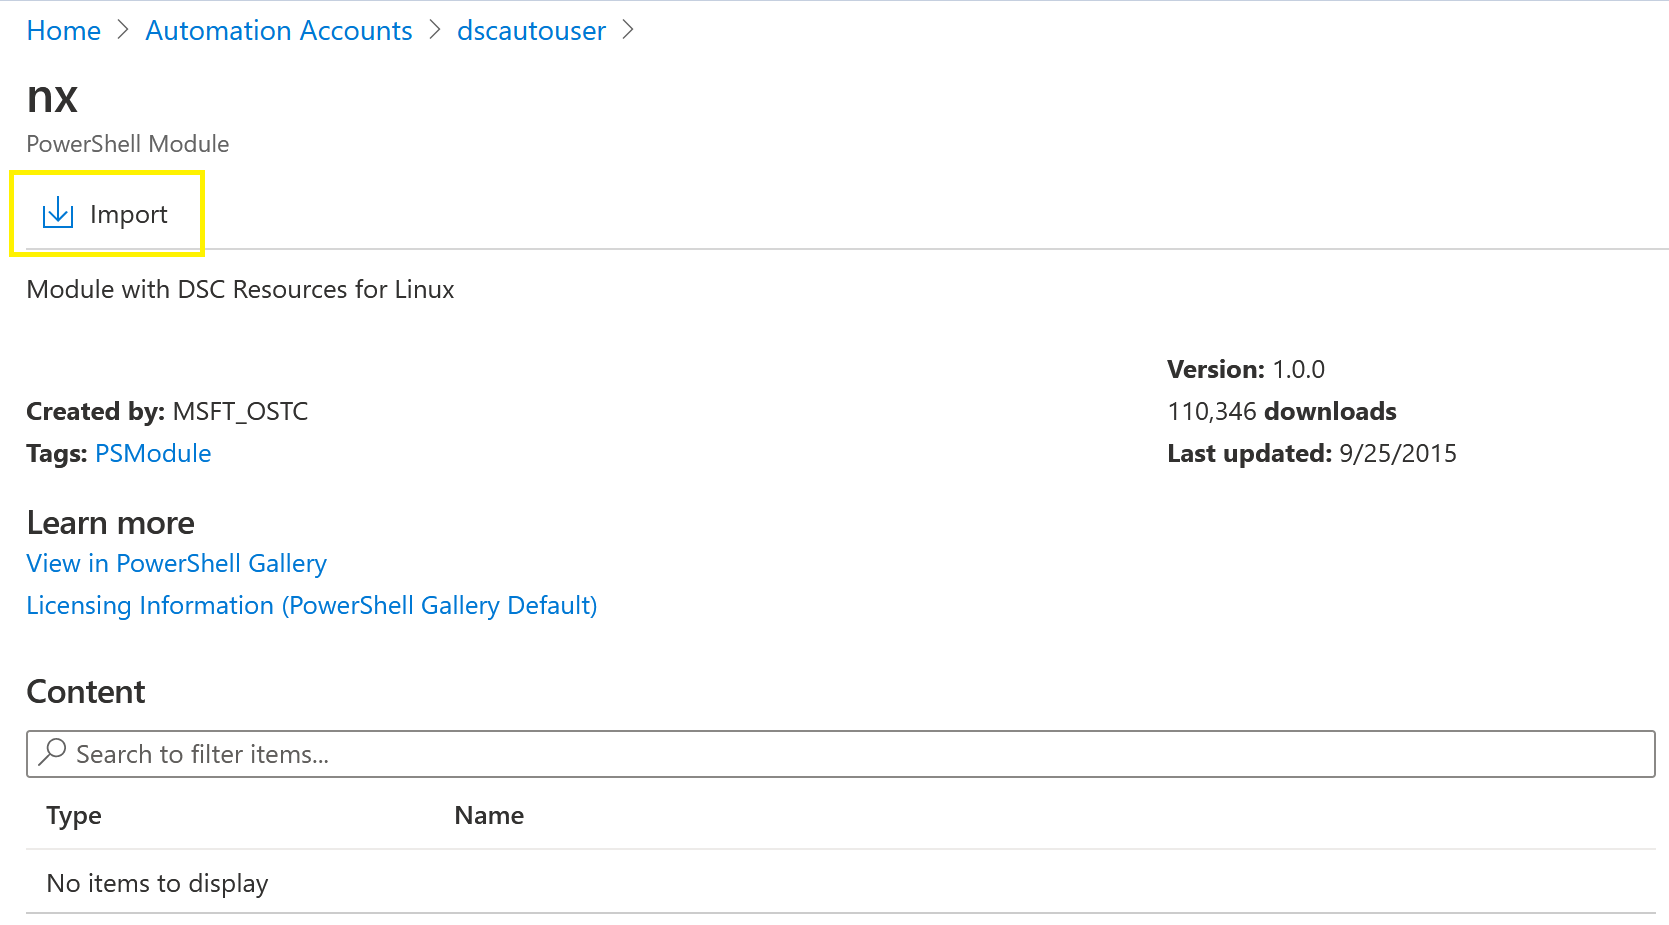
The import process may take a few minutes.
Defining the Azure DSC Configuration
Now that the Linux DSC resources are available within Azure DSC, it’s time to define your configuration.
A DSC configuration is defined within a special PowerShell function that describes the desired state of a target node. The following configuration function installs the apache2 package and starts the apache2 service.
#Establish DSC script file to install apache2 package and enable apache2 service
Configuration 'apache2' {
    #Import the nx DSC Resource
    Import-DscResource -ModuleName 'nx'
    Node localhost {
        #Ensure apache2 package is installed
        nxpackage 'apache2' {
            Ensure          = 'Present'
            Name            = 'apache2'
            PackageManager  = 'Apt'
        }
        #Ensure apache2 service is running
        nxService 'apache2' {
            Enabled         = $true
            Name            = 'apache2'
            Controller      = 'init'
            State           = 'running'
        }
    }
}
Save the contents of the configuration function as apache2.ps1 in a known location on your local system.
The filename (apache2.ps1) will be the configuration name within Azure DSC (apache2), and it must match the configuration name (
Configuration 'apache2') within your apache2.ps1 script file.
Importing the Azure DSC Configuration
To make your configuration available within Azure DSC, you first need to import it. The Import-AzAutomationDscConfiguration cmdlet imports the DSC configuration from your local system into Azure DSC.
The following code snippet uploads the configuration stored within the apache2.ps1 file to the Resource Group DSC_RG and Automation Account dscautouser in Azure DSC.
- The
Publishedswitch ensures that the configuration is imported in a published state and must be used for theImport-AzAutomationDscConfigurationcmdlet to succeed. - The source path following the
SourcePathparameter must be the full filesystem path to the script file that contains your DSC configuration.
In the code snippet below, you will see that the filesystem path to this tutorial’s script file is C:\DSC\apache2.ps1.
#Import DSC script file into Azure DSC
#Adjust -SourcePath parameter to match the full filesystem path to your apache2.ps1 file.
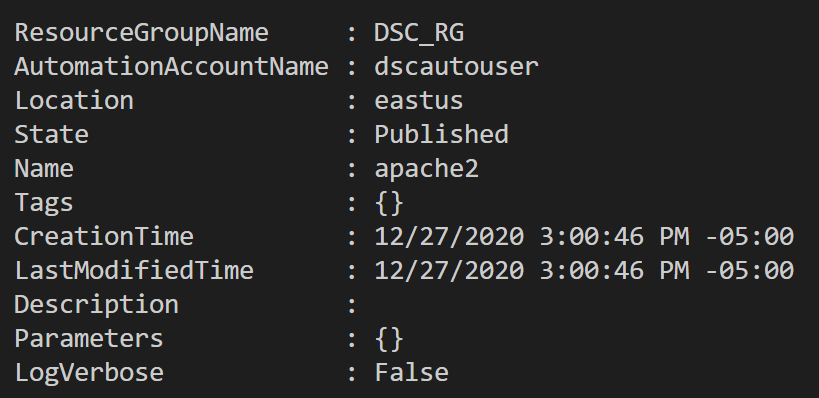
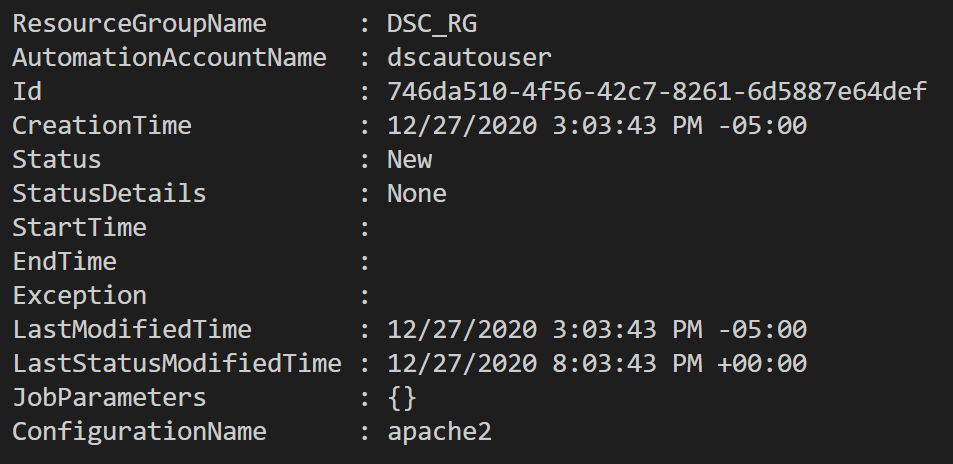
Import-AzAutomationDscConfiguration -SourcePath C:\DSC\apache2.ps1 -ResourceGroupName $resourceGroupName -AutomationAccountName $automationAccountName -Published
The output should resemble the following:
Compiling the Azure DSC Configuration
Once you’ve imported the DSC configuration into Azure DSC, it needs to be compiled into Managed Object Format. The Start-AzAutomationDscCompilationJob cmdlet carries out this task for you by forcing your configuration into the required Managed Object Format within Azure DSC.
#Force Azure DSC to compile DSC Configuration
Start-AzAutomationDscCompilationJob -ConfigurationName 'apache2' -ResourceGroupName $resourceGroupName -AutomationAccountName $automationAccountName
The output should resemble the following:
Verifying the Azure DSC Compilation Status
The Get-AzAutomationDscNodeConfiguration obtains metadata for compiled node configuration. You will use this cmdlet to verify that your configuration was successfully compiled by keying on the RollupStatus property of the Get-AzAutomationDscNodeConfiguration cmdlet’s output.
#Obtain metadata for DSC configuration and ensure RollupStatus is Good
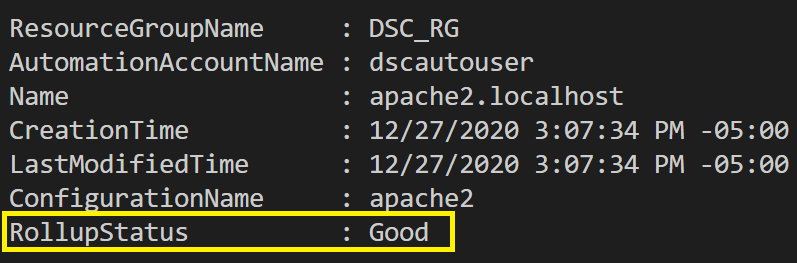
Get-AzAutomationDscNodeConfiguration -ResourceGroupName $resourceGroupName -AutomationAccountName $automationAccountName
The output should resemble the following. Ensure that the RollupStatus property displays as Good:
Registering an Azure DSC Node
Now that you’ve imported and compiled your configuration, you must register your VM as a node and associate it with your configuration. To register your Ubuntu VM as a node:
- Navigate to Automation Accounts within the Azure Portal.
2. Select the Automation Account you will be using to implement your configuration. In the screenshot below, you will see that the tutorial’s dscautouser Automation Account shows up:

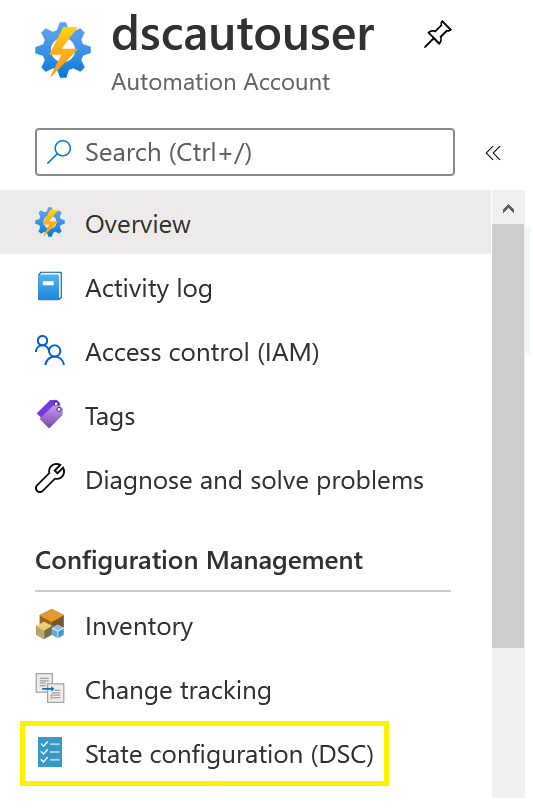
3. Select State Configuration (DSC) from the menu on the left-hand side of the screen:
4. Select Add from the menu:

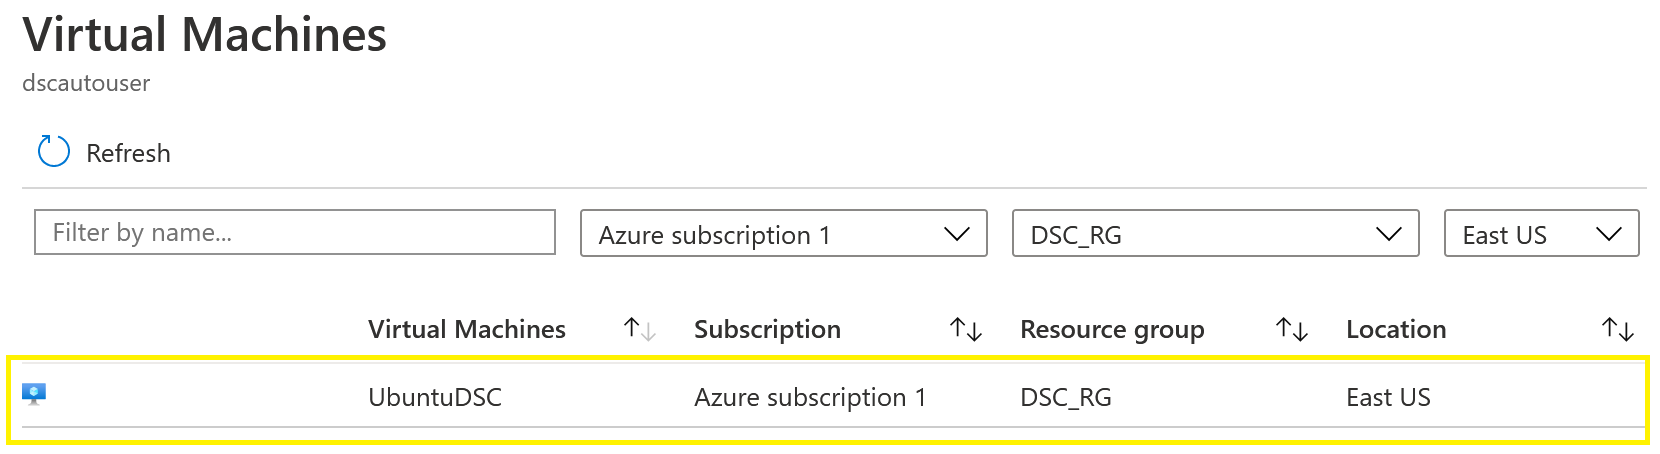
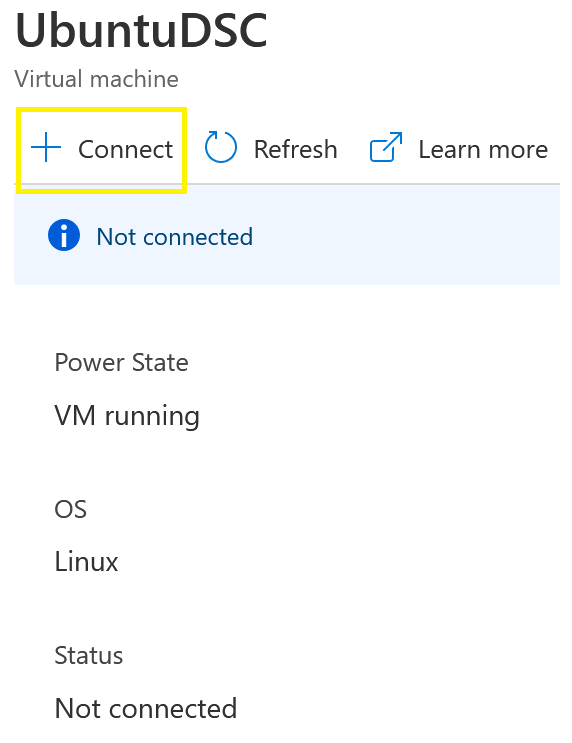
5. Select your VM from the list. In the screenshot below, you will see that the tutorial’s UbuntuDSC VM shows up:
6. Select Connect from the menu:
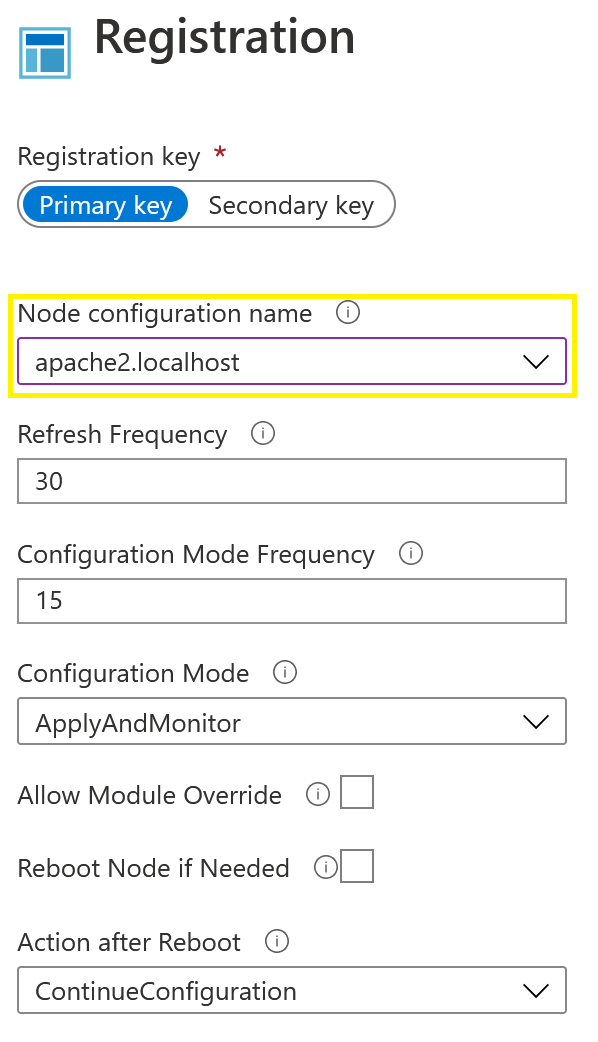
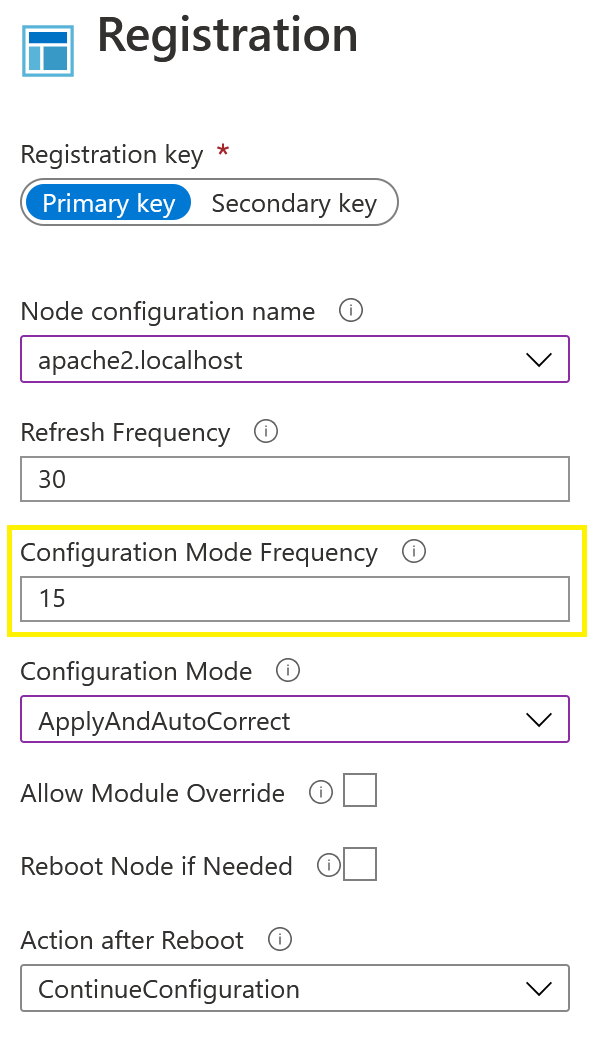
7. Select your compiled configuration from the Node Configuration Name drop-down menu (apache2.localhost if you’re following along). The remaining settings can be left as default for this tutorial. Additional information on the settings has been provided below:
- Node Configuration Name: The name of the node configuration that the VM should be configured to pull from Azure Automation DSC.
- Refresh Frequency: The frequency (in minutes) at which the Local Configuration Manager (LCM) contacts the Azure Automation DSC pull server to download the latest node configuration.
- Configuration Mode Frequency: The frequency (in minutes) at which the background application of DSC attempts to implement the current node configuration on the target node.
- Configuration Mode: Specifies how the configuration is applied to the target node. Possible values include ApplyOnly, ApplyAndMonitor, and ApplyAndAutoCorrect.
- Allow Module Override: Controls whether new configurations that are downloaded from the Azure Automation DSC pull server are allowed to overwrite the old modules already present on the target node.
- Reboot Node if Needed: Specifies whether to reboot the node if needed
- Action After Reboot: Specifies the action to perform after a reboot completes. Possible values are Continue Configuration and Stop Configuration.
8. Be patient as the process completes. No need to refresh your screen or click Refresh, the status will automatically update. Once the process completes, ensure that the status reads Connected. If an error occurs, additional troubleshooting may be required.

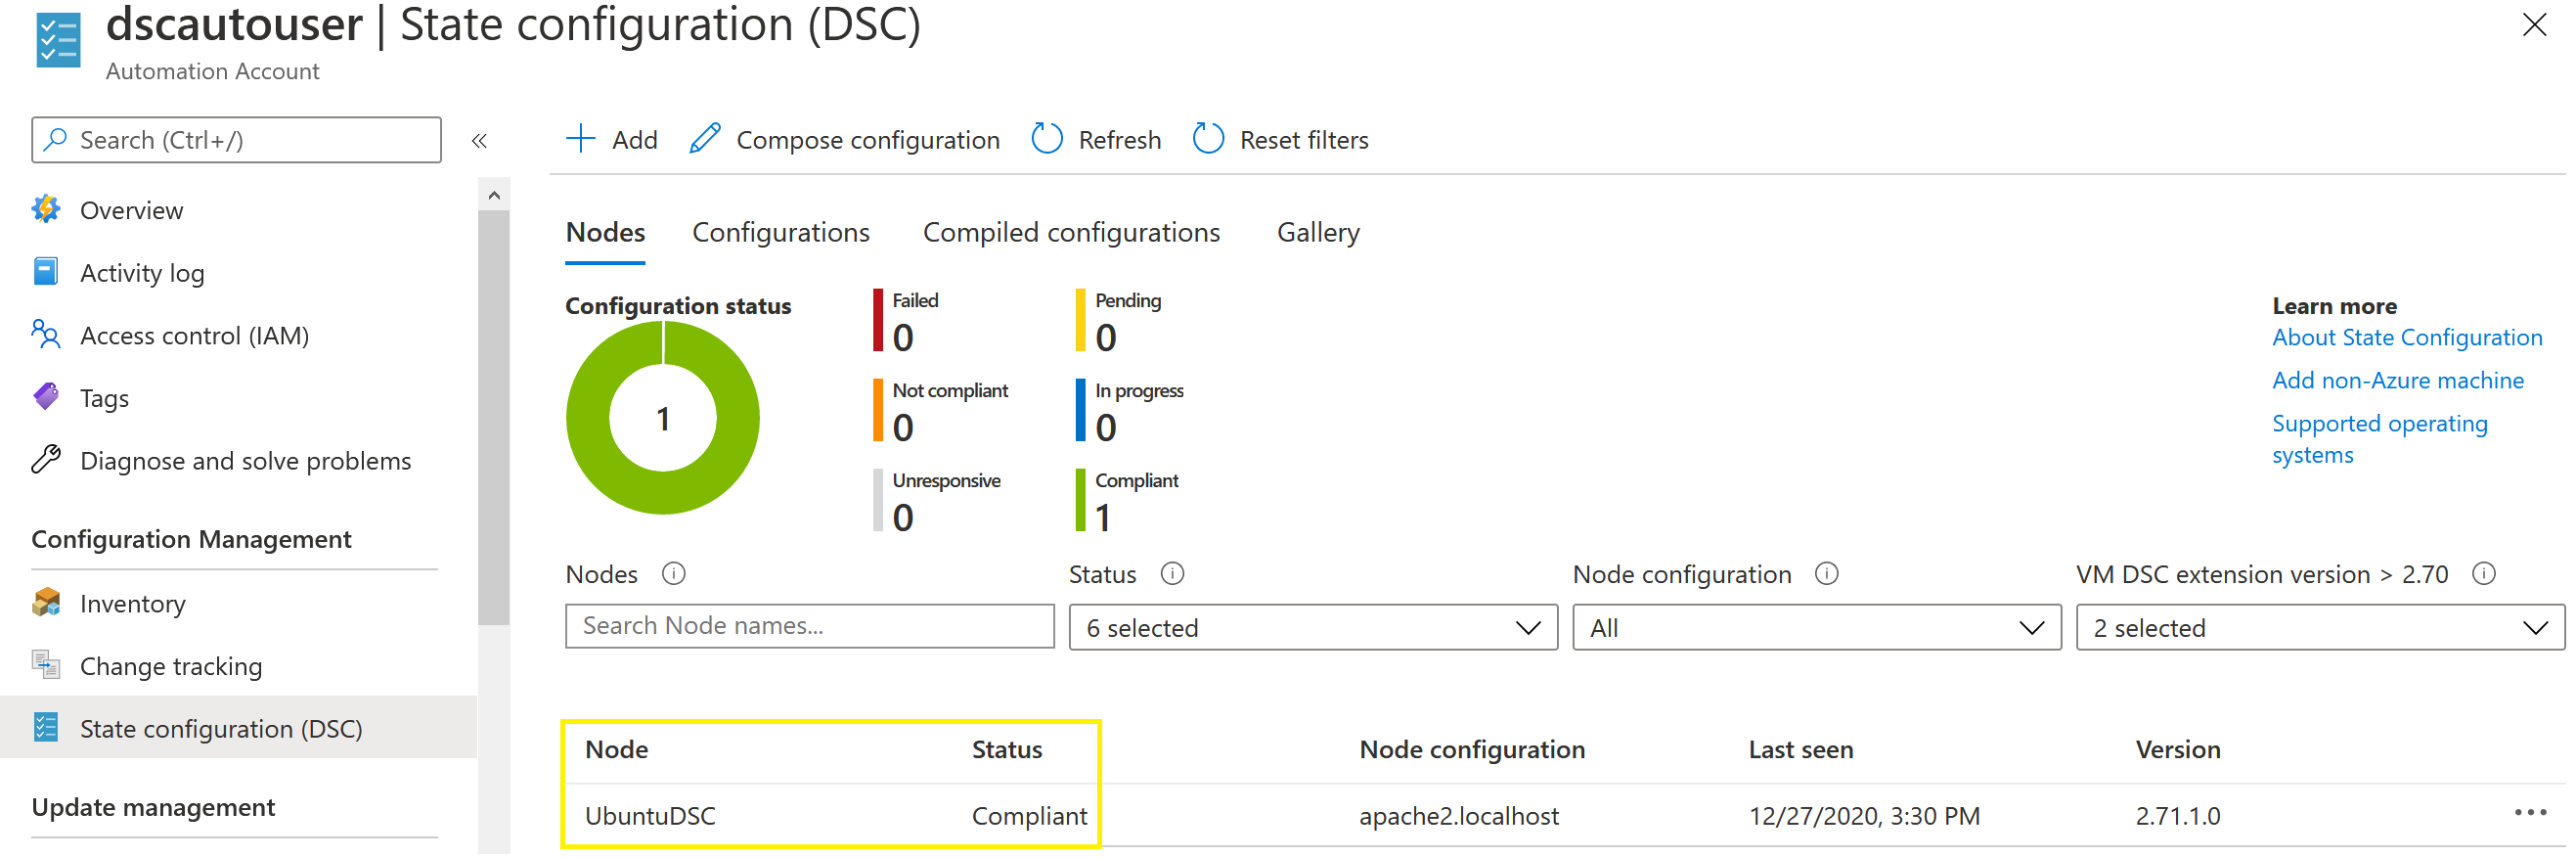
9. Navigate back to State Configuration (DSC) and note your node’s Status. There are three possible Status values that a node can report. They are listed below:
- Compliant: Indicates that the node is compliant with the check.
- Failed: Indicates that the configuration failed the check.
- Not Compliant: Indicates that the node is in the ApplyandMonitor configuration mode, and the machine is not in the desired state.
Ensure your node is present with a Status of Compliant. As you can see below, Azure DSC has registered the tutorial’s Ubuntu VM called UbuntuDSC and it is Compliant:
Verifying the Azure DSC Configuration Status
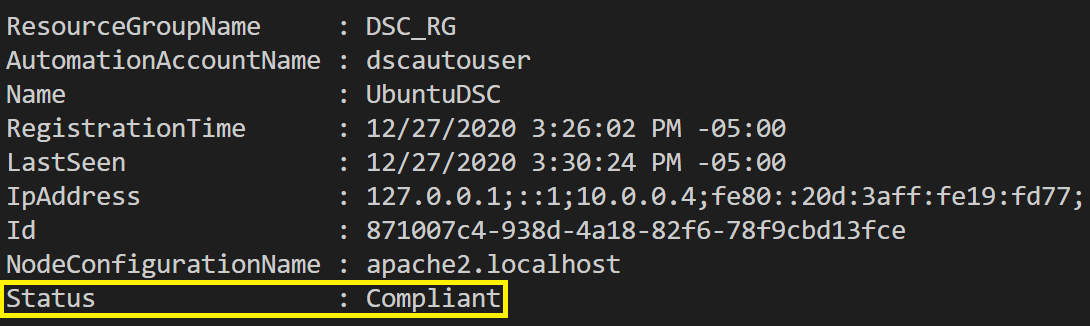
In the previous section, the final step provided instructions on how to obtain your node’s configuration status. Obtaining your node’s configuration status can also be accomplished using PowerShell. To check a node’s status from the command line, use the Get-AzAutomationDscNode cmdlet.
#Obtain metadata for DSC node and ensure Status is Compliant
Get-AzAutomationDscNode -NodeConfigurationName 'apache2.localhost' -ResourceGroupName $resourceGroupName -AutomationAccountName $automationAccountName
The output should resemble the following:
Forcing the Azure DSC Configuration to Apply
If you’ve tried to access your Ubuntu VM’s Apache web service and failed, that is because your configuration has not yet been applied. The initial status of Compliant means that your node is registered, and it will receive your DSC configuration at the next check-in.
The check-in interval was defined as the Configuration Mode Frequency during the node registration process. The default value is 15 minutes:
If you’re not willing to wait for the Configuration Mode Frequency interval to elapse, you can force the configuration to apply.
When you configured the Ubuntu VM as a node in Azure DSC, it automatically installed the necessary PowerShell DSC packages for the Linux operating system. These packages enable you to work with your node’s DSC configuration directly from the host. It is possible to manually install the PowerShell DSC packages for Linux, if necessary.
- To force the application of a configuration update, SSH into your Ubuntu VM using its public IP address.
- Obtain the VM’s public IP address with the
Get-AzPublicIpAddressPowerShell cmdlet. The following code snippet obtains the Ubuntu VM’s network interface Id and uses it to extract the interface’s IP configuration Id, which is used to filter theGet-AzPublicIpAddresscmdlet’s output to identify the VM’s public IP Address.
#Obtain network interface Id for VM
$vmNetworkInterfaceId = ((Get-AzVM -ResourceGroupName $resourceGroupName -Name $virtualMachineName).networkprofile.networkinterfaces.Id | Get-AzNetworkInterface).IpConfigurations.Id

#Use the network interface Id to obtain the VM public IP Address
Get-AzPublicIpAddress | Where-Object -FilterScript {$_.IpConfiguration.Id -eq $vmNetworkInterfaceId} | Select-Object -Property IpAddress
3. Now use the public IP Address obtained above to SSH into your Ubuntu VM.
4. Once SSHed in, run the PerformRequiredConfigurationChecks.py Python script. This script checks the local system’s configuration against the Azure DSC pull server’s required configuration, per the LCM meta-configuration settings.
Use the following to run the PerformRequiredConfigurationChecks.py python script on your Ubuntu VM and force your DSC configuration to apply:
#Force DSC configuration to apply. Run on target system (Ubuntu VM).
sudo /opt/microsoft/dsc/Scripts/PerformRequiredConfigurationChecks.py
ReturnValue=0 is the expected output, and it indicates that the script completed without error.

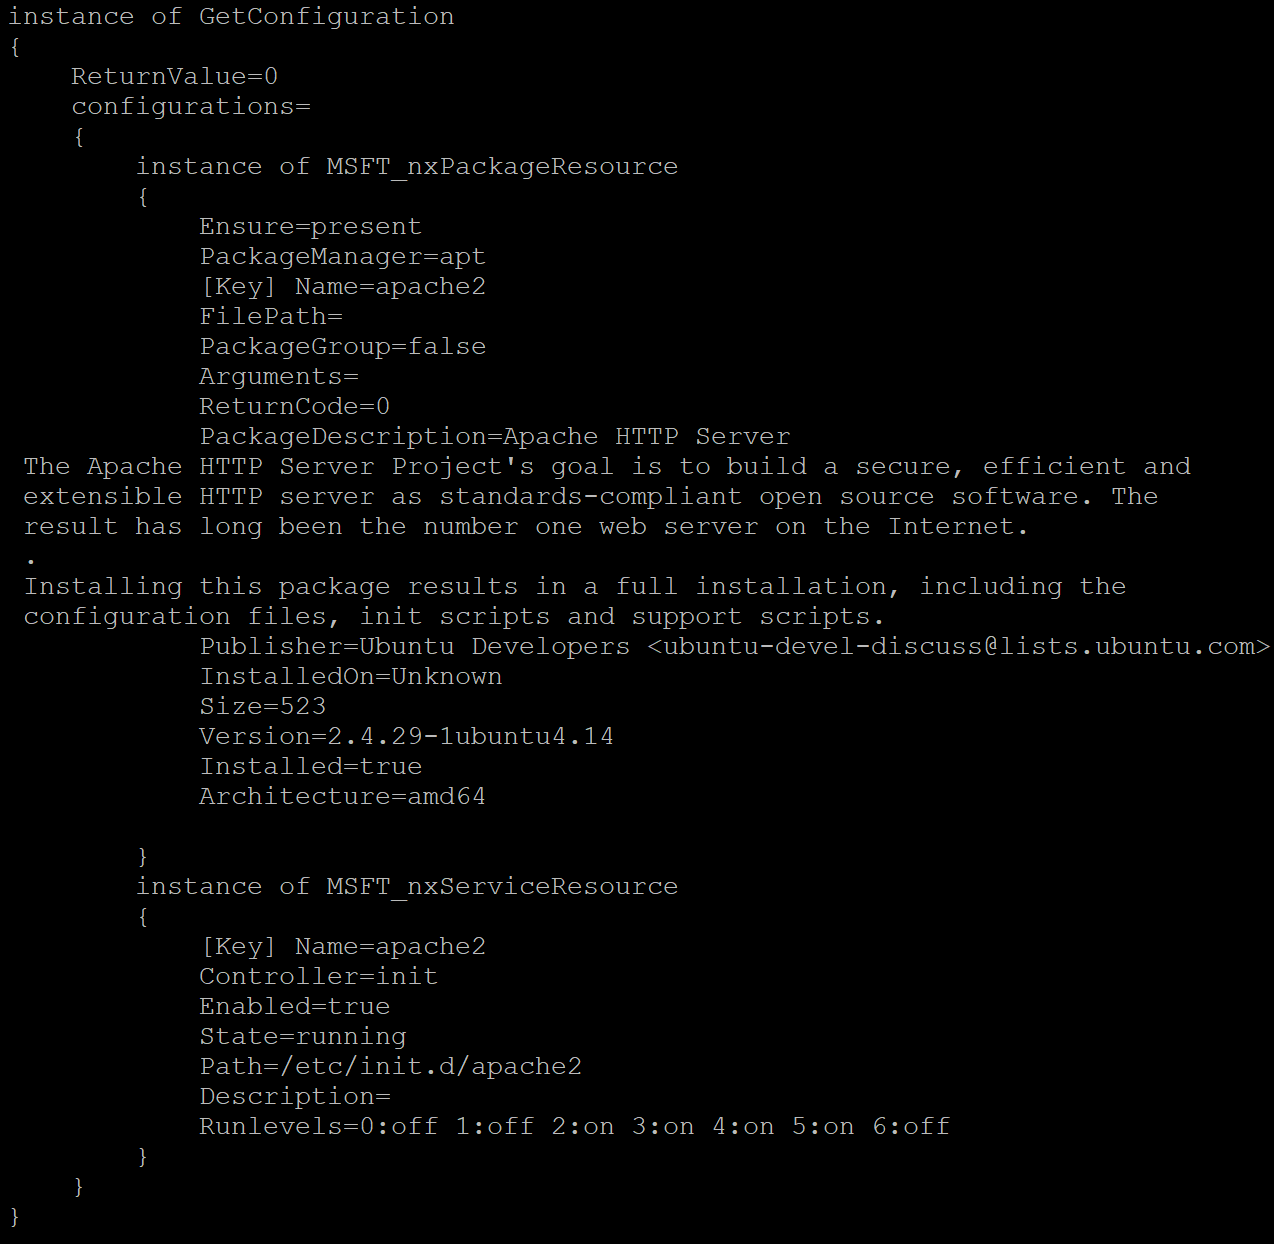
5. Verify that the correct configuration is applied with the GetDscConfiguration.py python script. The following returns the DSC configuration that is applied to your Ubuntu VM:
#Obtain current DSC configuration of node. Run on target system (Ubuntu VM).
sudo /opt/microsoft/dsc/Scripts/GetDscConfiguration.py
The expected output is shown below. Look closely and you can see some of the specifics that were defined within the configuration script that was established earlier in this tutorial:
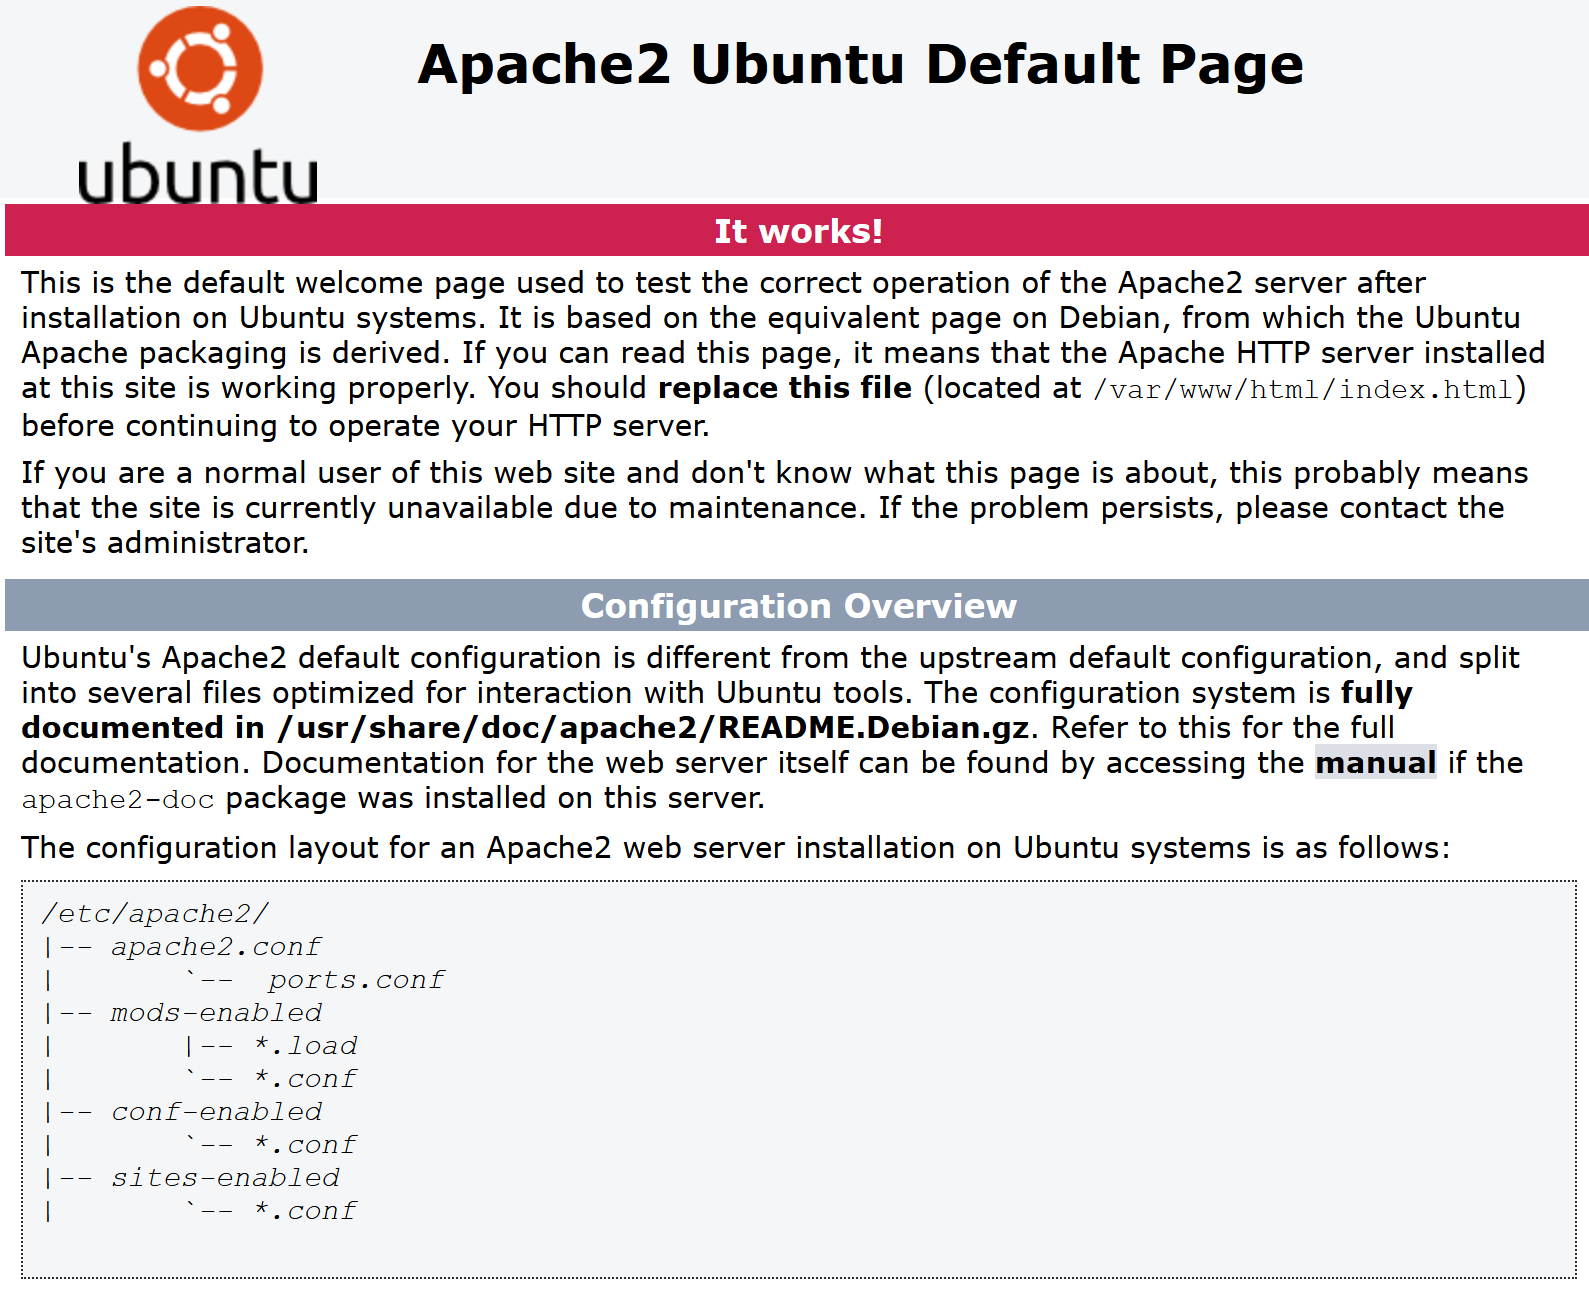
6. Now validate your hard work by navigating to your new webpage using your Ubuntu VM’s public IP Address. In the code snippet below, you will see that the public IP Address of this tutorial’s Ubuntu VM is 52.188.16.42:
#Establish HTTP connection to Ubuntu VM's public IP Address
#Adjust the IP Address to match the public IP Address of your Ubuntu VM.
http://52.188.16.42/
If all went as planned, your connection to the VM’s Apache Web service will be established and you will be prompted with the Apache2 Ubuntu Default webpage!
Next Steps
In this tutorial, we leveraged Azure DSC to onboard and apply a simple Azure DSC configuration that installed and started the Apache web service on an Azure VM. Feel free to delete your Ubuntu VM and start again with the goal of completing the process on your own. Once complete, apply additional configurations using Azure DSC to other nodes in your Microsoft Azure environment.


