

You’ll likely need to store data somewhere as an administrator or developer, not just any data, but massive data. Where do you turn? The cloud is your most practical option, and luckily, Azure Data Lake can help for worry-less data storage.
Azure Data Lake lets you perform all types of processing and analytics across platforms and languages at blazing speed. And in this tutorial, you’ll learn how to use Azure Data Lake for storage and analysis.
Efficiently and securely store your data in one place with Azure Data Lake today!
Prerequisites
This tutorial will be a hands-on demonstration. If you’d like to follow along, be sure you have an Azure account with an active subscription — If you don’t have one yet, a free trial will suffice.
Creating a Data Lake Through Azure Portal
Azure Data Lake is a cloud-based data storage service optimized for big data analytics and is highly scalable. You can start small and grow as your needs increase. But how do you create the storage?
Take a quick tour of the Azure Portal and create an Azure Data Lake account.
1. Open your favorite web browser, and navigate to the Azure Portal.
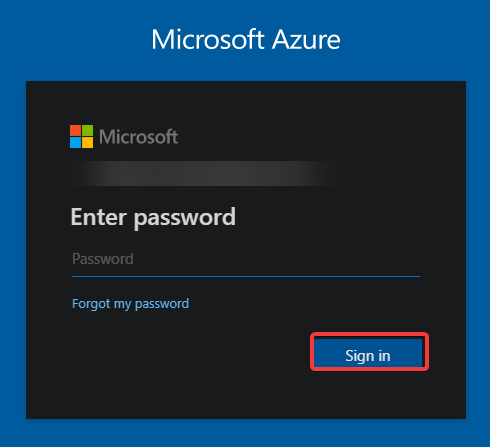
2. Next, provide your credentials, click on the Sign In button, and sign in to your Azure account.
After signing in, your browser redirects to the Azure Portal (step three).
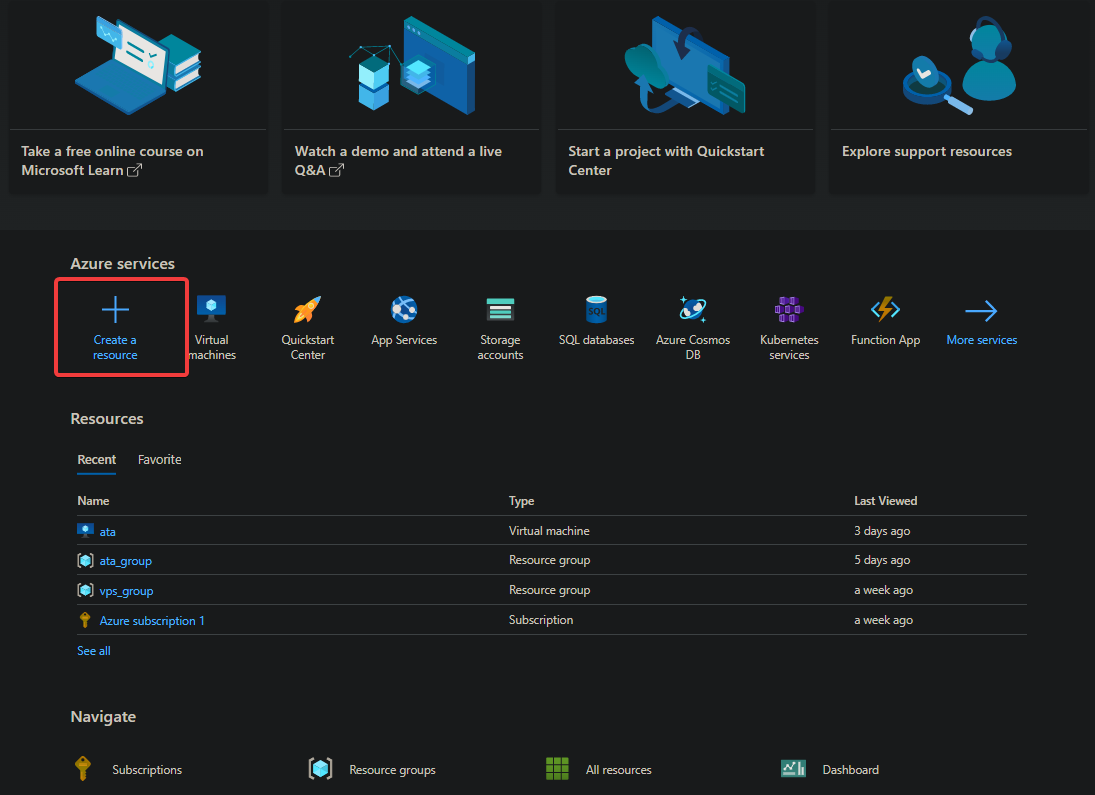
3. On your Azure Portal, click on Create a resource, which opens up the list of Azure resources available.
You’ll see the page below when you first log in or don’t have any resources deployed in your subscription.
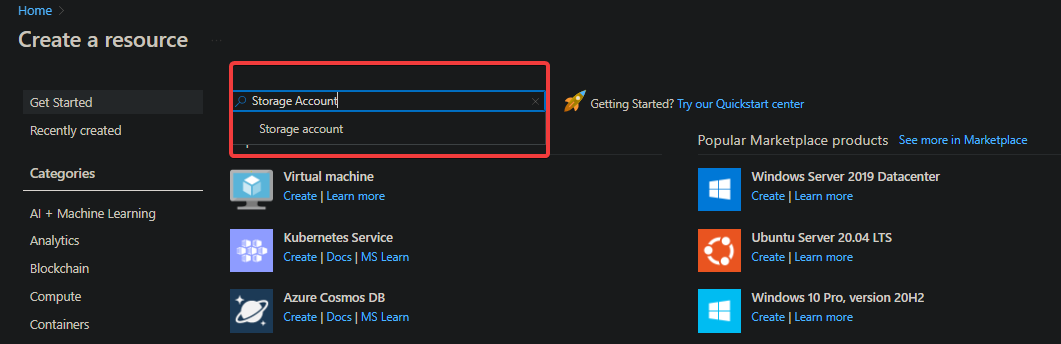
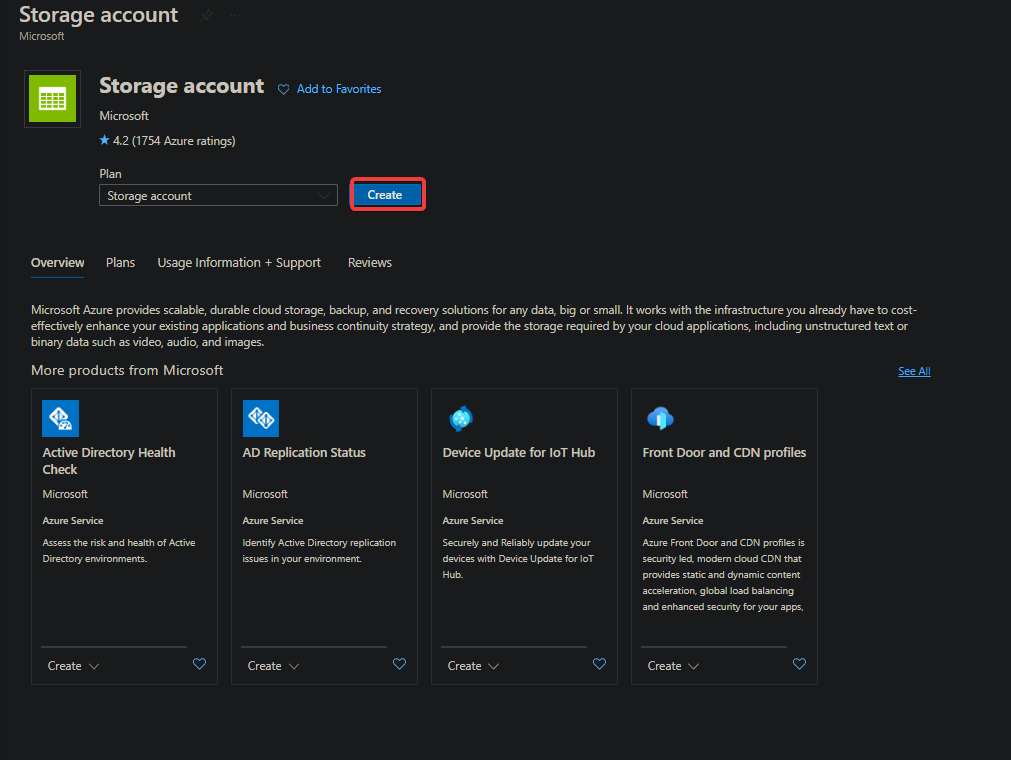
4. Search for ‘storage account’ in the search bar at the top of the page and select Storage account. Doing so redirects your browser to the Storage account resource’s overview page.
The search bar lets you quickly find resources you like to create instead of scrolling through the featured ones. But for this tutorial, you’re creating an Azure Data Lake account.
Azure Data Lake is built on top of Azure Storage. So, a storage account is the resource type you need to create a new Azure Data Lake account.
5. Now, click on Create, which redirects your browser to the Create a storage account page (step six), where you’ll configure your storage account.
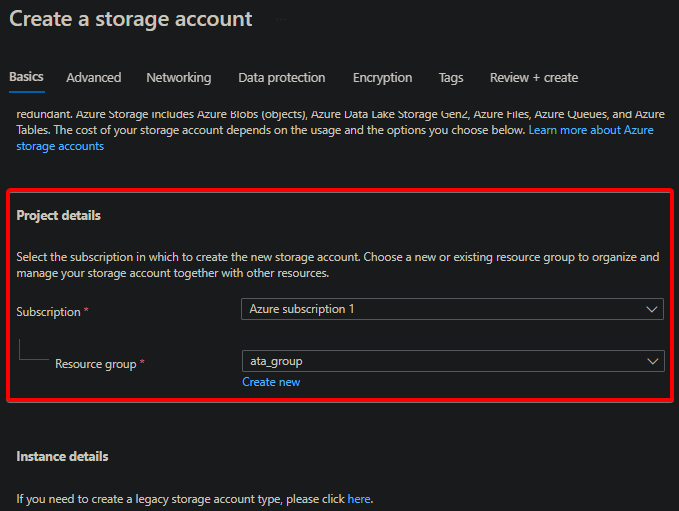
6. Configure your storage account starting with the Project details as follows:
- Select your Subscription – If you have multiple subscriptions, ensure you select one where you prefer to create your storage account. This tutorial uses Azure subscription 1, as shown below.
- Select your Resource group – Resource groups are a way to logically group Azure resources. You can think of resource groups as folders where you place related resources. Resource groups let you manage, monitor, and delete resources easier.
If you don’t have a resource group yet, click on the Create new hyperlink instead to create one.
7. On the same page, configure the instance details with the following:
- Provide a unique Storage account name – This tutorial’s choice is ataazurestorage. The name must be unique within Azure and must be between three and 24 characters long.
- Select the Region where you want to deploy your storage account – The region is where your storage account will physically reside. Select the region closest to you or your users.
For example, if you’re creating a storage account for a web application that users from the US will access, select US East or US West regions.
- Keep all other settings on default values and click on Next: Advanced at the bottom of the page. At this point, you’ll have a standard blob storage account.

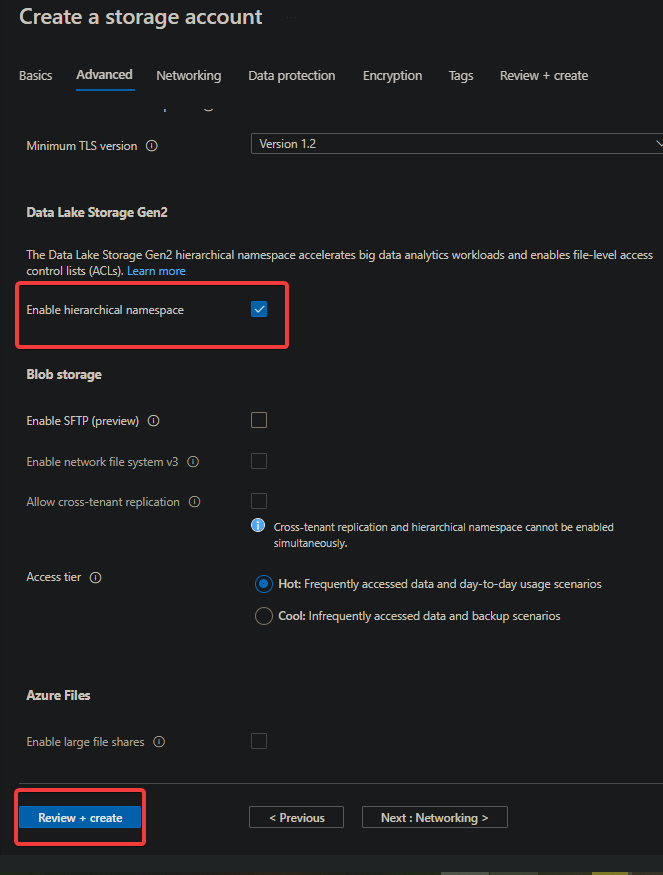
8. Under the Advanced tab, tick the Enable hierarchical namespace checkbox in Data Lake Storage Gen2. This option converts your blob storage account to a Data Lake account and enables all functionalities of a Data Lake, including Analytics and Store.
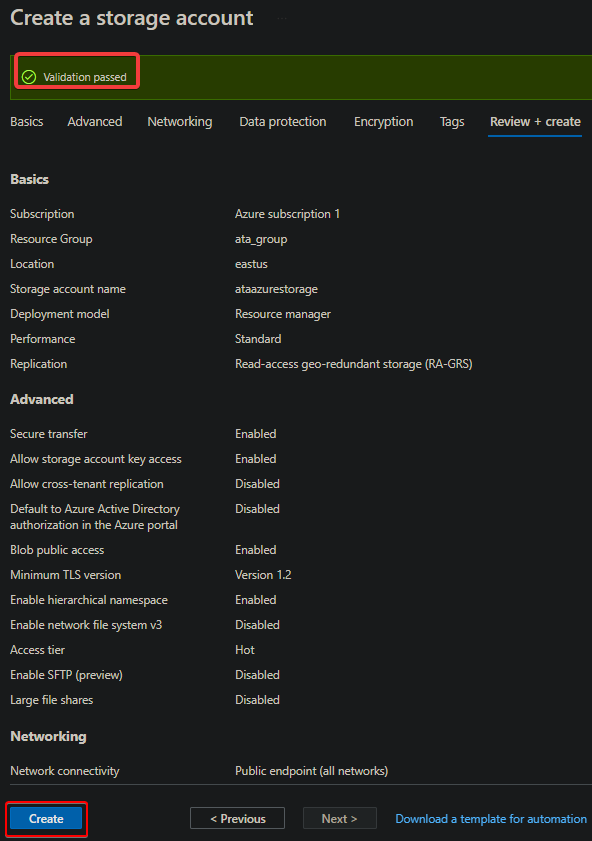
Click on the Review + create button (bottom-left) to validate your settings, which may take a few minutes to complete.
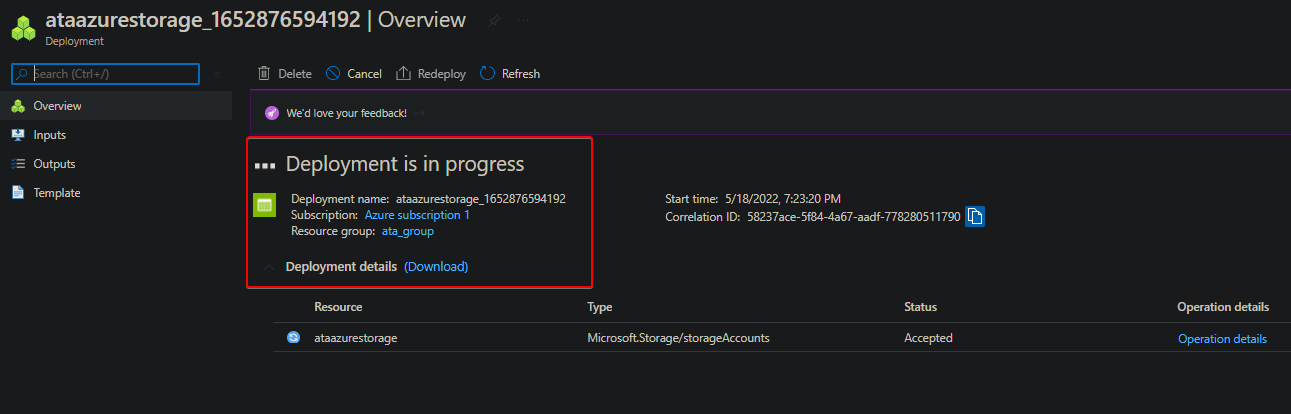
9. After validation, click on the Create button to finalize creating the storage account.
After your storage account is created, you’ll see the deployment in progress, as shown below, which may take a few minutes to complete.
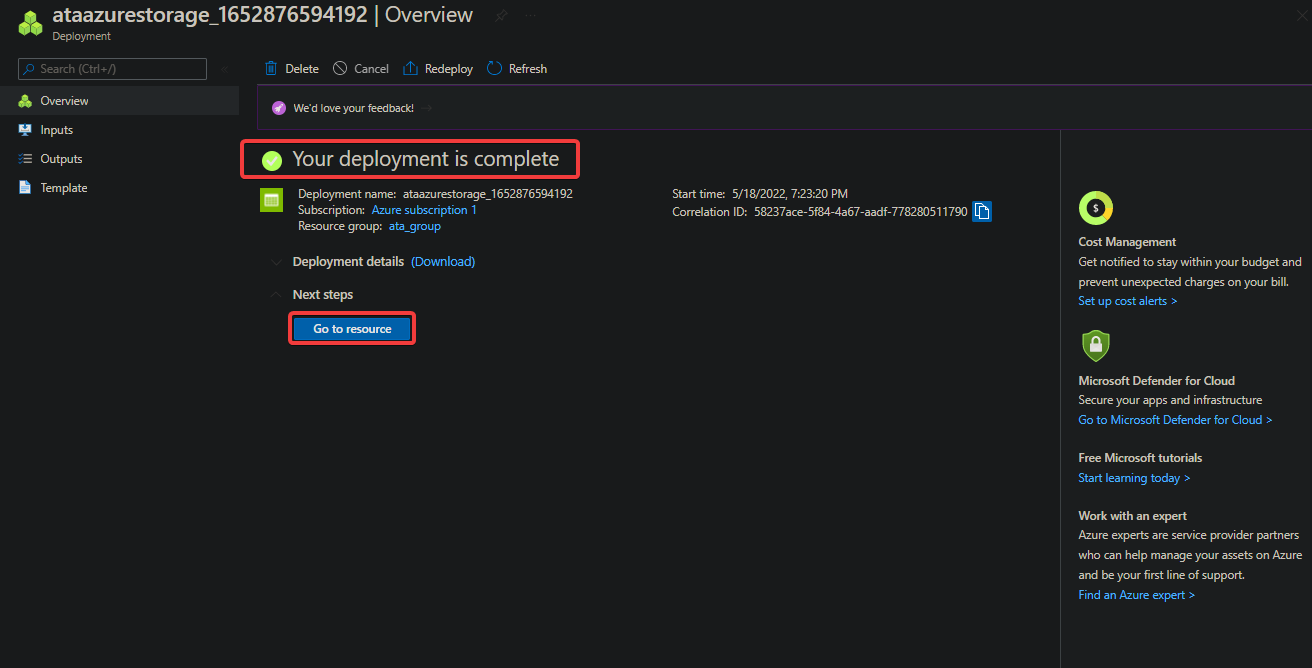
10. Lastly, click on the Go to resource button to open your newly-created storage account after deployment. At this point, you already have an Azure Data Lake account.
Creating a Data Lake Using the CLI
You’ve seen that creating an Azure Data Lake account using the Azure Portal works fine. But what If you like to have a repeatable and automated way of creating Data Lake accounts? Azure Portal is not the best option, but Azure CLI.
The Azure CLI is a cross-platform tool that you can use to manage your Azure resources and lets you integrate with your automated CI/CI process.
Azure CLI is available for Windows, Linux, Azure Cloud Shell, and macOS.
To create an Azure Data Lake account via the Azure CLI:
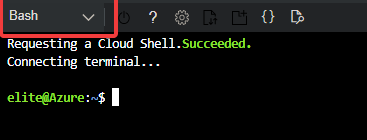
1. On the Azure Portal, click on the Cloud Shell button, as shown below, to open the Azure Cloud Shell.

2. At the bottom of the Azure Portal, choose either Bash or PowerShell as your shell type, and the shell opens.
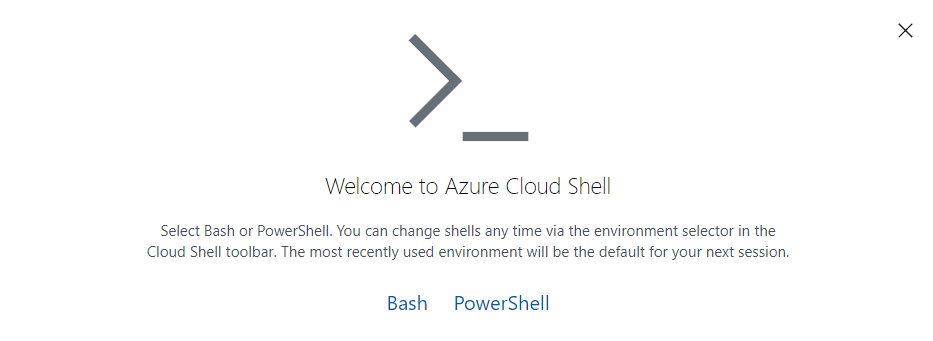
On your Azure Cloud Shell, you can change your shell type at will to either Bash or PowerShell. But for this tutorial, keep the Bash shell active.
3. Run the below command on your Azure Cloud Shell to verify the –version of Azure CLI installed. Whichever platform you’re using, ensure you have Azure CLI version 2.6.0 or later, or else you can’t create a Data Lake account.
az --version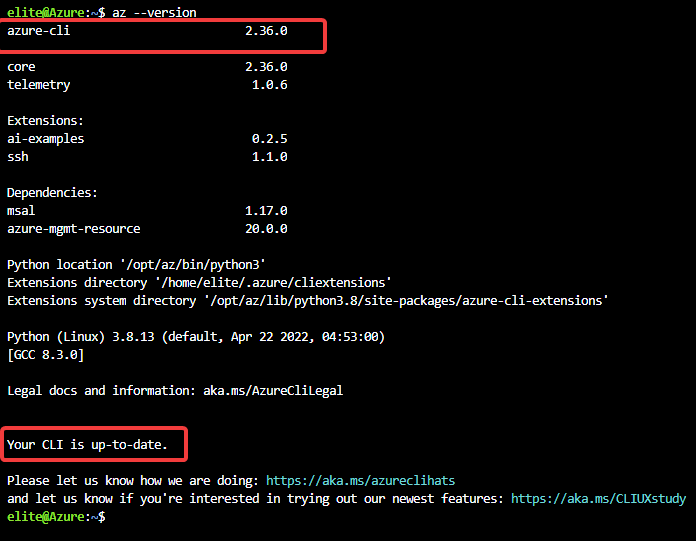
4. Now, run the command below to login to Azure with your Azure account.
This tutorial uses Azure Active Directory (Azure AD) authorization method. This method is the recommended authorization type as it’s easier and provides more security than using a service principal.
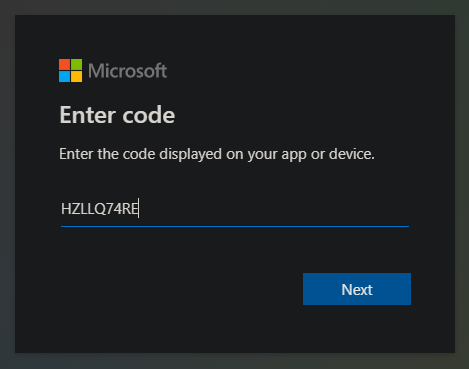
az loginYou’ll see a code and a URL appear in the terminal window below. Note down the URL as you’ll need it to authenticate Azure using Azure AD in the following step.

5. Authenticate using Azure AD with the following:
- Navigate to the URL you noted in step four in your browser.
- Log in using your Azure account credentials and the code you noted in step four.
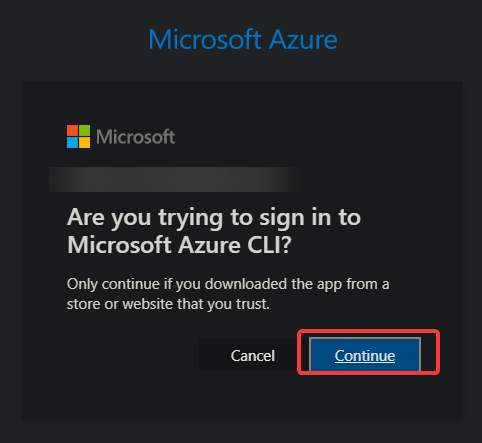
6. Next, click on Continue to complete the authentication process.
7. Run the below az account list command to list the subscriptions for the logged-in account.
If your account is associated with more than one Azure subscription, you might need to select and set the subscription that you want to use for your Data Lake account.
Note the name of the subscription to use for your Azure Data Lake account. For this tutorial, the subscription to use is Azure subscription 1.
az account list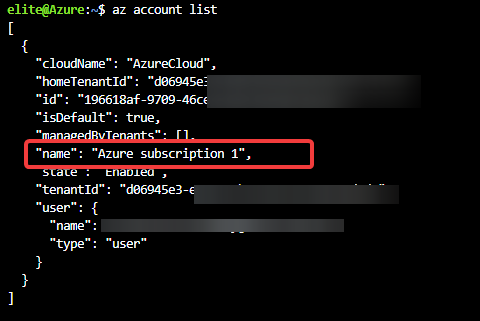
8. Now, run the following az account set command and specify the name of your subscription. This command doesn’t provide an output but sets the subscription to use for your Azure Data Lake account.
az account set --subscription 'Azure subscription 1'9. Run the following az group create command to create a resource group. Choose a unique name for your resource group, but this tutorial’s choice is ataadatalakecli and a –location set to westus.
az group create --location westus --resource-group ataadatalakecli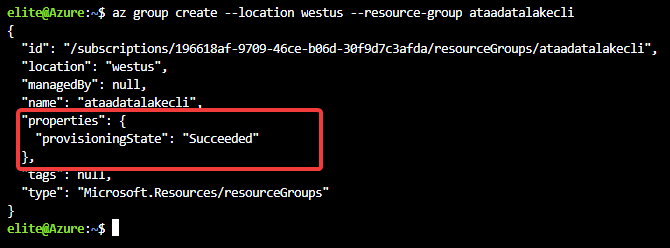
10. After creating a group resource, run the az storage account create command below and pass in the values for the following parameters to create a storage account:
--name– Your Data Lake account name (ataaazuredatalakecli).
--resource-group– Your resource group name (ataadatalakecli).
--location– Your Data Lake account’s location (westus).
--sku– The storage SKU for your Data Lake account (Standard_LRS).
--kind– The type of Data Lake account to create (StorageV2).
--enable-hierarchical-namespace true - Enables the hierarchical namespace for your account, which is required to use Data Lake Storage Gen2.
az storage account create --name ataaazuredatalakecli --resource-group ataadatalakecli --location westus --sku Standard_LRS --kind StorageV2 --enable-hierarchical-namespace trueNote that StorageV1 has now been deprecated, and you should use StorageV2 for all newly created Data Lake accounts. Existing StorageV1 accounts can still be used for some time but will eventually be migrated to StorageV2. So, migrating your data to StorageV2 accounts is strongly recommended.

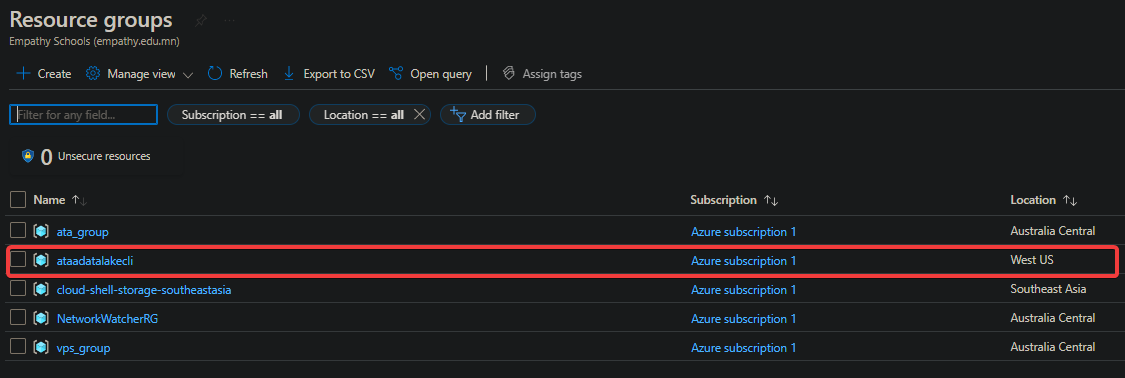
11. Now, navigate to your resources group in the Azure Portal, and you’ll see your newly-created resources, as shown below.
Click on the hyperlink of your resources group to navigate to the resource group’s overview page (step 12).
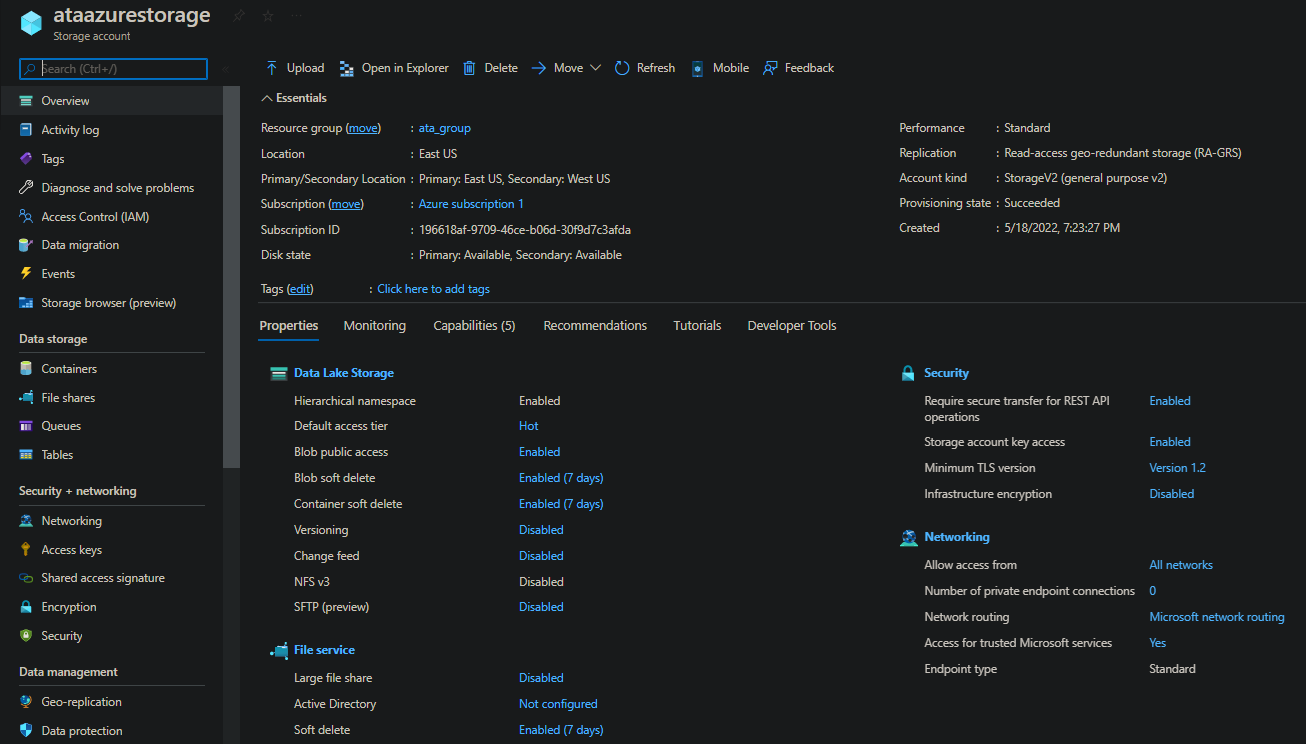
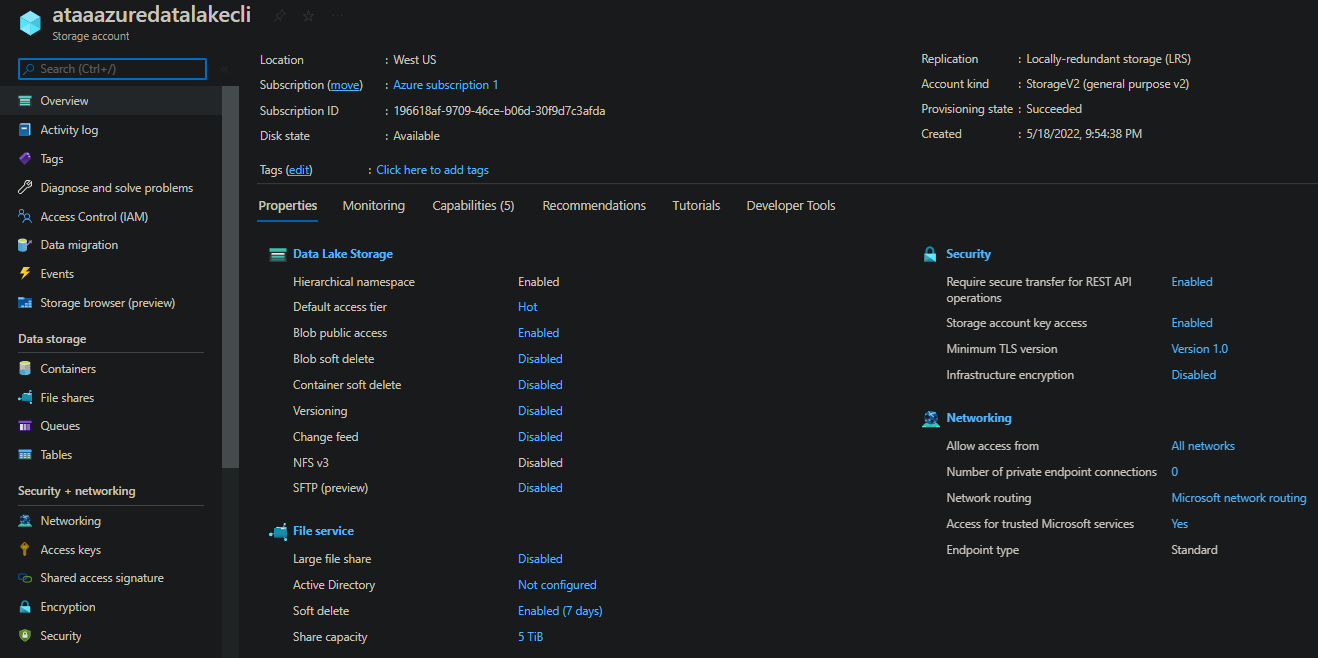
12. Finally, click on your storage account from the list to access its overview page.
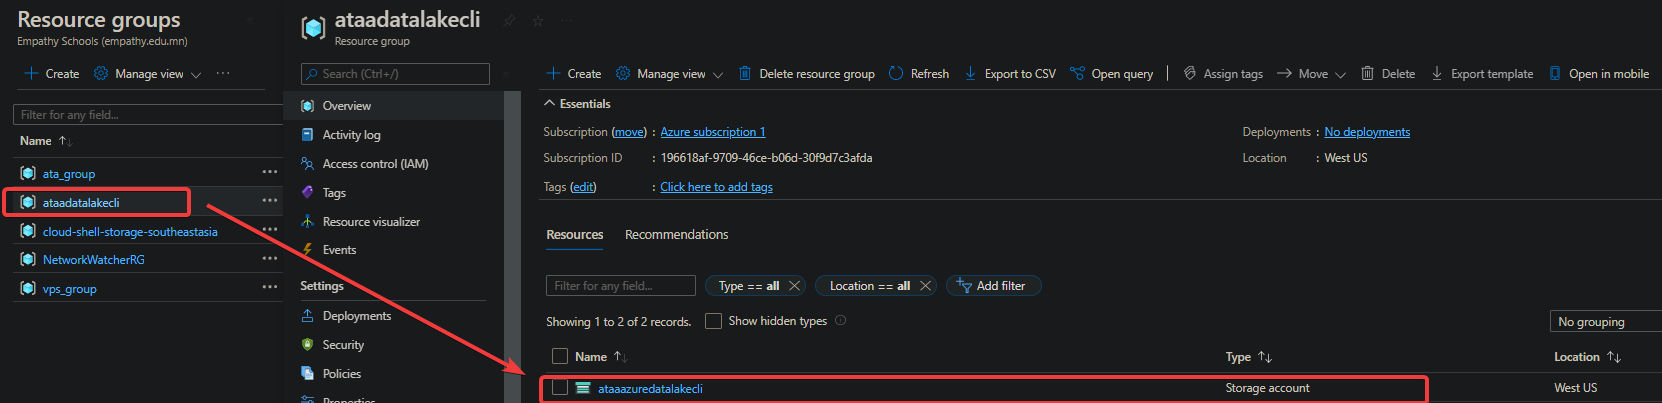
That’s it! You now have an active storage account.
Uploading Data to the Data Lake Storage
You’ve just created your Lake Storage Gen2 account, but it’s currently empty. So why not upload your data? You can upload and verify your data using the Azure Portal and Azure CLI, but first, you must create a container.
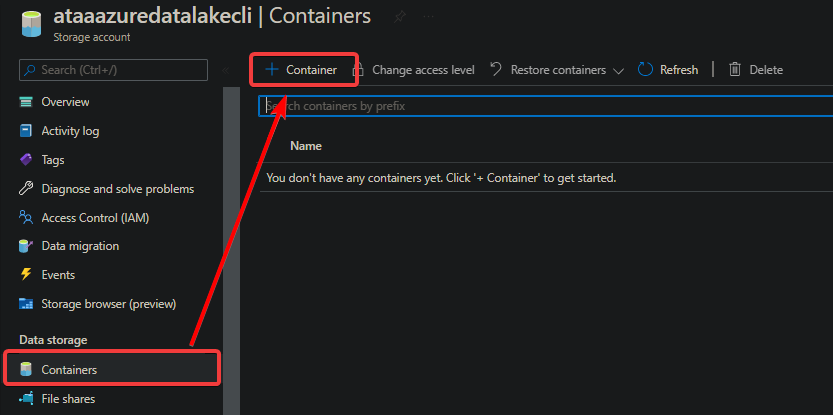
1. On your storage account’s dashboard, click on Container under Data Storage (left panel), and click on Container, as shown below, to create a new container.
In Azure, a container is a file system for storing your data.
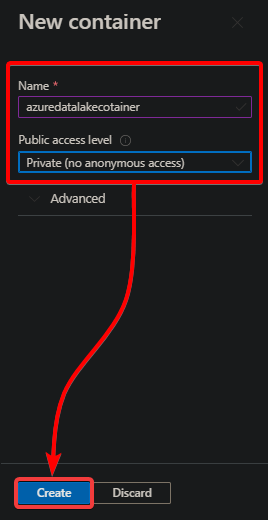
2. Next, configure the new container with the following:
- Specify a name for your container, but this tutorial’s choice is azuredatalakecotainer.
- Select Private (no anonymous access) for the access level.
- Click on Create at the bottom to create the container.
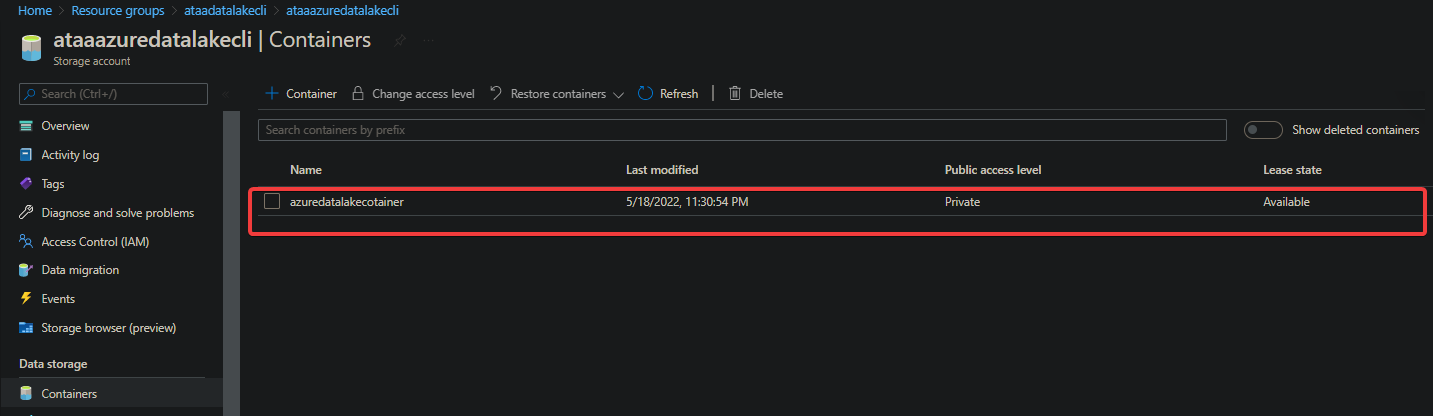
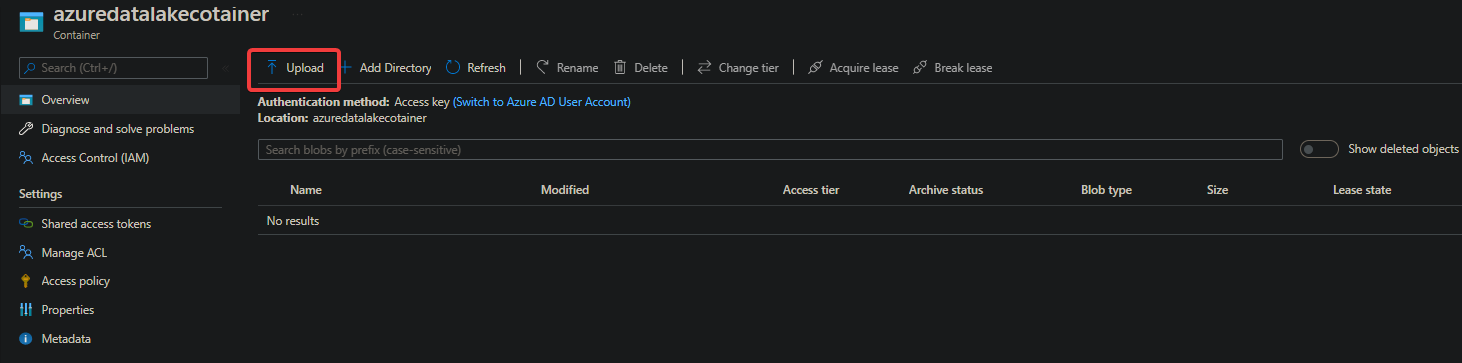
3. Click on your container’s name from the list, as shown below, to open it. Note that your container is currently empty.
4. Now, click on the Upload button at the top to upload files or folders to your container.
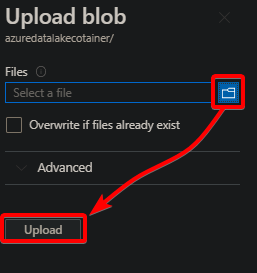
5. In the Upload blob blade, click on the folder upload button, locate your files or folders, and click on Upload to upload them.
You can select multiple files and folders to upload in one go.
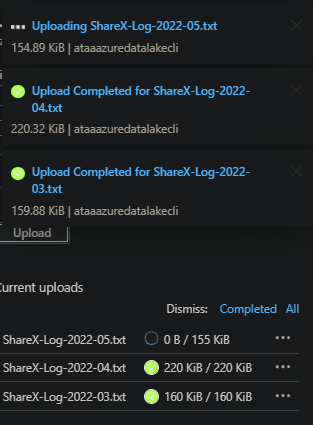
You’ll see the status of each file/folder upload like the one below.
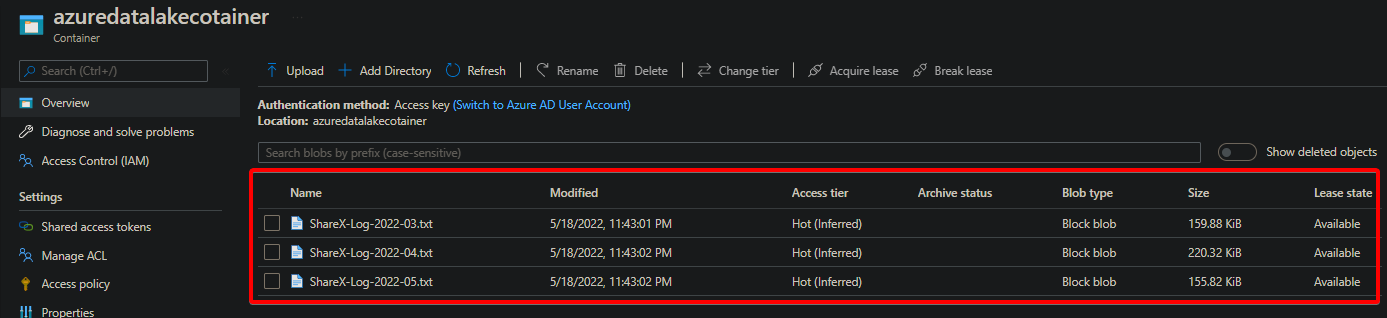
Once the upload completes, you’ll see the files listed in your container.
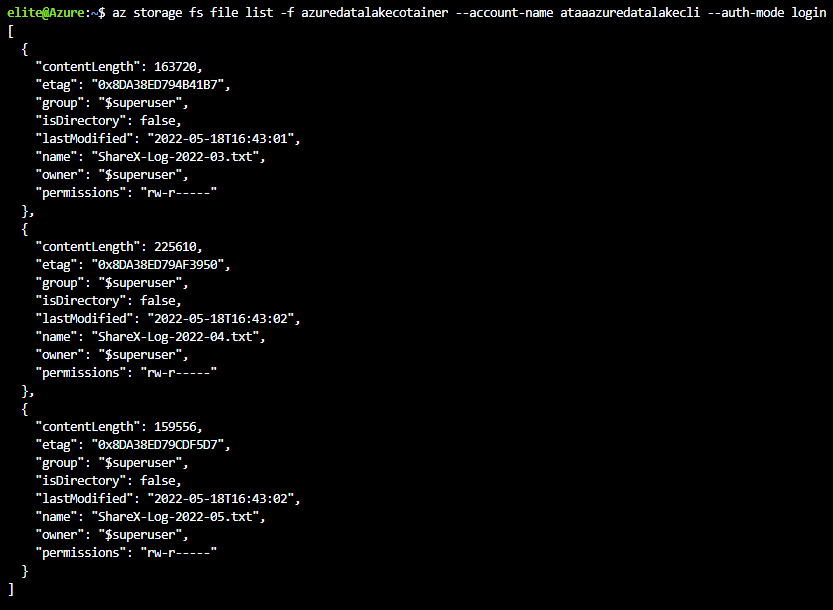
Alternatively, run the az storage command below to list all the uploaded files in your container. Replace the container name (azuredatalakecotainer) and the account name (ataaazuredatalakecli ) with your own.
az storage fs file list -f azuredatalakecotainer --account-name ataaazuredatalakecli --auth-mode loginThe output below verifies that the files have been uploaded successfully to your Azure Data Lake Storage Gen2 account and their metadata.
6. Run the below command to create a new directory named my-data-lake-directory on your container (azuredatalakecotainer).
az storage fs directory create -n my-data-lake-directory -f azuredatalakecotainer --account-name ataaazuredatalakecli --auth-mode login
7. Finally, navigate back to your container in the Azure Portal, and you’ll see the newly-created directory in the list, as shown below.
From there, you can upload more new files and folders to the newly-created directory following steps three to five.

Conclusion
Apart from being cost-effective as you’ll only pay for storage that you use, Azure Data uses Azure Active Directory for authentication and authorization. Securing your data is a top priority anyway. And in this tutorial, you’ve learned how to create an Azure Data Lake Storage Gen2 account using the Azure Portal and the CLI.
With Azure Data Lake, you get to upload files and verify them, without making complicated processing of big data analytics workloads.
At this point, you can now securely store all your data in one place, and begin to analyze your data using the tools and services that Azure offers. Why not begin the Data Lake Analytics service and start querying and visualizing your data?


