


If you have a Microsft Azure account and are still managing resources only through the Azure Portal, you’re missing out. One of the best ways to reduce clicking and increase productivity is by using the Azure CLI.
The Azure CLI is a cross-platform toolset written in Python that allows you to manage nearly all of your Azure resources from the command line. No matter what operating system you’re on, the Azure CLI provides a consistent experience across all platforms.
In this tutorial, you’re going to learn how to get started with the Azure CLI. You’ll learn how to perform an initial configuration and create and remove some common resources using various Azure CLI commands.
Prerequisites
This article will be a tutorial. If you plan on following along step-by-step, you will need at least one of the following:
- Azure CLI – This tutorial will be using v2.20.0 on a Docker Container, but the commands will work all the same on other platforms.
- An Azure Cloud account – This tutorial can be done using the free account.
- Permissions to create resources within Azure via a Microsoft account perhaps using a service principal.
Getting Help with az help
Before you run any command in the Azure CLI, learn how to use the az help command. The Azure CLI has rich and plentiful help in the Azure CLI. This tutorial can’t possibly cover all commands so learning how to use az help is critical.
To get started, let’s navigate around the help system and check out how to find further information on various commands.
Navigating a Typical Help Example
Examples make the best learning material. Let’s cover how to use the Azure CLI help system by walking through an example of finding the needed command to create a resource group in Azure.
With your terminal open:
1. Run the az help command. This command returns two types of output; groups and subgroups.
Commands are organized as groups. You’ll typically see tutorials (and even documentation) refer to groups as “commands”. Groups are broken out in a hierarchical fashion with each group representing an Azure service.
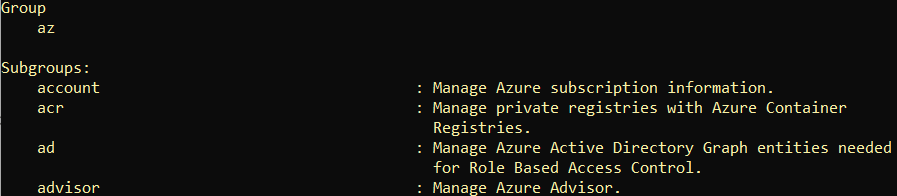
2. Scroll down until you find the subgroup called group. You can see from the description below, this subgroup is responsible for managing resource groups. Groups are ordered alphabetically.

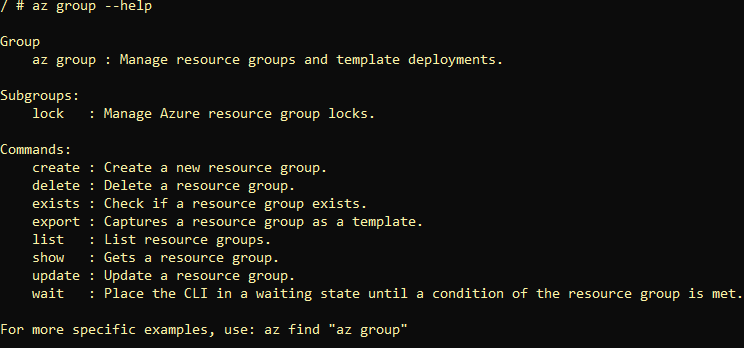
3. Once you’ve found the command you’re looking for, run it using the --help parameter. Using the --help parameter doesn’t make any changes; it returns all help documentation for a group or command.
az group --helpYou can see below the group group and a single subgroup (lock) with various commands inside.
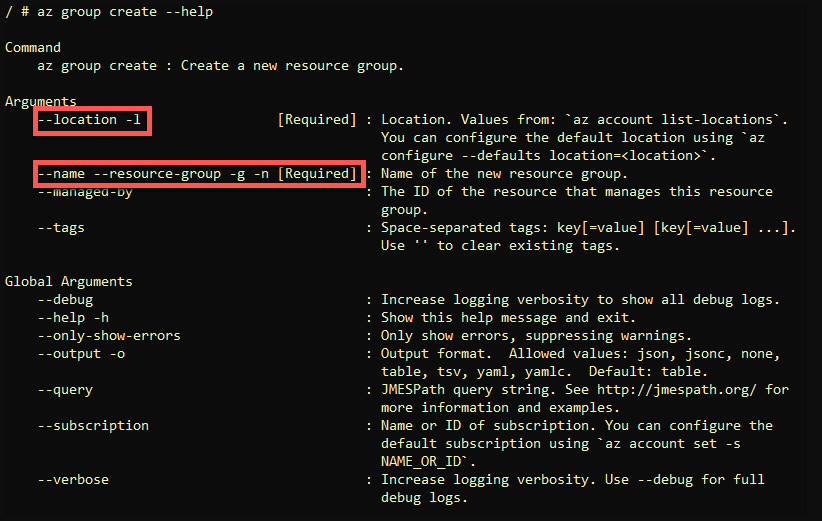
4. Since you want to create a resource group, the create command looks like the right command. Now continue getting more specific by appending a more granular command to the original az group reference and finding help.
az group create --helpReference the
--helpparameter on any command to see it’s help documentation.
The --help parameter now displays information about the create command. Commands have arguments as shown below. In this example, you now have the arguments required to specify a resource group and required location.
Finding Syntax Examples with az find
If you can’t easily find the group or command you’re looking for with the --help parameter, take a look at the az find command. This command searches for syntax examples using group/command references as shown below.
For example, instead of navigating the help system with --help as shown above, perform the same task with a single line with az find.
az find "az group create"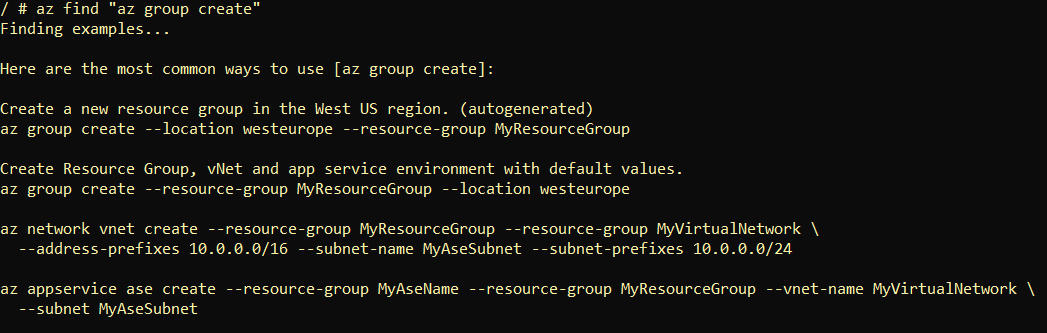
Assigning a Default Configuration with az configure
The Azure CLI has many commands and features. Each of these features has various configurations they reference like logging and data collection preferences. One of the first tasks you should complete when setting up the Azure CLI for the first time is running the az configure command.
In one command, the az configure command walks you through three different settings:
- Output Format – Seven different different ways that the Azure CLI returns output
- Logging – The ability to log all Azure CLI activity to a file
- Telemetry – To enable or disable sending information to Microsoft about how you use Azure CLI
To get started, assuming you already have the Azure CLI installed:
1. Open a terminal (Bash or PowerShell).
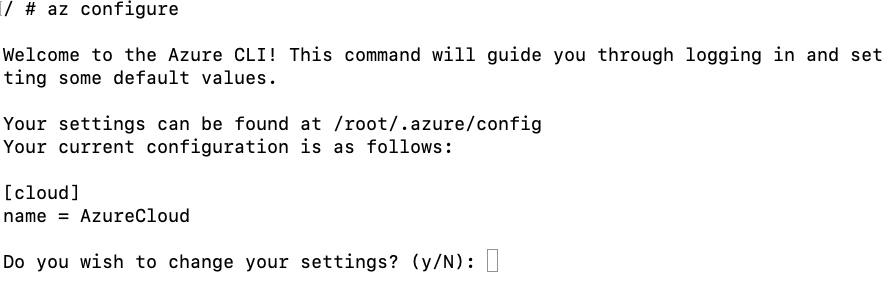
2. Type in the command az configure. You’ll be prompted with a simple menu letting you know that all settings will be stored in the .azure/config file. Press Y to continue.
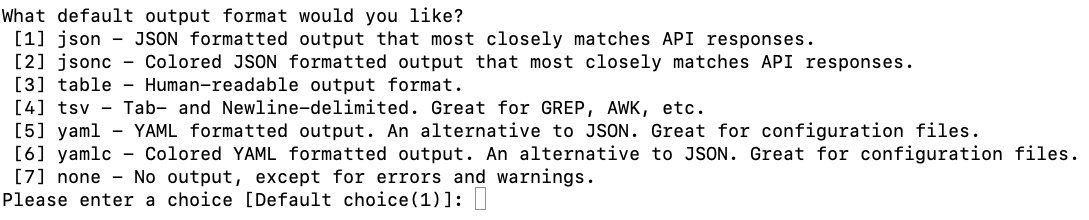
3. The command will first prompt you for your desired default output format. Here, pick your desired output. The default output format sets how your output will appear on the screen after executing a command or receiving an error message.
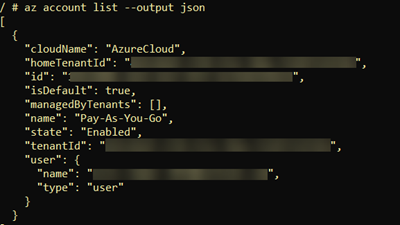
The below examples use the
outputparameter. Regardless of what format you pick as the default, you can always override the default output with theoutputparameter.
JSON (Java Object Notation)
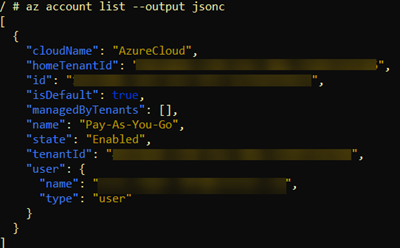
JSONC (Java Object Notation with comments\colorization)
Table

TSV (Tab-Separated Values)

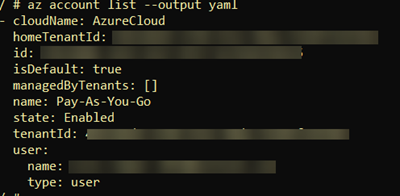
YAML (YAML Ain’t Markup Language)
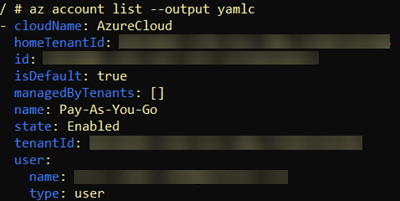
YAMLC (YAML with comments\colorization)
None – The Azure CLI will only return errors or warning.
4. Once you’ve set the output format, the Azure CLI will prompt you to enable logging. Here, select Y to enable logging all commands and output to a file.

Selecting Y here will create a log containing all the commands and output collected while using the CLI. This log is located in the $HOME/.azure/logs directory in Linux and macOS and %USERPROFILE%\.azure\logs in Windows.
Below you can see an example of what the log would look like.

az login5. The Azure CLI will then ask you to send telemetry data to Microsoft. Selecting Y here will send anonymous information to Microsoft on how you use the Azure CLI.

For more information on the information that Microsoft collects, refer to Microsoft’s privacy information on collecting anonymous data from Azure CLI.
Finally, az configure will ask to set the CLI object cache time-to-live value. You should leave this set at the default of 10.

Only change the CLI object TTL if advised by Microsoft when troubleshooting an issue with the Azure CLI.
Setting Default Parameter Values
The Azure CLI has various commands with the same parameters such as location and group. Rather than key in the values for these parameters every time for every command, you can set default parameter values.
To set parameter defaults, use the --defaults parameter on az configure. This parameter allows you to define a parameter and it’s default value. For example, perhaps you’re tired of typing in a location and group for various commands. No problem. Set a couple of default values.
The following example sets the default region (location) to westus2 and the resource group (group) to MyResourceGroup. Now whenever you run any Azure CLI command that has a location or group parameter, Azure CLI will automatically pass values to those parameters.
az configure --defaults location=westus2 group=MyResourceGroupIf you are using containers, you could set individual containers to manage specific regions, subscriptions or resource groups by setting the defaults in each container instance. You could create 4 containers in each container using az configure to set a default region and a default resource group using the command above.
Authenticating with a Browser
You’ve now learned the basics of using the Azure CLI, but you haven’t actually done anything yet. Let’s now take that step into creating some resources! But first, you must log in to Azure, using the command, az login.
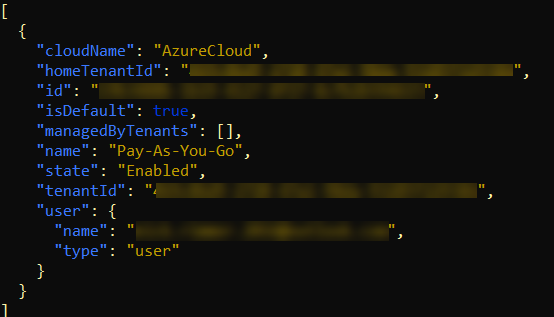
If you have multiple Azure subscriptions, run the
az account listcommand to find all subscriptions. When you find the subscription, runaz account set --subscription <subscription name>to set the subscription to use for the session. You can also use the globalsubscriptionparameter to explicitly specify a subscription.
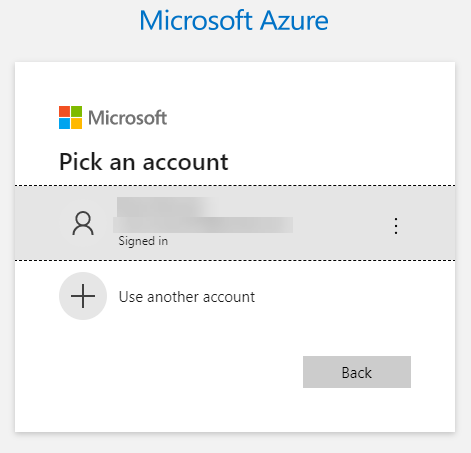
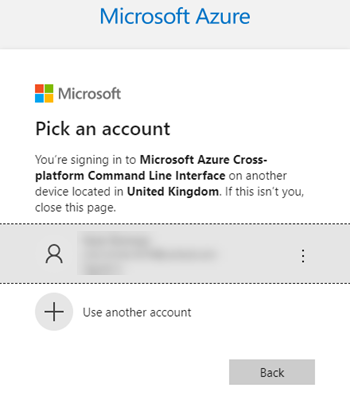
1. Open a terminal and run az login. This command opens a browser window that takes you to a page to provide your username and password.

2. Provide your Azure account credentials or click on an existing user account as shown below.
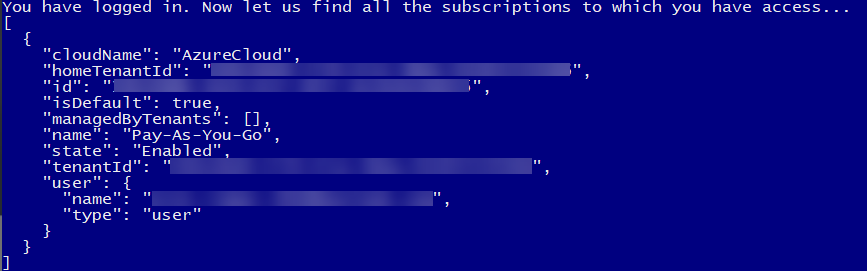
3. Once Azure authenticates your account, close your web browser and return to your Azure CLI session. The az login command returns information about your subscription to confirm you now have an authentication token.
Authenticating Using a Device Code
If you’re on a system without a browser or want to download an authentication token on another computer, use the --use-device-code parameter. This parameter allows a user to use a code supplied from another device to authenticate the user.
To authenticate using a device code, open a terminal and:
Run az login using the --use-device-code parameter. The az login command, this time, will not open a browser. Instead, it will provide a code to provide to the device login page on another computer.
az login --use-device-code
2. On a different computer, navigate to https://microsoft.com/devicelogin, paste in the code supplied, and click Next.
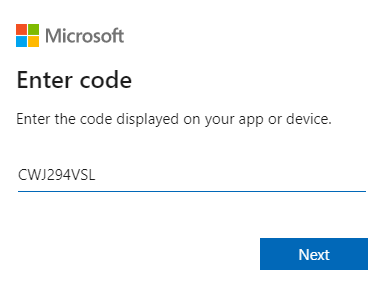
3. Now enter your credentials to authenticate to Azure and close your browser, if not needed.
Back in the Azure CLI session, az login will return your subscription information.
Azure CLI Output Options
As mentioned, the Azure CLI can return output in different ways. You can define the default output and change it on the fly with the output parameter. But the output parameter isn’t the only parameter that changes output behavior.
To change up the verbosity, filter output or modify error output behavior, use the following parameters.
query– Uses the JMESPath query language to filter output for all commands. Reference this article to learn more.verbose– Returns information about resources created in Azure and extended information about those resources.debug– Returns a low-level amount of information about CLI operations used for debugging.only-show-errors– Show errors and suppress warnings.
Creating a Resource Group
Now that you’re authenticated to Azure, you’re free to manage all of the resources you have permission to. Let’s first run through a common example of creating a resource group.
Assuming you’re on a computer with the Azure CLI installed and you’ve already authenticated to Azure with the CLI:
Create a resource group using the az group create command as shown below. This command is creating a resource-group called TESTGrp in the North Europe location and returning all verbose output.
az group create --location northeurope --resource-group TESTGrp --verbose
2. Now confirm Azure created the resource. az group list
az group listNotice that you’ve created the TESTGrp resource group.
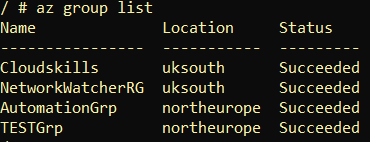
3. Perhaps you have a lot of resource groups to sift through. Instead of scrolling, use the query parameter to narrow down the list. The below command only returns resource groups in the North Europe location using JMESPath.
az group list --query "[?location=='northeurope']"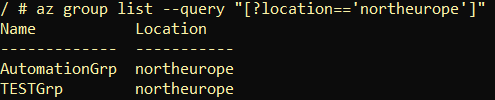
Creating A Linux Virtual Machine
For this last example, learn how to create an Azure VM with the Azure CLI. Creating virtual machines and the configuration around them is a good skill to learn. Creating Azure VMs is a common task you may perform repeatedly during your cloud journey.
In this exercise, you’ll create an Azure Linux VM with default settings and deploy it into the resource group created in the previous section.
An Azure VM consists of many Azure resources all working together like a disk image, virtual network adapter, virtual machine, and so on.
To create an Azure VM with the Azure CLI:
1. Run the az vm image list command to find all available VM images for the VM. This command returns all of the cached/offline images. az vm image list
az vm image listFor this demo, choose the UbuntuLTS image as highlighted below.
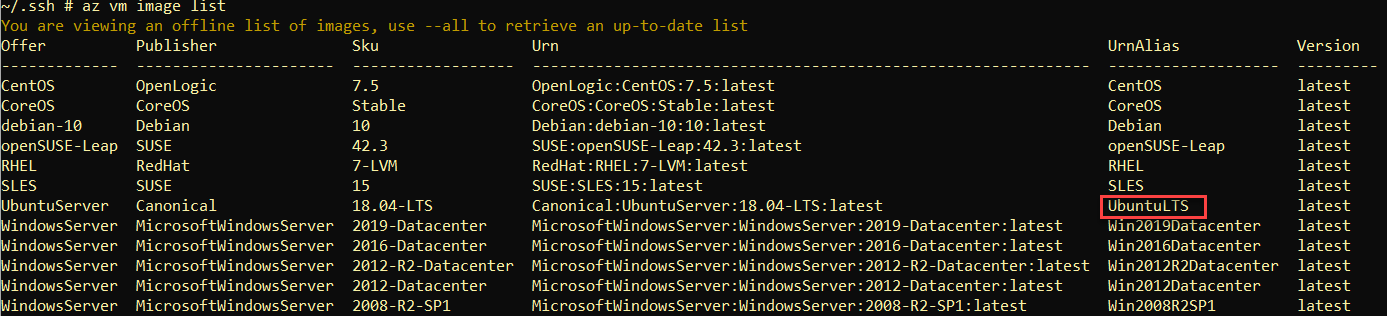
The Azure CLI maintains a cached list of all VM images. If the UbuntuLTS image doesn’t show up, use the
allparameter to get an updated list.
2. Once you know the disk image to use for the VM, create the VM with az vm create. The code snippet below creates a VM name of ATAVM1 using the UbuntuLTS image in the resource-group TESTGrp. When Azure creates the VM, it will generate the SSH keys (generate-ssh-keys) to connect to it later and return output in JSON (output).
az vm create --resource-group TESTGrp \
   --name ATAVM1 \ ## hostname for the virtual machine
   --image UbuntuLTS \ ## Image name gathered with az vm image list
   --generate-ssh-keys \ ## Auto generates SSH keys for use with VM
   --output json \ ## override for format output to return JSON
   --verbose ## extra output
Split a single longer Azure CLI commands on separates lines using a trailing backslash.
The
az vm createcommand has many more ways to configure building a VM. Remember the help system is your friend!az vm create --help
If the command was initiated successfully, you should see something similar to the screenshot below.
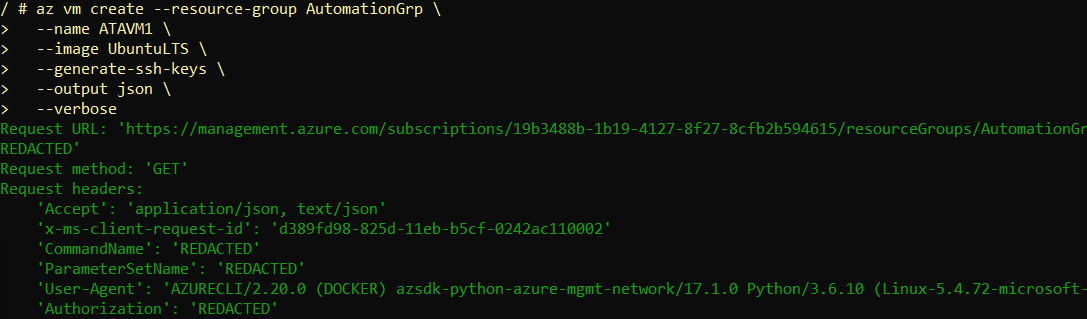
By using the
verboseparameter, you will see the actual REST API method and parameters used in green.
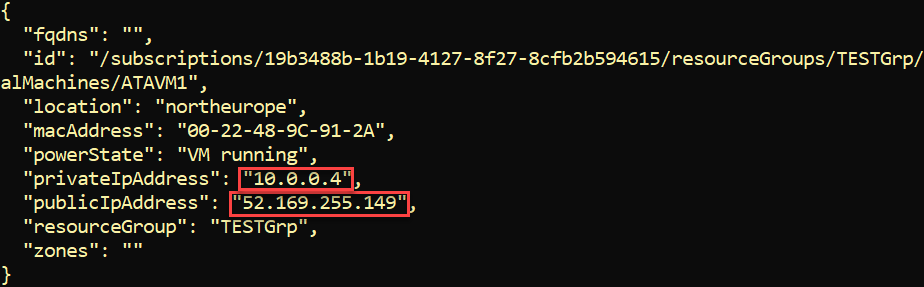
3. When the deployment completes, the last section of the output will display information about your VM. Most notably for this demo, copy the public IP address. You’ll need this to connect to the VM over the Internet.
At this point, now connect to the Ubuntu VM via SSH using the VM’s public IP address found above. To do so, open your favorite SSH client and connect to the VM as the user azureuser as shown below. By default, the az vm create command creates a local user called azureuser.
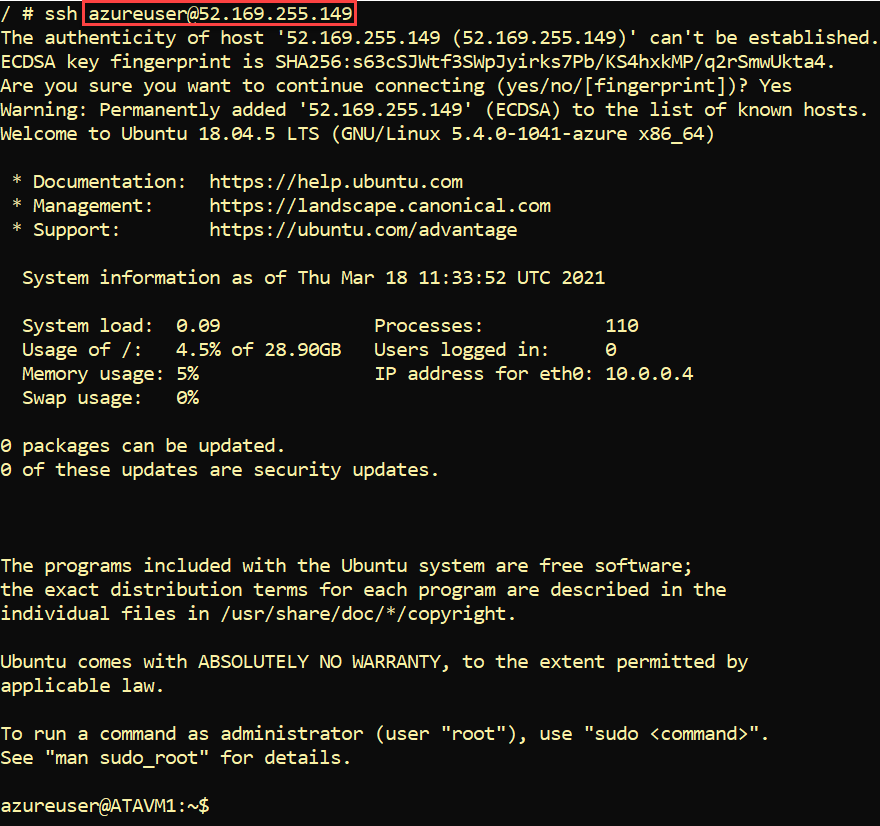
You were able to SSH to the VM without a password because you used the
generate-ssh-keysparameter when creating the VM. This downloads the private key to your ~/.ssh directory and uploads the public key to the VM allowing you to authenticate.
5. Now clean up the VM and the resource group.
az group delete --name TestGRPNext Steps
You should now have the Azure CLI ready to go. You’re now ready to manage some resources! So what next?


