


Nowadays, data is the new oil, but how does this affect a business transitioning to the cloud? or what happens when you migrate to the cloud with the raw and disorganized data stored in the different storage systems? Fortunately, Microsoft Azure Data Factory has answered these questions.
Microsoft Azure Data Factory offers an extract-transform-load (ETL) and data integration services. These services allow you to build data-driven workflows called data pipelines.
Sounds good? Let’s explore more about how awesome Azure Data Factory is!
Prerequisites
If you’d like to follow along with the step-by-step tutorial, be sure you have an Azure subscription. If you don’t have one, you can register for a free Azure account.
What is Azure Data Factory?
In a nutshell, Azure Data Factory provides a cloud-based data integration service that orchestrates the migration and transformation of data between different data stores and compute resources.
One of the interesting actions that you make with Azure Data Factory is to copy data to and from different Software-as-a-Service (SaaS) applications, on-premises data stores and, cloud data stores. And, during the copying process, you can even convert file formats.
After getting the data, you continue working on the transformation side, called Data Flows provided by the Integration Runtime (IR), taking the ETL process seriously.
Creating an Azure Data Factory
An introduction wouldn’t be enough to understand how Azure Data Factory works, so you’ll create an actual Azure Data Factory!
1. First, open your favorite web browser and navigate to the Azure Portal.
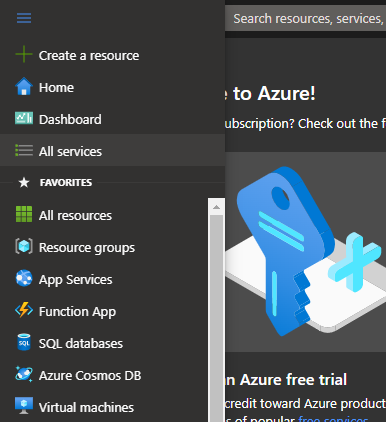
2. Next, click on the portal menu icon at the top-left of the page and select All services from the menu panel. Doing so lets you view all services available to you.
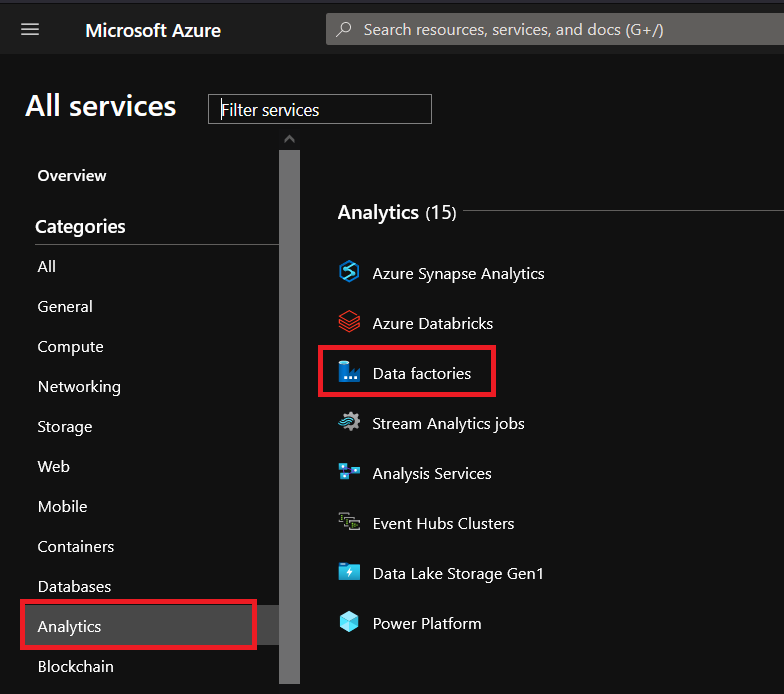
3. Click on Analytics —> Data factories to view the overview page where you’ll see all of your previous data factories’ resources.
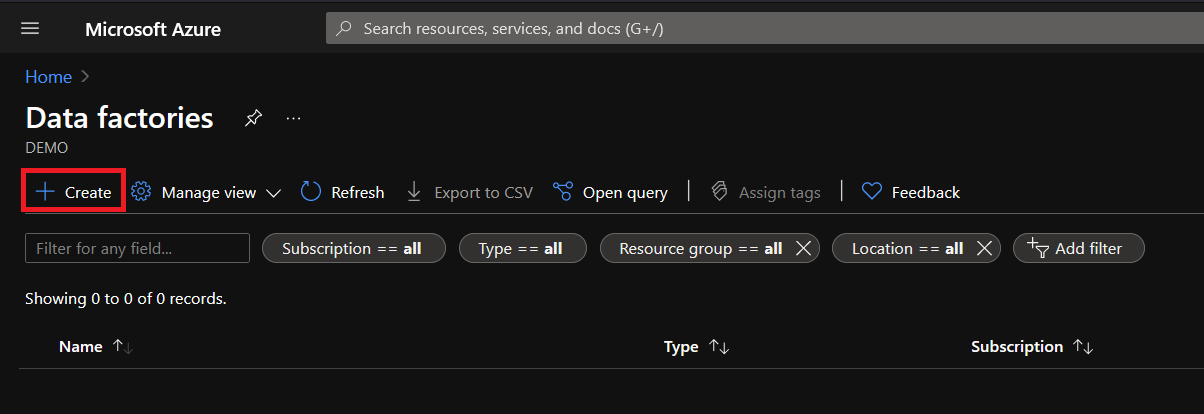
4. Now, click Create to open the assistant to create a new data factory resource.
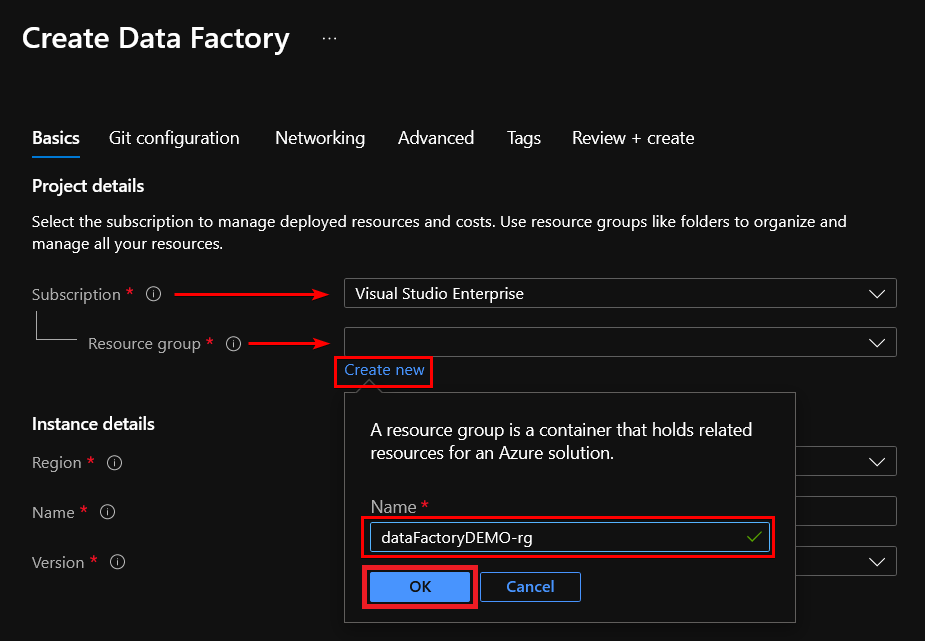
5. Select the subscription and resource group to place the new resources. But if you prefer to create a new resource group, click the Create new link, enter your preferred name and click OK.
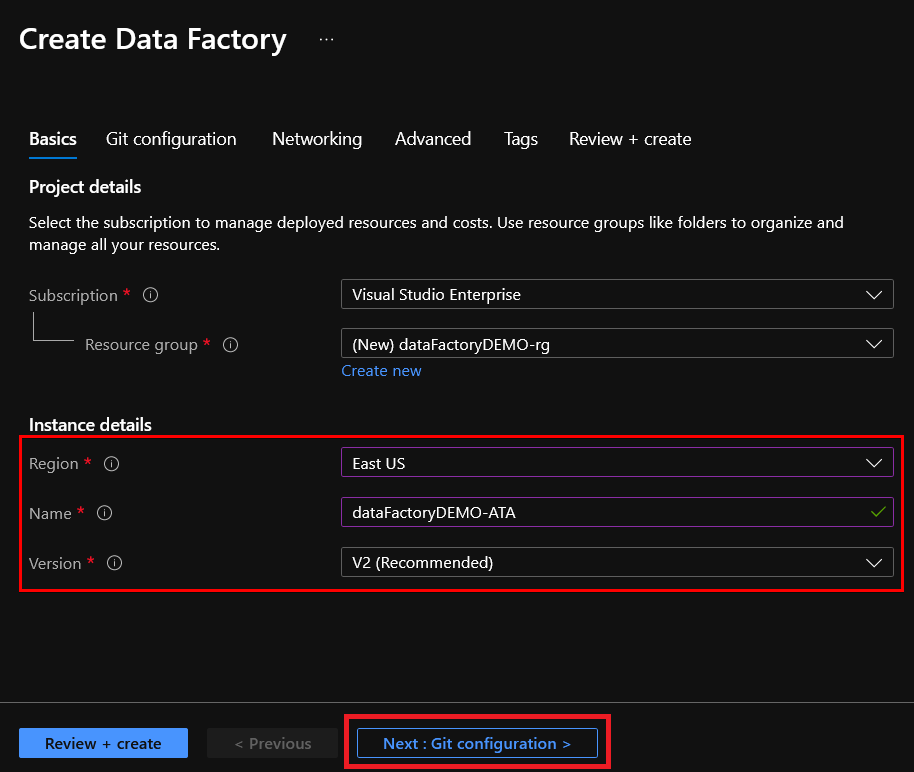
6. Now, configure the instance details with the following:
- A region to create the resource, typically choosing the location closest to you.
- A name you prefer for the resource.
- Check that the version is V2, to get the latest features and improvements (recommended by default).
- Click on the Next: Git configuration button to continue the creation wizard.
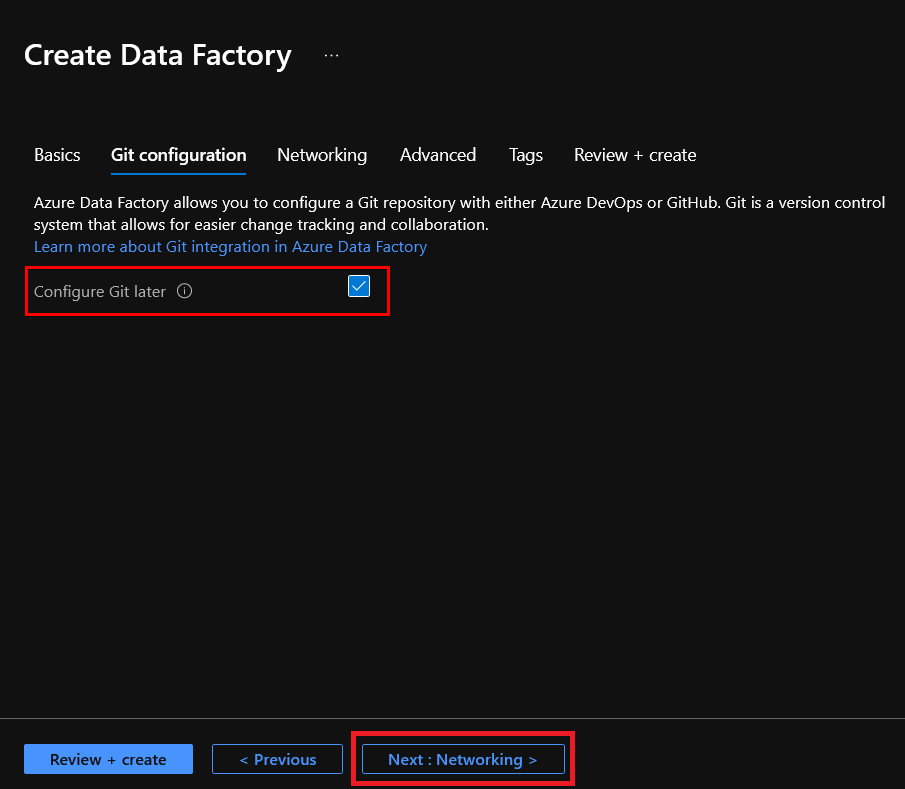
7. Check the box Configure Git later because now you are only creating the instance. Click on Next: Networking to access the Networking configuration tab.
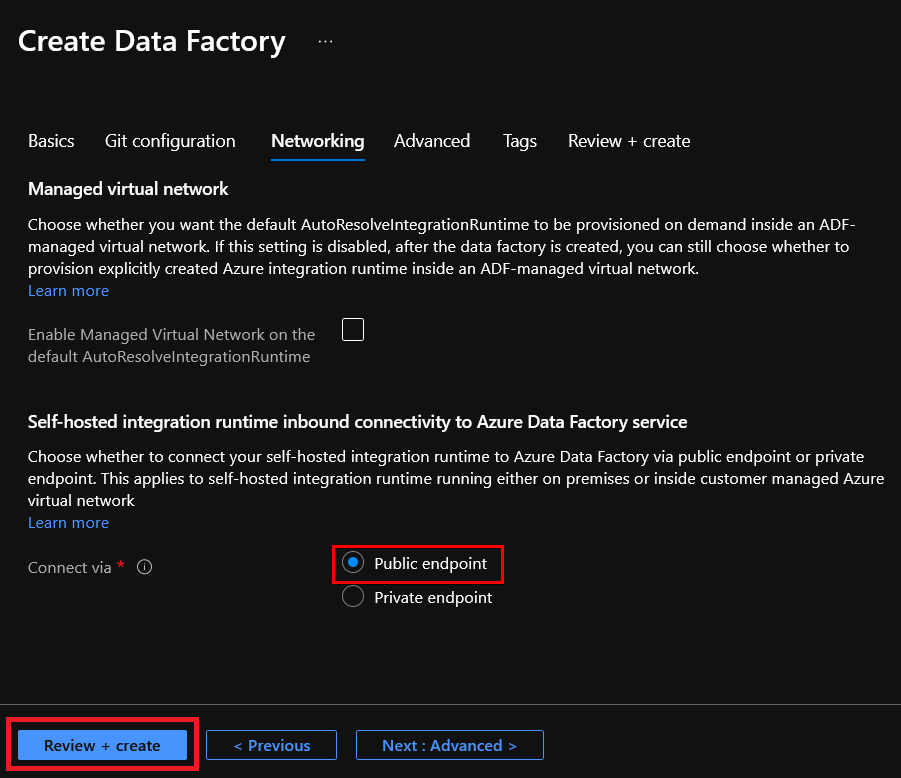
8. Click on Review + create to finish the config steps. By default, the configuration is set to Public endpoint, which is okay.
The Advanced config tab is necessary if you need to specify a custom key to encrypt your data and not use the Microsoft-managed key. While the Tags config tab is required, for example, when you use tags to identify resources within a project. For this demo, these tabs are not necessary.
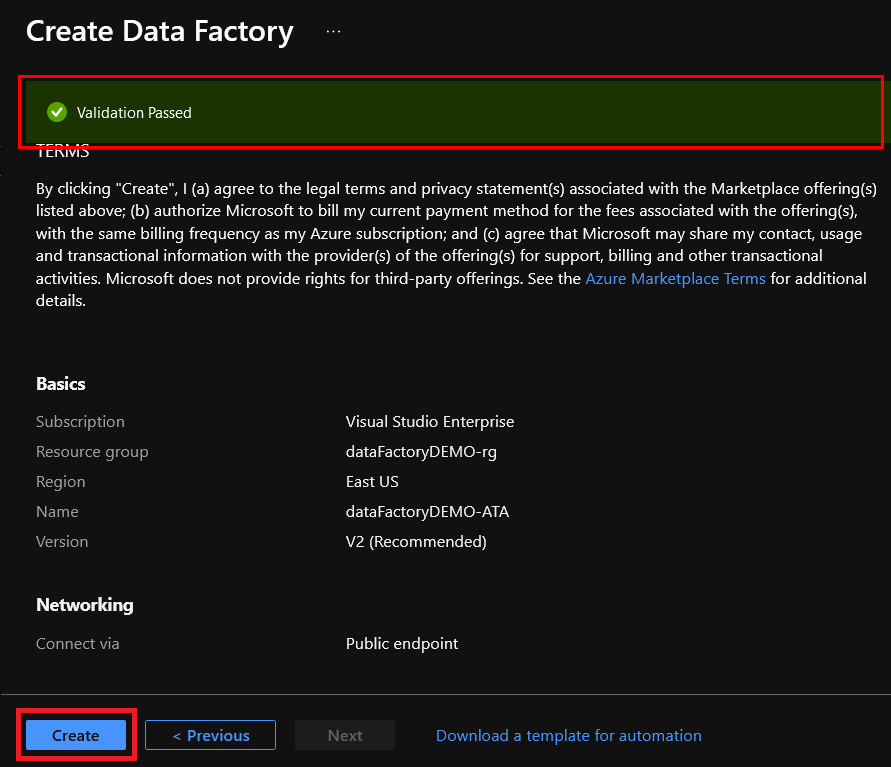
9. Once all the final validation passes, click on the Create button to instruct Azure to begin creating the instance of the Azure Data Factory.
Creating an Azure Data Lake Storage Account
Now you have an Azure Data Factory, you can now start copying data. But first, create the Azure Data Lake Storage Account to copy data into using the Azure Data Factory.
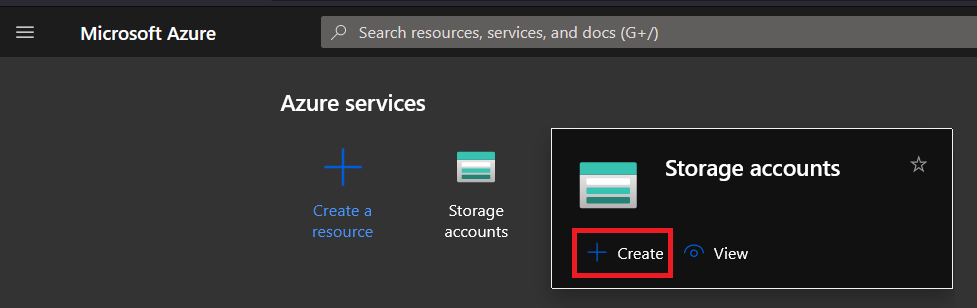
1. On the Azure Portal, hover your mouse on the Storage accounts button, and click Create on the pop-up window that appears, as shown below. Doing so redirects the page to the “Storage Account” page.
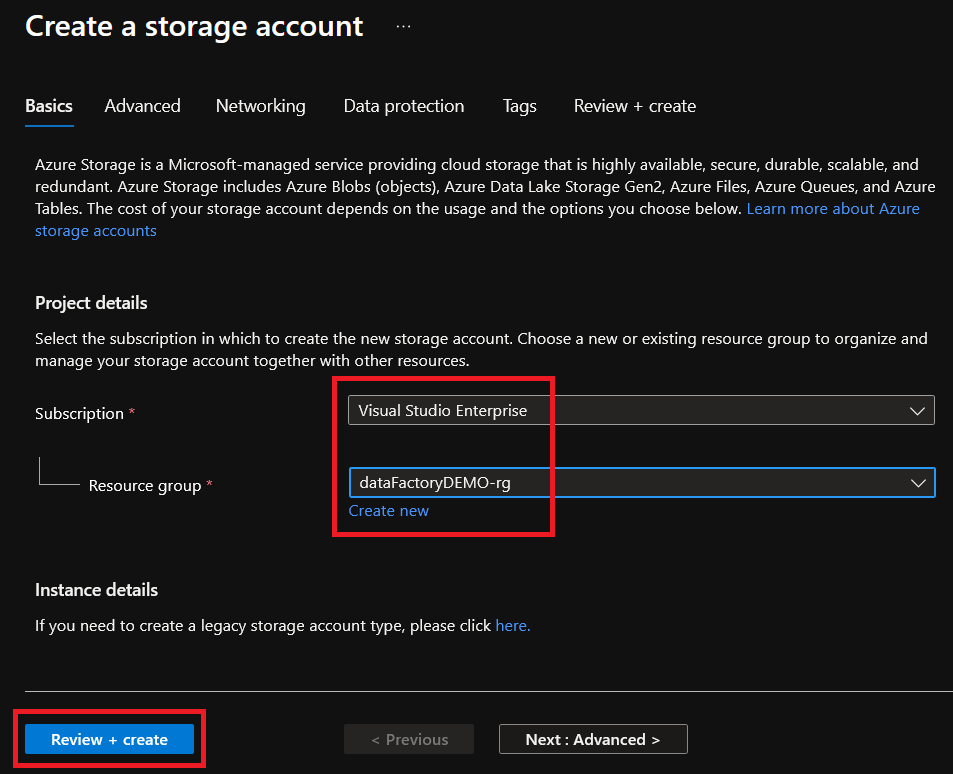
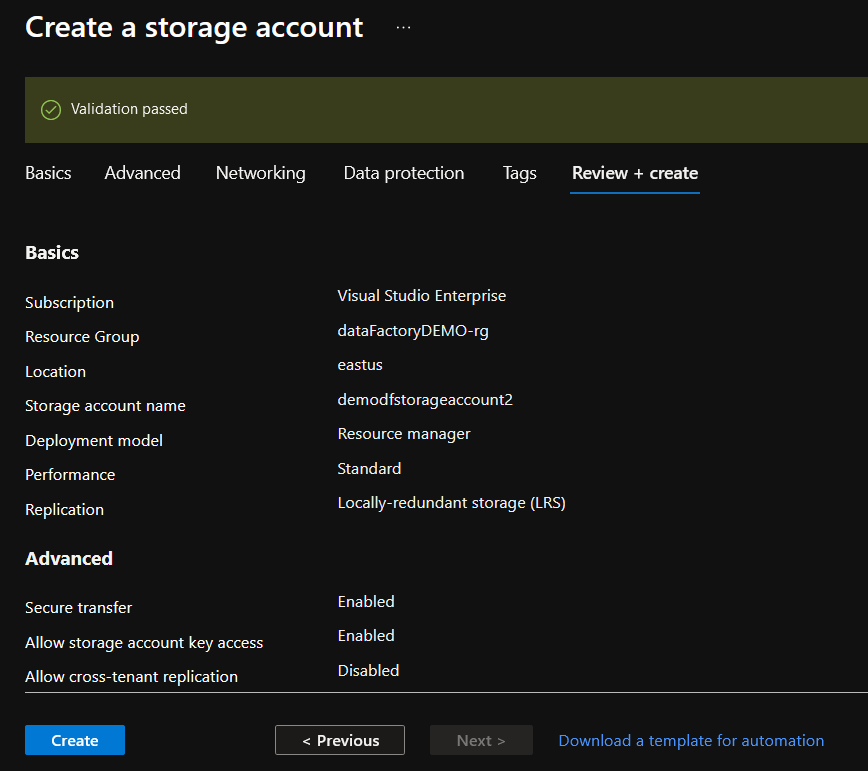
2. Under the Basics tab, choose the same resource group and region you selected in the “Creating an Azure Data Factory” section (step six).
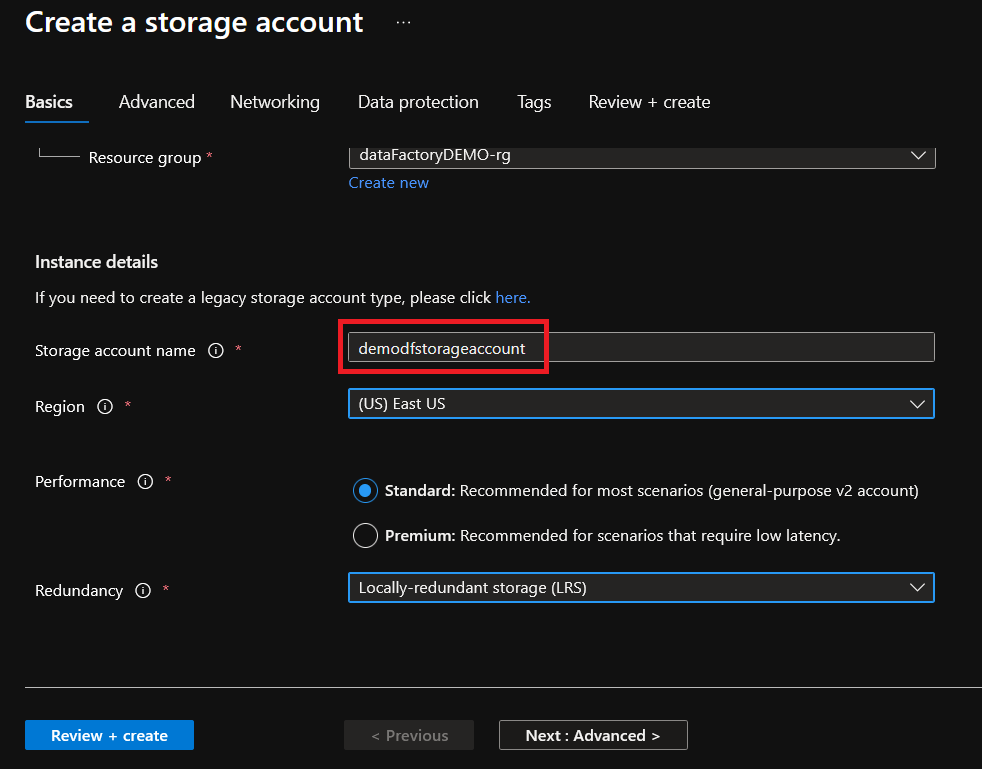
3. Give your storage account a unique name, but for this example, the storage account is named demodfstorageaccount. Choose Standard performance option and change redundancy to Locally-redundant storage (LRS) to keep costs down for these demos. Click Next: Advanced to get to the Advanced tab.
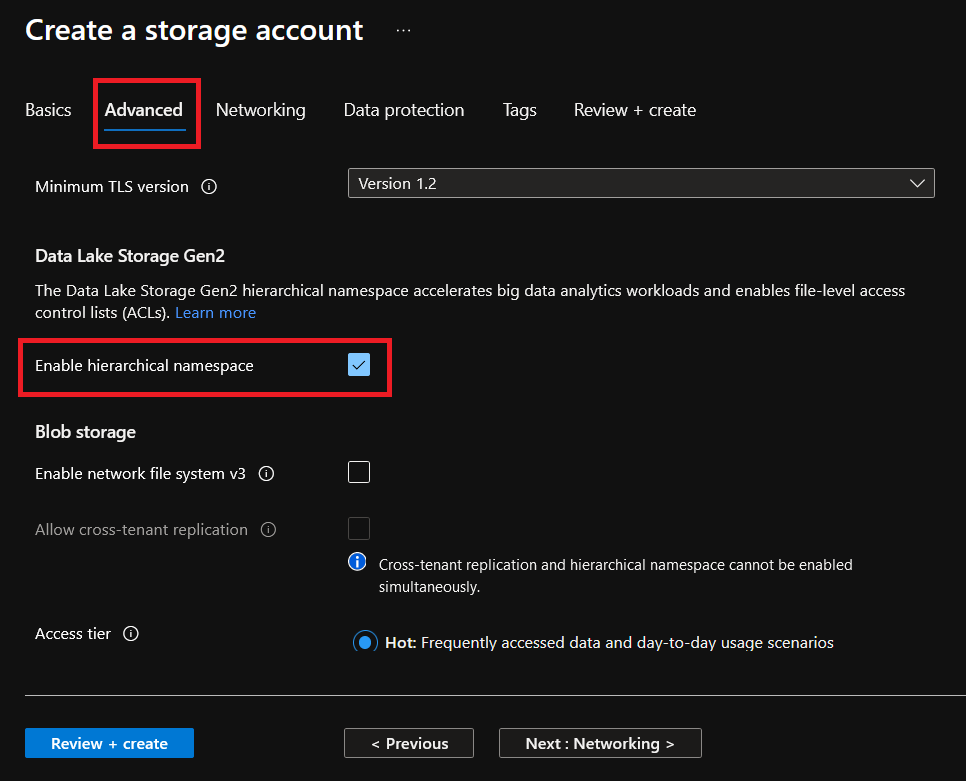
4. Over the Advanced tab, under Data Lake Storage Gen2, check the enable hierarchical namespace option. Selecting this option turns your storage account into a data lake instead of a regular blob storage account.
Click on Review + create to review your storage account settings.
5. After the validation, click on the Create button to finish the creation of your Azure Data Lake Storage Account:
Performing a Data Ingest with the Copy Data Tool
You now have an active storage account, so all that’s left now is to test if the storage account is working. You’re going to copy a sample CSV file into a blob container called weather in your Azure Data Lake Storage Account.
The selected datasets for this demo are from the National Centers for Environmental Information / National Oceanic and Atmospheric Administration (NCDD-NOAA). They also have a sample database for the daily summaries of the Global Historical Climate Network that you can download for free as CSV files.
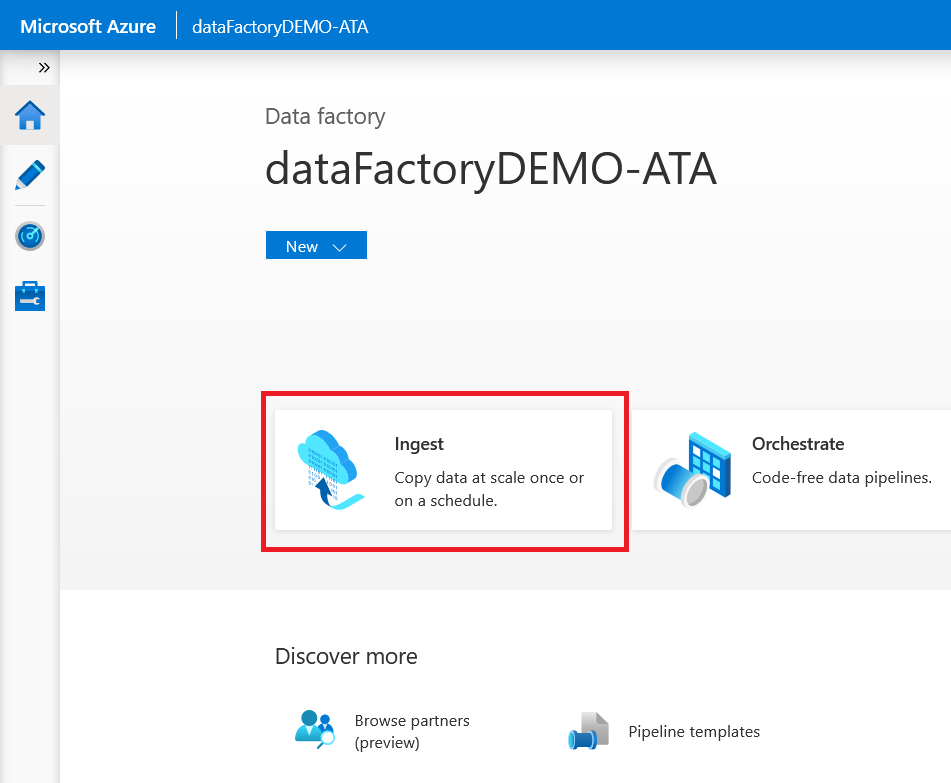
1. In your browser, navigate to the Azure Data Factory home page, and then click Ingest to open the Copy Data Tool where you’ll create a copy job.
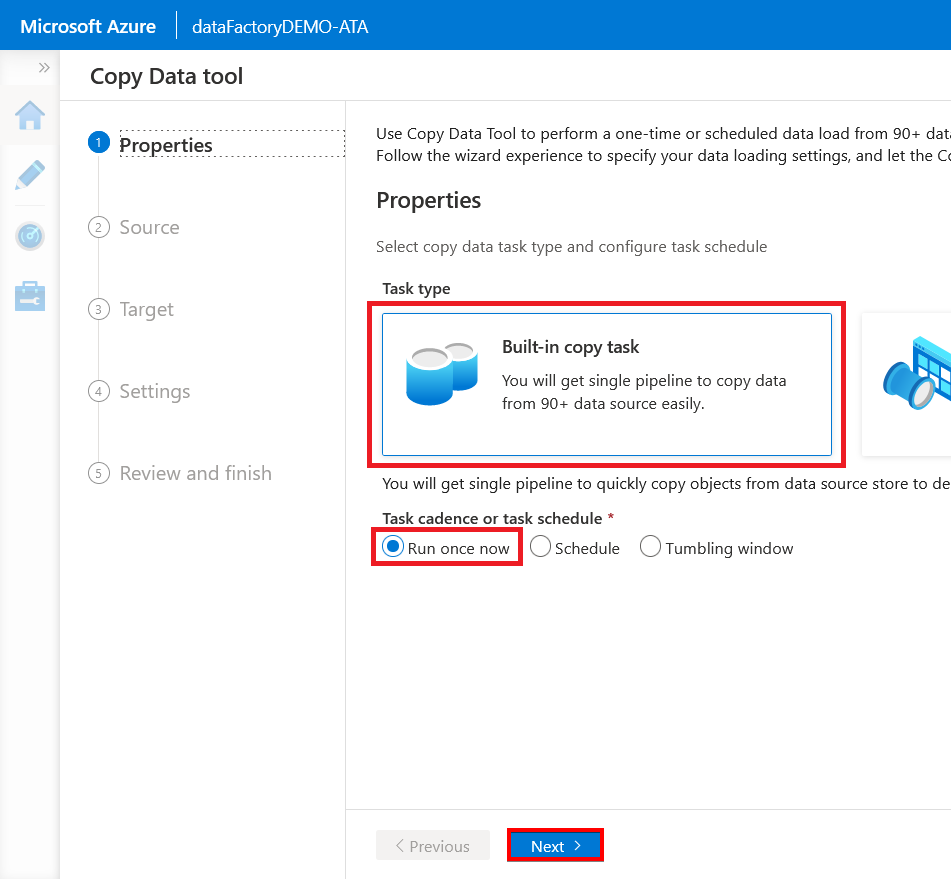
2. On the Properties page, choose the Built-in copy task option to create a single pipeline. Keep the default Run once now option selected for the task schedule, and click Next.
Selecting the Run once now option runs the copy job immediately after you set it up.
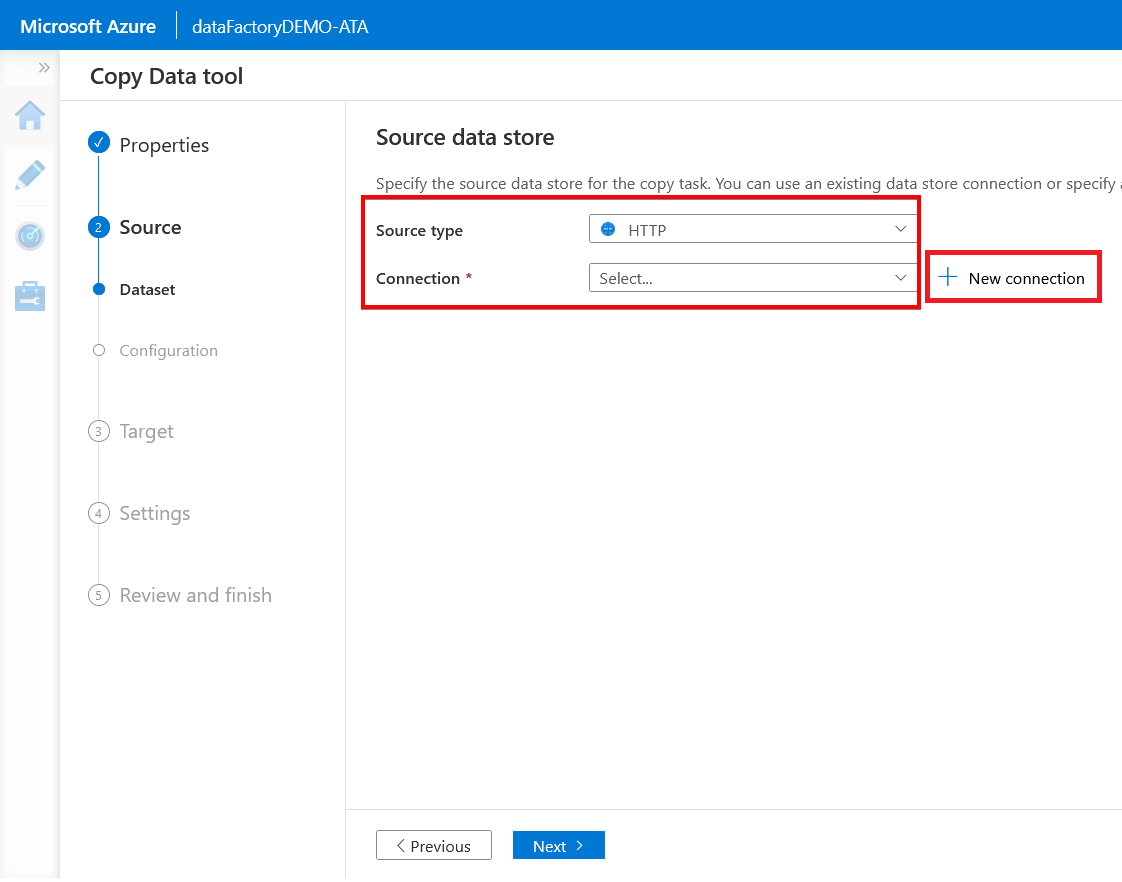
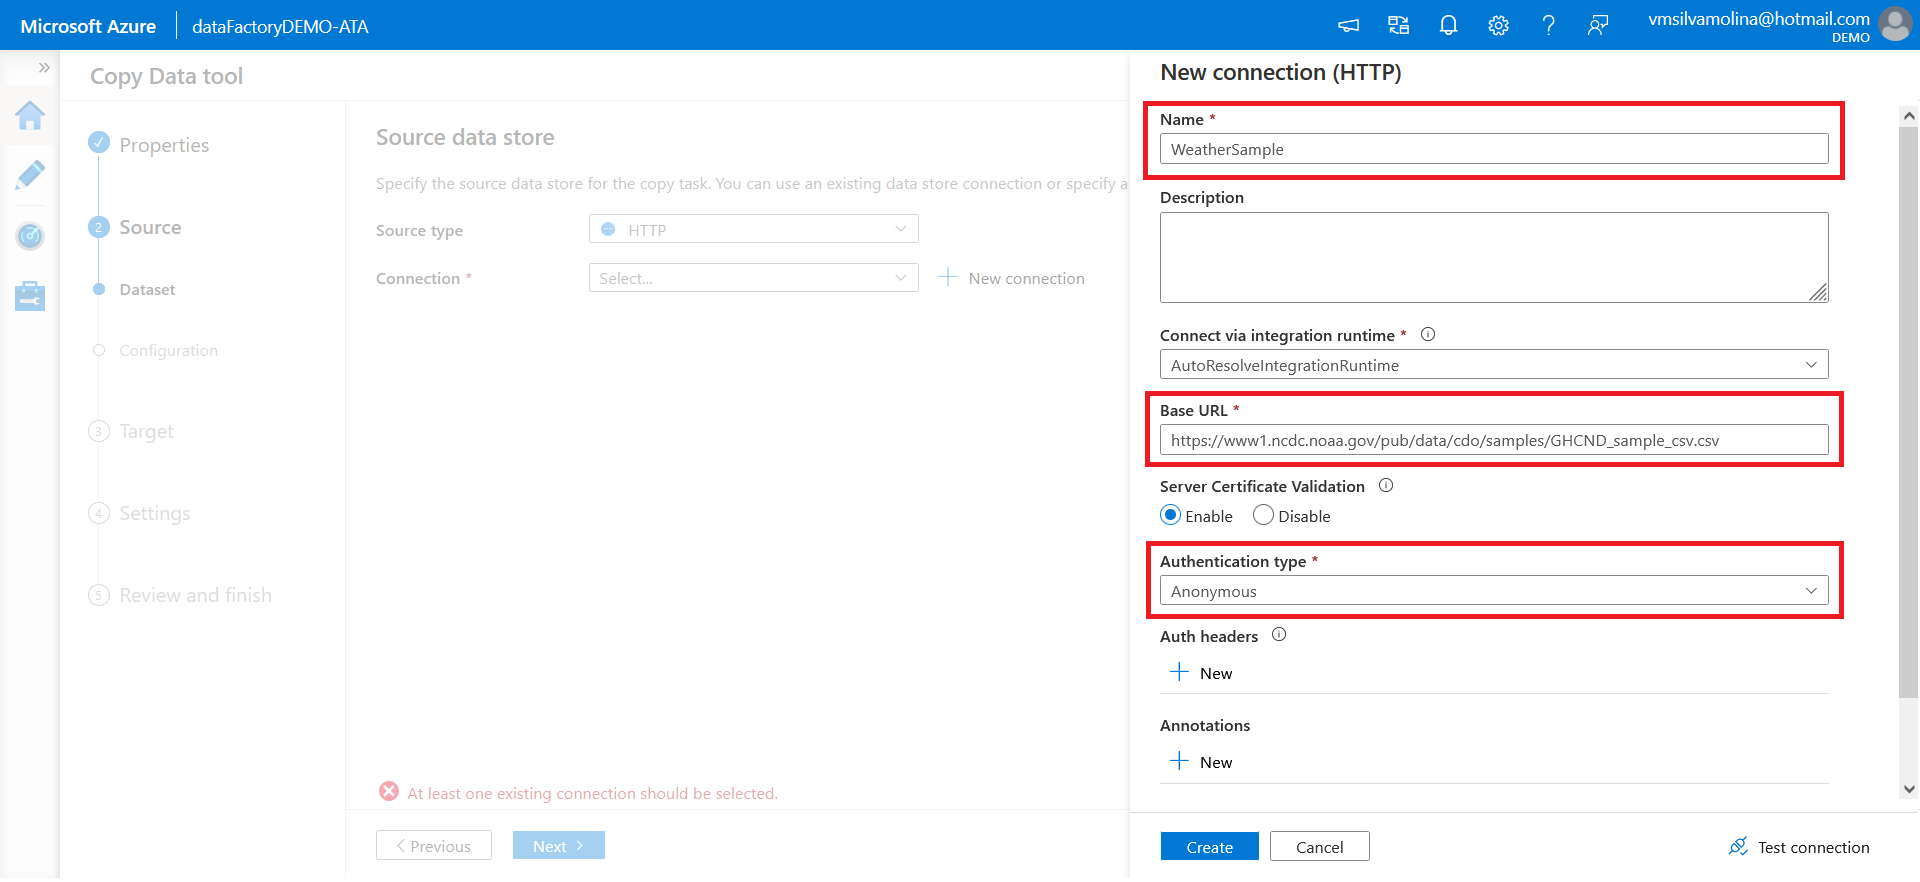
3. Next, on the Source data store page, choose HTTP from the Source type dropdown to use the selected dataset for this demo. Click New connection to specify the source URL.
Configure the new connection with the following:
- Give a name to the connection (the definition of the data source)
- Copy and paste the dataset URL below for this demo to the Base URL field: https://www1.ncdc.noaa.gov/pub/data/cdo/samples/GHCND_sample_csv.csv
- Change the Authentication type to Anonymous
- Keep the other default options, and click on
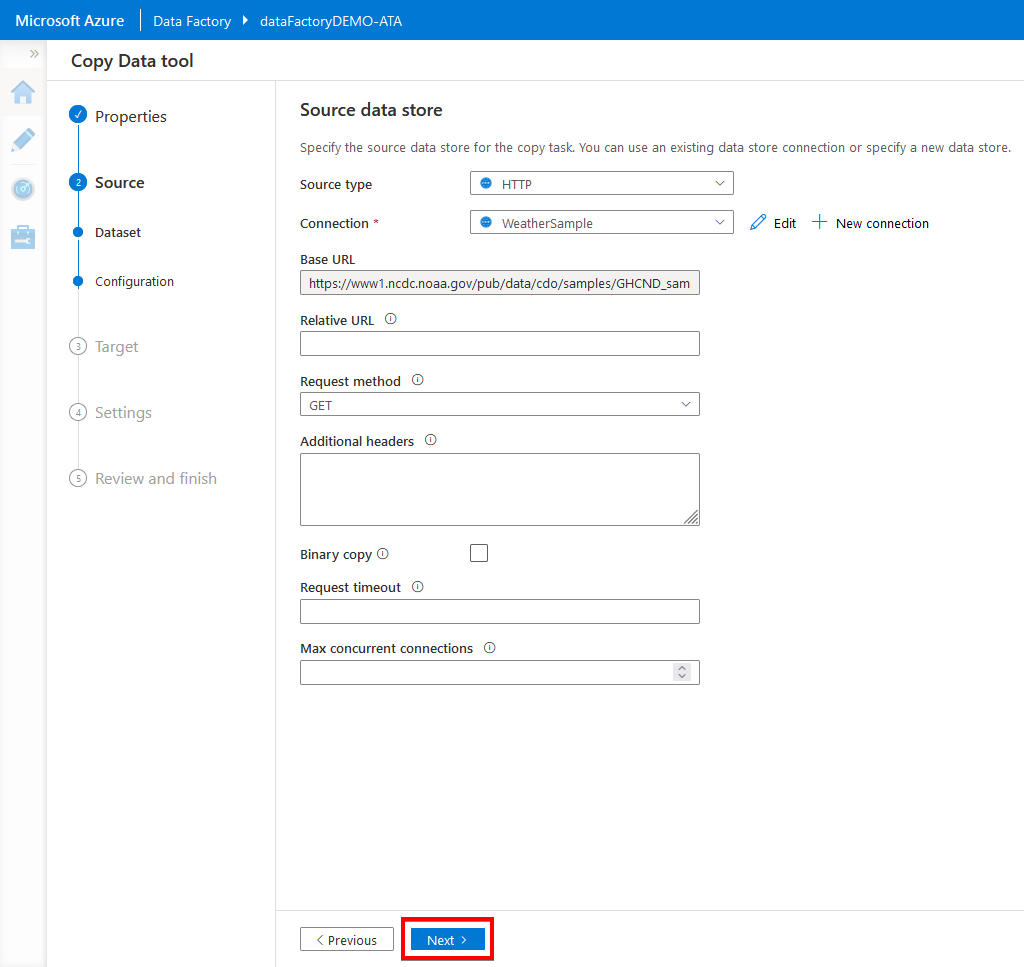
5. Click on Next since you don’t need to change or specify anything for the source data store in this demo.
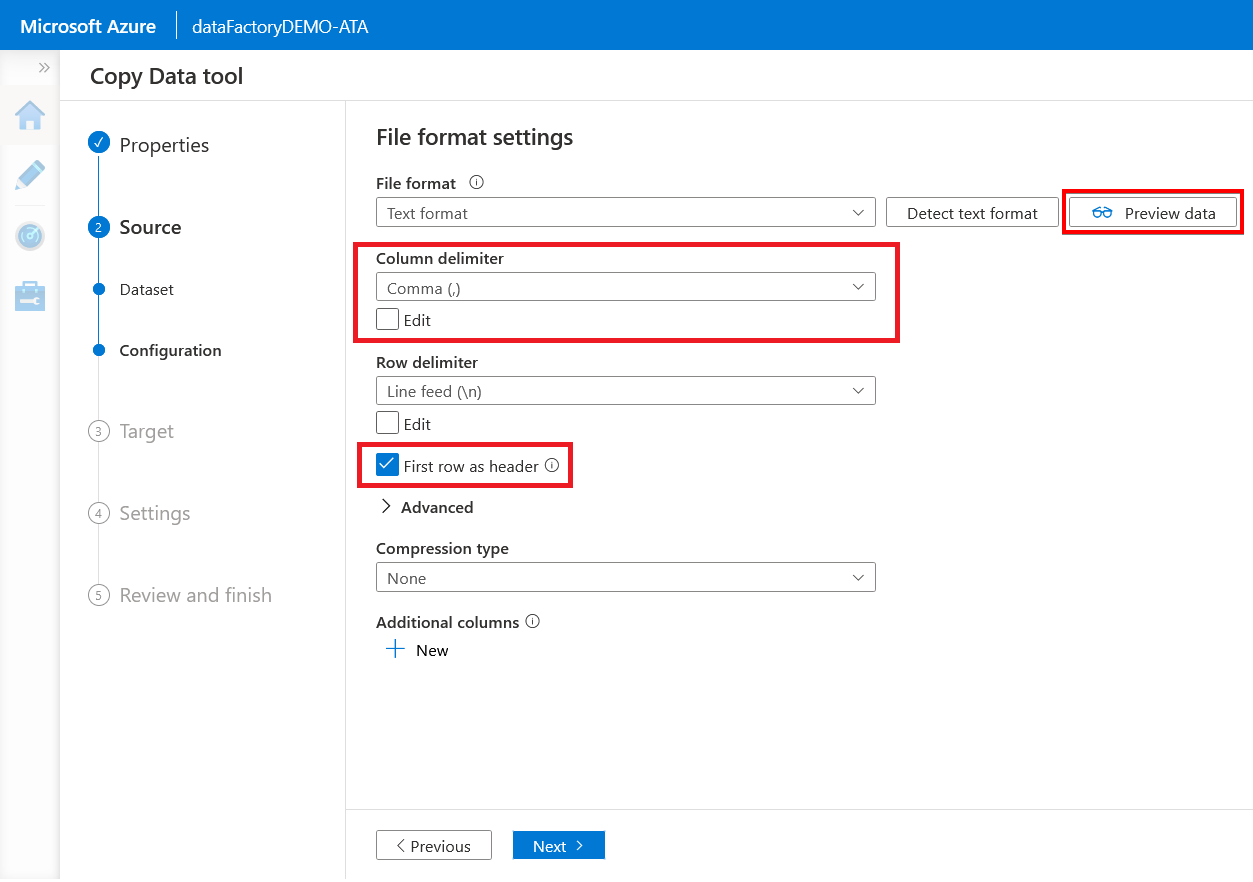
6. Now, check the First row as header option to specify whether to consider the first row as a header. Set the Column delimiter as Comma (,) because the format of the origin’s dataset is a CSV file.
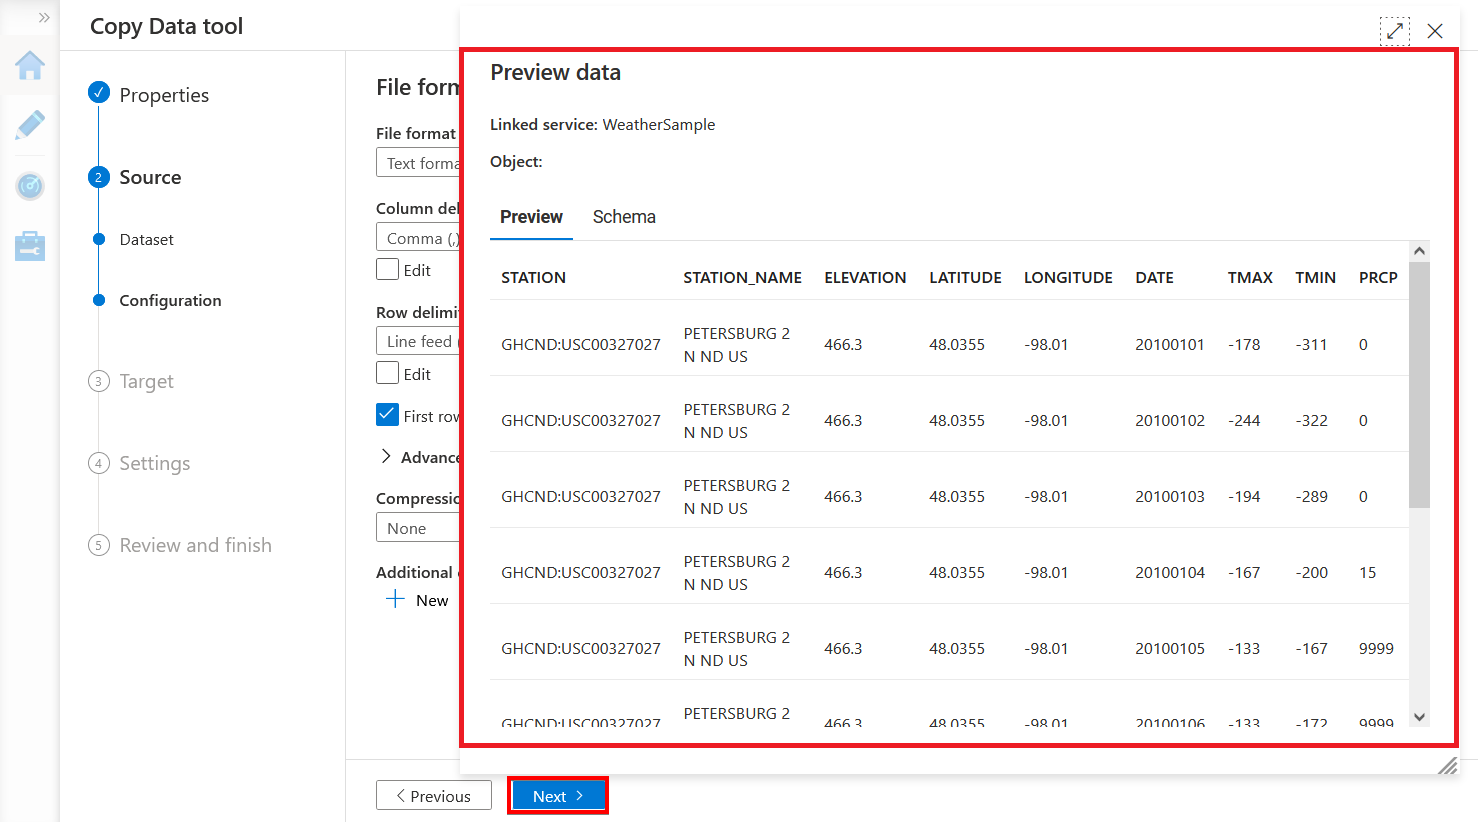
Click Preview data to view the sample dataset shown in the next step.
7. Scroll through the dataset to see its content, then close the window and click Next.
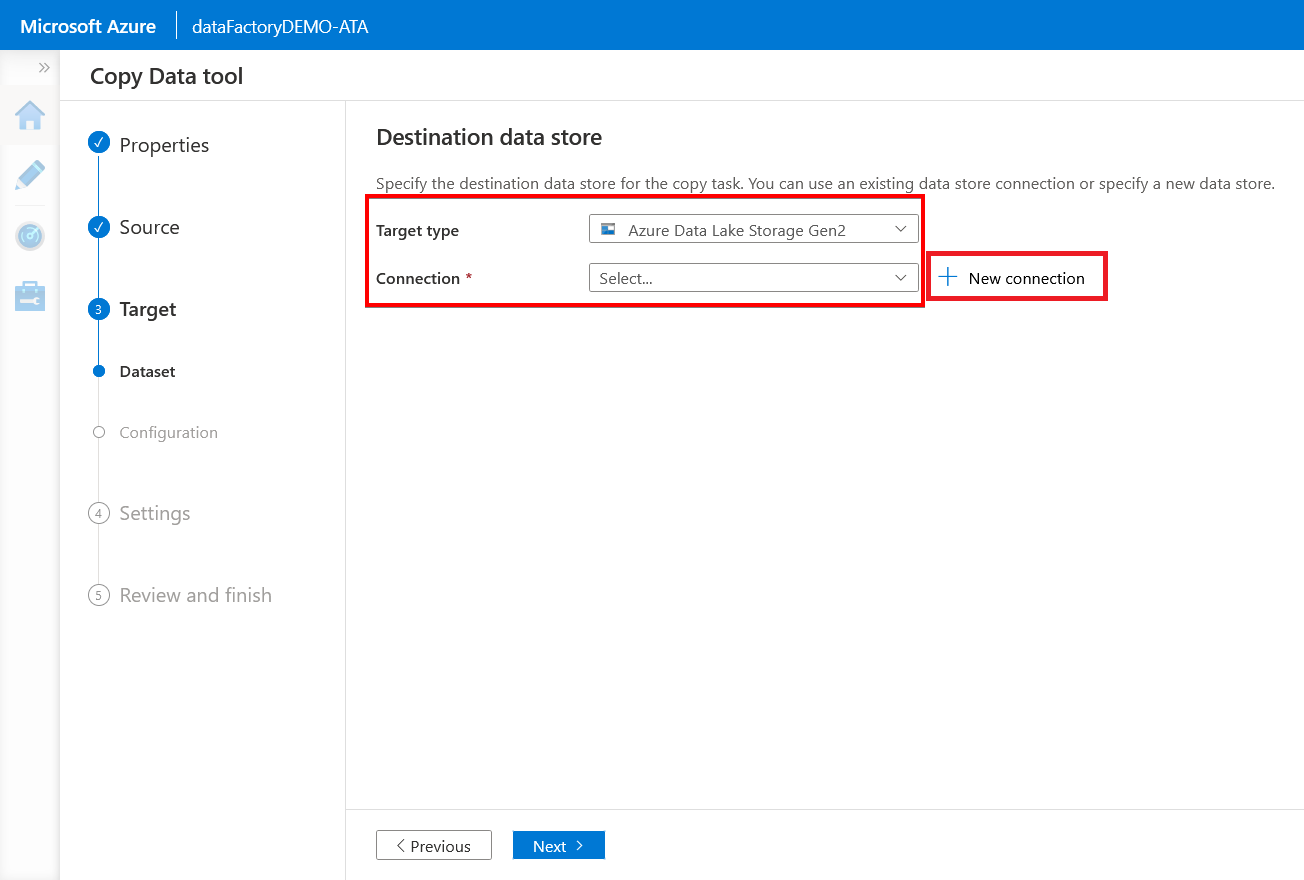
8. On the Destination data store page, choose your previously created storage account (Azure Data Lake Storage Gen2) from the Target type dropdown.
Click the New connection button to open the assistant to create a new connection in the next step.
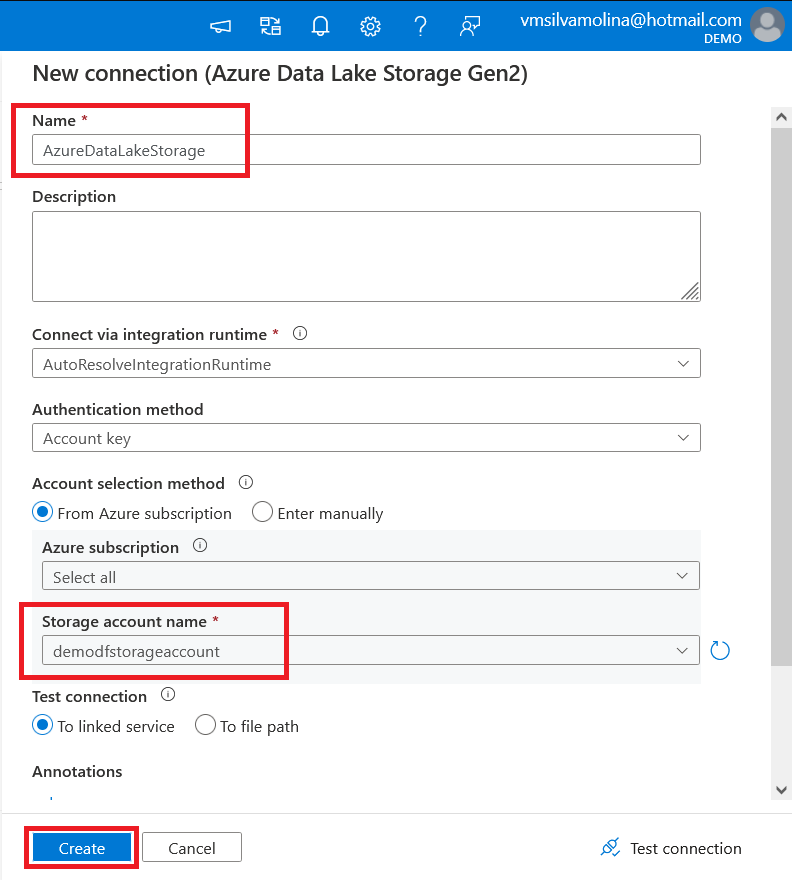
9. Configure the new connection with the following:
- Enter your preferred name for the new connection in the Name field.
- Click on the Storage account name dropdown and choose the storage account you previously created (demodfstorageaccount) — “Creating an Azure Data Lake Storage Account” section (step three).
- Click on Create to create the new connection.
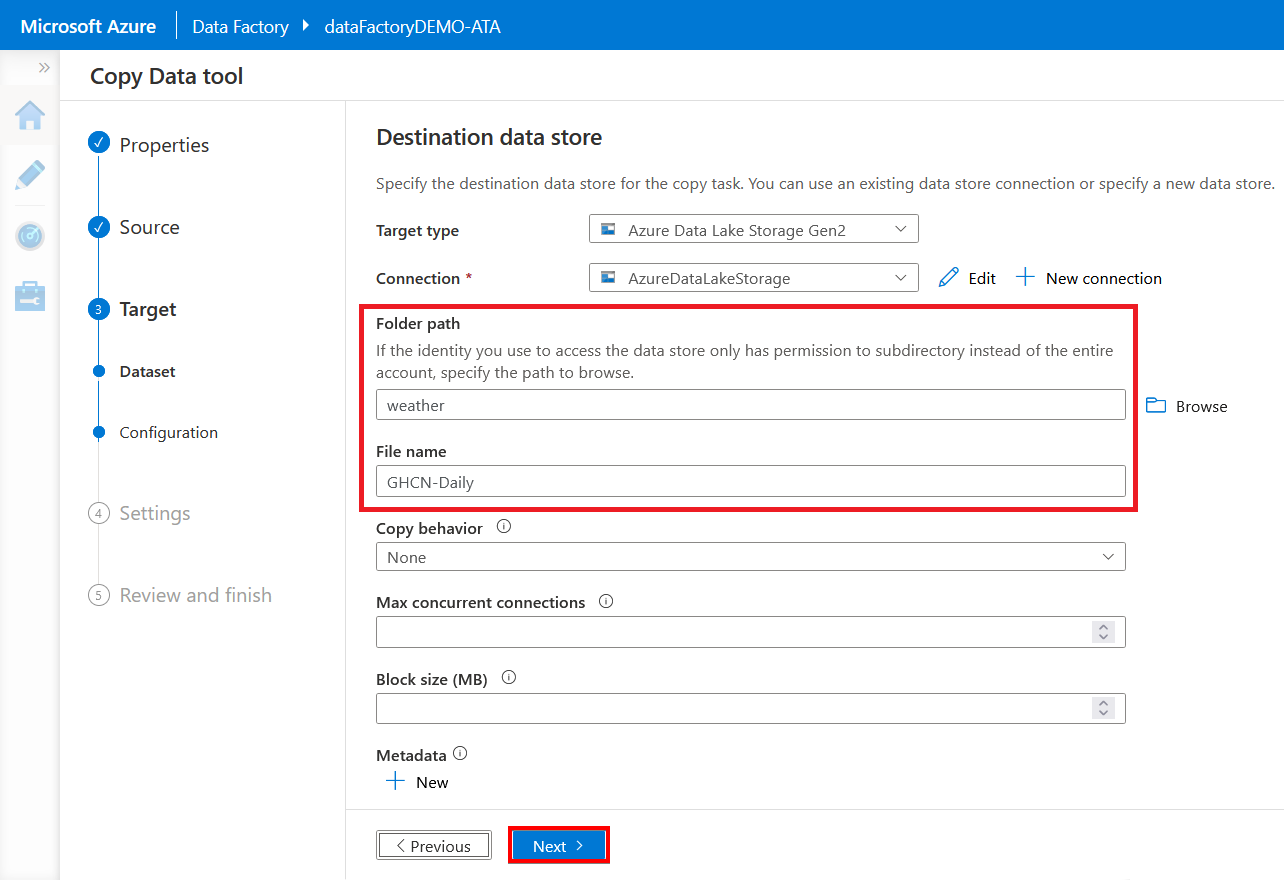
10. Now, enter your preferred Folder path and File name. But for this demo, the dataset with the file name GHCN-daily will be copied to the weather folder.
Keep the other default options, and click Next.
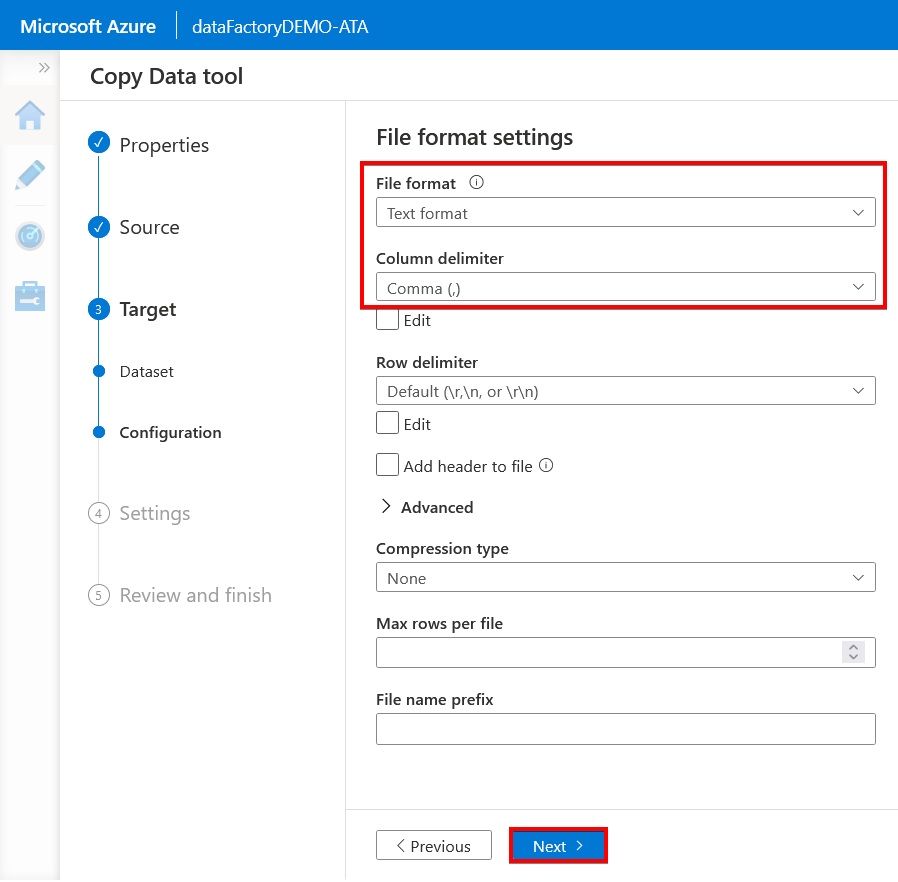
11. In the File format settings page, confirm the File format is set to Text format and the Column delimiter is set to Comma (,), then click Next.
Setting the delimiter to Comma (,) is crucial since you’re creating a copy job for a CSV file.
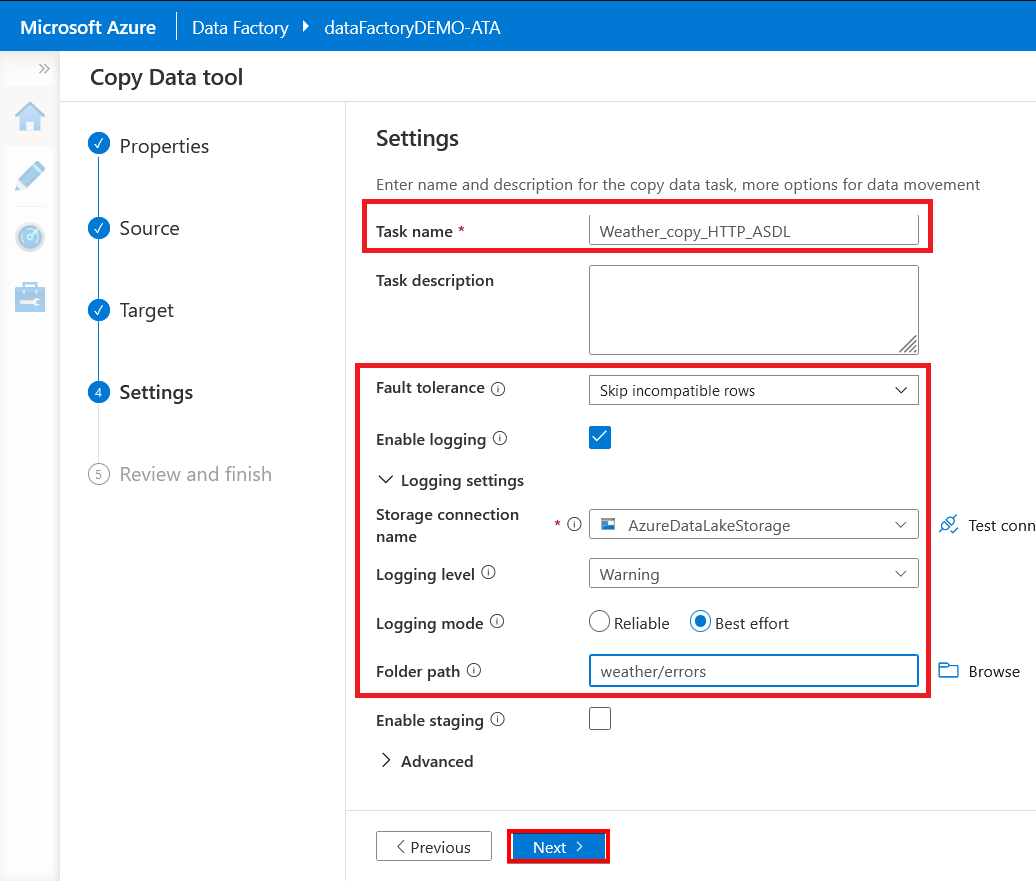
12. Configure the Settings page with the following:
- Write a pipeline name in the Task name field.
- Change the fault tolerance to Skip incompatible rows to avoid errors and check the Enable logging option to save logs.
- Specify weather/errors (these folders will be created) as the Folder path to save the logs.
- Click Next to review the overall settings of the copy job you’re creating shown in the next step.
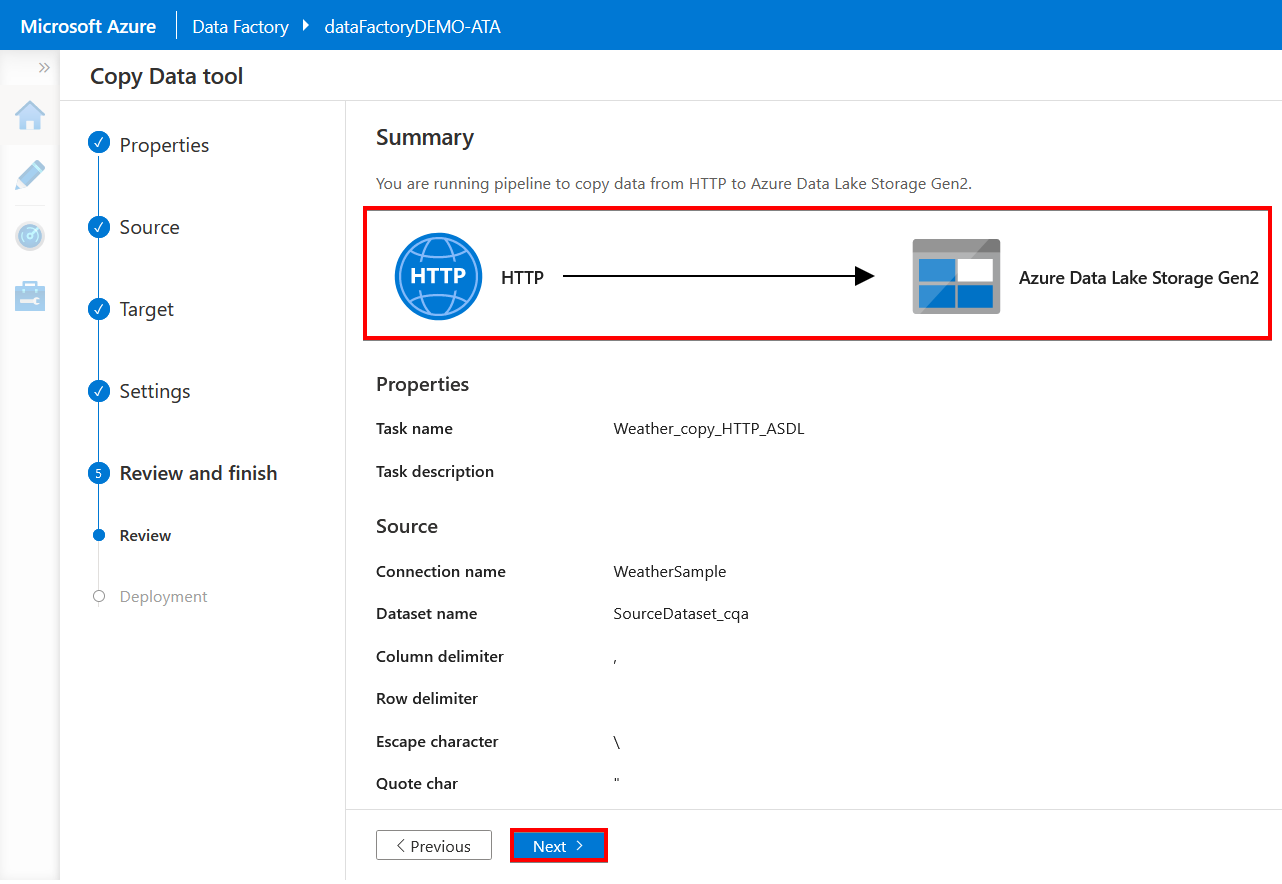
13. On the Summary page, review the overall settings for the copy job, and click Next to start the deployment process.
Below, you can see that you are ingesting data from an HTTP source to an Azure Data Lake Storage Gen2 target. Since you chose the “run once now” option in step two, the pipeline executes immediately.
14. Once the deployment is complete, click on the Monitor button to view the execution on the “Monitor” page.
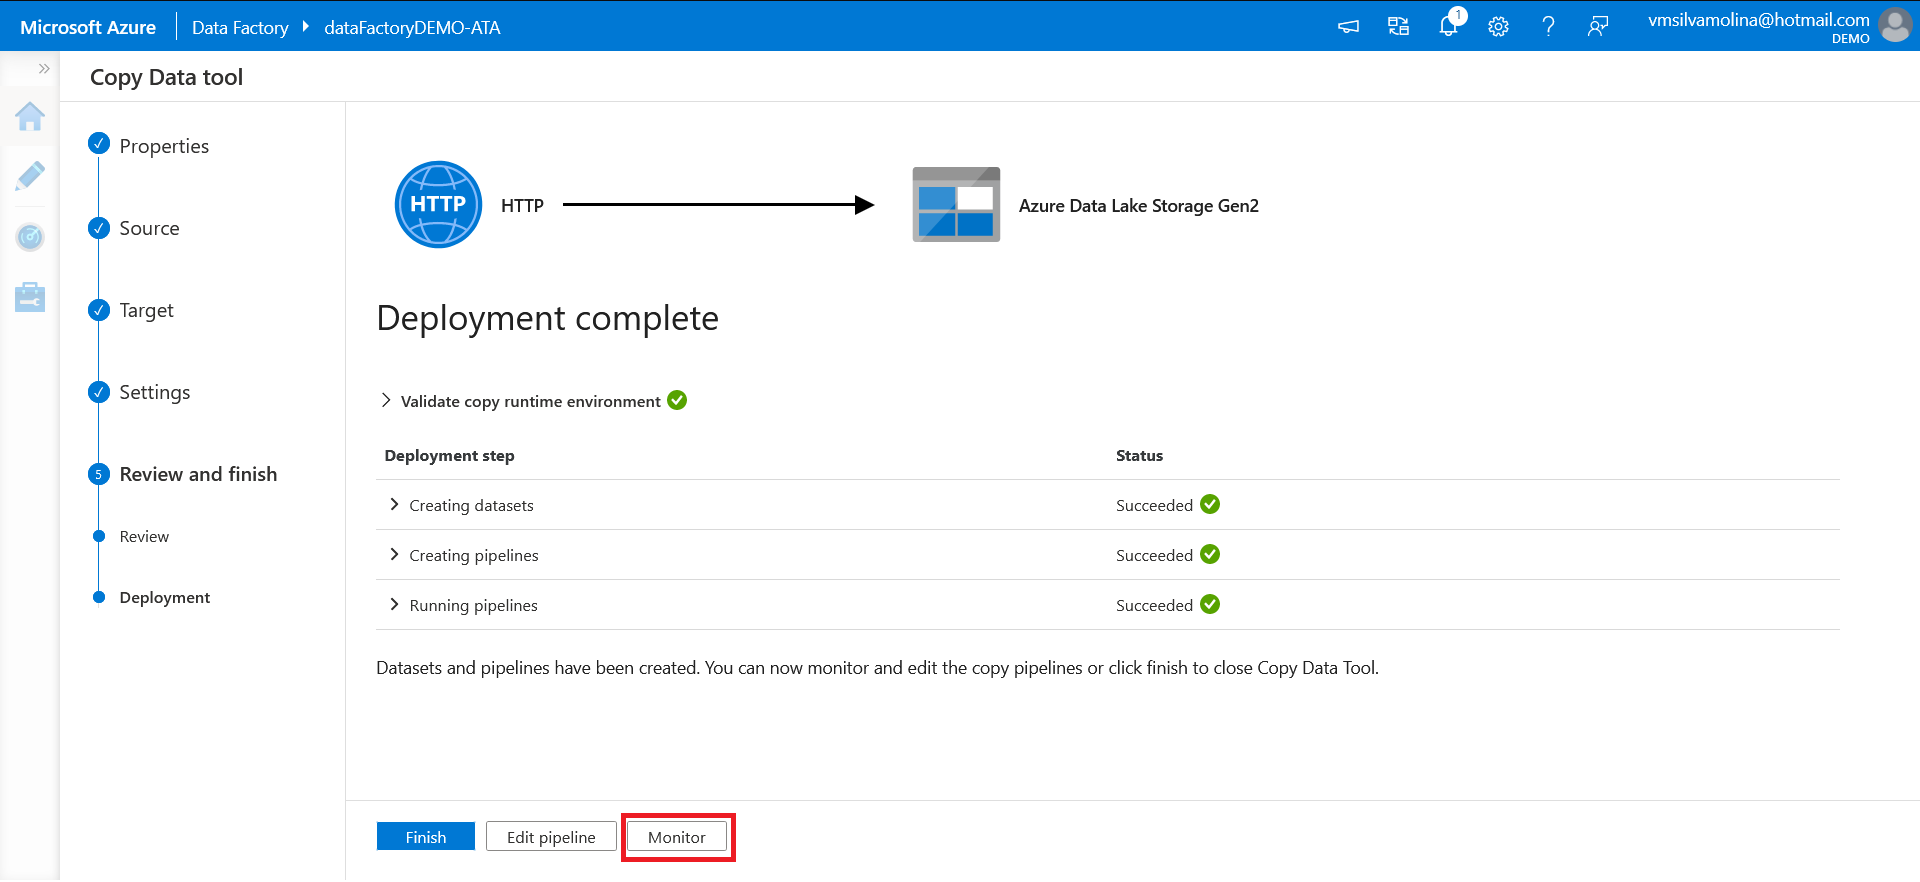
After starting the Deployment and clicking Monitor, you will be directed to the Pipeline runs page as shown below.

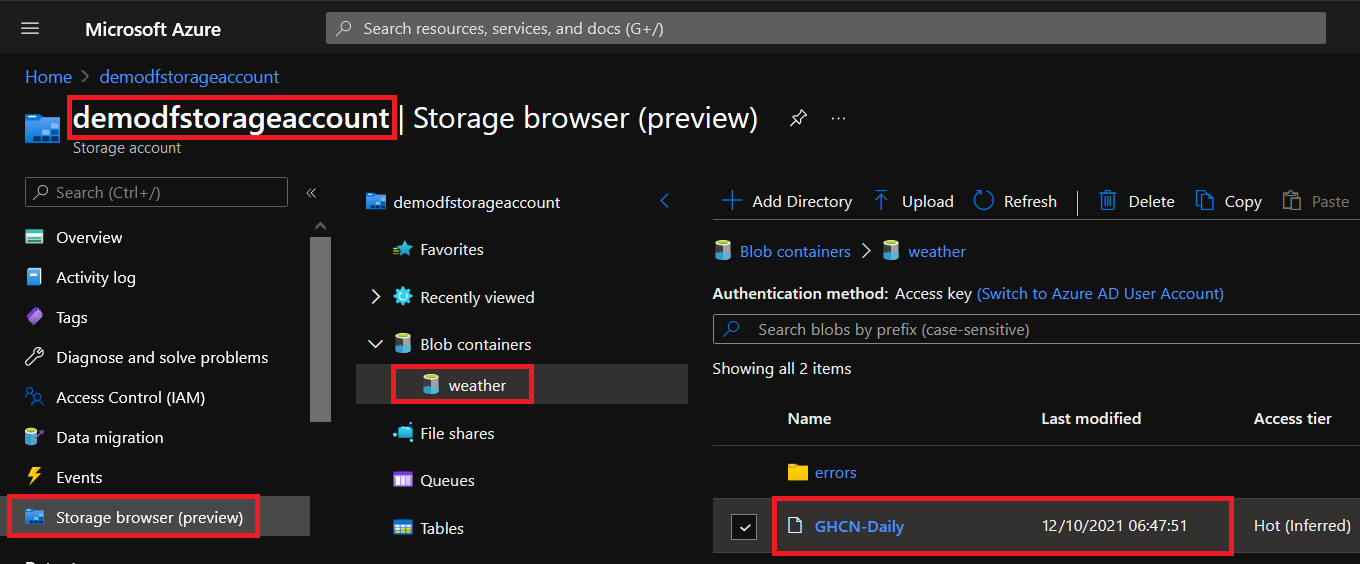
15. Finally, open your Azure Storage Explorer, and you’ll see your newly moved data like the one below.
Conclusion
In this tutorial, you learned how to navigate the Copy Data Tool to download a CSV file from your demo datasets and load it into your Azure data lake storage account. Microsoft Azure Data Factory is a great tool to store your data in the cloud efficiently and more rapidly.
What’s next? Why not explore different data sources and datasets? Or transform your data using the file format settings, and save them to a different target data store?


