


Do you need to build infrastructure in Azure? Have you looked at ARM templates and thought, whoa, looks complex? Because many people complained about the difficulty of building ARM templates, Microsoft developed a layer of abstraction called Azure Bicep.
In this tutorial, you will learn how to get started from scratch. You’ll learn how to do everything from setting up a development environment to deploying your first Bicep template!
Let’s get started!
Prerequisites
This tutorial will be a hands-on demonstration. If you’d like to follow along, be sure you have the following:
- Windows 10 – The majority of the demos in this tutorial will work on other operating systems but all demos will use Windows 10.
- Visual Studio Code – This tutorial will use v1.60.2.
- An Azure Resource Group to deploy to – This tutorial will use a resource group called ATA.
What is Azure Bicep?
Bicep is a domain-specific language that makes building ARM templates easier. You can think of Bicep as an abstraction layer on top of ARM templates. ARM uses JSON and can get complex, especially for large deployments.
Microsoft decided to create Bicep to reduce the complexities and improve the development experience. It is not a new language; think of it more as an improvement to the JSON ARM templates.
Setting Up a Bicep Development Environment
To start developing Bicep templates, you need to set up an environment that will help you get the best results. To do that, you have a few tools at your disposal. Let’s first set up the environment you need including the VS Code Bicep extension, the Bicep CLI, and optionally the Azure PowerShell modules.
Installing the VS Code Bicep Extension
VS Code is a great development tool to build Bicep templates. As such, Microsoft provides a VS Code extension to help make creating Bicep templates easier. Let’s start building a development environment by prepping VS Code.
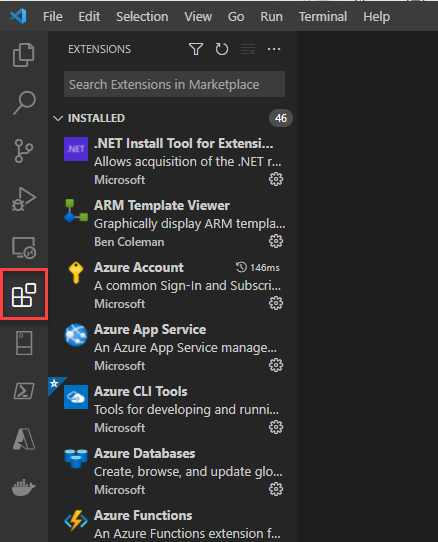
Open Visual Studio Code and click on the Extensions button.
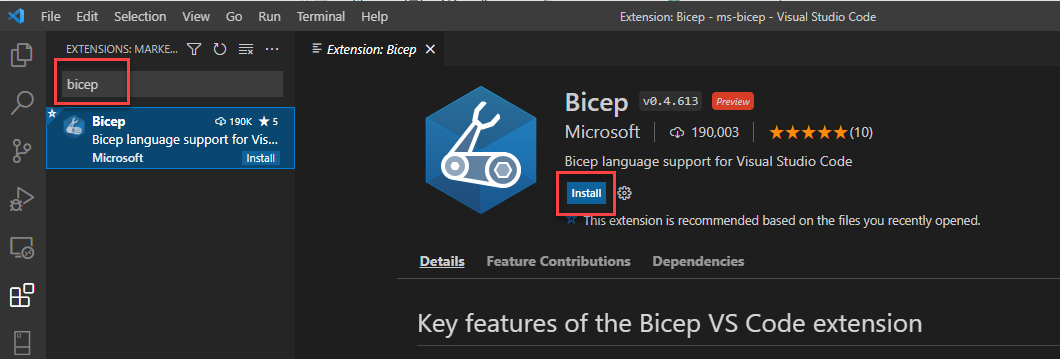
In the search bar, type “bicep”. You should see a single Bicep extension appear. When this happens, click on Install. After a few moments, VS Code will install the Bicep extension.
Even though the next section will give you the Bicep template to copy/paste, you’ll undoubtedly have times when you need to create Bicep templates from scratch. The Bicep extension in VS Code comes in handy here particularly due to its Intellisense features.
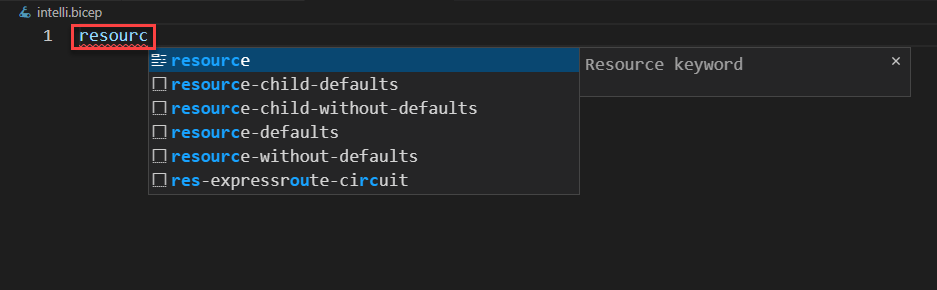
Notice that if you open a file with an extension of .bicep in VS Code, VS Code will attempt to provide shortcuts for you. For example, you create Azure resources with the resource keyword in a Bicep template. With the Bicep extension installed, VS Code understands this.
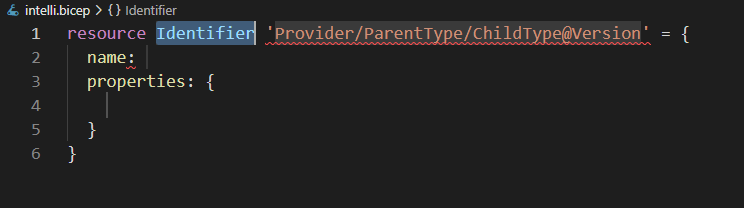
Selecting one of the provided menu options then automatically creates a template to fill out rather than having to remember the exact syntax every time.
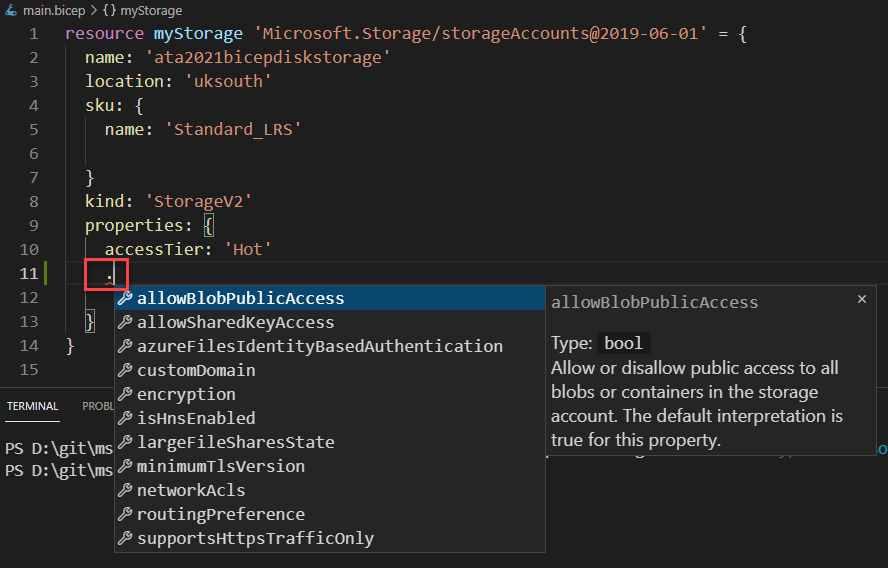
The period (.) is another handy shortcut when creating Bicep templates. By typing this in the properties section, for example, you’ll see all the properties available for a storage account.
Installing the Bicep CLI
Once created, you must invoke Bicep templates via the Bicep CLI. Before attempting to install the Bicep CLI, first check to see if it’s already installed. Depending on the version of the Azure CLI you have installed, you may already have the Bicep CLI. To check, open a PowerShell console or terminal and check for the version of the Bicep CLI.
az bicep versionIf you have the Bicep CLI installed, you’ll see a version statement, as shown below.

If you see an error message about the Bicep CLI not being found, run the install subcommand to install the Bicep CLI.
az bicep installYou will now see the output as below. It confirms that the Bicep CLI has been successfully installed and is ready for use.

As an alternate installation method, you can also install the Bicep CLI via the Bicep Windows Installer.
Creating a Bicep Template to Deploy a Storage Account
You can deploy some complex Azure resources with Bicep but let’s start off slow. For your first Bicep template, let’s create a simple Azure storage account that you can then use to deploy to Azure using both the Azure CLI and PowerShell in the next section.
1. Open VS Code and create a new file called main. bicep. You don’t have to name the file exactly as shown here but following Terraform’s lead calling the template main with a .bicep extension is common.
2. Copy and paste the Bicep template below code below into the file and save it. This template contains various attributes that make up a Bicep template.
You’ll first see some attributes common to all Bicep templates:
- The resource identifier (
resource myStorage) – Tells Bicep to create a new resource namedmyStorage. This name identifies the particular resource within the Bicep template. This name is not the name of the resource that is created in Azure. Microsoft.Storage/storageAccounts@2019-06-01– Defines a type composed of the resource providerMicrosoft.Storage, the resource type (storageAccounts), and the API version(2019-06-01)to use.name– The name of the resource as it appears in Azure (pay attention to the rules and restrictions for naming Azure resources.)location– The Azure region to create the resource in.
You’ll also see some attributes specific to the storageAccounts resource type:
SKU– The storage account SKU (Standard_LRS) as defined in the propertyname.kind– The type of storage account (StorageV2).properties– Various resource-specific properties that don’t have their own section such asaccessTierin this example. These properties are the same as you’ll find in ARM templates.
resource myStorage 'Microsoft.Storage/storageAccounts@2019-06-01' = {
  name: 'ata2021bicepdiskstorage'
  location: 'uksouth'
  SKU: {
    name: 'Standard_LRS'
  }
  kind: 'StorageV2'
  properties: {
    accessTier: 'Hot'

  }
}
Deploying a Bicep Template with PowerShell
As mentioned earlier, you can deploy Bicep templates one of two ways; via the Azure CLI and Azure PowerShell module. Let’s first deploy a Bicep template with PowerShell.
Be sure you have the Azure PowerShell module installed and you are authenticated to Azure before starting this section.
Deploying Azure resources with Bicep templates is identical to deploying ARM templates. Microsoft has essentially added support for the Bicep language to many of the existing PowerShell ARM cmdlets such as New-AzResourceGroupDeployment.
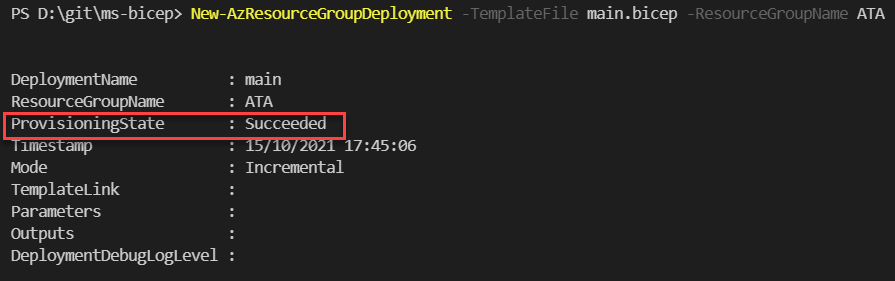
In your PowerShell console, invoke a new resource group deployment via the New-AzResourceGroupDeployment cmdlet providing the path of the Bicep template and the ResourceGroupName to deploy to. You’ll notice that you can use a Bicep template exactly how you could an ARM template.
New-AzResourceGroupDeployment -TemplateFile main.bicep -ResourceGroupName ATAIf the deployment is successful, you should see the following output in your PowerShell session with the property ProvisioningState showing as successful. That’s it!
To verify the resource was created successfully, log into the Azure Portal, navigate to your resource group, and you will see inside that resource group a newly created storage account.

If you’re following along and created the storage account as a demo, don’t forget to remove it! Notice the ResourceName coincides with the name provided in the Bicep template.
Remove-AzResource -ResourceName ata2021bicepdiskstorage -ResourceGroupName ATA -ResourceType "Microsoft.Storage/storageAccounts"You will now see the following output.

Deploying a Bicep Template with the Azure CLI
To round out this tutorial, let’s now cover deploying your recently-built Bicep template with the Azure CLI.
Be sure you have Azure CLI v2.2.0+ installed and signed in before starting this section.
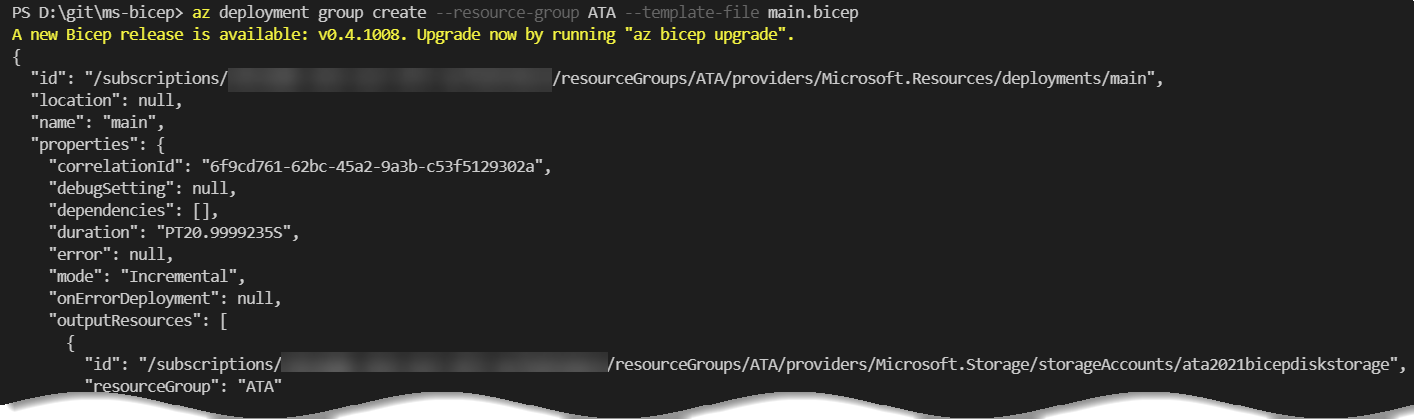
With your PowerShell or another terminal open, invoke an ARM deployment with the az deployment group create command. This command performs an ARM deployment just like with PowerShell. Be sure to specify the resource-group to deploy to along with the Bicep template created earlier via the template-file parameter.
az deployment group create --resource-group ATA --template-file main.bicepIf you see the provisioningState as Succeeded, as shown below, ARM has read the Bicep template and carried out all of the instructions within!

Don’t forget to clean up the resource with
az resource delete -g ATA -n ata2021bicepdiskstorage --resource-type "Microsoft.Storage/storageAccounts"
Conclusion
Now you have created a development environment for Azure Bicep and created a resource in Azure, what is your next step? Perhaps look at what Microsoft Learn has to offer on Bicep?
Perhaps a demonstration to your colleagues on how Bicep can help your organization?


