

Monitoring and managing DNS records is crucial for multi-tier microservices and applications in a data center or cloud infrastructure. One of the managed services of Amazon is AWS Route 53, which not only monitors applications using health checks but also takes care of all the domain networking parts.
In this tutorial, you’ll learn what AWS Route 53 is, how to integrate it with EC2, and some of its essential routing policies.
Prerequisites
This post will be a step-by-step tutorial. If you’d like to follow along, ensure you have the following in place:
- An Amazon Web Service (AWS) account.
- An AWS EC2 Ubuntu machine with apache2 installed – This tutorial uses Ubuntu 20.04 LTS, but any operating system works.
What is AWS Route 53?
AWS Route 53 is an AWS Managed Service that references traditional DNS ports and is highly available, scalable, and fully managed.
The AWS Route 53 service mainly uses the concept of records, allowing you to route traffic for a particular domain according to the requirements. Each record contains details such as domain or subdomain, record type, Value of record type, routing policy, and TTL.
AWS Route 53 also allows you to check the health of your resources. Furthermore, AWS Route 53 is also a domain registrar, so anyone can purchase the domain they wish to if it is available.
Integrating AWS Route 53 with an EC2 Instance
You have a basic idea about AWS Route 53, which is excellent. But do you know AWS Route 53 integrates with various AWS services such as CloudFront, AWS EC2, load balancer, etc.?
But in this tutorial, you will learn to integrate the EC2 instance with AWS Route 53. Perform the following steps.
1. Open your favorite web browser, navigate the AWS Management Console, and log in.
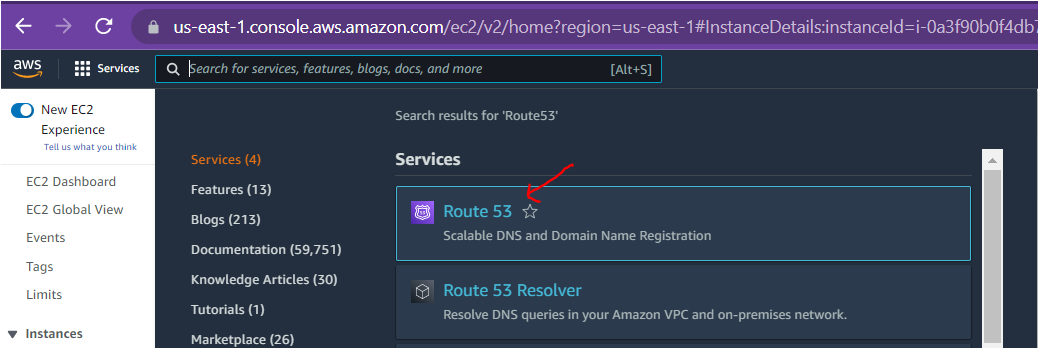
2. While in the Console, click on the search bar at the top, search ‘Route 53‘, and click Route 53 on the results.
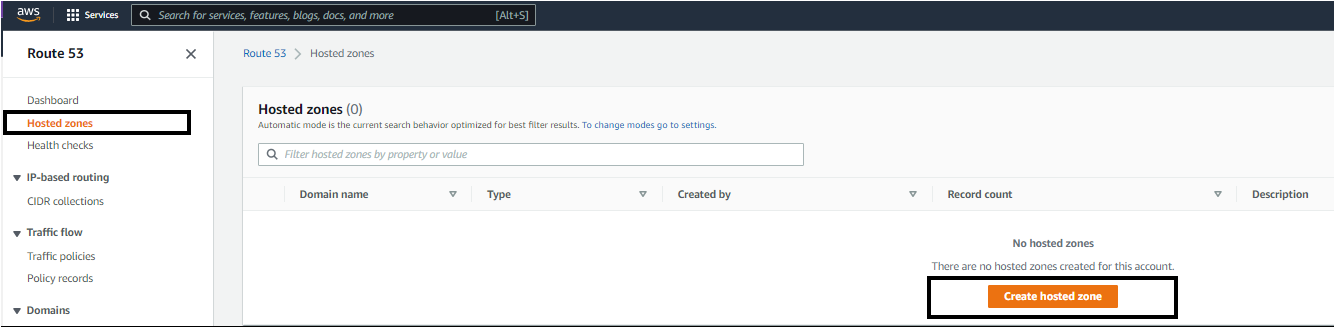
3. Next, click Hosted zones → Create hosted zone to create a new hosted zone. The hosted zone will contain all the records related to your domain.
A hosted zone is similar to a zone file containing records containing information about how you want to route traffic for a specific domain, such as example.com and its subdomains (abc.example.com, xyz.example.com).
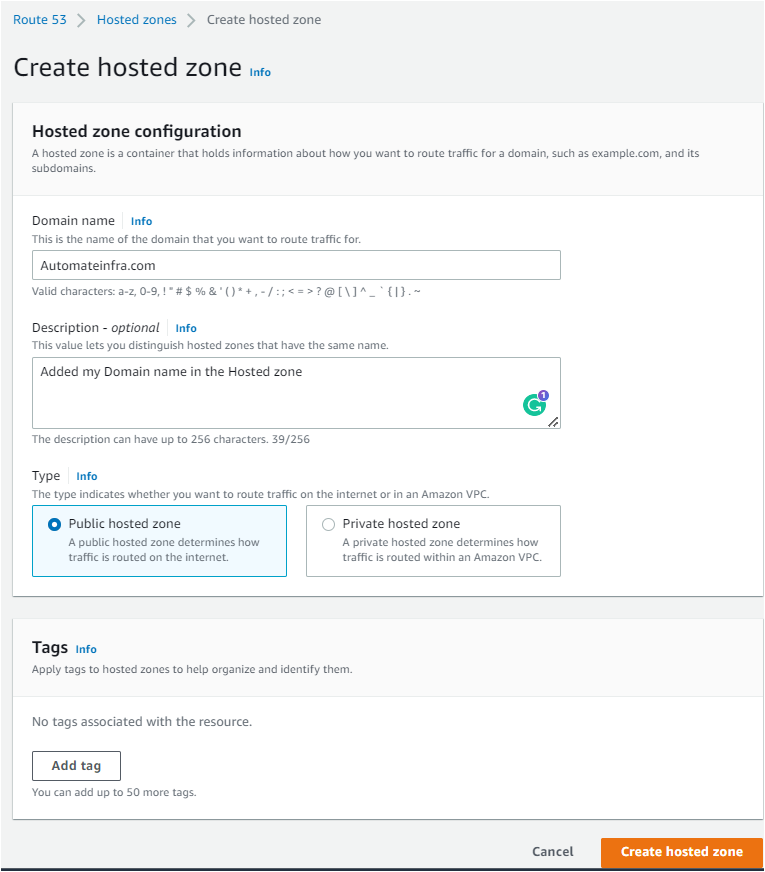
4. On the Create hosted zone, enter the Domain name that you want AWS Route 53 to route traffic. Optionally, add a Description to identify this zone better. Lastly, select Public hosted zone as type; this option means you’re routing the domain traffic on the internet.
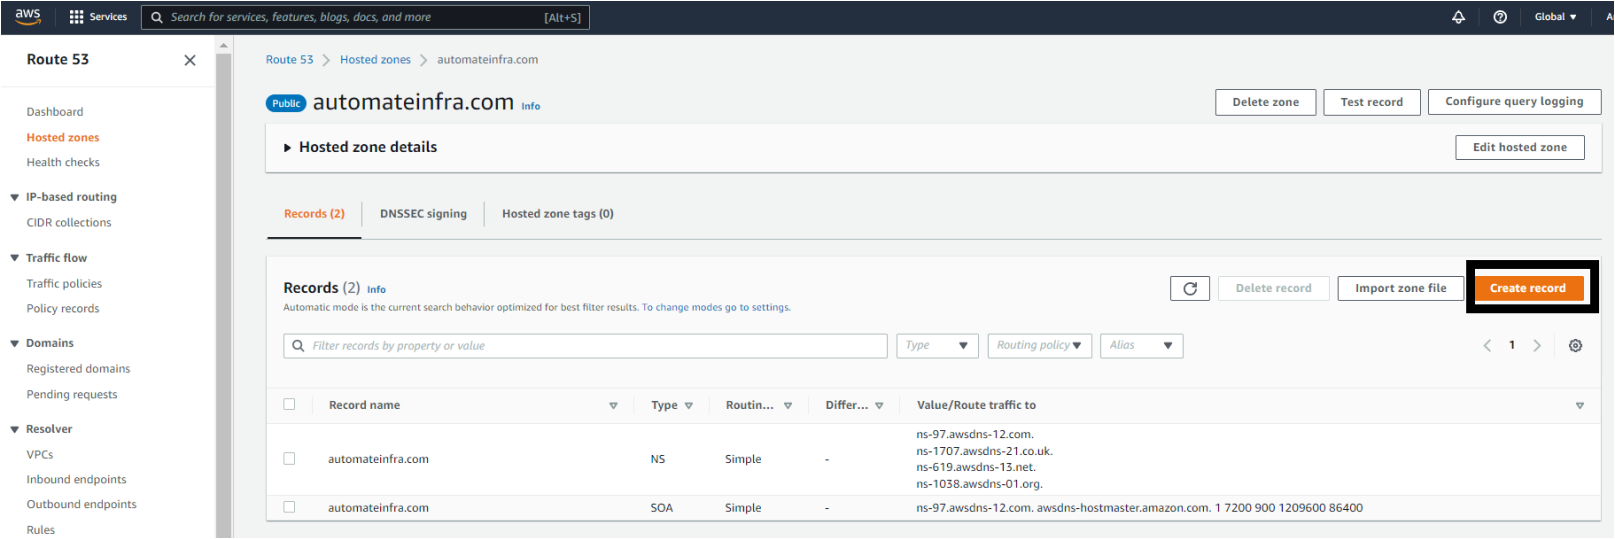
5. After you create a hosted zone, you will see the hosted zone appear in the Hosted zones. In the hosted zone, create a new record by clicking on the Create record button.
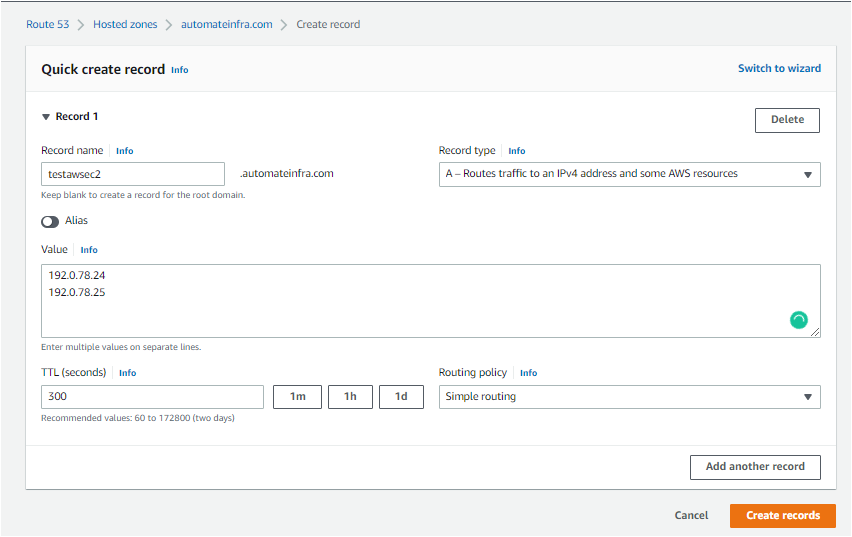
6. On the Quick create record page, add the record name you want to create. For example, if the DNS record is testawsec2.automateinfra.com, type testawsec2as the record name.
On the Record type, choose option A – Routes traffic to an IPv4 address and some AWS resources.
Type the target IP address inside the Value field. If there are multiple target IP addresses, enter them per line.
Finally, click Create records.
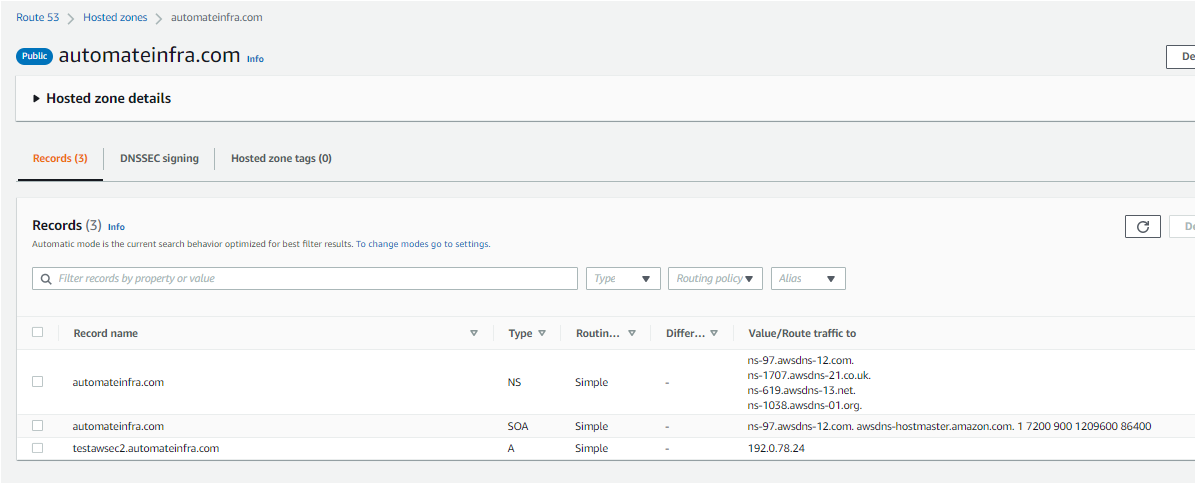
7. After creating the record, you will see the record (testawsec2.automateinfra.com) under the Records section.
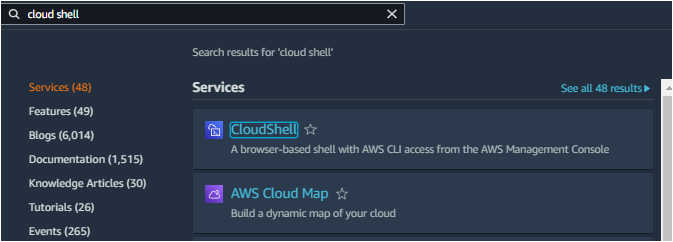
8. Now, open the AWS CloudShell from the Amazon Management console to verify if your created record is working correctly. To do so, search cloud shell in the search box and click CloudShell on the results.
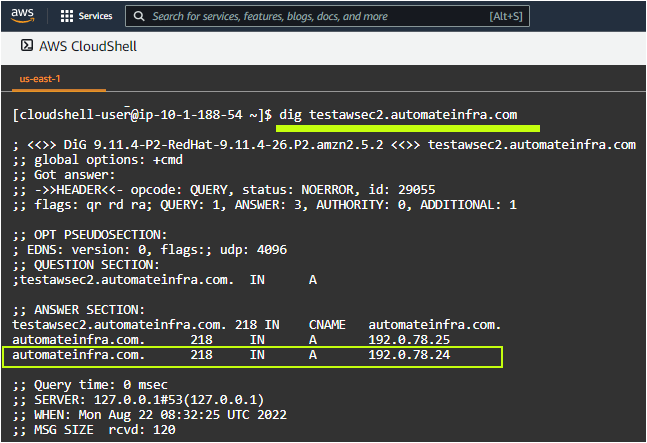
9. Here, execute the below command to verify if the A record (testawsec2.automateinfra.com) that you created is pointing to the correct IP address or not.
dig testawsec2.automateinfra.comYou can see that the A record you created is correct, and the testawsec2.automateinfra.com DNS records return the correct IP addresses.
Routing Policies in AWS Route 53
In AWS Route 53, it is essential to know how to route traffic, and to define these routes, AWS provides a feature known as routing policies. Routing policies explain how Route 53 responds to DNS queries. There are mainly three types of Routing policies that are supported by Route 53. Below is the summary of each.
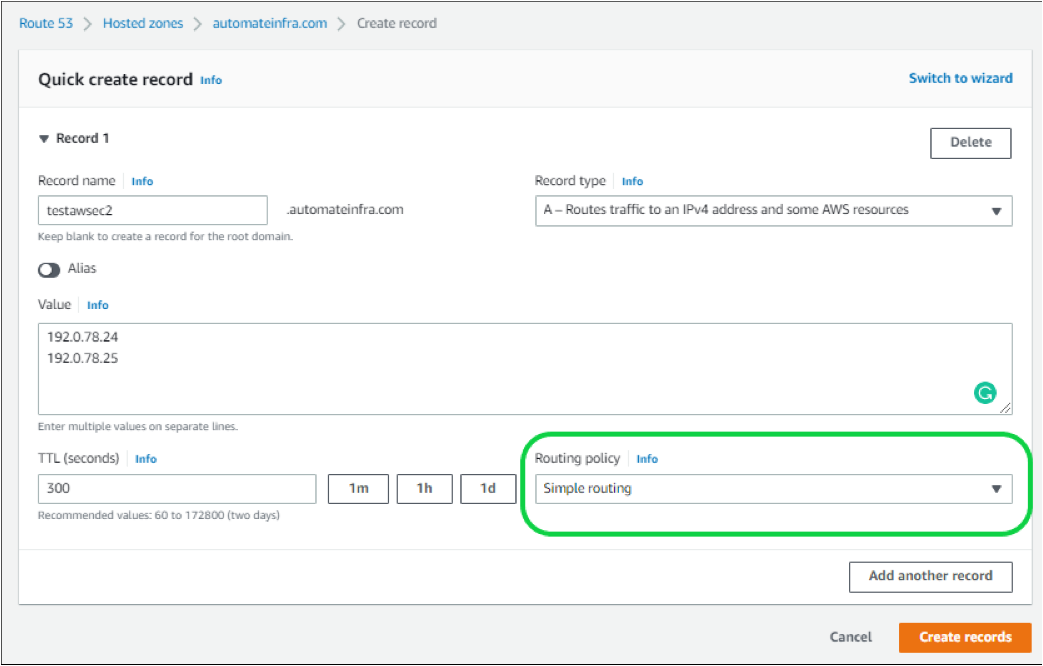
Simple Routing
Route 53 routes traffic to a single AWS resource with a simple routing policy. This policy cannot be associated with Health checks.
To create the simple routing policy navigate to Route 53 → Hosted zones → (Zone-Name) → Create Record → Routing Policy as Simple.
Weighted Routing
In this type of routing policy, you control the percentage that navigates to each specific AWS resource. In other words, you can assign which among the endpoints will get the heavier traffic. For example, the weight of 0 means completely no traffic.
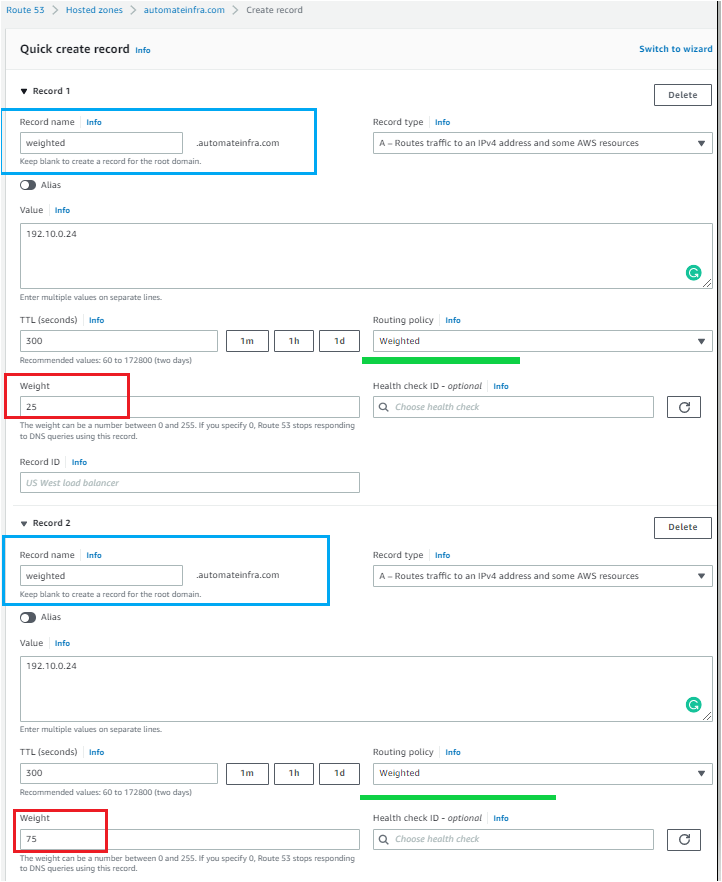
To create the weighted routing policy, navigate to Route 53 → Hosted zones → (Zone-Name) → Create Record → Routing Policy as Weighted.
In the below image, the weighted policy contains two records with the same name (weighted) with a weightage of 25 and 75 percent. When the requests come, Route 53 will route 25 percent of traffic to 192.10.0.24 and 75 percent to 192.10.0.25.
The record name should be the same when you create a weighted policy.
Latency-Based Routing
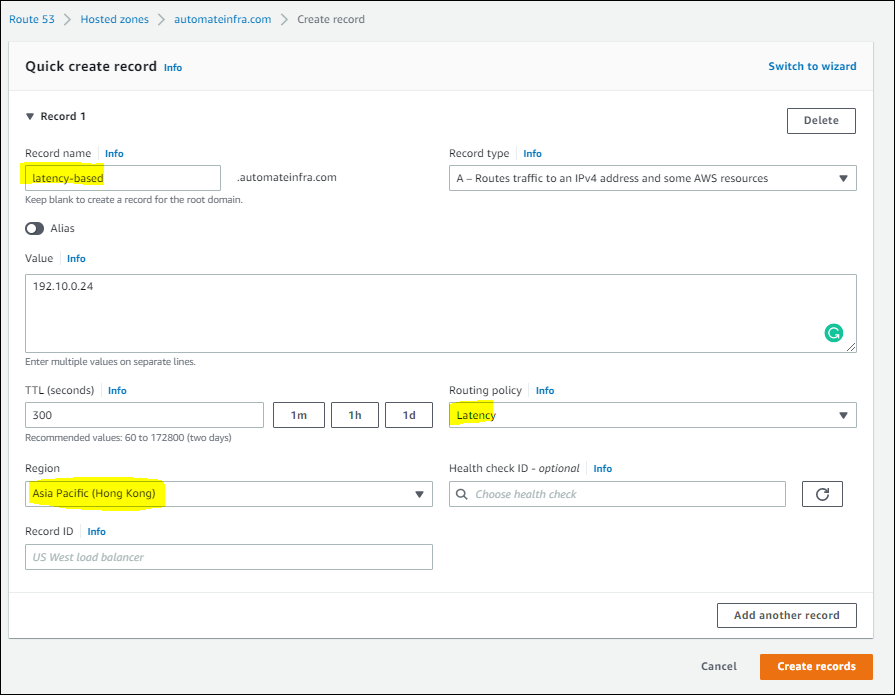
Latency-based routing redirects traffic to the resource with the least latency. This routing is helpful when latency for users is a priority. It can also be associated with Health checks.
As you can see below, the record (latency-based) uses a latency-based routing policy pointing to the Hong Kong region so that if any Hong Kong users make a request, then Route 53 will route your request to 192.10.0.24.
Monitoring Endpoints with AWS Route 53 Health Checks
Do you know Route 53 also monitors the health of your application by checking the health of your application before forwarding the requests? Health checks in Route 53 monitor an endpoint; it may be an application, a server, or other AWS resources.
Follow the below steps to better understand this concept.
1. Navigate to the AWS Route 53 console. Click Health checks → Create health check.

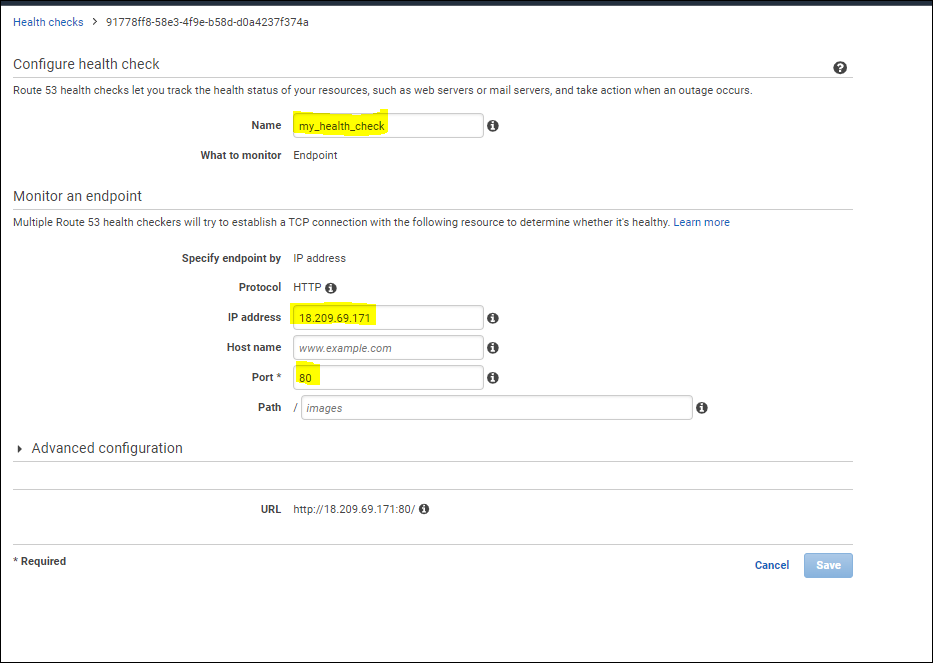
2. On the Configure health check page, enter the name of the health check (my_health_check) and the IP address of your server, type 80 as the port, and click Save.
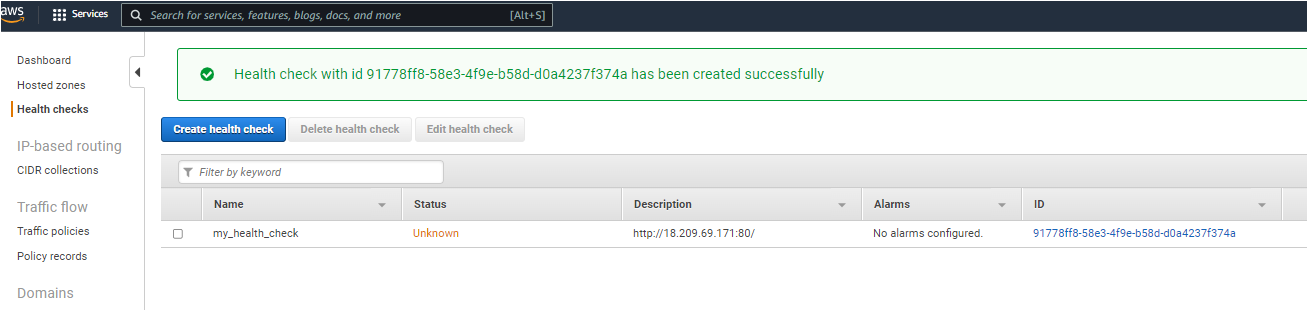
3. After successfully creating the health check, you should see something like the one below. The health check status will be initially Unknown as it takes time to check the application.
4. To verify if the application works fine, browse the server’s IP address using your browser. You should see the apache page loaded if the apache service is running.
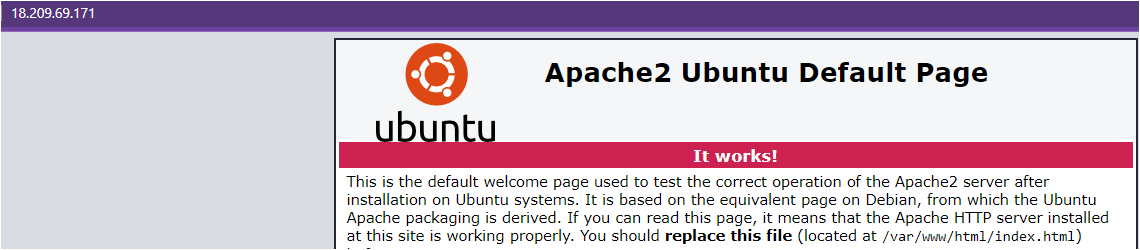
Check the health check status later, and you will notice that the status becomes healthy and shows the Green color line.

Conclusion
In this tutorial, you’ve learned what AWS Route 53 is, how to integrate it with an AWS EC2 instance, and monitor the health of your applications using health checks.
By now, you should have a good understanding of AWS Route 53. Go wild and test out everything you can with your applications and endpoint. Good luck!


