

Are you tired of eyeballing through images to extract information? Undoubtedly, the manual process can be a pain. So why not go with Optical Character Recognition (OCR) server, like AWS OCR Textract?
AWS OCR Textract analyzes texts and even handwritings in images and automatically converts them to machine-readable text. And in this tutorial, you’ll learn to take advantage of the AWS OCR Textract service and be more productive when extracting information from images.
Ready? Read on and let AWS OCR Textract do the extracting!
Prerequisites
This tutorial will be a hands-on demonstration. If you’d like to follow along, be sure you have the following:
- An AWS account – A free tier account is ]available.
- AWS CLI installed and configured on your computer – The tutorial uses AWS CLI 2.3.6 version.
- JQ installed on your computer – The tutorial uses JQ CLI tool 1.6.
Extracting Text from an Image Document
In the past, OCR was commonly used by scanners to extract characters while scanning through documents. But now, OCR is also used by applications to extract data from image documents, such as ID cards, invoices, and receipts.
You can use the AWS OCR Textract service through the AWS Console, AWS CLI, Textract API, and even programmatically through supported client SDKs. But in this tutorial, you’ll extract content from images via the AWS CLI.
AWS Free Tier allows you to analyze 1000 pages per month for free. And since Textract is offered through AWS public cloud as a managed service, Textract provides more benefits over other OCR services.
1. Launch your computer’s terminal and execute the command below to create (mkdir) and change (cd) into a new directory. You can name the directory as you prefer, but the directory is called textract-extraction in this demo.
The new directory will contain the images whose text you will extract using Textract.
mkdir textract-extraction && cd textract-extraction2. Next, execute the wget command below to download a public image named work-foodsign.jpg. The image has a handwritten sentence, which you’ll extract using the Textract service.
wget https://raw.githubusercontent.com/adam-the-automator/Scripts/main/aws-ocr/Job-Search-2.jpg3. Open the image in your media viewer to view the image and confirm the handwritten text.

4. Now, execute the textract command below to extract (detect-document-text) the text from the work-foodsign.jpg image and outputs the extracted data in JSON format (--output json).
The –document flag contains a list with a Byte whose value is the base64 representation of the work-foodsign.jpg file.
Textract’s DetectDocumentText operation analyzes a document and extracts all characters.
aws textract detect-document-text --document Bytes=$( base64 ./work-foodsign.jpg ) --output json There is no need to manage an additional infrastructure for OCR. Powerful instances are used and managed by AWS, reducing extraction time.
Once the command completes, you’ll see the printed JSON output below, which contains the following fields:
- A DocumentMetadata object – Contains a Pages field to indicate how many pages Textract scanned from the document.
- A Blocks array – Contains objects that hold each layer’s data scanned from the input document.
- DetectDocumentTextModelVersion – contains a value that specifies the version of the text model.
The Pages object below shows the geometric properties of the items detected within the document. As you see, the Geometry object contains the BoundingBox object and Polygon array, which contains values that describe the shape of the scanned image document.
Note the first highlighted value within the IDs array, as you will use it to identify the next layer scanned in the document.
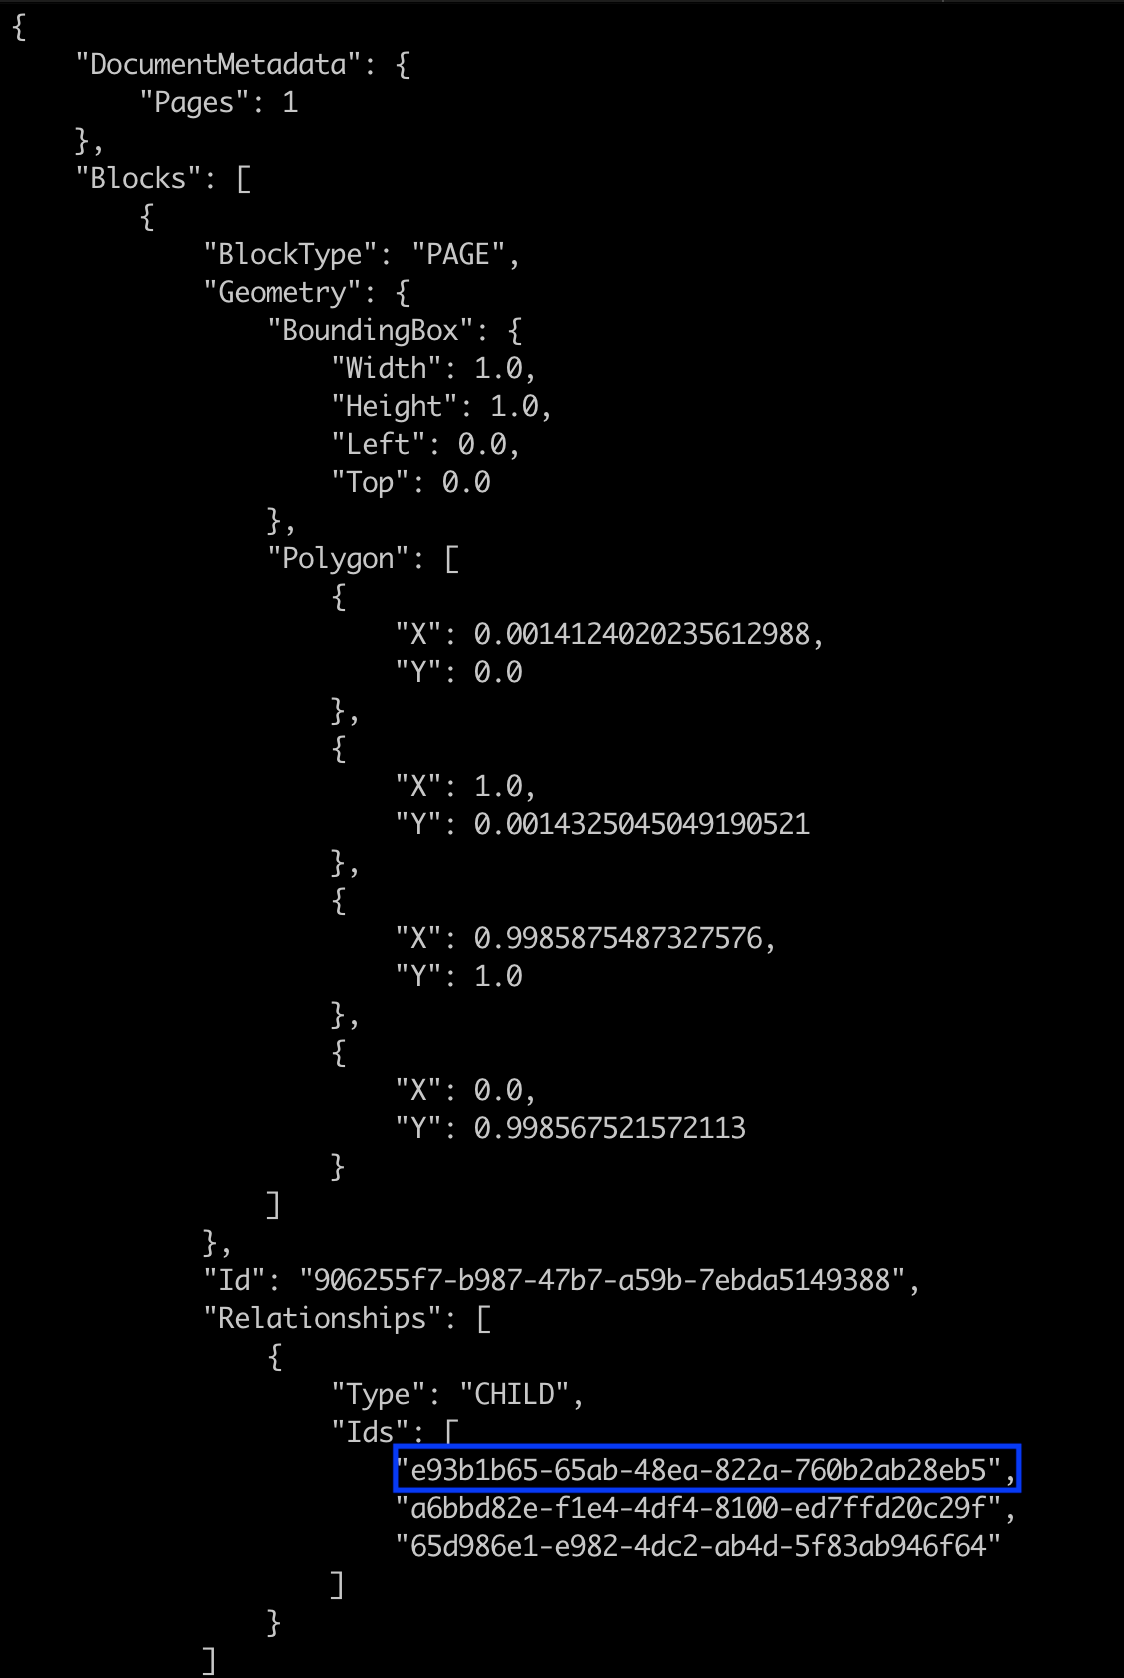
5. Finally, scroll down the JSON output until you reach the next object within the Blocks array.
The next object has a BlockType set to LINE, which indicates the result of the first line scanned in the image. The value of the highlighted Ids field (scanned line’s ID) corresponds with the first value that you noted previously (step four).
At this point, you can scroll further down the JSON output to find objects containing other lines scanned from the image document.
Extracting Content from an Expense Document
You’ve previously extracted all text from an image document, and that’s cool. But what if you need to extract more useful information instead of all texts? The analyze-expense ( AnalyzeExpense operation) analyzes and extracts expense-focused contents in an image document, like receipts.
To see how the analyze-expense command works, you’ll extract a sample invoice then filter the output using JQ. JQ is a command-line tool used for working with JSON data.
Textract returns a large amount of data from a document scan that requires a tool such as JQ to retrieve only useful values from the JSON output. These useful values can be but are not limited to,
Text,ValueDetection, orConfidence.
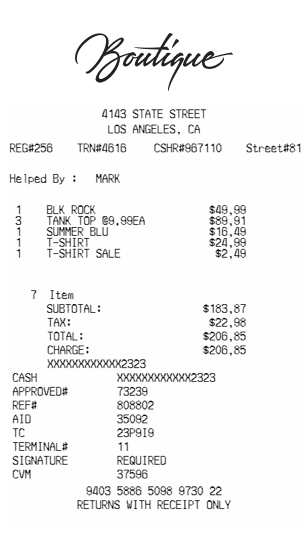
1. Run the wget command below to download another image (sample-reciept.png) that contains a printed invoice.
wget https://raw.githubusercontent.com/adam-the-automator/Scripts/main/aws-ocr/sample-reciept.png2. Open the image in your media viewer to view the image and the figures it contains.
3. Execute the command below to analyze and extract the invoice figures (analyze-expense) from the image document (sample-reciept.png).
The parameters in the below command are similar to the previous detect-document-text command in the “Extracting Text from an Image Document” section (step four). But this time, the command stores the JSON output to a JSON file (–output json > expense-analysis.json).
aws textract analyze-expense --document Bytes=$( base64 ./sample-reciept.png ) --output json > expense-analysis.jsonThe root element of the JSON output from the analyze-expense command contains two fields:
- A
DocumentMetadataobject – Contains keys with details of the document that Textract scanned, such as the Pages key.
- An
ExpenseDocumentsarray – Contains objects with the financial relationships analyzed from the document. TheExpenseDocumentsarray contains aSummaryFieldsarray with objects that hold a summary of the invoice, such as the invoice name and address.
The ExpenseDocuments array also contains a LineItemsGroups array with objects that hold the document’s financial relationships, like items purchased and their prices.
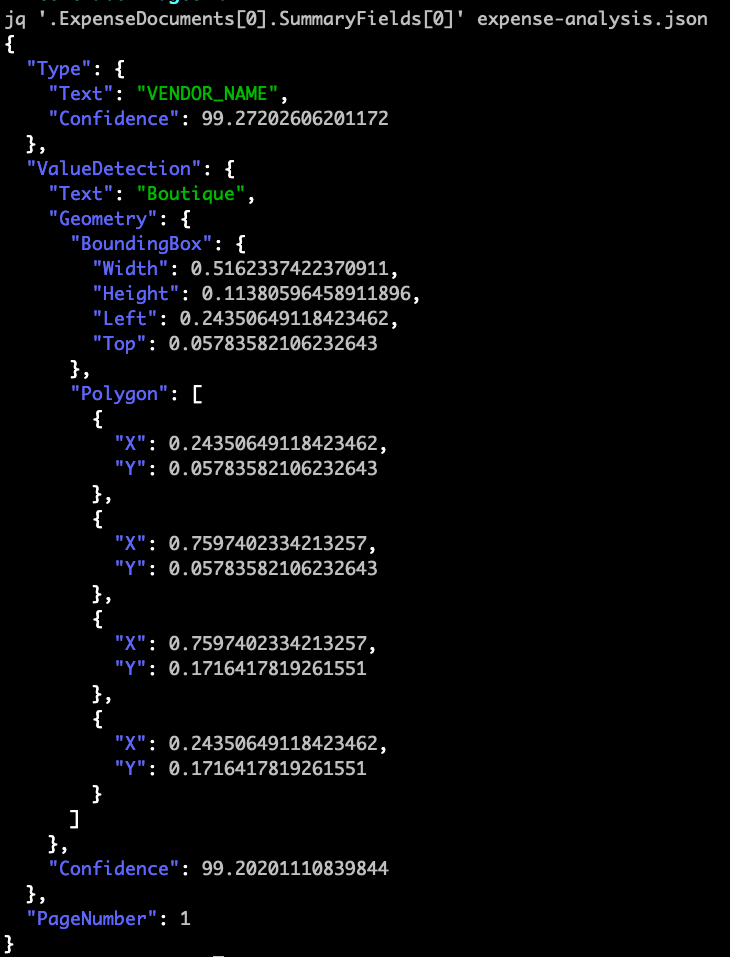
4. Now, execute the jq command below to retrieve the first object (.ExpenseDocuments[0]) within the SummaryFields[0] array from the expense-analysis.json file.
The first object is expected to be the shop’s name (Boutique) as it’s the first item on the invoice.
jq '.ExpenseDocuments[0].SummaryFields[0]' expense-analysis.jsonThe JSON response below shows a Type object specifying VENDOR_NAME as the object’s type and a ValueDetection object with Boutique as the Text value. At the same time, the Geometry object contains an object and array that describes the line’s shape.
5. Finally, execute the jq command below against the expense-analysis.json file to retrieve an object’s Type and ValueDetection keys.
The total cost of goods or services rendered is important data included in all invoices. Textract includes the total cost in an object within the SummaryFields array.
The objects in the SummaryFields array are piped (|) to the JQ .select function until it finds an object whose Text property value is TOTAL (select(.Type.Text == “TOTAL”).
jq '.ExpenseDocuments[0].SummaryFields[] | select(.Type.Text == "TOTAL") | {Type, ValueDetection }' expense-analysis.jsonExtracting Data with AWS OCR Textract via the AWS Console
By now, you already have a sound understanding of how to extract content via the AWS CLI. But did you know AWS Console lets you perform the same tasks in a GUI? The AWS console provides more features when using Textract, as you can natively search, filter, and download a ZIP file of the scan result.
Remember that you can only perform either the AnalyzeDocument, AnalyzeIdentity, or AnalyzeExpense operations in AWS Console.
1. Execute the wget command below to download an image (sample-journal.png) that contains a journal. You’ll extract the image file’s raw text and table via the AWS console.
wget https://raw.githubusercontent.com/adam-the-automator/Scripts/main/aws-ocr/sample-journal.jpg2. Next, open your favorite web browser and log in to the AWS Console.
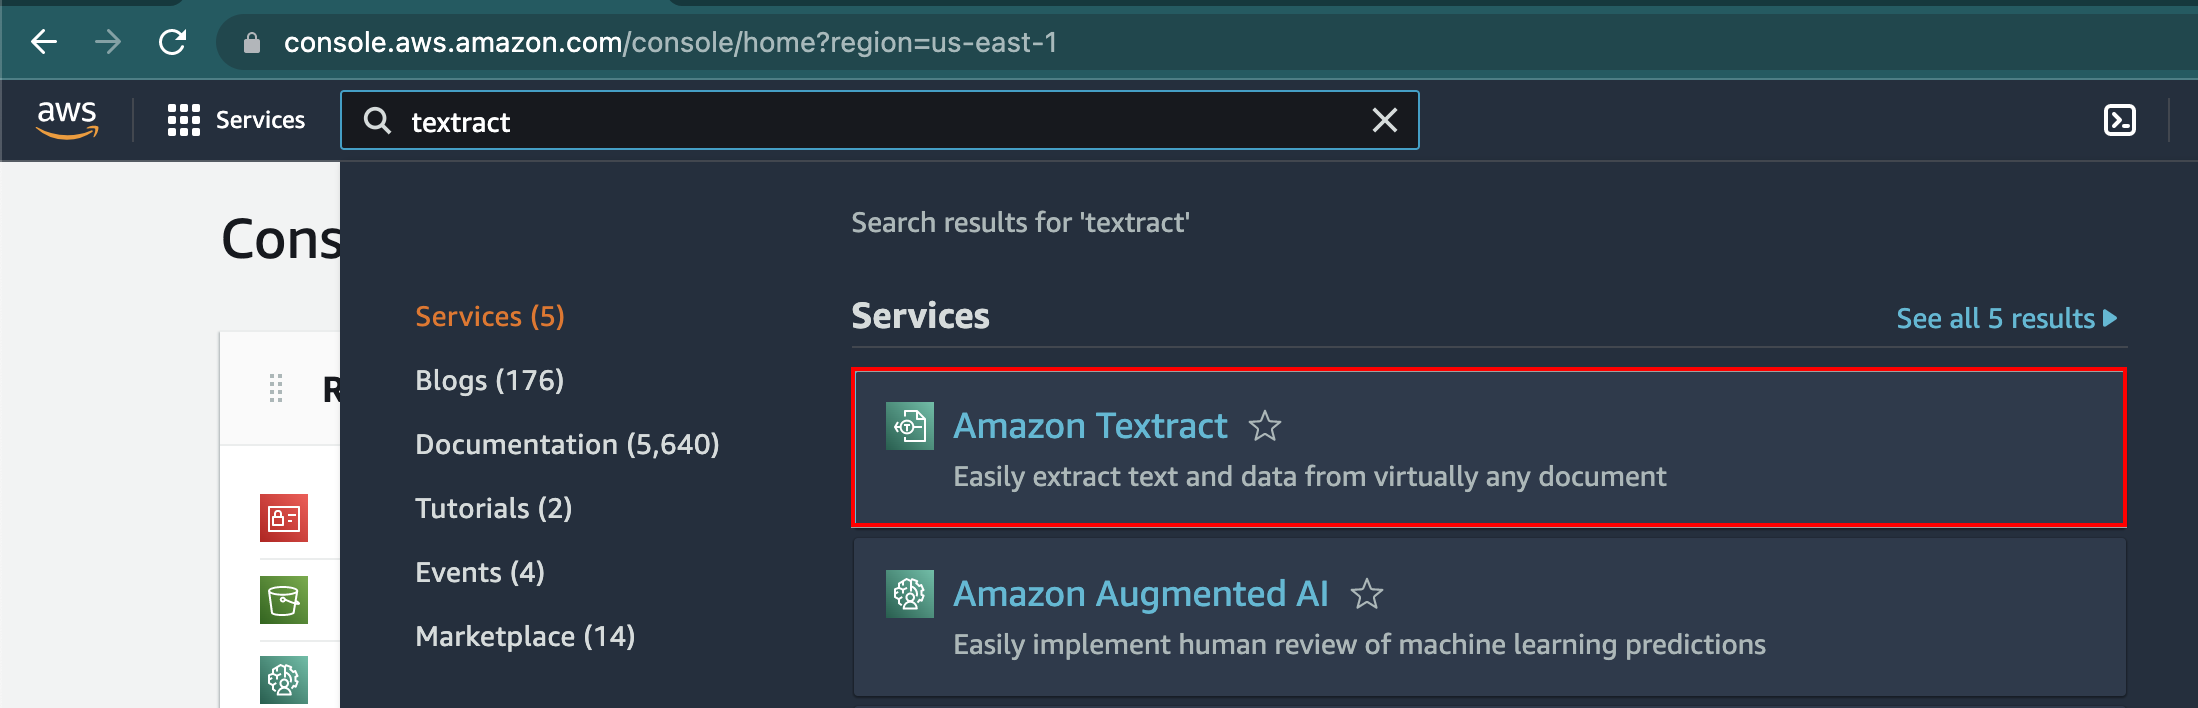
Search textract, and select the Amazon Textract service from the result, as shown below. Your browser redirects the page to the Amazon Textract dashboard (step three).
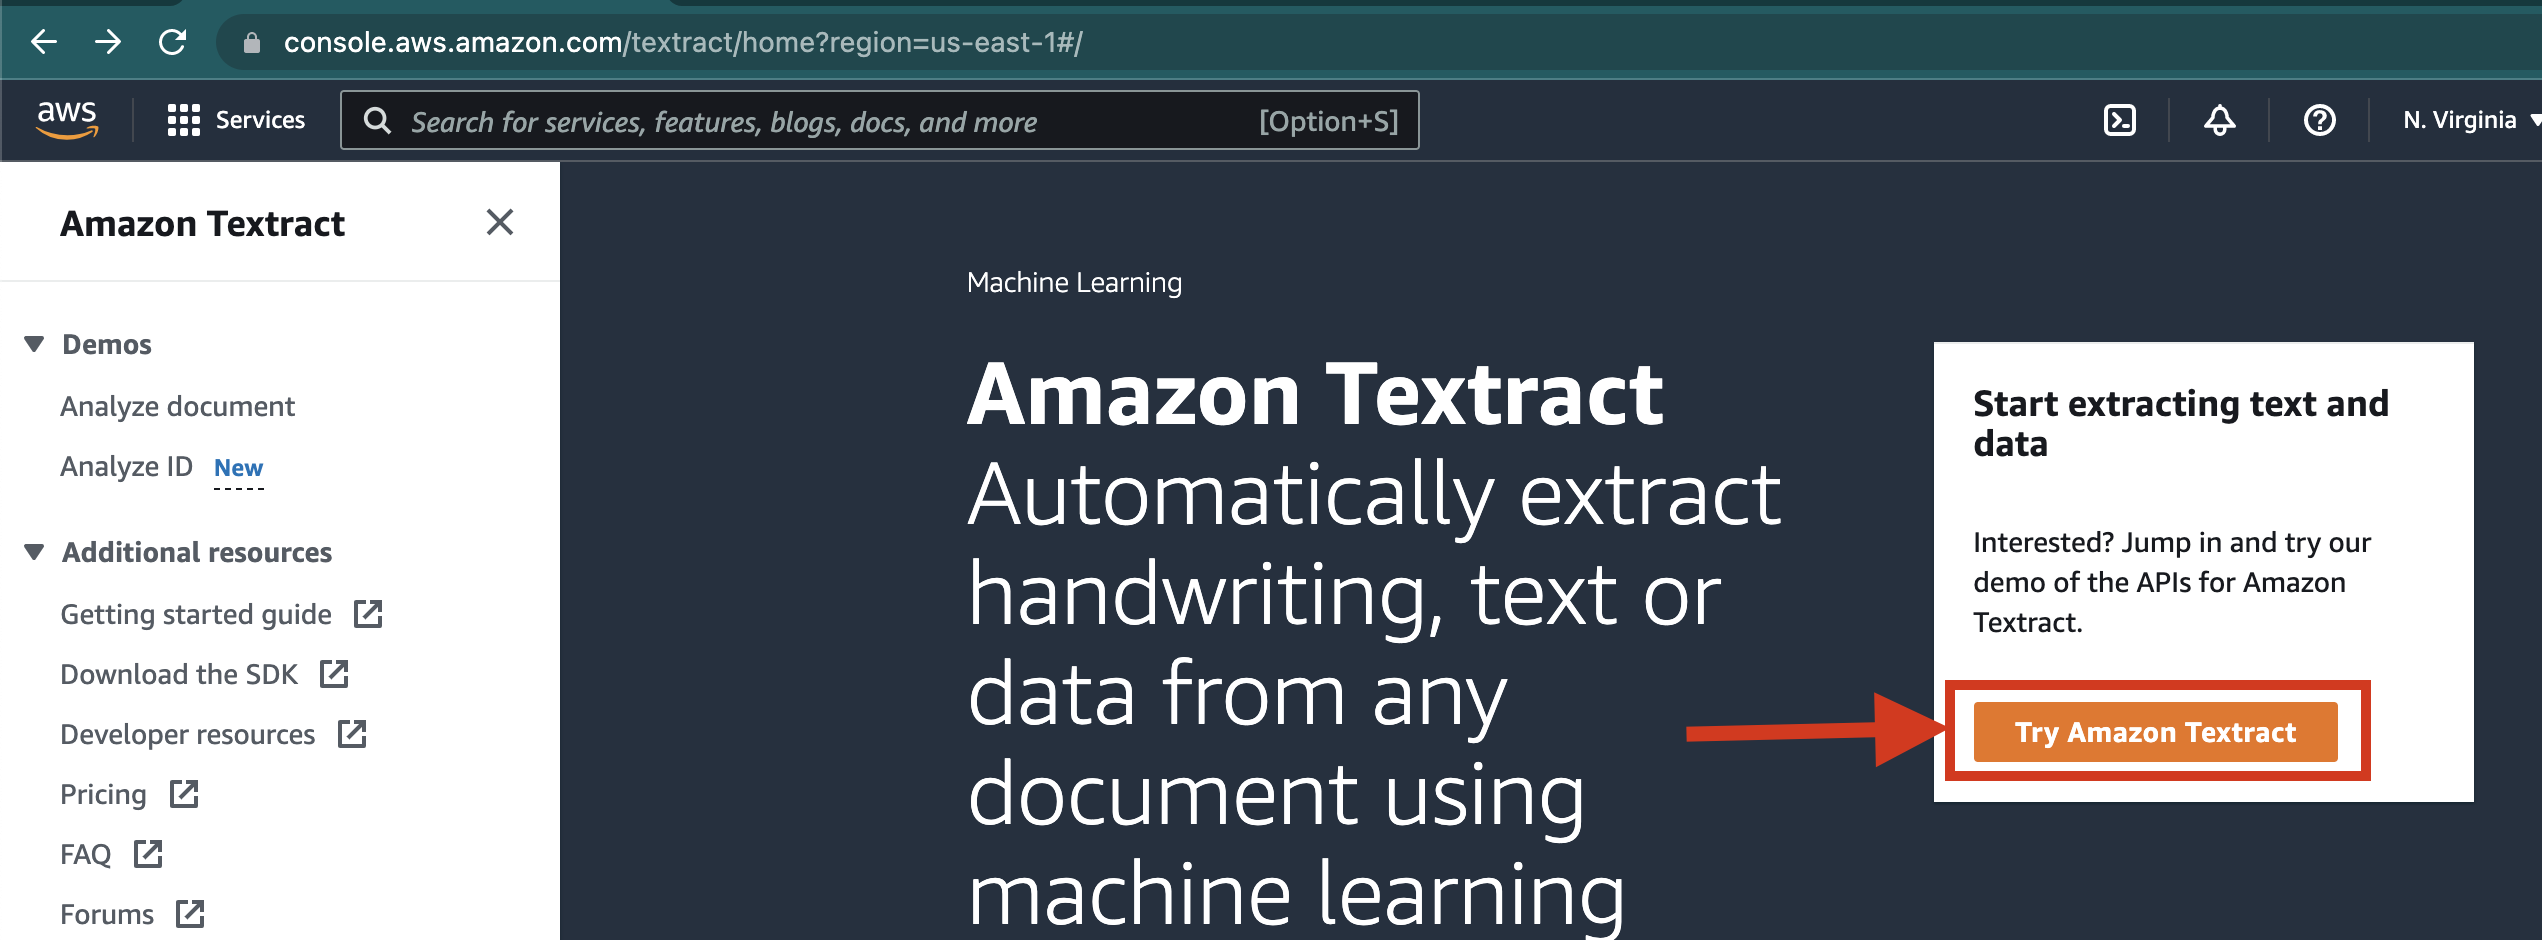
3. Click the Try Amazon Textract button to use Textract via the AWS Console. You’ll get to a page where you can select documents to extract content from.
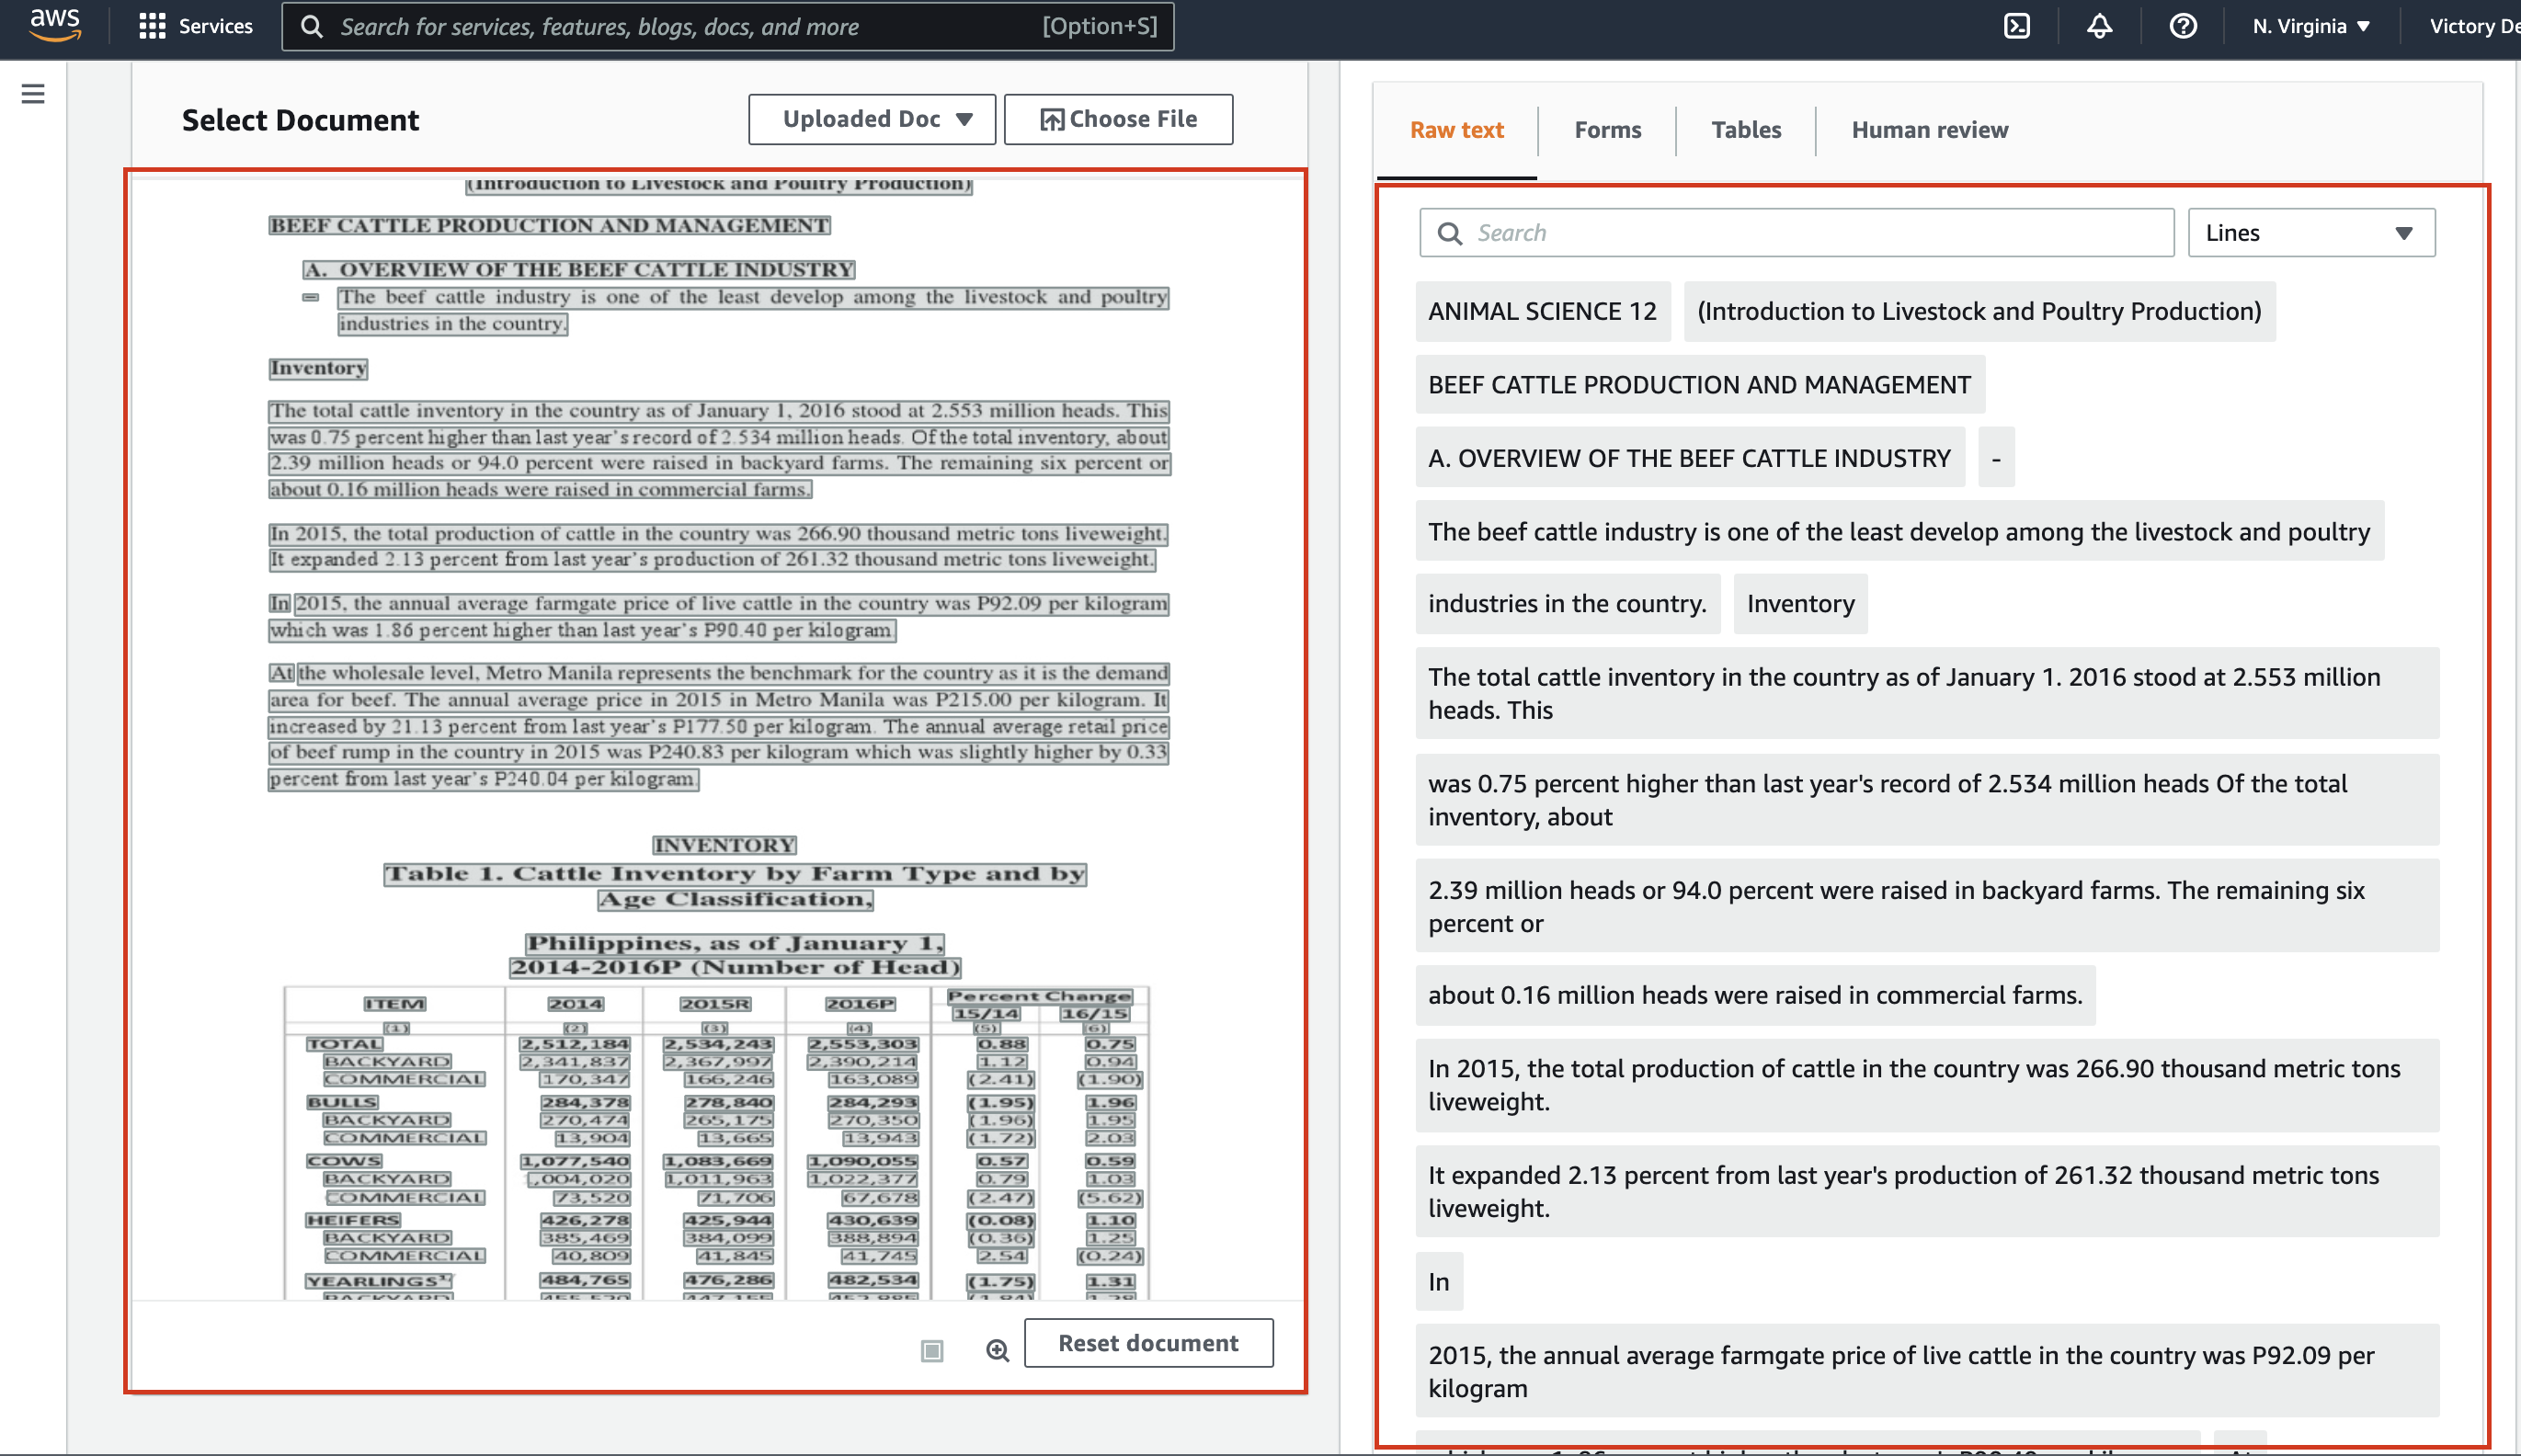
4. Now, click the Choose File button and select the sample-journal.png file you downloaded in step one.
The gray characters at the left section highlight all scanned characters, while a preview of the results is shown in the right section. Although the right section previews all raw text extracted, you can further filter the results (step five).
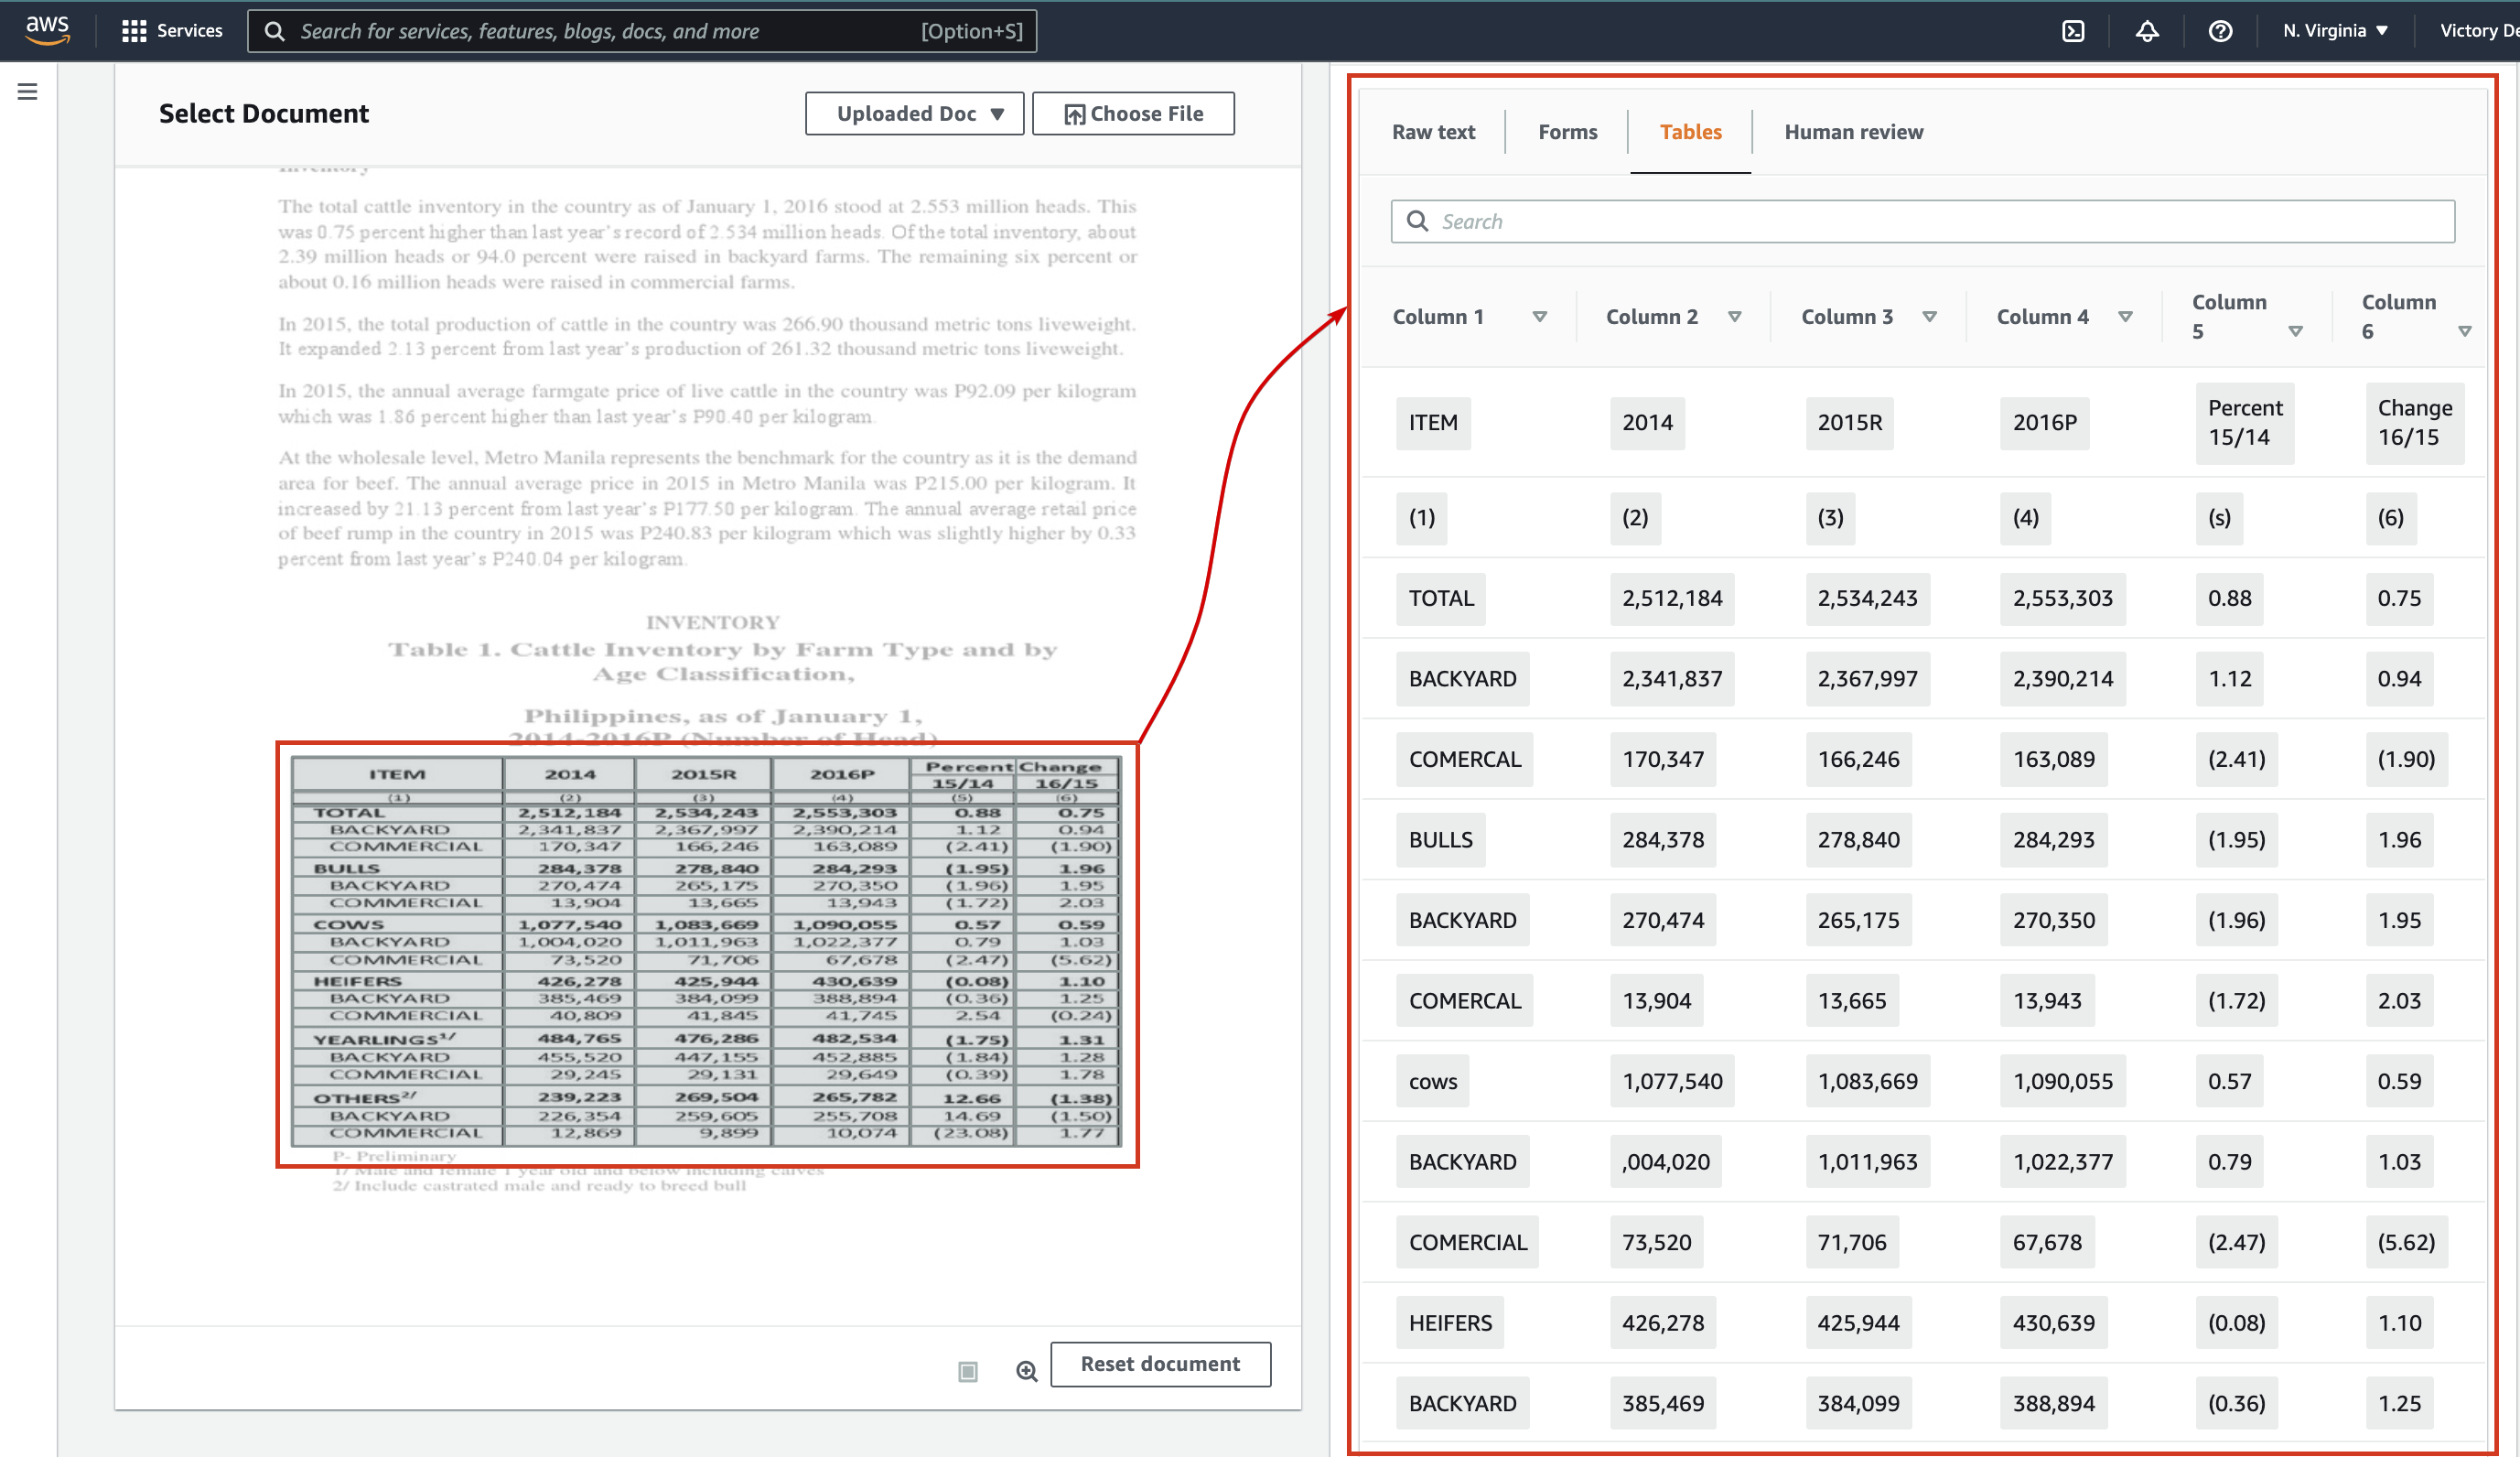
5. Click the Tables tab at the right section to view only the tabular characters extracted from the tables within the image document.

Below, you can see the Tables tab displays a preview of the tabular data extracted from the input document.
6. Finally, click the Download results button to download a ZIP file containing all information extracted from the image document (sample-journal.png).

The files included in the ZIP file are:
- A *.json file – Contains the result of the AnalyzeDocument operation in a JSON format.
- A *.txt file – Contains all characters scanned from the image document.
- Two *.csv files – Contain the key-value and table data filtered out of the image document.
Conclusion
This tutorial aimed to teach you how AWS OCR Textract can lessen manual tasks. You’ve learned to extract content from different image documents, from expense to tabular-focused data. As you’ve realized, the Textract service lets you choose either method (AWS CLI or AWS Console) when extracting content.
At this point, through the AWS Console, you can now analyze image documents right from the convenience of your mobile device or tablet.
Since you’ve only extracted contents from image documents locally, why not try uploading a file to an S3 bucket and use that file as the input document for Textract?


