


Transfer of data occurs every second between users, devices, and the internet. And if you’re looking for a way to move data from one source to another, the AWS Data Pipelines service is what you can rely on.
In this tutorial, you’ll learn how to keep your data secure by automating data transfer between sources with the AWS Data Pipelines.
Read on and start transferring data like a pro!
Prerequisites
This tutorial will be a hands-on demonstration but doesn’t require many tools to get started. If you’d like to follow along, be sure you have an AWS account.
Creating Data in a DynamoDB Table
What is the AWS data pipeline anyway? AWS data pipeline is a web service that helps move data within AWS compute and storage services as well as on-premises data sources at specified intervals. And as part of preparations for moving data between sources, you’ll create an AWS data pipeline.
Since you’ll be using DynamoDB to transfer data to an S3 bucket, start by creating a DynamoDB table.
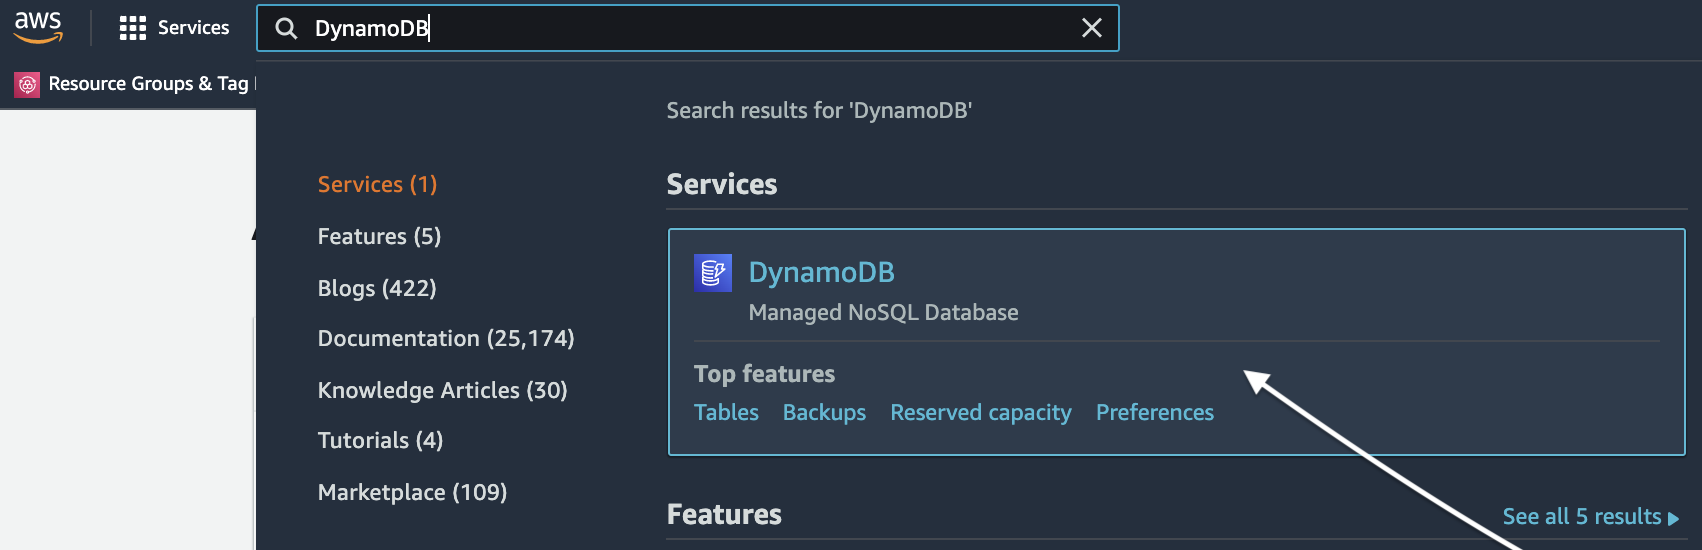
1. Open your favorite web browser and log in to your AWS account. Locate the Search input field, enter “DynamoDB”, and click the DynamoDB item, as shown below.
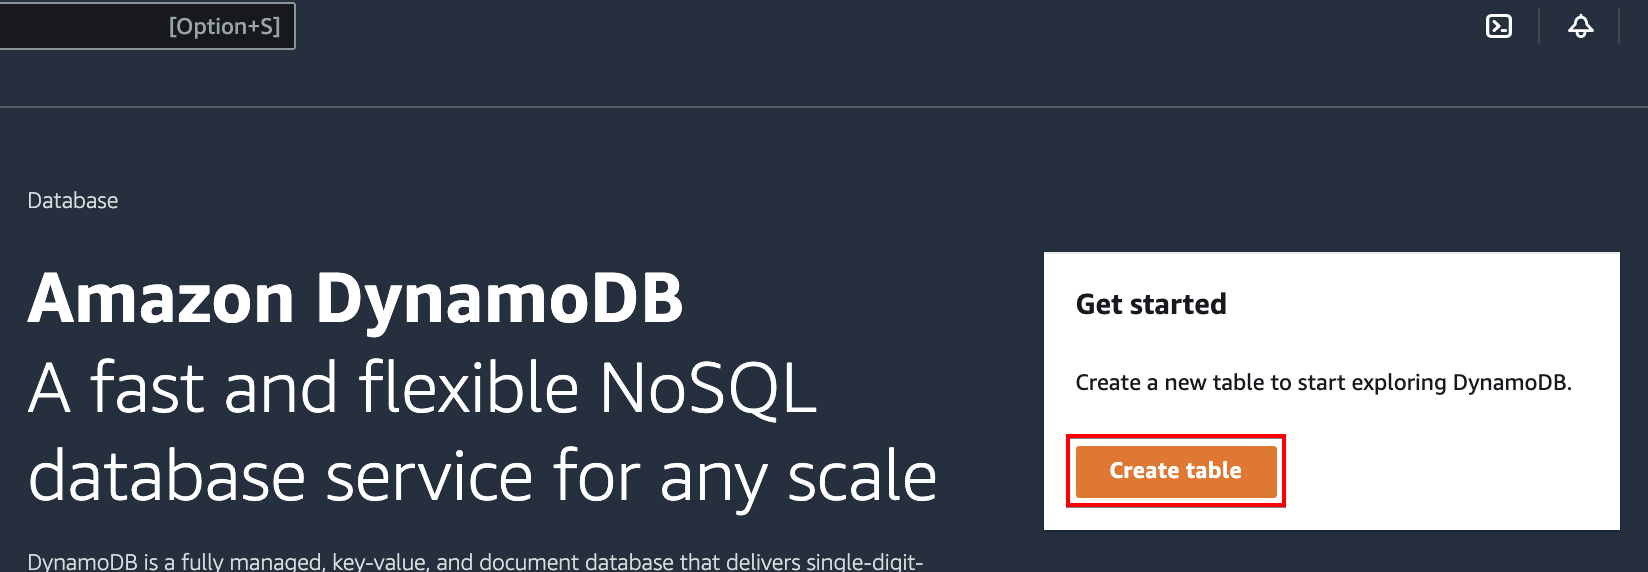
2. On the DynamoDB dashboard, click on the Create table button (right-most) to initiate creating a DynamoDB table.
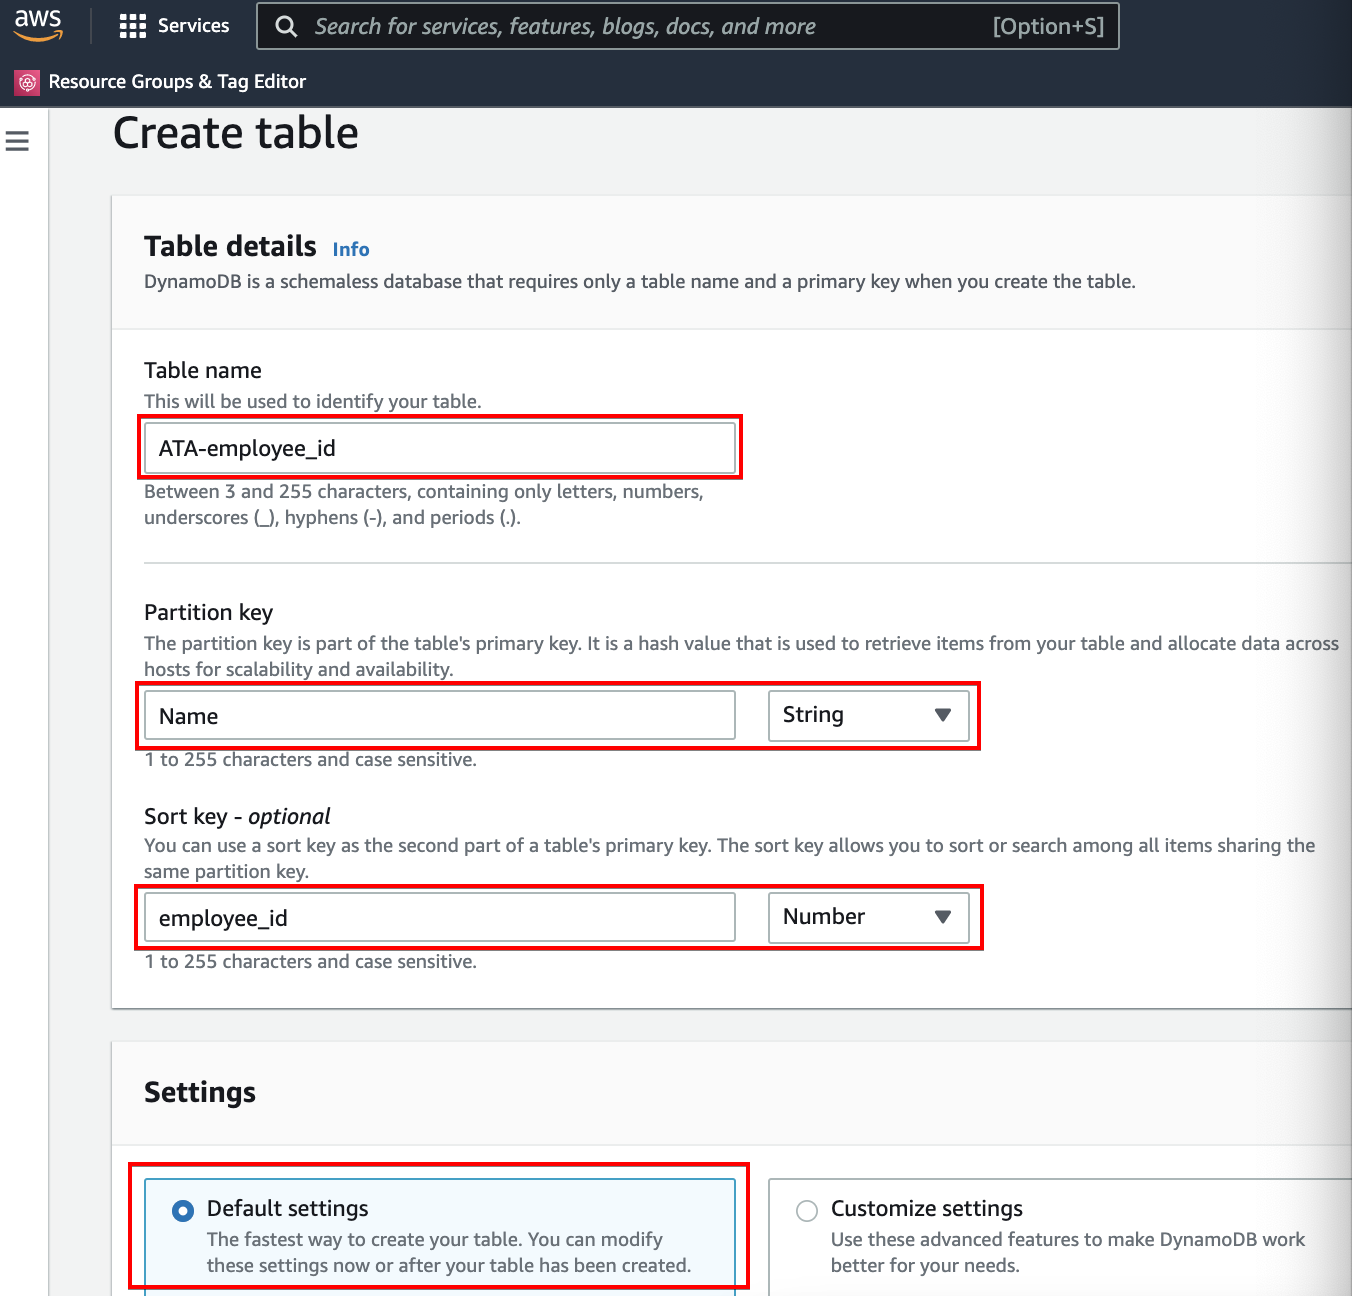
3. Enter a Table name, Partition key, and Sort key, as shown below. Leave the Default settings option selected as it’s the fastest way to create your table. You can always modify these settings after you’ve created the table.
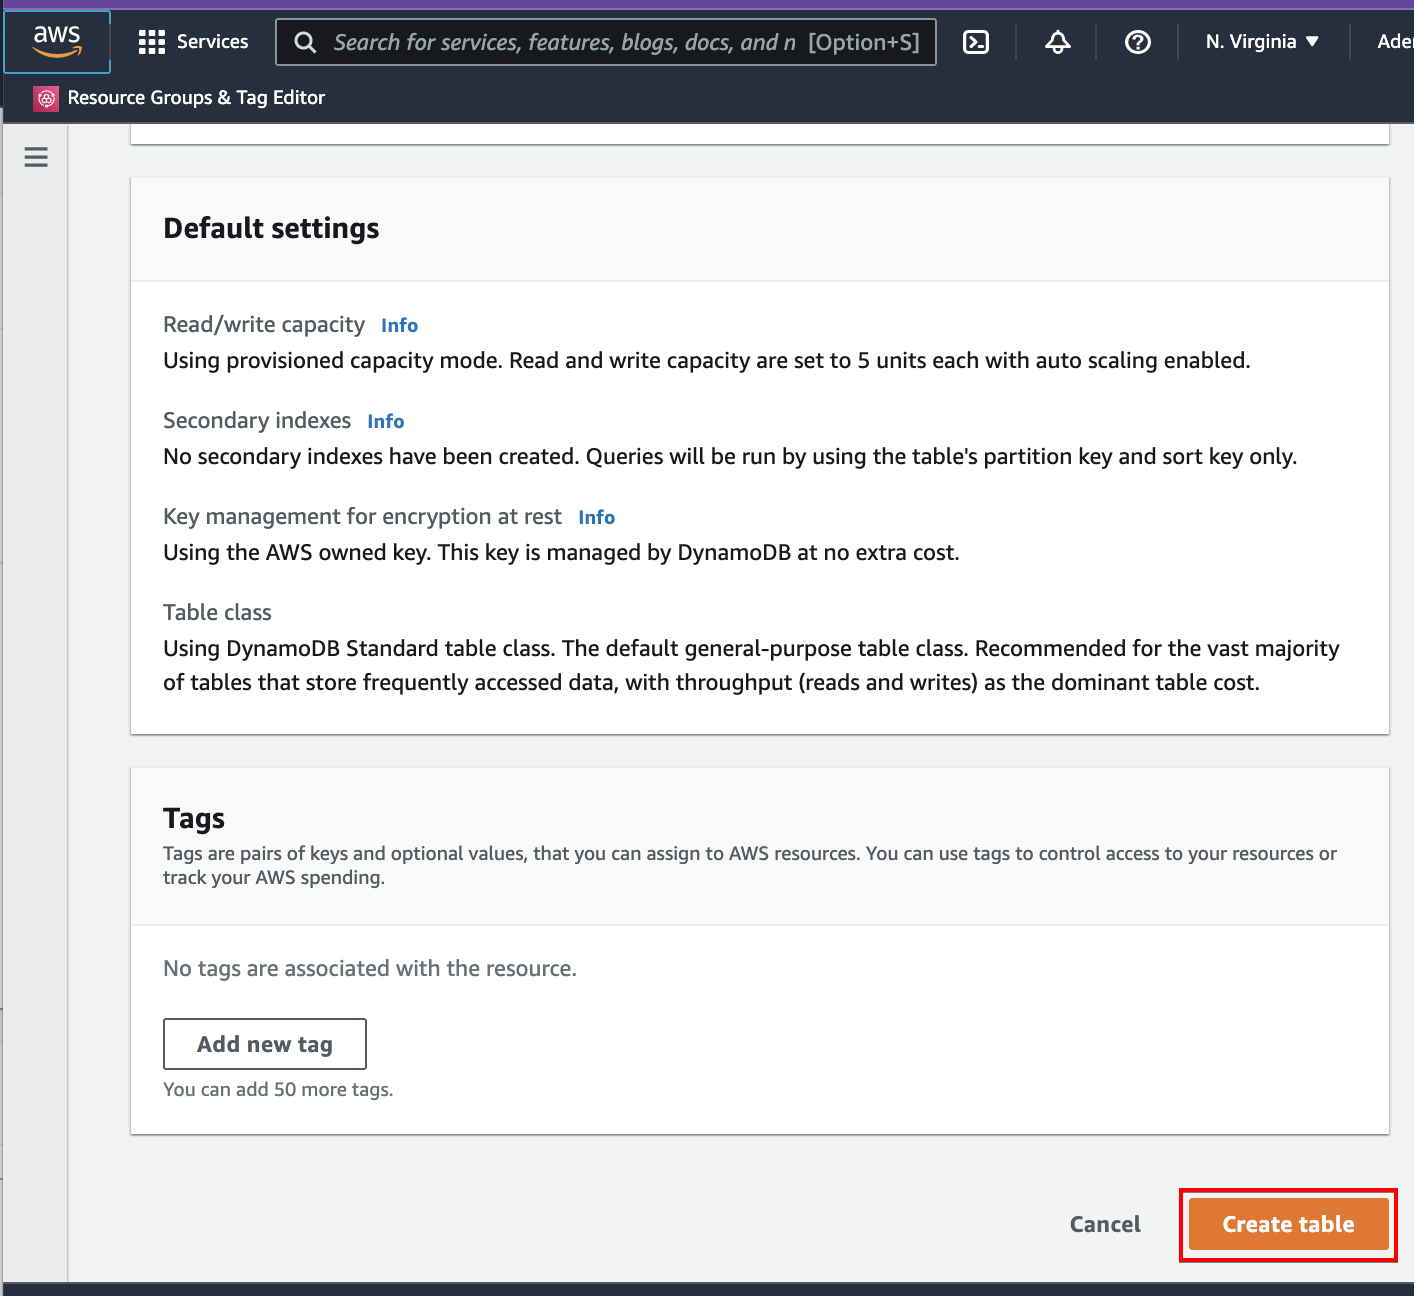
Scroll down and optionally add tags. But for this example, skip adding tags and click on the Create table button to finalize table creation.
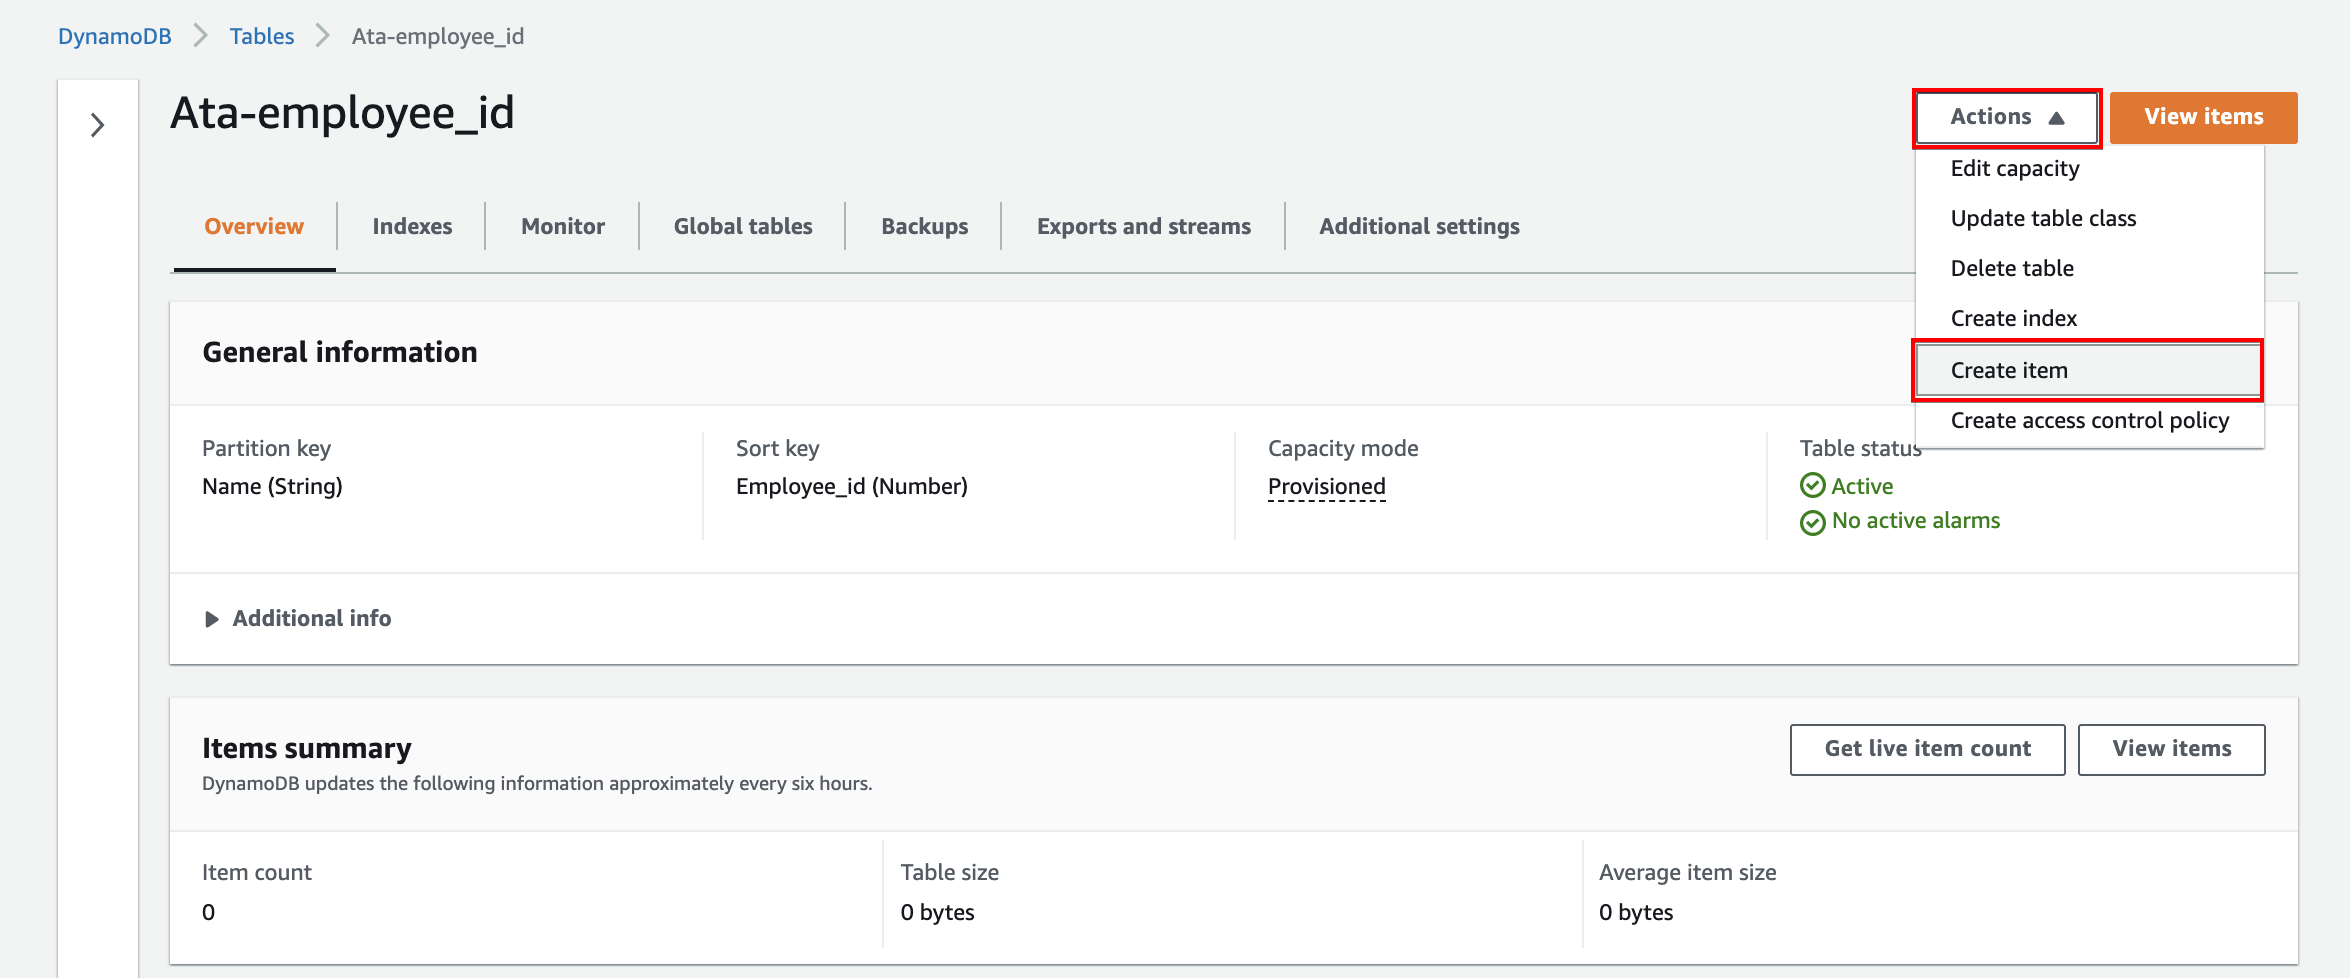
4. Now, click the newly created table (Ata-empoyee_id) to view its properties. Your table will look similar to the one below.
Click on the Actions dropdown button and select Create item to start creating items in the table.
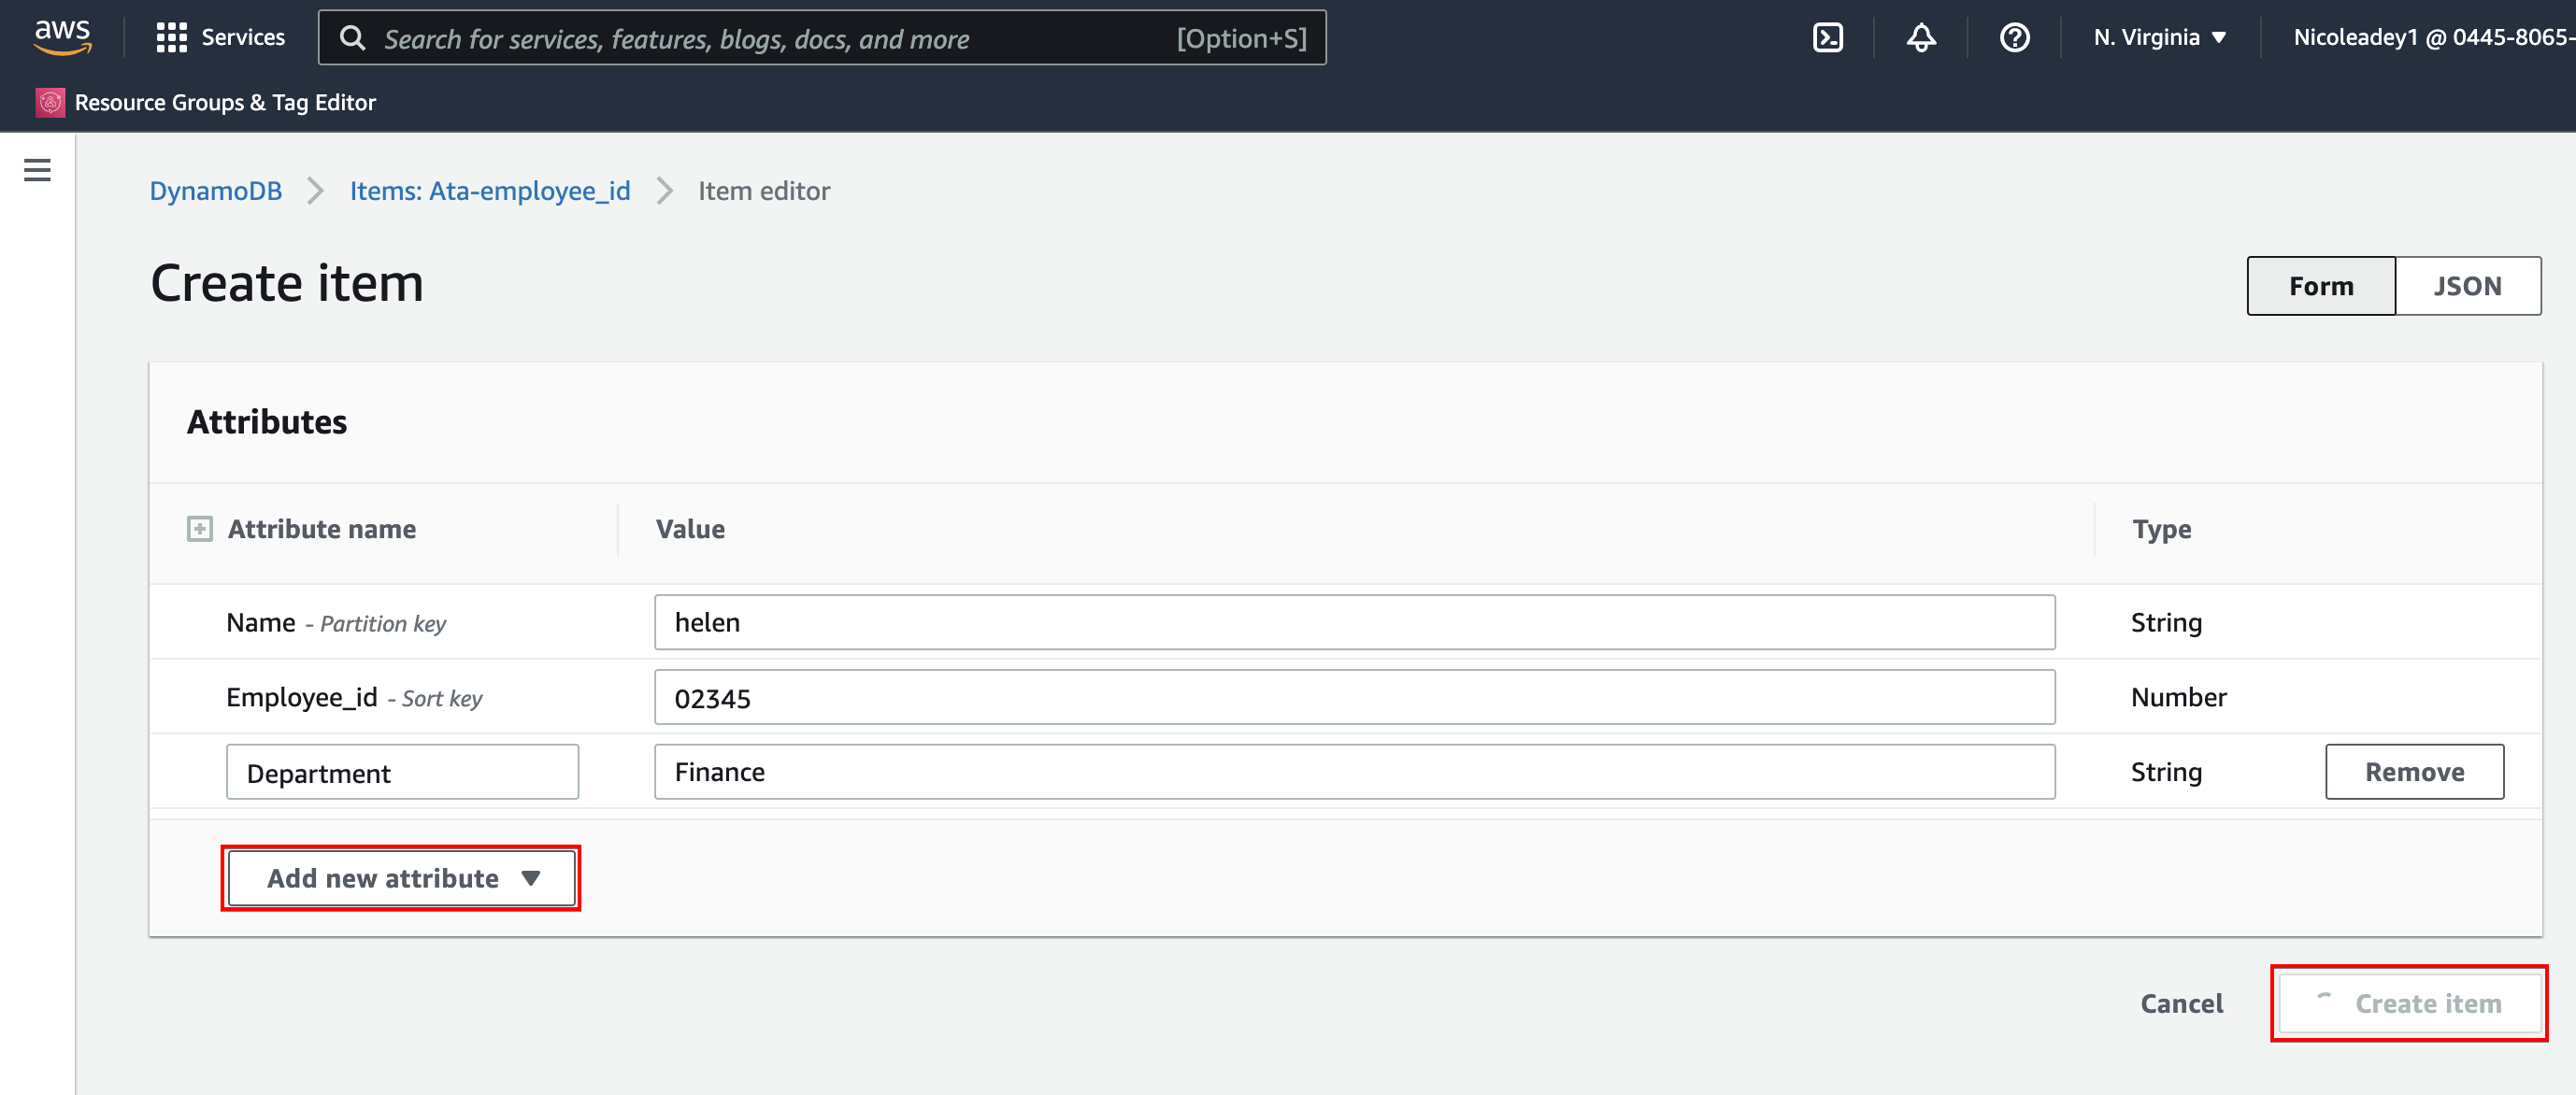
5. Click on the Add new attribute dropdown button, select an attribute to add, and set its value. Repeat the process and add more attributes as you want, then click Create item to create the item on the table.
This table would serve as your data to be transferred to an S3 bucket.
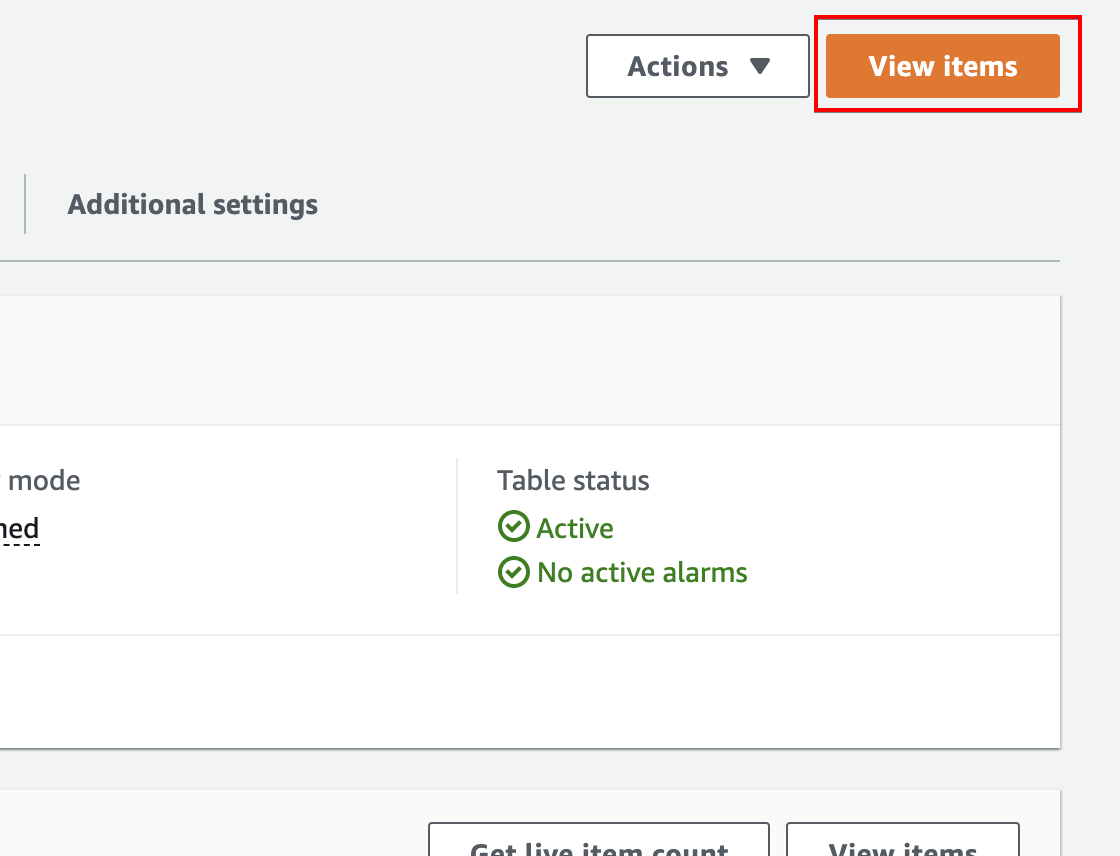
6. Back to your table’s (ATA-employee_id) overview page, click on the View items button (top-right) to see the newly created item.
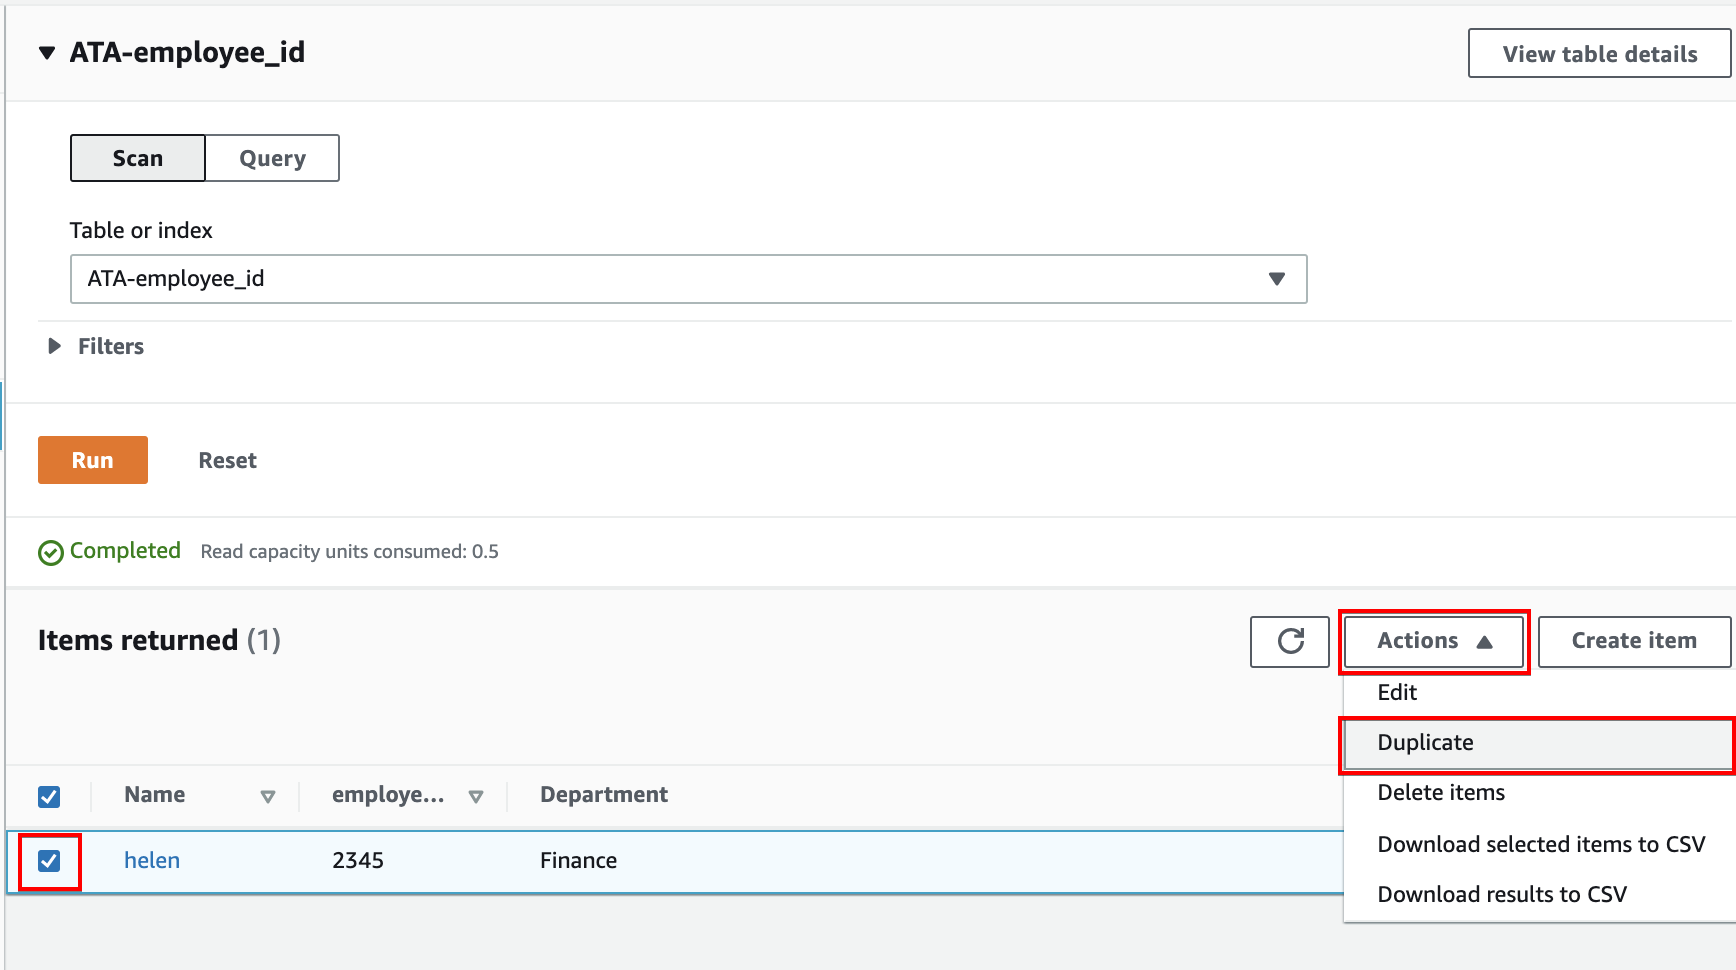
7. Put a check on the item, then click the Action dropdown button, and choose Duplicate to duplicate the item as many times as you like.
Providing Access to Resources with IAM Policy and Role
You now have the DynamoDB table set up. But to move data to the S3, you’ll create an IAM policy and a role to provide access. Both IAM policy and a role that also allows or denies certain actions on services.
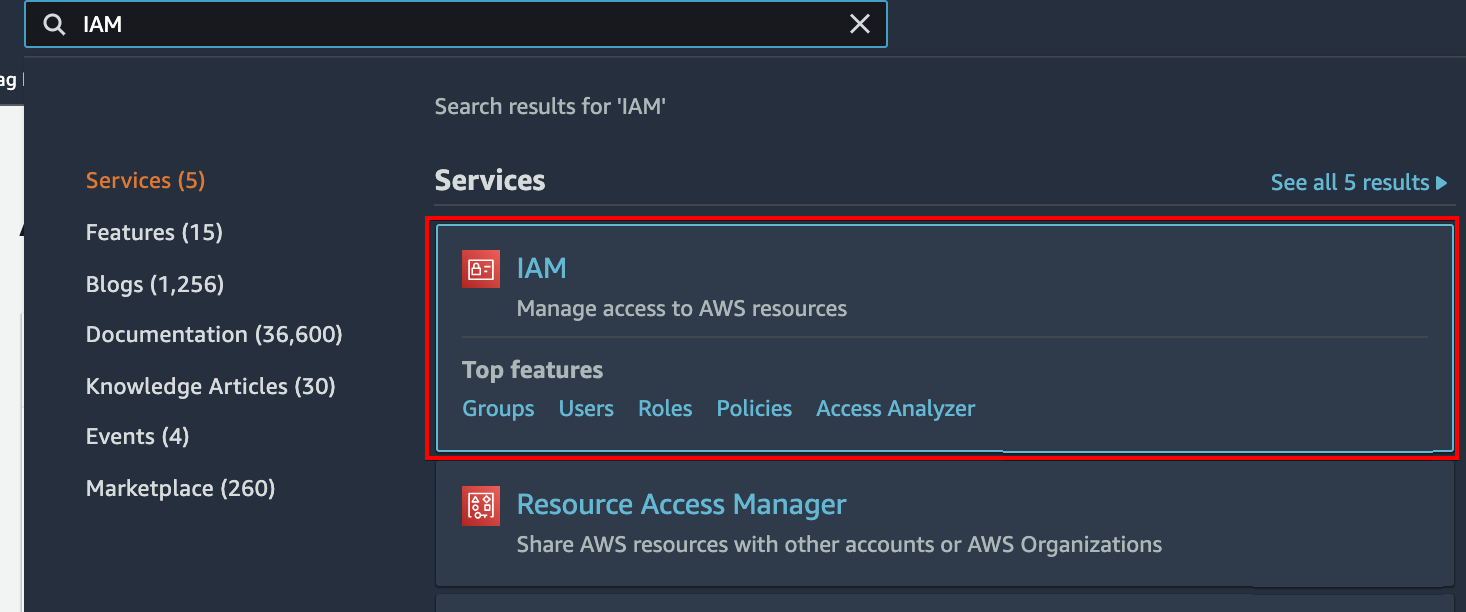
1. Search for IAM on the dashboard, and click the IAM item, as shown below to access the IAM dashboard.
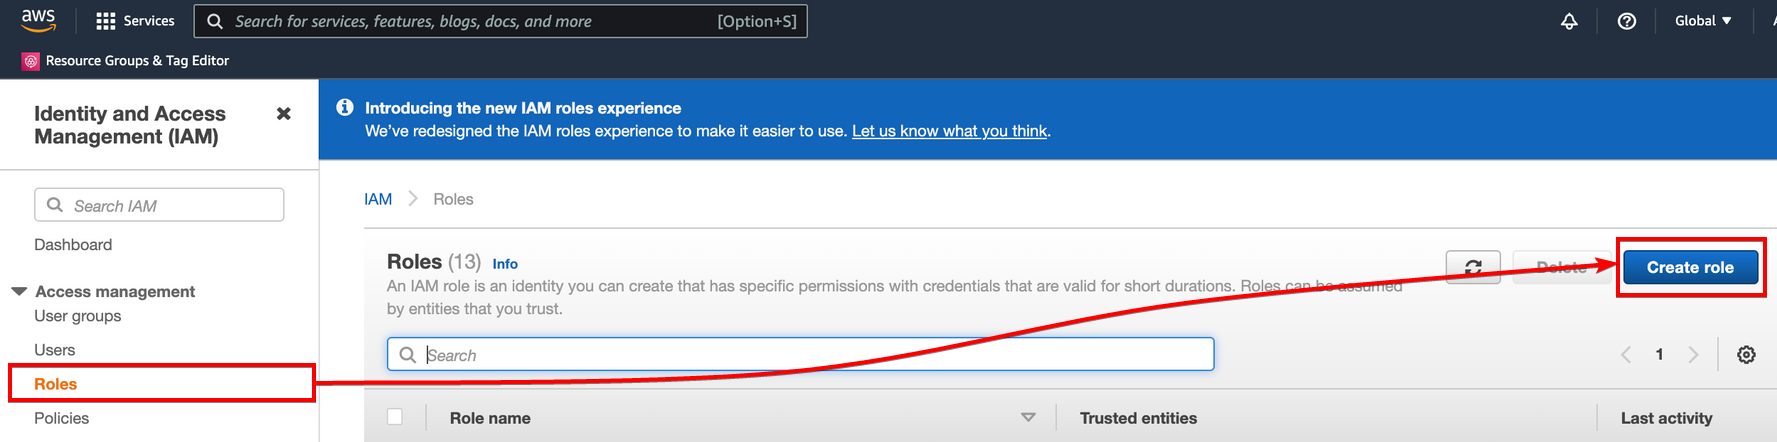
2. On the IAM dashboard, select roles on the left panel, then click on Create roles access the page where you can add the data pipeline as a use case.
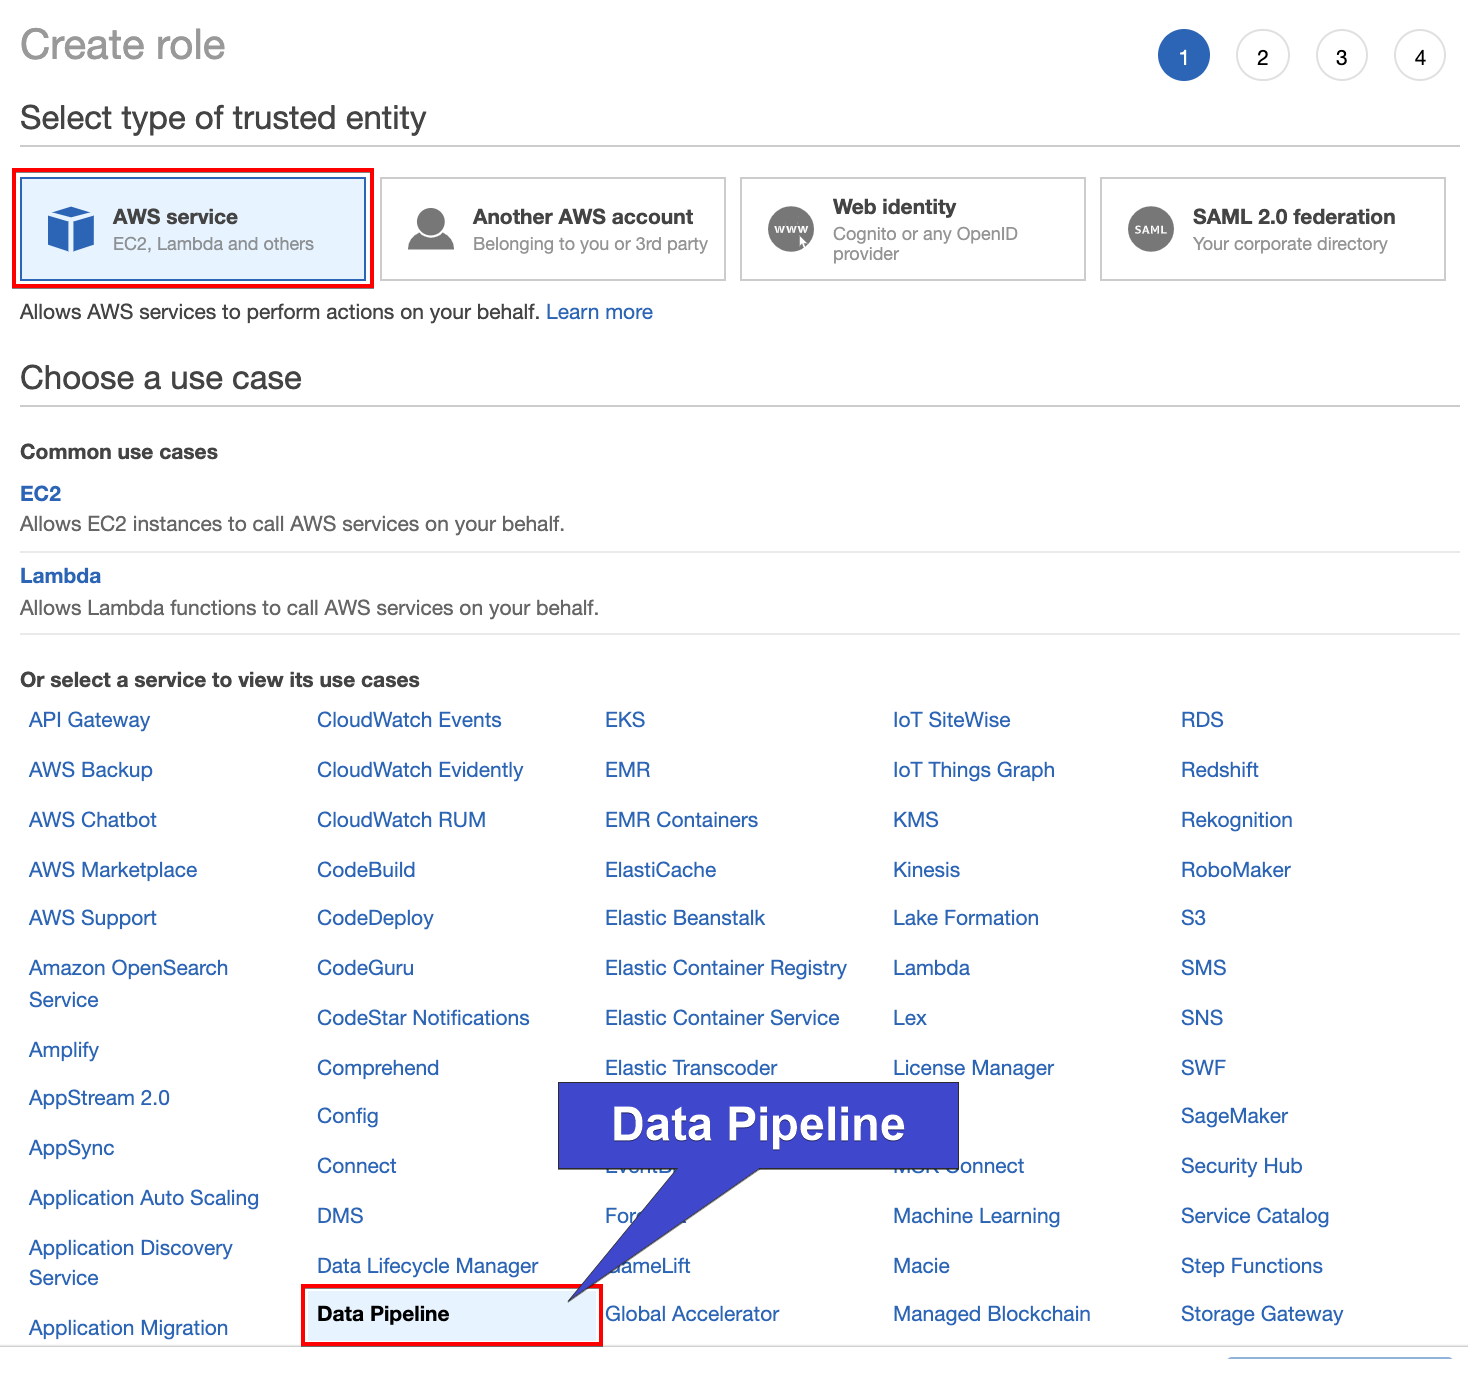
3. Next, choose the AWS service option, then click on Data Pipeline at the bottom as the use case shown below, and click Next.
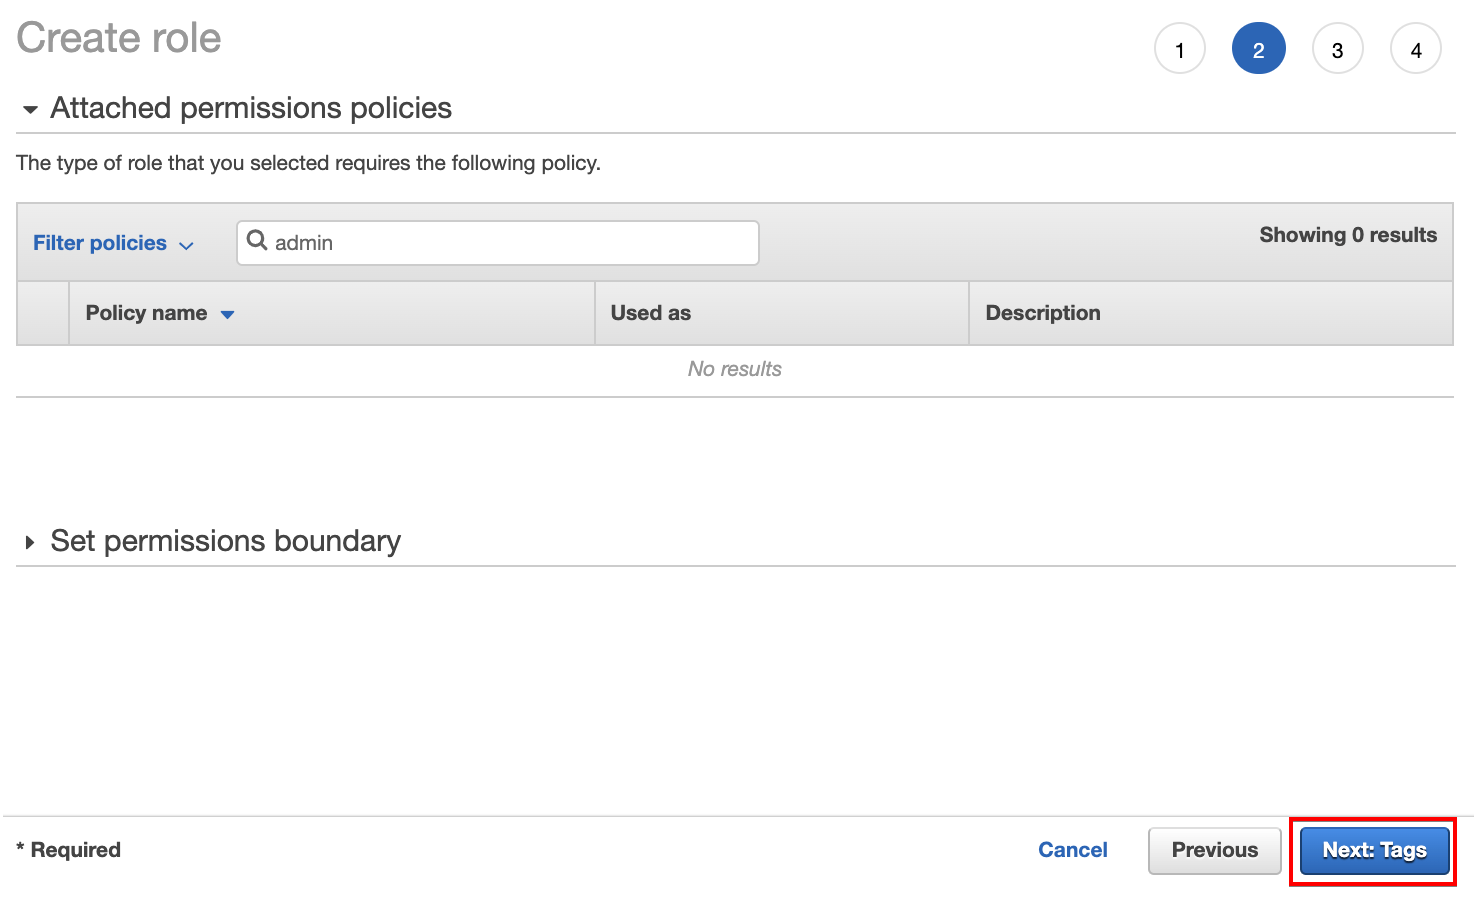
4. Click on Next: Tags to skip adding permission since the permission for this service is automatically given.
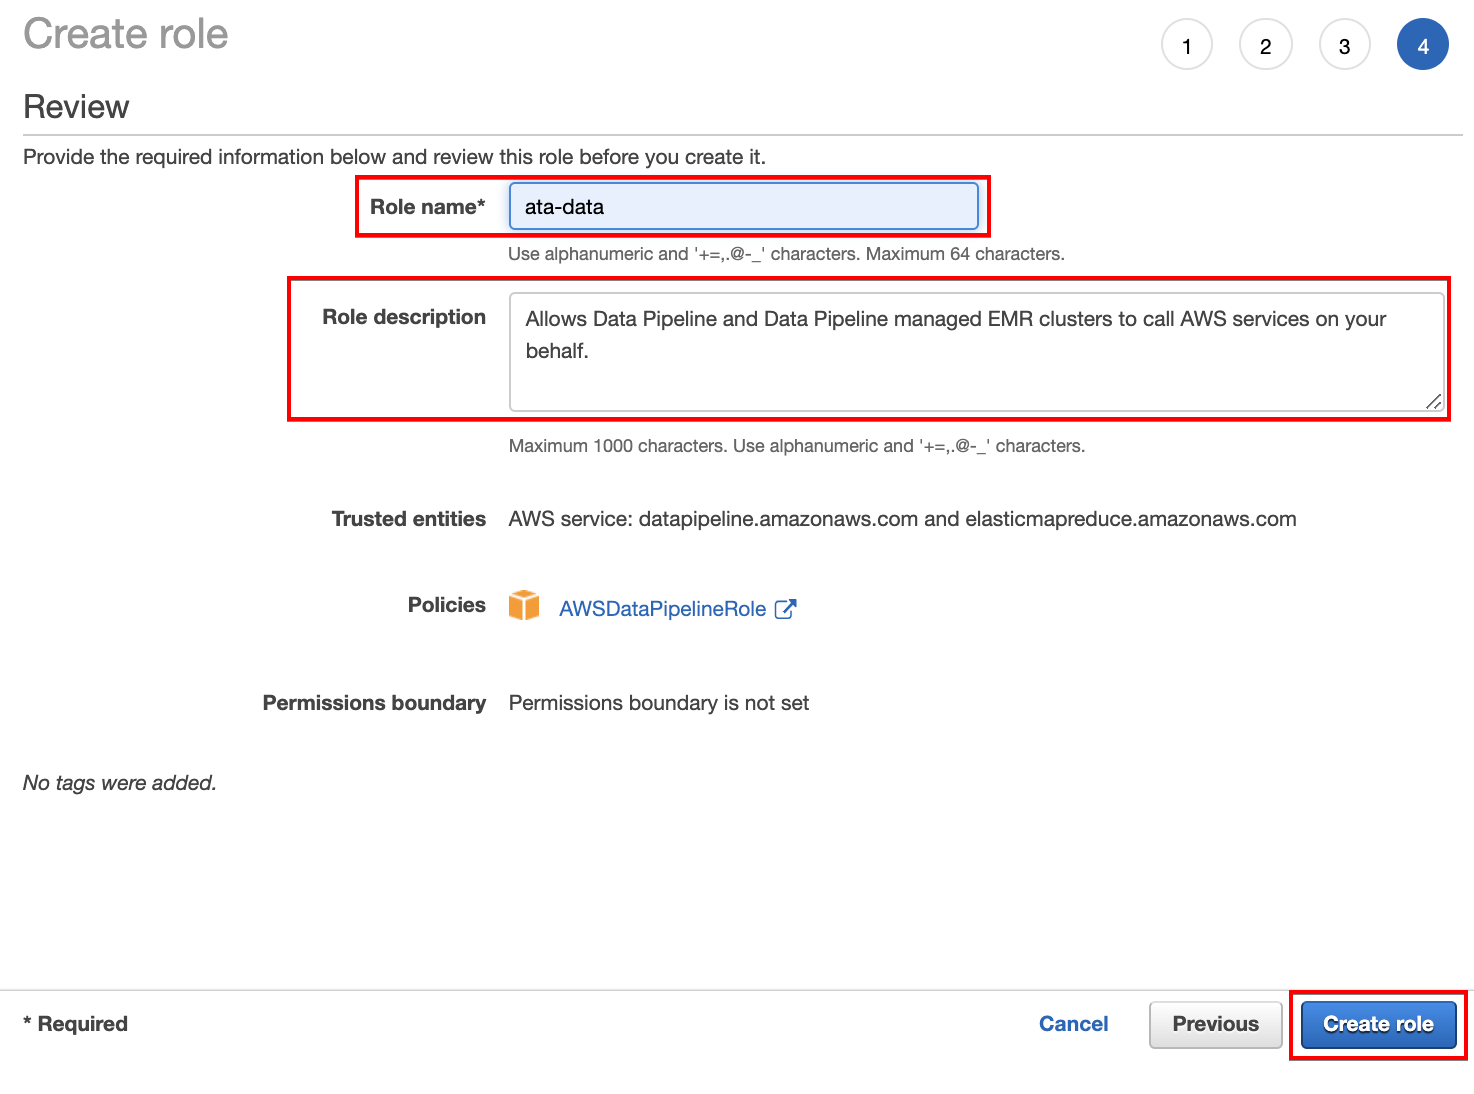
5. Enter a unique name for the role (Role name field) and a role description (optional), but for this example, the role is named ata-data. This role allows the user account access services like the clusters needed for the data pipelines to run, as shown below.
Click on Create role to finalize creating the role.
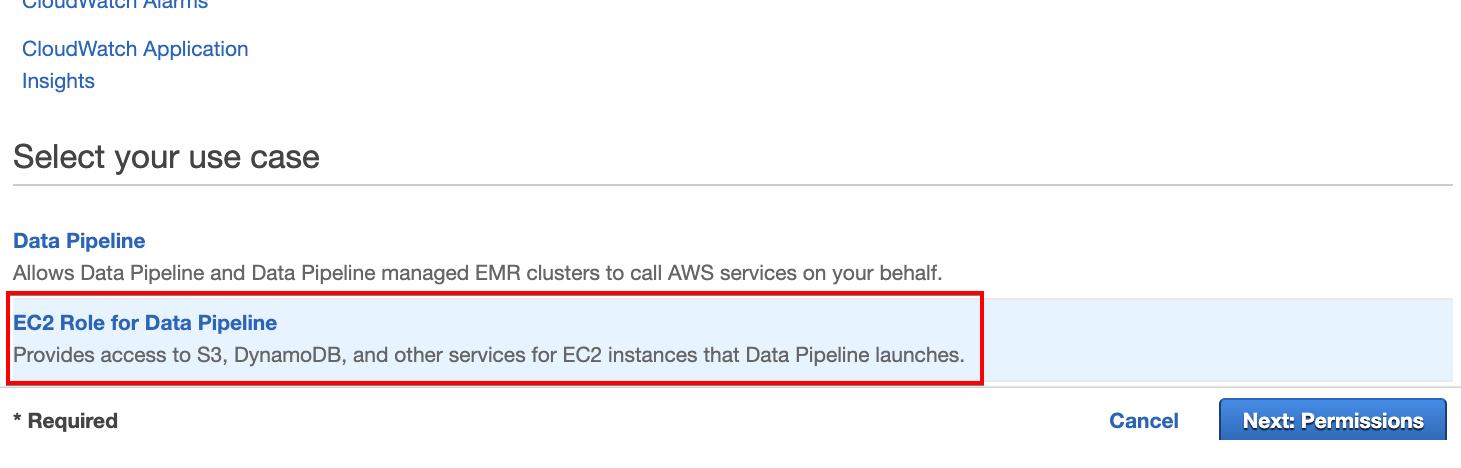
6. Now, repeat steps two to five. But this time, scroll down and choose EC2 Role for Data Pipeline for the use case, as shown below. For this demo, the EC2 role is named ATA-eC2employeerole.
This use case lets you create another role to provide access to your S3 and DynamoDB for EC2 instances.
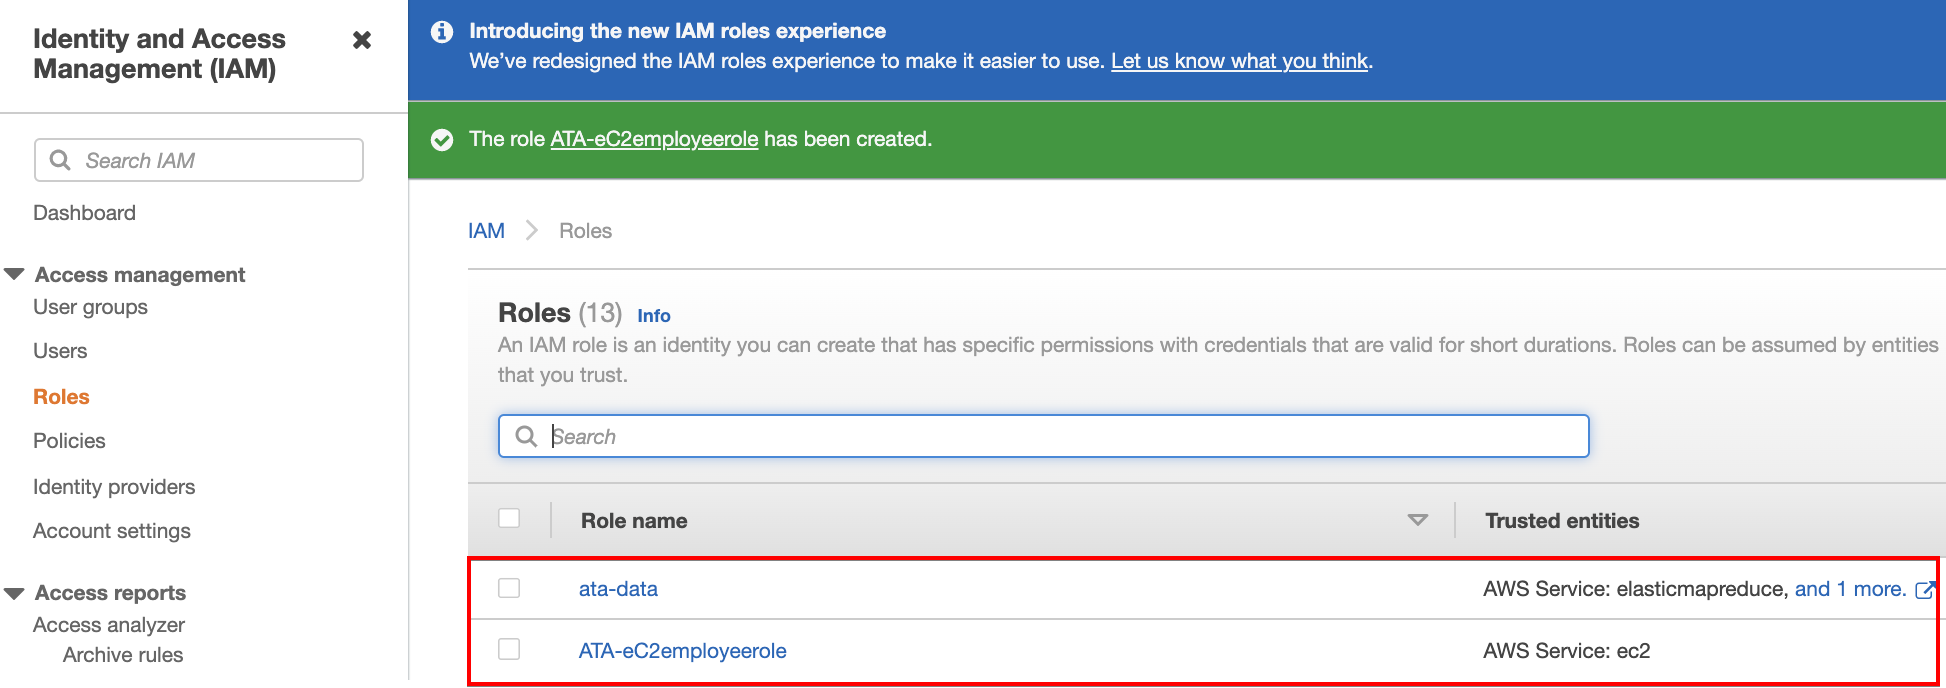
7. Navigate back to the IAM dashboard to confirm the roles you’ve created exist.
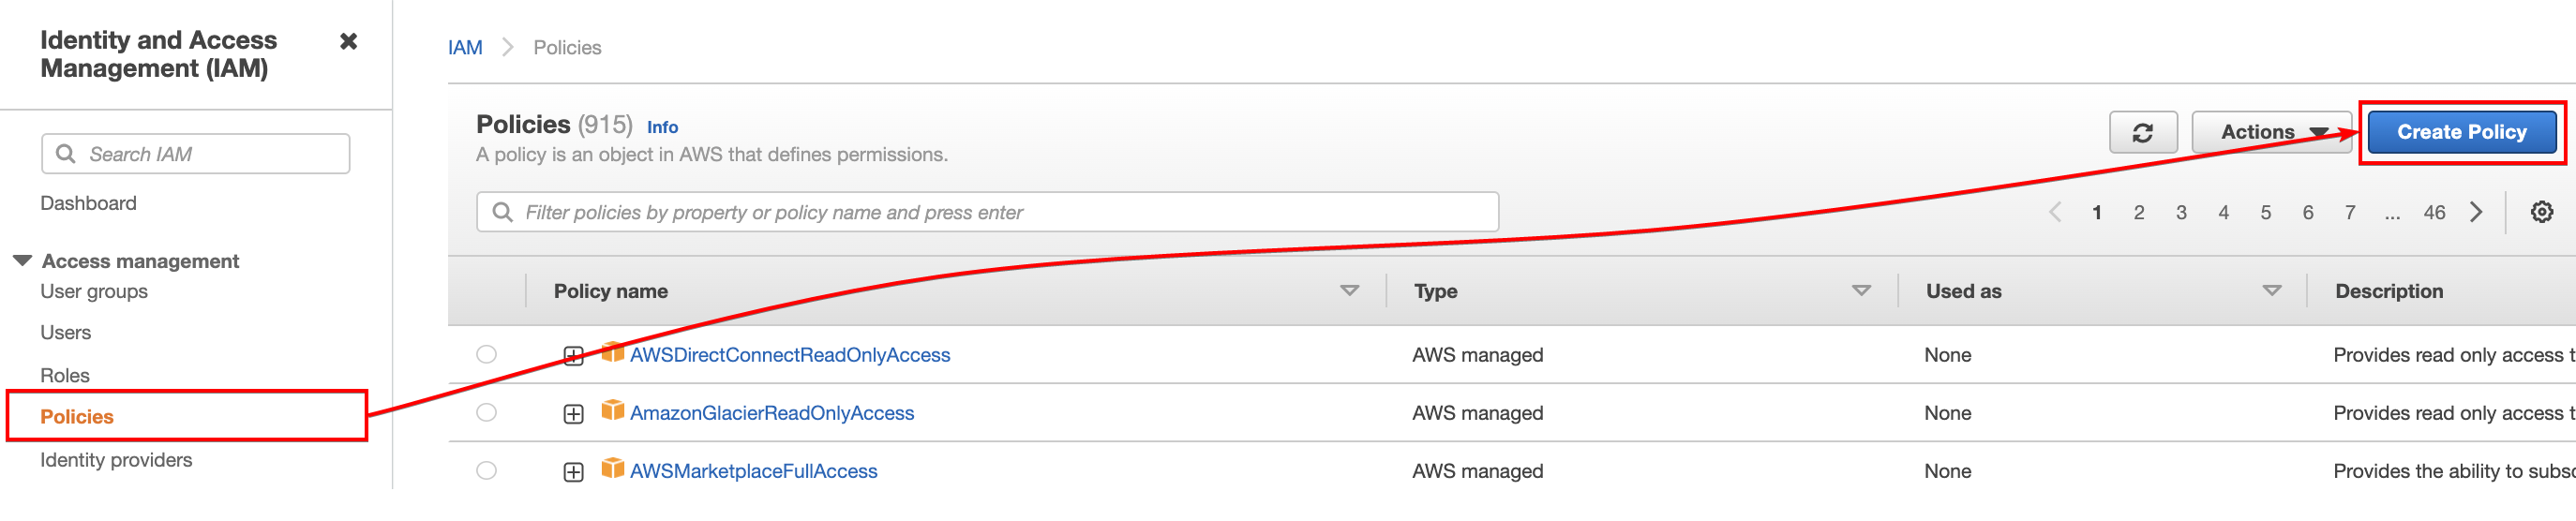
8. Click the Policies menu on the left panel of the IAM dashboard, then click on Create Policy. Your browser redirects you to a page (step nine) where you can create policies to attach to the role for the data pipeline.
Policies are needed to be attached to roles to restrict or give access to resources. For this tutorial, access to perform actions on the S3, EC2, and DynamoDB needs to be specified.
9. On the Create policy page, click on the JSON tab to write a policy in JSON format.
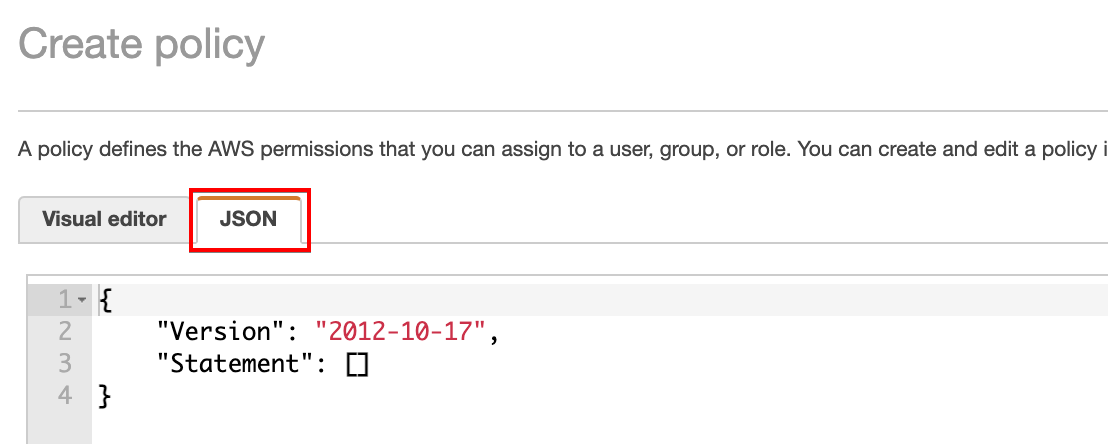
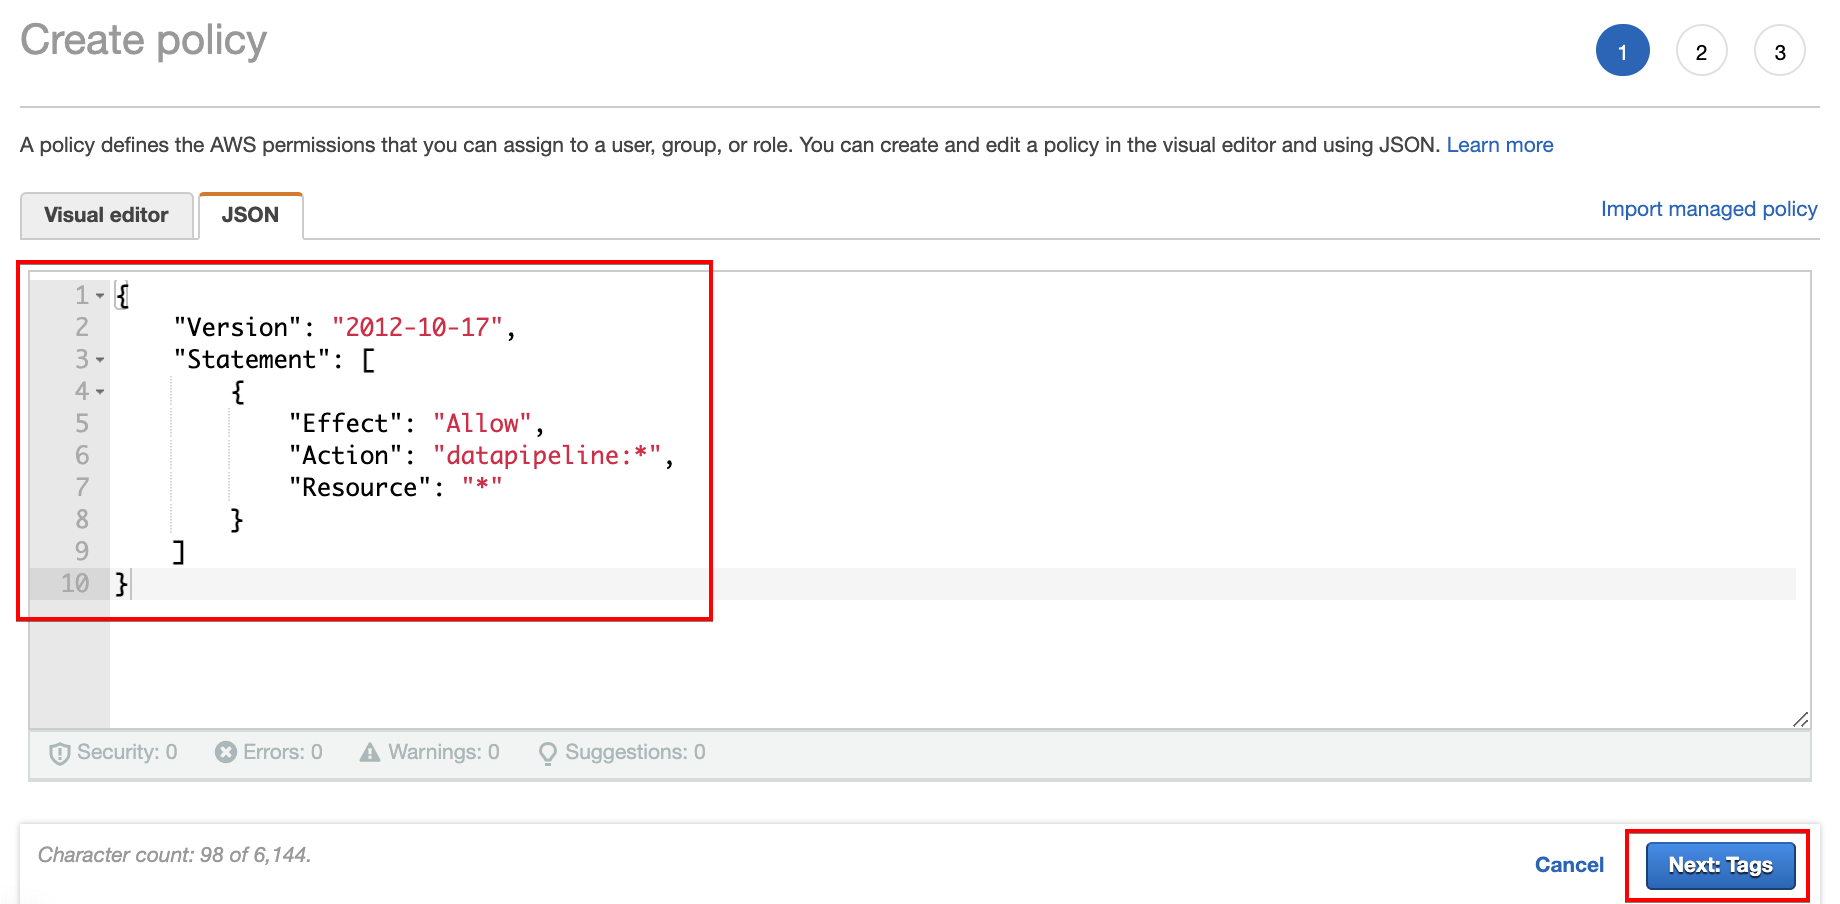
10. Copy and paste the code below to allow the user account access to the data pipeline, then click on Next: Tags to save the policy.
{
    "Version": "2012-10-17",
    "Statement": [
        {
            "Effect": "Allow",
            "Action": "datapipeline:*",
            "Resource": "*"
        }
    ]
}
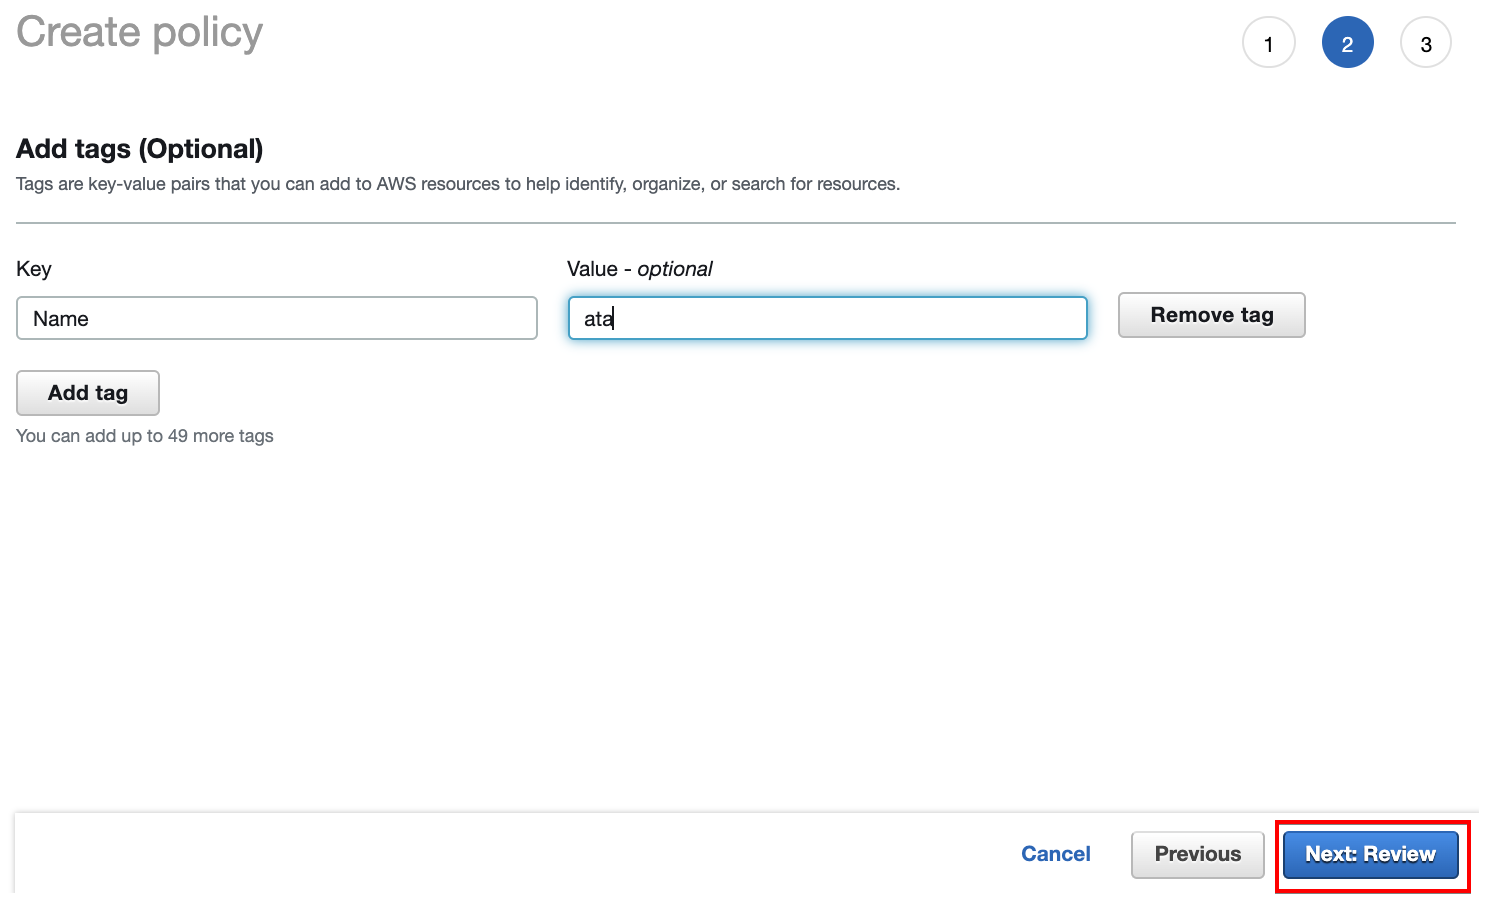
11. Add tags optionally for ease of identification and organization, then click on Next: Review.
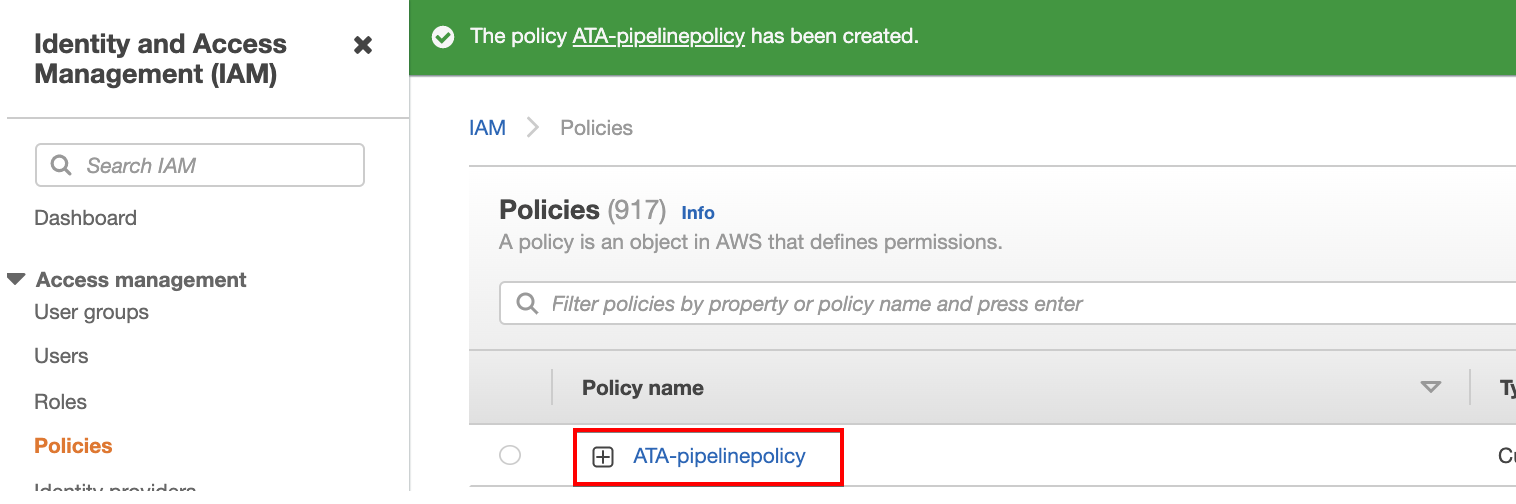
12. Enter your preferred name (ATA-pipelinepolicy) and description for the policy, and click Create policy to finalize creating the policy.
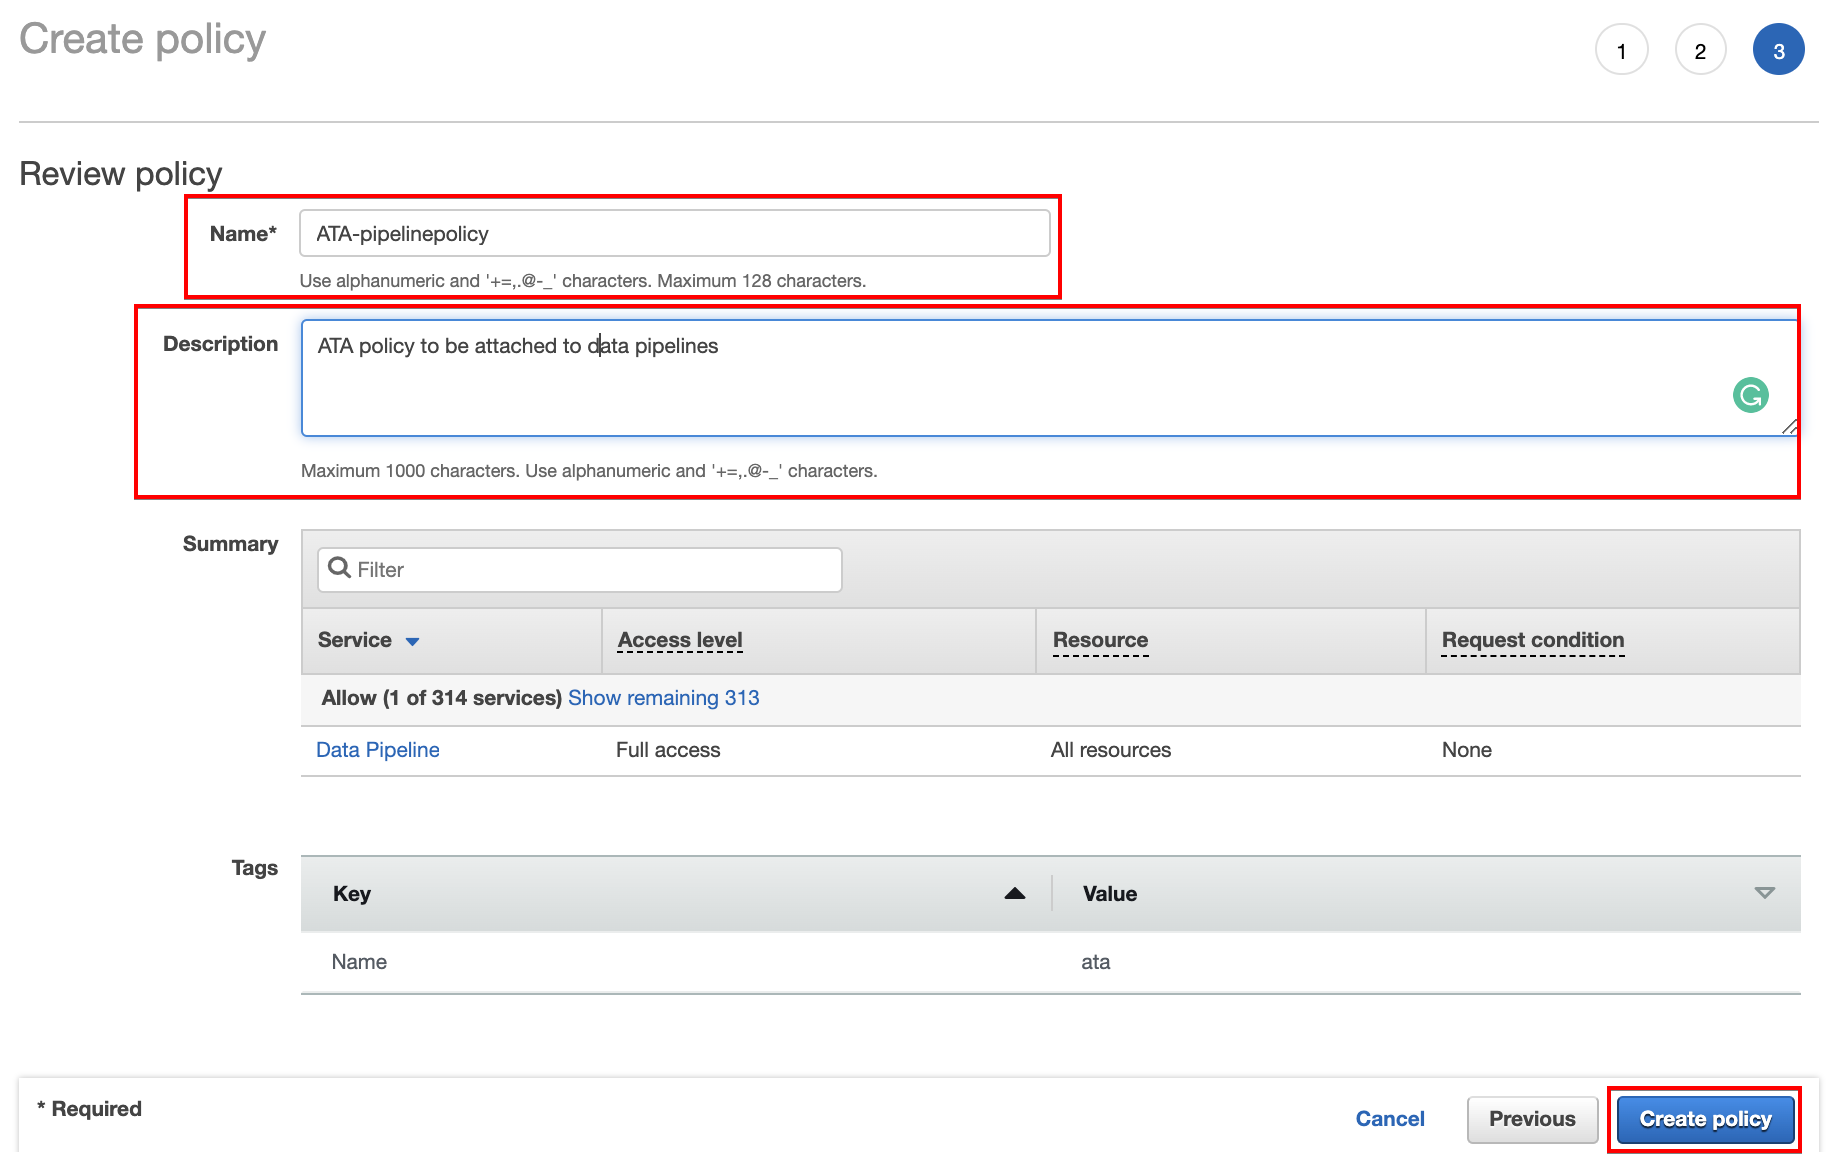
As you see below, your browser automatically redirects to the Policies page in the IAM dashboard to view the newly created policy (ATA-pipelinepolicy).
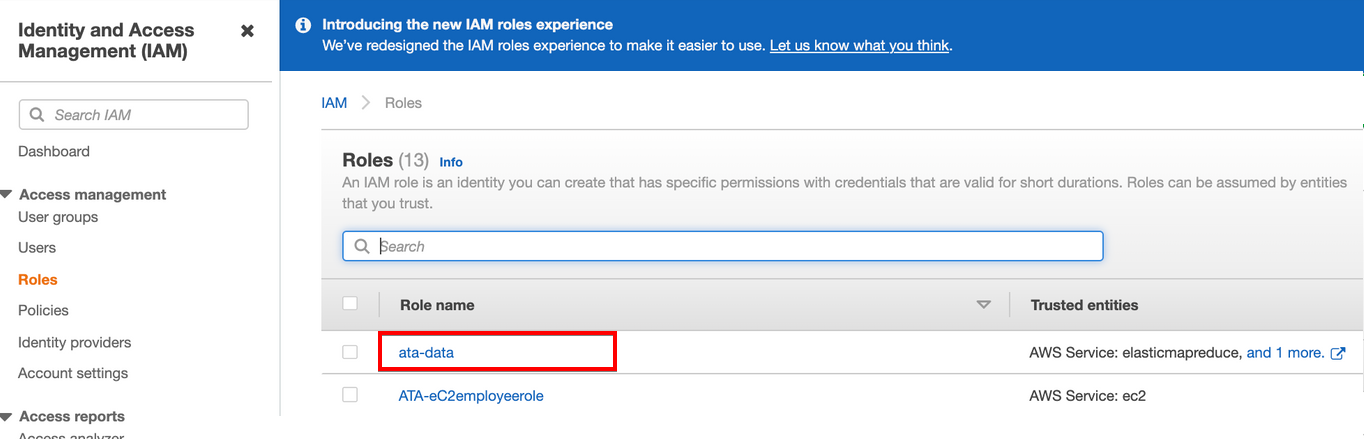
13. Navigate to the Roles page in the IAM dashboard, and click on the data pipeline role (ata-data) you previously created (step five). Doing so redirects your browser to the role’s Summary page (step 14).
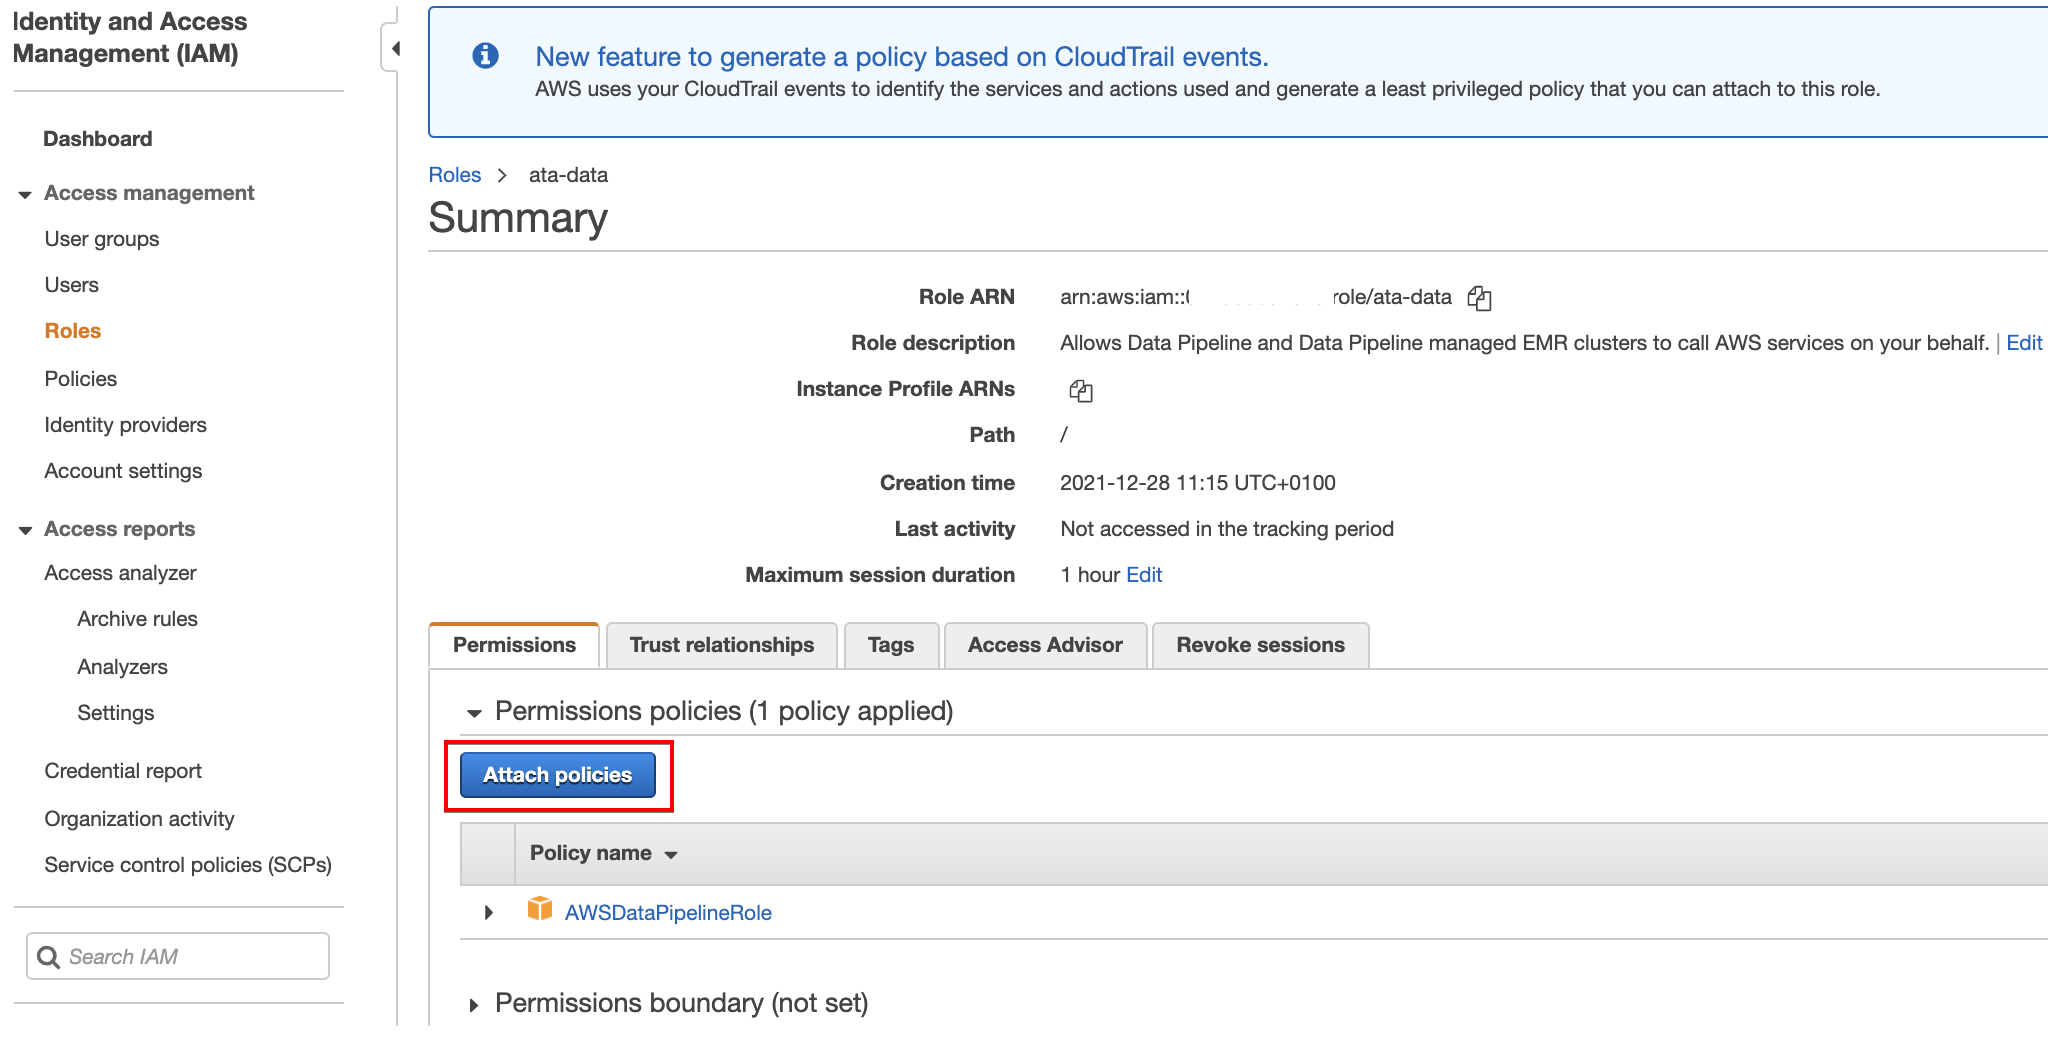
14. Now, click on Attach policies and you’ll see a page (step 15) where you can search and choose policies to attach to the data pipeline role (ata-data).
15. Search for the policy (ATA-pipelinepolicy) you created (step 12). Once found, check the box in front of the policy and click Attach policy to attach the policy to the data pipeline role (ata-data).

16. Navigate back to the Roles page and choose the EC2 data pipeline (ATA-eC2employeerole) you previously created (step six). Repeat steps 14 to 15 to attach the ATA-pipelinepolicy to the ATA-eC2employeerole role.

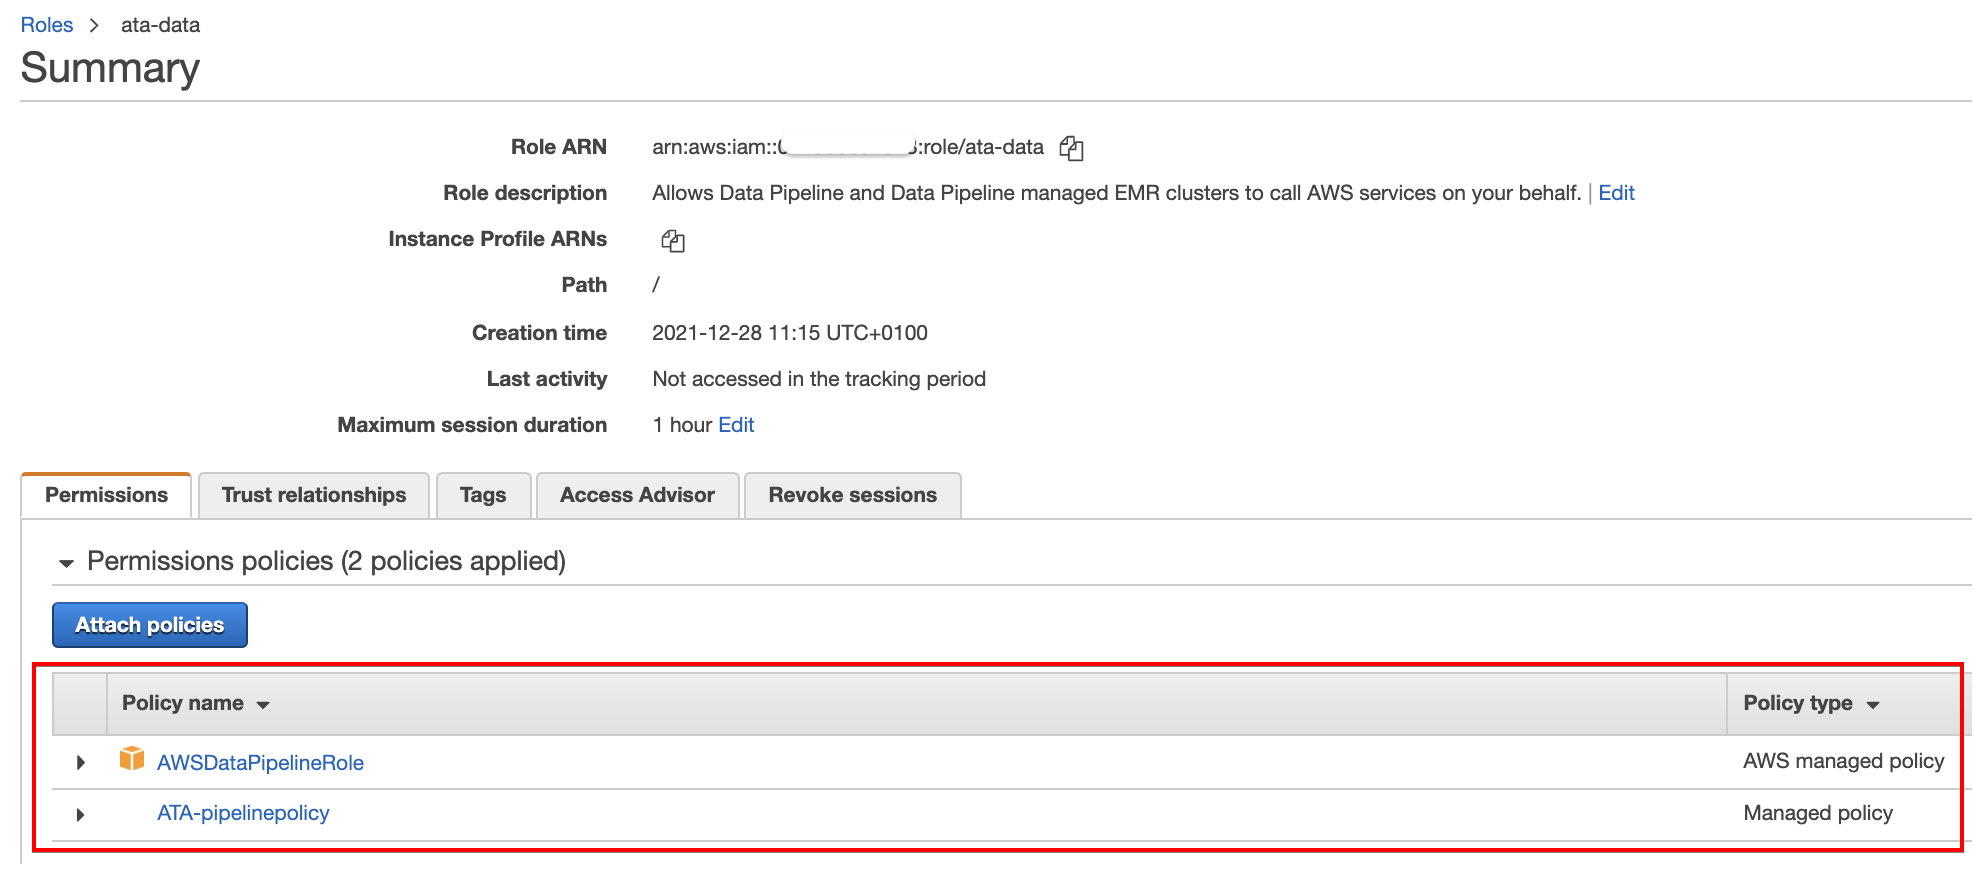
17. Finally, click on any of the roles on the Roles page in the IAM dashboard. Confirm if you’ve successfully attached the ATA-pipelinepolicy policy to the roles, as shown below.
Creating an S3 Bucket
You now have data you can transfer between sources. But where exactly will you transfer the data? Create an S3 bucket that will serve as storage where you can transfer data from your DynamoDB table (ATA-employee_id).
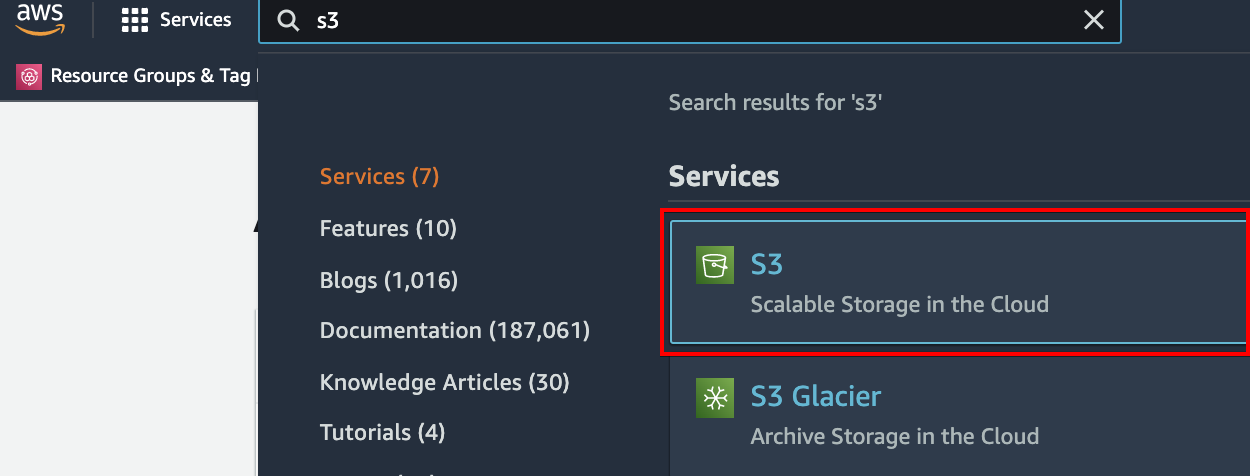
1. Login to your AWS account and enter S3 on the search box, as shown below. Click on the S3 item to access the Amazon S3 dashboard.
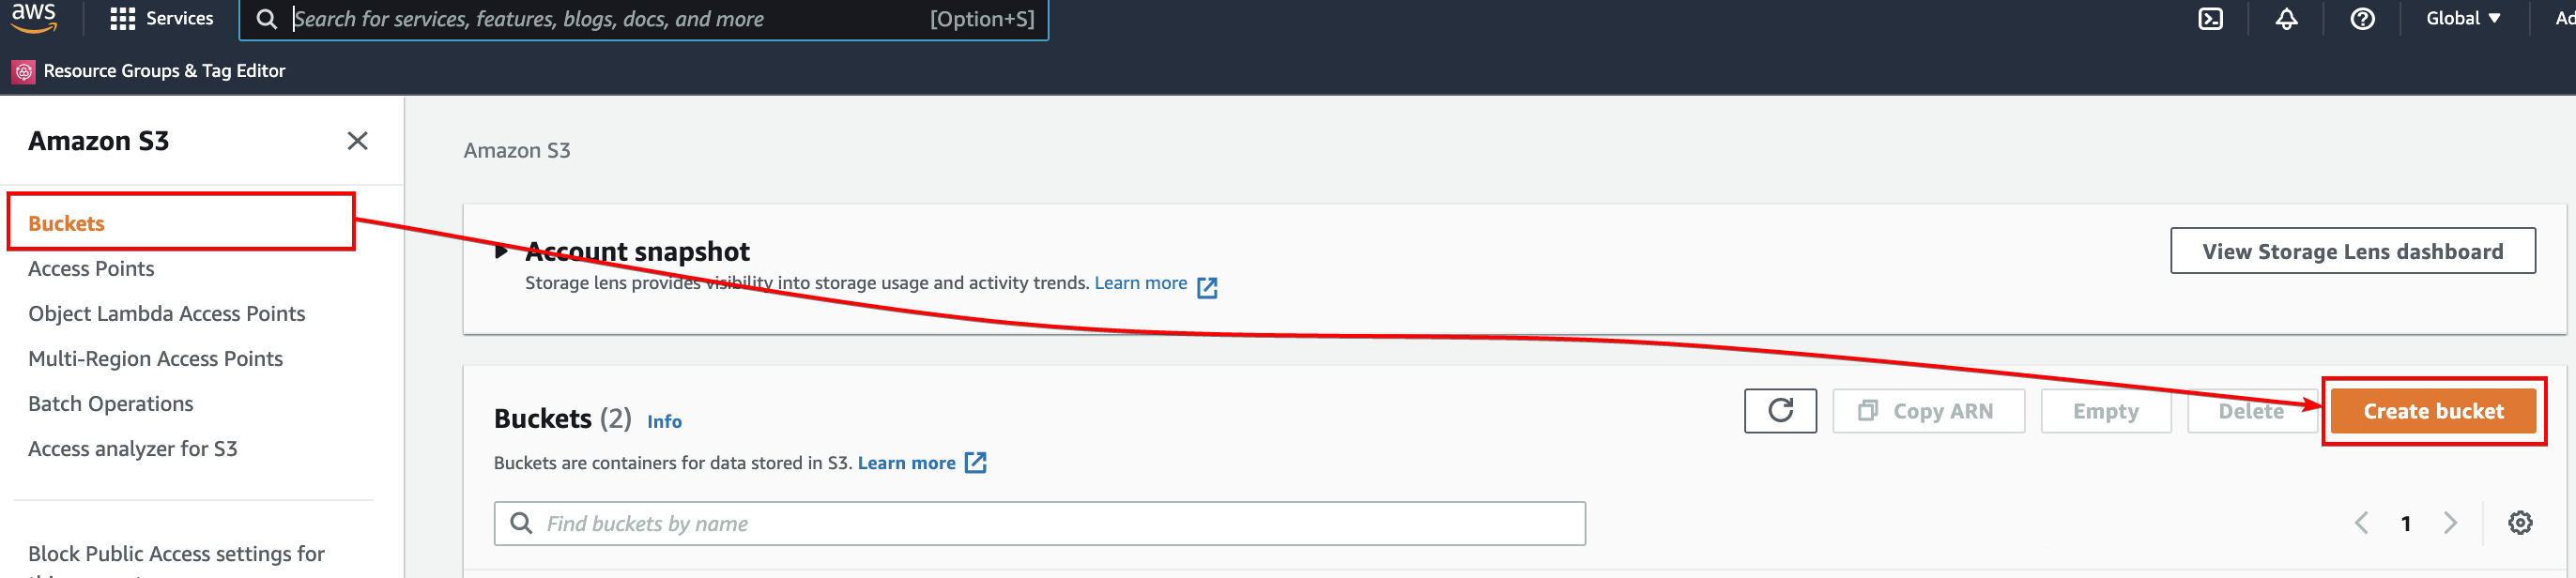
2. Next, click on the Buckets menu (left panel) in the S3 dashboard, and click Create bucket on the right-hand side to initialize creating an S3 bucket.
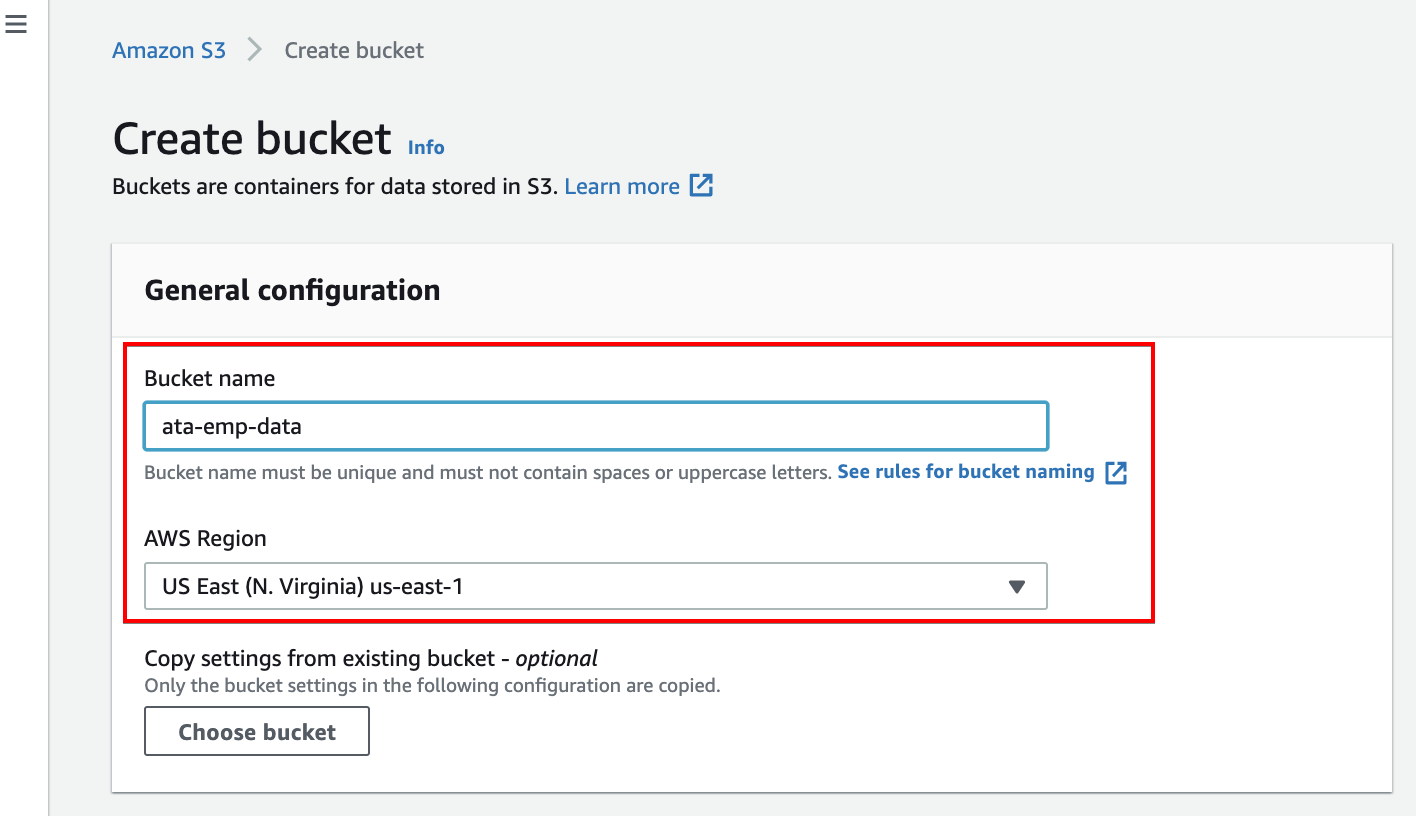
3. Now, enter a unique bucket name. But for this demo, the bucket name is set as ata-amp-data. Ensure the location is the same as your DyanmoDB table’s.
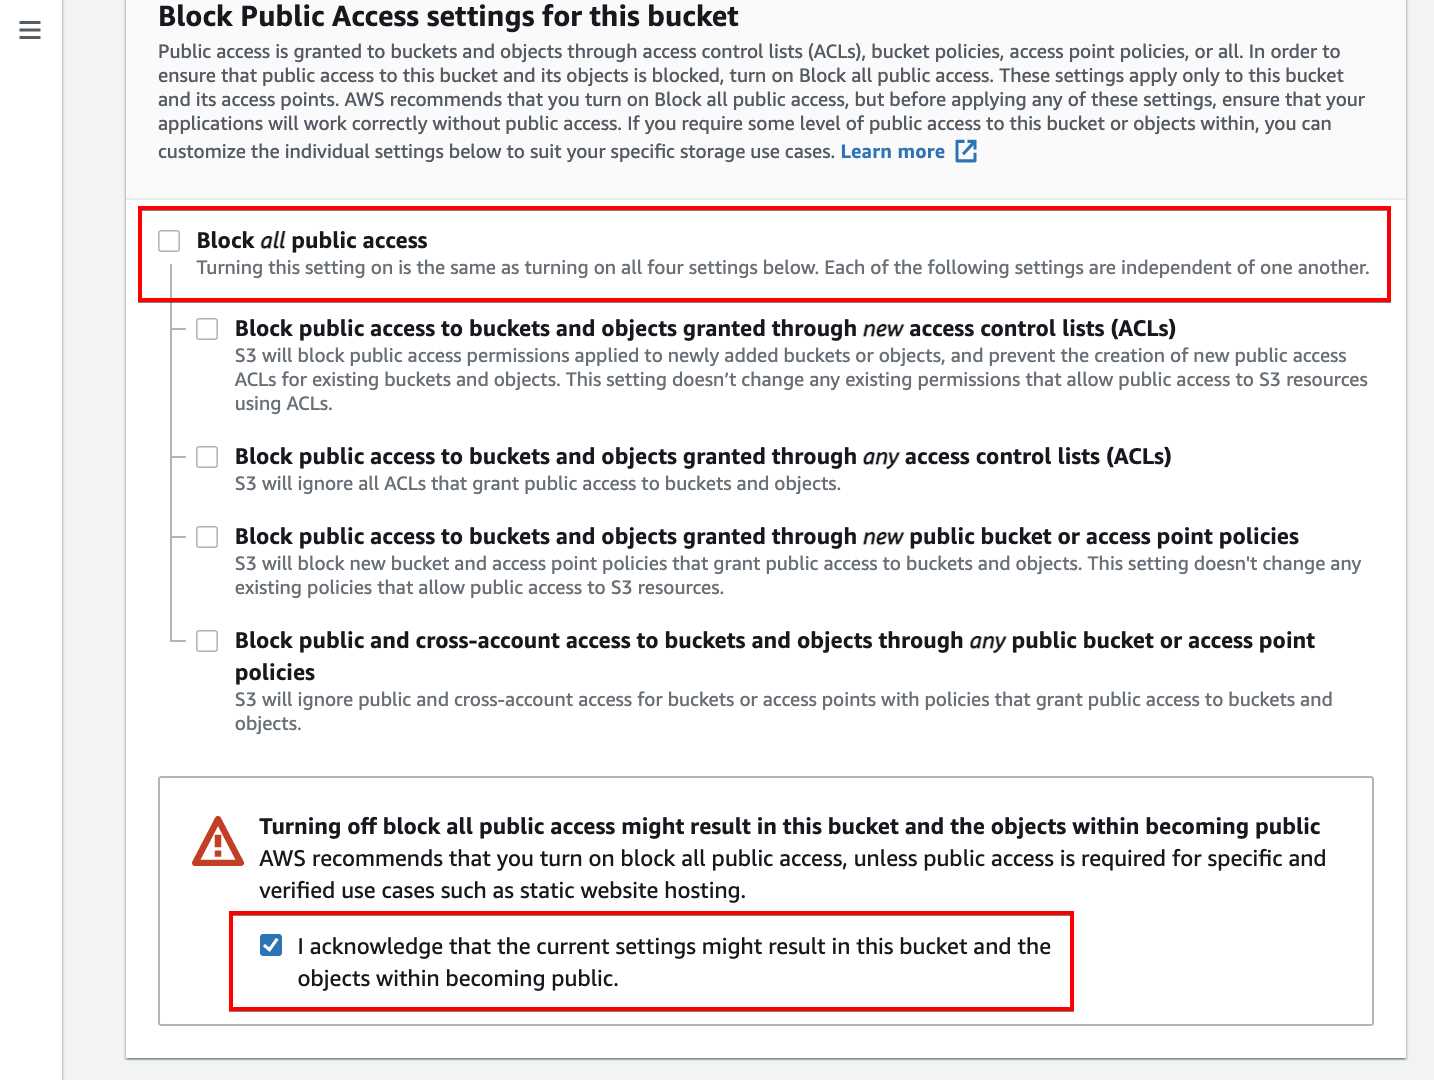
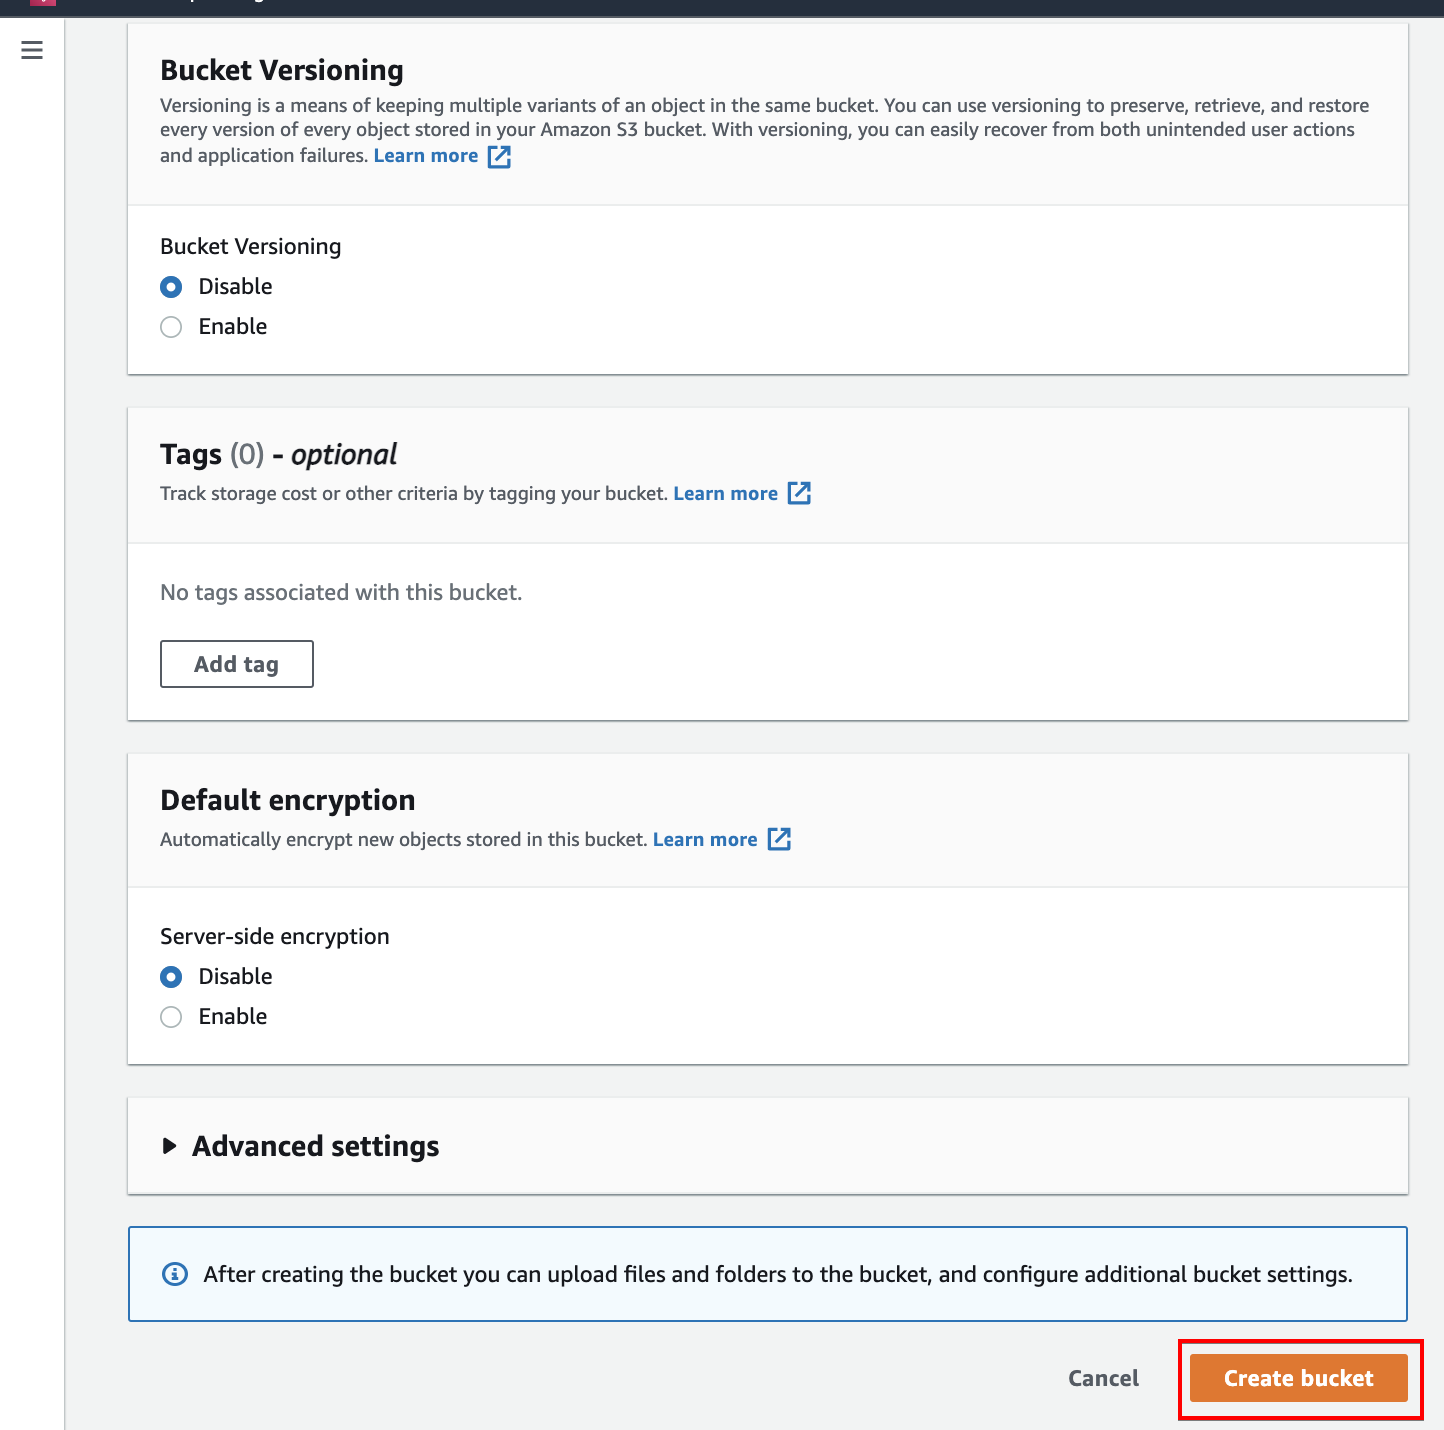
4. Scroll down, untick the Block all public access option, and tick the confirmation box. Doing so allows the bucket to be publicly accessible.
5. Leave the rest of the defaults and click Create bucket (bottom-right) to finalize creating the S3 bucket. Your browser automatically redirects to the Amazon S3 dashboard.
6. After creating your S3 bucket, click the newly created bucket to view the bucket’s settings.

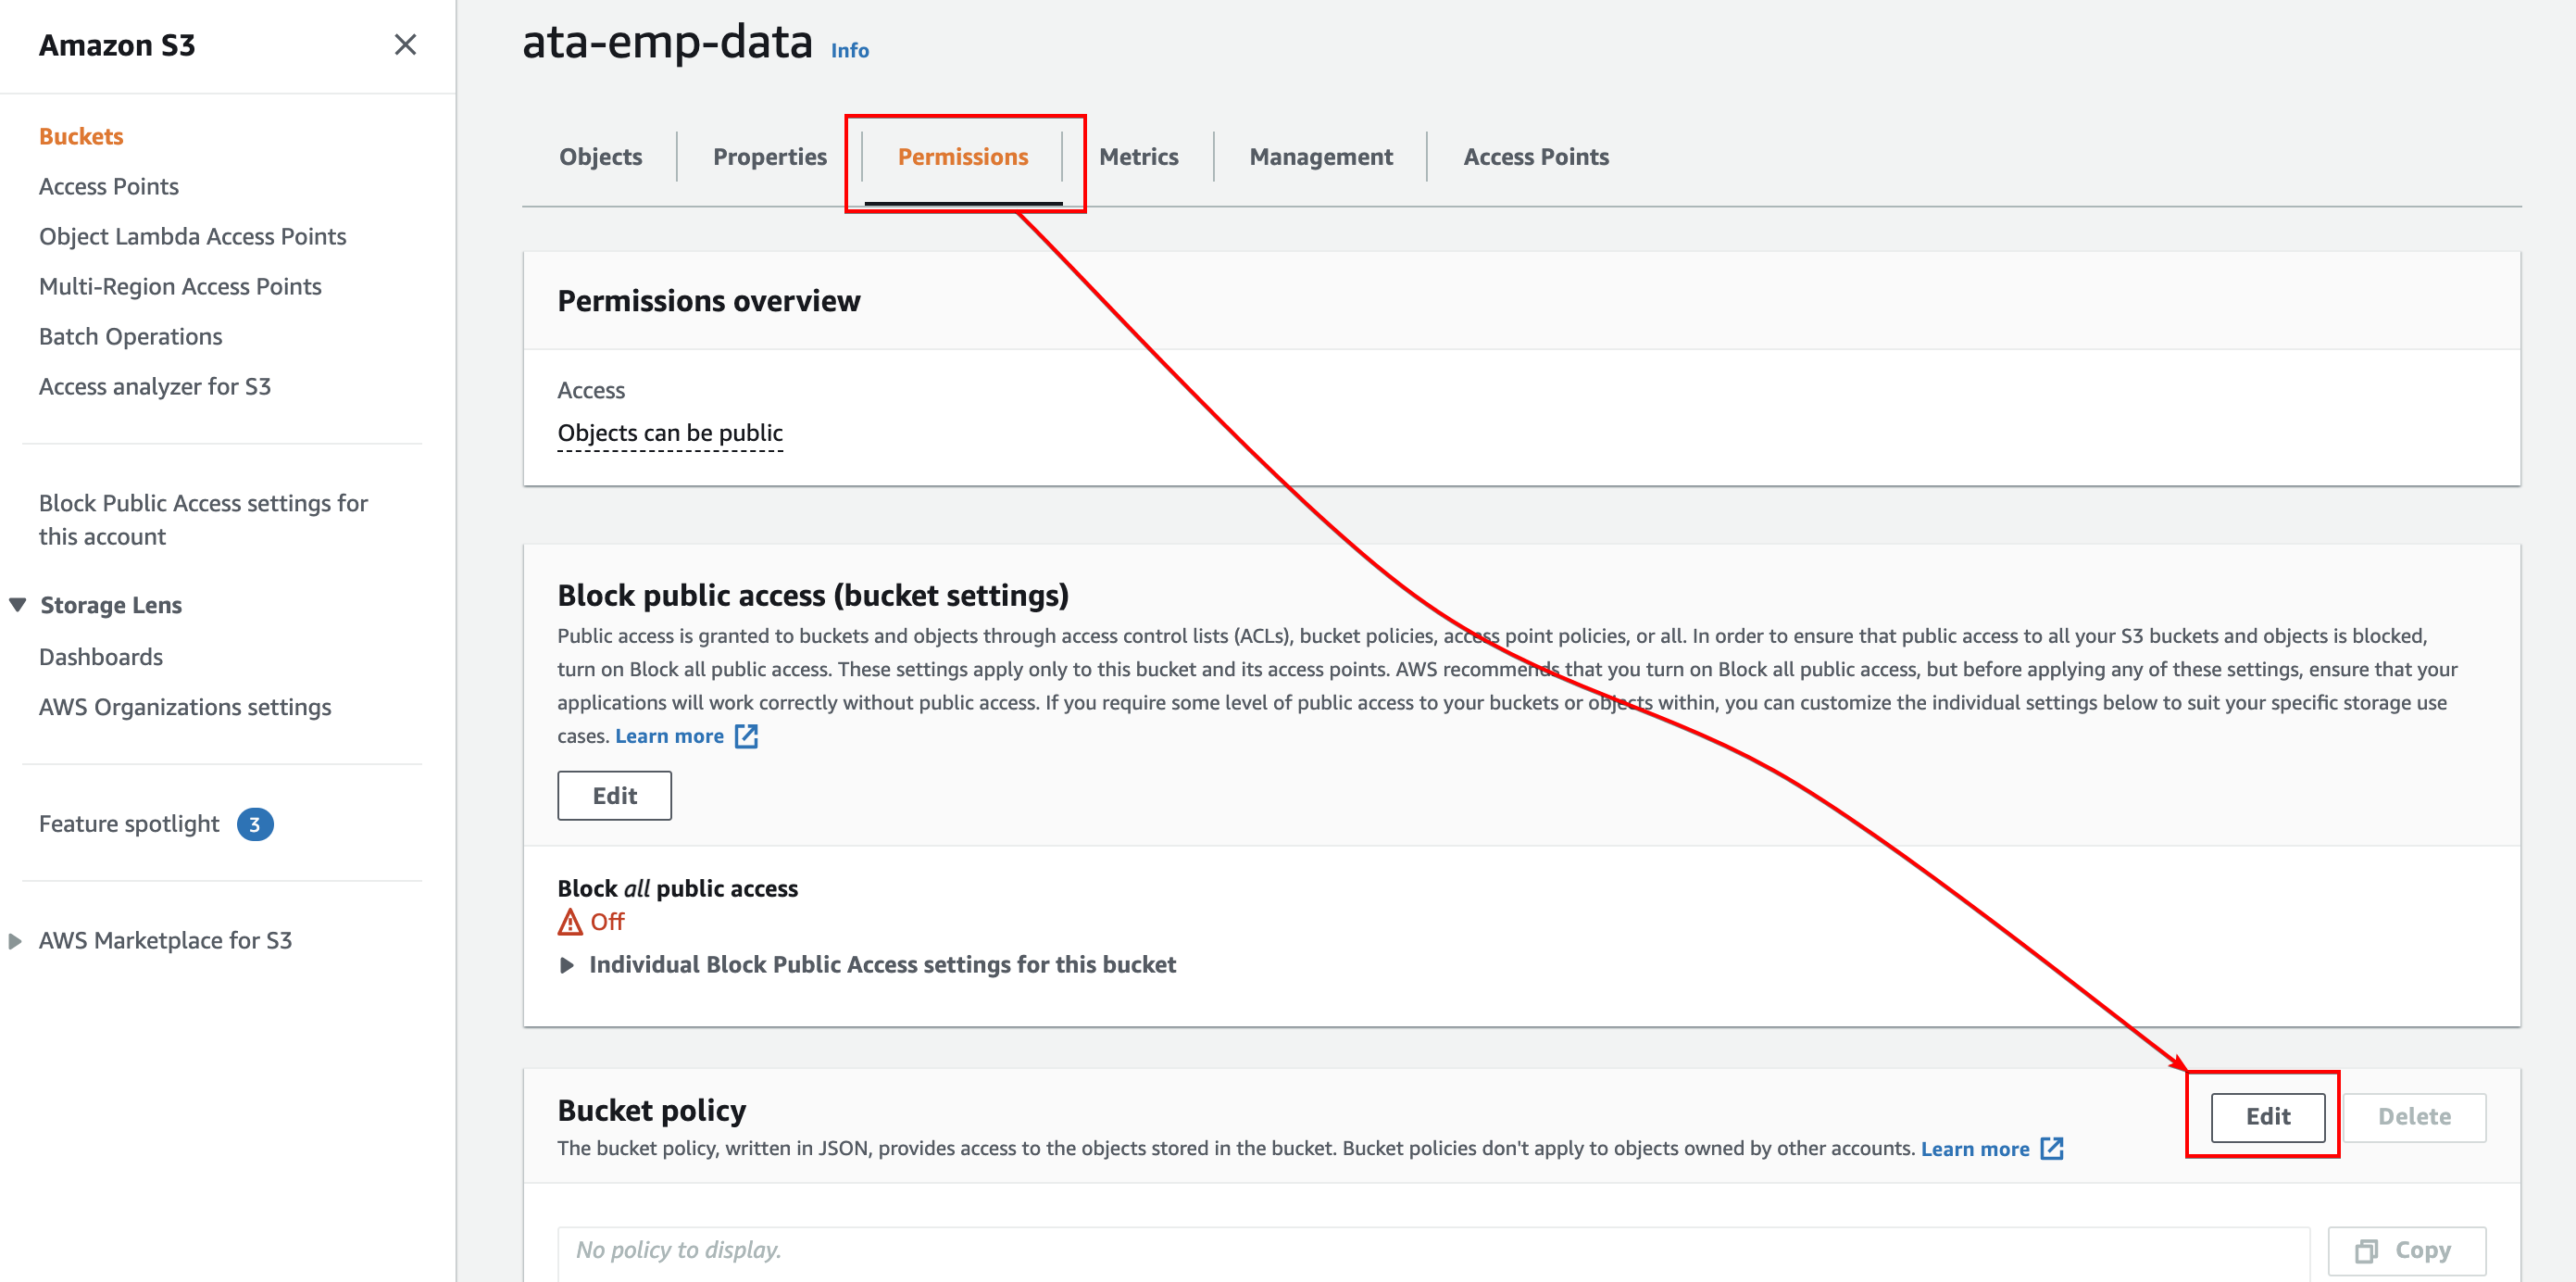
7. In the bucket’s settings page, select the Permissions tab where you can manage policies. Scroll down to the Bucket policy section, and click the Edit button to add a policy.
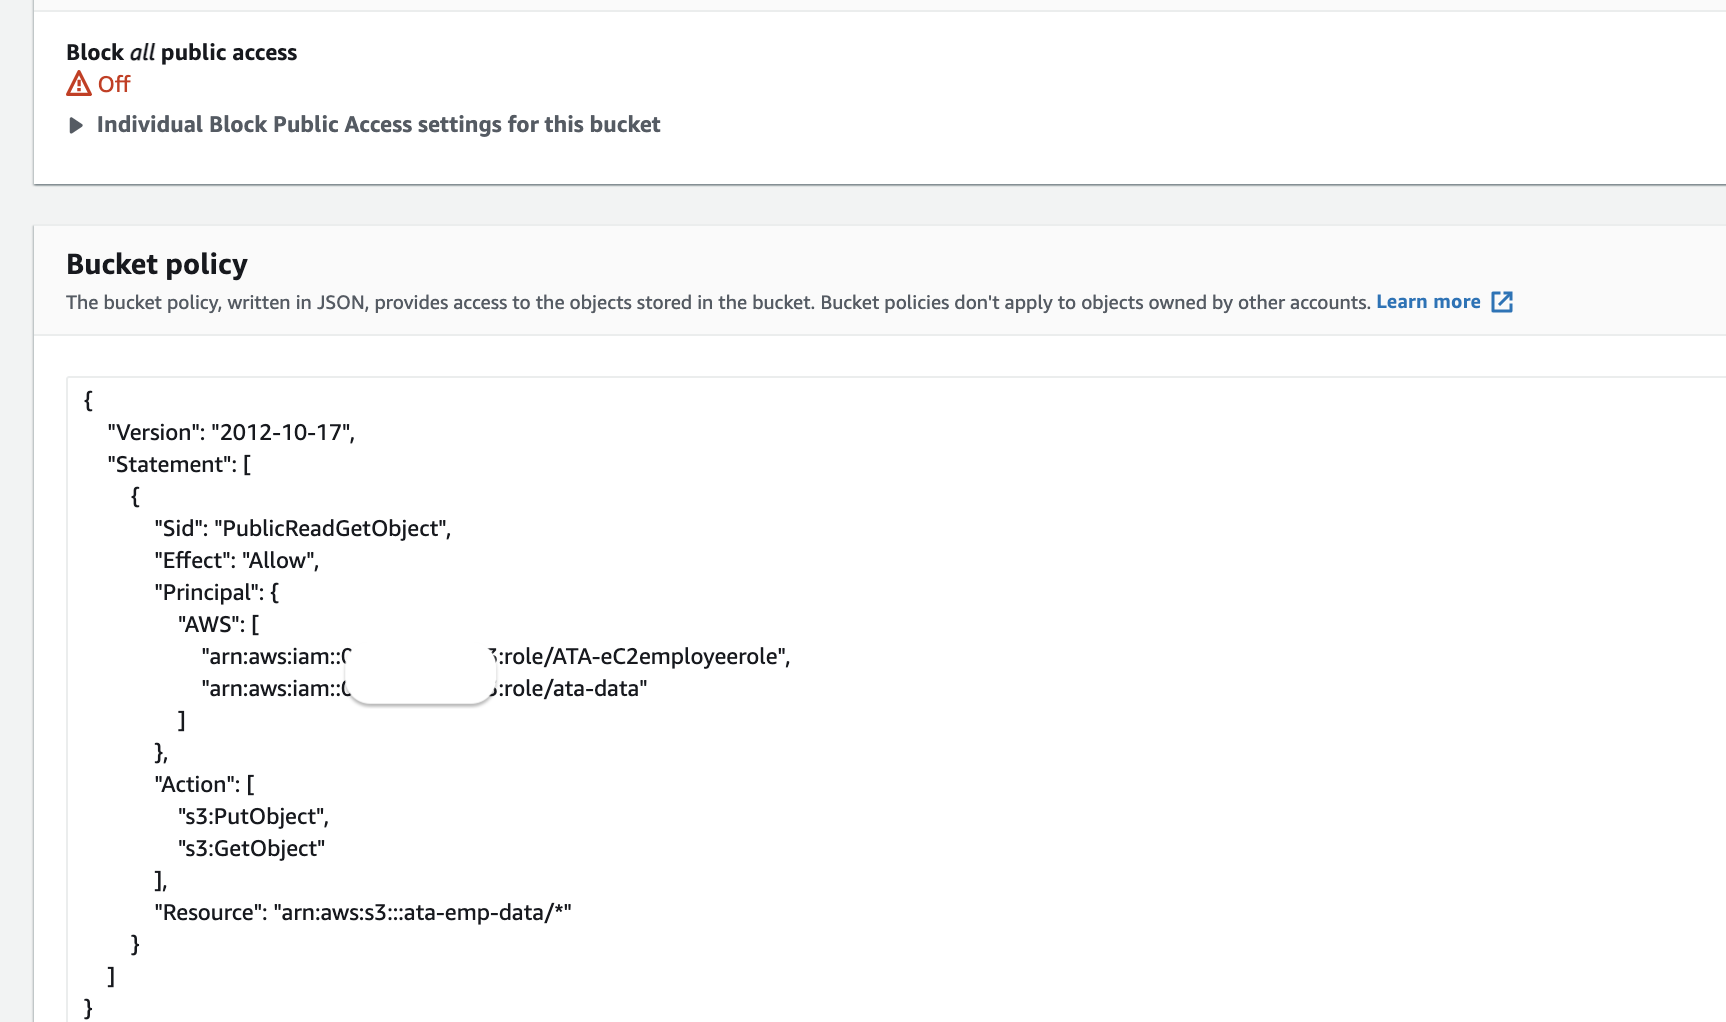
8. Copy and paste the code below to the policy editor. Be sure to replace ata-emp-data with the name you set for the newly created bucket (step three), and save the changes. The browser automatically redirects back to the Permissions tab.
The code below enables the S3 bucket to be accessible only to your AWS account. Replace 444455556866 with your account ID. It can be found at the top right corner of the webpage.
{
    "Version": "2012-10-17",
    "Statement": [
        {
            "Sid": "PublicReadGetObject",
            "Effect": "Allow",
            "Principal": {
                "AWS": [
                    "arn:aws:iam::444455556866:role/ata-data",
                    "arn:aws:iam::444455556866:role/ATA-eC2employeerole"
                ]
            },
            "Action": [
                "s3:PutObject",
                "s3:GetObject"
            ],
            "Resource": [
                "arn:aws:s3:::ata-emp-data/*"
            ]
        }
    ]
}
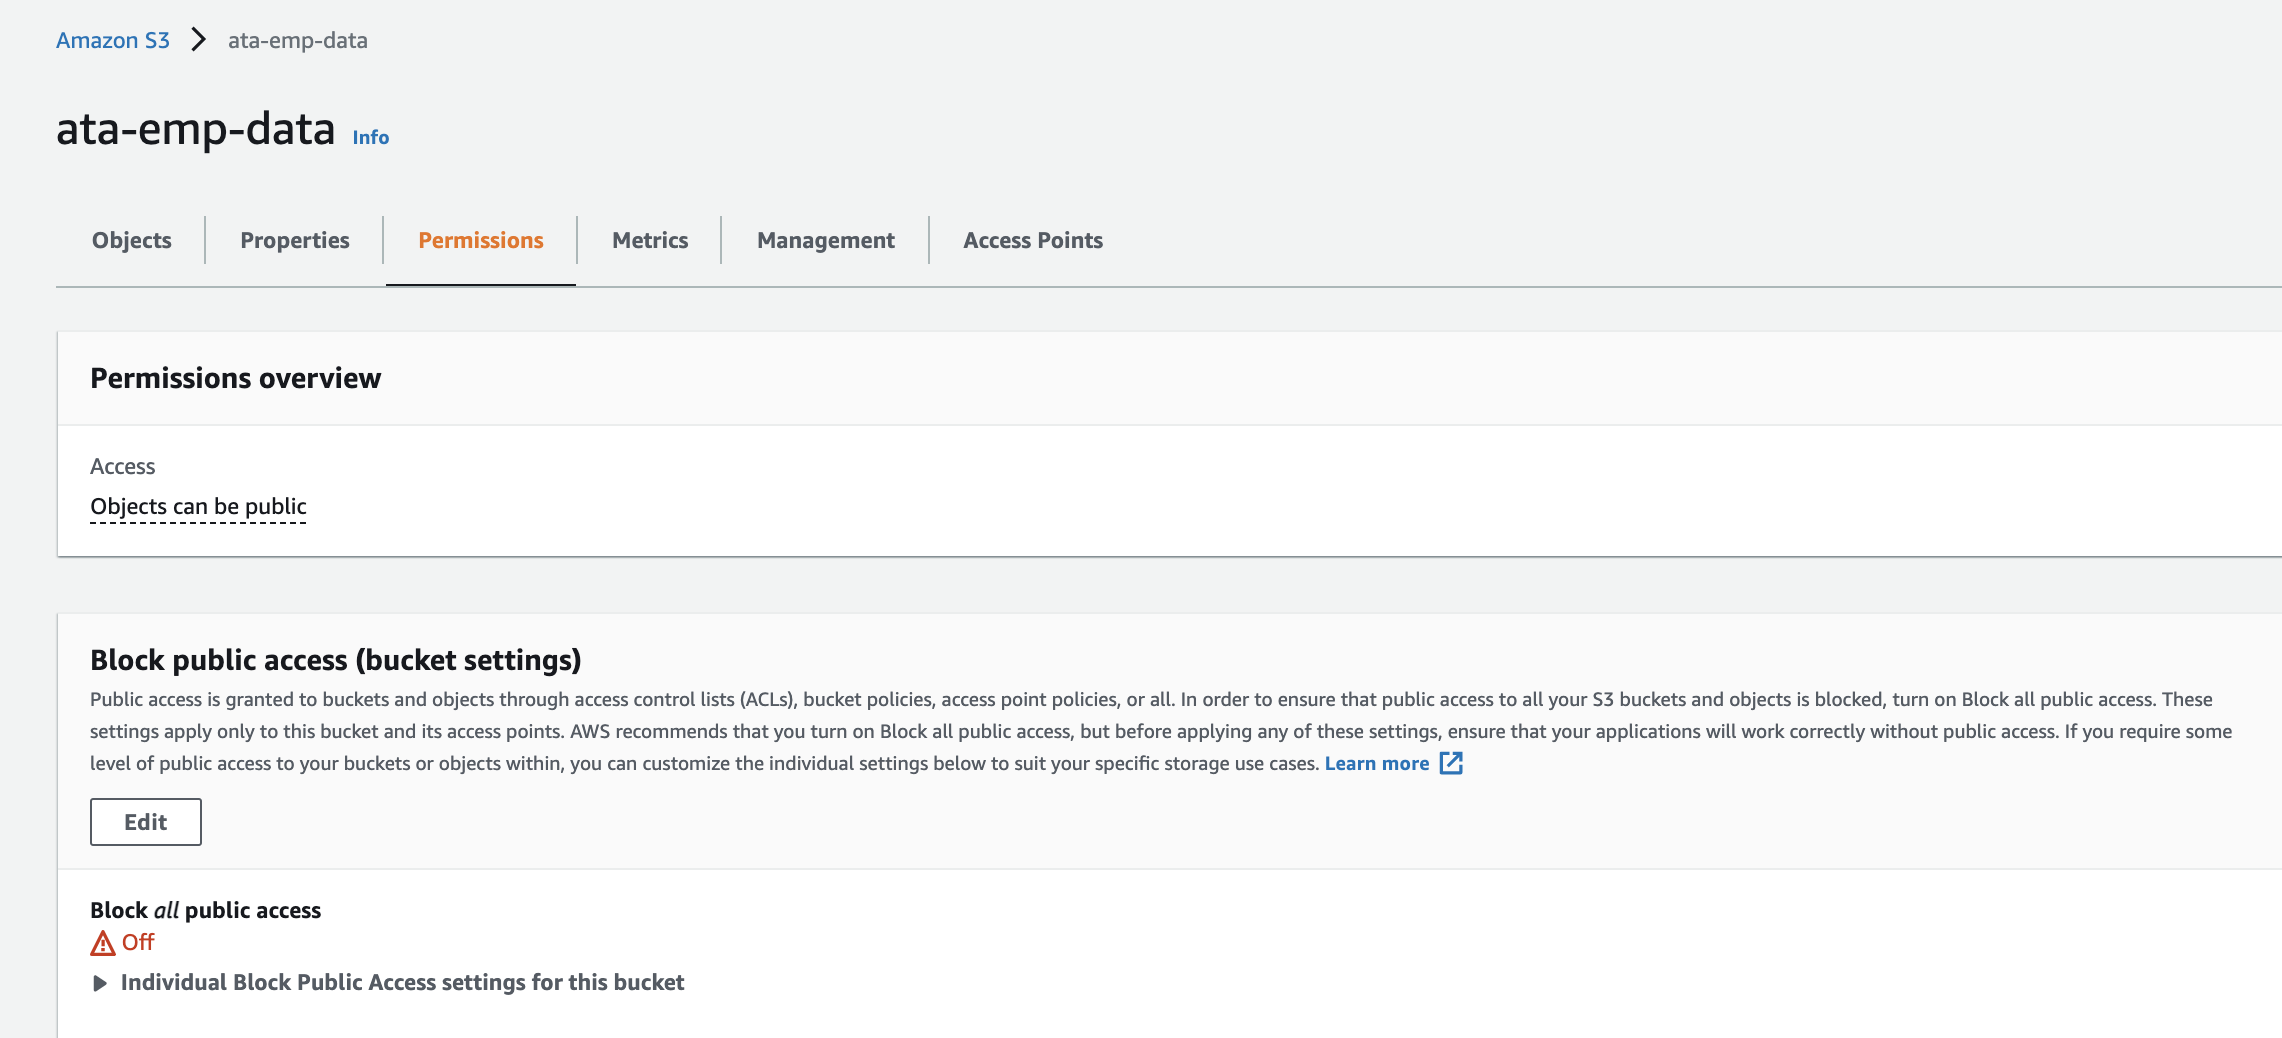
Below, you can see that your S3 bucket is now accessible only to your AWS account, this simply means you only have access to this bucket.
Moving Data Between DynamoDB Table and S3 Bucket
Now that the IAM roles and policy are set up, you can now create and configure an AWS Data Pipeline to move data between DynamoDB and S3.
1. Search and choose Data Pipeline in the AWS console search box, as shown below. This action redirects your browser to the AWS Data Pipeline home page (step two).
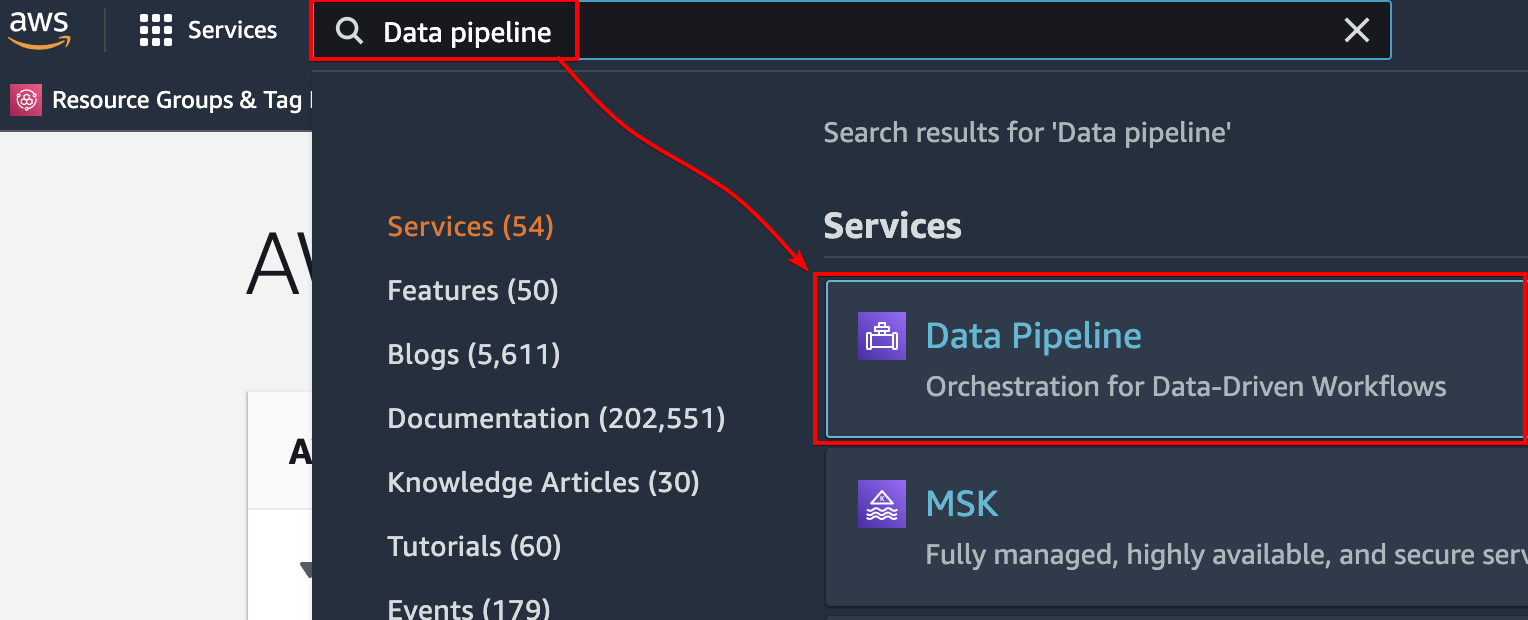
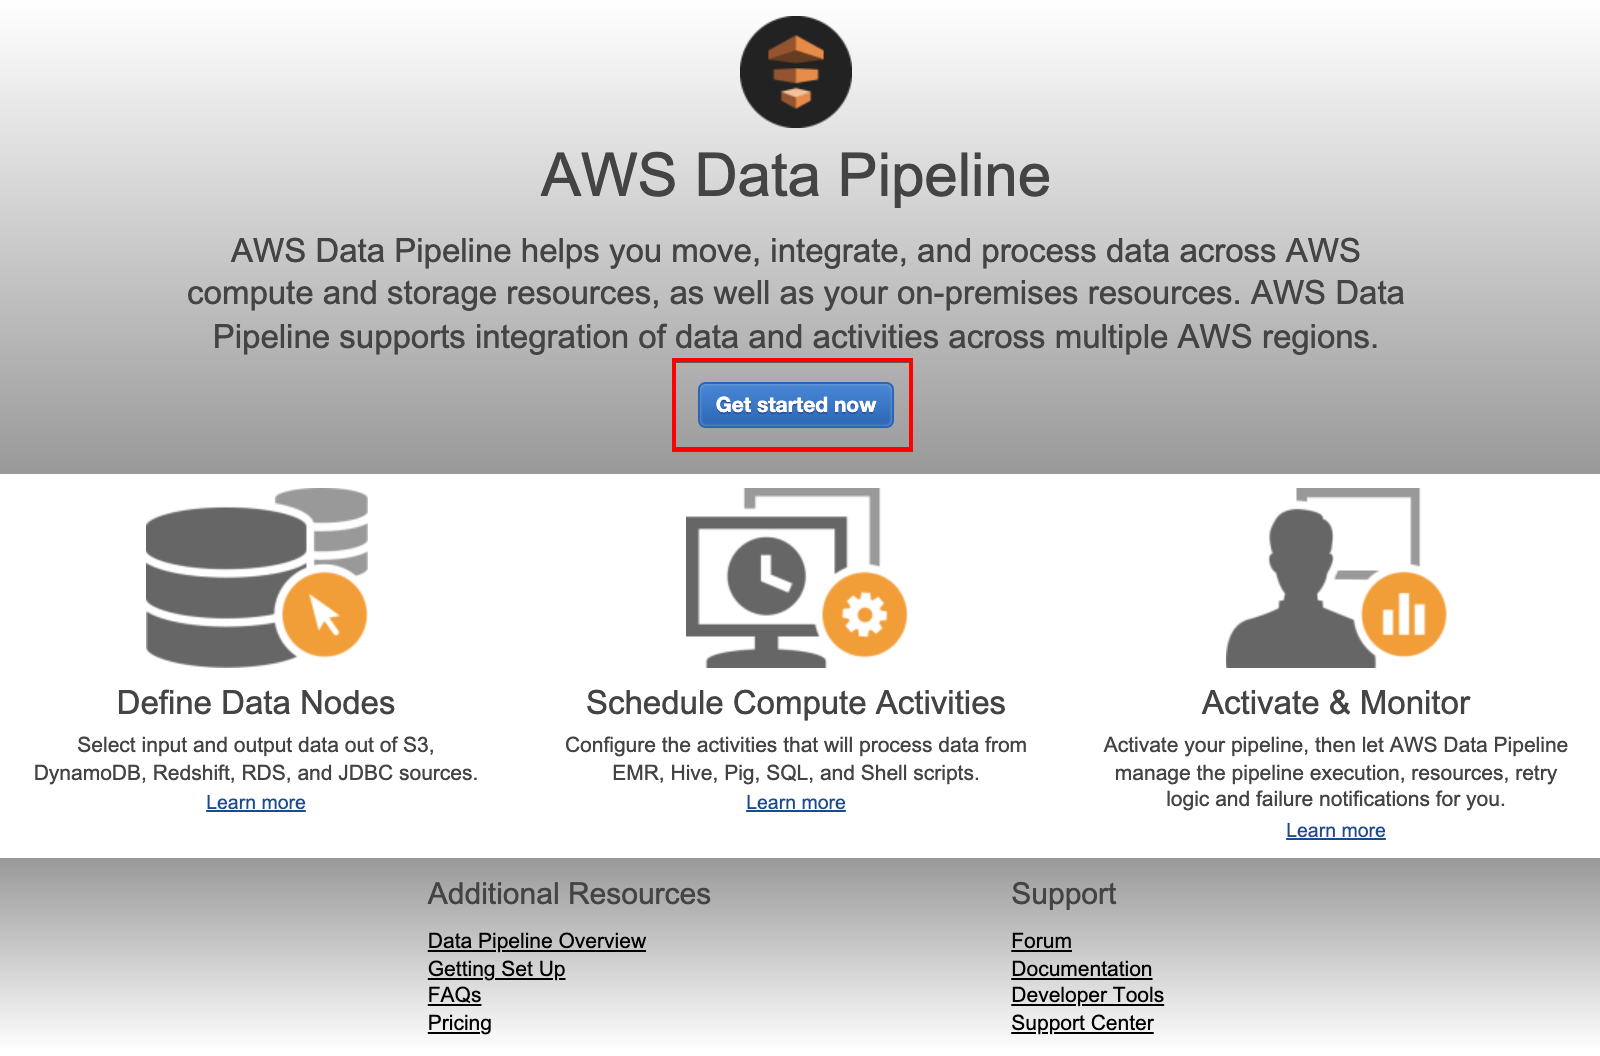
2. Click Get started now to initiate creating and configuring an AWS Data Pipeline.
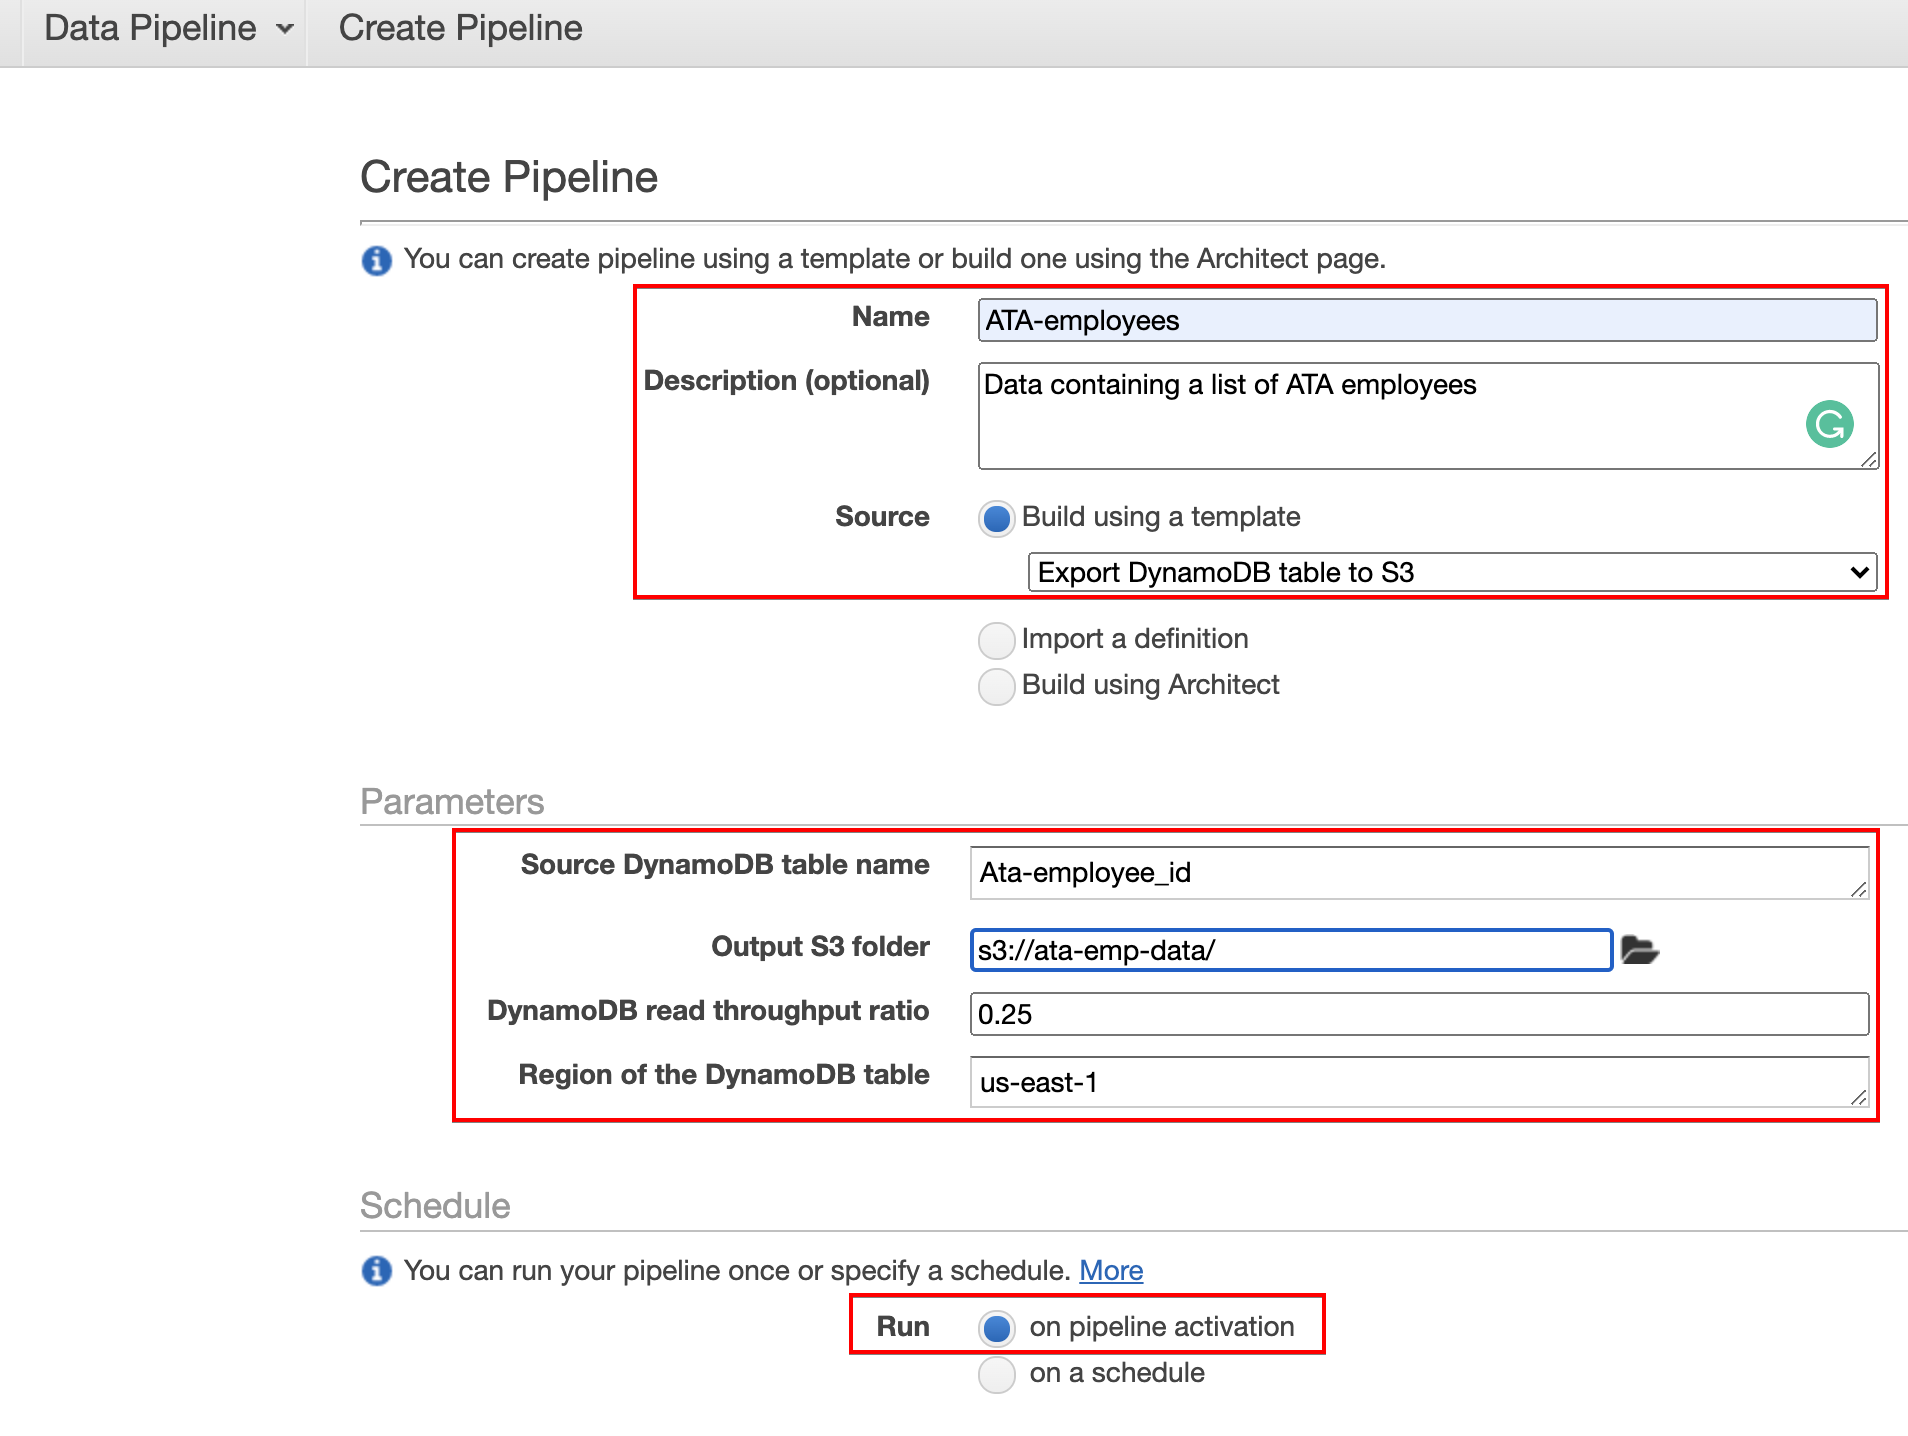
3. Configure the data pipeline with the following:
- Set a Name and Description for the pipeline. For this demo, the name is set to ATA-employees.
- Click the dropdown box under Source and select the Export DyanmoDB table to S3 option, as shown below. This option sets the action the data pipeline will take, which is to export the data from your DynamoDB table to your S3 bucket.
- Under the Parameters section, enter the name of your DynamoDB table (ATA-employees_id) to the Source DynamoDB table name field.
- Choose an S3 output folder. This folder is where you’ll export data from the DyanmoDB table.
- Leave the DynamoDB read throughput ratio at default (0.25) and ensure the region of the DyanmoDB table is correct. In this demo, the region is set to us-east-1.
- Under the Schedule section, choose to run the pipeline on pipeline activation. This option runs the pipeline once on activation.
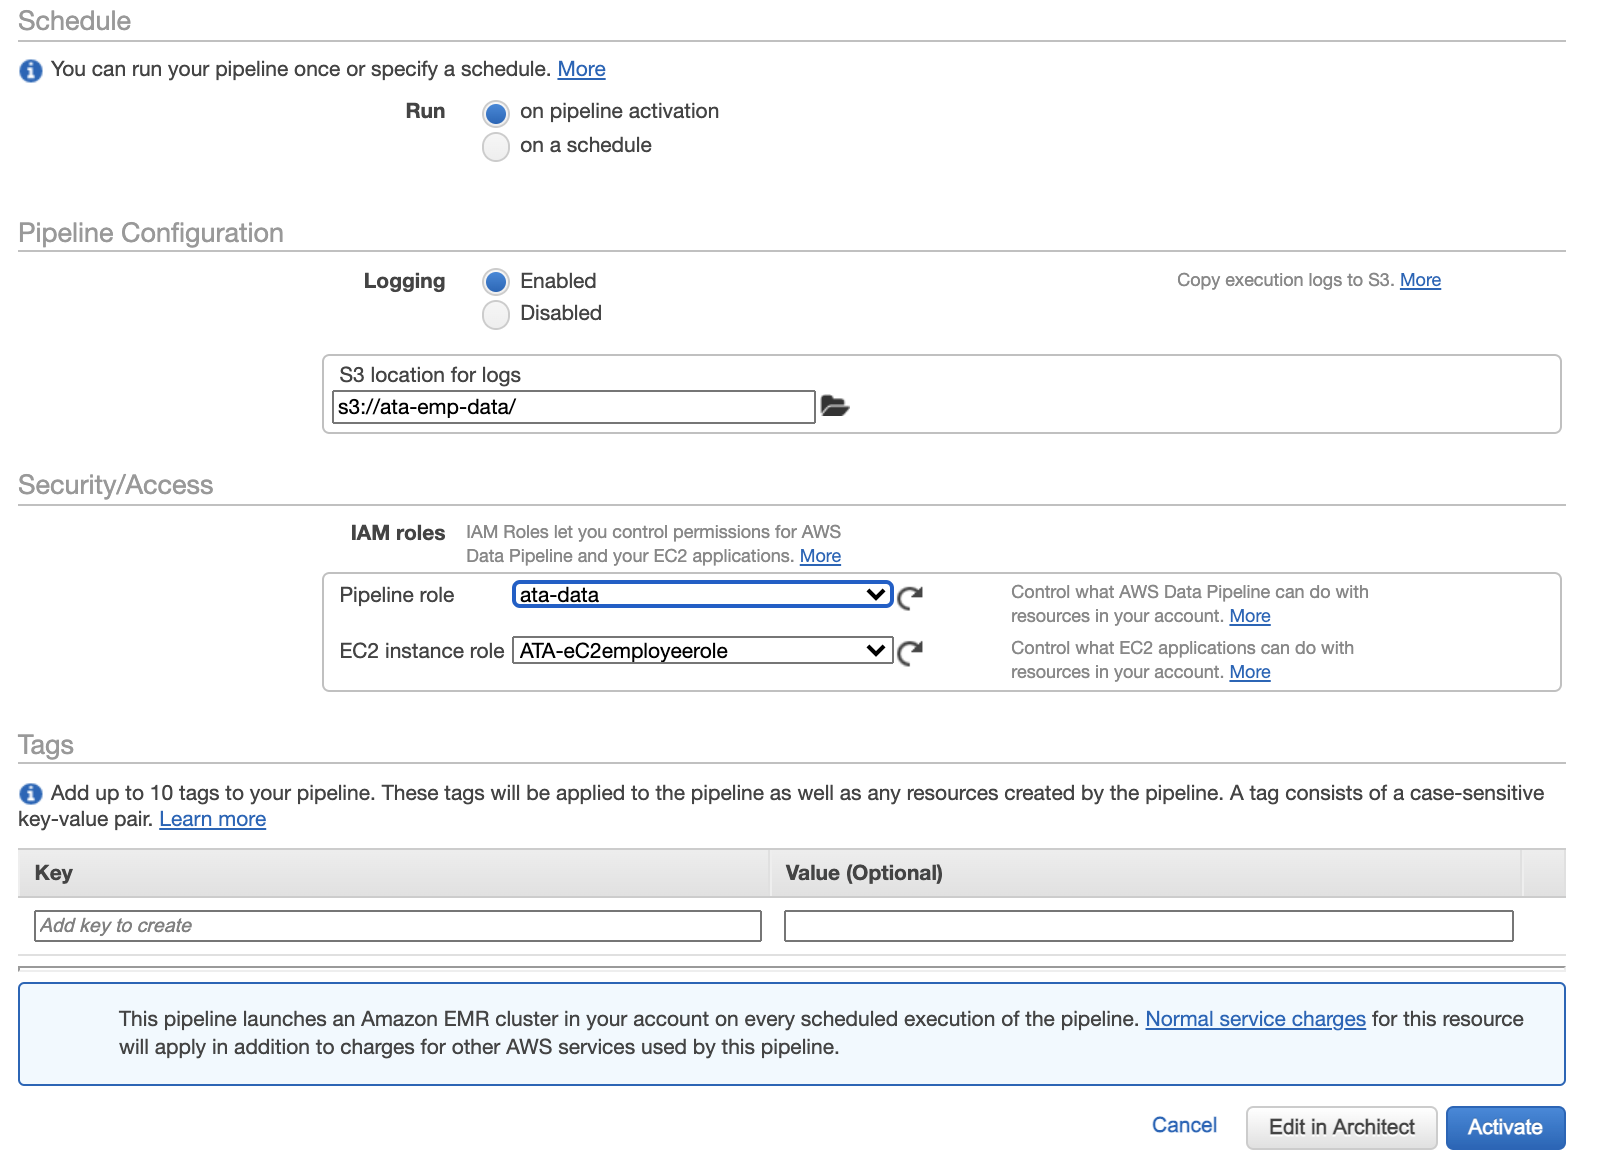
- Scroll down and select the Enabled option under Pipeline Configuration and choose an S3 location to save the logs. Selecting the Enabled option lets you view the logs of data transfer from DynamoDB to S3.
- Under Security/Access, select the data pipeline role (ata-data) and EC2 instance role (ATA-eC2employeerole) you created.
- Click Activate to activate and run the pipeline. Your browser then redirects to a page where you can see the list of available pipelines (step four).
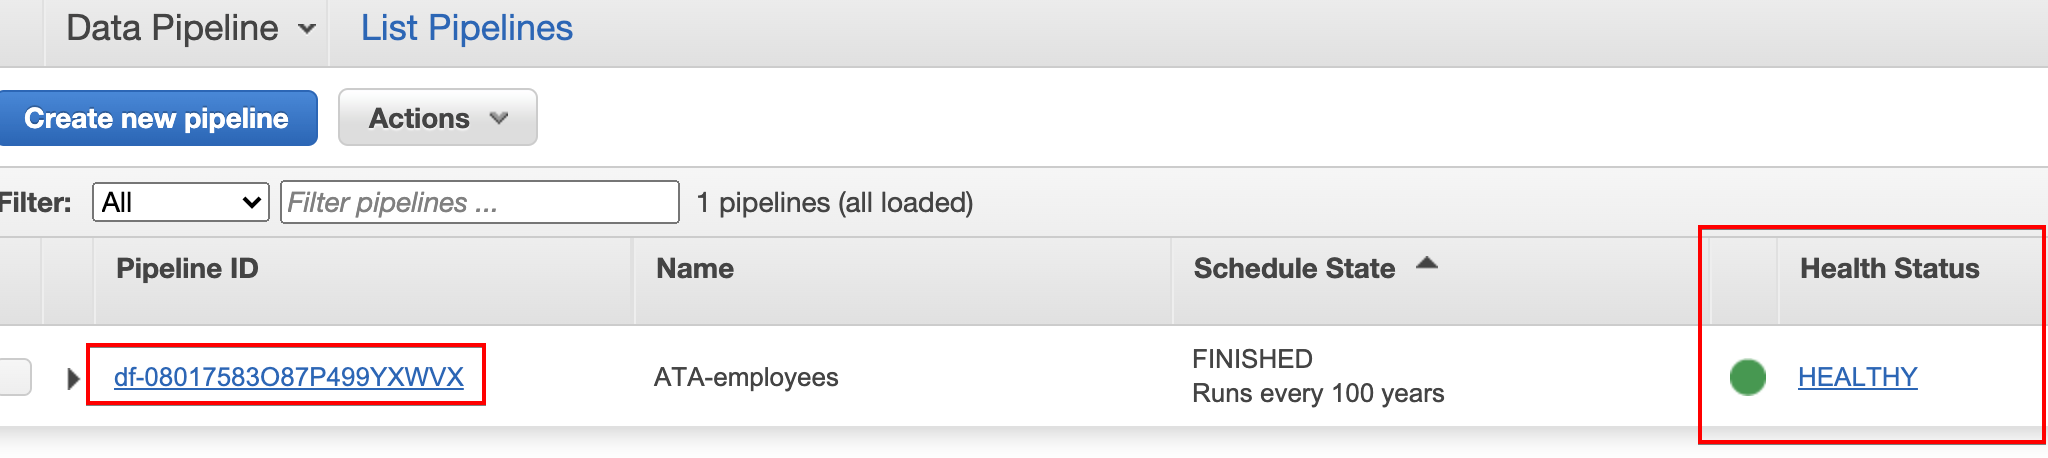
4. Click on the newly created data pipeline when the Health Status column shows the pipeline is HEALTHY to see the logs of the data transfer.
5. Finally, confirm if your S3 bucket has the data that you moved from the DynamoDB table in the logs similar to the one below.

Conclusion
In this tutorial, you learned how to move data between sources, specifically with DynamoDB and S3 bucket using the AWS Data Pipeline service. You’ve also touched on setting up IAM roles and policies to provide access for moving data between resources.
At this point, you can now transfer various data using the AWS data pipeline. So what’s next for you? Why not build data warehouses to run queries easily?


