


Do you need to route some network traffic in your lab? Maybe you don’t have free ports on your hardware router. Setting up a VMware Photon OS software router can save the day!
VMware Photon OS is a small, lightweight virtual machine (VM) you can spin up quickly and needs little maintenance. This tutorial will show you how to spin up a Photon VM in VMware Workstation Pro, set static IPs, and turn on routing.
Let’s get it on!
Prerequisites
If you’d like to follow along with the demos in this tutorial, be sure you have VMware Workstation Pro v11+. You can run Photon OS on AWS, Azure, Google Cloud, or even a Raspberry Pi. The instructions for setting the IPs and turning on routing are identical once the VM was deployed.
Importing the Photon OS Open Virtualization Appliance (OVA)
You have many options when choosing how to set up the VMware Photon OS. Just check out the GitHub project download page. For this tutorial, you’re going to learn how to set up a Photon VM using the OVA installer. The OVA is targeted at VMware hypervisor products, with unnecessary drivers, programs, and libraries removed.
To set up the VMware Photon VM with an OVA:
1. Download the OVA with virtual hardware v13 (UEFI Secure Boot) file and save it to your local system. The version linked here is a direct link for the version used in this article, but newer versions may be available.
If your copy of Workstation Pro is older than version 14, be sure you download the OVA with virtual hardware v11 file.
Make sure not to download the “arm64” version. Everything will proceed smoothly, but the VM will fail to boot.
2. Open VMWare Workstation Pro, and select File → Open.
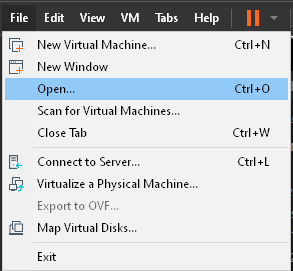
3. Locate the OVA file and open it.

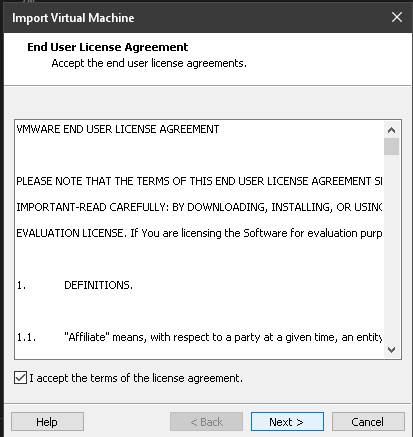
4. Read and accept the EULA by checking the “I accept the terms of the license agreement” option and click the Next button.
5. Name your VM, select the storage path to save the VM to, and click Import. This action will import the OVA into VMware Workstation. The VM will use around 700MB to 1GB of storage.
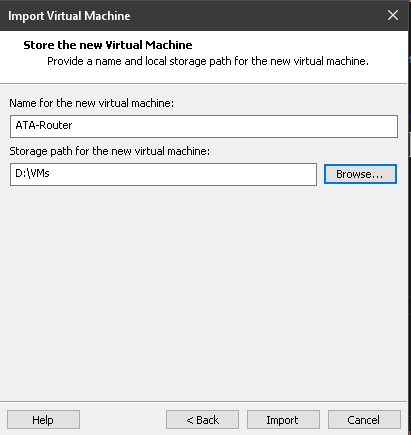
Once the process is complete, the VM will be ready to boot.
Adding Additional Network Interfaces to the Photon VM
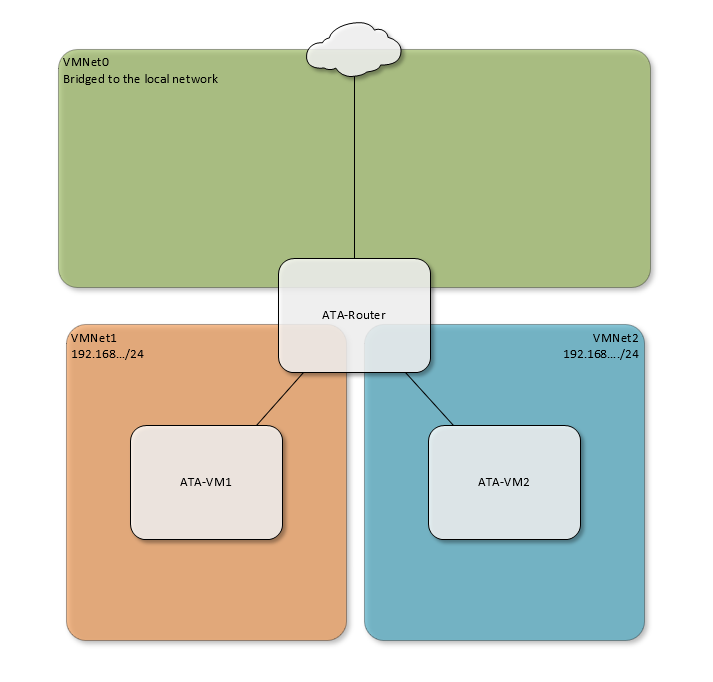
When setting up Photon OS to be a software router, you must have multiple network interface cards (NICs) to pass traffic from one side of the network to the other. In a virtual machine, those NICs are virtual devices.
To route network traffic properly, the NICs must be on different subnets. These networks are created in the Virtual Network Editor as “Host only” networks for this tutorial.
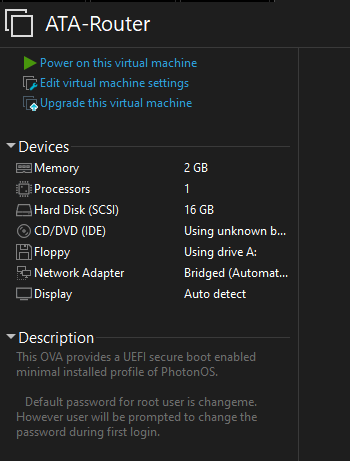
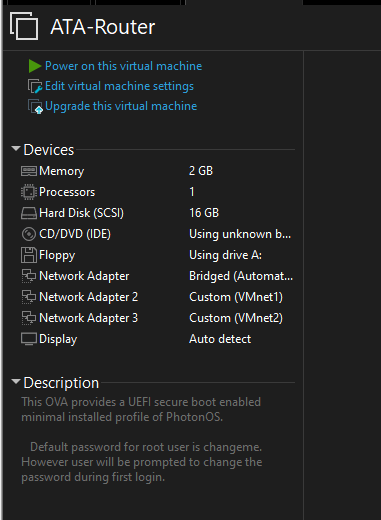
The diagram shows how the Photon VM “ATA-Router” spans all three networks enabling it to send traffic between them.
1. In VMware Workstation, click on Edit → Virtual Network Editor. Here you can see Workstation Pro already has some networks defined
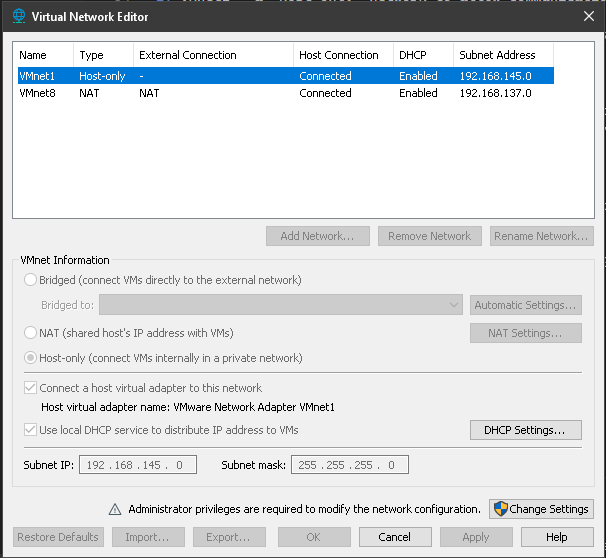
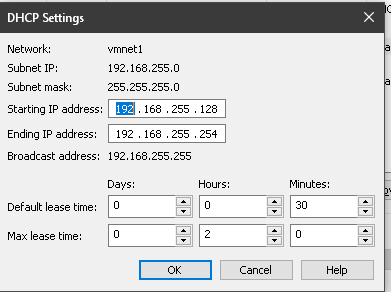
2. Select VMmnet1 and click on DHCP Settings. The start and end of the DHCP range is important for later, as you will want to avoid configuring a static IP within this range. Take a note to set static IPs outside of the range (128-254 here).
3. Now, click on Change Settings to re-launch the network editor as an administrator.
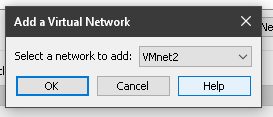
4. Next, click on the Add Network button. For the purposes of this article, you will need two additional interfaces using different, Host-only networks.
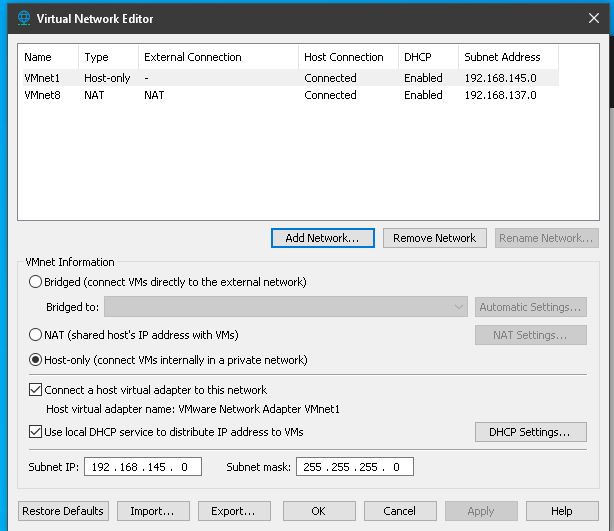
5. Select the next available network number, such as VMnet2, and click OK and click OK again to exit the Virtual Network Editor.
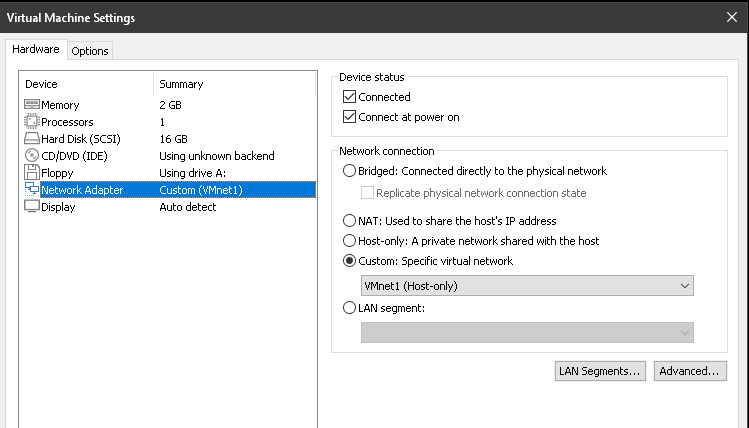
6. From VMware Workstation, select the VM, and click on Edit virtual machine settings.
7. Click the Add button and select Network Adapter, as shown below. Finally, click on the Finish button.
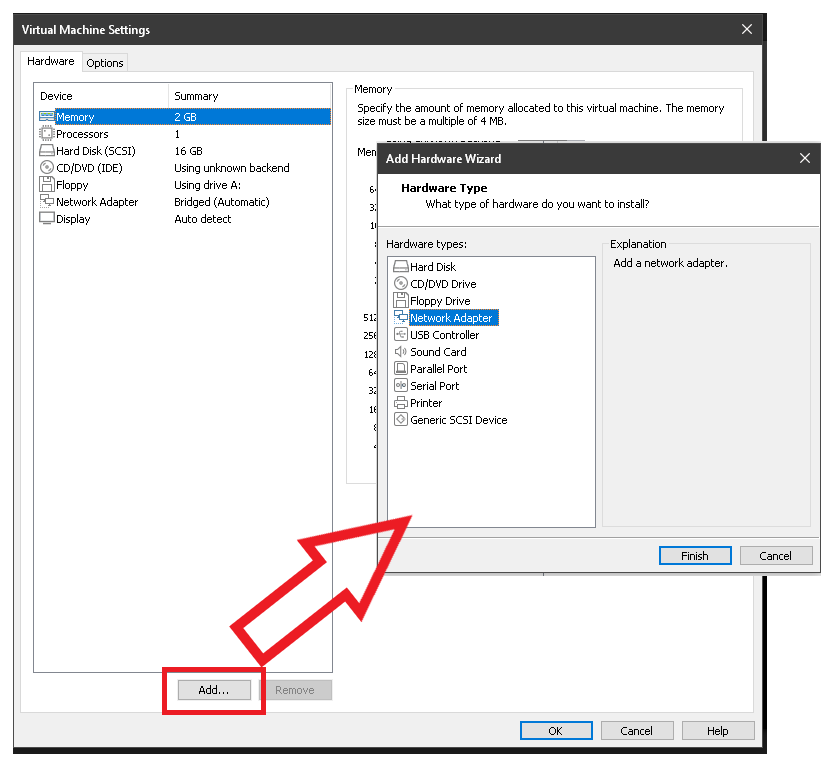
8. Repeat Steps 4-7 to add a third NIC.
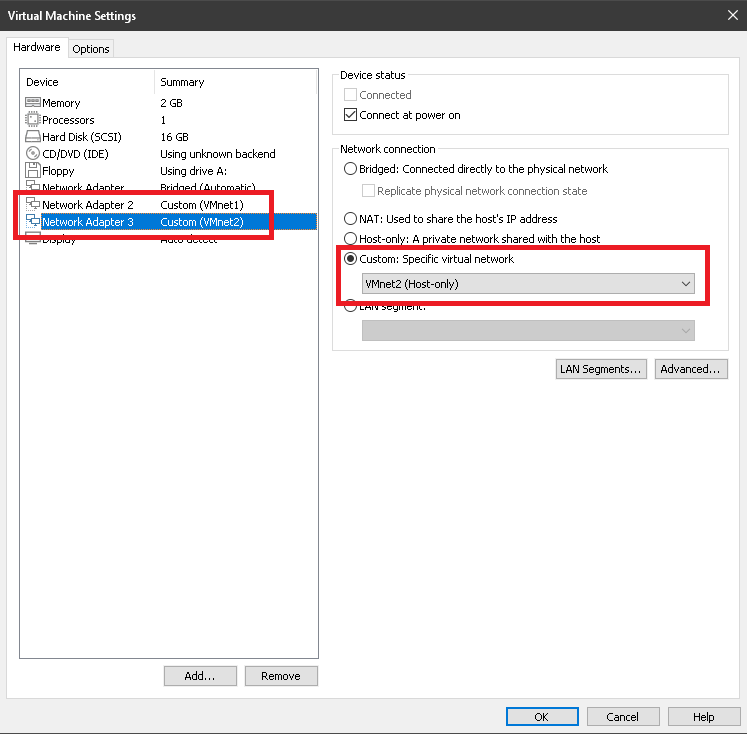
9. Once you’ve added all NICs, select each newly added NIC, select Custom: Specific virtual network, and select VMnet1 for Network Adapter 2, and VMnet2 for Network Adapter 3.
Under the Hardware tab, you will now see Custom (VMnet1) for Network Adaptor 2 and Custom (VMnet2) for Network Adaptor 3.
Click OK when complete.
Configuring VMware Photon OS as a Network Router
Once you’ve added the additional NICs, it’s time to power on the VM and finish the initial configuration.
- Select the VM and click Power on this virtual machine and start the PhotonOS VM.
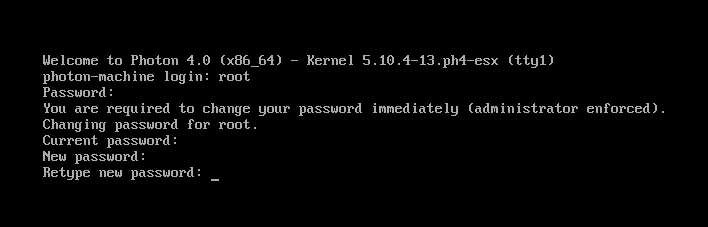
2. Login as the root user. If you have not already changed the root password from the default, you will be asked to do so now.
Note that the default password for the
rootuser is in the VM Description, andchangemein this version.
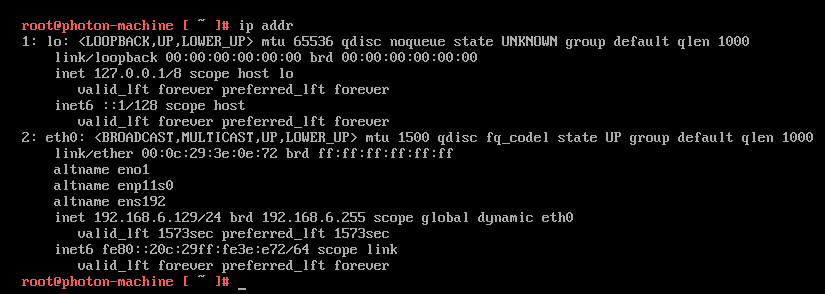
3. Now run the ip addr command to display the current IP addresses of the interfaces. ip addr
ip addr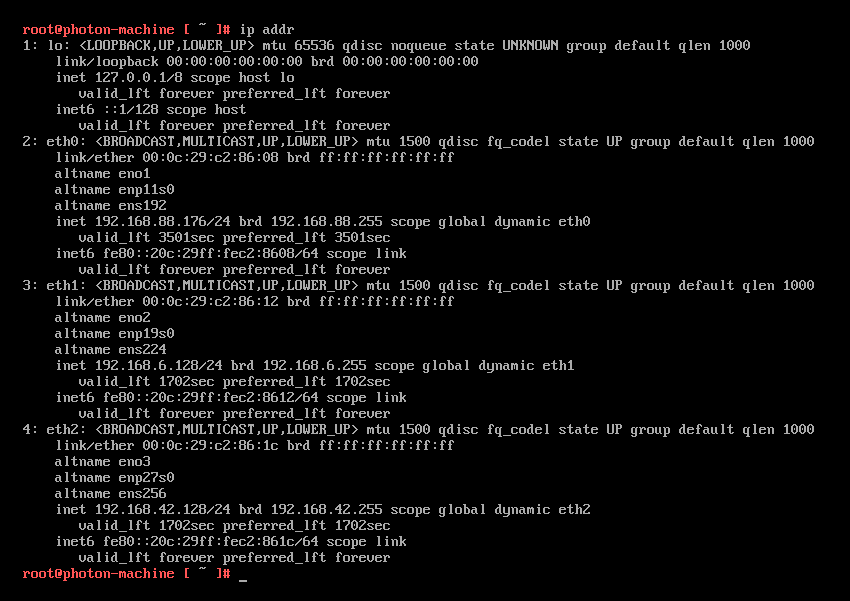
Setting Static IP Addresses
At this point, you’ve set up the NICs and they have IPs assigned, but they are assigned via DHCP. If you’re going to create a software router, the NICs must have static IPs on each routed interface.
Other devices or routers will be pointing to these interfaces and the last thing you want to happen is for the interface IP to change! Both eth1 and eth2 may be gateway interfaces, and therefore need to be statically assigned.
1. Create the configuration file /etc/systemd/network/10-static-eth1.network to contain the network configuration.
As originally noted, avoid using an address in the DHCP range, which by default is .128 - .254. Therefore .10 will not conflict.
 Use the CAT command to send all content to the specified file until the "EOF" string is seen.
 cat > /etc/systemd/network/10-static-eth1.network << "EOF"
 [Match]
 Name=eth1
 [Network]
 Address=192.168.6.10/24
 EOF
2. Set read permissions to the configuration file via the chmod command so that systemd can read the file.
chmod 644 etc/systemd/network/10-static-eth1.network3. Repeat steps 1-2, as shown below for the second additional network interface, eth2.
cat > /etc/systemd/network/10-static-eth2.network << "EOF"
 [Match]
 Name=eth2
 [Network]
 Address=192.168.42.10/24
 EOF
 chmod 644 /etc/systemd/network/10-static-eth2.network
4. Verify that the files exists with the correct permissions before continuing.
ls -l /etc/systemd/network/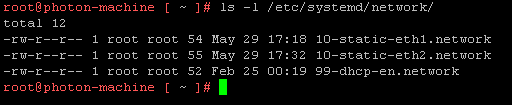
The default file,
99-dhcp-en.network, informs any unspecified network interface to request an address via DHCP.
5. Next, commit the configuration changes to systemd by restarting the systemd-networkd service. and verify by re-running *ip addr*.
# Restart the network service to apply the configuration changes
 systemctl restart systemd-networkd
# Verify that the network addresses are properly assigned
 ip addr
Turn on Network Routing
By default, Linux does not pass network traffic between interfaces called IP forwarding. Your next step is to enable IP forwarding between the interfaces just created.
1. First, create a new configuration file at /etc/sysctl.d/10-ip_forward.conf with the line net.ipv4.ip_forward = 1 to enable IP Forwarding.
echo 'net.ipv4.ip_forward = 1' > /etc/sysctl.d/10-ip_forward.conf2. Run the sysctl command to turn on IP forwarding immediately. Typically, enabling IP forwarding requires a reboot.
sysctl -w net.ipv4.ip_forward=13. Finally, read the contents of the system file /proc/sys/net/ipv4/ip_forward. You should see that the file contains the string 1 indicating that IP forwarding is enabled.
cat /proc/sys/net/ipv4/ip_forward
Testing the Router
You’re complete and the VMware Photon VM should be routing traffic between the interfaces but let’s verify that. To do so, spin up another two Photon VMs using the same technique as described earlier. This tutorial will use two Photon VMs called ATA-VM1 and ATA-VM2 as shown in the topology diagram in the Adding Additional Network Interfaces to the Photon VM section.
1. Deploy two new VMs using the same process as above.
2. Instead of adding new hardware to these VMs, change the default Network Adaptor to the correct host-only network: VMnet1 for ATA-VM1 and VMnet2 for ATA-VM2.
3. Log in as root to the ATA-VM1 machine and run the ip addr command to see the network interface. You should see that DHCP has assigned the eth0 NIC an IP on the same subnet as the router network; in this case 192.168.6.0/24.
4. Now, on ATA-VM1, add a default route or default gateway to one interface.
ip route add 0.0.0.0/0.0.0.0 via 192.168.6.105. On ATA-VM2, add a default route to the other interface.
ip route add 0.0.0.0/0.0.0.0 via 192.168.42.10Note that the exact IP addresses will be different on your machine, and you should use the same subnets as you used for ATA-Router. Host-only networks are not given a next-hop router by DHCP.
6. On, ATA-VM2, ping the other Photon VM on the other network. This action will send 10 packets across the router to the ATA-VM2 network. ping 192.168.6.129 -c 10
ping 192.168.6.129 -c 10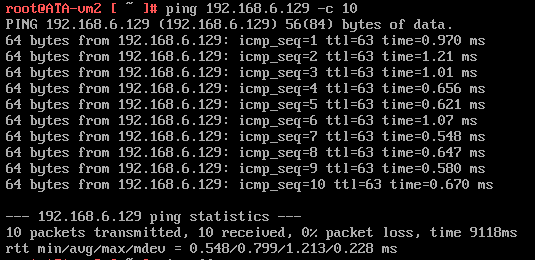
Seeing no packet loss here proves that the router is working!
Conclusion
In this article, you have installed VMware’s Photon OS from the OVA file available on GitHub. You have then added new interfaces to the VM, assigned static IPs, and enabled IP forwarding. You now have a handy software router available!
VMware Photon OS is designed to run docker containers, and K8s PODs, so comes with Docker pre-installed. Why not try installing a Photon VM from the minimal ISO or Raspberry Pi image to local hardware? Or the Azure or AWS AMIs? Or even use Photon as your next Docker host?


