


Are you looking to streamline your Terraform workflow and simplify the management of infrastructure as code (IaC)? Terragrunt, an open-source wrapper for Terraform, might be the tool you need!
Dive in as this tutorial covers the basics, from installation to configuration through practical examples.
Get ready to revamp your infrastructure management journey with Terragrunt!
Prerequisites
Before you jump into the nitty-gritty of keeping Terraform maintainable with Terragrunt, ensure you have the following in place:
- Terraform is installed – This tutorial uses Terraform v1.7.2.
- An AWS account – A free-tier account will suffice for this tutorial.
- An S3 bucket to act as the backend to store Terraform State.
- Terragrunt is installed – This tutorial uses version 0.55.0.
Preparing the Terragrunt Directory Structure
Imagine crafting a blueprint for your dream home. Before you start pouring the foundation, you need a solid plan. In Terraform and Terragrunt, your directory structure is your blueprint, the foundation upon which your infrastructure-as-code (IaC) masterpiece will stand.
To prepare your directory structure, proceed with the following:
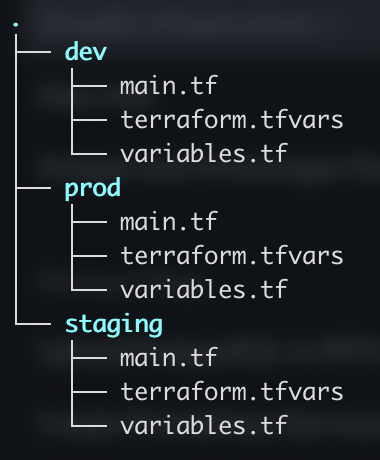
1. Create a project directory called terragrunt-demo (arbitrary), with subdirectories named/dev, /prod, and /staging.
2. Inside each subdirectory, create empty files named /main.tf, /terraform.vars, and /variables.tf.
At this point, you should have a directory structure like the one below. In this directory structure, the main.tf file is replicated for use in other environments.
3. In your /dev sub-directory, open your /main.tf file with your preferred editor and add the following code.
Remember to replace <YOUR_S3_BUCKET_NAME> and <YOUR_BUCKET_REGION> with your S3 bucket’s name and region. This configuration completes the following:
- Sets up Terraform to use an S3 bucket as a backend for storing state files.
- Defines an EC2 instance module with specific configurations for launching an EC2 instance in the AWS environment.
# Terraform Backend Configuration
terraform {
  # Specify the backend configuration for storing state files
  backend "s3" {
    # Replace <YOUR_S3_BUCKET_NAME> with the name of your S3 bucket
    bucket         = "<YOUR_S3_BUCKET_NAME>"
    # Specify the path within the S3 bucket where the state file will be stored
    key            = "terragrunt/dev/terraform.tfstate"
    # Replace <YOUR_BUCKET_REGION> with the AWS region where your S3 bucket is located
    region         = "<YOUR_BUCKET_REGION>"
    # Specify the name of the DynamoDB table for state-locking
    dynamodb_table = "my-lock-table"
  }
}

# EC2 Instance Module Configuration
module "ec2_instance" {
  # Specify the source of the module, which is an EC2 instance module provided by terraform-aws-modules
  source = "terraform-aws-modules/ec2-instance/aws"

  # Specify the parameters for the EC2 instance
  # Name of the EC2 instance
  name           = "dev-instance"
  # Type of EC2 instance
  instance_type  = "t2.micro"
  # Enable detailed monitoring for the instance
  monitoring     = true

  # Specify tags to assign to the EC2 instance
  # Tag indicating that Terraform created the instance
  Terraform   = "true"
  # Tag indicating the environment (in this case, development)
  Environment = "dev"
}
4. Now, add the following configuration to your /prod/main.tf file.
This configuration is similar to the main.tf in your /dev environment but differs in some specific values.
# Terraform Backend Configuration
terraform {
  # Define the backend configuration for storing state files
  backend "s3" {
    # Specify the name of the S3 bucket where state files will be stored
    bucket         = "<YOUR_S3_BUCKET_NAME>"
    # Specify the path within the S3 bucket where the state file will be stored
    key            = "terragrunt/prod/terraform.tfstate"
    # Specify the AWS region where the S3 bucket is located
    region         = "<YOUR_BUCKET_REGION>"
  }
}

# EC2 Instance Module Configuration
module "ec2_instance" {
  # Define the source of the module, which is an EC2 instance module provided by terraform-aws-modules
  source = "terraform-aws-modules/ec2-instance/aws"

  # Specify the parameters for the EC2 instance
  # Name of the EC2 instance
  name                   = "prod-instance"
  # AMI ID for the EC2 instance
  ami                    = "ami-06aa3f7caf3a30282"
  # Type of EC2 instance
  instance_type          = "t2.micro"
  # Specify the availability zone for the instance
  availability_zone      = "us-east-1"
  # Enable detailed monitoring for the instance
  monitoring             = true

  # Specify tags to assign to the EC2 instance
  tags = {
    # Tag indicating that Terraform created the instance
    Terraform   = "true"
    # Tag indicating the environment (in this case, production)
    Environment = "prod"
  }
}
The backend configuration is repeated to other environments, such as /dev and /prod, with slight changes only to specific input values. This method of setting up the backend is error-prone and may cause issues such as overriding an existing state file.
Some of the input variables for the ec2_instance module are duplicated. In scenarios where the configurations are straightforward, duplication of input variables does not create much confusion or overhead. The issue may not be considered a significant concern in these cases.
But, as configurations become more intricate and complex, managing such duplication becomes increasingly difficult and problematic. This way of managing configurations goes against Don’t Repeat Yourself (DRY) principles.
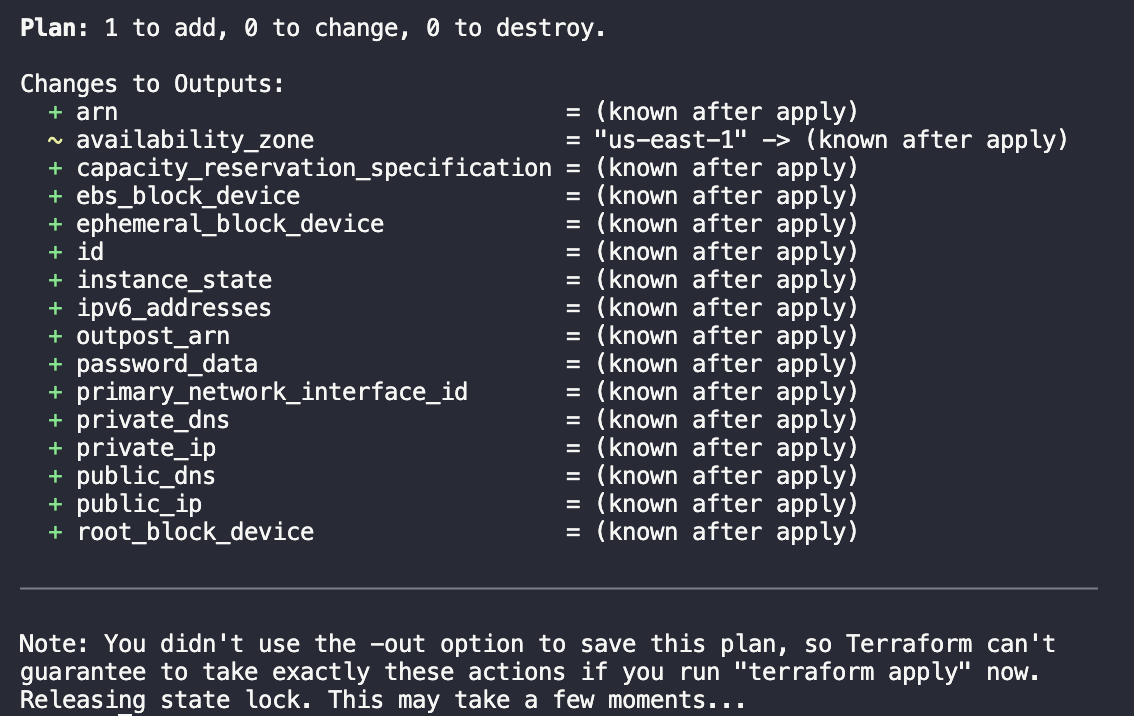
5. Lastly, navigate to your /dev environment and execute the following commands to apply the /main.tf configuration.
# Initializes Terraform working directory
terraform init

# Previews changes Terraform will make to the infrastructure
terraform plan

# Applies changes to the infrastructure
terraform apply
You will get a similar output, as shown below, once the terraform configuration has been applied to your infrastructure.

Setting up for the Root Directory
You have seen Terraform in action, from its simplicity to its potential complexities, with more configurations spawned as needed. But can you simplify the process of managing your IaC? Yes, through Terragrunt, as it promotes a defined directory structure, fostering organization and manageability.
To streamline IaC management, you must set it up for the root directory as follows:
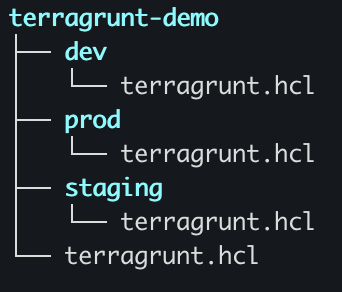
1. Delete the main.tf, terraform.tfvars, and variables.tf files, as they are now obsolete and no longer needed in this tutorial.
2. Next, create a file called terragrunt.hcl like with the following:
- One in the root directory of your infrastructure (terragrunt-demo), as this file contains the global settings.
- One terragrunt.hcl file for each environment (dev, prod, and staging) to contain settings that extend or override the global settings.
It allows you to keep configurations DRY by defining repeatable configurations, such as the backend and module, once in the root location. You can then inherit that configuration in other “child” directories.
3. Now, add the following configuration to the terragrunt.hcl file in your root directory.
This setup establishes remote state storage through an S3 backend and outlines the essential input variables required to deploy infrastructure using Terraform. path_relative_to_include() is a function that returns the relative path from the current configuration file to the included configuration file. You will see a clearer view of this setup later in this tutorial.
# Define remote state configuration
remote_state {
  # Specify the backend type for remote state storage
  backend = "s3"
  # Specify the configuration for generating the backend configuration file
  generate = {
    # Specify the path where the backend configuration file will be generated
    path      = "backend.tf"
    # Specify the behavior if the file already exists
    if_exists = "overwrite_terragrunt"
  }

  # Specify the configuration for the backend
  config = {
    # Specify the name of the S3 bucket for storing state files
    bucket         = "<YOUR_BUCKET_NAME>"
    # Specify the path within the S3 bucket where the state file will be stored
    key            = "terragrunt/${path_relative_to_include()}/terraform.tfstate"
    # Specify the AWS region where the S3 bucket is located
    region         = "<YOUR_BUCKET_REGION>"
  }
}

# Define input variables
inputs = {
  # Specify the AMI ID for the EC2 instance
  ami                    = "ami-06aa3f7caf3a30282"
  # Specify the availability zone for the EC2 instance
  availability_zone      = "us-east-1"
  # Specify the type of EC2 instance
  instance_type          = "t2.micro"
  # Specify whether detailed monitoring is enabled for the instance
  monitoring             = true
}
With this setup, each environment will have its key generated automatically without needing to make changes manually. The generated key will look like the ones in the table below:
| Environment | Generated Key |
|---|---|
| dev | terragrunt/dev/terraform.tfstate |
| prod | terragrunt/prod/terraform.tfstate |
| staging | terragrunt/staging/terraform.tfstate |
Configuring for Multiple Environments
Orchestrating various environments can be akin to navigating a labyrinth. But fear not, as you are about to unveil the seamless orchestration that it brings.
This approach lets you maintain consistency across environments. You define common configurations in the root configuration, ensuring environments adhere to the same standards.
To configure for multiple environments, carry out the following:
1. Open the /dev/terragrunt.hcl file and add the following configuration, which allows it to inherit configurations from the root directory. This setup enables efficient and reusable management of configurations across various environments.
💡 Only one environment, /dev,is used for this tutorial, but you can replicate the same method in other environments as needed.
The include block is used to have additional configurations. For this case, this configuration uses a function find_in_parent_folders(). This function dynamically consists of the inputs from the configuration file from the root directory.
The find_in_parent_folders() function in each environment directory automatically searches through the project directory. This function finds the root terragrunt.hcl and inherits the remote_state to store the Terraform state.
# Include Terragrunt configuration from the root directory
include "root" {
  # Search for the Terragrunt configuration file in parent folders
  path = find_in_parent_folders()
}

# Terraform configuration
terraform {
  # Specify the source of the Terraform module using Terragrunt's source URL format
  source = "tfr:///terraform-aws-modules/ec2-instance/aws?version=5.6.0"
}

# Input variables for the Terraform module
inputs = {
  # Specify the number of EC2 instances to deploy
  instance_count = 1

  # Specify tags to assign to the EC2 instances
  tags = {
    # Name tag for the EC2 instance
    Name = "dev-instance"
    # Environment tag for the EC2 instance
    Environment = "dev"
  }
}
2. Next, execute the following terragrunt commands to deploy your newly created Terragrunt-managed infrastructure for your /dev environment.
# Initialize terragrunt working directory
terragrunt init

# Preview changes Terragrunt will make to the infrastructure
terragrunt plan

# Apply changes to the infrastructure
terragrunt apply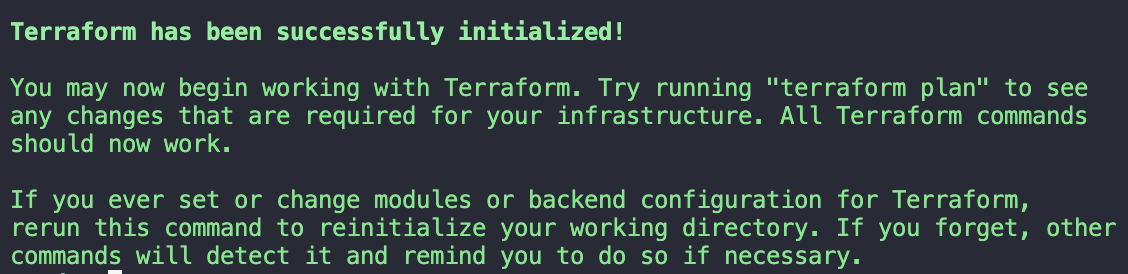
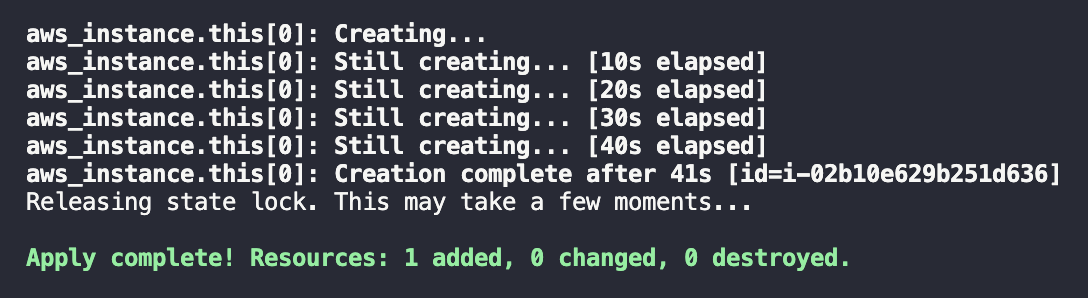
Your resources are now successfully deployed.
3. Finally, run the command below to destroy these Terragrunt-managed resources.
Why remove all provisioned resources after completing development, testing, or experimentation with infrastructure? One benefit of doing so is avoiding unnecessary costs or environmental clutter.
terragrunt destroy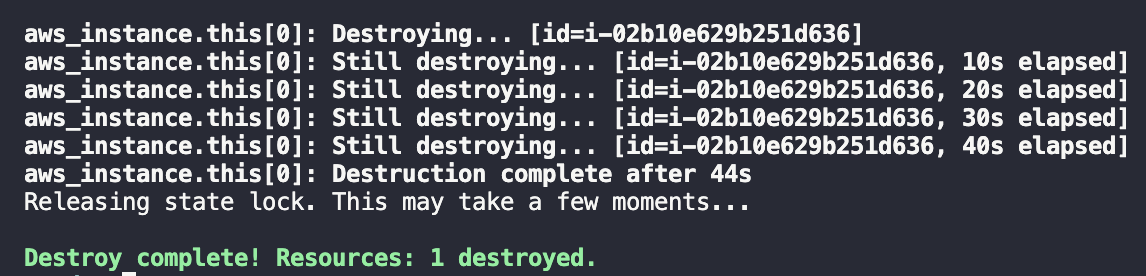
Paid link disclosure: AffiliateMagic may earn a commission if you buy through the linked review. If Terragrunt is part of a broader Terraform skill path, compare the Udemy technical training buying aid before choosing a paid infrastructure-as-code course. Compare Udemy Terraform training.
Conclusion
Throughout this tutorial, you have delved into the intricacies of Terragrunt. You have mastered critical concepts like preparing directory structures, setting up Terragrunt for the root directory, and configuring it for multiple environments. By harnessing the power of Terragrunt, you have unlocked the potential for streamlined and efficient infrastructure management.
Terragrunt’s power turns the complexity of managing IaC into a breeze. Terragrunt brings order to the chaos by promoting modularization and streamlining configurations, making your codebase more readable, organized, and scalable.
As you reflect on your learning, why not explore advanced Terragrunt features, such as leveraging Terragrunt modules? These modules offer opportunities to modularize further and optimize your infrastructure configurations.
Keep experimenting. Your infrastructure awaits its next evolution!


