


If you are a DevOps engineer, stop wasting time manually managing your infrastructure. Instead, let Terraform in Azure Devops manage it for you!
Not a reader? Watch this related video tutorial!
Not seeing the video? Make sure your ad blocker is disabled.
Terraform is an infrastructure as code (IaC) tool that allows you to build, change, and version infrastructure safely and efficiently. Keep reading, and you will learn how to integrate Terraform Azure DevOps project.
Prerequisites
To follow along with this tutorial, here is what you will need:
- A Microsoft Azure Account: the free trial is sufficient.
- An Azure DevOps Account with access to hosted parallelism. To gain free access to hosted parallelism, submit an Azure DevOps Parallelism Request.
The granting of Azure DevOps Parallelism Request can take up to 2-3 business days.
Creating a Terraform in Azure Devops Configuration
Before you can start building infrastructure with Terraform, you need to create a Terraform configuration.
A Terraform configuration is a document that tells Terraform how to manage your desired infrastructure and consists of one or more configuration files. The configuration languages for Terraform are JSON and the Hashicorp Control Language (HCL), a declarative language.
Declarative languages allow you to describe your intended infrastructure and not the steps to build that infrastructure. You declare the intended infrastructure with HCL, and Terraform takes care of the rest!
Time to create your Terraform configuration! The examples here will use a sample Terraform Azure DevOps project, which contains a web application called PartsUnlimited. The sample project will include the source code, the unit tests, and a starting Terraform configuration folder for the sample web application.
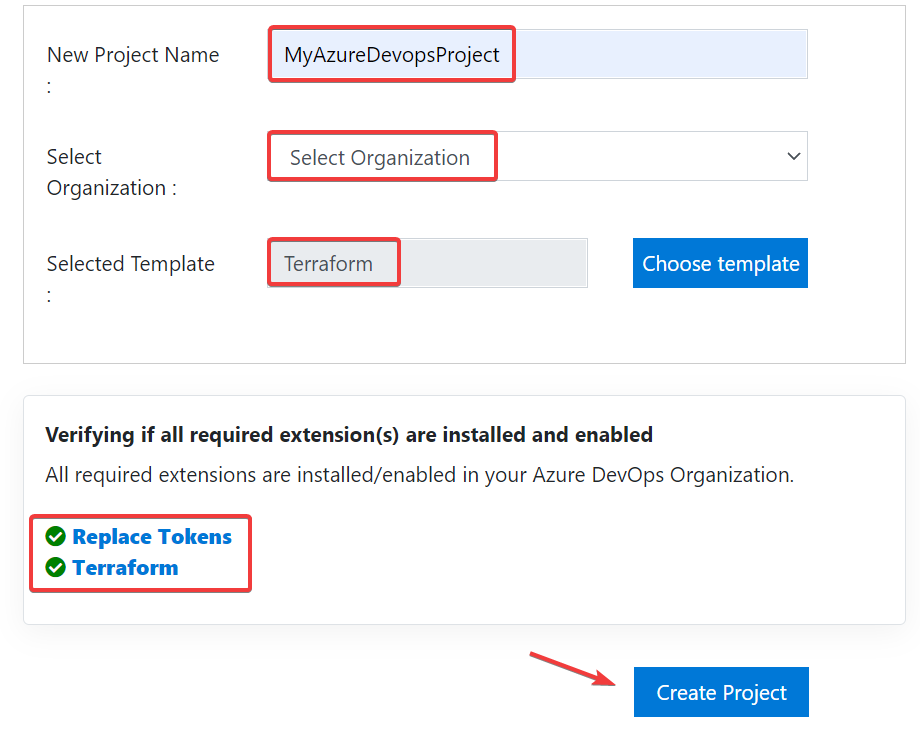
1. Navigate to the Azure DevOps Demo Generator and sign in with your Azure DevOps account. Add an Azure organization to your Azure DevOps account if you do not already have one.
Enter the project name, select your Azure organization, and choose the Terraform template. Ensure the extensions Replace Tokens and Terraform are installed. Finally, click on Create Project.
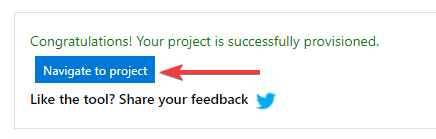
2. After creating the project, click on Navigate to project.
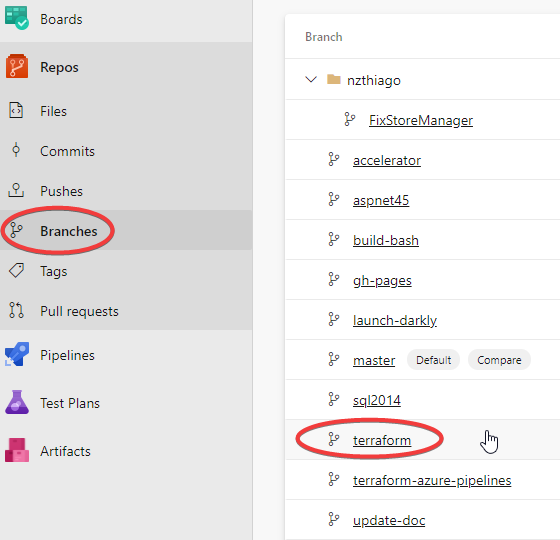
3. Navigate to Repos → Branches and select the terraform branch.
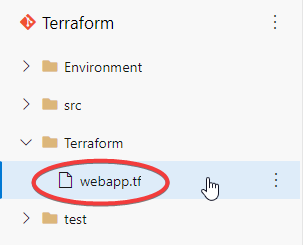
4. Click on the Terraform folder and open the file webapp.tf, the Terraform configuration file written in HCL.
5. Replace the sample webapp.tf file with the following code. You must add the Features blocks to the sample configuration file to configure the Microsoft Azure Provider. In this example, the Terraform state file will be stored remotely in your Azure storage account. The two resources the configuration holds are an app service plan and the PartsUnlimited web application. The app service plan defines the compute resources for the web application to run on.
terraform {
  required_version = ">= 0.11"

  backend "azurerm" {
    storage_account_name = "__terraformstorageaccount__"
    container_name       = "terraform"
    key                  = "terraform.tfstate"
    access_key           = "__storagekey__"
    features{
    }
  }
}

provider "azurerm" {
  features {
  }
}

resource "azurerm_resource_group" "dev" {
  name     = "PULTerraform"
  location = "West Europe"
}

resource "azurerm_app_service_plan" "dev" {
  name                = "__appserviceplan__"
  location            = "${azurerm_resource_group.dev.location}"
  resource_group_name = "${azurerm_resource_group.dev.name}"

  sku {
    tier = "Free"
    size = "F1"
  }
}

resource "azurerm_app_service" "dev" {
  name                = "__appservicename__"
  location            = "${azurerm_resource_group.dev.location}"
  resource_group_name = "${azurerm_resource_group.dev.name}"
  app_service_plan_id = "${azurerm_app_service_plan.dev.id}"
}
Note that some of the values in this configuration file have the prefix and suffix ‘__’. These are placeholder values.
Publishing the Terraform Configuration via an Azure CI Pipeline
Now it is time to set up the continuous integration (CI) pipeline! A continuous integration pipeline automates code integration by running automated tests whenever one pushes code to the repository. You will publish the Terraform configuration you created in the previous section to a build artifact in your CI pipeline.
The build artifact is a compressed copy of your Terraform configuration. The pipeline will store the exact version of the configuration that you specify by publishing it to a build artifact. The alternative, pulling the configuration directly from your repository, is not ideal as other users can change the configuration.
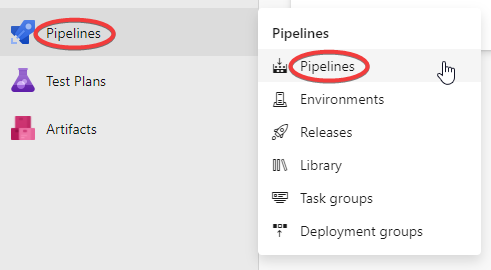
1. In your Azure DevOps project, navigate to Pipelines → Pipelines.
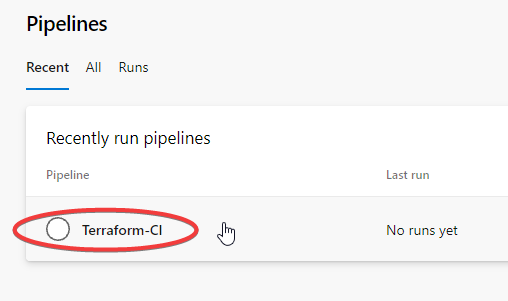
2. The sample project has its own CI pipeline. To access this pipeline, click Pipelines and then Terraform-CI.
3. Click on Edit in the top right corner.

The pipeline tasks for the sample project’s Agent job 1 will be displayed. The tasks are .NET core tasks, part of the sample project. These tasks’ role is to restore the dependencies and build, test, and publish the sample web application. This web application will then run on the architecture built with Terraform.
4. Click on the task Copy Terraform files to artifacts. This job will copy your Terraform configuration files to a build artifact to build your infrastructure later.
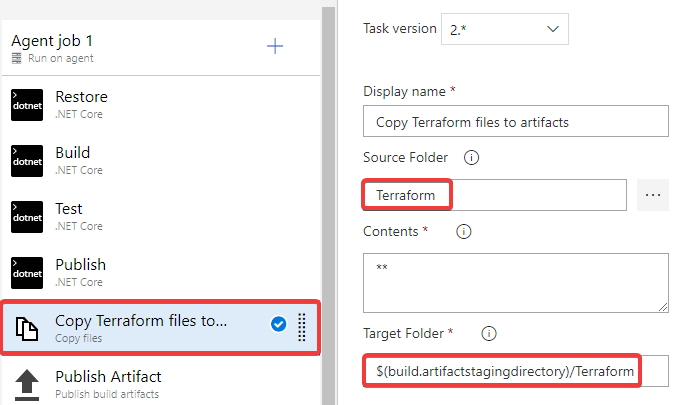
Under Source Folder, the selected folder should contain your configuration file. In this example, ensure that the ‘Terraform’ folder is selected.
In this example under Target Folder, $(build.artifactstagingdirectory)/Terraform is specified. This directory will store the build artifact.
The build variable
build.artifactstagingdirectoryholds the local path on the agent that stores copies of artifacts.
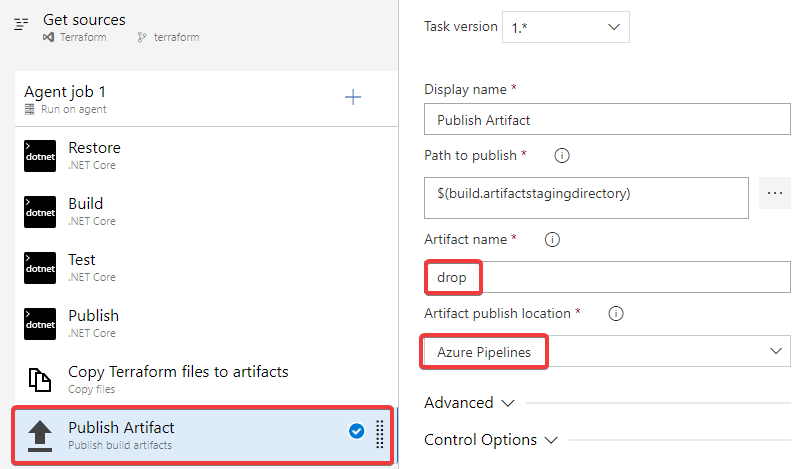
5. Click on the task Publish Artifact. The Artifact name field is for the name of the folder that will contain your artifact. The default artifact name is drop, but you can change it to any name. Under Artifact publish location confirm that Azure Pipelines is the selected.
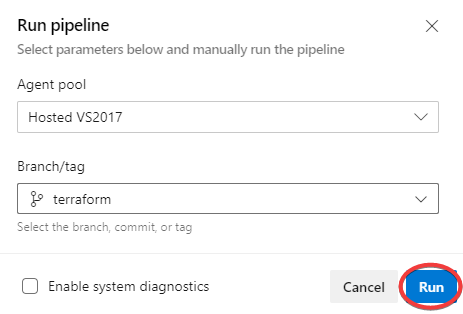
6. To run the pipeline, click on Queue at the top of the page. A dialog window will appear, as shown in the image below. At the bottom of the window, click Run.
7. Under Jobs, click on the job Agent job 1. Recall that Agent job 1 is the job in the sample project that you triggered. Verify that all the tasks succeeded, indicated by a green checkmark. Click on the back arrow to return to the previous page.

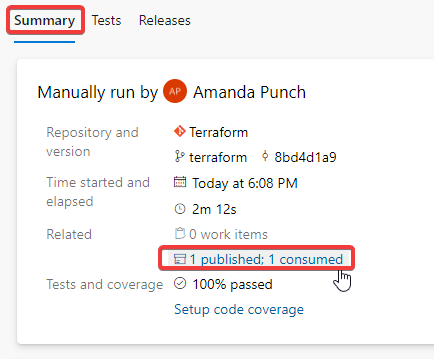
8. Navigate to the published artifacts. Go back to Pipelines → Terraform-CI, and under Runs, click on the most recently run job. Under Summary, click on 1 published; 1 consumed. The text 1 published; 1 consumed specifies that one artifact is published and one is consumed. This example only had one build artifact.
9. Under Published, verify that your artifact is listed. In this example, the artifact is under the drop folder or the folder you specified in step 5. The folder should contain a zip file storing the web application and your configuration file, webapp.tf.

Building Infrastructure with Terraform via an Azure CD Pipeline
Now that you have published your Terraform configuration to an artifact, it is time to use it in a continuous delivery (CD) pipeline.
In the CD pipeline, Terraform will build the resources you specified in your Terraform configuration. You will then use these resources to deploy the web application in the sample project.
The infrastructure built is part of the staging environment that replicates the production environment where your website will be running. By running your application in a staging environment, you can ensure it will run correctly in the production environment before releasing it to the user.
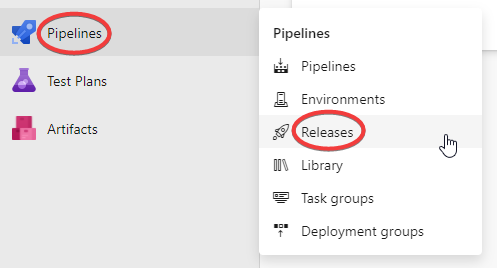
1. In your Azure DevOps project, navigate to Pipelines → Releases.
2. The sample project has its own CD pipeline. To access this pipeline, select Terraform-CD and click Edit.

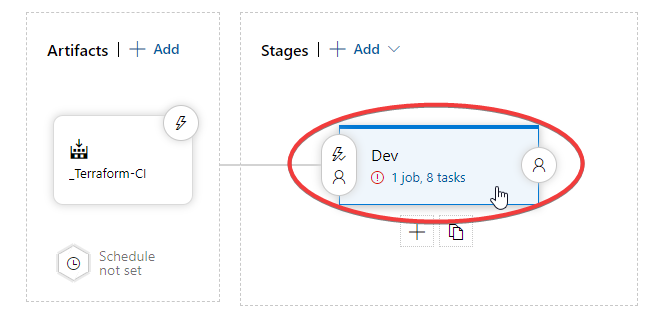
3. Navigate to the pipeline tasks by clicking on 1 job, 8 tasks under Dev on the list of stages of the sample project’s CD pipeline.
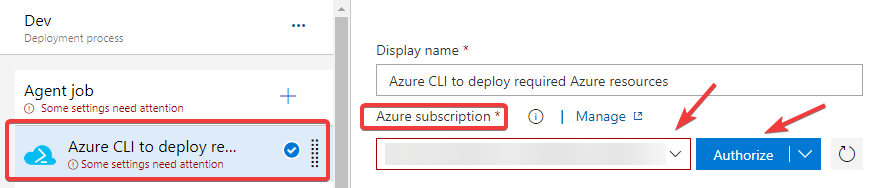
4. Select the task Azure CLI to deploy Azure resources. Under the Azure subscription dropdown menu, select your Azure subscription. The subscription will store the Terraform state file. Click Authorize and log in to your Azure account to allow the CD pipeline to use your subscription.
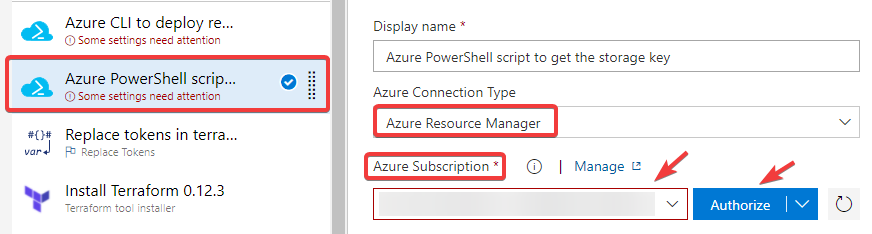
5. Select the task Azure PowerShell script to get the storage key. Under the Azure Connection Type dropdown, select Azure Resource Manager. Once again, choose your Azure subscription and authorize it.
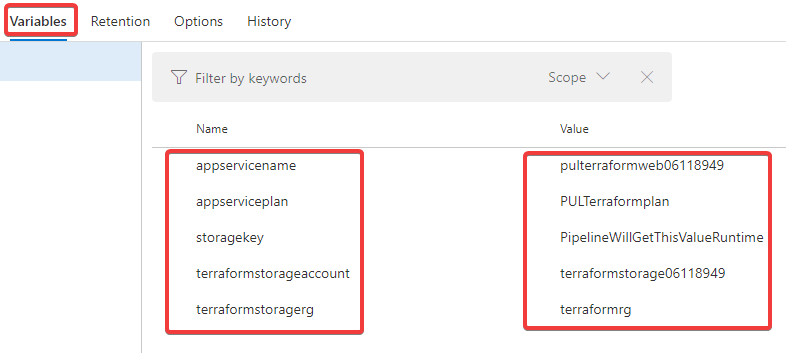
6. The following task is Replace tokens in terraform file. The Replace Tokens extension will replace the placeholder values with the appropriate variable values. To check the replacement values, navigate to Pipelines → Releases. Select the pipeline Terraform-CD, click Edit, and select Variables at the top of the page.
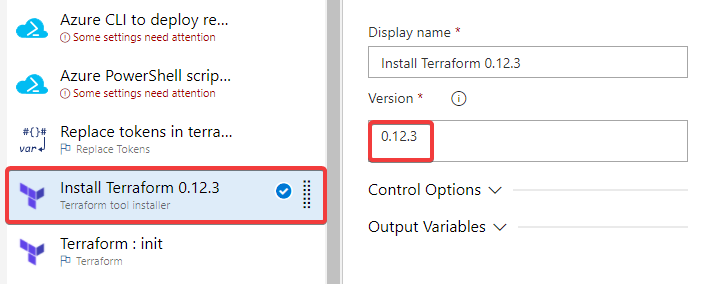
7. Select the Terraform tool installer task. This task installs Terraform. In the sample project Terraform version 0.12.3 will be installed, as shown in the image below.
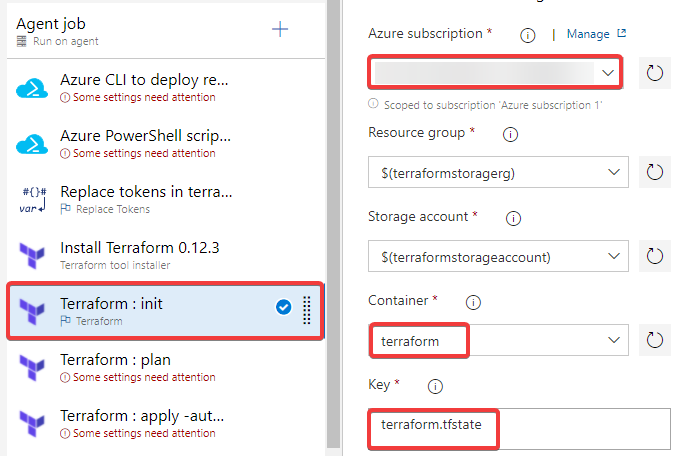
8. Select the Terraform : init task. This task invokes the terraform init command that initializes a working directory with the configuration files.
Select your Azure subscription and authorize it. In the sample project under Container, the container name is terraform by default. You can replace it with any name, but it must be the same value given to the argument container_name in the configuration file. Under Key, the name of the Terraform state file is terraform.tfstate by default. It must match the value of key in the configuration file.
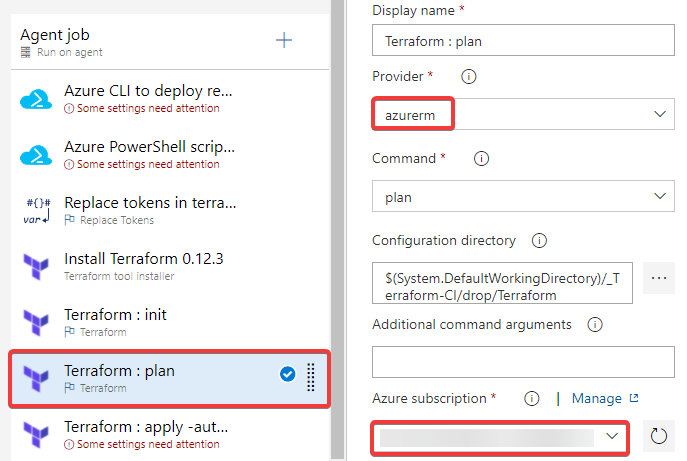
9. Select the Terraform : plan task. This task invokes the terraform plan command, which creates a plan to alter the state of your resources to match your desired infrastructure.
Select your Azure subscription and authorize it. In the sample project, azurerm is the provider.
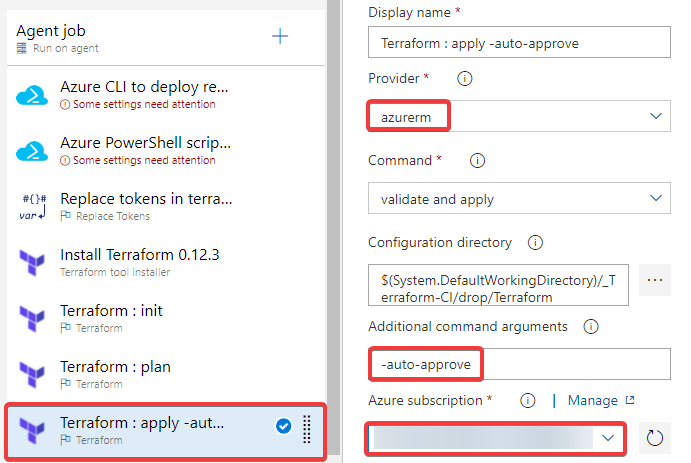
10. Select the Terraform: apply task. This task invokes terraform apply command, which executes the plan created in the Terraform: plan task.
Select your Azure subscription and authorize it. In this sample project, under Additional command arguments, ensure -auto-approve is selected. This argument bypasses the prompt for confirmation so your pipeline can be fully automated.
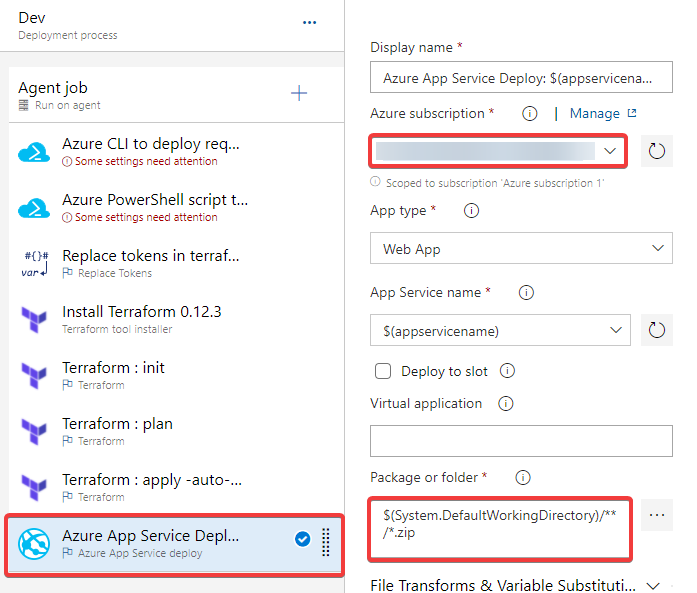
11. Click on the Azure App Service Deploy task. Select your Azure subscription and authorize it. Recall that you published a zip file for the web application to a build artifact in your CI pipeline. Under Package or folder, the path to this file is specified. This task deploys this web application package to an Azure app service provisioned by Terraform Azure Devops.
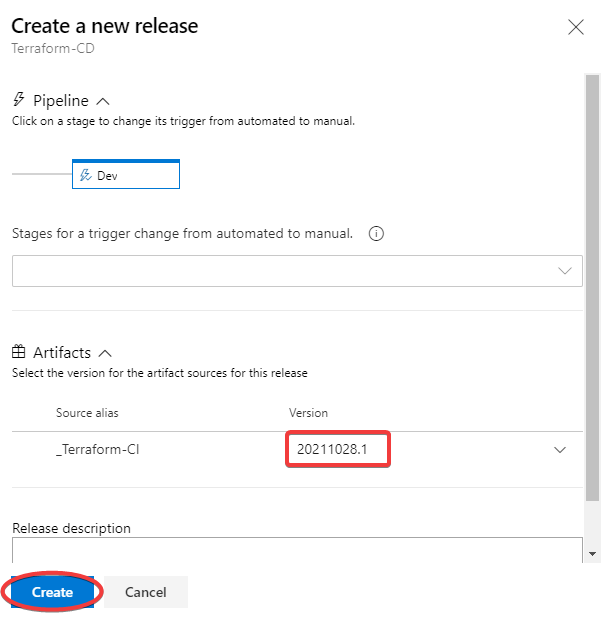
12. With your pipeline setup, it is time to create a release. In the top, right-hand corner click Save and then click Create release. A dialog window will appear. Under Artifacts, select the build version from your CI pipeline that contains the published artifacts. To find the build version, Navigate to Pipelines → Pipelines to view all the build versions. Click Create.
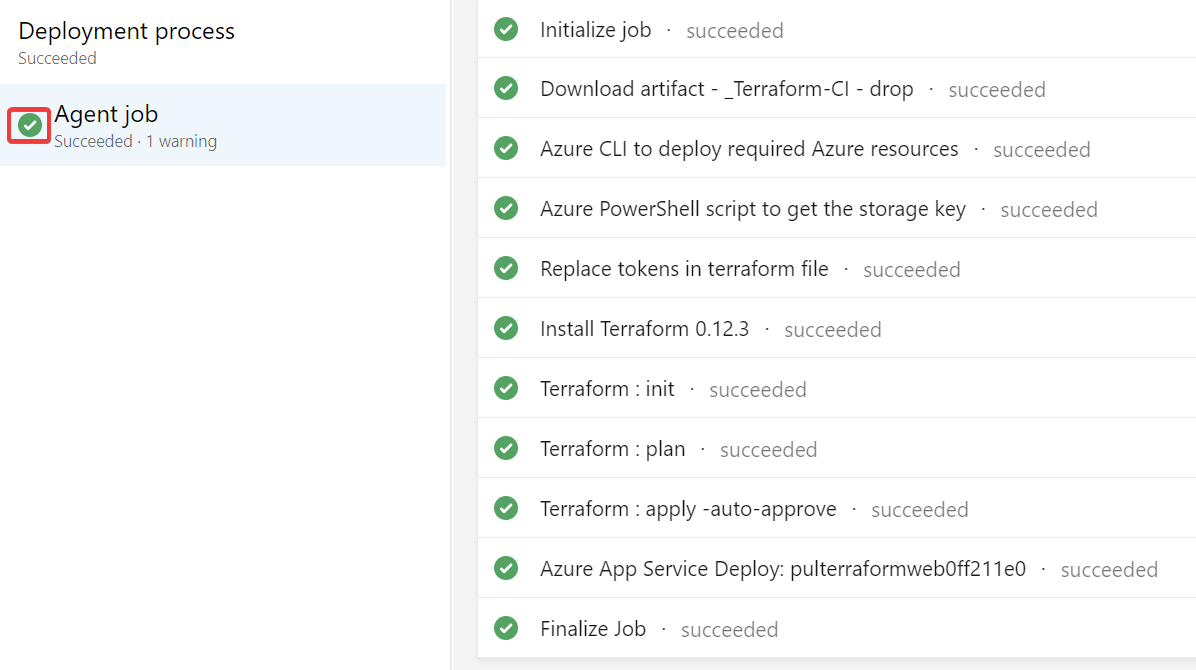
13. Navigate to Pipelines → Releases. In Terraform-CD and under Releases, click on the release you just created. Under Stages, click on Dev to view the pipeline progress. When the pipeline succeeds, it will be indicated by a green checkmark, as shown in the following image.
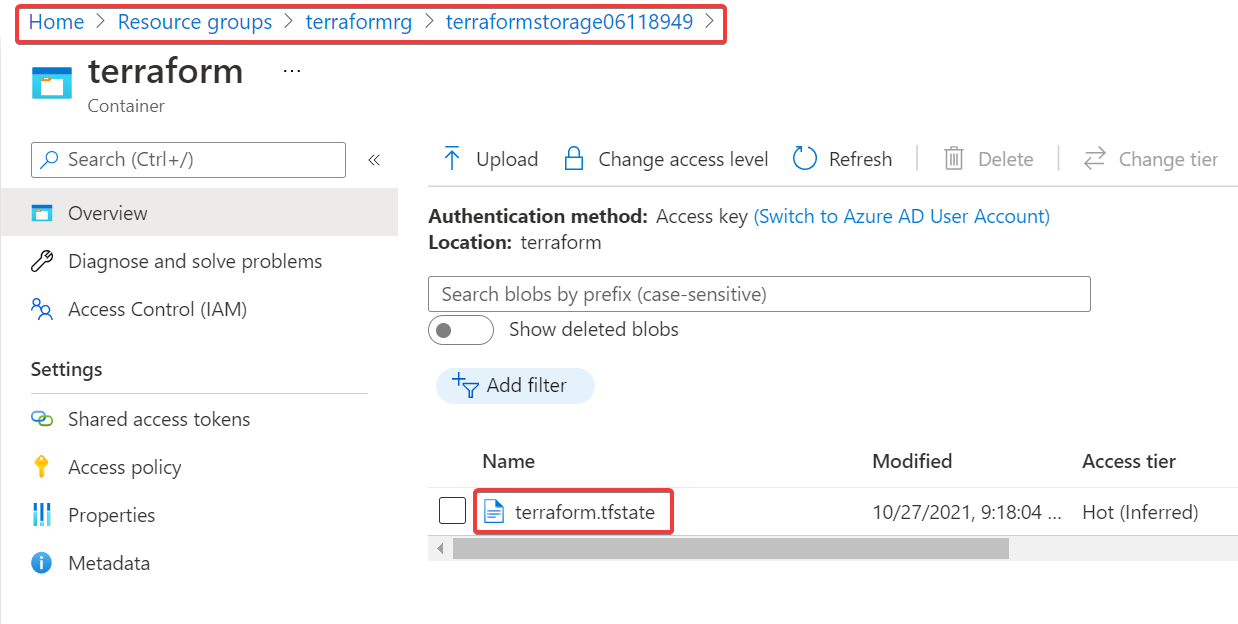
14. Log in to your Microsoft Azure Account. Navigate to Home → Resource Groups. Click on the terraform resource and then click on the terraform storage container. As specified in the pipeline, the terraform.tfstate file will be stored here using your Azure subscription.
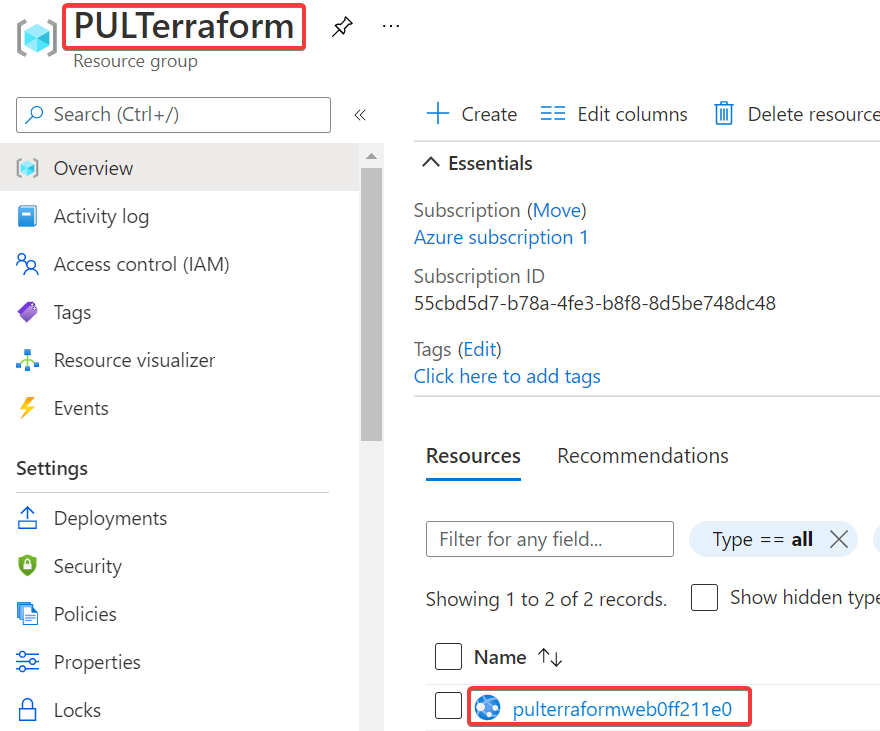
15. Now it’s time to see your infrastructure in action! Under Resource Groups, navigate to the PULTerraform resource group. Under Resources, click on web application resource as shown in the following image.
16. Click Browse. Your web application will open in a new tab on your browser, running on the infrastructure you just built using Terraform!

Conclusion
Throughout this tutorial, you have learned how to integrate Terraform into your Azure DevOps project to automate the management of your infrastructure. Next time you need to build infrastructure, save time by letting Terraform Azure Devops manage it for you.
What infrastructure do you plan on building with Terraform now that you know helpful Terraform can be?
Terraform is an infrastructure as code (IaC) tool that allows you to build, change, and version infrastructure safely and efficiently. Keep reading, and you will learn how to integrate Terraform into your Azure DevOps project.
Terraform is an infrastructure as code (IaC) tool that allows you to build, change, and version infrastructure safely and efficiently. Keep reading, and you will learn how to integrate into your Terraform Azure DevOps project.


