


If you’re administering a database, it’s only natural you’d be responsible for nurturing and caring for it. And what better care than backing up your databases regularly, so your data is safe? An SQL server backup database script is one of the best options.
Backing up regularly gets even trickier when you manage multiple projects with lots of databases. Don’t let that worry you, though. In this tutorial, you’ll learn methods to backup your databases regularly by invoking SQL scripts.
Read on and start backing up your databases!
Prerequisites
This tutorial will be a hands-on demonstration. To follow along, be sure you have the following:
- An SQL Server (The Developer Edition will suffice) – This tutorial uses an SQL Server instance named (SQLEXPRESS).
- An SQL Database to backup – This tutorial uses AdventureWorksLT2019.bak from AdventureWorks sample databases.
- SQL Server Management Studio (SSMS) installed – This tutorial uses Microsoft SQL manager version 18.
- PowerShell installed on your device. This tutorial uses Windows PowerShell 5.1, but later versions will also work.
- A Windows 10 machine – This tutorial uses OS Build 19043.1288.
Setting up your Backup Project Folder
In this tutorial, the first method you’ll try is creating a Transact-SQL (T-SQL) script. T-SQL is a Microsoft-specific extension to the SQL language. sqlcmd is a command-line utility tool that allows you to run SQL script files. And these script files perform tasks like backing up your databases.
But before backing up your database, you’ll first have to verify if sqlcmd works and create a backup folder.
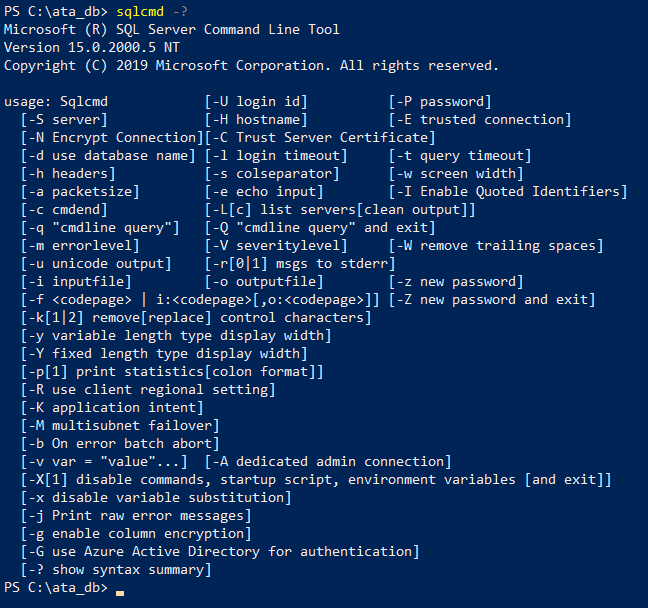
1. Open PowerShell as administrator, and run the below command to verify if sqlcmd works on your PowerShell session.
sqlcmd -?Below, you can see the sqlcmd command works, but the output may vary depending on the installed version.
2. Restore your database to Microsoft SSMS, in this case, AdventureWorksLT2019.bak.
3. Lastly, create a folder to hold all your backups. For this tutorial, the folder is named C:\ata_db. The chosen path will be shown in the commands throughout this tutorial as C:\ata_db\name_of_your_file.
Backing up a Database Following a Naming Convention
Now that you have settled on a backup folder, it’s time to build the script. Typically, you’d want to identify a backup file at first glance. So, why not follow a naming convention for your backup files?
For this tutorial, you can adopt the YYYYMMDD_HHMM_DatabaseName.bak convention. The suggested convention stores the hour and minutes following the 24-hour layout (e.g., 2300 for 11 pm).
You are free to follow a different convention, just be aware that you will need to change the commands in the scripts accordingly.
1. Open your favorite text editor, copy/paste the T-SQL content below, and save the file with your preferred name. But for this tutorial, the file is named backup1.sql saved in the C:\ata_db folder.
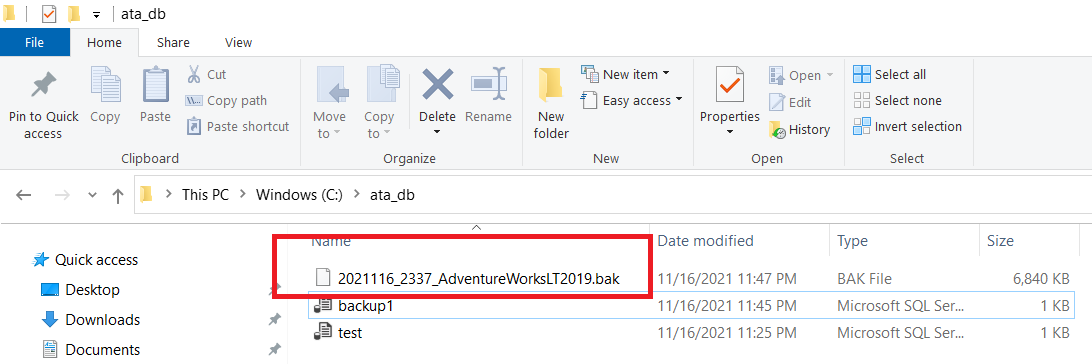
The code below will consider a database named AdventureWorksLT2019 and store a backup created on November 16, 2021, at 11: 37 PM. Following the naming convention, the backup file will be named 20211116_2337_AdventureWorksLT2019.bak.
USE AdventureWorksLT2019;
GO
BACKUP DATABASE AdventureWorksLT2019
TO DISK = 'C:\ata_db\20211116_2337_DatabaseName.bak'
GO
2. Now, run the following command to invoke backup1.sql on your SQL server (-S localhost\SQLEXPRESS). Be sure to replace SQLEXPRESS with your SQL server’s instance name.
sqlcmd -S localhost\SQLEXPRESS -i C:\ata_db\backup1.sqlThe command will work even if you have a remote database, such as an Azure-powered SQL database.
As you see below, the backup was successful.

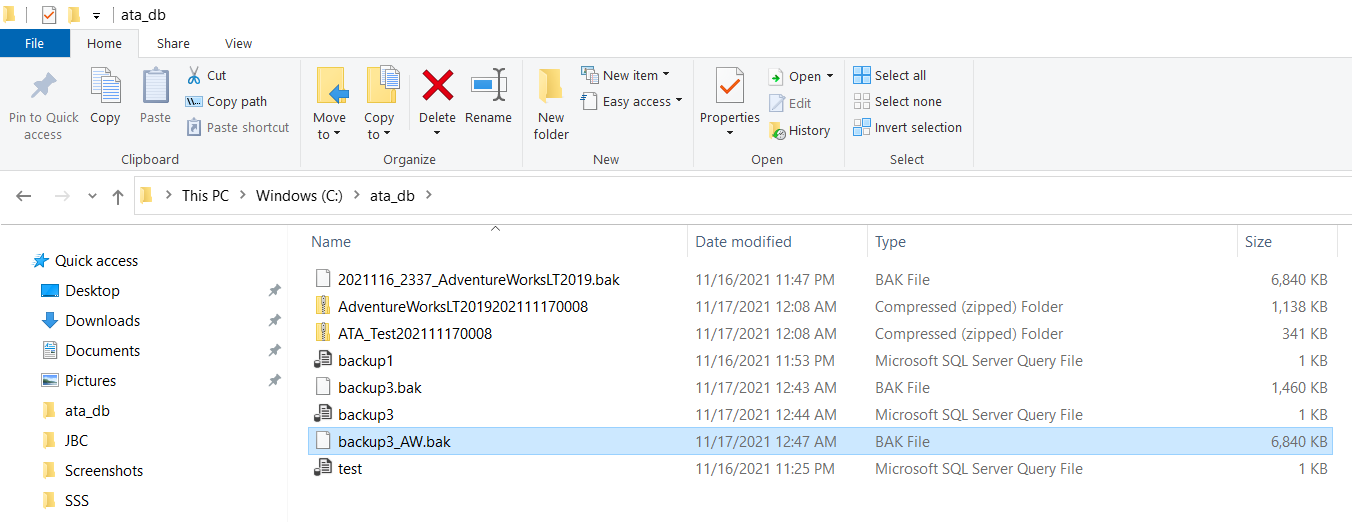
3. Lastly, open File Explorer, browse the backup folder you specified (C:\ata_db), and look for the backup file to confirm the backup file creation.
Performing Differential SQL Backup
If you’re following along, you already performed your first full backup. But you’re not restricted to full backups! With the power of T-SQL, you can also perform a differential backup, which only stores the changes that happened since the previous full backup.
1. Create a new file named backup2.sql and populate the file with the code below.
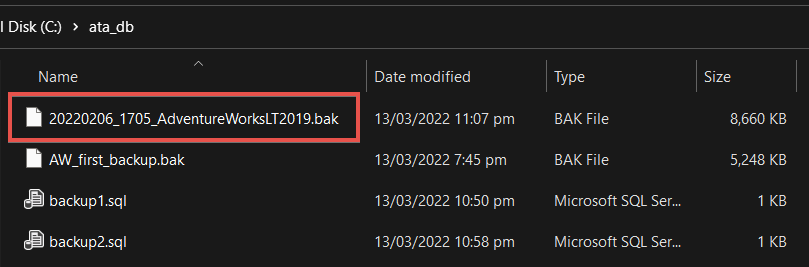
The code below will backup the AdventureWorksLT2019 database with the name 20220206_1705_AdventureWorksLT2019.bak.
USE AdventureWorksLT2019;
GO
BACKUP DATABASE AdventureWorksLT2019
TO DISK = 'C:\ata_db\20220206_1705_AdventureWorksLT2019.bak'
WITH DIFFERENTIAL
GO
2. Now, run the command below to invoke the script (backup2.sql). You can change the absolute path specified into a relative path of your choice.
sqlcmd -S localhost\SQLEXPRESS -i C:\ata_db\backup2.sqlA successful differential backup will look like the one below.

3. Finally, check the C:\ata_db folder and verify if the backup file you created in step two exists, as shown below.
Backing up a Database in File-Level
SQL Server databases can have multiple files, and sometimes you can just cherry-pick or select the critical parts you want to back up. And you can use this file-level backup option for such purposes.
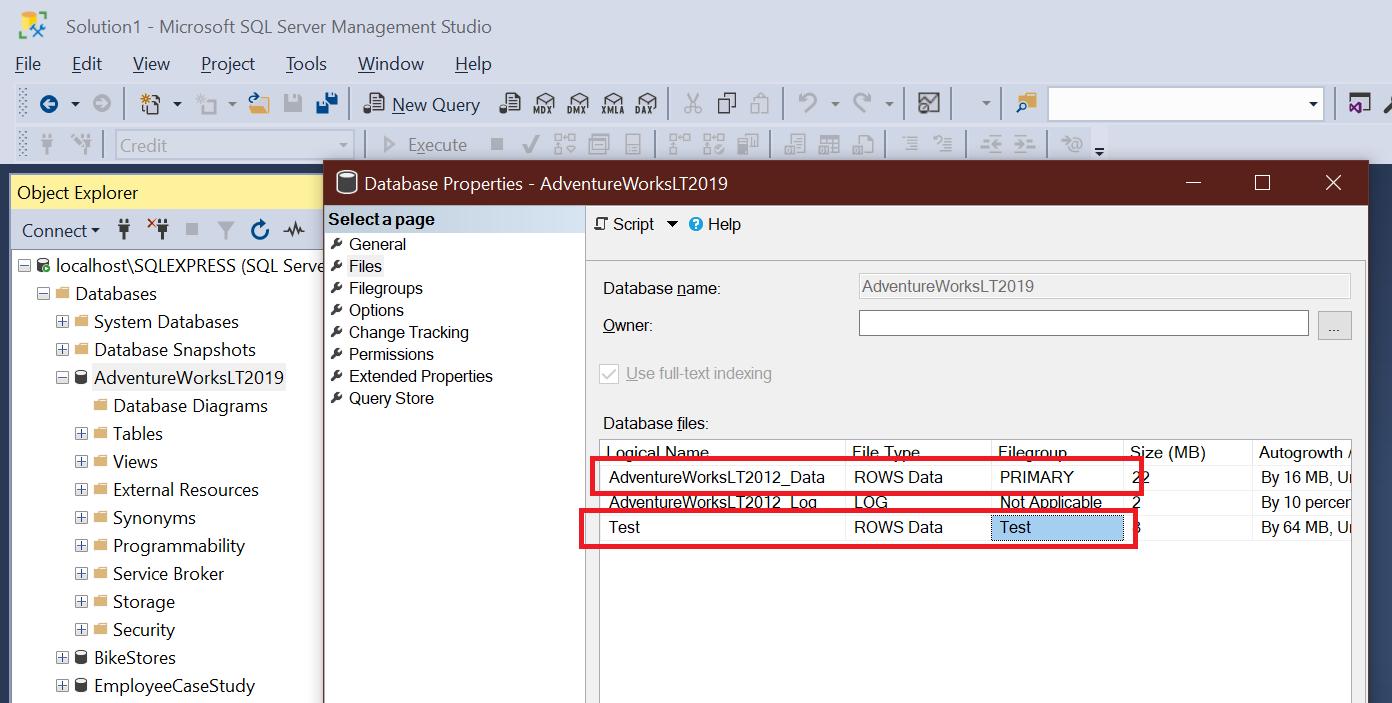
1. Open your Microsoft SSMS, right-click on the AdventureWorksLT2019 database and choose Properties to show the databases’ properties.
To demonstrate how to back up a database in File Level, add a test file with the following:
- Select the Files menu on the left panel, and click on the Add button at the bottom of the Database Properties window to create a ROWS data filegroup.
- You can set a distinct Logical Name, Filegroup, and File Name for the new ROWS data filegroup. But for learning purposes, all three properties are set as Test in this tutorial, as shown below.
Below, you can see the database files (log and data files). The data for AdventureWorksLT2019 is stored on two files.
2. Create a new script file, paste the contents below to the file, and save it as C:\ata_db\backup3.sql.
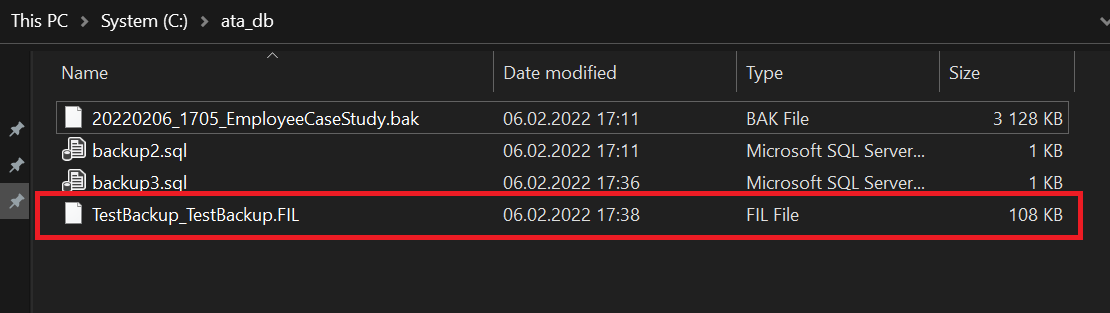
The code below backs up only the Test file as TestBackup_TestBackup.FIL in the C:\ata_db folder.
BACKUP DATABASE AdventureWorksLT2019 FILE = 'Test'
TO DISK = 'C:\ata_db\TestBackup_TestBackup.FIL'
GO
3. Now, run the command below to invoke the script (backup3.sql).
sqlcmd -S localhost\SQLEXPRESS -i C:\ata_db\backup3.sqlOnce again, a successful backup will look like the one below.

4. Lastly, navigate to C:\ata_db in File Explorer to verify the backup file (TestBackup_TestBackup.FIL) is present.
Backing up Database in Multiple Folders
You’ve seen how to backup database in a single folder, but what if you need to backup your database in multiple folders? Backing up your database in multiple folders gives you high data availability.
1. Create a folder called C:\secondfolder, where you’ll store a second backed up database later.
2. Next, create a new script file (backup4.sql), and populate the file with the code below.
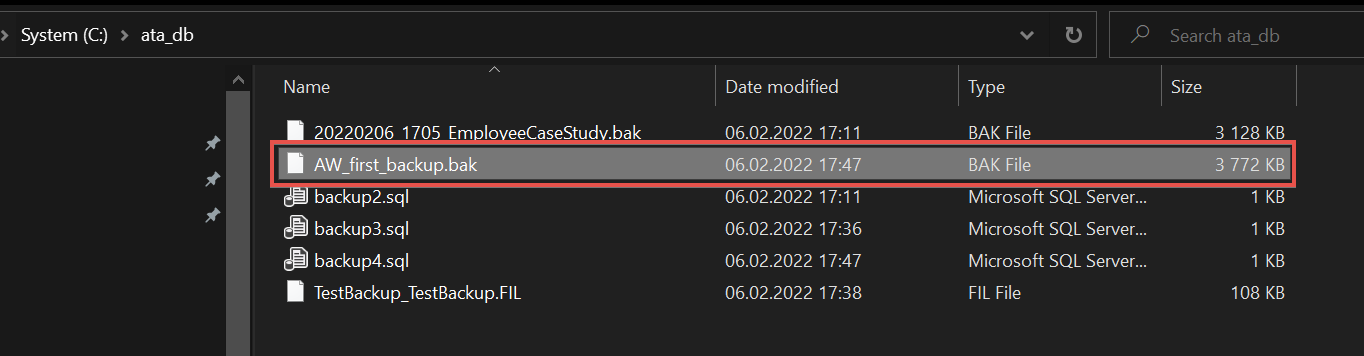
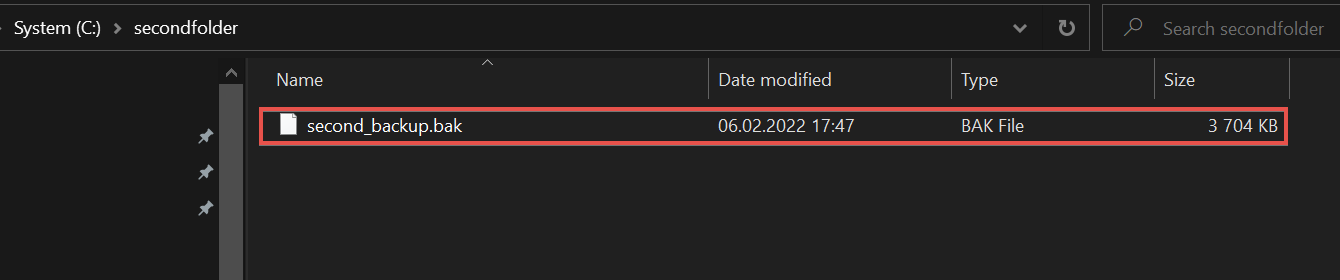
The below code backs up the same database (AdventureWorksLT2019 ) to two different locations with different names.
BACKUP DATABASE AdventureWorksLT2019
TO DISK = 'C:\ata_db\AW_first_backup.bak',
DISK = 'C:\secondfolder\AW_second_backup.bak'
GO
3. Finally, run the following command to invoke the SQL script (backup4.sql).
sqlcmd -S localhost\SQLEXPRESS -i C:\ata_db\backup4.sql
The script generates two .bak files on separate folders, as shown below.
Tracking the Backup Status with a Progress Bar
Some database backups are lengthy, and it’s hard to decipher progress with a blinking cursor, so adding a progress bar helps.
Create another script file named backup5.sql, and copy/paste the content below to the backup5.sql file, which adds a progress bar.
BACKUP DATABASE AdventureWorksLT2019
TO DISK = 'C:\\ata_db\\stats_backup.bak'
WITH STATS
GO
Now, run the sqlcmd command similar to previous steps to invoke the backup5.sql script
sqlcmd -S localhost\\SQLEXPRESS -i C:\\ata_db\\backup5.sql
Once you invoke the script, you’ll see the progress of backing up the file as it happens, as shown below.
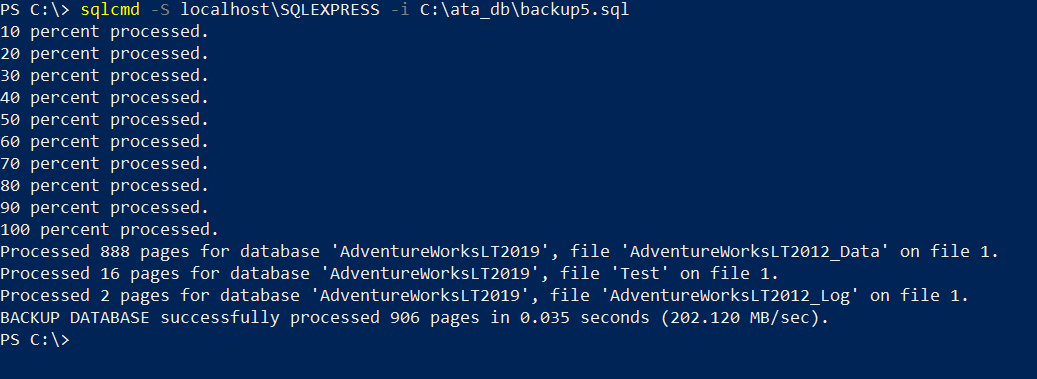
By default, the
WITH STATSflag shows tracks in 10% steps. But perhaps you prefer to update the bar at every 1% for example, change the flag toWITH STATS = 1
The file stats_backup.bak will now be present in your C:\ata_db folder.

Adding a Backup Description
When managing many databases, it’s easy to get lost in a plethora of files. Adding a description for your backups allows you to backtrack and refer to the backup description in the future.
Create a new script named backup6.sql and populate the following contents.
The code below backs up the AdventureWorksLT2019 as with_desc_backup.bak with a description (Full backup for AdventureWorks).
Your description for the backup can only have up to 255 characters.
BACKUP DATABASE AdventureWorksLT2019
TO DISK = 'C:\\ata_db\\with_desc_backup.bak'
WITH DESCRIPTION = 'Full backup for AdventureWorksLT2019'
GO
Now execute the following to invoke the backup6.sql script.
sqlcmd -S localhost\\SQLEXPRESS -i C:\\ata_db\\backup6.sql
Once you invoke the script, you will see an output similar to the previous examples.

Backing Up Multiple Databases in One Script
By now, you’ve already learned different options to back up a single database. But your machine may have multiple databases. So instead, use an extended script to back up all your databases at the same time.
1. Create a new script named backup_combo.sql, and populate the code below to the backup_combo.sql file.
The code is quite long, so you’ll add individual parts of the code to the script file in the sequence. You’ll see the entire code just before you invoke the script.
The code below declares four variables initially to represent the database name, path, name of the file for each database backup (the one with a .bak extension), and date of the file backup.
DECLARE @dbname VARCHAR(50) -- database name
DECLARE @file_path VARCHAR(256) -- path
DECLARE @file_name VARCHAR(256) --
DECLARE @file_date VARCHAR(20) -- used for filename

SET @file_path = 'C:\ata_db\'
2. Next, add the code below to the backup_combo.sql file, where the file_date variable later stores the actual date and timestamp when the backup script was invoked.
The GETDATE() command is in date format, so it’s converted into VARCHAR type first. That way, the date can be later concatenated in the file name of the database.
Note that the following code captures all databases. So, you exclude other built-in system databases named master, model, msdb, and tempdb with the WHERE flag.
SELECT @file_date = CONVERT(VARCHAR(20),GETDATE(),112) + '_' + REPLACE(CONVERT(VARCHAR(20),GETDATE(),108),':','')

DECLARE db_cursor CURSOR READ_ONLY FOR
SELECT name
FROM master.sys.databases
WHERE name NOT IN ('master','model','msdb','tempdb')  -- these are system databases

OPEN db_cursors
FETCH NEXT FROM db_cursor INTO @dbname
3. Add the last part of the code to the backup_combo.sql file.
The WHILE loop captures each database name fetched by the db_cursor. The loop will keep fetching each database in the machine (FETCH_NEXT statement) until it captures all the existing databases.
WHILE @@FETCH_STATUS = 0
BEGIN
   SET @file_name = @file_path + @dbname + '_' + @file_date + '.BAK'
   BACKUP DATABASE @dbname TO DISK = @file_name

   FETCH NEXT FROM db_cursor INTO @dbname
END

CLOSE db_cursor
DEALLOCATE db_cursor
As previously mentioned, you can see below the entire code for the backup_combo.sql file.
The backup_combo.sql script file is like the other previous scripts. But this script file even automates the naming of each database in the machine by using date and time variables.
DECLARE @dbname VARCHAR(50) -- database name
DECLARE @file_path VARCHAR(256) -- path
DECLARE @file_name VARCHAR(256) --
DECLARE @file_date VARCHAR(20) -- used for filename

SET @file_path = 'C:\ata_db\'

SELECT @file_date = CONVERT(VARCHAR(20),GETDATE(),112) + '_' + REPLACE(CONVERT(VARCHAR(20),GETDATE(),108),':','')

DECLARE db_cursor CURSOR READ_ONLY FOR
SELECT name
FROM master.sys.databases
WHERE name NOT IN ('master','model','msdb','tempdb')  -- these are system databases

OPEN db_cursor
FETCH NEXT FROM db_cursor INTO @dbname

WHILE @@FETCH_STATUS = 0
BEGIN
   SET @file_name = @file_path + @dbname + '_' + @file_date + '.BAK'
   BACKUP DATABASE @dbname TO DISK = @file_name

   FETCH NEXT FROM db_cursor INTO @dbname
END

CLOSE db_cursor
DEALLOCATE db_cursor
4. Now, run the command below to invoke the entire script (backup_combo.sql).
sqlcmd -S localhost\SQLEXPRESS -i C:\ata_db\backup_combo.sqlYou’ll know the backup is successful when you see multiple processed statements for all the databases in your machine just like the one below.
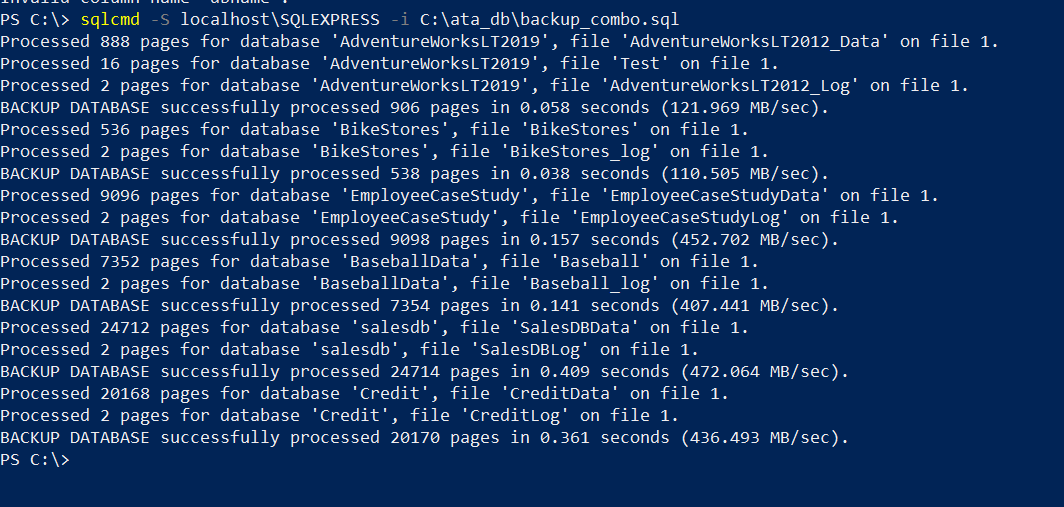
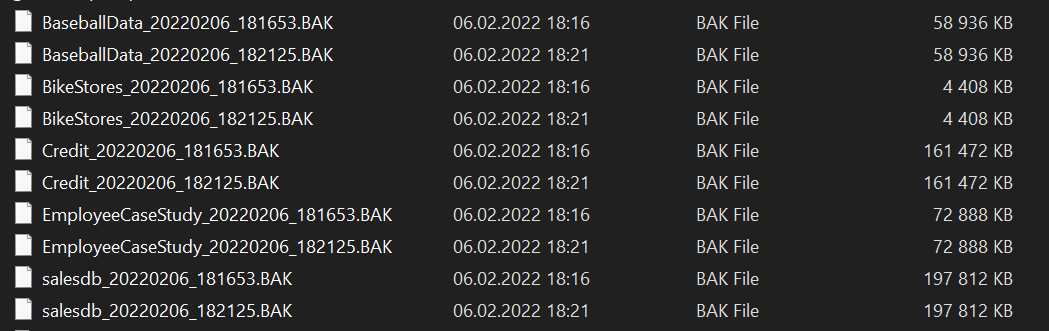
Similarly, you’ll see the generated .bak files on your specified folder accordingly.
Note that your machine may contain different databases, so the file names and the contents will not be identical to the screenshot below.
Backing up Databases with Microsoft SSMS
The SQL Server Management Studio tool is an equally viable option to perform backups like T-SQL and sqlcmd utility. You’ve already had a glimpse of how to navigate through the SSMS’s GUI in the previous examples, but this time, you’ll perform the backup directly in SSMS.
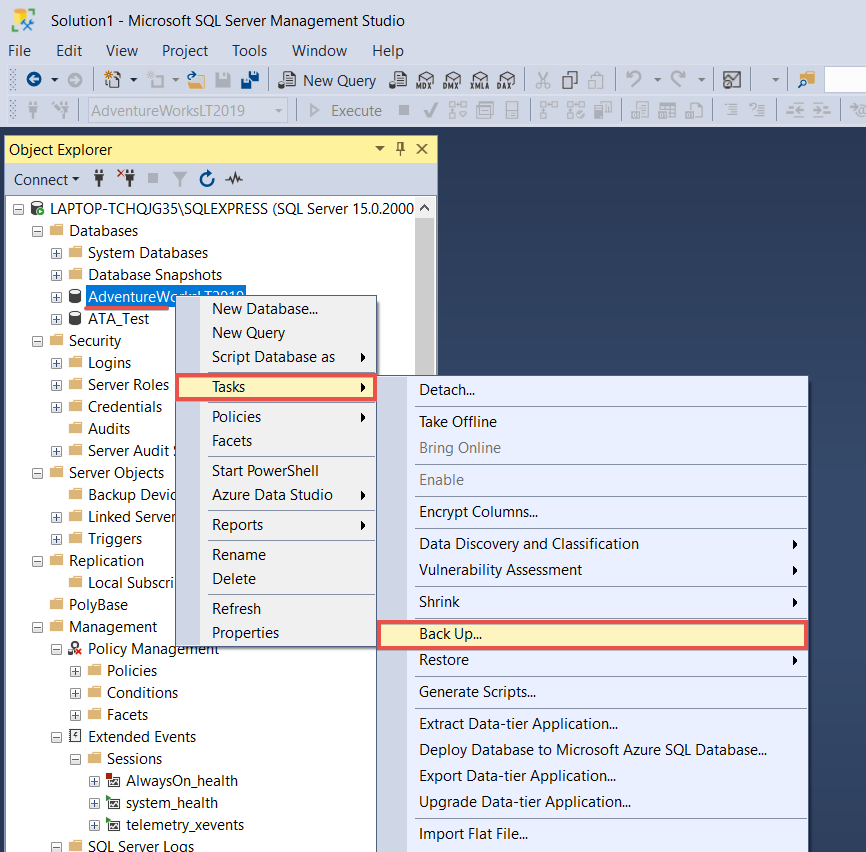
1. Open Microsoft SSMS, right-click on the database to backup (AdventureWorksLT2019) —> Tasks —> Back Up, as shown below to initialize a backup task (step two).
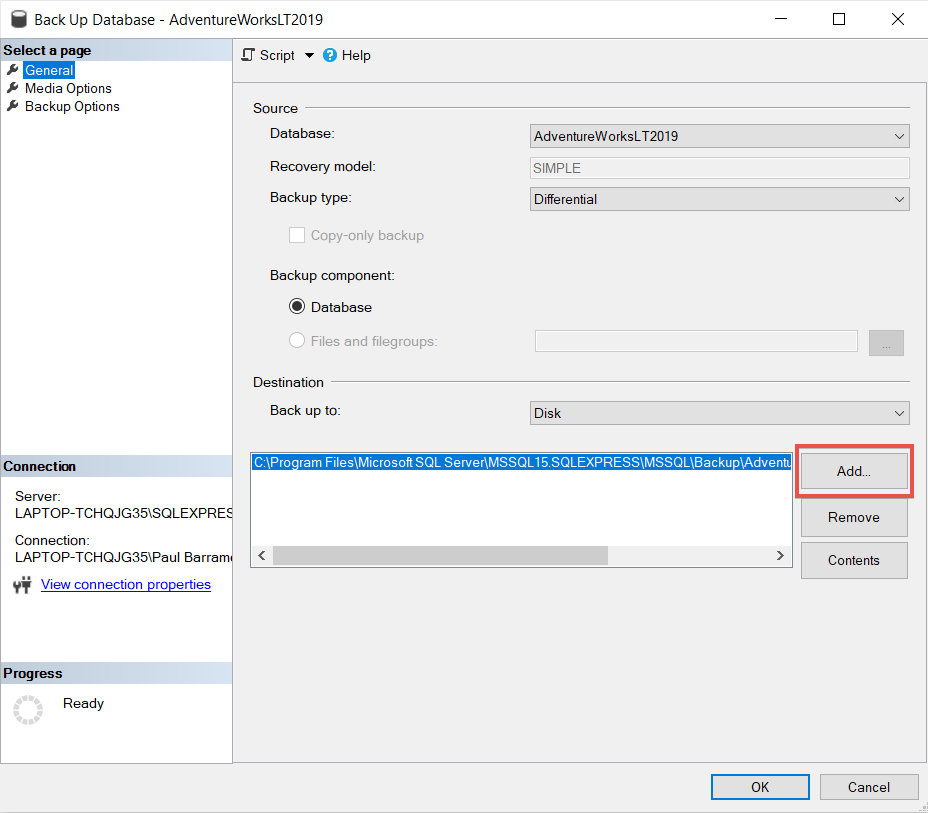
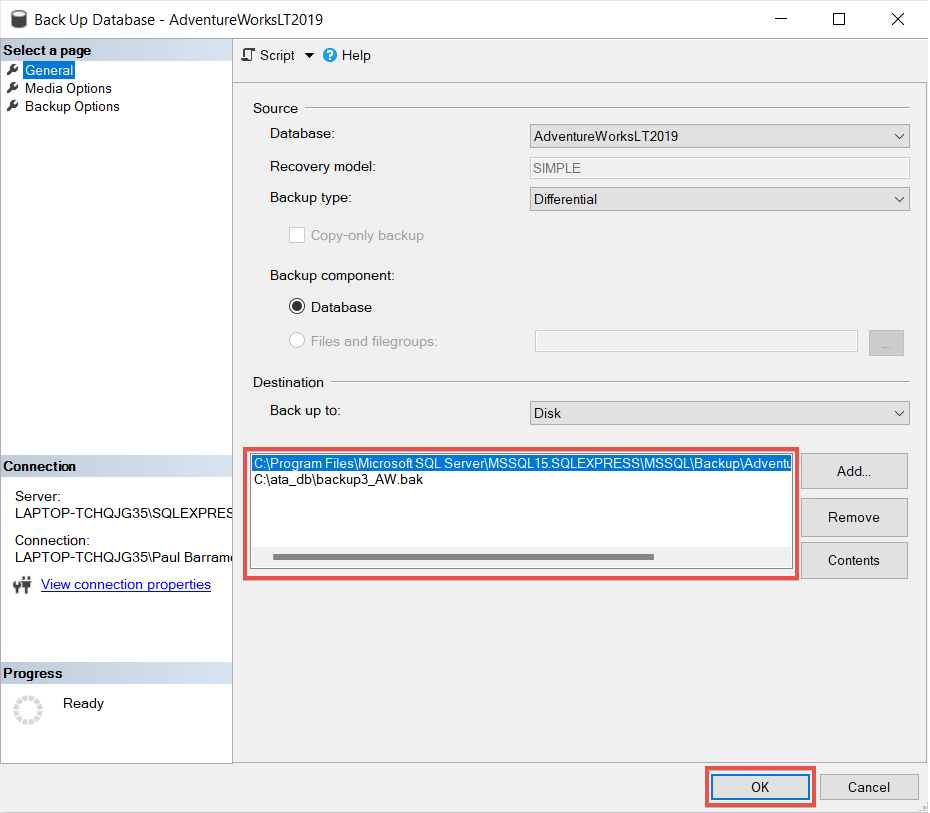
2. Click on Add to select a backup folder on the Back Up Database window.
You can also click on Remove to remove the default backup folder or leave it there so you can backup the same database in two locations.
3. Click on the File name option, then the ellipsis button (…) to select a backup folder and set a backup name. But for this tutorial, the directory is set to C:\ata_db, and the backup name is set to backup3_AW.bak.
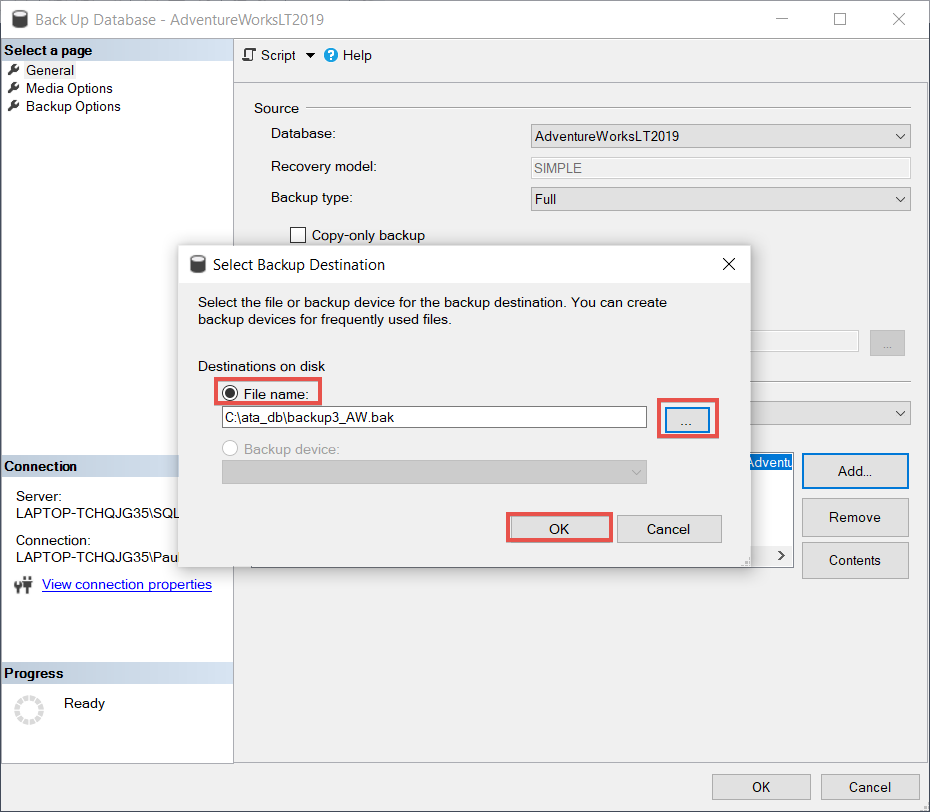
4. Finally, click on OK to back up the selected database.
You’d see two backup folders listed if you didn’t remove the default backup folder, as shown below.
Backing up a Database with a Reusable SSMS Generated Script
You’ve seen that backing up a database works perfectly fine using Microsoft SSMS. But, if you need a recurring backup command, Microsoft SSMS’s UI is not your best option. Instead, you can extract the SQL script from SSSM to perform the task.
1. Initialize a backup as you did in step one of the “Backing up Databases with Microsoft SSMS” section.
2. Select the arrow down button beside Script, select Script Action to File, and choose a location to save the script. You can name the script anything you prefer, but in this tutorial, the script is called backup7.sql.
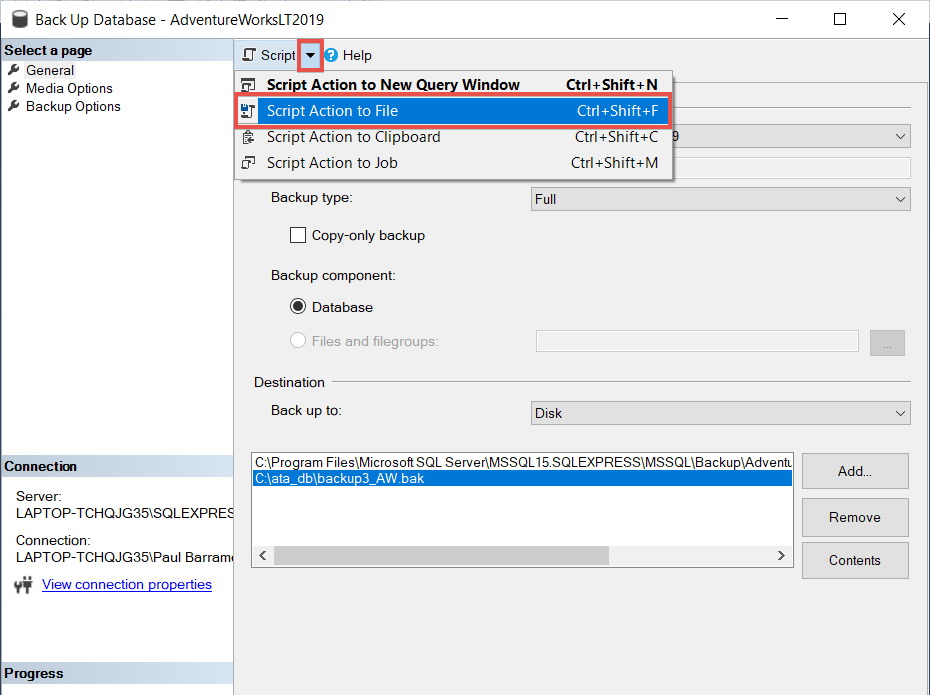
For reference, the script generated by SSMS contains the code below
BACKUP DATABASE [AdventureWorksLT2019] TO DISK N'C:\ata_db\backup3_AW.bak' WITH NOFORMAT, NOINIT, NAME = N'AdventureWorksLT2019-Full Database Backup', SKIP, NOREWIND, NOUNLOAD, STATS = 10 3. Finally, run the following command to invoke the reusable generated script (backup7.sql). The script works similarly to the scripts in the previous examples. The only difference is auto-generated by SSMS, so you didn’t have to write the code for the script manually.
sqlcmd -S localhost\SQLEXPRESS -i C:\ata_db\backup7.sql
Invoking backup7.sql script file will generate the backup file accordingly, as shown below.
Conclusion
In this tutorial, you learned a couple of methods to create SQL Server database backup scripts to backup your databases. You’ve learned to use Transact-SQL and Microsoft’s very own SQL Server Management Studio to perform backups, whether full or differential backups.
At this point, you can now create your own SQL scripts and easily run backups for your databases.
Now, how do you plan to incorporate this newfound knowledge into your admin tasks? Perhaps creating scheduled tasks with PowerShell to automate backups?


