

Worried about the security of your business data? With the growing number of cyberattacks, securing your connection to AWS is more critical than ever. Why not let Site-to-Site VPN on AWS be the solution?
In this tutorial, you will learn how to secure the connection between your on-premises network and your AWS environment without compromising your network speed and performance.
Start protecting your sensitive data with this cost-effective solution today!
Prerequisites
This tutorial comprises hands-on demonstrations. To follow along, be sure you have an AWS account with active billing, but a free trial will suffice.
Creating Amazon Virtual Private Clouds (VPCs)
Setting up a site-to-site VPN connection requires the creation of virtual private clouds (VPCs). VPCs let you establish a secure, isolated, and flexible environment for your cloud-based resources.
In this example, you will create two VPCs, one for the on-premise and the other for the AWS cloud network.
To create a VPC, follow the steps below:
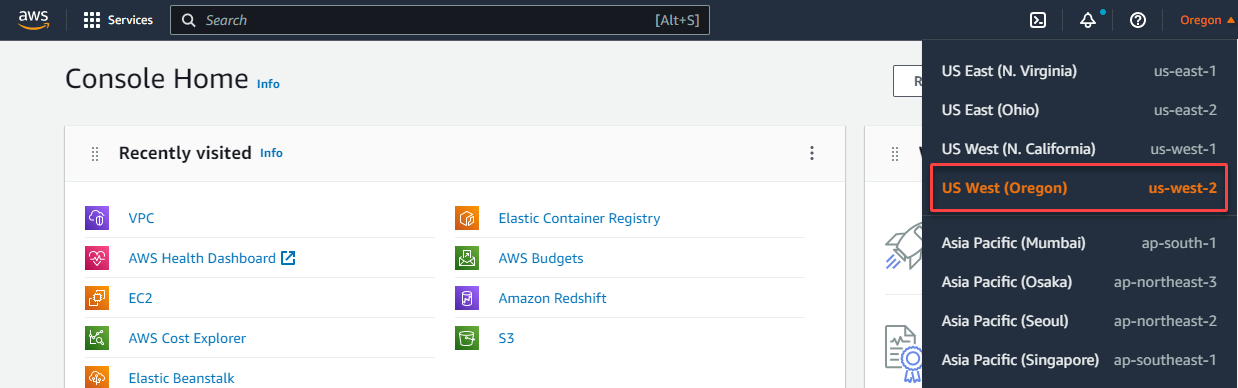
1. Open your favorite web browser, and log in to the AWS Management Console.
This tutorial uses the us-east-2 region for the AWS cloud environment, but you can use a different one.
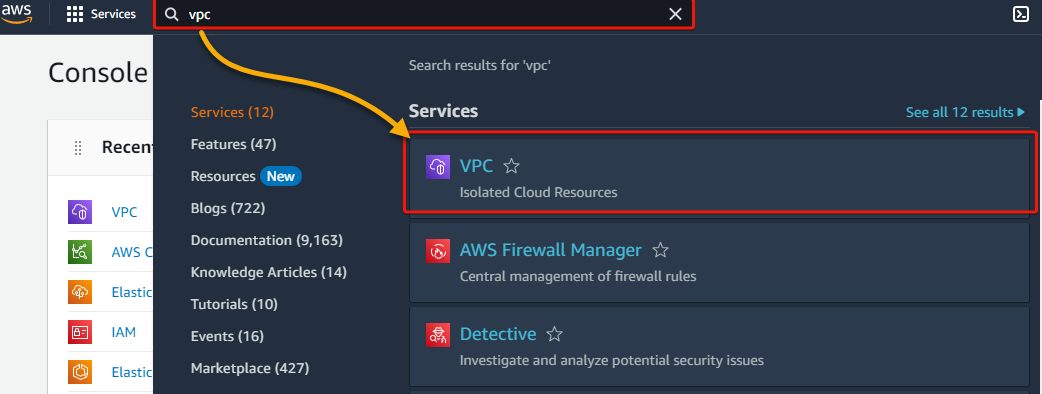
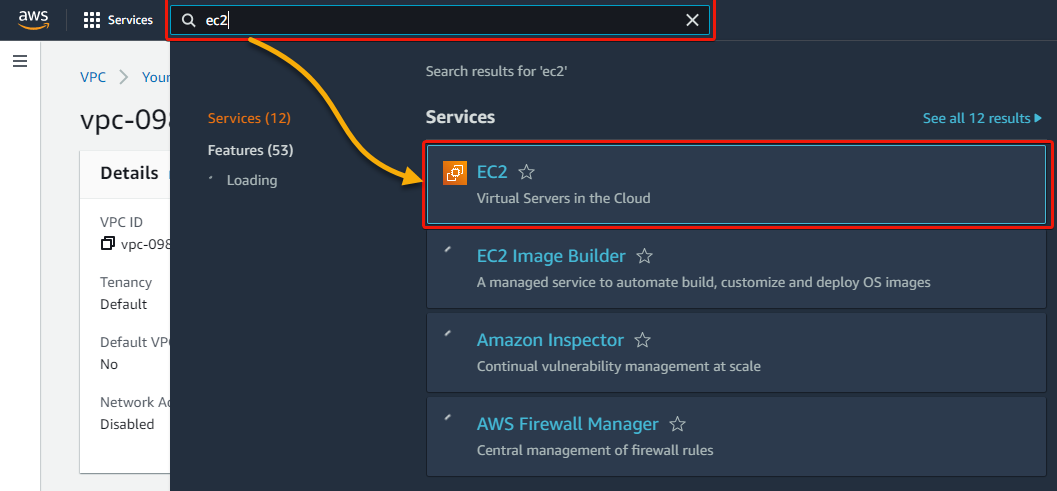
2. Search for, and select VPC, as shown below, to access the VPC dashboard.
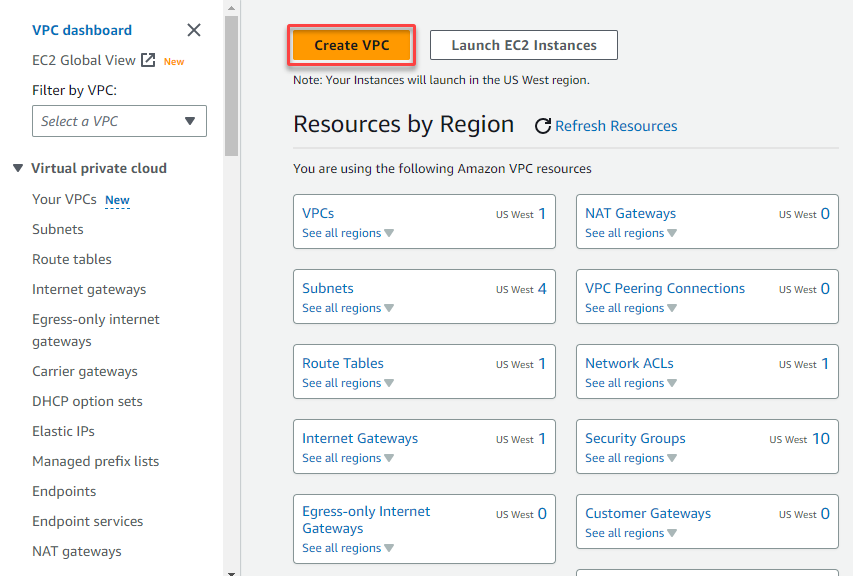
3. On the VPC dashboard, click Create VPC to initiate creating a new VPC.
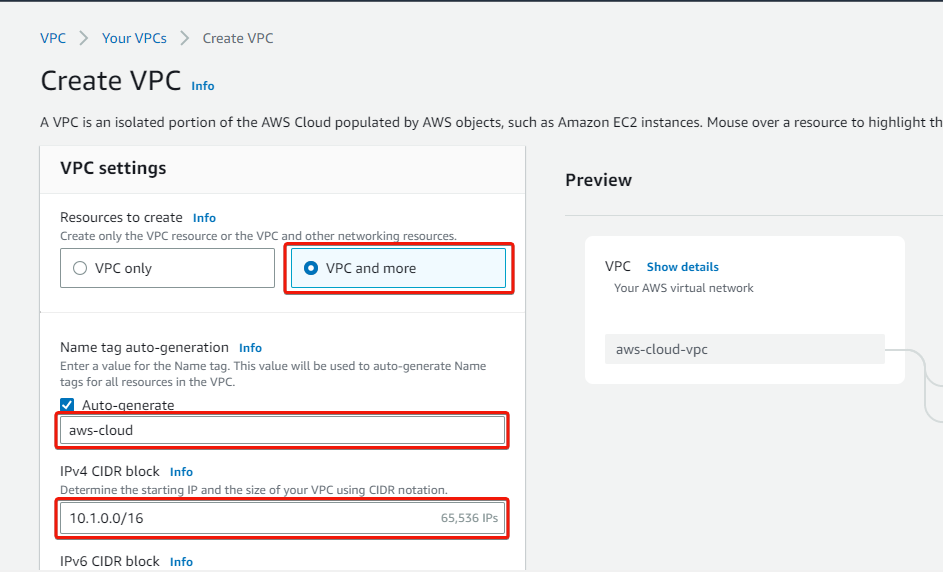
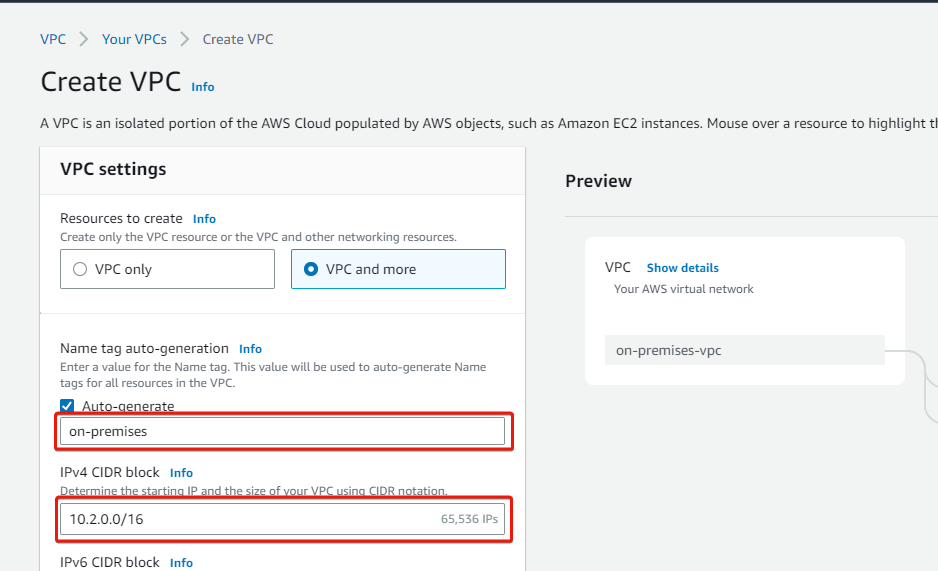
4. Now, configure the VPC settings as follows:
- Resources to create – Select the VPC and more option, which lets you create a VPC together with its resources.
- Name tag auto-generation – Provide a VPC name tag (i.e., aws-cloud).
- IPv4 CIDR block – Enter a VPC CIDR IP address (i.e., 10.1.0.0/16).
5. Scroll down, and indicate one availability zone and one public and private subnet for the VPC.
At least two availability zones are recommended, but one will suffice for this tutorial.
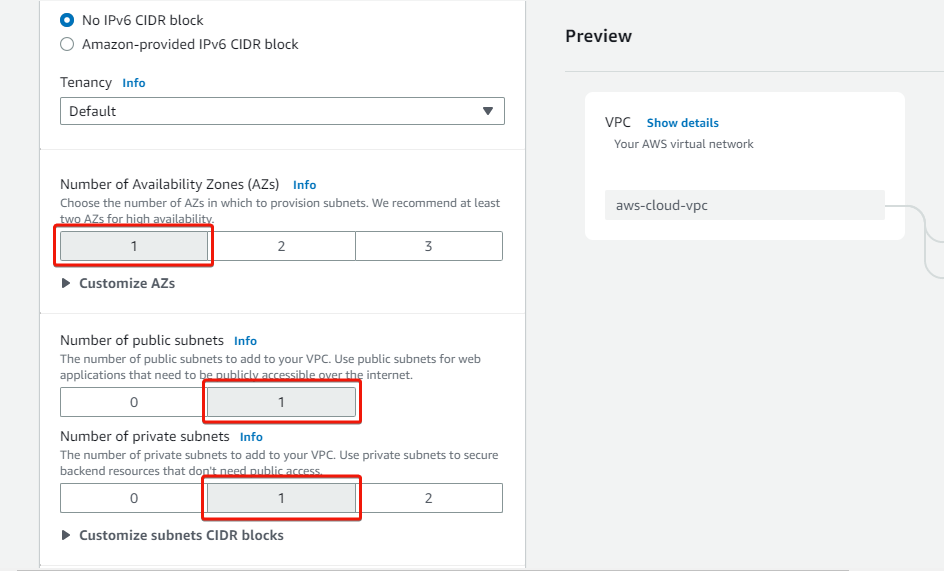
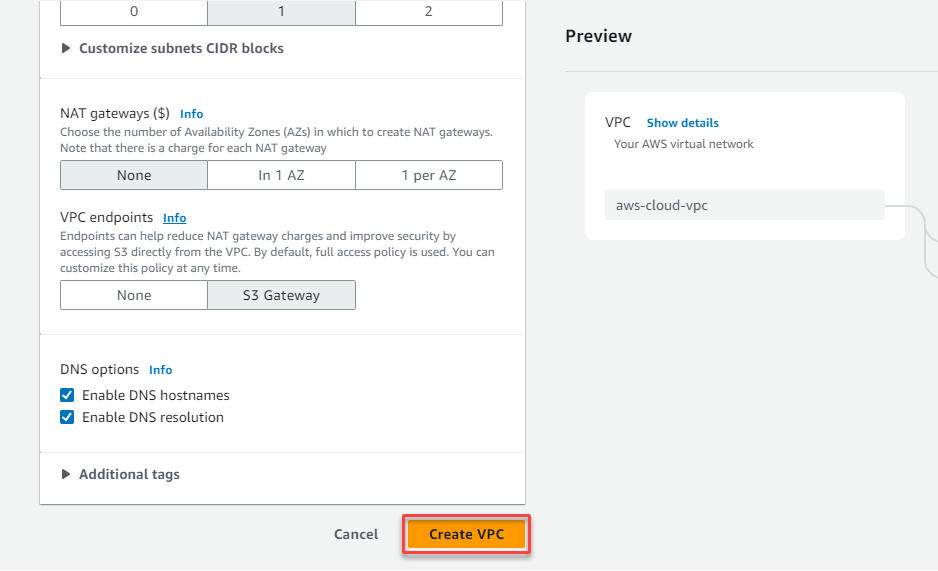
6. Leave the rest as default, and click Create VPC to finalize creating the VPC and its resources.
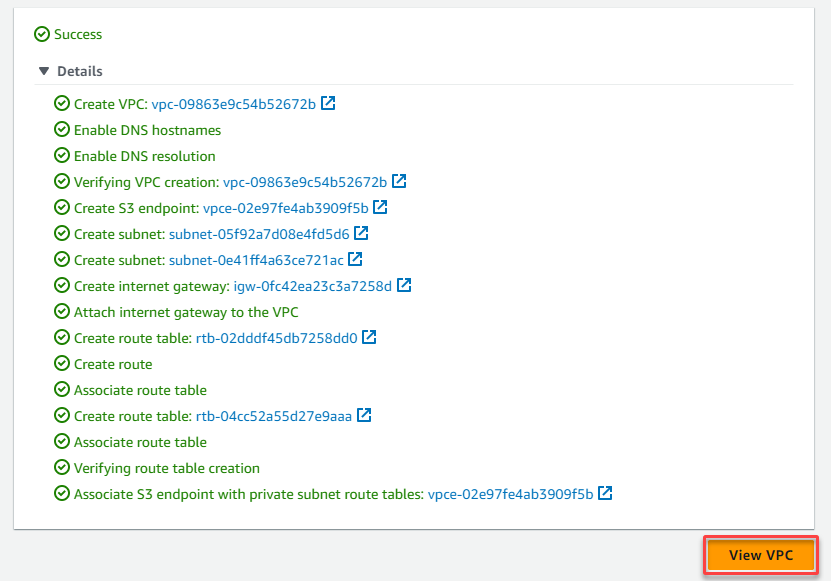
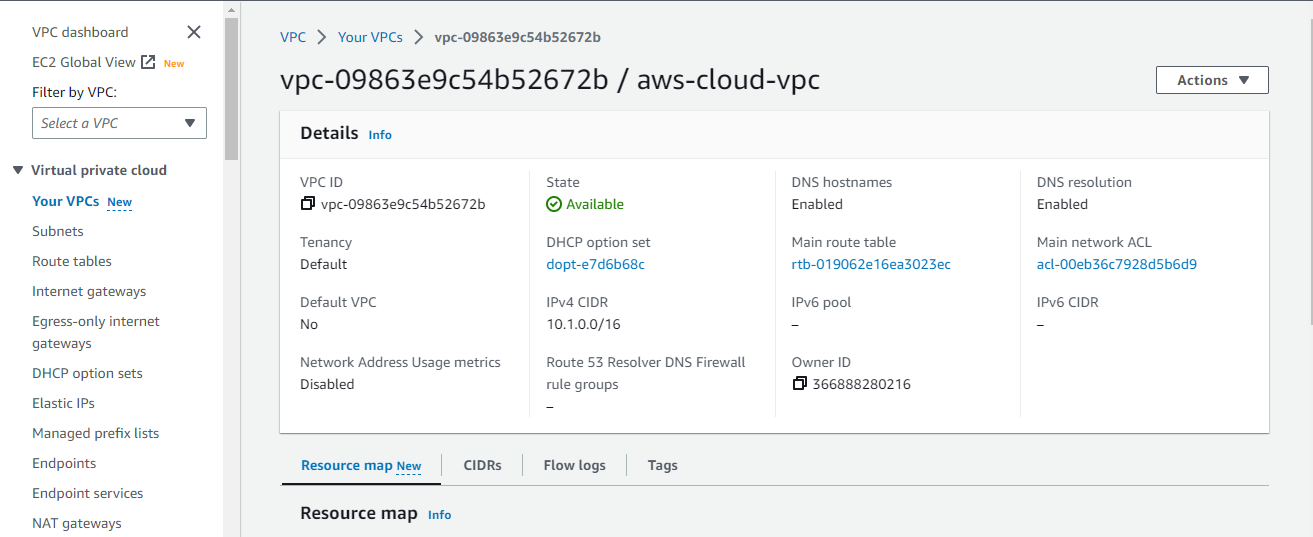
7. Now, click View VPC after seeing the Success message below to view your newly-created VPC.
Below, you can see the details of your newly-created VPC.
8. Open the AWS Management Console in a different tab, and switch to another region (i.e., us-west2), where you will create a VPC for the on-premises network.
Site-to-Site VPN is an excellent solution for businesses with multiple locations. By connecting all locations securely and efficiently, Site-to-Site VPN improves collaboration and productivity across an organization.
9. Lastly, navigate to the VPC dashboard, repeat steps three to six to create a VPC, selecting one private and public subnet. But this time, use on-premises as the VPC name tag and a different CIDR IP address (i.e., 10.2.0.0/16), as shown below.
Creating and Deploying EC2 Instances
With your VPCs created, you must deploy two EC2 instances, one in each VPC. These instances will act as the on-premises and the aws-cloud servers that will communicate with each other over the VPN connection.
To deploy EC2 instances, follow these steps:
1. Within the us-east-2 region, search and choose EC2 to access the EC2 dashboard.
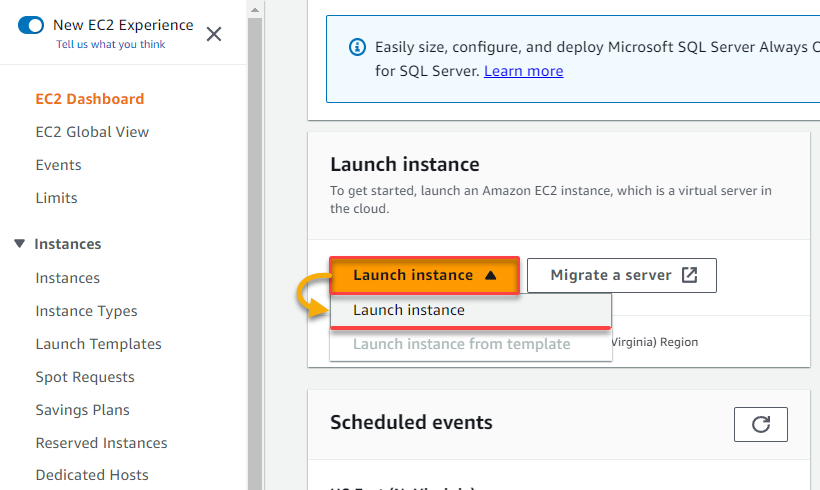
2. On the EC2 dashboard, click the Launch instance drop-down, and choose Launch instance.
Your browser redirects to a page where you can configure a new instance (step three).
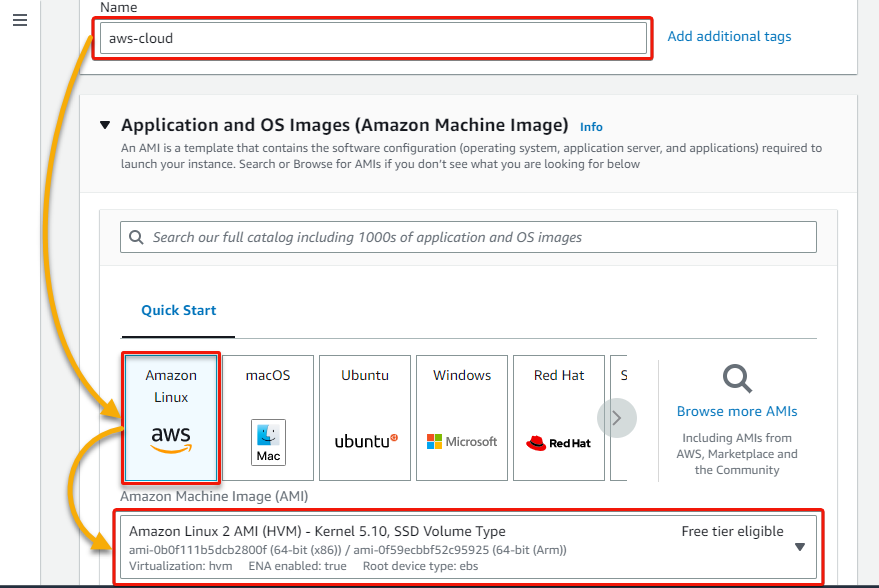
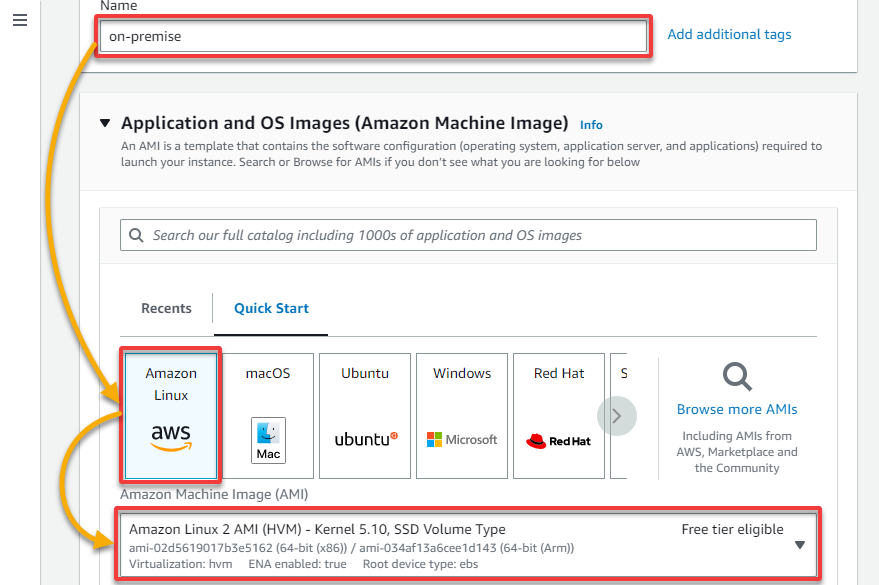
3. Next, provide an instance Name (i.e., aws-cloud), and select Amazon Linux 2 as the machine image. This machine image is free tier eligible, enough for this tutorial, but you can choose any as you like.
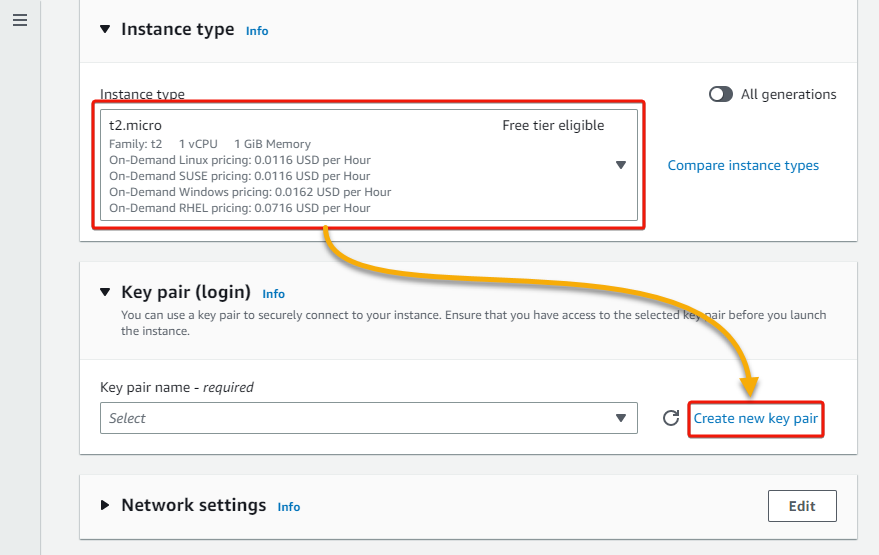
4. Now, scroll down, choose t2.micro as the instance type (to use free tier eligible resources), select an existing key pair, or click Create new key pair to create one.
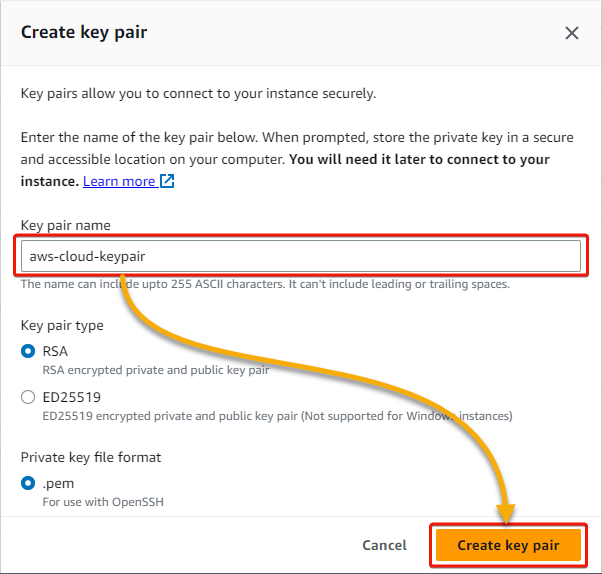
If you choose to create a key pair, enter a Key pair name in the pop-up window, and click Create key pair. The new key pair will be downloaded to your local computer.
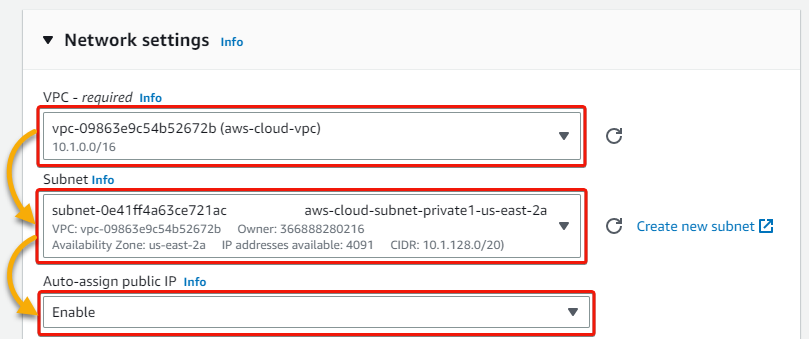
5. In the Network settings section, click Edit to edit the network settings (step six).
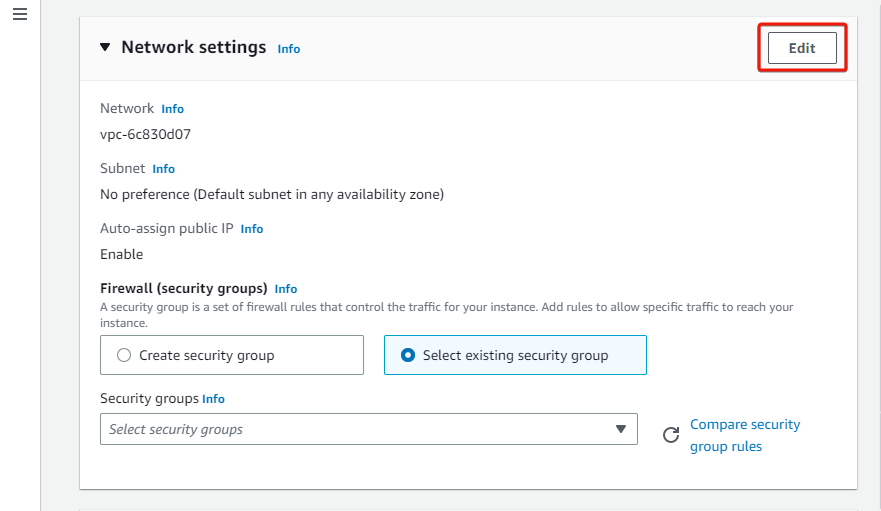
6. Select your VPC (aws-cloud-vpc) for the AWS cloud network, select the VPC’s private subnet, and enable the Auto-assign public IP feature.
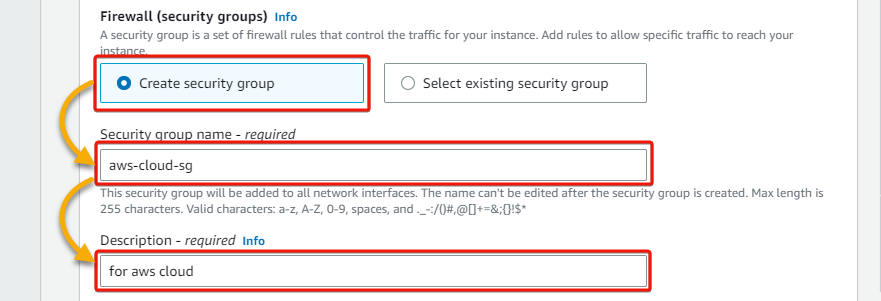
7. Next, configure the Firewall (security groups) as follows:
- Create security group – Select this option to create a new security group. This group will contain firewall rules that allow specific traffic for your instance.
- Security group name – Provide a descriptive security group name (i.e., aws-cloud-sg).
- Description – Write a description to distinguish this new security group from the others.
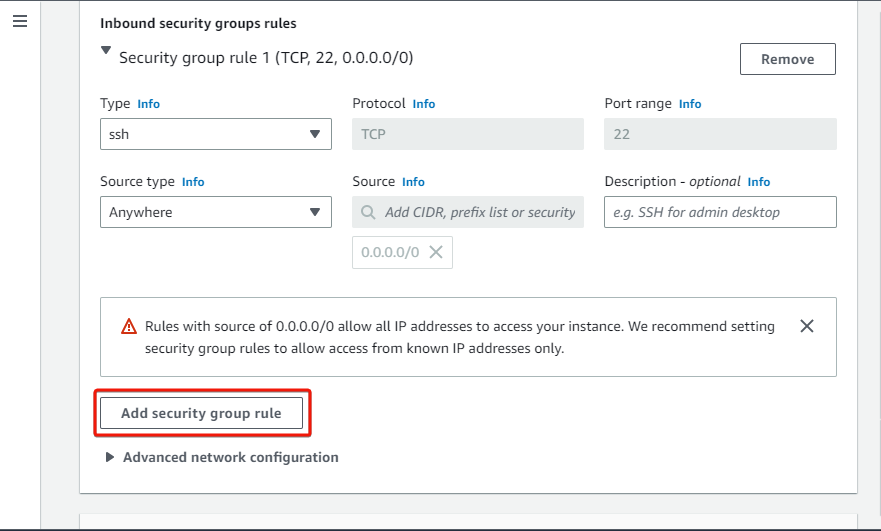
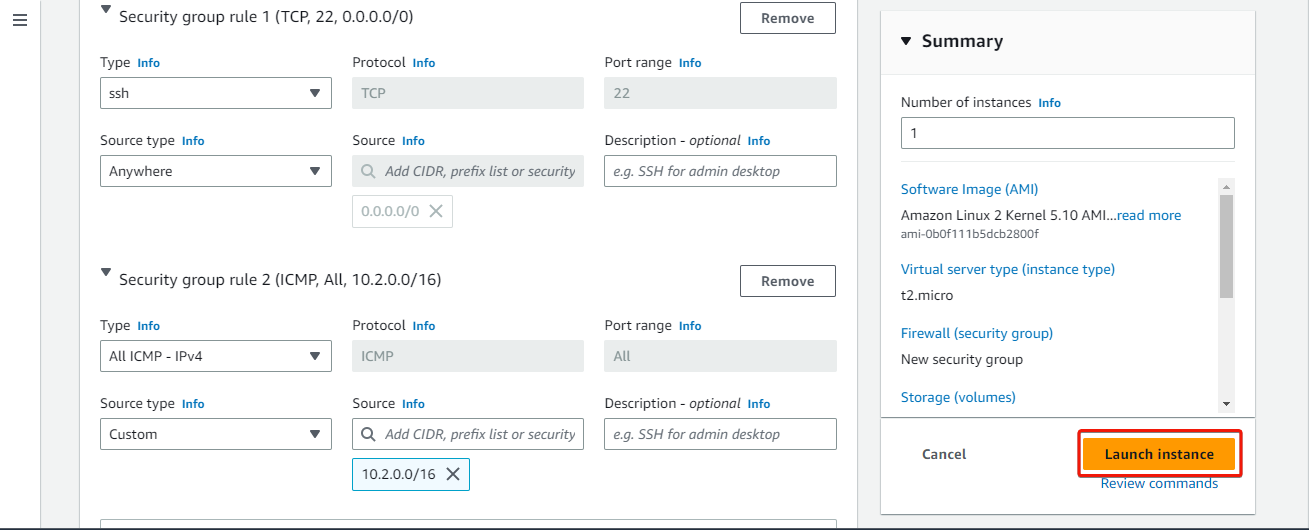
8. Leave the default rule below (Security group rule 1) as is for this tutorial, which allows SSH from anywhere, and click Add security group rule to add another rule.
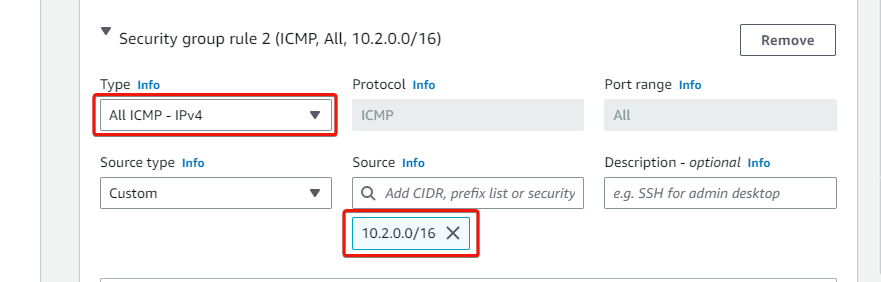
9. For Security group rule 2, select All ICMP – IPv4 as the group rule Type and provide the CIDR IP address of your on-premises VPC as the Source.
10. Leave the rest as defaults, and click Launch instance under the Summary pane to create and launch the EC2 instance.
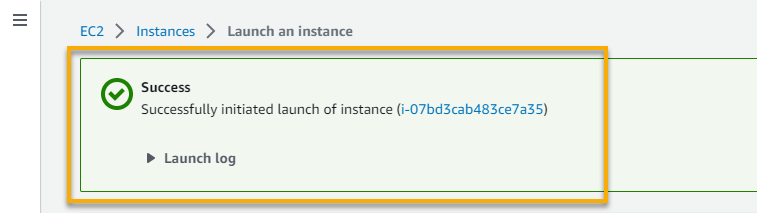
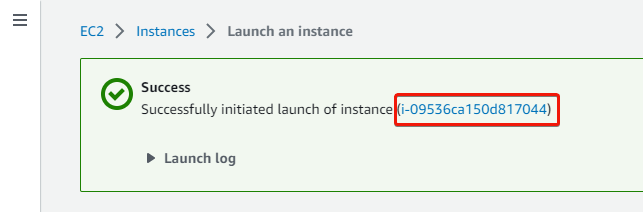
You should see the success message below if the instance was created successfully.
11. Switch to your on-premises’s region (us-west2), and follow steps two to five to create an EC2 instance for your on-premises VPC. But this time, set an instance name, and select Amazon Linux 2 as the machine image.
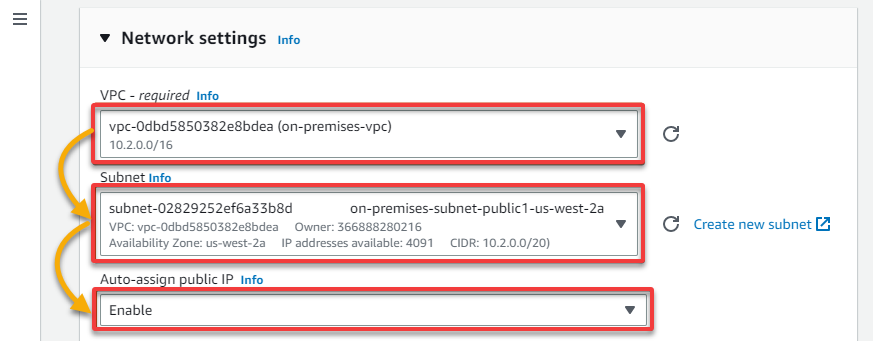
12. Under Network settings, select your on-premises VPC and public Subnet, and enable the Auto-assign public IP feature.
13. For the Firewall (security groups), select the Create security group option and provide a descriptive Security group name (i.e., onprem-sg) and a Description.
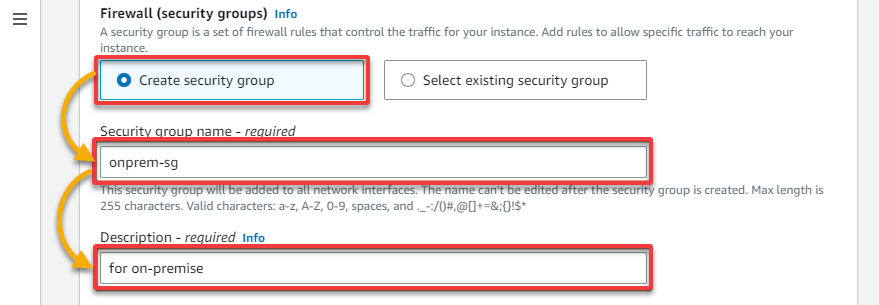
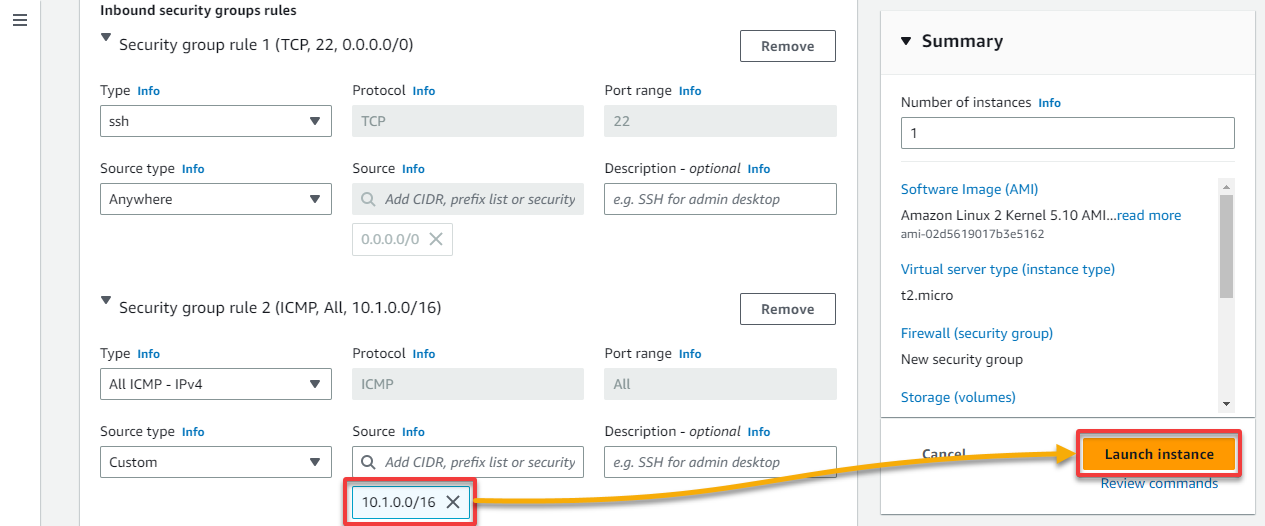
14. Now, repeat steps nine to eleven to create the same two rules as your AWS cloud instance security groups (aws-cloud-sg).
But for the ICMP rule, add your AWS cloud VPC’s CIDR IP address (i.e., 10.1.0.0/16), leave the rest as defaults, and click Launch instance to create the new on-premises EC2 instance.
15. Next, click on the instance ID to verify the instance has been created.
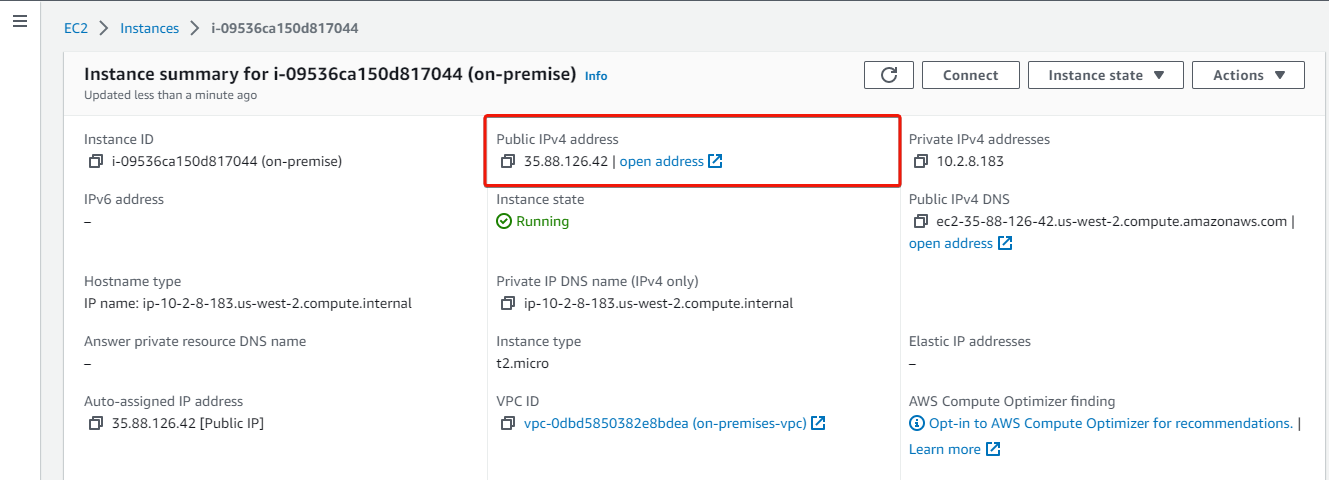
16. Click on the instance ID to view the instance’s details.

17. Lastly, copy the instance’s public IP for later use.
Creating Gateways for Establishing Site-to-Site VPN on AWS
Now that you have two instances running, you are almost ready to create a Site-to-Site VPN. But first, you will create two components to establish a VPN connection.
To create the required gateways, switch to your AWS cloud network’s region, in this case, us-east2, and follow these steps:
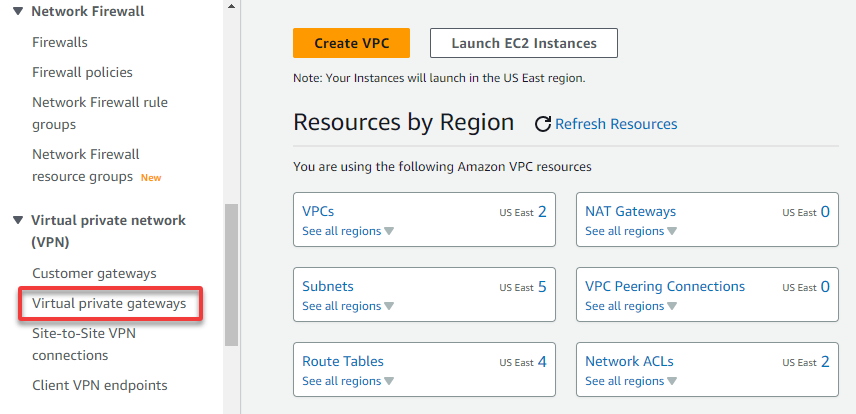
1. In your VPC dashboard, expand Virtual private network (left navigation pane), and choose Virtual private gateways.
Your browser redirects to a page where you can manage your Virtual Private Gateways (VPGs) (step two). A VPG in your AWS environment enables communication between your on-premises network and your AWS environment.
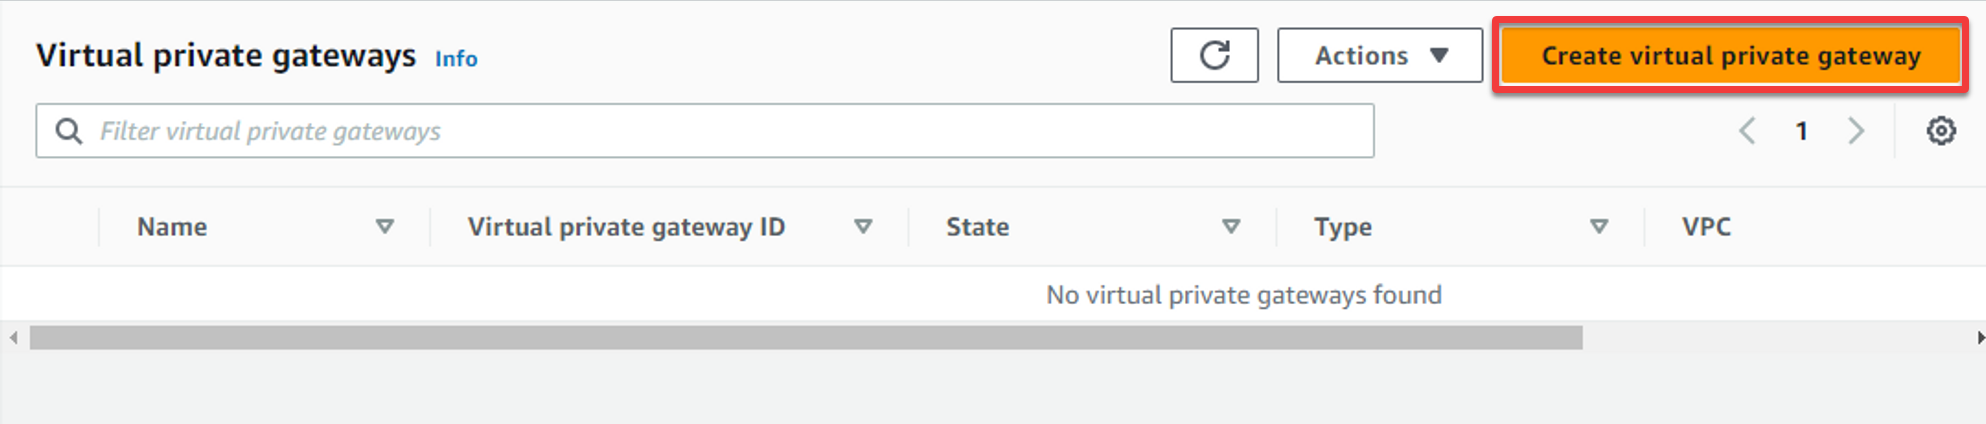
2. Next, click Create virtual private gateway (top-right) to initiate creating a new VPG.
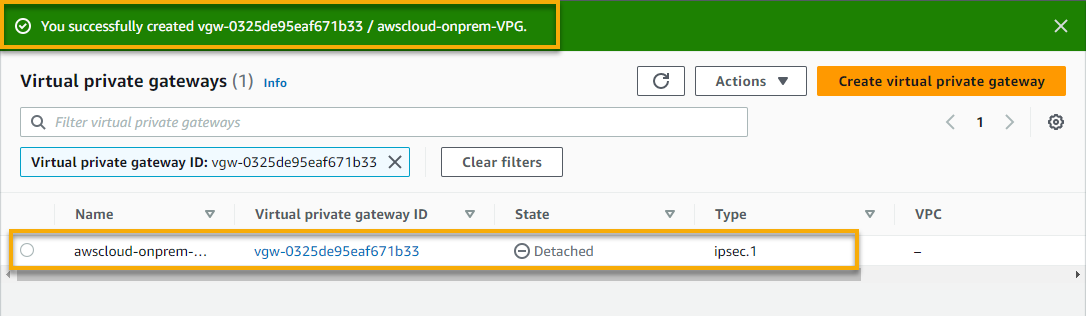
3. Input a VPG name tag (i.e., awscloud-onprem-VPG), leave the rest as defaults, and click Create virtual private gateway to create the new VPG.
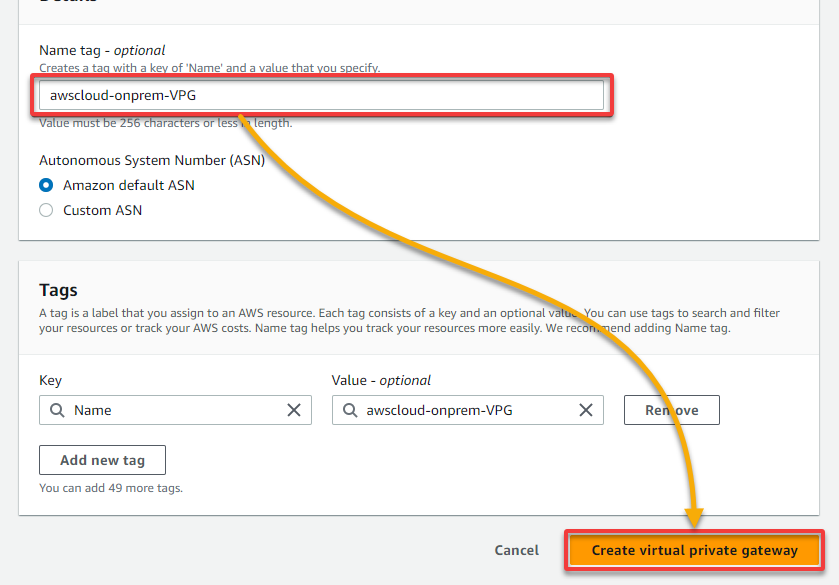
Your newly-created VPG is the entry point for your VPN connection and provides a secure connection to your Customer Gateway (CGW). A CGW in your on-premises network enables communication with your AWS environment.
Site-to-Site VPN can quickly and easily establish a secure connection to AWS in case of a disaster or outage, enabling businesses to recover data and restore their network.
4. Now, select your VPG, click the Actions drop-down, and choose Attach to VPC to initiate attaching the selected VPG to a VPC.

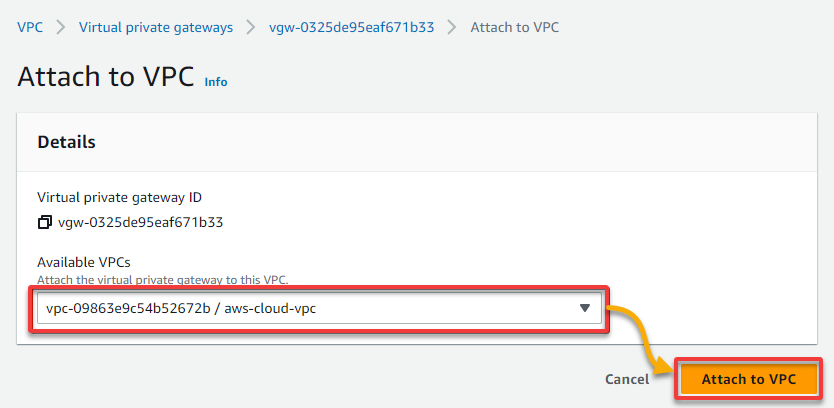
5. On the new page, select your AWS cloud VPC (aws-cloud-vpc), and click Attach to VPC to attach your newly-created VPG to the selected VPC.
If successful, you will see a notification that confirms the VPC has been attached, and the State shows Attaching.
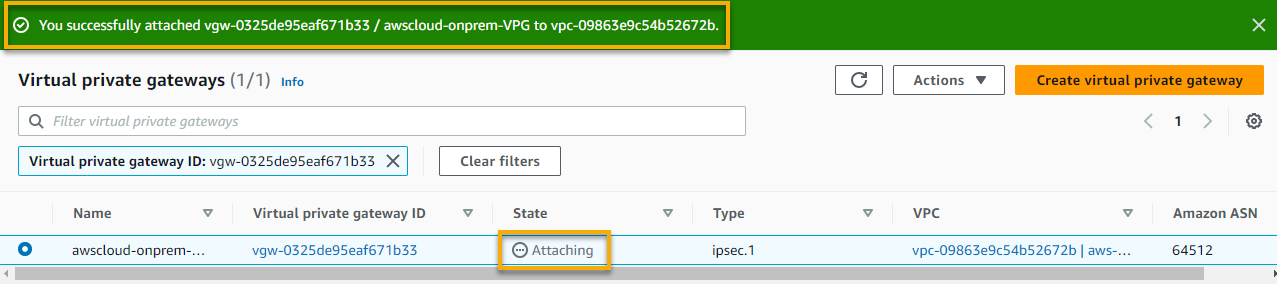
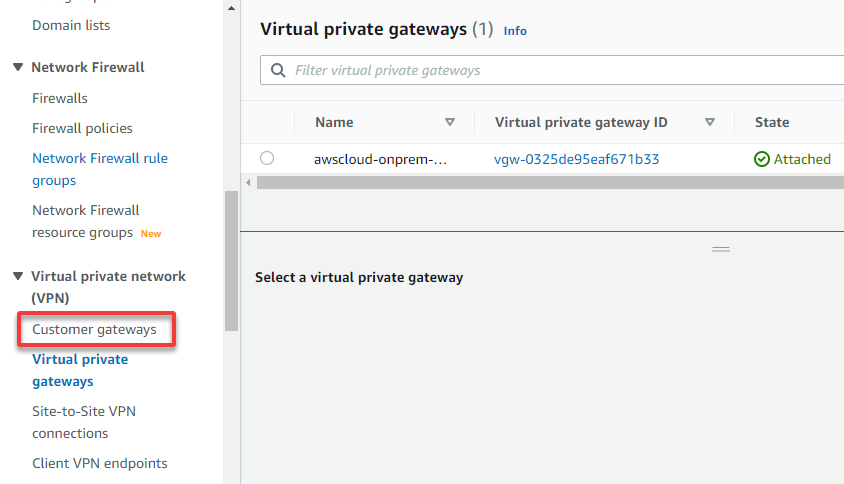
Once the attachment completes, the State changes to Attached, as shown below.

6. Next, navigate to Customer gateways to see all available CGWs (step seven).
7. On the Customer gateways page, click Create customer gateway to initiate creating a new customer gateway.

8. Now, provide a CGW Name tag and your on-premises EC2 instance’s IP address.
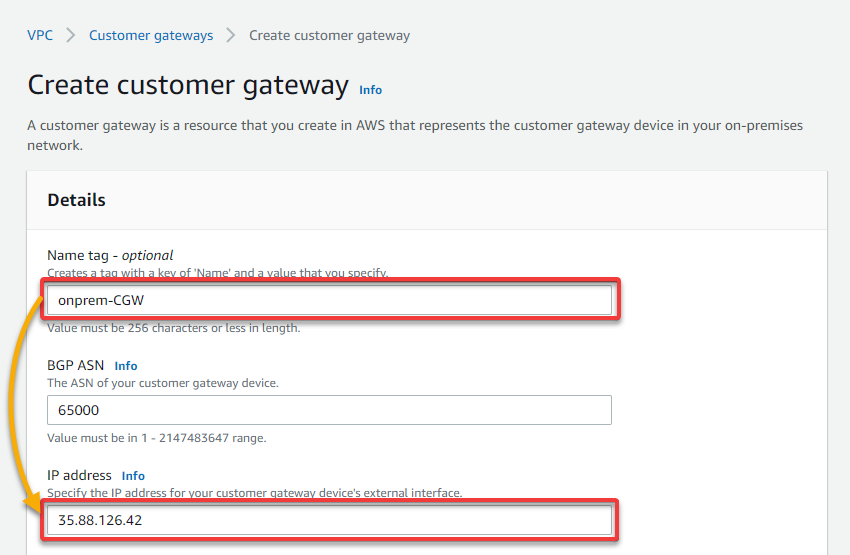
9. Leave other default settings as is, and click Create customer gateway to finalize creating the new CGW.
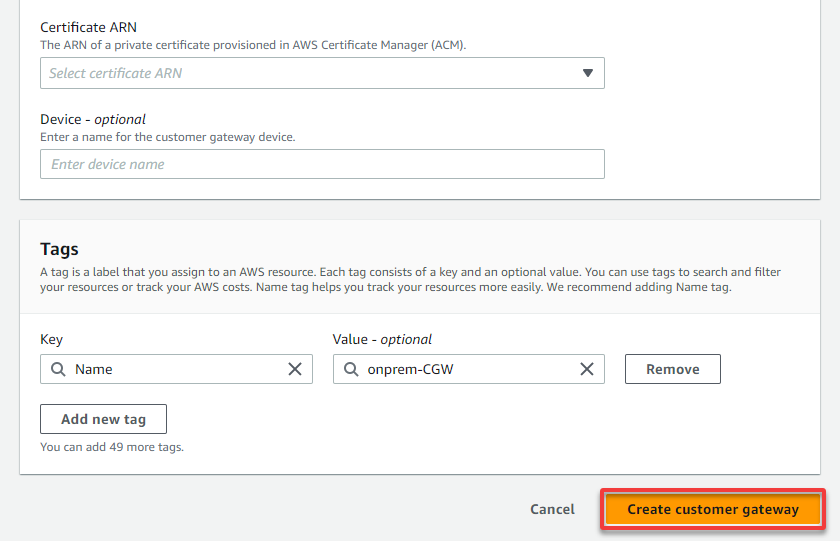
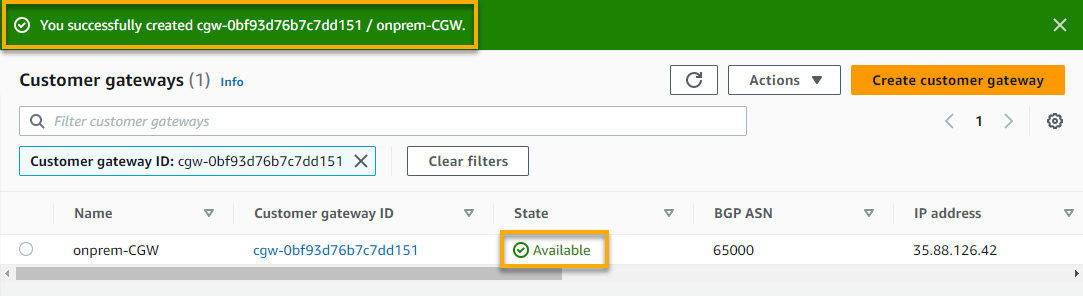
If all goes well, you will see a notification indicating the successful CGW creation. This CGW acts as the exit point for your VPN connection and provides a secure connection to your VPG.
Creating a Site-to-Site VPN for Secure Connection
With your VPG and CGW in place, it is time to enable secure access to your remote network from your VPC by creating a Site-to-Site VPN.
What makes Site-to-Site VPN on AWS stand out is that it uses industry-standard IPsec to encrypt your data and maintain its privacy and confidentiality. This solution eliminates the need for complex hardware and software solutions, saving you time and money.
To create a Site-to-Site VPN on AWS:
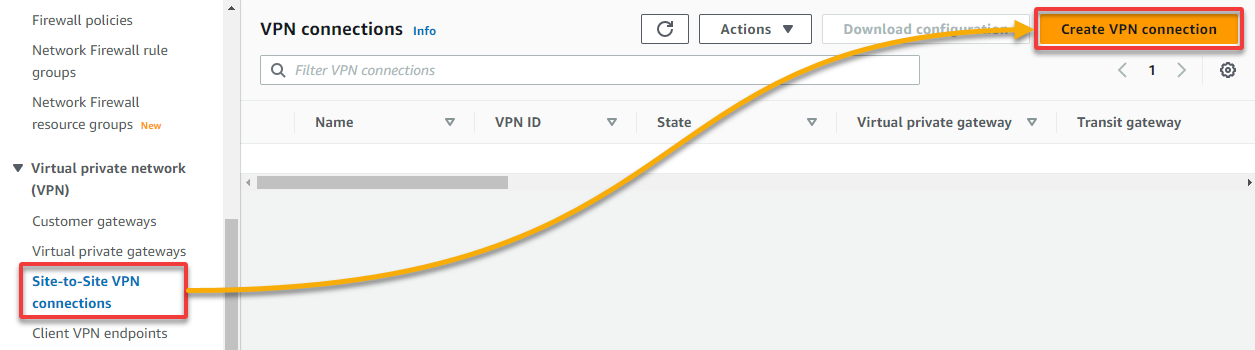
1. Navigate to Site-to-Site VPN connections, and click Create VPN connection (top-right) to initiate creating a new VPN connection.
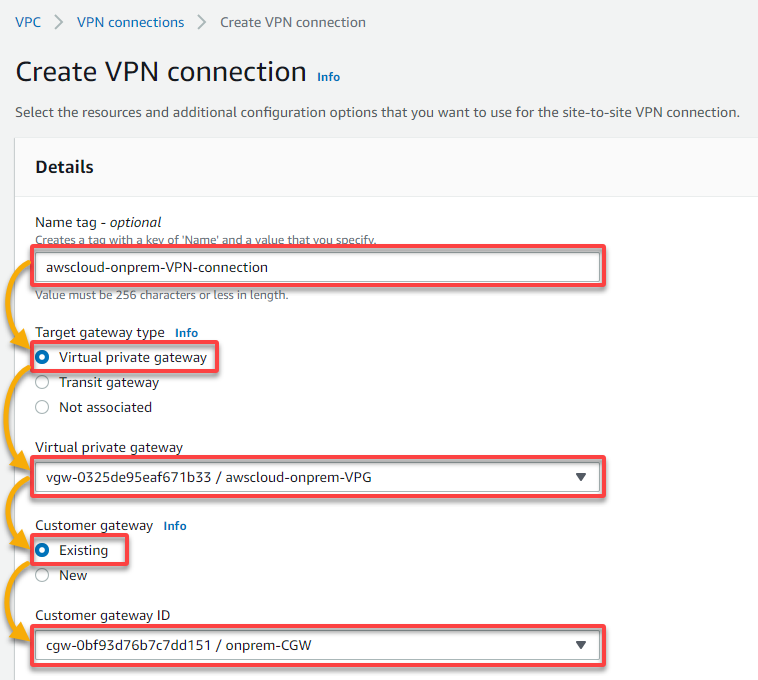
2. Next, configure the VPN name tag and the gateways to use for the VPN as follows:
- Name tag – Provide a descriptive name tag (i.e., awscloud-onprem-VPN-connection) for the VPN connection.
- Target gateway type – Choose the Virtual private gateway option since you will use your VPG.
- Virtual private gateway – Select your VPG from the Virtual private gateway drop-down field.
- Customer gateway – Choose the Existing option since you will use your CGW.
- Customer gateway ID – Select your CGW from the drop-down field.
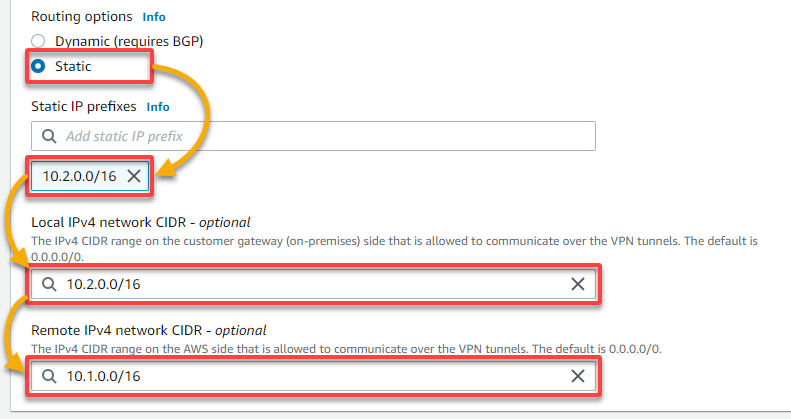
3. Scroll down, and configure the routing and IP settings with the following:
- Routing options – Choose the Static option to set your IPv4/IPv6 network CIDR manually.
- Static IP prefixes – Specify your on-premises VPC’s CIDR block (i.e., 10.2.0.0/16).
- Local IPv4 network CIDR – Specify your on-premises VPC’s CIDR IP address (i.e., 10.2.0.0/16).
- Remote IPv4 network CIDR – Specify your AWS cloud VPC’s CIDR IP address (i.e., 10.1.0.0/16).
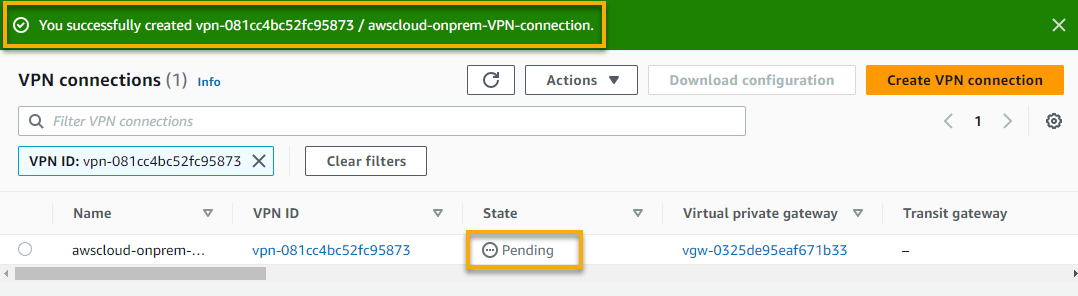
4. Now, leave the rest as defaults, and click Create VPN connection to finalize creating the VPN connection.

If successful, you will see a notification confirming the VPN connection has been successfully created. But the VPN connection’s state shows Pending, which takes a few minutes.
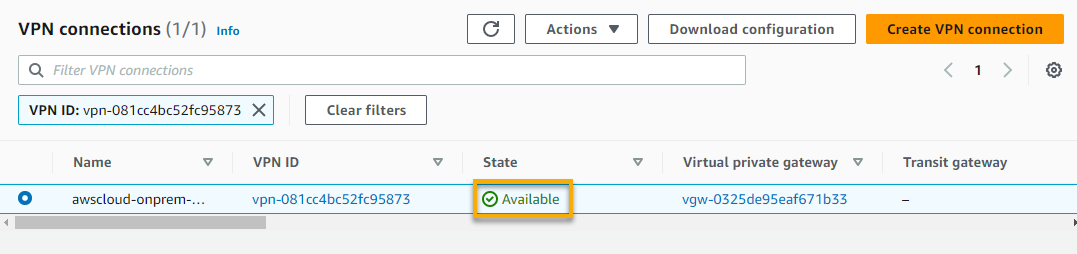
Eventually, the VPN connection’s state changes to Available, as shown below.
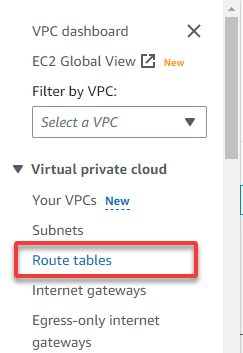
5. Next, expand Virtual private cloud (left pane), and navigate to Route tables so you can propagate the route for the router (step six). A route table contains a set of rules (routes) that regulate your subnet’s or gateway’s network traffic directed.
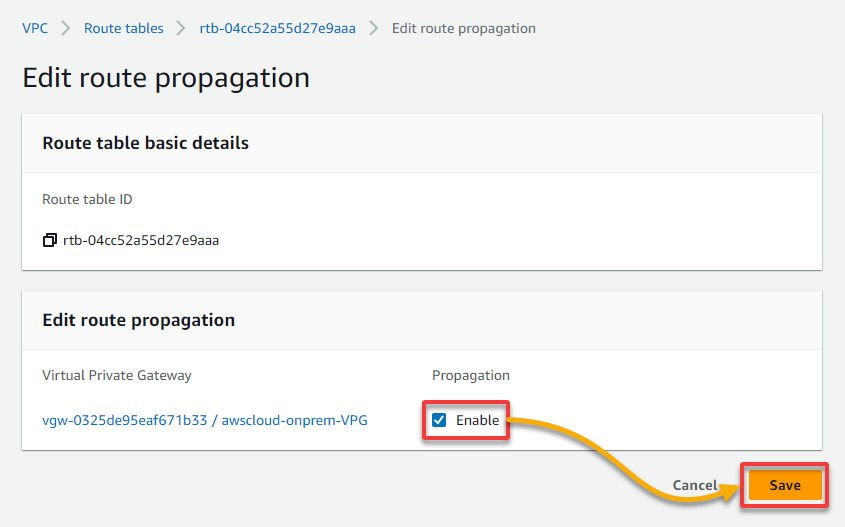
6. On the Route tables page, initiate route propagation as follows:
- Select your AWS cloud VPC’s private subnet from the list.
- Navigate to the Route propagation tab.
- Click Edit route propagation to initiate editing the route propagation details.

7. Tick the Enable box, and click Save to enable route propagation.
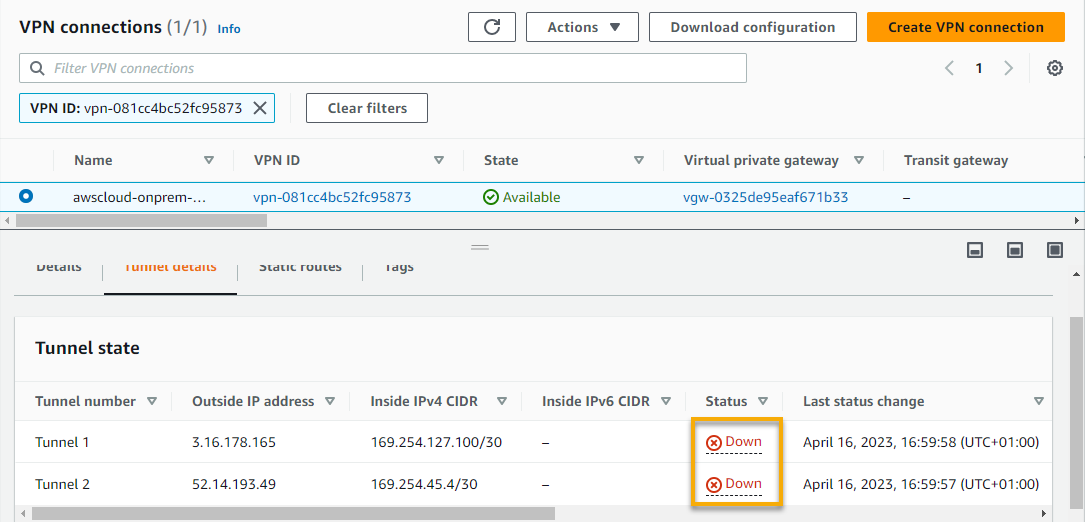
Even though the VPN connection is available, you can see that the tunnels are down, as shown below. A tunnel (an encrypted link) allows data to pass from the customer network to or from AWS.
The outcome below indicates that the customer side of your CGW is not configured correctly, which you will fix in the following section to ensure both tunnels are available.
Each VPN connection has two VPN tunnels by default, which is handy for high availability. For example, when one tunnel becomes unavailable, network traffic is automatically routed to the other available tunnel.
Configuring the On-premises EC2 Instance
Having both VPN tunnels down only cries trouble for passing data unless you fix the VPN tunnels by adequately configuring your on-premises EC instance. For this fix to work, you need a VPN application, and this tutorial uses Openswan VPN, an open-source IPsec implementation for Linux.
To configure your on-premises EC2 instance, follow these steps:
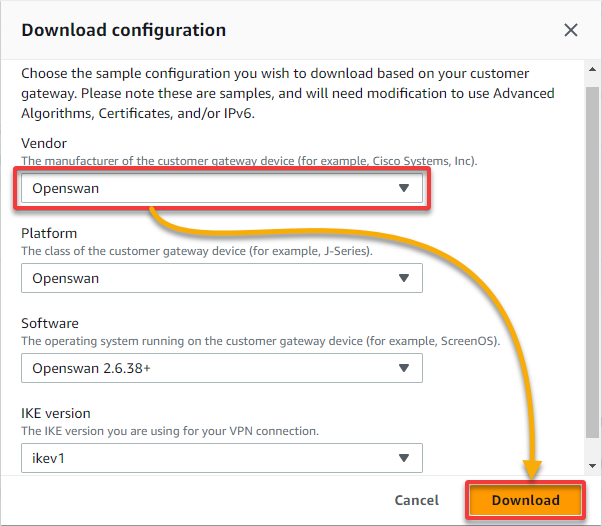
1. On the VPN connections page, select your newly-created VPN, and click Download configuration to initiate downloading your VPN connections configuration.

2. Next, in the pop-up window, select Openswan as the Vendor and click Download to download your VPN configuration in a text file to your local computer.
This file will contain some IP address information for configuring your Openswan VPN application.
3. Navigate to the Instances page of your on-premises EC2 instance’s region.
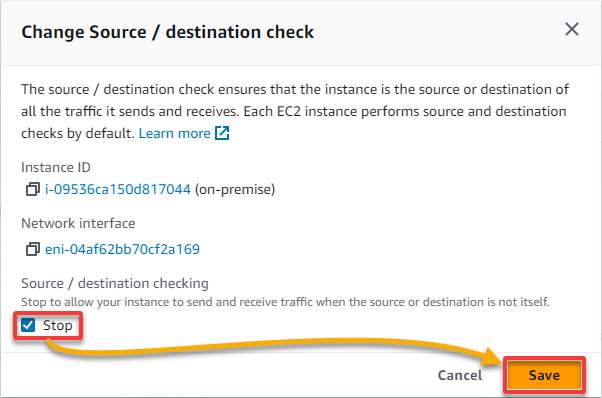
4. Now, select your on-premises EC2 instance, click the Actions drop-down → Networking → Change source/destination check.
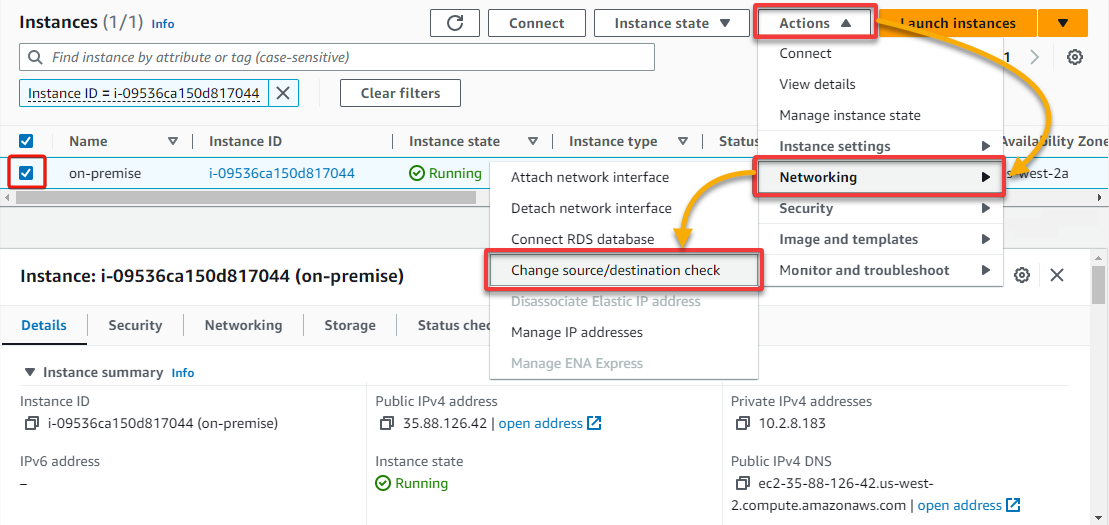
5. In the pop-up window, tick the Stop box, and click Save. Doing so disables source/destination checking, allowing you to route via the EC2 instance.
The source/destination check for the on-premises instance will not check the IP addresses coming in or going out. If you do not have the source/destination checking disabled for the EC2 instance, you cannot use IP forwarding with an EC2 instance.
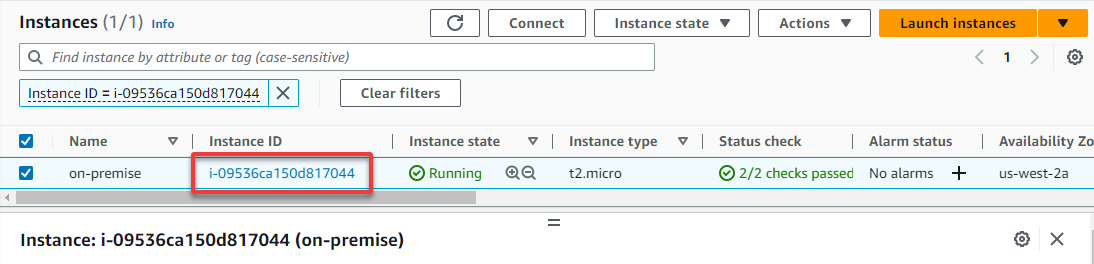
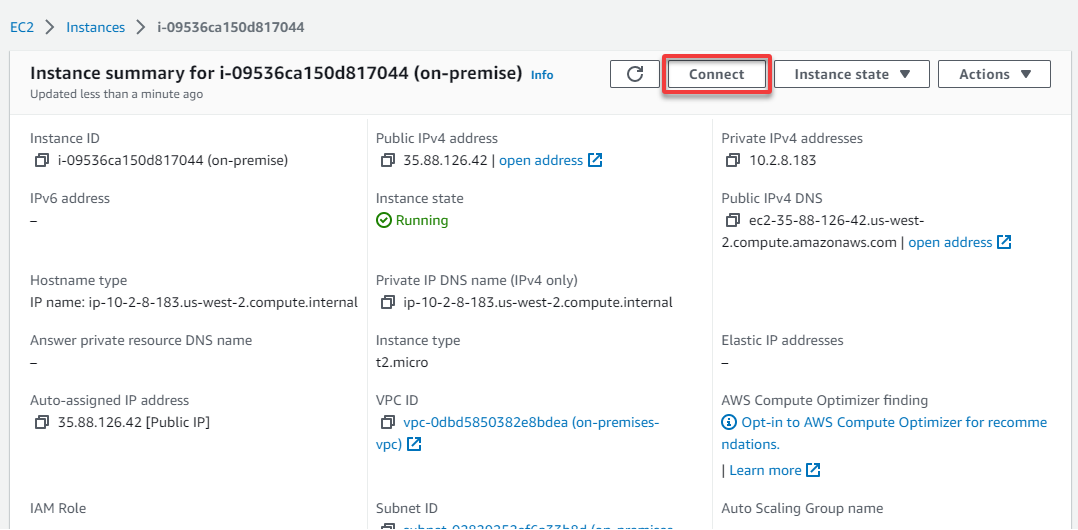
6. Now, click your instance’s ID to access its summary page.
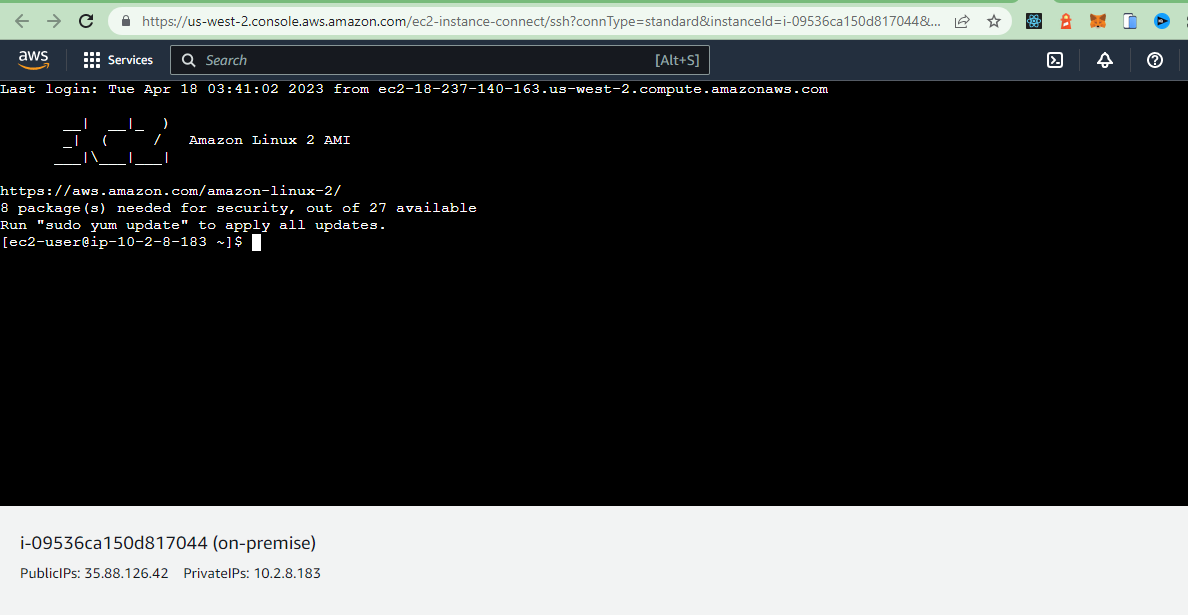
7. Next, click on Connect to initiate connecting to your on-premises EC2 instance. Your browser redirects to a page where you will see the options for connecting to an instance (step eight).
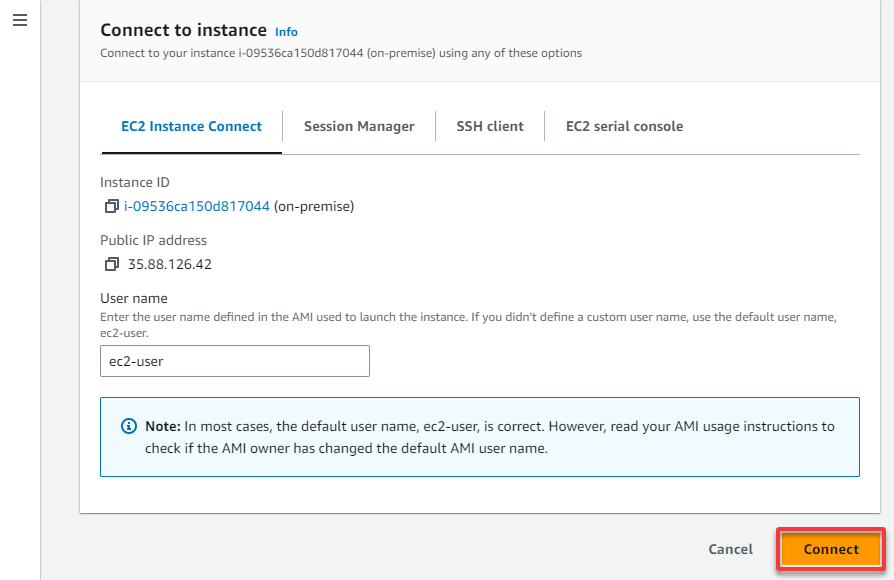
8. On the Connect to instance page, click Connect, which opens up a new browser tab and connects to the instance.
Site-to-Site VPN provides a centralized management console that lets you quickly configure and manage your connections. This feature includes automatic failover, traffic logging, and detailed monitoring to ensure secure connections.
9. Now, run the below commands to switch to root user and install openswan.
sudo su -
yum install openswan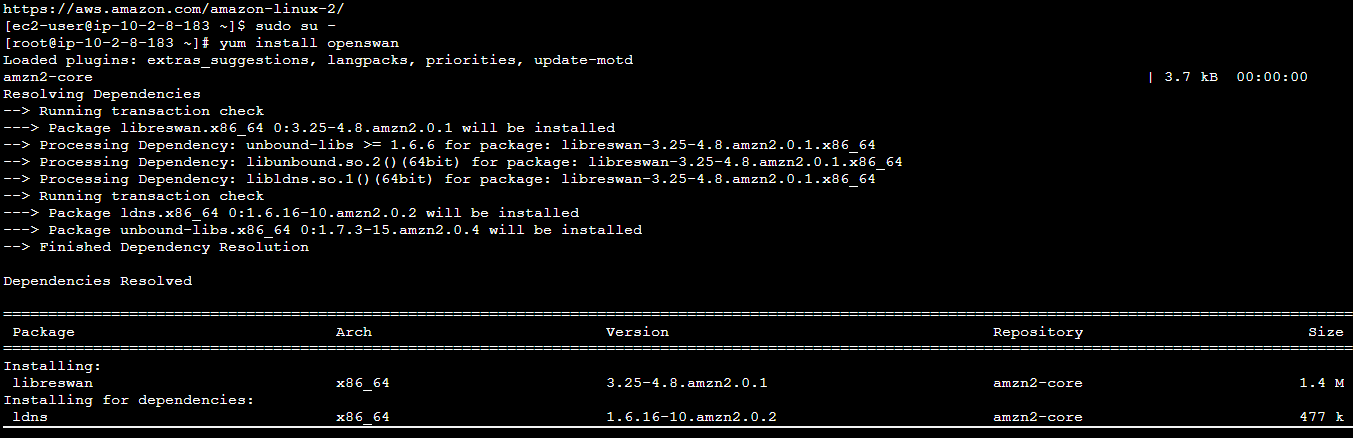
10. Once Openswan is installed, open the /etc/sysctl.conf file in your preferred text editor, add the following configurations. These lines dictate the behavior of IP forwarding and enhance the network behavior and security.
# Enable IP forwarding.
net.ipv4.ip_forward = 1
# Disable reverse path filtering for the default network interface
net.ipv4.conf.default.rp_filter = 0
# Disable packets acceptance with source routing for the default network interface
net.ipv4.conf.default.accept_source_route = 0
11. Run the below command to apply the changes.
sysctl -p
12. Navigate to the /etc/ipsec.d directory, create a file called aws-vpn.conf, and add the following configuration. This configuration defines the parameters for establishing a secure tunnel (Tunnel1) between your on-premises network and aws-cloud using the IPsec protocol. Ensure you replace the values for the following:
Ensure you replace the values for the following:
left– Your CGW IP address.leftid– Your VPG IP address.leftsubnet– Your on-premises VPC CIDR.rightsubnet– Your aws-cloud VPC CIDR.
conn Tunnel1
  # Authentication method (using a pre-shared key)
	authby=secret
  # Start the connection automatically
	auto=start
  # Use the default route for the local IP address
	left=%defaultroute
  # Public IP address of the customer gateway
	leftid=<Customer Gateway IP address>
  # Public IP address of the Virtual Private gateway
	right=<Virtual Private Gateway IP address>
  # Tunnel-type connection
	type=tunnel
  # Phase 1 (IKE) lifetime - 8 hours
	ikelifetime=8h
  # Phase 2 (IPsec) lifetime - 1 hour
	keylife=1h
  # Phase 2 encryption and hashing algorithms
	phase2alg=aes128-sha1;modp1024
  # IKE encryption and hashing algorithms
	ike=aes128-sha1;modp1024
  # Number of IKE negotiation attempts (unlimited)
	keyingtries=%forever
  # Use the IKE key exchange protocol
	keyexchange=ike
  # Local subnet (on-premises VPC CIDR)
	leftsubnet=<on-premises VPC CIDR>
  # Remote subnet (AWS VPC CIDR)
	rightsubnet=<aws-cloud VPC CIDR>
  # Dead Peer Detection (DPD) delay should be 10 seconds
	dpddelay=10
  # DPD timeout should be 30 seconds
	dpdtimeout=30
  # DPD action when the peer is detected as unreachable (restart the connection)
	dpdaction=restart_by_peer
  # Enable overlapping IP address ranges
  overlapip=yes
Site-to-Site VPN uses a combination of digital certificates and pre-shared keys to authenticate your connections. This behavior ensures that only authorized users can access your network.
13. Create another file called aws-vpn.secrets, and add the following line. The pre-shared secret key will be used to authenticate between your CGW and VPG.
Make sure to replace the following:
CGW-IP– Your CGW IP address.Outside-IP– An outside IP address for Tunnel 1.Pre-Shared-Key– Your pre-shared key.
The configuration for the tunnels, and their pre-shared keys, are included in the configuration file you downloaded in step two.
<CGW-IP> <Outside-IP>: PSK <"Pre-Shared-Key">14. Now, run the following commands to restart the network and IPsec services.
# Restart the network service
service network restart

# Enable IPsec to start automatically at system boot
chkconfig ipsec on

# Start the IPsec service
service ipsec start

# Check the status of the IPsec service
service ipsec status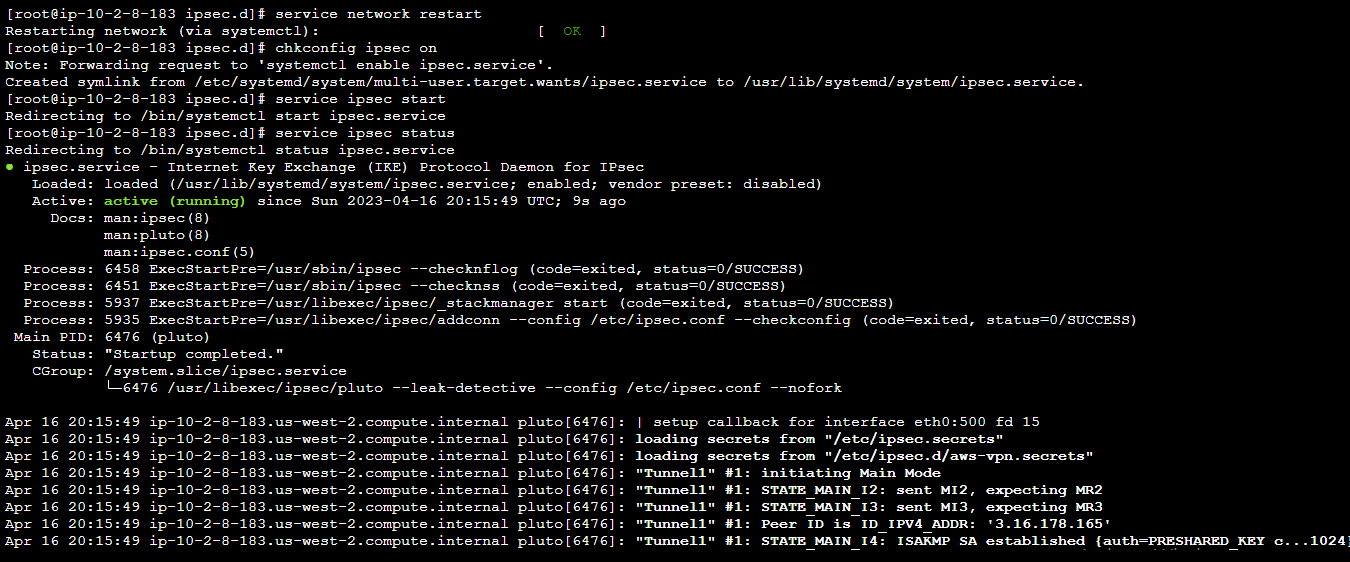
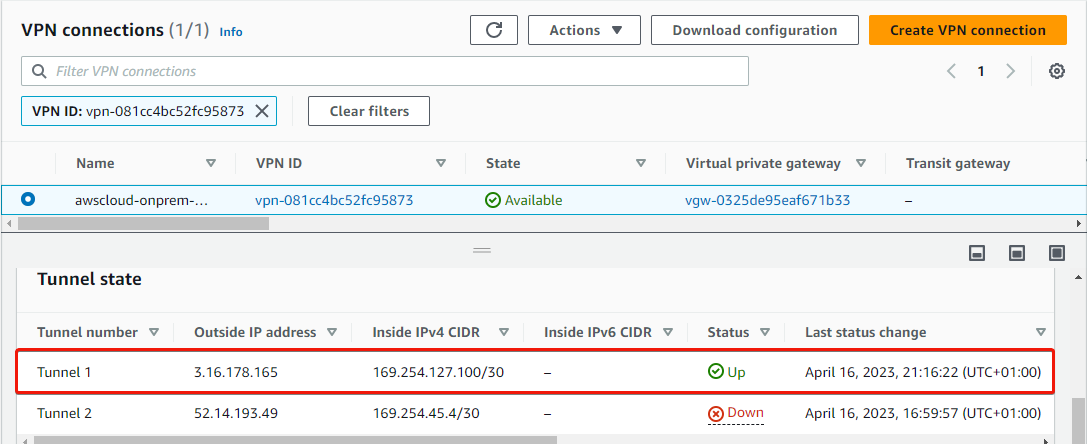
15. Return to the VPN connections page, and you will see that Tunnel 1 is up since you only added configuration for Tunnel 1.
You can add the configuration for Tunnel 2 in the same file as your Tunnel 1 (aws-vpn.conf). You can also add a secret for Tunnel 2 using its outside IP address and pre-shared key in the aws-vpn.secrets file for Tunnel 2 to run.
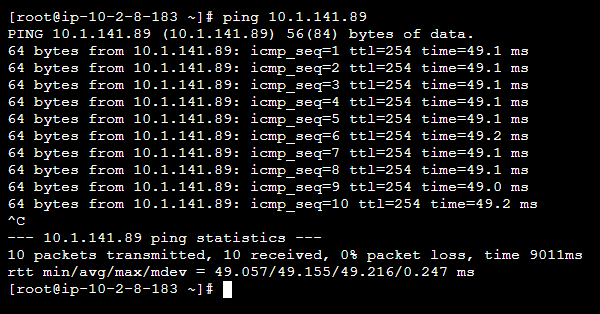
16. Finally, run the command below to ping the private IP of your aws-cloud instance from the on-premises instance to test if the VPN connection works.
All data transmitted between your on-premises network and your AWS environment is encrypted (cannot be intercepted by third parties).
ping <private-IP>With this setup, devices on this network can communicate with each other without a direct VPN connection.
Conclusion
Throughout this tutorial, you have learned to establish a Site-to-Site VPN on AWS between your on-premises network and your AWS environment. All of these without sacrificing network performance or breaking the bank.
With a fully functional Site-to-Site VPN on AWS, why not look into how you can monitor your VPN Site-to-Site connections?


