

Are you looking to integrate ServiceNow into your workflow using its API? This tutorial will walk you through the process of setting up a ServiceNow developer account, creating an OAuth application, and making your first API call using PowerShell.
Step 1: Create a ServiceNow Developer Account
- Go to the ServiceNow Developer Portal and sign up for an account.
- Once logged in, request a personal developer instance following the instructions here.
Step 2: Access Your Developer Instance
- In the developer portal, click on your profile and then on "Manage instance password".
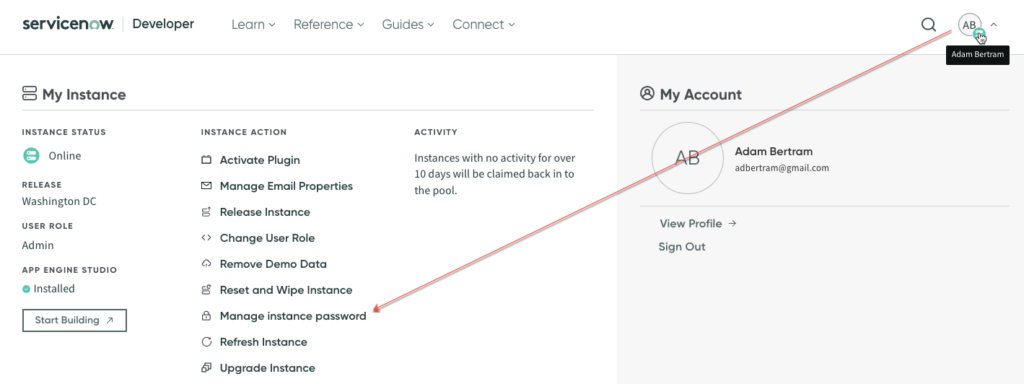
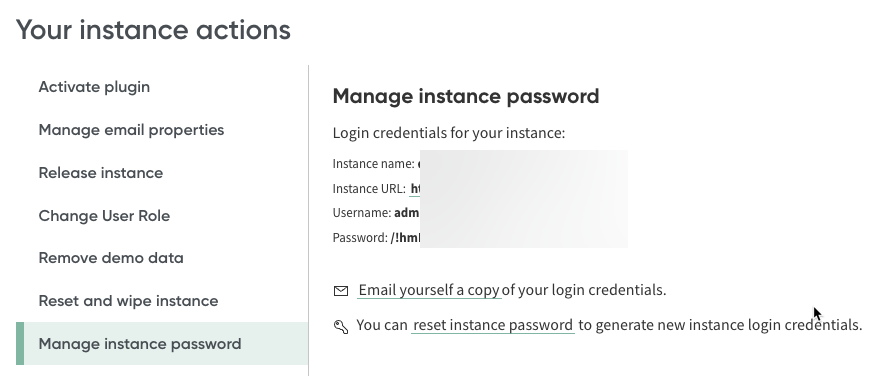
- Note down your instance name, username, and password.
- Log into your instance using the URL format:
https://[your-instance-name].service-now.com/login.do💡 Tip: Make sure to include login.do at the end of the URL to avoid seeing a blank page.
Step 3: Create an OAuth Application
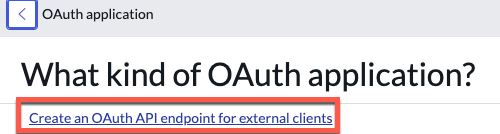
- In your ServiceNow instance, navigate to System OAuth > Application Registry.

- Click "New" and select "Create an OAuth API endpoint for external clients".

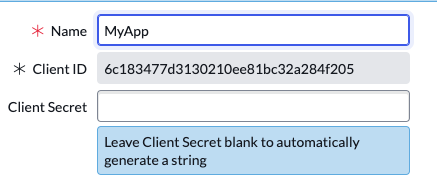
- Provide the OAuth app a name and save the app. The app will create a client ID and client secret you’ll need to authenticate to the API with.
Step 4: Create a User Account
- Navigate to User Administration > Users.
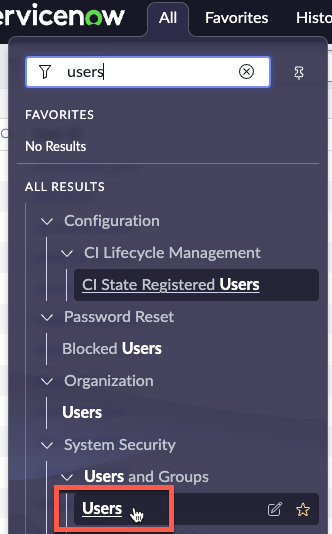
- Create a new user account that you'll use for API access.

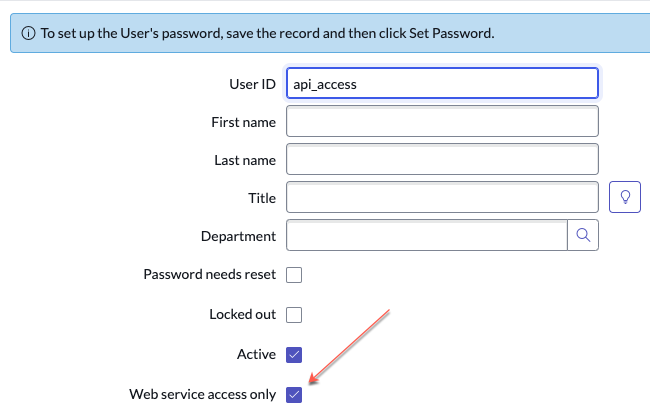
Set the User ID at a minimum and be sure to check on Web service access only. This option will restrict this user to only the API.
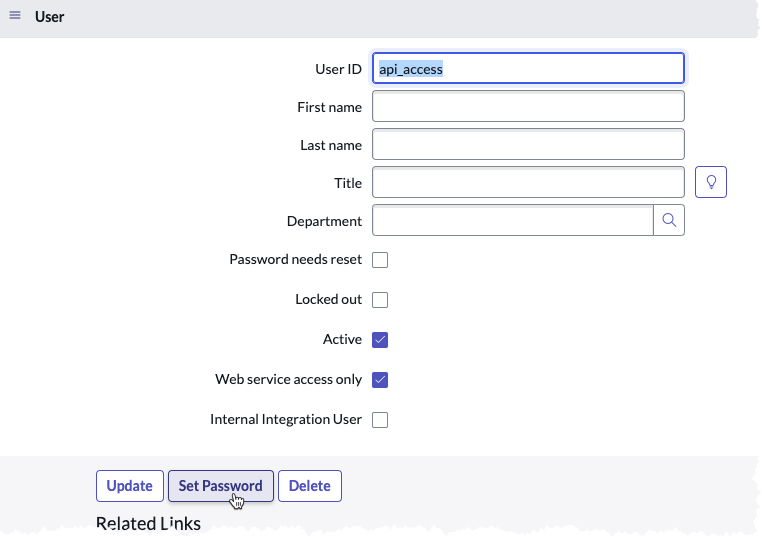
- Set a user password.
Once you’ve saved the user account, open the user account and click on Set Password.
Once you’ve created the OAuth app and user account, you should have the following values:
- Instance name
- Username
- User password
- Client ID
- Client Secret
You’ll need these values to use in your PowerShell script.
Step 5: Get an OAuth Access Token
At this point, you should now have a working ServiceNow instance to test with. It’s now time to query the API. But first, you must get an OAuth access token. The access token is what you’ll use to authenticate all future API requests.
Open up Visual Studio Code or whatever IDE you’re working with and first define variables for each attribute you’ll need gathered above.
$serviceNowInstance = 'your-instance-name'
$apiUrl = "https://$ServiceNowInstance.service-now.com/oauth_token.do"
Here, we're setting up two important variables:
$serviceNowInstance: This should be replaced with your actual ServiceNow instance name.$apiUrl: This constructs the full URL for the OAuth token endpoint. We're using string interpolation to include the instance name in the URL.
$oauthclientId = 'your-client-id'
$OAuthClientSecret = 'your-client-secret'
$Username = 'your-username'
$UserPassword = 'your-password'
In this section, we're defining our OAuth credentials:
$oauthclientIdand$OAuthClientSecret: These should be replaced with the Client ID and Client Secret you obtained when creating your OAuth application in ServiceNow.$Username: This is the username for the ServiceNow account you're using for API access.$UserPassword: The user password defined when creating the user.
$params = @{
    Uri                = $apiUrl
    SkipHttpErrorCheck = $true
    Method             = 'POST'
    StatusCodeVariable = 'StatusCode'
    Body               = @{
        grant_type    = "password"
        client_id     = $OAuthClientId
        client_secret = $OAuthClientSecret
        username      = $Username
        password      = (New-Object PSCredential "user", $UserPassword).GetNetworkCredential().Password
    }
}
Here, we're creating a hashtable $params that will be used as arguments for our API call:
Uri: This is set to our$apiUrl, specifying where we're sending the request.SkipHttpErrorCheck: Set to$true, this tells PowerShell not to automatically throw an error if we get a non-200 status code. We'll handle errors ourselves.Method: We're using 'POST' because we're sending data to the server to get our token.StatusCodeVariable: This will store the HTTP status code in a variable named 'StatusCode', which we'll use later to check if the request was successful.Body: This nested hashtable contains the data we're sending to the server:grant_type: We're using "password" as our grant type.client_idandclient_secret: These are our OAuth application credentials.username: The ServiceNow username.password: We're extracting the password from our SecureString. This complex-looking code creates a temporary PSCredential object and then extracts the password as plain text.
$response = Invoke-RestMethod @params
This line is where we actually make the API call:
Invoke-RestMethodis a PowerShell cmdlet that sends HTTP and HTTPS requests to web services and returns structured data.- By using
@params, we're splatting our parameters – essentially passing all the key-value pairs in our$paramshashtable as individual parameters toInvoke-RestMethod. - This call will send a POST request to our ServiceNow instance's OAuth endpoint, including our credentials in the body of the request.
- The response from the server (which should include our access token if successful) is stored in the
$responsevariable.
if ($StatusCode -ne 200) {
    throw "Failed to generate access token. Error: $($response.error_description)"
}
After the request, we check the status code:
- HTTP status code 200 indicates a successful request.
- If the status code isn't 200, we throw an error, including the error description from the response.
- This helps us quickly identify if something went wrong with our request.
$responseFinally, we output the response. If successful, this should contain our access token along with other details like the token type and expiration time.

Step 6: Make Your First API Call
Now let's break down the code for making an API call:
$serviceNowInstance = 'your-instance-name'
$endpoint = 'table/incident'
$uri = "<https://$ServiceNowInstance.service-now.com/api/now/$Endpoint>"

$headers = @{
    'Authorization' = "Bearer $($response.access_token)"
}

$result = Invoke-RestMethod -Uri $uri -Headers $headers -Method Get
$result.result | Format-Table
Here's what's happening:
- We set up our API endpoint URL.
- We create a
$headershashtable with our authorization token. The "Bearer" prefix is part of the OAuth 2.0 specification. - We use
Invoke-RestMethodagain, but this time with different parameters:Uri: The URL we're sending the request to.Headers: Our authorization header.Method: We're using 'Get' to retrieve data.
- The response from the API is stored in
$result. - We then pipe
$result.resulttoFormat-Tableto display the data in a neat table format.
This Invoke-RestMethod call is simpler than our previous one because we're not sending a body with our request – we're just retrieving data.

Bonus: Using Refresh Tokens
When your access token expires, you can use a refresh token to get a new one without requiring the user to log in again:
$params = @{
    Uri                = $apiUrl
    SkipHttpErrorCheck = $true
    Method             = 'POST'
    StatusCodeVariable = 'StatusCode'
    Body               = @{
        grant_type    = "refresh_token"
        refresh_token = $response.refresh_token
    }
}

$newTokenResponse = Invoke-RestMethod @params
if ($StatusCode -ne 200) {
    throw "Failed to refresh access token. Error: $($newTokenResponse.error_description)"
}

$newTokenResponse
Conclusion
You've now set up a ServiceNow developer account, created an OAuth application, and made your first API call. This is just the beginning of what you can do with the ServiceNow API. Experiment with different endpoints and start integrating ServiceNow into your workflows!
For more detailed information, check out the official ServiceNow API documentation.
Happy coding!


