


Learning new skills can be daunting; that’s a universal truth. But if you’re on a quest for something transformative, like stepping into the world of machine learning, PyTorch is the answer.
In this hands-on tutorial, you’ll navigate the PyTorch landscape to bring your machine-learning dreams to life.
Embrace the challenge as the portal to knowledge and innovation with PyTorch!
Prerequisites
Before you begin the installation process, ensure your Windows system meets the following requirements:
- Python installed – This tutorial uses Python 3.12.
- pip (installed by default with recent Python versions) or Anaconda installed – This tutorial uses pip 23.3.1 and Anaconda 23.7.4
- CUDA drivers and toolkit installed if your Windows system or server is GPU-supported.
Installing PyTorch via pip
PyTorch is your ultimate tool for diving into research and development, and the cool part? There’s no one-size-fits-all for installing it on your Windows system.
You’ll walk through two methods of getting PyTorch on board—but first up, the trusty pip via a command-line interface, like PowerShell.
To install PyTorch via pip, carry out the following:
1. Open PowerShell as administrator, and execute the commands below to verify you have Python and pip installed.
python --version
pip --version
2. Next, run the below commands to create a project folder (mkdir) called pytorch-env (arbitrary) and navigate to that folder.
mkdir pytorch-env
cd pytorch-env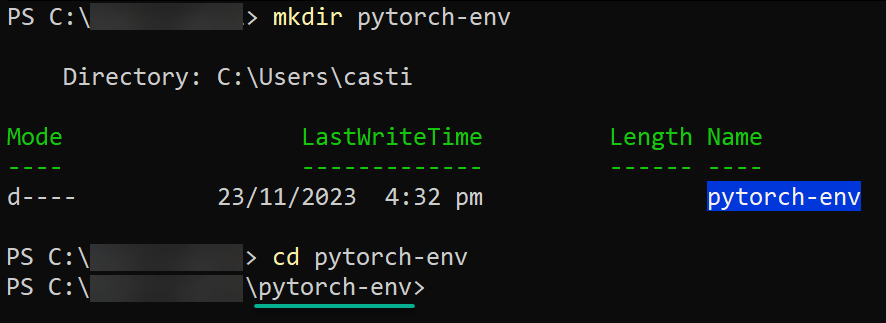
3. Run each command below to create (venv) inside the project folder and activate a virtual environment called pytorch-env.
With a virtual environment, you isolate your PyTorch installation and its dependencies from other Python projects and the global Python environment. As a result, you avoid conflicts and compatibility issues.
python -m venv pytorch-env
pytorch-env\Scripts\activate
Once activated, you’ll see the prompt changes to your virtual environment, as shown below.

4. Now, execute either pip3 commands below to install PyTorch on your Windows system.
PyTorch offers options for both CPU and GPU. If your system lacks GPU support, you can install PyTorch with CPU support only. But this tutorial focuses on CPU support only.
# For Windows with CPU support only
pip3 install torch torchvision torchaudio
# For Windows with GPU support
pip3 install torch torchvision torchaudio --index-url https://download.pytorch.org/whl/cu121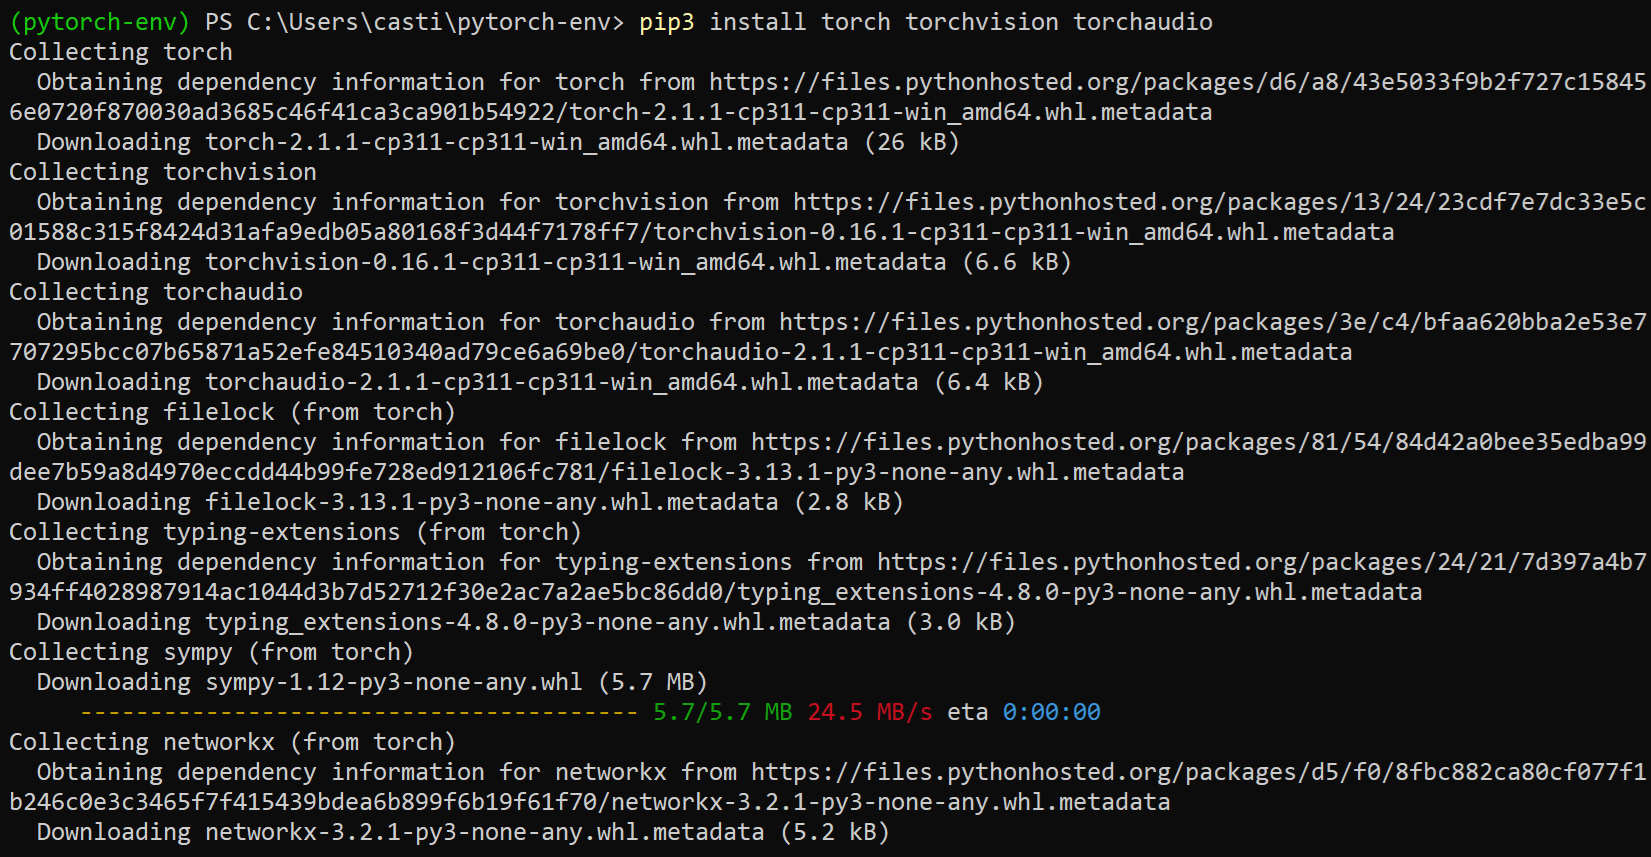
5. Lastly, run the below python command to verify the PyTorch version installed.
python -c "import torch; print(torch.__version__)"
Installing PyTorch via Anaconda
Installing PyTorch using pip is comparable to taking the well-worn path of a familiar and reliable main street. But you may want to opt for one that uniquely simplifies the landscape — Anaconda.
Like an ecosystem where data science tools and libraries coexist seamlessly, Anaconda is designed to simplify package and environment management.
To install PyTorch via Anaconda, follow these steps:
1. Launch Anaconda Prompt from the Windows start menu, as shown below.
Anaconda’s prompt is a specialized command line for orchestrating environments, adding a personal touch to your navigation.

2. Next, execute the following conda command in the prompt to create a virtual environment called pytorch-env (arbitrary)
conda create --name pytorch-env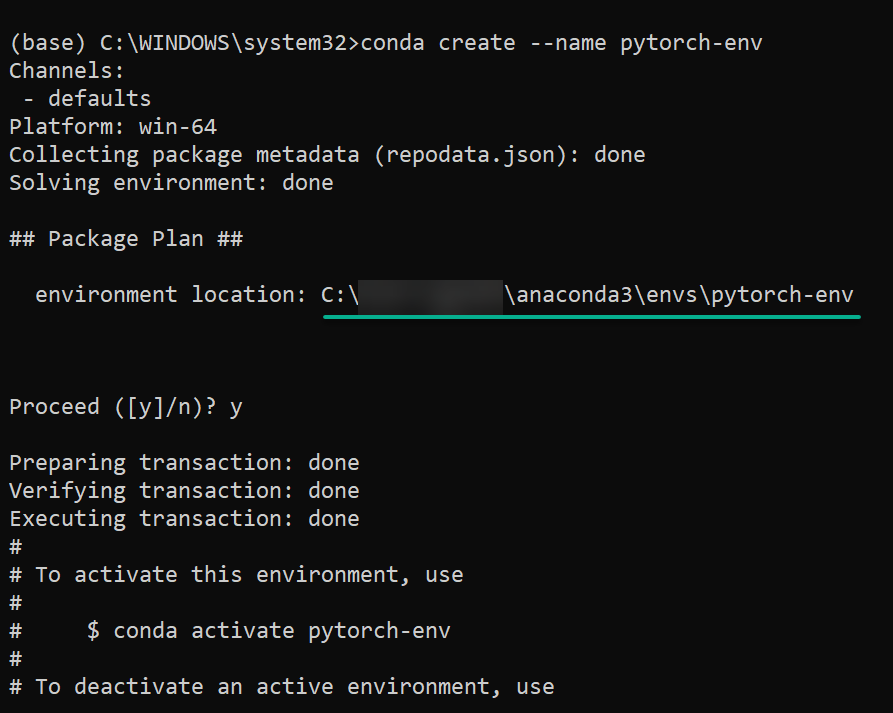
3. Once created, run the below command to activate your virtual environment (pytorch-env)
conda activate pytorch-env
4. Subsequently, run either of the following commands to install pytorch.
# For Windows with CPU support only
conda install pytorch torchvision torchaudio cpuonly -c pytorch
# For Windows with GPU support (CUDA)
# Replace versions and the channel (nvidia) as needed
conda install pytorch torchvision torchaudio pytorch-cuda=12.1 -c pytorch -c nvidia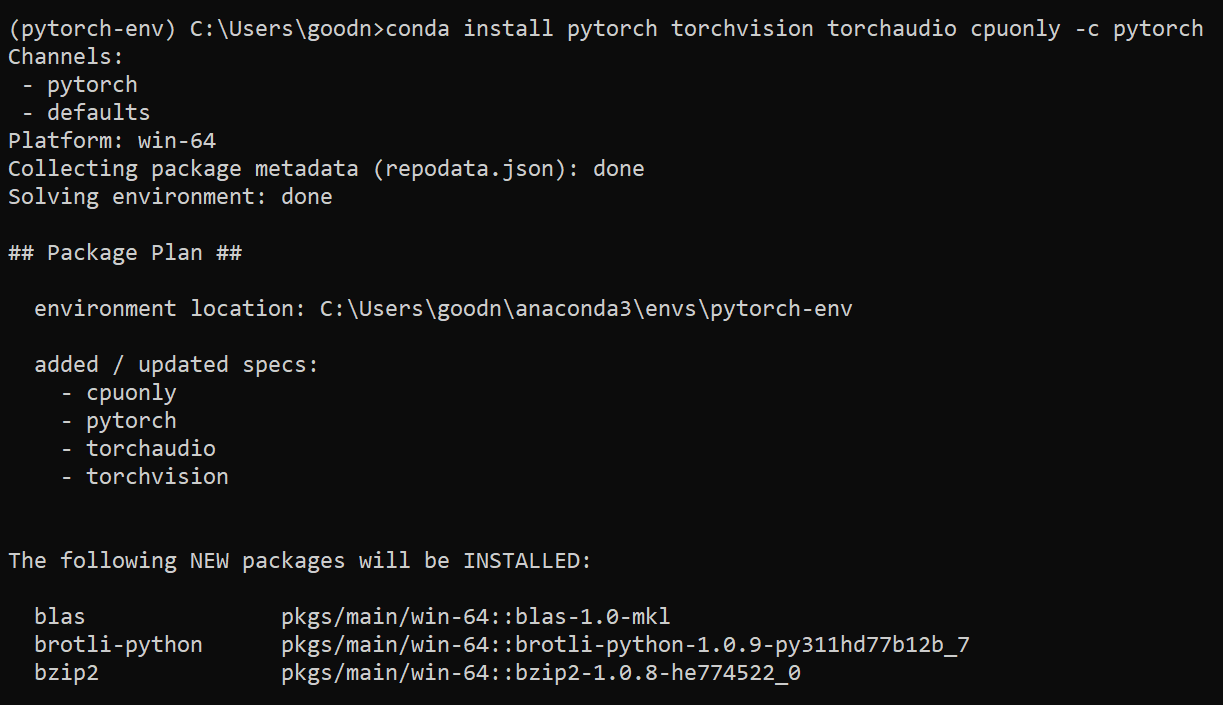
5. Now, run the below command to verify your environment’s installed version of PyTorch.
python -c "import torch; print(torch.__version__)"
Building a Neural Network Sample with PyTorch
With PyTorch installed, you now have a powerful deep-learning library. But how does PyTorch work exactly? Imagine crafting a digital brain that learns patterns, makes predictions, and evolves through data — diving into the heart of artificial intelligence.
To see how PyTorch works, you’ll build a neural network as follows:
1. Create a Python script called basic_demo.py (arbitrary) in your preferred editor, like Visual Studio Code (VSCode).
2. Add the following import statements to import PyTorch core functionalities and the necessary modules in your script.
# Import PyTorch core functionalities
import torch
# Import PyTorch module (nn) for neural network components
import torch.nn as nn
# Import PyTorch module (optim) for optimization algorithms
import torch.optim as optim
3. Next, populate the following tensors to define your datasets, which are examples your neural network can learn from. The goal is to learn a mapping from inputs (x) to outputs (y).
# Represents the input values
x = torch.tensor([[1], [2], [3], [4]], dtype=torch.float32)
# Represents the corresponding output values
y = torch.tensor([[2], [4], [6], [8]], dtype=torch.float32)
4. Now, paste the line below to the file, which defines the model as a Linear regression model using PyTorch.
model = nn.Linear(1, 1)5. After defining the model, add the following to train your model, such as teaching the network to recognize the pattern in your data.
How the model works is that you give it examples, then it makes predictions, and you tell it how wrong it is. Based on the result, the model adjusts itself to be better.
criterion = nn.MSELoss()
optimizer = optim.SGD(model.parameters(), lr=0.01)
epochs = 1000
for epoch in range(epochs):
predictions = model(x)
loss = criterion(predictions, y)
optimizer.zero_grad()
loss.backward()
optimizer.step()
if (epoch + 1) % 100 == 0:
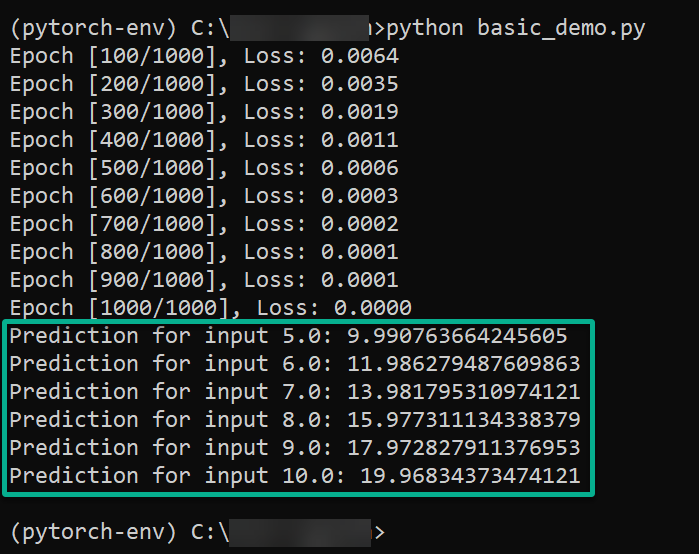
print(f'Epoch [{epoch+1}/{epochs}], Loss: {loss.item():.4f}')6. Add the last part of the code for testing the model, and save the file.
In this code, with provided input values (x values), the model predicts what the y values should be and prints the result.
test_inputs = torch.tensor([[5], [6], [7], [8], [9], [10]], dtype=torch.float32)
predicted_outputs = model(test_inputs)

for i in range(len(test_inputs)):
    print(f'Prediction for input {test_inputs[i].item()}: {predicted_outputs[i].item()}')
Following the previous steps should give you the complete code below in your basic_demo.py file.
# Import PyTorch core functionalities
import torch
# Import PyTorch module (nn) for neural network components
import torch.nn as nn
# Import PyTorch module (optim) for optimization algorithms
import torch.optim as optim

# Define dataset
x = torch.tensor([[1], [2], [3], [4]], dtype=torch.float32)
y = torch.tensor([[2], [4], [6], [8]], dtype=torch.float32)

# Define the model
model = nn.Linear(1, 1)

# Train the model
criterion = nn.MSELoss()
optimizer = optim.SGD(model.parameters(), lr=0.01)

epochs = 1000

for epoch in range(epochs):
    predictions = model(x)
    loss = criterion(predictions, y)
    optimizer.zero_grad()
    loss.backward()
    optimizer.step()

    if (epoch + 1) % 100 == 0:
        print(f'Epoch [{epoch+1}/{epochs}], Loss: {loss.item():.4f}')

# Test the model
test_inputs = torch.tensor([[5], [6], [7], [8], [9], [10]], dtype=torch.float32)
predicted_outputs = model(test_inputs)

# Print predictions for each test input
for i in range(len(test_inputs)):
    print(f'Prediction for input {test_inputs[i].item()}: {predicted_outputs[i].item()}')
7. Lastly, change the directory to where your script is located, then run the python command below to execute your script (basic_demo.py).
python basic_demo.pyAssuming everything works, you’ll see the predictions for your test inputs, as shown below.
Uninstalling PyTorch
While PyTorch is a powerful library for machine learning and deep learning tasks, there might be instances where you need to uninstall it from your system. Uninstalling PyTorch can be necessary to switch to a different version, free up space, or resolve compatibility issues.
Execute either of the following commands, depending on your environment, to uninstall PyTorch while automatically accepting prompts (-y).
# Uninstall PyTorch via pip
pip3 uninstall torch -y
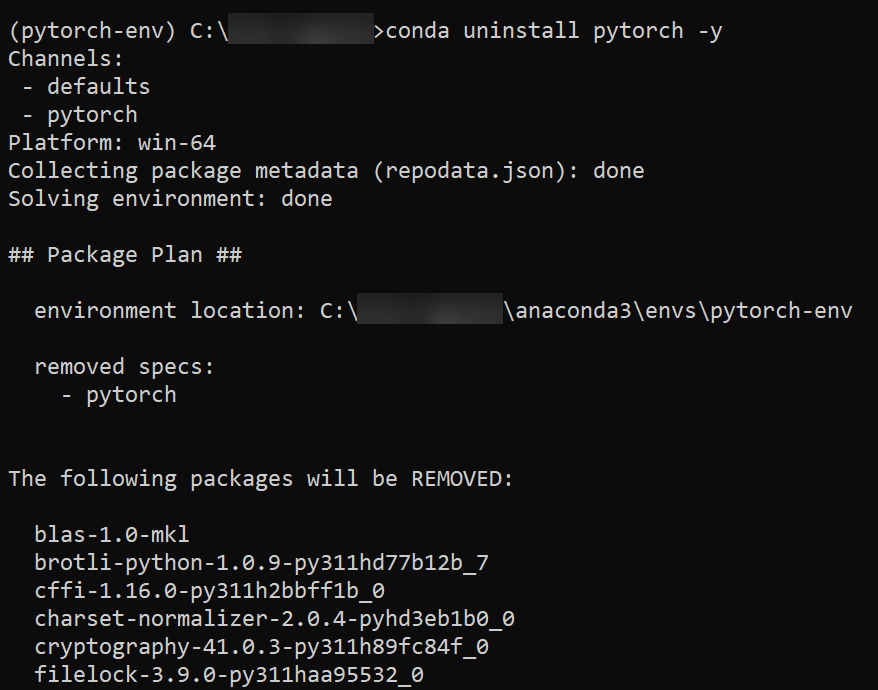
# Uninstall PyTorch via Anaconda
conda uninstall pytorch -y
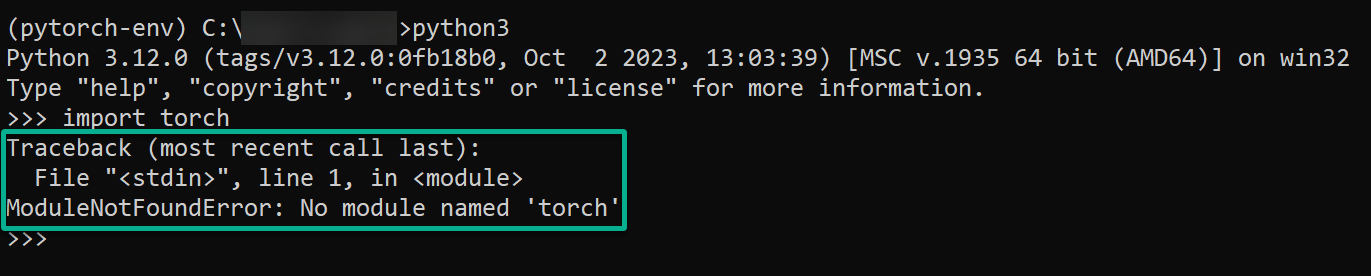
Finally, run the commands below to launch the Python interpreter (python3) and attempt to import PyTorch (torch) into your Python environment.
python3
import torch
If PyTorch is uninstalled, you’ll see an import error, as shown below.
Conclusion
Throughout this tutorial, you’ve equipped yourself with the fundamental tools to dive into the captivating realm of deep learning. You’ve learned how to set up PyTorch and ventured into constructing a neural network, training it on data, and witnessing its predictive prowess.
From importing core functionalities to making predictions, you’ve traversed the essential steps in the PyTorch landscape. Now, you’re at the gateway to endless possibilities, whether exploring advanced model architectures or tackling real-world datasets. The same exciting potential stands in contributing to the vibrant community shaping the future of artificial intelligence.
Where to from here? Why not explore transfer learning from pre-trained models and learn how to adapt them to new tasks? Or discover PyTorch Lightning to simplify the training process and enable scalable machine learning projects?


