IT admins can do a lot with PowerShell and the command line; working with Windows networking is one of those ways. In this tutorial, you’re going to learn how to use PowerShell to get IP addresses from network adapters on a Windows computer with the Get-NetIPAddress cmdlet and WMI.
Prerequisites
This tutorial will assume you’re on a Windows 10 or greater computer with Windows PowerShell v5.1 installed. It is also assumed that you’re in an Active Directory environment. If not, be sure to learn about the Credential property on the New-CimSession cmdlet.
Using Get-NetIPAddress
PowerShell has various cmdlets to work with network connections such as Get-NetAdapter, Get-NetAdapterBinding, and even one specifically to find IP addresses called Get-NetIPAddress. If you want to use PowerShell to get the IP address in a simple script, by all means, use these cmdlets.
Keep it simple. If PowerShell offers a simpler way to do something, do it!
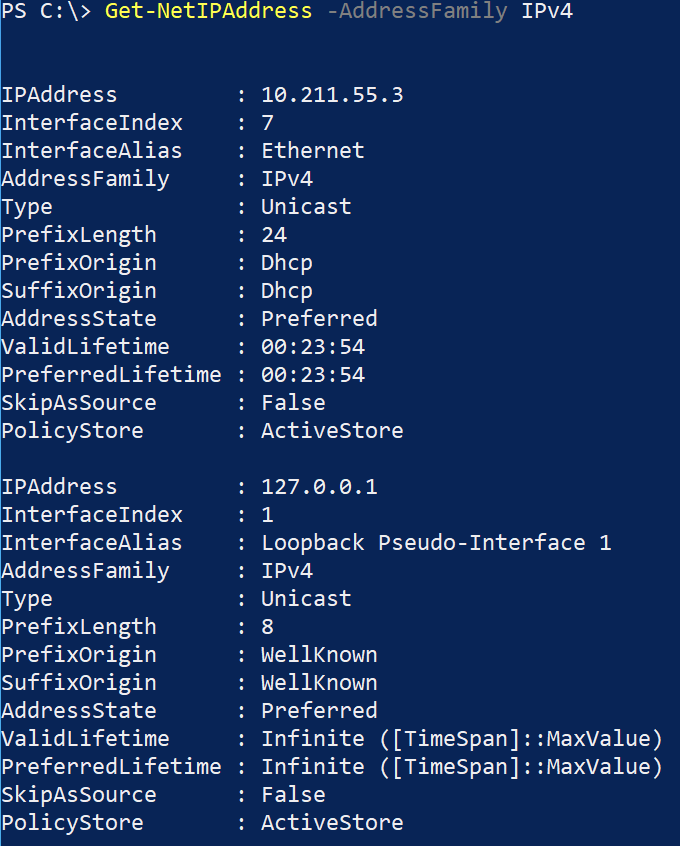
For example, to find the IPv4 address on all network adapters on a local computer, run a single line.
Get-NetIPAddress -AddressFamily IPV4
The output above references a specific network adapter such as the Ethernet adapter and returns only the IP address.

You’re done! Simply using PowerShell to get an IP address is a straightforward process, at least much more so than using other means.
If you’re not a fan of PowerShell, you can also use the ipconfig command to get an IP address. Look more on ipconfig at The Ipconfig Commands You Need to Know.
Why Use CIM/WMI?
When you run the Get-NetIPAddress cmdlet, PowerShell is actually querying WMI to retrieve that information. Why is it important to know this? Because you can query WMI directly yourself. But why use WMI when you can use a single command?
One of the most common reasons to use WMI over a single command like Get-NetIPAddress is when you’re already querying WMI. WMI contains lots of system information that comes in handy when building scripts for inventory purposes.
When communicating with WMI with PowerShell, you can create a CIM session much like a PSRemoting session. Using a session is an efficient way to authenticate to a computer once and reuse that connection repeatedly.
Use CIM to get an IP address when you’re building this task as part of a larger script.
Querying CIM Without a Session
When you’re building a PowerShell script using CIM to query various pieces of information, you should use a reusable CIM session. Reusing a single session not only speeds up your script but also reduces code duplication.
For example, perhaps you’d like to find what operating system a remote Windows computer is running. CIM holds the OS name in a property called Caption inside of the Win32_OperatingSystem class. To get this information, you’d use the Get-CimInstance cmdlet below, specifying the computer name (REMOTECOMPUTER), the CIM class (Win32_OperatingSystem), and referencing only the Caption property on the object.
(Get-CimInstance -ComputerName REMOTECOMPUTER -ClassName Win32_OperatingSystem).CaptionWhen you run Get-CimInstance, PowerShell must find the remote computer, pass the logged-in credentials to it and finally query CIM for the information you need. There’s a lot of overhead that comes with running Get-CimInstance without a session.
What if you’re building a server inventory script and also want to find information about storage, memory, networking, and so on? In that case, you’d have a lot of Get-CimInstance commands like below.
Get-CimInstance -ComputerName REMOTECOMPUTER -ClassName Win32_LogicalDisk
Get-CimInstance -ComputerName REMOTECOMPUTER -ClassName Win32_OperatingSystem
Get-CimInstance -ComputerName REMOTECOMPUTER -ClassName Win32_PhysicalMemory
Get-CimInstance -ComputerName REMOTECOMPUTER -ClassName Win32_NetworkAdapter
Your script will connect to REMOTECOMPUTER four times in the above code snippet, and what if the computer name changes? You’re going to have to find/replace that computer name, which is never a good sign while coding.
Creating a CIM Session
Instead of using Get-CimInstance with a session, you should create a single CIM session with the New-CimSession cmdlet and reuse that session repeatedly.
Instead of authenticating to a remote computer over and over, create a single CIM session with New-CimSession and pass that session to Get-CimInstance like below.
$remoteComputer = 'REMOTECOMPUTER'
$cimSession = New-CimSession -ComputerName $remoteComputer

Get-CimInstance -CimSession $cimSession -ClassName Win32_LogicalDisk
Get-CimInstance -CimSession $cimSession -ClassName Win32_OperatingSystem
Get-CimInstance -CimSession $cimSession -ClassName Win32_PhysicalMemory
Get-CimInstance -CimSession $cimSession -ClassName Win32_NetworkAdapter
Once you’re done with the session, disconnect and remove it from memory.
$cimSession | Remove-CimSessionUsing CIM sessions like above is a great way to work with CIM/WMI.
Finding the Right Network Adapter
Since a Windows computer can have different network adapters, you must first narrow down which network adapter you’d like to get the IP address from. When using WMI, use the Win32_NetworkAdapterConfiguration class. This class provides much of the information that the Get-NetIPAddress returns.
First, create a PowerShell script with the remote computer’s name, create a new CIM session, and then add your CIM session removal line below it.
$remoteComputer = 'REMOTECOMPUTER'
$cimSession = New-CimSession -ComputerName $remoteComputer

$cimSession | Remove-CimSession
Once you’ve built out the CIM session code, insert the WMI query.
$remoteComputer = 'REMOTECOMPUTER'
$cimSession = New-CimSession -ComputerName $remoteComputer

Get-CimInstance -CimSession $cimSession -ClassName Win32_NetworkAdapterConfiguration

$cimSession | Remove-CimSession
You can see that the default output above doesn’t show the IP address. You’ll have to dig in a bit deeper. It also doesn’t return a single instance. How do you narrow down the one that has the IP address you’re looking for?
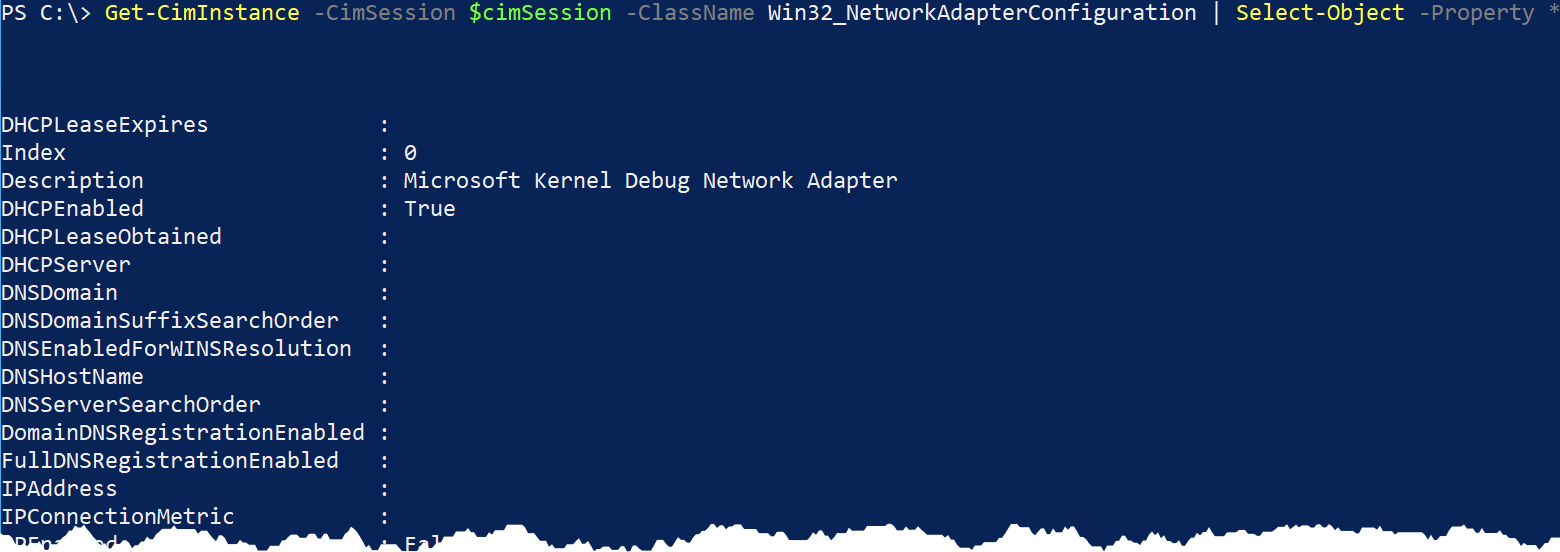
To do that, first display all of the properties using Select-Object.
Get-CimInstance -CimSession $cimSession -ClassName Win32_NetworkAdapterConfiguration | Select-Object -Property *Scroll through the output, and you’ll notice some network adapters without an IP address, some with one, and some with multiple IPs! You must limit that down. You must find some standard criterion to filter on so that it can apply to all servers.

On each adapter, you should see the IPEnabled property. When this property is set to True, the TCP/IP protocol is bound to this NIC, which is a prerequisite to having an IP address. You must narrow down the NICs that have the IPEnabled property set to True, and you’ll have the adapter you’re looking for.
When filtering WMI instances, it’s best to use the Filter parameter on Get-CimInstance. There’s a motto in the PowerShell community that says “filter left.” If you have the chance, this saying means always filter output as far to the left as possible.
Don’t use Where-Object unless you have to. The performance will be much faster instead due to the lack of overhead of processing unnecessary objects across the pipeline.
The Filter parameter on Get-CimInstance uses Windows Query Language (WQL). WQL is a small subset of SQL. The Filter parameter expects the same constraint WHERE clause syntax as SQL would.
To find all of the CIM instances of the Win32_NetworkAdapterConfiguration class with the IPEnabled property set to True, use the SELECT * FROM Win32_NetworkAdapterConfiguration WHERE IPEnabled = 'True' WQL query.
Since we’re already specifying the class name for the ClassName parameter argument in Get-CimInstance, we need to specify IPEnabled = 'True' for the Filter. This will return only the network adapter with the IP address.
Get-CimInstance -CimSession $cimSession -ClassName Win32_NetworkAdapterConfiguration -Filter "IPEnabled = 'True'" | Select-Object -Property *When you run the above code snippet, you should see that Get-CimInstance returns only a single (or limited set) of instances.
Now that you have a single CIM instance and know the property you’re looking for (IPAddress), let’s see what it looks like. You’ll see below that, in this instance, it returns a single CIM instance but with three strings for the IPAddress property, including IPV6 addresses.
(Get-CimInstance -CimSession $cimSession -ClassName Win32_NetworkAdapterConfiguration -Filter "IPEnabled = 'True'").IPAddress

192.168.0.40
fe80::e4e1:c511:e38b:4f05
2607:fcc8:acd9:1f00:e4e1:c511:e38b:4f05
You’re going to have to filter some more elements out. Because WQL can’t filter deeper than the IPAddress property value, you must now parse out the IPv4 address.
The IPV4 address is typically the first one defined in the array. Pick out that one using by referencing the 0 index as shown below. When you do, you’ll see that it returns only a single IPV4 IP address string.
(Get-CimInstance -CimSession $cimSession -ClassName Win32_NetworkAdapterConfiguration -Filter "IPEnabled = 'True'").IPAddress[0]

192.168.0.40
The IPV4 address may not always be the first array element. In fact, the IPAddress property may not even be an array. IP configurations vary drastically over adapters and various configurations. You may have to get creative in filtering them.
Conclusion
If you need to use PowerShell to get an IP address from a computer, look at the Get-NetIPAddress cmdlet first. If you’re building a larger script or cannot run this command for some reason, look into using Get-CimInstance and CIM session to do the dirty work.


