

PowerShell is an object-oriented language. When you run commands, see the output on your screen, those are objects. Objects don’t just come from thin air; developers create them or, more specifically, instantiate them with classes. PowerShell classes represent definitions or schemas of those objects.
Although you may be familiar with creating objects with commands like New-Object and using the pscustomobject type accelerator, these aren’t “new” objects. The kinds of objects these methods produce are of a specific type. PowerShell classes define the type.
In this tutorial, you’re going to learn how to get started with PowerShell classes. You’ll create your first class with constructors, learn how to create objects from your class, and deck out your class with properties and methods.
For background on terms like objects, properties and methods, check out the blog post Back to Basics: Understanding PowerShell Objects.
Prerequisites
Creating Your First Class and Object
Before you can learn the ins and outs of a PowerShell class, you should first walk through creating a simple class. You’ll learn about the more advanced topics later on.
Creating your first class will feel a little like creating a function. The basic syntax is the same. A class is created from a definition like a function. Unlike functions though, the first line doesn’t start with function followed by the name of the function, it starts with class followed by the name of your object type.
Below you’ll see the bare skeleton of a class called student.
class student {

}
Classes have properties that look like parameters that are attributes that describe that class. The example below shows a class called student with two properties; FirstName and LastName.
When you define a property, you should always define a type that sets a specific “schema” for what property values can hold. In the example below, both properties are defined as strings.
You should always define property types. You’ll see why later.
class student {
    [string]$FirstName
    [string]$LastName
}
After you define a class, create an object from it or instantiate an object. There are multiple ways to instantiate objects from classes; one common way is to use type accelerators such as [student] which represent the class, followed by a default method that comes with every class called new().
Using the type accelerator shortcut is the same as creating an object using the New-Object command.
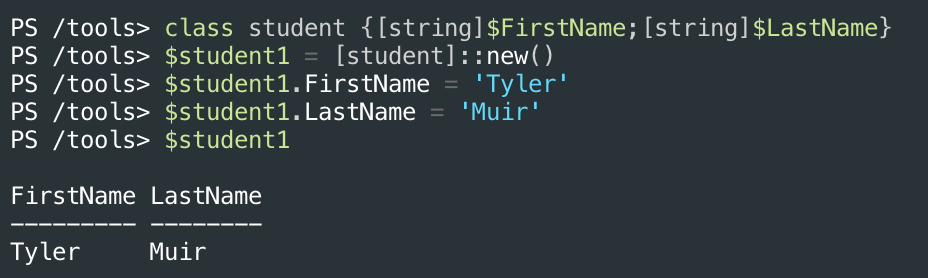
New-Object -TypeName studentOnce you’ve created an object from that class, then assign values to properties. The example below is assigning values of Tyler and Muir for the FirstName and LastName properties.
class student {
    [string]$FirstName
    [string]$LastName
}
$student1 = [student]::new()
$student1.FirstName = 'Tyler'
$student1.LastName = 'Muir'
$student1
Once you’ve created the object and assign values to the properties, inspect the object by calling the variable you assigned the object to, as shown below.
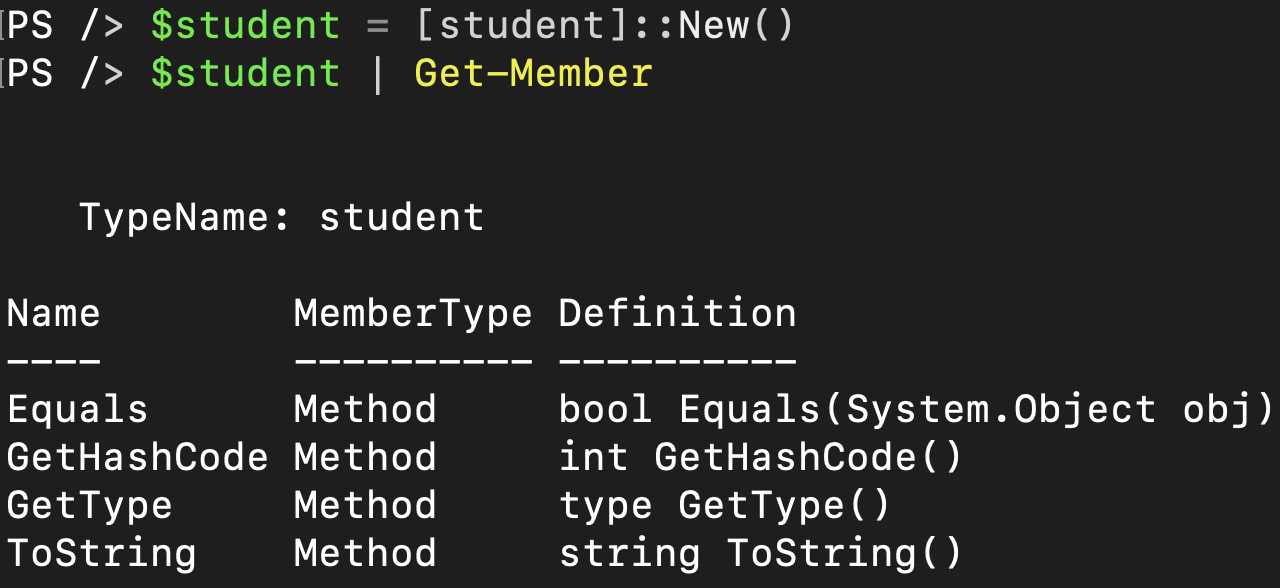
Now that you’ve created an object from a class, pipe that object just like any other object in PowerShell to the Get-Member cmdlet to inspect it. You can see below the object held within the $student1 variable is of type student.
The class name will always correlate to the object type.
Notice that Get-Member returns four methods and two properties. The properties probably look familiar, but the methods sure don’t. PowerShell adds certain methods by default, but you can add your own methods or even modify the default methods.

Creating Methods
In the example above, you saw a few default methods on the object, but chances are, you’re going to want to create your own. To do that, you must define one or more methods inside of the class definition.
A method definition looks like below with an output type that defines what type of object is returned from this method, the name of the method, and the code to execute inside of a scriptblock.
[<output type>]<name>() {
	<code that runs when the method is executed>
}
Notice the parentheses () after the name. This is where you can define method parameters (covered later). Method parameters allow you to change up a method’s functionality just like you can with function parameters.
If you have written and ran PowerShell functions before, method scriptblocks should feel familiar, but there are a couple of special rules for methods you should know about.
return is Mandatory
PowerShell functions will return objects by simply placing the object anywhere in the function like the below example.
function foo {
	$object = Get-Service
	$object ## Just sending the object to the pipeline
}
Unlike functions, however, if a method returns an object, you must use the return construct as shown below.
[string]GetName() {
	return 'foo'
}
Using the $this Variable
Another difference methods have with functions is the $this variable. The $this variable, as defined inside of a method, references the current object’s properties or other methods.
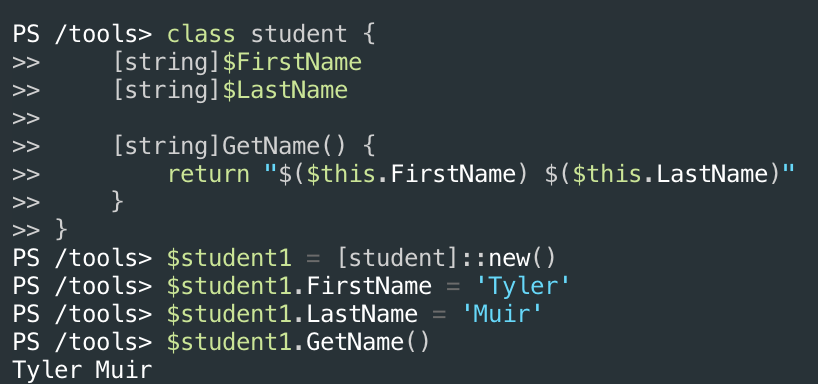
Below is an example of a method called GetName() added to the student class that concatenates the value of the FirstName and LastName properties and returns them.
class student {
    [string]$FirstName
    [string]$LastName

    [string]GetName() {
        return "$($this.FirstName) $($this.LastName)"
    }
}
Now you can call the GetName() method using dot notation as shown below. If you previously assigned values to FirstName and LastName, GetName() will return them.
Adding Parameters to Methods
In the above example, when you ran the line $student1.GetName(), you were calling the GetName() method as-is. Inside of the parentheses, you can define parameters just like functions.
The GetName() method just returned whatever values were set for the FirstName and LastName properties. But what if you’d rather have a method to set properties that GetName() can then get? In that case, you need to define method parameters.
Define method parameters by including one or more parameters separated by a comma in the method parameter parentheses, as shown below.
Note the
[void]output type. Whenever a method doesn’t output anything, you don’t need areturnconstruct, and you should define the output type as[void]to tell PowerShell the method returns nothing.
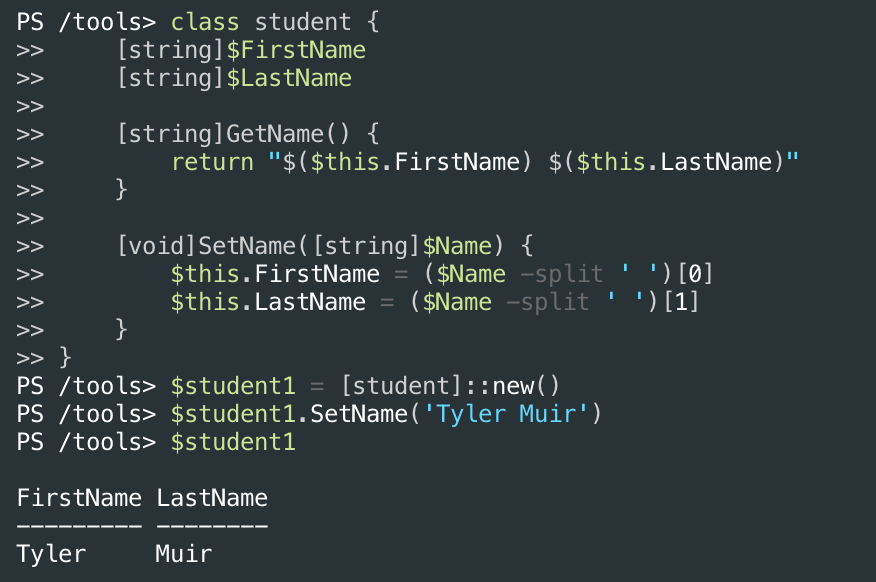
[void]SetName([string]$Name) {

}
For example, perhaps the SetName() method accepts a full name (first and last name). If so, in the scriptblock, you can then split this string and assign the first and last name that way.
By inserting the SetName() method in the student class, below is what it looks like now.
class student {
[string]$FirstName
[string]$LastName
[string]GetName() {
return "$($this.FirstName) $($this.LastName)"
}
[void]SetName([string]$Name) {
$this.FirstName = ($Name -split ' ')[0]
$this.LastName = ($Name -split ' ')[1]
}
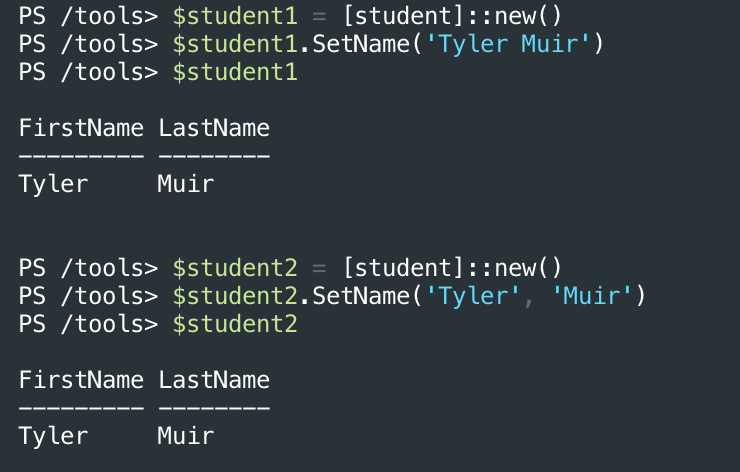
}Now you can pass a full name as a parameter to the SetName() method, which sets the current object’s FirstName and LastName properties.
Overloading Methods
Perhaps you’d like to define different parameter sets for a method. Similar to how parameter sets work in functions and cmdlets, you can define different parameter “contexts” or method signatures.
Maybe you’d like to set the FirstName and LastName parameters by passing a full name to the SetName() method or passing the first and last name separately. You don’t have to choose; you can define them both with method signatures.
When you define more than one method signatures in a class, that’s called overloading.
Reusing the example from the previous section, you can create an overload for the SetName() method to accept two strings instead of one. When you pass in two strings instead of one, the SetName() method assumes the first string is the FirstName and the second string is the LastName. With that overload, the class would look like the below.
class student {
    [string]$FirstName
    [string]$LastName

    [string]GetName() {
        return "$($this.FirstName) $($this.LastName)"
    }

    [void]SetName([string]$Name) {
        $this.FirstName = ($Name -split ' ')[0]
        $this.LastName = ($Name -split ' ')[1]
    }

    [void]SetName([string]$FirstName,[string]$LastName) {
        $this.FirstName = $FirstName
        $this.LastName = $LastName
    }
}
Class Constructors
Whenever you instantiate an object with the new() method or another way, you can tell PowerShell to run some user-defined code called a constructor. Constructors are like methods, but they are run automatically when PowerShell instantiates an object.
Every class has a default constructor. This default constructor doesn’t do much; it’s just in charge of instantiating the object. You can see the default constructor by viewing the output of the New method. You can see below that this line returns a single new() method.
[student]::New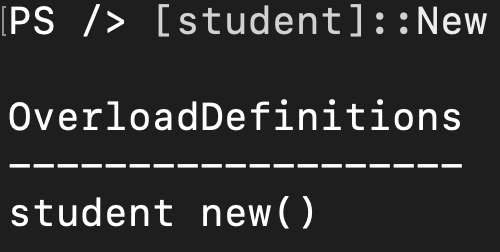
Constructor Overloading
Perhaps you’d like to set a value for the FirstName and LastName properties as soon as you create the object, not with the typical dot notation. In that case, you can create a constructor with a parameter that then calls SetName().
Below is an example of a constructor for the student class. Notice the constructor does not have a specific name or is prefaced with an output type. Constructors always use the same name as the class.
Calling an existing method in the constructor allows us to reuse the method we already wrote to handle setting the variables.
student([string]$Name) {
	$this.SetName($Name)
}
And below you’ll see that constructor added to the student class.
class student {
[string]$FirstName
[string]$LastName
student([string]$Name) {
$this.SetName($Name)
}
[string]GetName() {
return "$($this.FirstName) $($this.LastName)"
}
[void]SetName([string]$Name) {
$this.FirstName = ($Name -split ' ')[0]
$this.LastName = ($Name -split ' ')[1]
}
[void]SetName([string]$FirstName,[string]$LastName) {
$this.FirstName = $FirstName
$this.LastName = $LastName
}
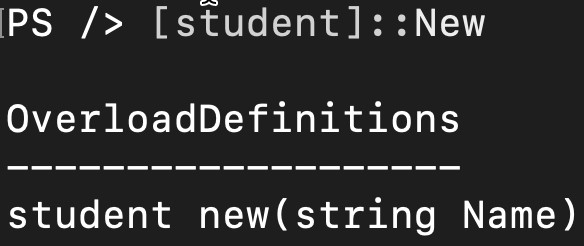
}When you instantiate a new student object and pass in a string parameter, the object properties will immediately have the expected values.
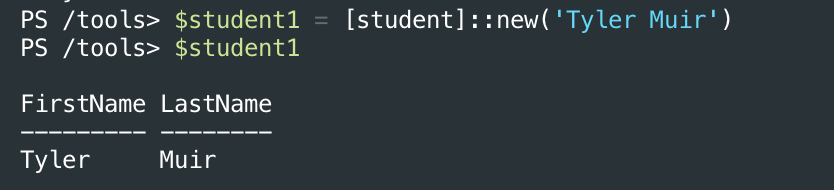
You can now see the overloaded constructor again with [student]::New. Notice now that the new overloaded constructor defined with a Name parameter.
Defining a Default and Overloaded Constructor
Now that you have an overloaded constructor on your student class, PowerShell overwrites the default constructor. But, you can get it back by manually creating one without parameters.
student() {}You can see what that looks like in the student class below.
class student {
    [string]$FirstName
    [string]$LastName

    student([string]$Name) {
        $this.SetName($Name)
    }

    student() {}

    [void]SetName([string]$Name) {
        $this.FirstName = ($Name -split ' ')[0]
        $this.LastName = ($Name -split ' ')[1]
    }
}
Now check the constructors again. You’ll now see both constructors show up.
[student]::New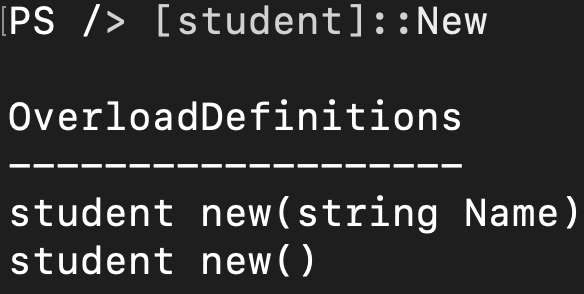
Class Inheritance
Like all other object-oriented languages, you can build PowerShell classes hierarchically with multiple classes. Each class can have “parent” and “child” classes that start from less-specific, more generic purposes and increase specificity.
For example, our student class represents a university student (child/specific). That university student is a person (parent/generic). These two concepts are related and form a hierarchy.
A child class can inherit a parent class which means it can hold all properties and methods (members) defined via a parent class. We know that a person class may have properties like eye_color, height, and weight and perhaps a method called SetHeight().
If a student is a person, that student still has those properties and methods. It would duplicate effort to implement those same members on the student class that the person class already has. You can define class inheritance to automatically define all members of the person class on the student class.
If this doesn’t make sense now, it will as we walk through a demo.
Class Inheritance Demo
First, make a copy of the student class you created earlier, remove the constructors and rename it to a person class. Your person class should like the below class.
A student, of course, has a first name and last name, but the class can be described more accurately by labeling it as a person. When creating a more “generic” class like this, you can create more specific “child” classes from it.
class person {
    [string]$FirstName
    [string]$LastName

    [string]GetName() {
        return "$($this.FirstName) $($this.LastName)"
    }

    [void]SetName([string]$Name) {
        $this.FirstName = ($Name -split ' ')[0]
        $this.LastName = ($Name -split ' ')[1]
    }

    [void]SetName([string]$FirstName,[string]$LastName) {
        $this.FirstName = $FirstName
        $this.LastName = $LastName
    }
}
Now, create a couple of classes that represent a person but have a more specific role. For example, in the code snippet below, you now have a teacher and student class.
class teacher {
    [int]$EmployeeId
}

class student {
    [int]$StudentId
}
As-is, the teacher and student class, are mutually exclusive from the person class. They have no relationship but cannot inherit any class members of the person class. Let’s change that.
Now define that hierarchy by defining the teacher and student class as “child” classes of the person class with inheritance. You can define inheritance by appending a colon (:) after the class name followed by the name of the parent class as shown below.
class teacher : person {
    [int]$EmployeeId
}

class student : person {
    [int]$StudentId
}
Your entire class script should now look like this:
class person {
    [string]$FirstName
    [string]$LastName

    [string]GetName() {
        return "$($this.FirstName) $($this.LastName)"
    }

    [void]SetName([string]$Name) {
        $this.FirstName = ($Name -split ' ')[0]
        $this.LastName = ($Name -split ' ')[1]
    }

    [void]SetName([string]$FirstName,[string]$LastName) {
        $this.FirstName = $FirstName
        $this.LastName = $LastName
    }
}

class teacher : person {
    [int]$EmployeeId
}

class student : person {
    [int]$StudentId
}
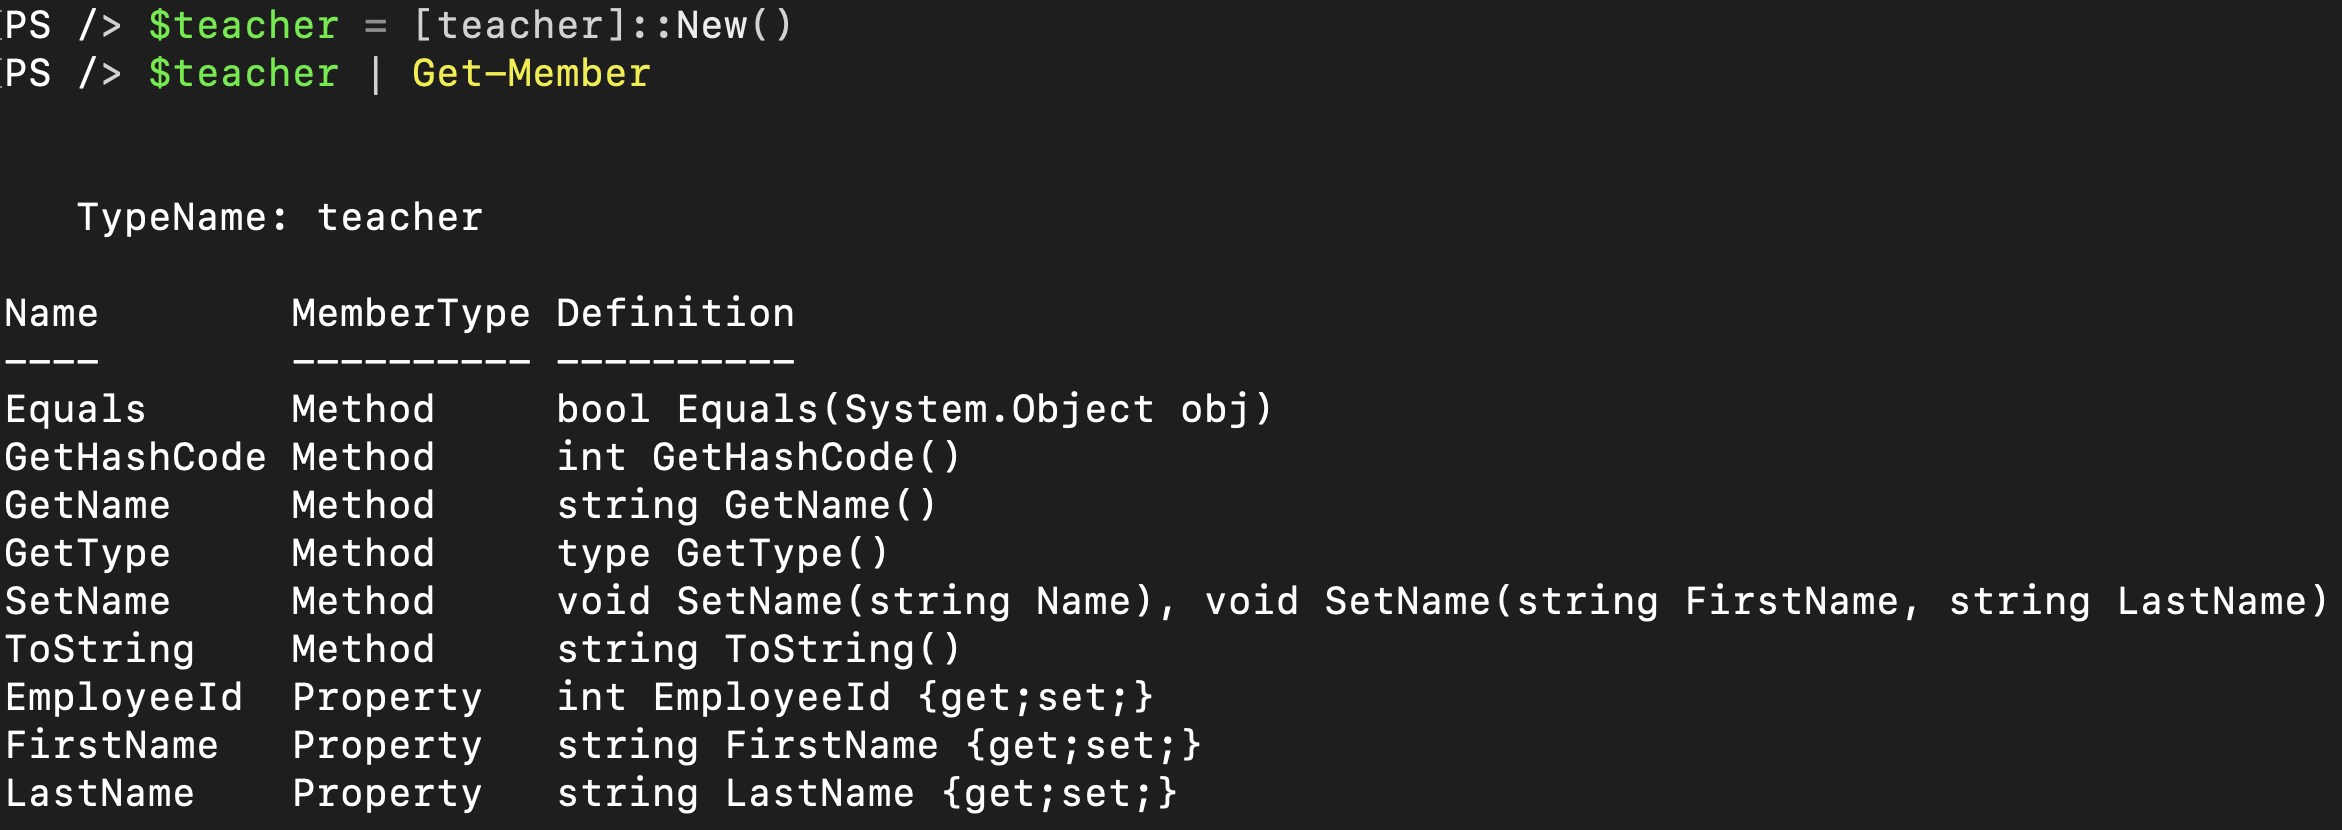
At this point, when you instantiate an object from the teacher or student class, both classes will have the same members as the person class.
Inheriting with Constructors
As you saw above, class methods are inherited via class inheritance. This behavior may lead you to think that constructors would follow that same logic, but you’d be wrong. Constructors are not inherited, and constructors for all child classes must be defined in each child class separately.
For example, perhaps you just defined an overloaded constructor for the person class but didn’t define a constructor for the teacher class, as shown below.
class person {
[string]hidden $FirstName
[string]$LastName
[string]GetName() {
return "$($this.FirstName) $($this.LastName)"
}
[void]SetName([string]$Name) {
$this.FirstName = ($Name -split ' ')[0]
$this.LastName = ($Name -split ' ')[1]
}
[void]SetName([string]$FirstName,[string]$LastName) {
$this.FirstName = $FirstName
$this.LastName = $LastName
}
person([string]$Name) {
$this.SetName($Name)
}
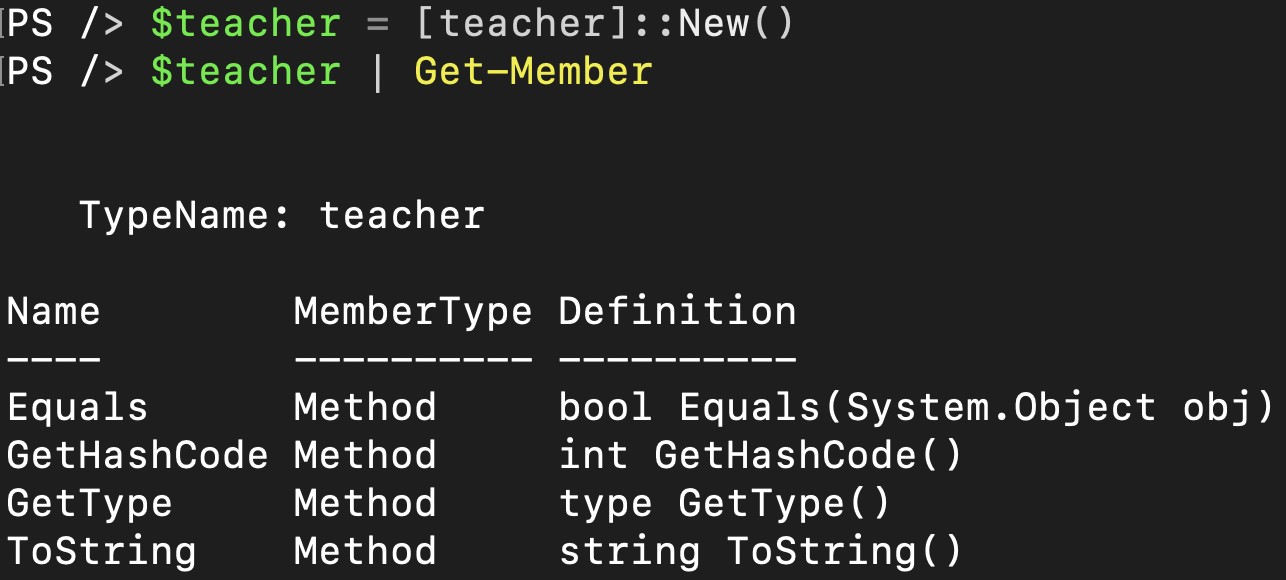
}You then define a child class, teacher, for example, and try to create an object with no parameters from it, as shown below. Notice that PowerShell returns an error because a parameterless constructor was not defined inside of the teacher class.

A constructor is not necessary in a child class if you’re only using it as a template. Alternatively, if you want to use the parent class as its own standalone class and as a parent class you can include constructors. But you have to make sure that the parent class has a constructor that matches the ones in the child classes.
Class Member Attributes
Just like PowerShell command parameters, classes can have member attributes. These attributes modify the behavior of each member.
Hidden Members
If you’re using a class member for internal purposes only and would not like the user to read or write to it, you set a member as hidden. For example, maybe you have a method that’s only used by other methods. There’s no need to expose that method to the user.
To define a hidden member, use the hidden attribute as shown below.
class teacher {
    [int]hidden $EmployeeId
}
Now when you use Get-Member to inspect all object members, that property does not show up.
Setting a class member as hidden does not restrict access to the value; it only hides it from view. You should not hide properties to store sensitive data.
Static Members
Recall earlier; this tutorial used the term “instantiate” to describe creating an object from a class. When you instantiate an object, that object takes on all of the properties and methods the class defines. But that’s not always the case.
Sometimes, you don’t need the overhead of instantiating an entire object. Instead, you need to reference a single class member quickly. In that case, you can set a class member as static.
Just as with the hidden attribute, define a class member as static using the static keyword as shown below.
class student {
	[int]static $MaxClassCount = 7
}
Unlike typical class members, PowerShell does not create properties and methods from static class members. When you define a class member as static, like hidden members, it doesn’t show up when you use Get-Member.
For example, perhaps you’d like to associate university class names with the student class and define the maximum number of university classes that a student can participate in. To do that, you create a Classes array member and a MaxClassCount member.
Since the user rarely needs to change the MaxClassCount member, you decide to define it as static.
Finally, you create an AddClass() method to add a class to the student’s schedule, but only if it’s less than that MaxClassCount.
class student {
    [string[]]$Classes = @()
    [int]static $MaxClassCount = 7

    [void]AddClass ([string]$Name) {
        if ($this.Classes.Count -lt [student]::MaxClassCount) {
            $this.Classes += $Name
        }
    }
}
Now when you attempt to create a new student object and assign too many university classes to it, PowerShell will only assign the maximum number which would be seven.
$student1 = [student]::new()
'PE','English','Math','History','Computer Science','French','Wood Working','Cooking' | ForEach-Object {
	$student1.AddClass($_)
}
$student1.Classes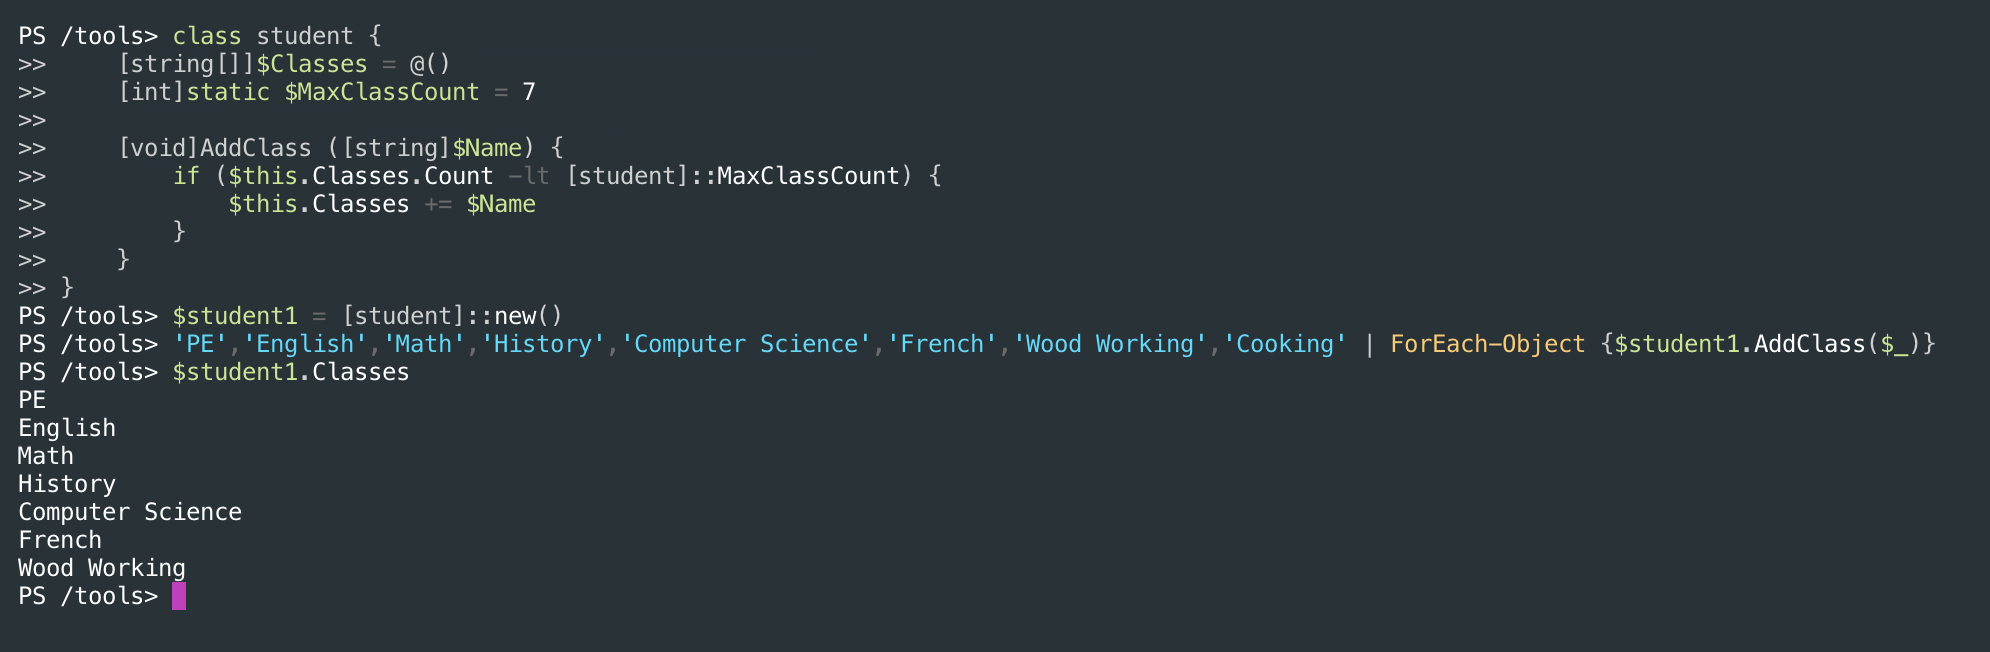
You can change static member values at any time. If, for example, you wanted to make the
MaxClassCountmember 5 instead of 7, you’d change the value using[student]::MaxClassCount = 5. Changing the value would not retroactively remove classes that are over the limit in this example.
Conclusion
PowerShell classes blur the line between a scripting language and a programming language. Classes are a great way to define object relationships, add ways of interacting with and formatting objects that’d normally only be possible by writing specialized functions.


