


If you’re using PowerShell to work with a file system, registry, certificates, or even network drives, you’ve got to check out PowerShell drives. PowerShell drives or PS drives are a concept in PowerShell that allows you to work with structured data like a file system. The New PSDrive cmdlet is the way to begin.
In this tutorial, you’re going to learn how PS drives work, some of the cmdlets used to work with PS drives, and ultimately how to make your scripting tasks easier.
Open a PowerShell console and let’s get started!
Prerequisites
This tutorial will be a hands-on demonstration. If you’d like to follow along, be sure you have the following:
- A Windows PC – Even though PS drives will work in PowerShell on other platforms, all demos will use Windows in this tutorial.
- An available SMB network share if you’d like to follow along with one of the demos.
Inspecting PS Drives with Get-PSDrive
Out of the box, PowerShell comes installed with a few default drives. To see these drives, run the Get-PSDrive command. PowerShell will return various drives from familiar ones like file system drives such as C or registry drives like HKLM or HKCU.
Get-PSDrive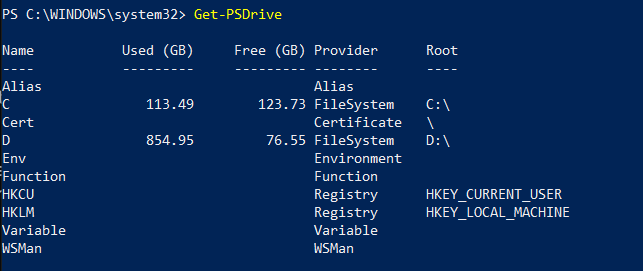
PS drives vary in the type of data they contain by providers. These providers are what PowerShell uses to expose the data inside each of the drives. You can see above that Get-PSDrive has returned drives from eight different providers.
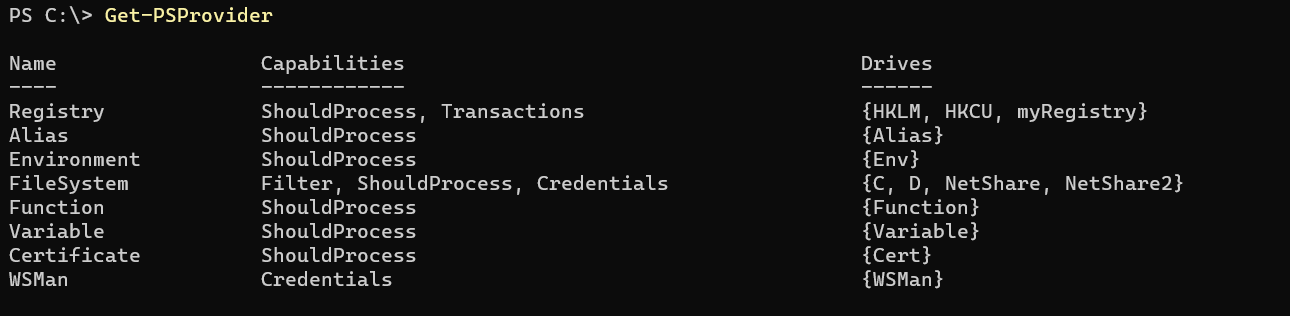
You can find all providers installed on your computer by running Get-PSProvider. As you can see below, different providers different capabilities dictating how each provider interacts with the current PowerShell session.
The Get-PSDrive also has a few handy parameters such as the PSProvider parameter. This parameter allows you to filter the PS drives returned by a particular provider. You’ll see below where Get-PSDrive only returns those drives served by the FileSystem provider.
Get-PSDrive -PSProvider FileSystem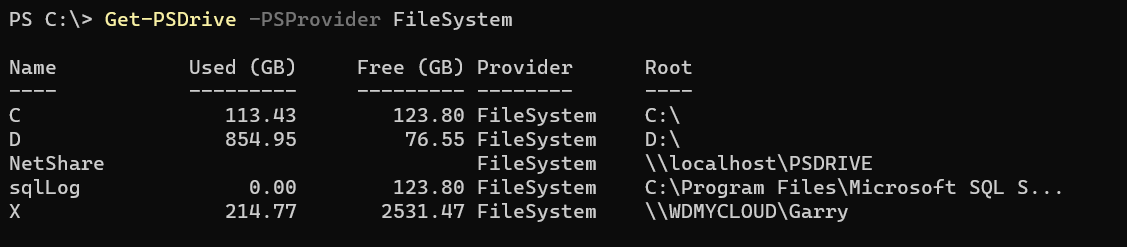
Navigating PS Drives
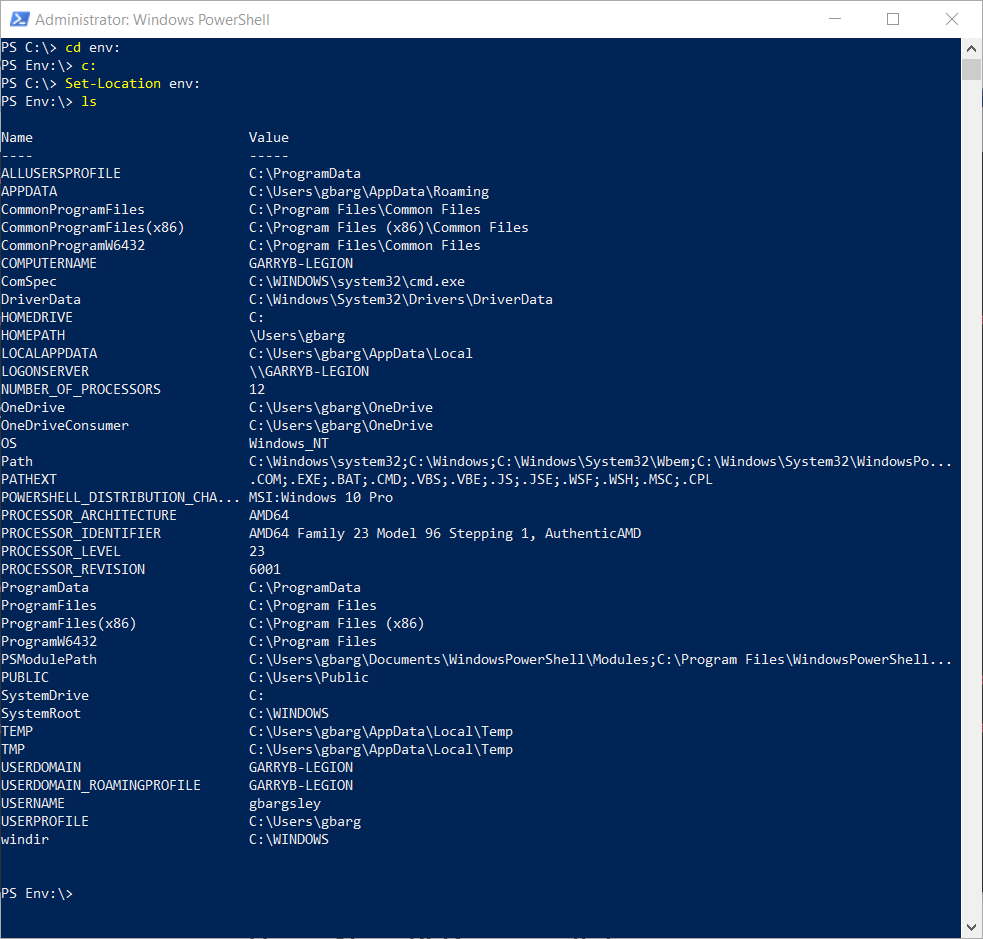
Once you know what PS drives are available, you can then check out what’s inside each of them. For example, the Env drive is a default PS drive that contains Windows’ environment variables. Just like with a file system, you can browse environment variables.
To browse the Env drive, change to the drive letter with cd or Set-Location as you normally would a file system and run ls or Get-ChildItem, as shown below.
Take note of the colon at the end of each example. You must use a colon to signify a PS drive.
cd Env:
ls
Once you run ls, as shown below, you’ll see PowerShell returns key/value pairs for each environment variable in Windows.
Creating New PS Drives with New PSDrive
You’ve learned that PowerShell comes with a few built-in PS drives but you can also create custom drives yourself with the New-PSDrive cmdlet.
One of the most common uses of the New-PSDrive cmdlet is with the FileSystem provider to create “shortcuts” to file system directories or even map network drives. Using New-PSDrive you can assign labels to various file system locations.
Mapping a File Share with New-PSDrive
For example, perhaps you have an SMB file share on your network somewhere and you need to map that share to a drive letter. You could map that network drive via the GUI or you could use PowerShell if you prefer the command-line or your building a script.
In this example, let’s say you have network share located at UNC path \\localhost\PSDRIVE.
The local computer (
localhost) is only be used as an example. You can map actual network drives withNew-PSDrivethe same way.
To map a network drive with New PSDrive provide:
- The
Nameof the drive you’d like to create (NetSharein this example). - The type of provider (
PSProvider) the drive will use (FileSystemin this example). - The path to the file share or
\\localhost\PSDRIVEusing theRootparameter.
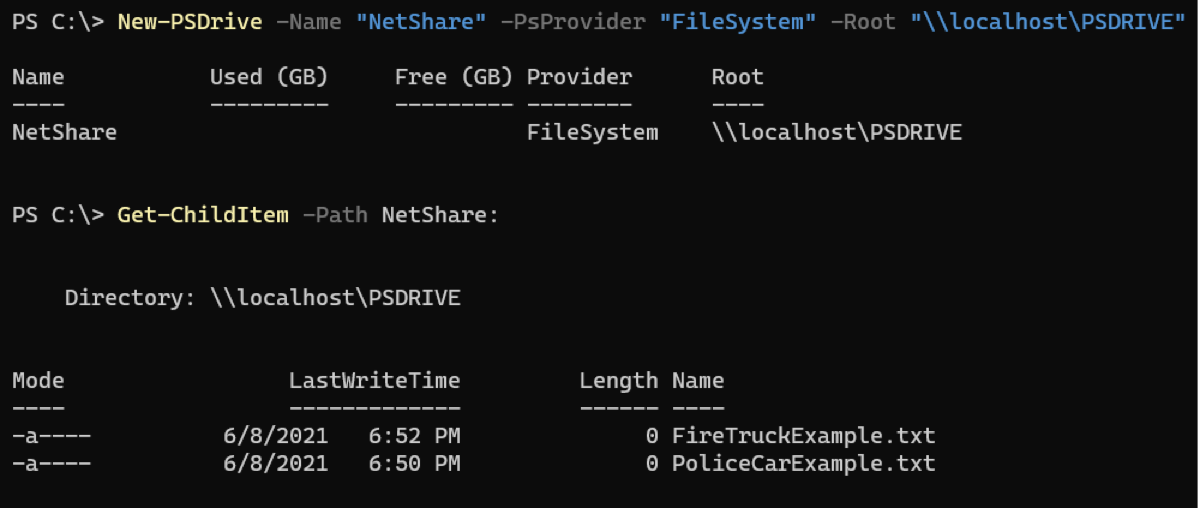
Run New-PSDrive, as shown below, and then run Get-ChildItem to see what’s in the file share.
New-PSDrive -Name "NetShare" -PSProvider "FileSystem" -Root "\\localhost\PSDRIVE"
Get-ChildItem -Path NetShare:
You’ll see that by referencing NetShare now is the same as directly referencing \\localhost\PSDRIVE.
Need to assign some notes to your new drive? Perhaps
The file share to store docs? Use theDescriptionparameter like-Description 'The file share to store docs'.
Using a Filesystem PS Drive for the Windows GUI
In the above example, the PS drive only shows up while in PowerShell. Using New PSDrive in this manner doesn’t technically map a network drive like the GUI does. But, you can still do it by adding the Persist parameter.
The Persist parameters tells New PSDrive to expose the drive to Windows and just not PowerShell. For example, you could map and X drive to the \\WDMYCLOUD\Garry file share with the command below.
New-PSDrive -Name "X" -PSProvider "FileSystem" -Root "\\WDMYCLOUD\Garry" -PersistYou’ll now see the X drive show up in Windows File Explorer.

Creating Filesystem PS Drives for Long Directory Paths
Other than mapping file shares, you can create PS drives with the New-PSDrive cmdlet to also save some typing! By creating a drive based on some long directory path, you can get away with changing to a directory called C:\thisisareallylongdirectorypath\Ido\not\want\totype to simply C:\LongDirPath.
To demonstrate a real-world example, Microsoft SQL Server2019, by default, stores its logs in the C:\Program Files\Microsoft SQL Server\MSSQL15.SQL2019\MSSQL\Log directory. If you routinely find yourself changing to that directory in PowerShell, it would get old quick typing that in every time.
Instead of typing in a long directory path, create a PS drive with New-PSDrive called sqllog. Once created, then change to the directly not with the original directory path but with the PS drive name.
New-PSDrive -Name sqlLog -PSProvider "FileSystem" -Root "C:\Program Files\Microsoft SQL Server\MSSQL15.SQL2019\MSSQL\\og"
Set-Location sqlLog: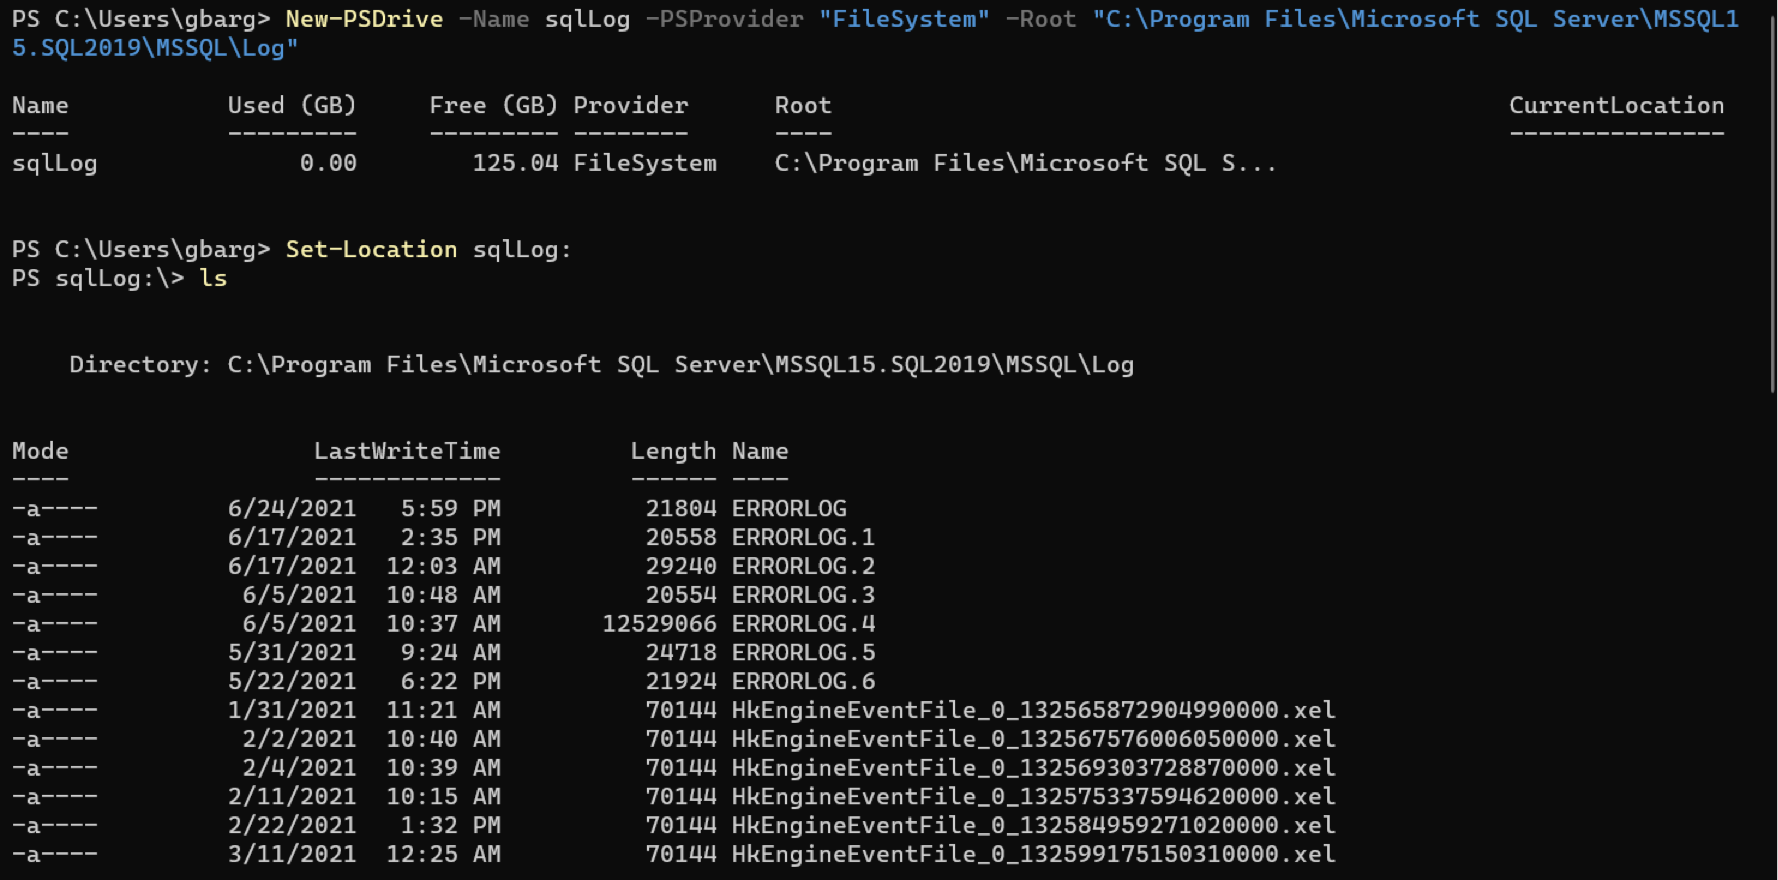
Working with the Registry
PS drives aren’t just relegated to the file system. Remember that PS drives use various providers. One of those providers is the registry. Using the same technique as you’ve learned, you can also create “shortcuts” to any registry key you’d like.
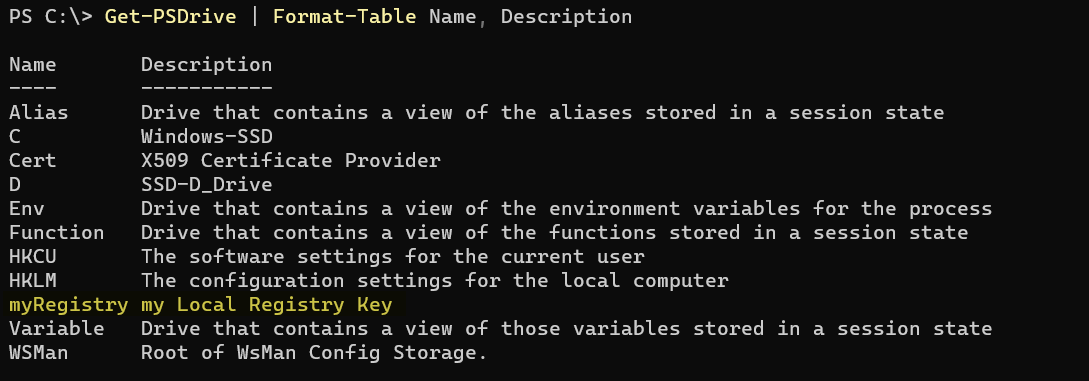
To create PS drives on a registry provider, pass the Registry argument to the PSProvider parameter and, instead of a directory path, use a registry key path for the Root, as shown below. Notice that this example also used the optional Description parameter setting a description on the PS drive.
New-PSDrive -Name "myRegistry" -PSProvider "Registry" -Root "HKLM\Software" -Description 'my local Registry key'Once created, run Get-PSDrive to inspect your work. The below example is using the Format-Table cmdlet to limit output to only the Name and Description properties. The Description property is not visible, by default.
Removing PS Drives with Remove-PSDrive
Finally, perhaps you’re done working with PS drives and it’s time to clean up. To do that, use the Remove-PSDrive cmdlet. One of the most intuitive ways to use the Remove-PSDrive cmdlet is to use the PowerShell pipeline. By “piping” PS drives to Remove-PSDrive, you can remove or more drives at once.
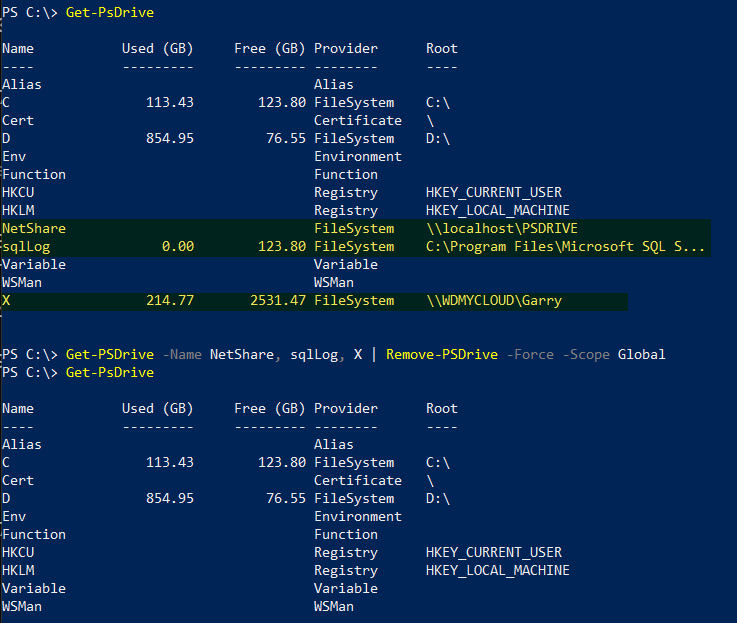
For example, perhaps you’ve followed all examples in this tutorial and would like to remove them all. Rather than running Remove-PSDrive three different times, instead read them all with Get-PSDrive and pipe each drive to Remove-PSDrive, as shown below.
Get-PSDrive -Name NetShare, sqlLog, X | Remove-PSDrive -Force -Scope GlobalNotice below that each PS drives was created prior but running the above command has removed them all.
Note that the
ForceandScopeparameters are optional. TheForceparameter removes a PS drive even if a file is open whileScoperemoves drives defined in the global scope with theNew-PSDrive -Scopeparameter.
Conclusion
PS drives can save a lot of time and help you navigate the file system, registry and other data sources easier. Have you been inspired to try out PS drives in your scripts? If so, how?


