


Moving user mailboxes is a common occurrence for Exchange administrators and one that requires a few steps you might not be familiar with. In this tutorial, you’re going to learn how to initiate requests to move mailbox from one database to another.
Let’s get started!
Prerequisites
If you’d like to follow along with all examples demoed in this tutorial, be sure you have the following ahead of time:
- Exchange 2013/2016 or 2019 running in an Active Directory environment
- Logged into a domain-joined computer with a domain user having the Mailbox Move and Migration Permission permission
- The Exchange Mailbox Replication Server (MRS) and Exchange Mailbox Replication Proxy services running on a mailbox server.
- An available source and destination mailbox – This tutorial will use a source mailbox database of Ex01-DB and a destination mailbox database of Ex02-DB.
- A mailbox – This tutorial will be moving the User1 user mailbox.
- Exchange Server with Database Availability Groups (DAG) enabled (Optional) – Although optional, this tutorial will have enabled.
Related: How to Set Up Exchange 2019 Database Availability Groups
- You’re logged into the Exchange Admin Center.
Preparing for the User Mailbox Move
Before you move a mailbox, you should first run through few tasks to ensure the mailbox exists on the expected database and the source and destination databases are healthy enough.
Finding the User Mailbox Database
Let’s first find what database the sample mailbox is in. In Exchange admin center:
- Click on Recipients.
- From the Mailboxes tab, locate the designated user User1 and double click on it. A mailbox properties window will appear.

- Click on More Options. From here, you should see the Mailbox Database. This is the database this user mailbox is stored in.

Checking the Health of the Source and Destination Databases
Once you know the database a mailbox is stored on, you should now confirm that both the source and destination databases are healthy. If not, you won’t be able to make the move.
To check the status of both databases, navigate to Server —> Databases. In this view, all the available databases will be listed as you can see below.
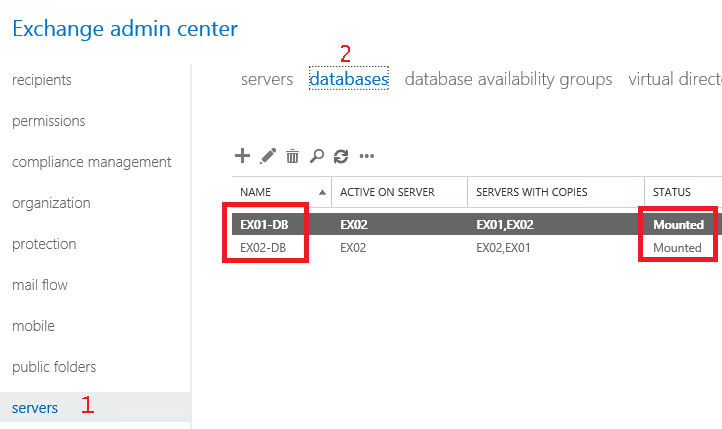
It’s important to ensure the source and destination databases show the status of Mounted.
You should always move mailboxes to a DAG-ready mailbox database for a higher level of availability
In some cases where some nodes are in a DR, the Mailbox Move Operation might consume a lot of bandwidth, which might disturb some services. Consider the size of the mailbox before a move.
Initiating a Move Request
Moving a mailbox in Exchange between databases is called a local move request and it’s time to get started! To do so:
- In the Exchange Admin Center, click on Recipients —> Migration.
- Click on the + symbol to start a new move request.
- From the dropdown menu, select Move to a Different Database as shown below. A new popup window will appear, named New Local Mailbox Move.

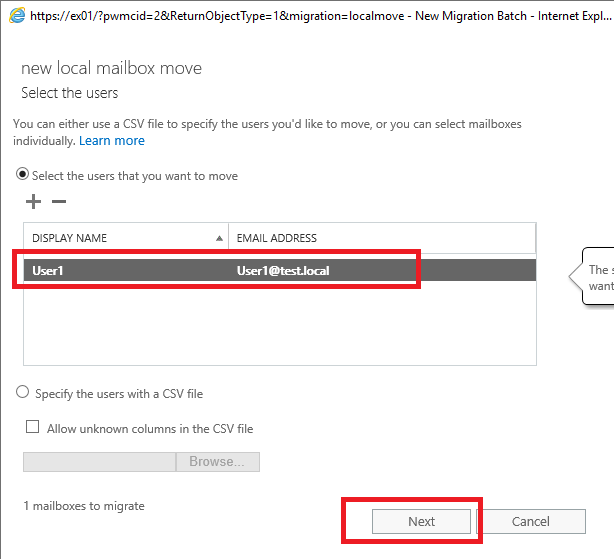
- Click + and add User1. Click on Next.
It’s also possible to add multiple user accounts by holding the CTRL and select the desired users.
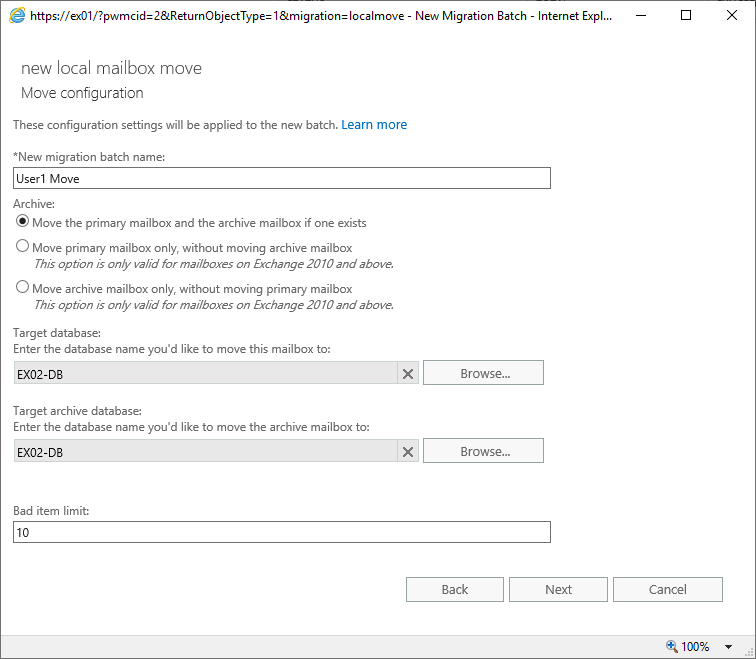
- You’ll be asked for a batch name in the following screenshot. Any name will do but for this tutorial, use User1 Move. Below the name, you’ll see a few options:
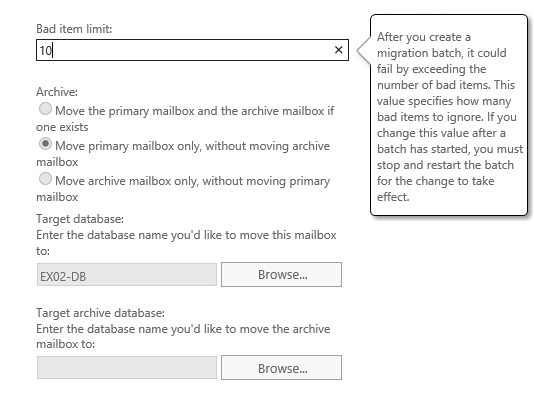
- Move the primary mailbox and the archive mailbox if one exists: This option will move the user mailbox and the archive and place them on the database destination, defined on the Target Database and Target Archive Database.
- Move primary mailbox only, without moving archive mailbox: This option will only move the primary mailbox and won’t move the archive mailbox. This option is good if the primary mailbox database is located on a slow storage tier and should be moved to a faster tier while keeping the archive mailbox only on its current database storage tier.
- Move archive mailbox only, without moving primary mailbox: This option will move only the archive mailbox without moving the primary mailbox. This option is the opposite of Move primary mailbox only, without moving archive mailbox. In this case, the archive mailbox will be moved
Regardless of the selection, the owner of the mailbox being moved can continue accessing all mailbox items and won’t be disturbed. Placing the mailbox database and archive database on a different storage tiers is a recommended approach. Read about storage best practices on Microsoft.com
- In the Target Database, select the mailbox database to move to. In this case, it’s EX02-DB.
- In the Target Archive Database field, select the destination mailbox database which will host the user’s archive mailbox.
- Note the Bad Item Limit. This field is a threshold for how many corrupted items are allowed to be skipped during the move. These items might be Calendar, Email, or a non-item such as permission too. If the number of bad Item exceeds this number, the Local Move Request will fail.
- Click on Next and the Start the Batch window appears.
- You can now select options about the migration batch. These steps are completely up to you with explanations with each option.
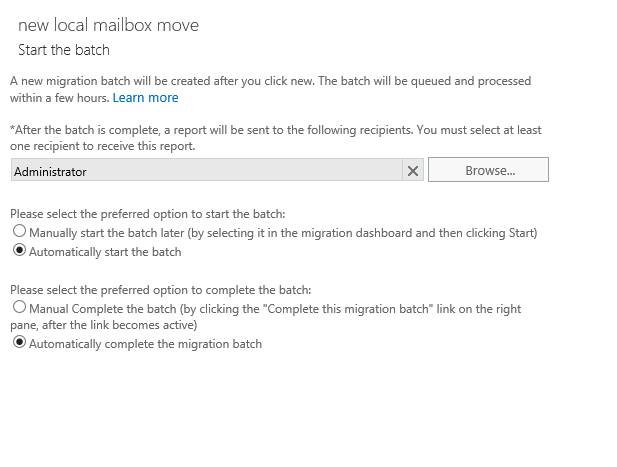
- Click on New to start.
Editing the Local Move Request
Once the move request has started, you can change the Bad item limit.
In the Migration tab, you can see all active move requests. To change the bad item limit, clicking on the pen icon. You’ll then see the familiar mailbox move properties page. Here you can change the Bad item limit as shown below.
Completing a Local Move Request
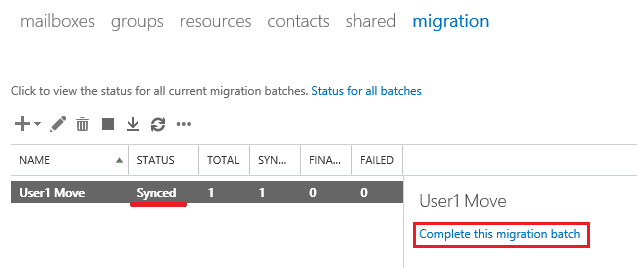
If you chose Manually start the batch later on the migration batch page from earlier and after the migration progress reaches 95%, the migration process will look like below. It will be in a Synced status which indicates it’s almost complete, it’s just waiting on you to complete it.
Viewing the Local Move Request and Getting a Report
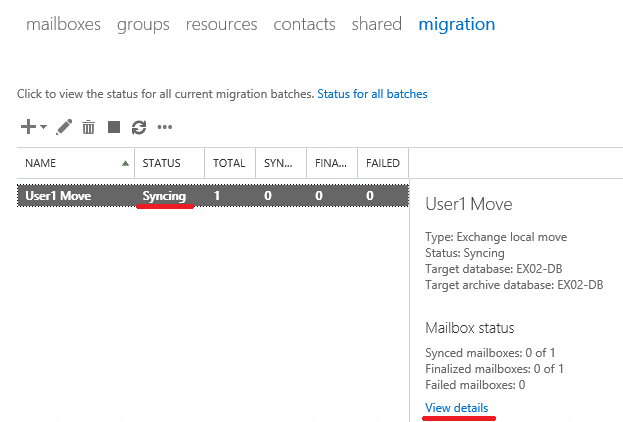
Once the move request is running, you can easily view its progress. On the migration tab, you’ll see all of the active move requests as shown below with a status of Syncing.
For more details on a particular move request, click on the move request and click on the View details link on the right as shown below.
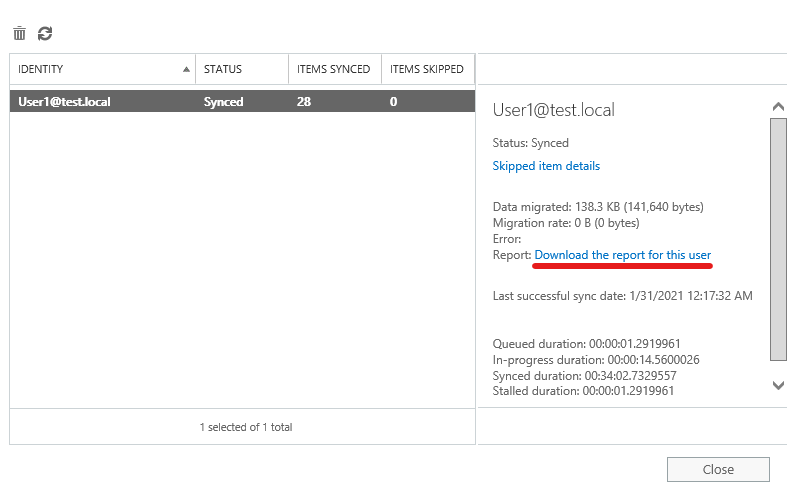
On the details page, you’ll then see more information and a link called Download the report for this user. This report is a text file that contains verbose details on the move request and the reason the move failed, if applicable.
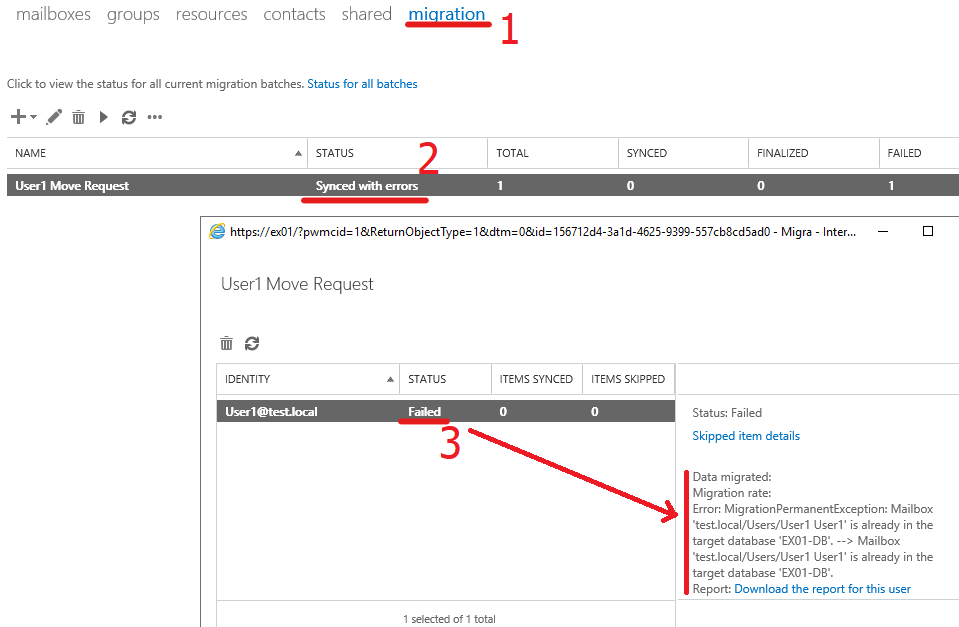
What a Failed Move Looks Like
Sometimes things don’t always go as planned. When that happens, you’ll see a status of Failed for the request as shown below. Here you can see an example of a failed move because the User1 mailbox was already in the target database of EX01-DB.
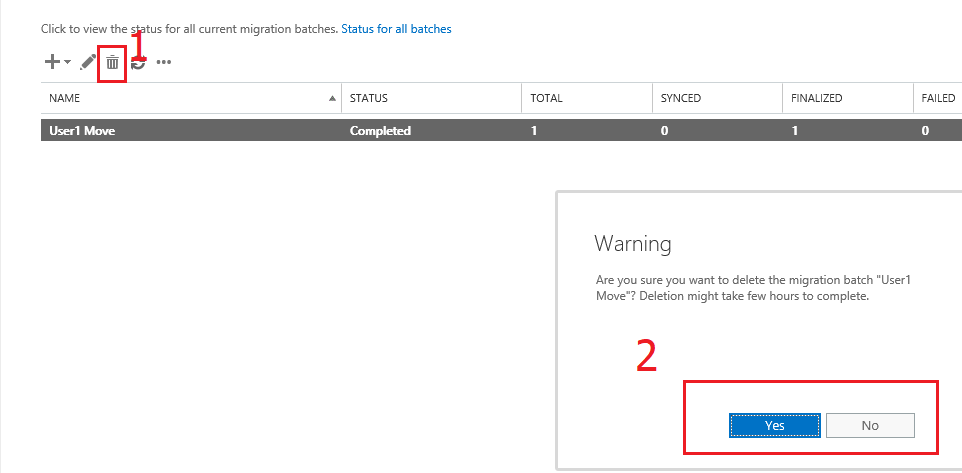
Removing a Local Move Request
After Exchanges completes a move request, you can remove the request from the list. To do so, select the move request from the list on the migration tab and click on the trashcan to remove it.
You can remove an active move request. Exchange Server will not remove any mailbox data, it will only cancel the operation and the mailbox will be hosting database will remain unchanged.


