


The world of relational databases can be quite confusing for those just starting. As you probably know, many different types of databases are out there. Microsoft SQL Server is one of the world’s most popular database management systems.
Installing Microsoft SQL Server Standard Edition on Windows can be a bit daunting for those new to the world of databases. Worry not, though! This guide will walk you through the process step-by-step to get your SQL Server running in no time.
Prerequisites
This tutorial will be a hands-on demonstration. If you’d like to follow along, be sure you have the following.
- A Windows PC (Windows 10 TH1 1507 or greater) or Windows Server (Windows Server 2016 or greater). This guide uses Windows 10, but the process should be similar to other versions of Windows.
- You have SSMS ( SQL Server Management Studio) installed on your computer. This tool provides the management interface for your SQL server. This tutorial uses SMSS 18.12.1.
- Minimum of 10GB of storage space available on your computer.
- Your Microsoft SQL Server Standard Edition 2019 product key. Don’t worry if you haven’t purchased a product key. You can continue installing the evaluation version, which is valid for 60-days.
There is no free direct ISO download link for the SQL Server Standard Edition. You can only download the ISO if you have purchased it, have a Visual Studio Enterprise subscription, or from the Volume Licensing Service Center (VLSC).
You may still download the Microsoft SQL Server Evaluation Edition installation media if you don’t meet the above conditions.
Downloading the Microsoft SQL Server Standard Edition 2019 Installation Media
Note: This section shows the steps to download an evaluation edition of Microsoft SQL Server 2019 valid for 60 days. If you already have the Microsoft SQL Server Standard Edition 2019 ISO, skip this step.
Follow the steps below to download the Microsoft SQL Server Standard Edition 2019 media.
1. Open a web browser and visit the SQL Server Downloads page.
2. Look for the SQL Server on-premises and click Download now.

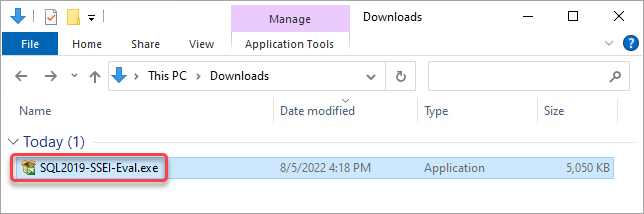
3. Open your File Explorer and locate the file you downloaded. In this example, the filename is SQL2019-SSEI-Eval.exe. Double-click the file to launch it.
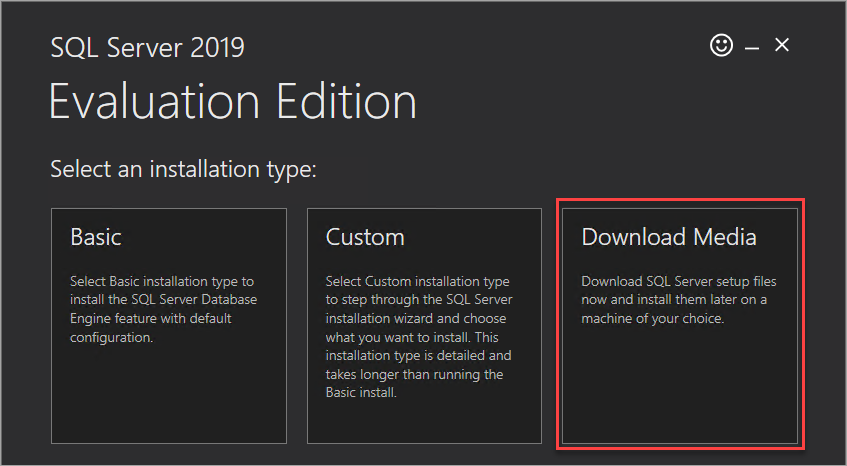
4. Click Download Media on the next page.
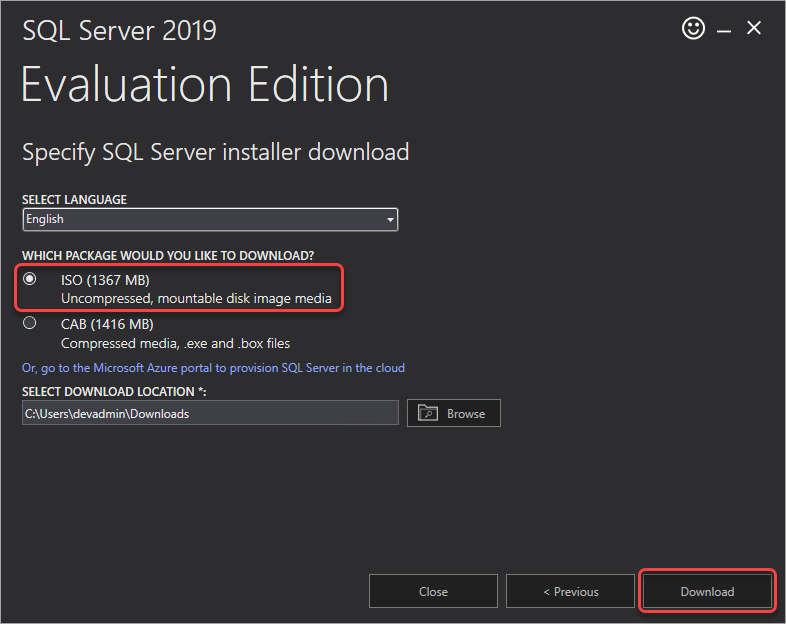
5. On the next page, ensure to select the ISO option and click Download.
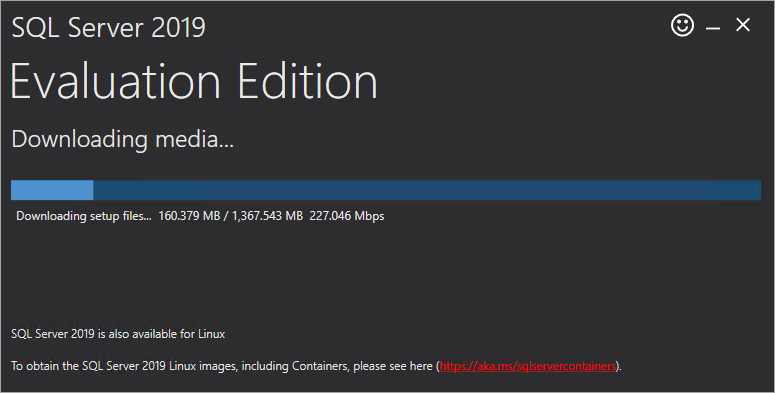
Wait for the download process to finish.
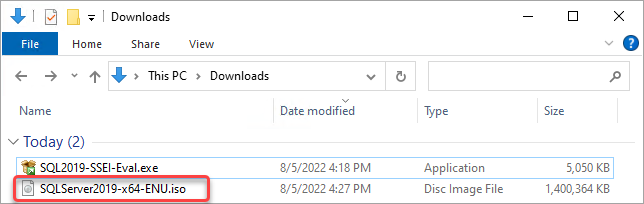
6. After downloading, click the Open folder button to open the folder where the installer saved the ISO.
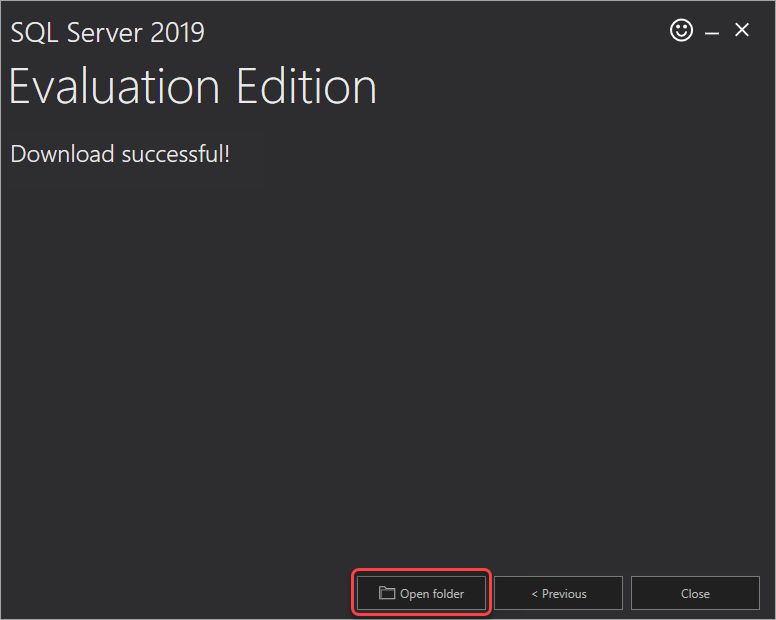
You’ve now downloaded the evaluation ISO media.
Installing Microsoft SQL Server Standard Edition 2019
There are several ways to install the Microsoft SQL Server Standard Edition 2019. The most prominent methods are via the command line and the installation wizard. This tutorial will focus on the latter.
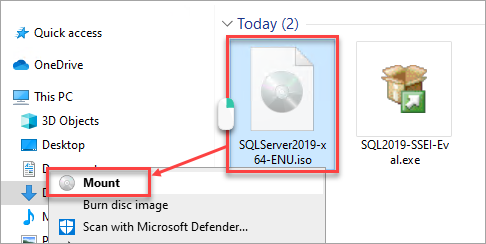
1. Right click on the ISO file and click Mount.
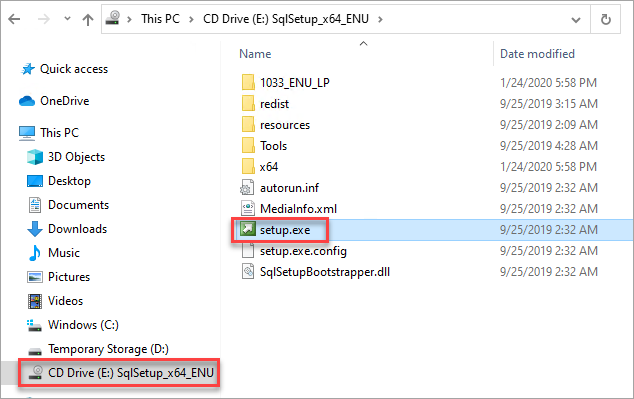
2. Next, double-click on setup.exe to launch the installation wizard.
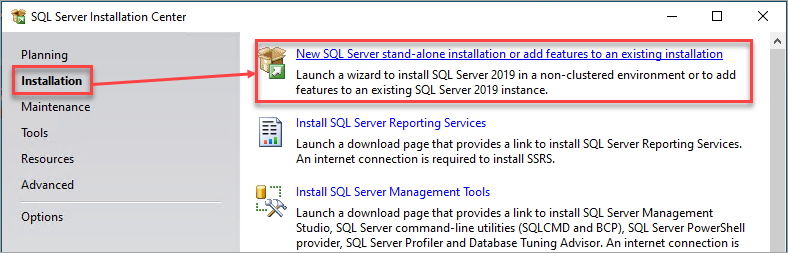
3. The SQL Server Installation Center screen appears. Click Installation on the left pane, click the New SQL Server stand-alone installation, or add features to an existing installation link on the right.
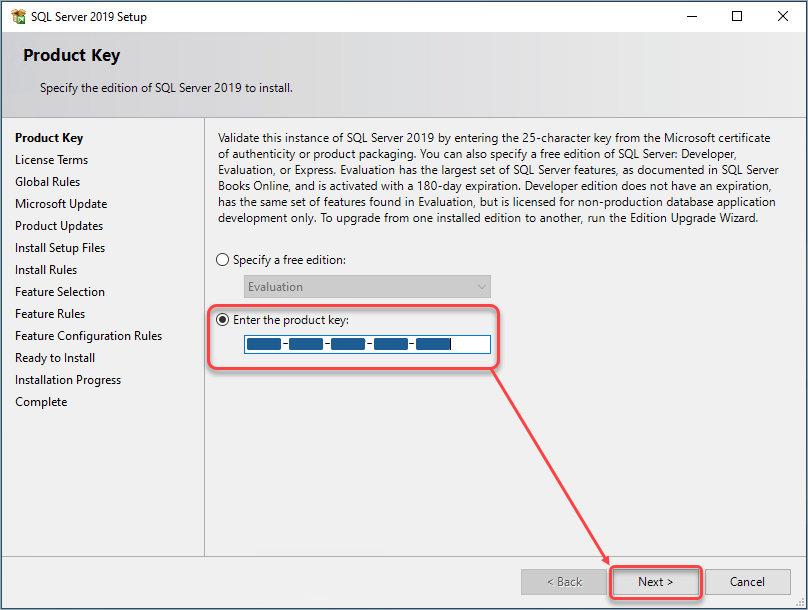
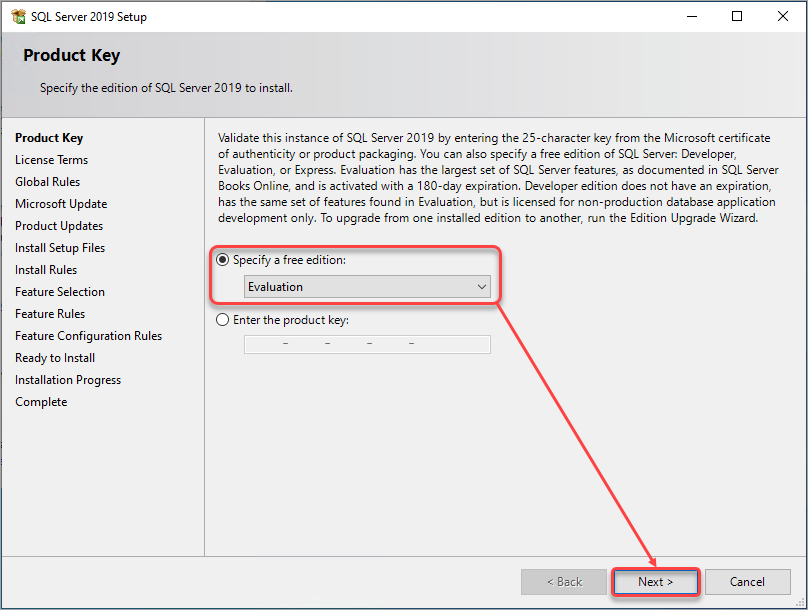
4. The SQL Server Setup Wizard appears. The first page asks you to enter a product key or specify a free edition.
If you have a product key, select the Enter the product key, type your product key, and click Next.
If you don’t have a product key, select the Specify a free edition option, choose Evaluation and click Next.
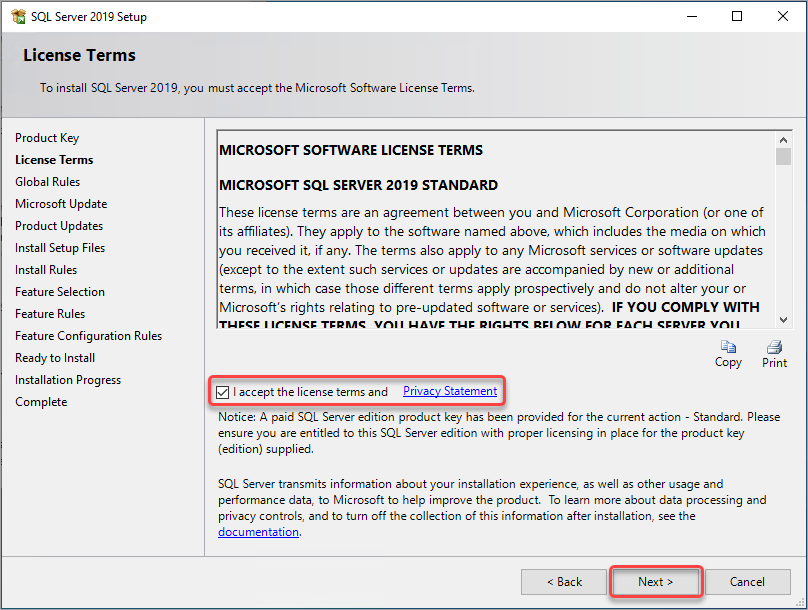
5. Tick the I accept the license terms checkbox and click Next.
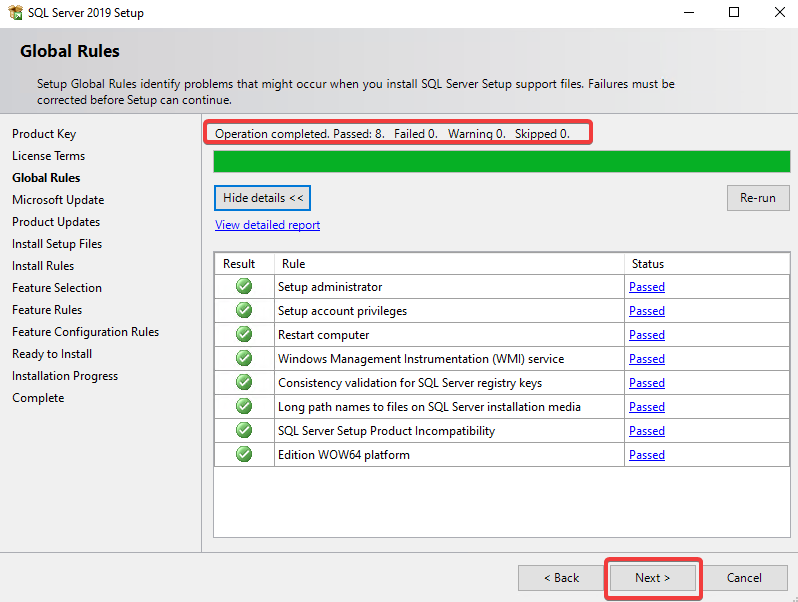
6. The installer tests to check if your computer meets the minimum SQL server requirements. Click Next to continue after the tests. The Wizard will let you know what needs to be fixed before you can continue.
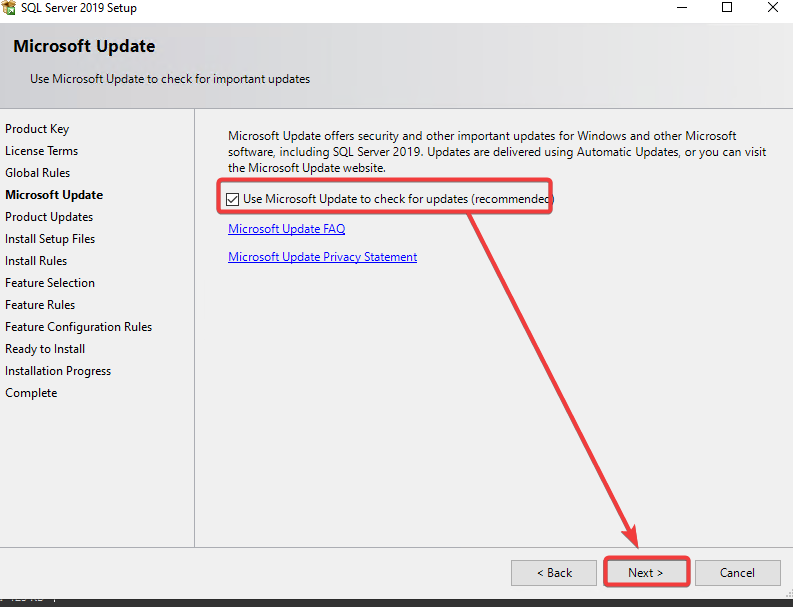
7. Tick the Use Microsoft Update… checkbox and click Next to continue. This step is optional, but enabling Microsoft updates checking ensures you get the latest updates and fixes to your SQL Server.
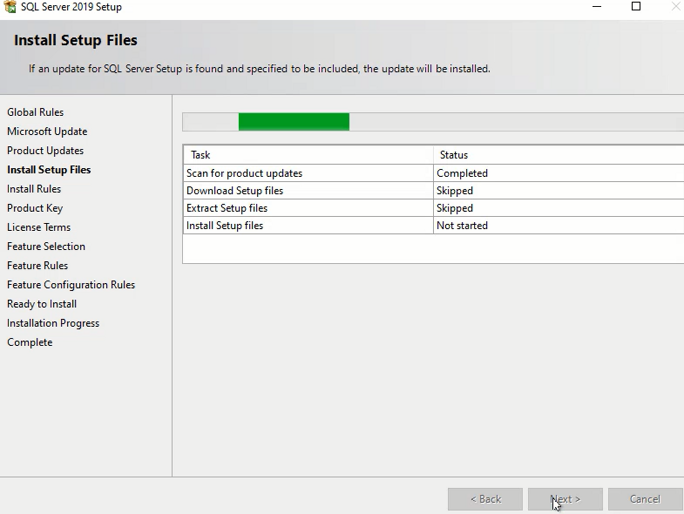
The Wizard scans for product updates and copies and installs the setup files—no need to do anything here and wait for the process to finish.
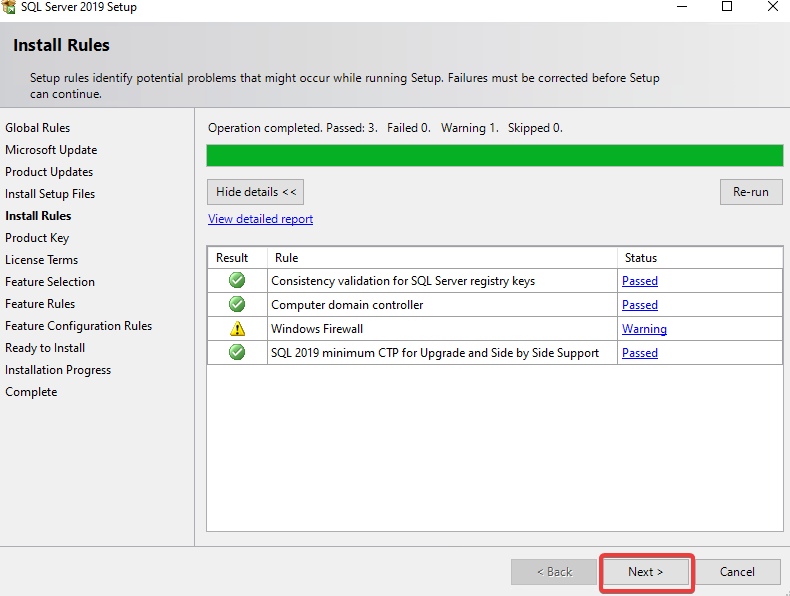
8. The Wizard runs tests to check the rules on your local machine that can affect the installation process. Click Next to continue.
You can safely ignore any Warning status that might appear here. When a Failed status appears, you will need to take appropriate action and Re-Run the test before you can continue.
9. On the Feature Selection, tick the Database Engine Services, which is the core component of SQL Server. Change the installation directories if needed, for example, if you’re installing to another drive, and click Next to continue.

The Wizard runs a set of tests to check the rules for your selected features. After the tests, the Wizard takes you to the next page automatically.
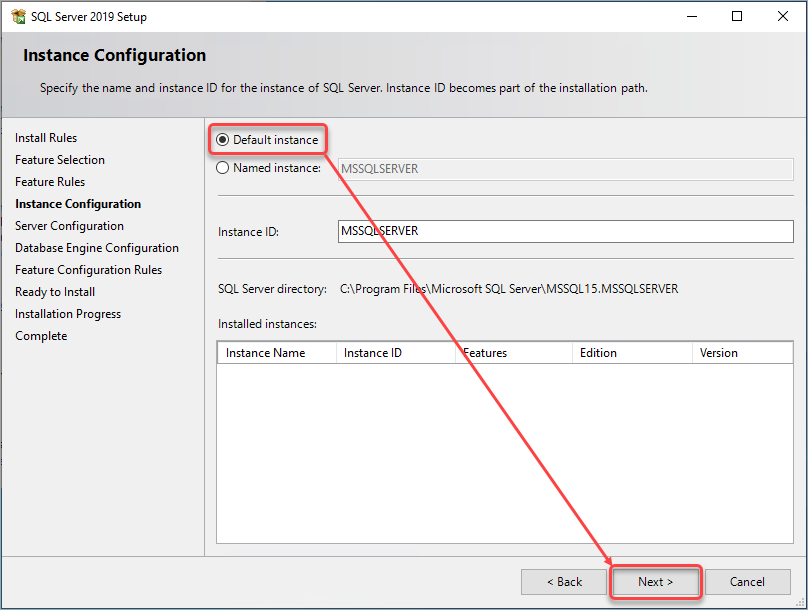
10. On the Instance Configuration, specify the name and location of the instance of the SQL Server you want to create. The default settings are usually fine. Select the Default instance radio button and click Next to continue.
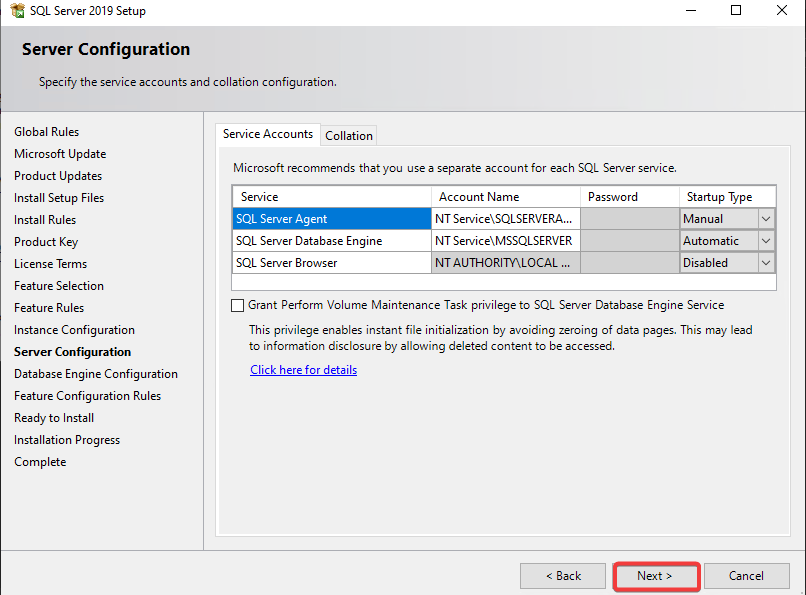
11. Specify the accounts that will run the various SQL Server services on the Server Configuration. The default settings are usually acceptable in most cases; keep the default setting and click Next to continue.
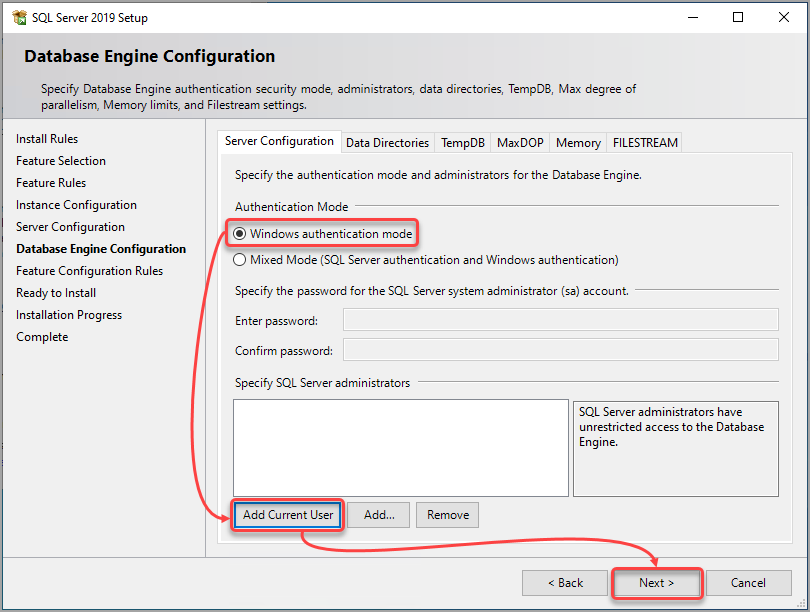
12. On the Database Engine Configuration, specify the security settings for your SQL Server instance. In this example, select Windows Authentication Mode, click Add Current User, and click Next to continue.
This step adds your Windows account to the list of SQL Server administrators and will allow you to log in to SQL Server using your Windows credentials.
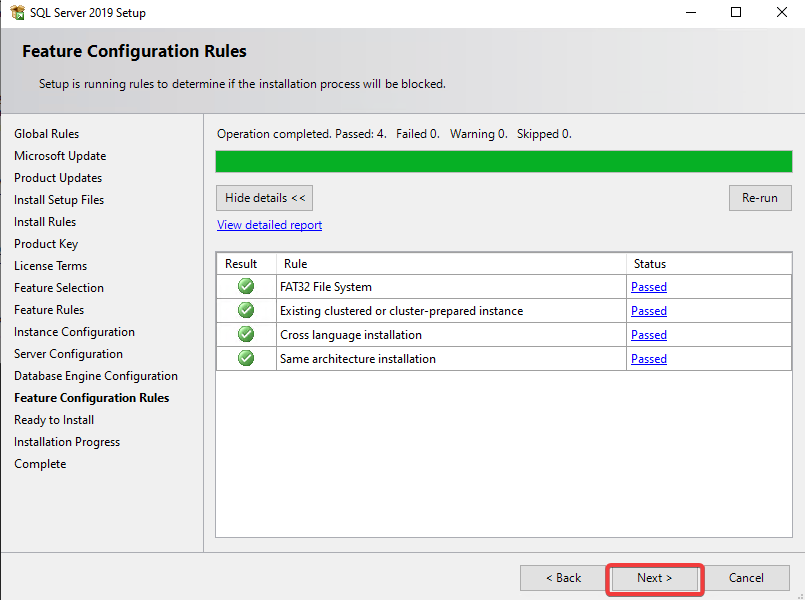
13. The Wizard runs tests to check the rules for the selected configuration. Click Next to continue.
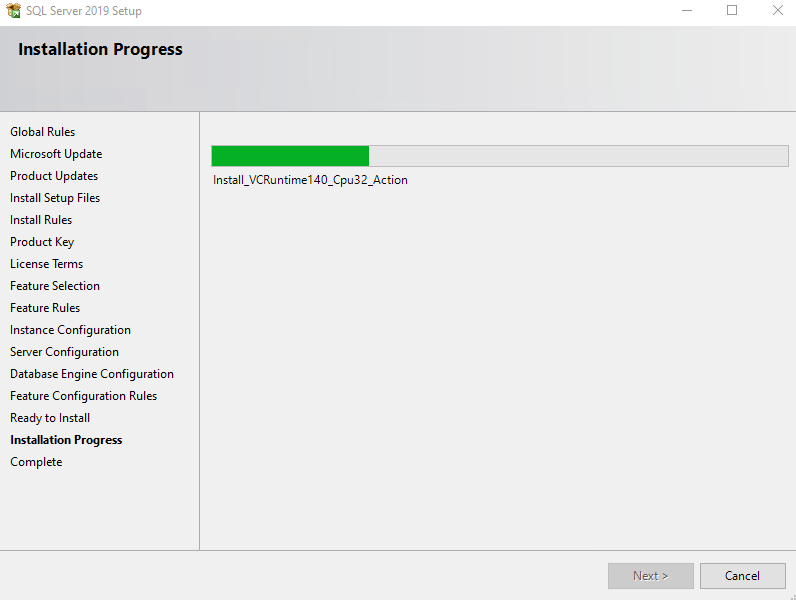
14. Finally, click Install to start the installation process.

The installation process may take several minutes to complete or longer, depending on your computer’s capacity.
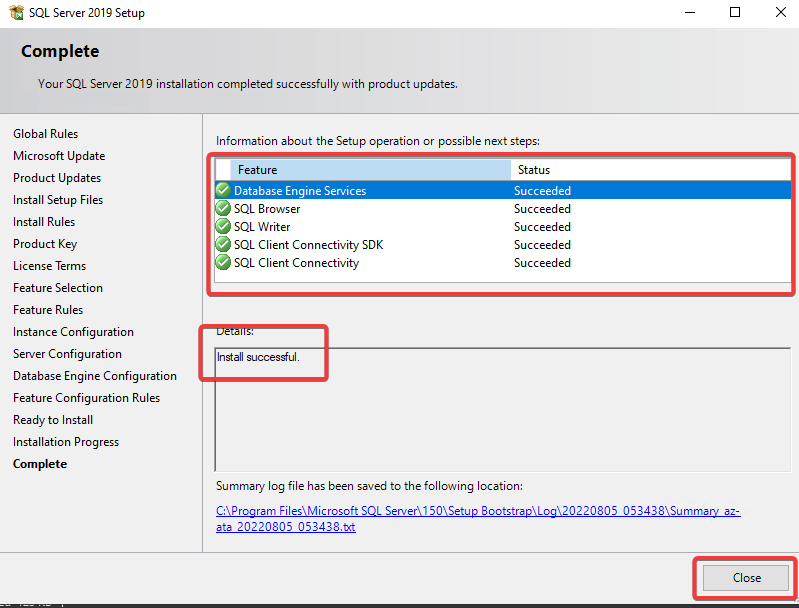
15. Click Close to exit the Wizard once the installation is successfully completed.
Verifying the Microsoft SQL Standard Server Instance
Before attempting to connect to the SQL server, you must ensure that your SQL server instance is running. Follow the below steps to confirm the SQL server status.
Open PowerShell as Administrator and run the following command. This command retrieves services whose names match SQL Server.
Get-Service | Where {$_*.status -eq 'running' -and $_*.DisplayName -match "sql server*"}
You will see the output similar to the one below.

Next, run the below command to verify that the SQL Server error logs containing the SQL Server is now ready for client connections message. This message indicates that the SQL Server is ready to accept connections.
Get-ChildItem -Path "C:\\Program Files\\Microsoft SQL Server\\mssql*" -Recurse -Include Errorlog |select-string "SQL Server is now ready for client connections.”
The result below confirms that the SQL Server is now running.

Connecting to the Server Using SSMS
Now that you have verified that the server is running, it’s time to connect to it using SSMS. SSMS integrates a broad group of script editors and graphical tools that works well for many administrative tasks such as configuring, monitoring, and deploying data changes.
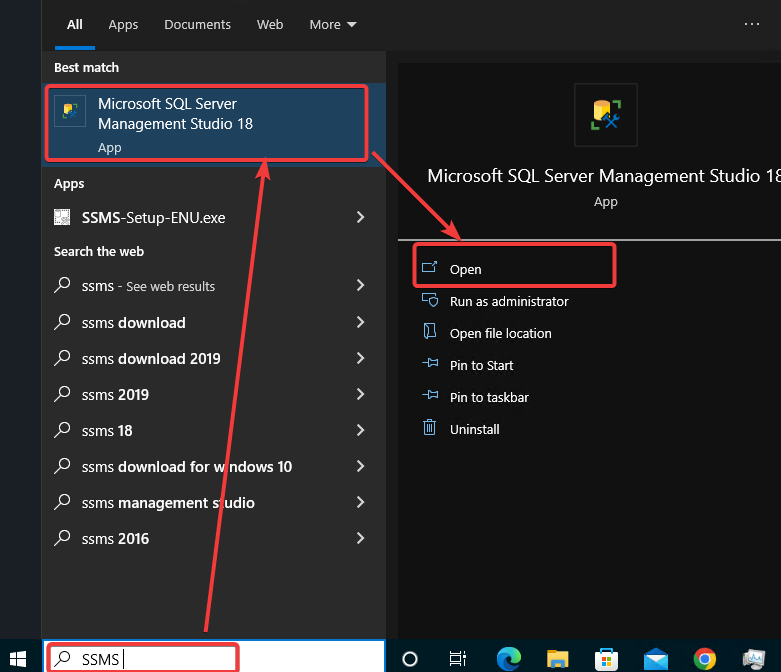
1. Open SSMS by typing SSMS in the search bar and clicking on it when it appears in the results.
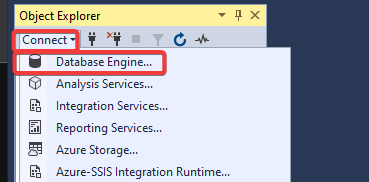
2. To connect to your SQL server instance, click Connect → Database Engine, as shown below.
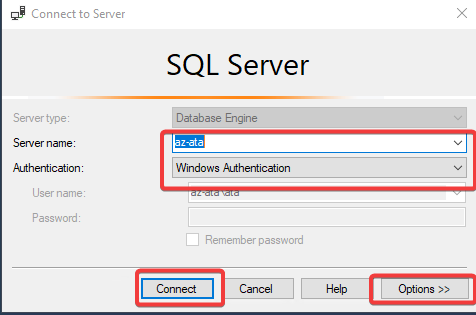
3. On the Connect to Server window:
- Server Name: Enter the SQL server name.
You can enter localhost if you run SSMS on the same computer as the SQL Server instance.
- Authentication: Select Windows Authentication from the dropdown. This type of authentication uses your Windows credentials to log in. This option is secure and recommended for most installations.
- Click Connect to connect to the server.
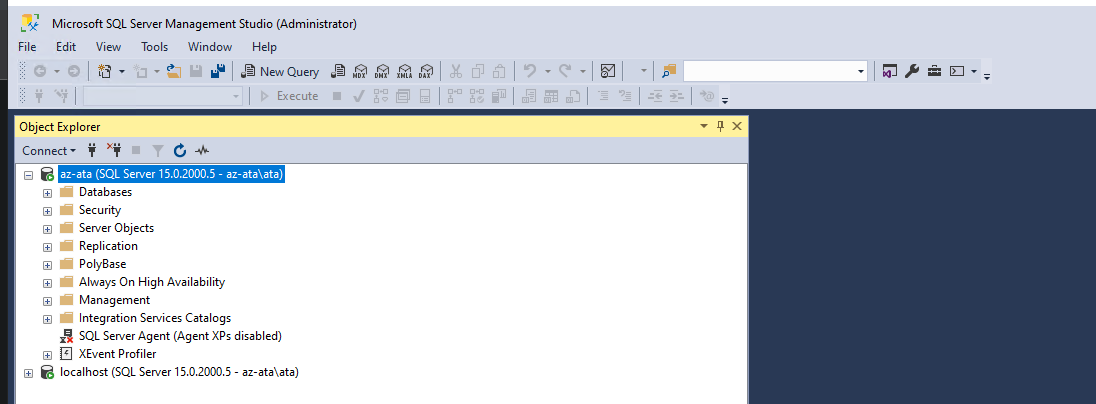
If the connection is successful, you will see the Object Explorer populated with your server and database objects.
Creating Your First Database
You’ve established the connection to the server, and it’s time to create your first database.
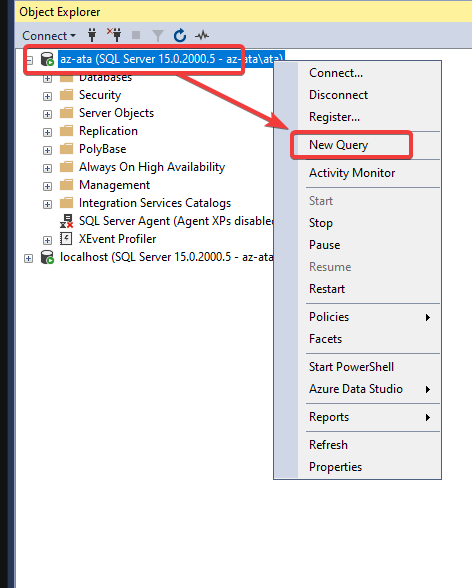
1. To create a database, right-click on the name of your server in the Object Explorer and select New Query, as shown below. This action opens a new query editor.
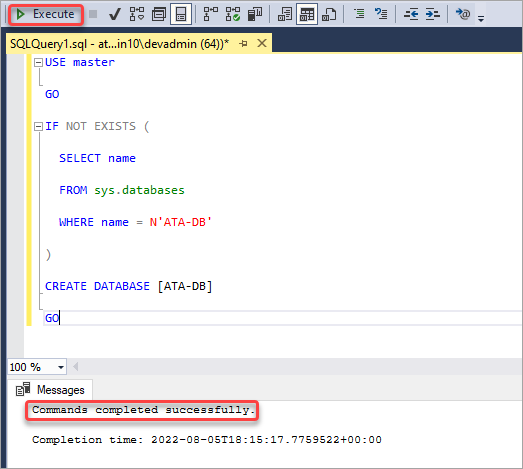
2. Copy and paste the below T-SQL code into the query window and click Execute. This code checks if a database with the name ATA-DB exists on the server. If not, the code creates a new database with that name. You can replace ATA-DB with any name you want for your database.
USE master

GO

IF NOT EXISTS (

  SELECT name

  FROM sys.databases

  WHERE name = N'ATA-DB'

)

CREATE DATABASE [ATA-DB]

GO
3. Now, click Execute to execute the code. The message Commands completed successfully appear when the query execution is successful.
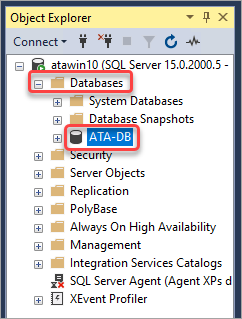
4. Lastly, expand Databases and see the new database as a child item.
Creating a Table and Inserting Data
Your database is useless without data. In this section, you will create a table and insert data into it. A table is a collection of data organized into rows and columns. SQL Server saves data in tables and provides a structure for querying that data for a given app.
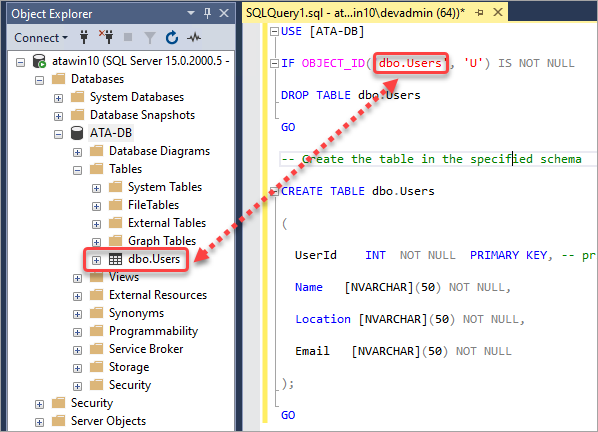
1. Execute the below code in the query window to create a table named Users in your ATA-DB database. This code will check if a table with that name already exists. If it does, the code will drop (delete) that table and create a new one.
The CREATE TABLE statement defines the columns in the table and the data type for each column. In this case, the table has four columns: UserId, Name, Location, and Email. The UserId column will be the primary key column. Each row in the table must have a unique UserId. The other columns can have duplicate values.
USE [ATA-DB]

IF OBJECT_ID('dbo.Users', 'U') IS NOT NULL

DROP TABLE dbo.Users

GO

-- Create the table in the specified schema

CREATE TABLE dbo.Users

(

  UserId    INT  NOT NULL  PRIMARY KEY, -- primary key column

  Name   [NVARCHAR](50) NOT NULL,

  Location [NVARCHAR](50) NOT NULL,

  Email   [NVARCHAR](50) NOT NULL

);

GO
2. Expand the ATA-DB database and click Tables. You will see your Users table, as shown below.
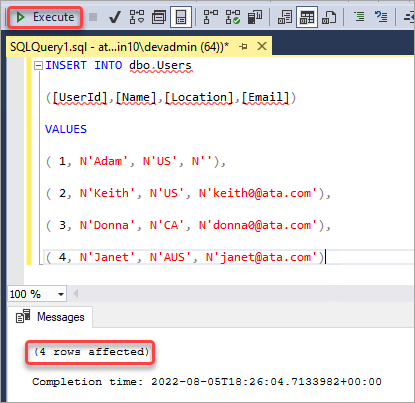
3. Finally, execute the below code to insert data into the table.
This code uses an INSERT INTO statement to add rows of data to the table. The values for each column are inside the VALUES clause. Notice that the code uses N before each string value. This N stands for national character set and ensures that the data is stored correctly in SQL Server.
INSERT INTO dbo.Users

([UserId],[Name],[Location],[Email])

VALUES

( 1, N'Adam', N'US', N''),

( 2, N'Keith', N'US', N'[email protected]'),

( 3, N'Donna', N'CA', N'[email protected]'),

( 4, N'Janet', N'AUS', N'[email protected]')
You will get a status message (4 rows affected), which coincides with the four records you inserted into the table.
Querying Data
Querying is a standard action you’ll do as a database administrator. Running a query means asking questions about the data to get the necessary information.
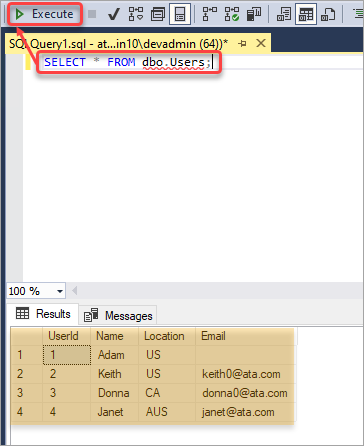
Run the below code to query all the data in the Users table. The SELECT statement queries the data from a database. The asterisk (*) in the code means all columns. This query will return all the columns and rows from the Users table.
SELECT * FROM dbo.Users;
You’ll see the results on the Results pane, as you can see below.
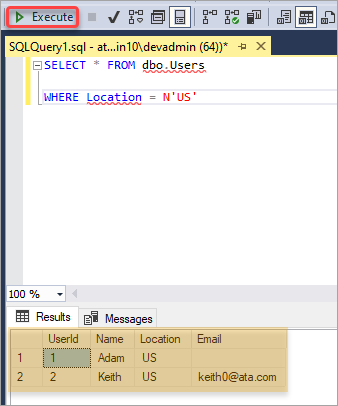
The SQL language is flexible. You can query more specific data according to your needs. For example, the below code returns data where the Location is the US.
The code uses a WHERE clause to specify the condition for the query. In this case, the condition is that the Location must be equal to US.
SELECT * FROM dbo.Users

WHERE Location = N'US'
Conclusion
This article taught you how to install Microsoft SQL Server Standard Edition 2019 on Windows and create a database using T-SQL. You have also learned how to create and insert data into a table. Finally, you have seen how to query data from a database.
SQL Server is a powerful database management system widely used worldwide in businesses of all sizes. In this article, you have taken your first steps in learning how to use SQL Server.
With this newfound knowledge, you can integrate SQL Server into your NodeJS applications for greater control over your data.


