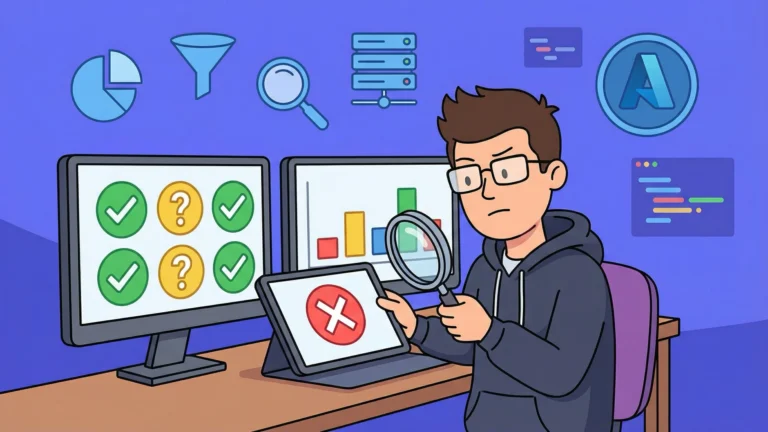

You ran 400 test cases last sprint. Half were manual, half came from pipelines. Now your test manager asks: “What’s our pass rate across everything?” And you’re stuck tabbing between three different screens, exporting CSVs, and hoping the numbers line up. That workflow is about to get a lot simpler.
The Test Run Hub in Azure Test Plans consolidates manual and automated test execution into a single, filterable interface. Instead of bouncing between separate views for pipeline results and manual runs, you get one place to search, filter, triage, and analyze everything your team executes. It also introduces an embedded analytics dashboard that breaks down results across five dimensions—outcome, priority, configuration, failure type, and resolution—so you can drill into failures without leaving the page.
A test run, for the uninitiated, is simply a container that captures the execution of one or more test cases. Whether you kicked off those tests from the Execute tab in a test suite or they ran through an Azure Pipeline, the hub treats them the same way. That unification is the entire point.
Getting to the Test Run Hub
You can query test runs programmatically through the Azure DevOps REST API at GET {org}/{project}/_apis/test/runs. For the web UI, navigate to Test Plans > Runs in your Azure DevOps project. The landing page displays every available test run—manual and automated—with filtering and search built into the top bar. Column settings and filter selections persist across sessions, which means you set up your preferred view once and it stays that way. No more reconfiguring every time you open the page.
You need Basic + Test Plans access (or an equivalent Visual Studio Enterprise/Test Professional subscription) to use the hub. If your team members only have Basic access, they won’t see the Runs option in the sidebar.
Pro Tip: The hub renders up to 5,000 results. If your organization generates more than that in your search window, narrow your filters or use the REST API to pull full datasets for custom reporting.
Filtering That Actually Remembers Your Preferences
The old test views had an annoying habit: every time you navigated away, your filters reset. The new hub fixes that. Your filter selections and column widths persist across sessions until you explicitly clear them.
What You Can Filter
-
Timeline: Defaults to the past seven days, but you can expand the window to search across any 90-day timeframe
-
Run Type: Toggle between Manual and Automated runs
-
Pipeline: Filter by the specific build or release pipeline that generated the results
-
Run State: Narrow results to Completed, Needs Investigation, In Progress, or Aborted
-
Run ID: Search by exact run ID—this overrides all other filters when used
-
Run Title: Matches titles that start with your search term
Filters work additively. Stack them to zero in on exactly the set of runs you care about. Looking for automated runs from your staging pipeline that failed in the last two weeks? Three clicks and you’re there.
Understanding Run States
Every test run lands in one of three states, and recognizing them at a glance saves you from opening runs you don’t need to investigate.
| State | What It Means | When You See It |
|---|---|---|
| Completed | All test cases passed (or some were marked Not Applicable) | Your happy path—nothing to investigate |
| Needs Investigation | One or more cases failed or were blocked | The runs that demand your attention |
| In Progress | One or more cases are paused | Tests that someone started but didn’t finish |
The hub uses color coding—green for completed, red for failures, orange for blocked—so you can scan a list of 50 runs and immediately spot the ones that need attention.
Running Manual Tests Through the Hub
Manual test execution starts from the Execute tab within a test suite, but the results flow directly into the Test Run Hub for tracking and analysis. You have two runner options.
The Web Runner is browser-based and works across platforms—you don’t need to install anything. Open it, step through your test cases, mark each step as passed or failed, and capture screenshots along the way. It handles web application testing without friction.
The Test Runner desktop client collects richer diagnostic data—screen recordings, image action logs, system information, and screen captures. You’ll want this for desktop application testing where browser-based capture isn’t sufficient.
Warning: The Test Runner desktop client for Windows is being retired. Microsoft recommends the web-based runner as its replacement—start transitioning your desktop testing workflows now rather than scrambling when the legacy client stops working.
Run with Options
Select Run with options from the Execute tab dropdown to customize your execution. This dialog lets you pick your runner type, associate a specific build number with the run (critical for traceability between code changes and test results), and configure what diagnostic data gets captured. Every bug filed during execution automatically links to the selected build—no manual association required. You can also accomplish this programmatically through the Test Runs REST API by specifying the build reference and test settings in the request body.
Automated Test Integration
Automated tests from Azure Pipelines show up in the hub automatically when your pipeline uses the Publish Test Results task. The hub supports JUnit, NUnit, XUnit, and other common test result formats—so whatever framework your team settled on during that heated meeting three years ago, it’s covered.
The navigation works both directions. From a pipeline’s logs, you can jump directly to the specific run summary in the Test Run Hub. From the hub, the Pipeline Run column links back to the build or release instance that produced the results. No more copy-pasting run IDs between browser tabs.
You can also trigger automated tests on-demand from the Test Hub itself. Select Run with options, choose Automated tests using release stage, pick your build, and select the release pipeline and stage. This requires a release pipeline configured with the Run automated tests from Test Manager template.
Key Insight: Create a dedicated release pipeline for on-demand test execution. Reusing your production CI/CD pipeline risks accidentally triggering deployments or cluttering your release history with partial test runs. Keep them separate.
The Analytics Dashboard
Open any test run and you’ll find a predefined analytics dashboard embedded directly in the run summary. This is where the hub earns its keep. Instead of exporting data to build charts elsewhere, you get immediate visual breakdowns across five dimensions.
Five Ways to Slice Your Results
-
Outcome: How many tests passed, failed, were blocked, or marked Not Applicable
-
Priority: Distribution across test case priority levels—are your critical tests passing while the minor ones fail, or is it the other way around?
-
Configuration: Results grouped by test environment (Chrome, Edge, Windows 10, etc.)—useful for catching browser-specific or platform-specific failures
-
Failure Type: Categorization into Regression, New Issue, Known Issue, or Unknown
-
Resolution: The triage state of each failure—Investigate, Won’t Fix, or other custom categories
Select any tile in the dashboard to filter the results list below it. Click “Failed” in the Outcome tile and the test case list instantly shows only failures. Click “Chrome” in the Configuration tile and you see only Chrome results. The filtering is immediate and requires zero page reloads.
For automated runs, the default filter on test case results is set to Failed or Aborted. The hub assumes you care most about what broke—a reasonable default that saves you a click on every investigation.
Post-Execution Triage
Failures without context are just noise. The Test Run Hub’s triage workflow turns raw failures into categorized, actionable items.
Classifying Failures
When a test fails, it creates a “Needs Investigation” state. Open the test case result, navigate to the Analysis section, and classify the failure using the Update Analysis workflow.
The default failure categories—Regression, New Issue, Known Issue, Unknown—cover most scenarios. If your team uses different terminology, you can add custom failure types through the Azure DevOps REST API. Once your team consistently categorizes failures, the Failure Type tile in the analytics dashboard actually becomes useful. Without categorization, it’s an empty chart that tells you nothing.
Comments That Pull Their Weight
The hub separates run-level comments from analysis-specific comments. Run comments capture general context (“Executed against staging environment, build 2847”). Analysis comments capture root-cause details for individual failures (“Timeout in the payment API—known issue tracked in Bug #4521”).
Both comment types support Markdown formatting, user tagging with @, work item references with #, and pull request links with !. Use them. A failure with a linked bug and a one-sentence explanation saves the next person ten minutes of investigation.
Linking Work Items
Bugs filed during test execution automatically link to the run. You can also manually link existing work items—bugs, user stories, features—to specific test results. By default, the results view shows directly related work items, but you can add relations to parent requirements for broader traceability.
You can even link work items across different projects in your organization, which matters when your test infrastructure spans multiple Azure DevOps projects.
Data Retention and Performance
High-volume automated testing generates massive datasets, and understanding retention policies prevents unpleasant surprises. Skip this section at your own risk—nothing kills a root cause analysis faster than discovering the data got purged last Tuesday.
Manual test results can be retained for a configurable duration at the project level, independent of build retention. Automated test results follow a different path—by default, they’re retained only as long as the associated build is retained. If your build retention is set to 30 days, your automated test history vanishes after a month unless you configure separate retention rules.
For teams running thousands of automated tests per day, configure your retention policies to keep test results longer than build artifacts. Historical trend data is only valuable if the history actually exists.
The hub UI caps results at 5,000 for performance. For anything beyond that—historical analysis, compliance reporting, Power BI dashboards—use the OData Analytics service or the REST API to extract full datasets.
Making the Hub Work for Your Team
The hub gives you the tools, but consistent team practices determine whether those tools actually help. Here are the habits that separate teams who get value from the hub from teams who just have another tab open.
Adopt a Naming Convention
The Run Title search matches strings starting with your search term. Structure your manual run titles with a consistent format—something like [Environment]-[Scope]-[Date]—so searching for “staging” instantly surfaces every staging run. Without a convention, you’re scrolling through hundreds of generic titles hoping to recognize the one you need.
Categorize Every Failure
Make failure triage a non-negotiable part of your test process. Every run in “Needs Investigation” status should get a Failure Type and Resolution assigned through the Update Analysis dialog. The analytics dashboard is only as useful as the data feeding it. Uncategorized failures make your charts meaningless.
Use Markdown in Comments
Turn your test run comments into a lightweight knowledge base. Link to wiki pages, reference external documentation, tag the developer who owns the failing component. Six months from now, when the same test fails again, that context saves your team from re-investigating from scratch.
Set Automation Status on Test Cases
Keep the Automation Status field accurate on your test cases—Manual, Automated, or Planned. When you link an automated test method to a test case, this status updates automatically. Accurate automation status ensures the Run Type filter in the hub reflects reality, not guesswork.
Permissions You Need
| Permission | What It Controls |
|---|---|
| View test runs | Read-only access to runs and results |
| Create test runs | Executing tests and generating new runs |
| Delete test runs | Removing runs from the hub |
| Manage test plans | Configuring run settings and build associations |
These permissions are configured at the project level. If someone on your team can see Test Plans but not the Runs tab, check their access level first (Basic + Test Plans required), then verify project-level permissions.
Transitioning From the Legacy Test Run Views
The Test Run Hub replaces the legacy Test Run views. If your team has built workflows or documentation around the old interface, update them. The core concepts—runs, results, triage—haven’t changed, but the navigation paths and available features are different enough that muscle memory from the old views won’t transfer cleanly.
Start using the hub for your daily triage workflow. Get comfortable with the persistent filters, explore the analytics dashboard, and update your team’s onboarding docs. The sooner you make the switch, the less painful the transition.


