


Hackers are always out there, looking for their next victims? Are the security of your Linux devices a worrying topic and something you are looking to improve? Look no more. In this article, you will get to know a tool called Lynis by CISOfy that helps you perform vulnerability scans to discover problems before they arise.
You’ll learn how to perform various security auditing scans and dive into the reports that the Lynis tool provides. Read on to start auditing!
Prerequisites
To use Lynis and to run through the demos in this tutorial, be sure you have the following:
- A Debian Linux distribution – This tutorial will use Ubuntu 20.04 LTS.
- Inbound SSH and ICMP traffic allowed from the Lynis host to all the remote auditable hosts.
- A non-root user with
sudoprivileges.
Installing Lynis
Kick this tutorial off by getting some familiarity with Lynis and learning how to install the tool.
Lynis is an open-source security auditing tool for Unix/Linux-like systems and performs in-depth vulnerability scans on almost all UNIX-based systems, providing the following.
- Security auditing: testing SSL certificates, user accounts without passwords, and more.
- System hardening: software patching, network configuration tweaks, file permission inconsistencies.
- Vulnerability scanning: validating packages against known vulnerabilities from databases like CVE.
- Configuration compliance reporting and remediation: validating the current state of endpoints against predefined policy documents.
Lynis only shows you potential security issues; it will not harden machines for you.
Now it is time to install Lynis so that you can start taking advantage of the features. Log into your Ubuntu or Debian-based Linux host as a non-root user with sudo privileges and follow along below to install Lynis.
1. First, update your apt package repositories, so your repositories have the necessary Lynis packages.
You can install Lynis via
apt-get, source tarball, or by cloning the GitHub repository. This tutorial will be installing Lynis viaapt-get.
# Downloads the package lists from the repositories and "updates" them
# to get information on the newest versions of packages and their dependencies
sudo apt-get -y update

# Fetches new versions of packages existing on the machine and handle
# the dependencies so it might remove obsolete packages or add new ones
sudo apt-get -y dist-upgrade

# Download (wget) and install apt-transport-https. The apt-transport-https
# is an APT transport method. This APT transport method allows APT to use
# HTTPS certificates when downloading repository metadata and packages from servers.
sudo apt install apt-transport-https wget -y
Next, download the public key from the official repository signing key via the wget utility and add the key to APT with the apt-key command.
The public key provides a method of verifying that a trusted entity signs the software. In this case, the
apt-getpackage manager in Debian.
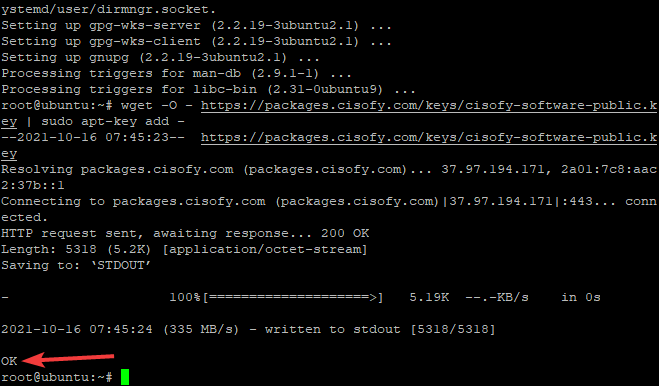
wget -O - https://packages.cisofy.com/keys/cisofy-software-public.key | sudo apt-key add -You will see an OK message, which indicates the key is correctly added.
3. Now, add the Lynis repository (cisofy-lynis) to the system package repository list with the following command
echo "deb https://packages.cisofy.com/community/lynis/deb/ stable main" | sudo tee /etc/apt/sources.list.d/cisofy-lynis.list
4. Next, run the commands below to update the package list and install Lynis with the apt package manager.
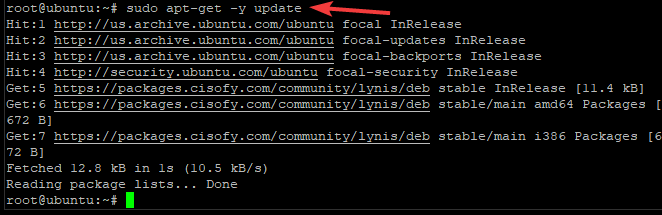
sudo apt-get -y update # Update the package list
sudo apt install lynis -y # Install Lynis

Finally, run the command below to check the version of Lynis installed. As you can see below, the command returns the Lynis version installed.
As of writing, the current stable/latest released version of Lynis is 3.0.6.
sudo lynis show versionAs you can see below, the command returns the Lynis version installed.

lynis show version Checking Lynis Commands and Settings
With Lynis installed, it is time to check some of its commands and configuration options. Run the show command with the commands argument to see all of the various Lynis commands.
sudo lynis show commands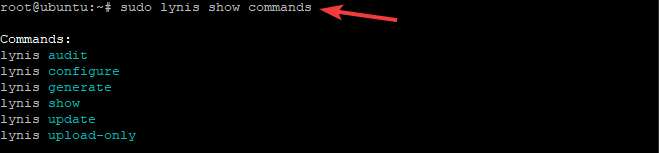
Lynis has various settings to customize its behavior. Run lynis show settings to inspect the multiple settings defined in the Lynis configuration file. The configuration file is generally located at the /etc/audit directory.
When Lynis runs, it looks for the configuration file in the /etc/audit directory first. Failing to find it, it will attempt to find it in your home directory.
sudo lynis show settings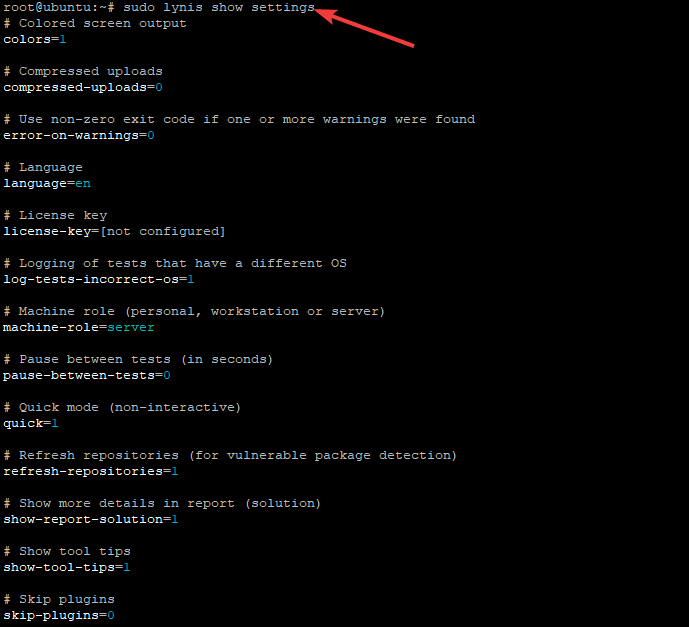
For a complete list of Lynis options and syntax, run the
man lyniscommand.
Invoking an Audit
Lynis is an auditing tool, so let’s run your first security audit. When you run a security audit, Lynis checks the system and software configuration for any security issues.
Run the lynis audit system command as seen below to perform an audit on your system.
Running Lynis as root (or another user with full rights) is recommended to test everything available on your system. The scan will offer recommendations for improvement and show which parts of your system lack security hardening.
sudo lynis audit system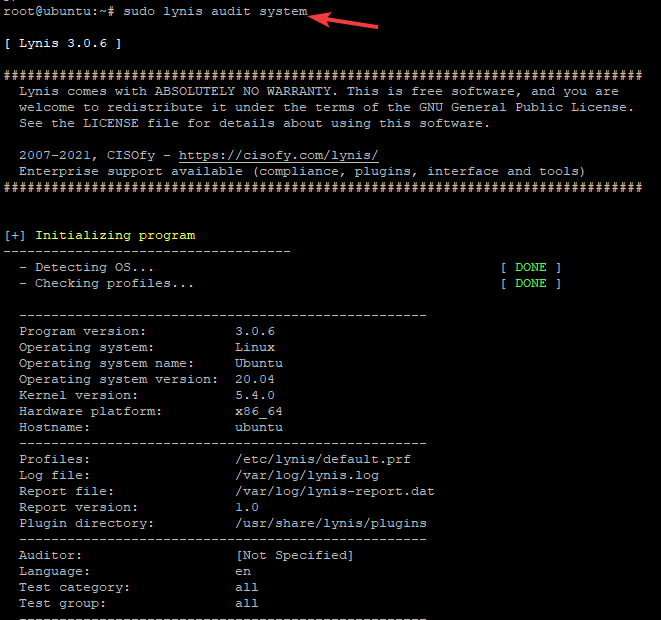
The result of the command is an extensive report, which you will see broken down in the following sections. So, keep in mind that the next screenshots are the result of running the
lynis audit systemreport.
Understanding the Audit Report
The system audit provides an extensive report of various areas, including:
- Directories and files related to logging and auditing
- Services like the SSH daemon, Apache web server, MySQL database, and others
- Security aspects like password strength, file system quotas, and memory usage (heap)
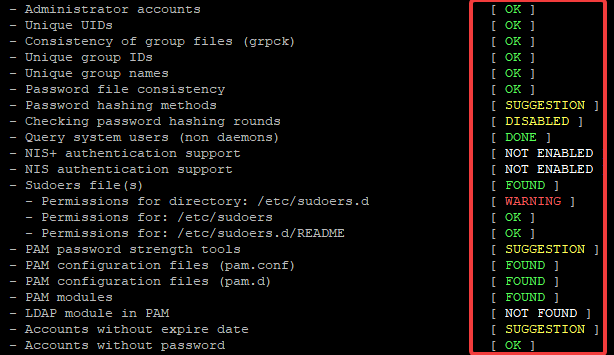
To categorize severity, Lynis has several status states and also color-coded results indicating the severity of each issue found.
- OK – All required tests were completed successfully.
- WARNING – A problem that should be checked and fixed when possible.
- FAIL – A test failed that may affect system security.
- FOUND – Lynis found the requested object, usually used for locating specific files.
- NOT FOUND – Lynis was unable to locate the requested object.
- SUGGESTION – A non-critical suggestion that should be evaluated for action.
- DONE – Typically used to indicate that a task is done, such as querying data.
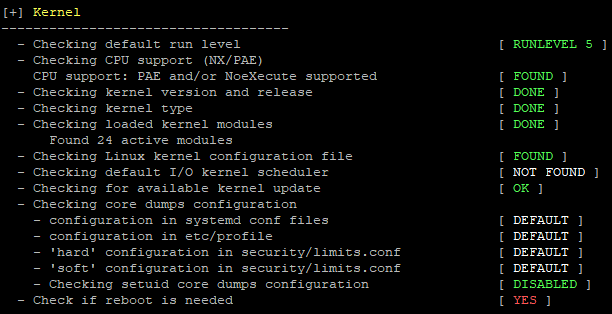
Understanding “Kernel” Results
Kernel audit support is enabled by default on most modern Linux distributions. Lynis checks if you are using kernel security features such as SELinux, AppArmor, or GRSecurity.
Evaluating “Memory and Processes” Results
Lynis performs many tests to check how much memory is in use and other related process issues. For example, when an application uses too much memory, it can become a Denial of Service (DoS) vector. Lynis checks if services such as like httpd or sshd are leaking information.

Verifying “Software: firewalls” Results
In this test, Lynis checks the iptables kernel module. It can check if your firewall settings are sane for software firewalls as well, including FireHOL, FireQoS, IPCop, IPTables (Netfilter), Kerio Control.

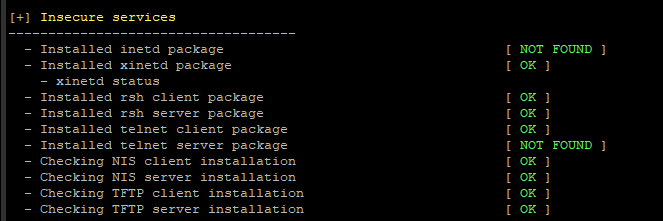
Evaluating “Insecure services” Results
Lynis also scans for insecure services like FTP and Telnet. These services could lead to a significant security risk, especially the first two if they are exposed via an Internet-facing system.
Furthermore, Lynis will also perform checks for services you may want to improve security on, such as SSH port settings, BIND name server settings, and much more.
Finding Lynis’ Files
The report is generated on the console, but Lynis also creates a log file and a report file. The report path is /var/log/lynis-report.dat. The more granular log report, with test and debugging log information, is in /var/log/lynis.log.
The information log file is logged after every scan, while the information for the report file is only saved after the audit finishes.
The information that goes into the log file :
- Audit information: found configuration items, suggestions for improvement, and security risks.
- Test (and other) result: type of check and the reason for performing a test.
- Debugging information: used to look into problems or how something worked. The details may include complete command lines or additional valuable information for troubleshooting issues.
Inspecting Specific Tests from Warnings and Suggestions
Now that you have generated a report, the next step is to look into how to resolve the vulnerabilities that Lynis reports.
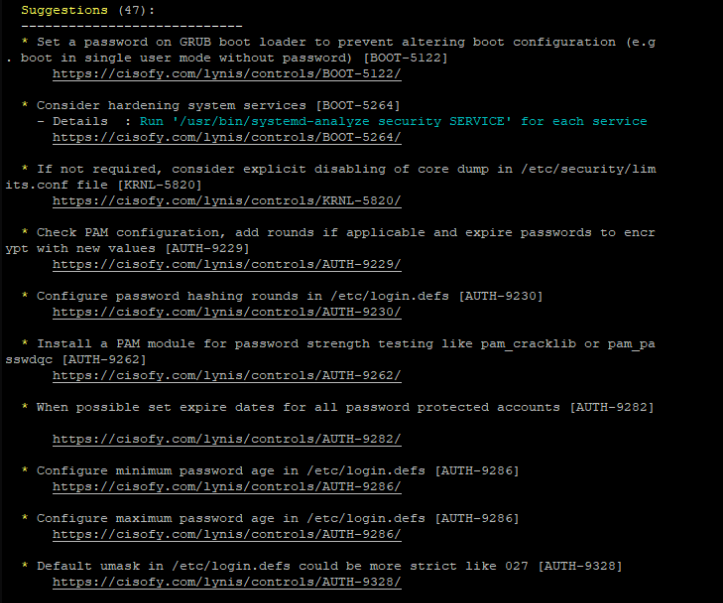
When Lynis finishes a scan, it provides you with a list of results. Some of those results might be warnings or suggestions. Each warning or suggestion has a short explanation and a link to the control group, where you can find more information on the message and how to fix the warnings.
For example, the warning below tells you Lynis performed a system scan, and you should reboot the host due to a probable kernel upgrade. You’ll see that each warning has a test ID associated with it. In this case, the ID is KRL-5830. You can find more about the warning through its ID.

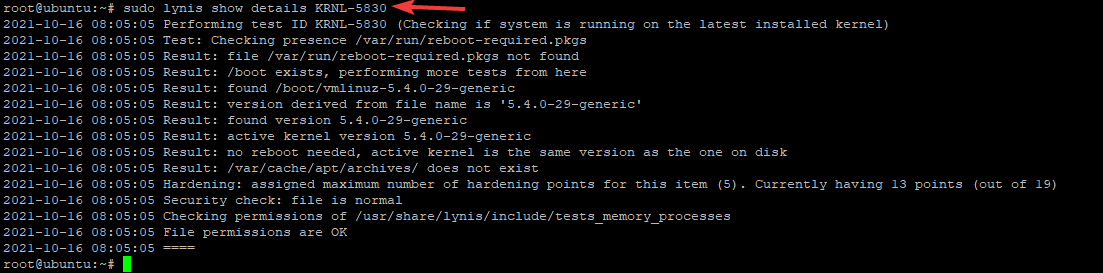
Let’s dig into a specific warning. To do that, run the show details command providing the test ID you want to know more about. The same KRL-5830 as before, for example. The full command follows.
sudo lynis show details KRNL-5830Once you run the show details command, Lynis will provide a verbose log of what it did and how it came up with the warning, as shown below.
You can find the test ID for suggestions precisely the same as you can with warnings.
Customizing Lynis Scan Profiles
To group tests, allowing you to enable or disable tests define the scope of tests, and more, Lynis has scan profiles stored in the /etc/lynis directory. Scan profiles have various configurations, providing a handy way to manage similar tests in bulk rather than worrying about managing them one at a time.
Lynis only comes with one scan profile called default by default, as you can see by running the show profiles command. The default profile is as generic as possible.
sudo lynis show profiles 
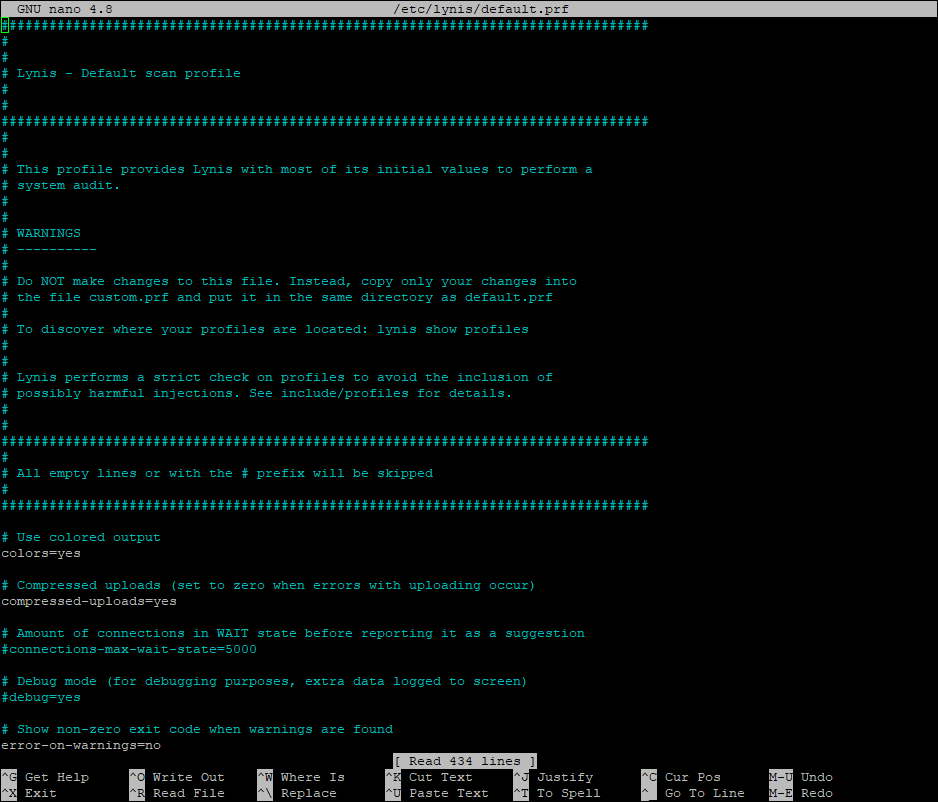
If you’d prefer not to run all tests, modify the output in some way or change the behavior in any way, you can create or edit profiles. For example, open the /etc/lynis/default.prf scan profile in your favorite editor. You can see below the contents of the default scan profile.
You can either modify the default scan profile or create your own. For example, perhaps you have some tests you’d like to skip. You can tell Lynis which tests to skip by setting the skip-test attribute in a scan profile.
To create a custom profile, copy the default.prf scan profile and call it something specific like custom.prf. Open the scan profile in a text editor and add the following attributes. Lynis will always skip the two tests whose IDs you specify below when you invoke this scan profile.
# Skip checking password set for single mode.

skip-test=AUTH-9308

# Skip checking the PKGS-7392 package.

skip-test=PKGS-7392
You can have many custom profiles as you want. But only one custom profile can be running at a time.
Creating a Custom Profile
You may want to customize your Lynis tests and to do so you can create a custom profile. To learn how, follow along below.
1. Create a custom.prf file in the /etc/lynis/ directory using the nano editor.
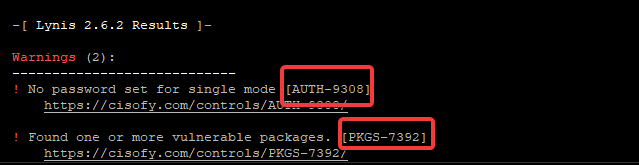
sudo nano /etc/lynis/custom.prf2. Populate the file custom.prf. In this example, you will try to skip two warnings: AUTH-9308 and PKGS-7392.
To skip the tests, add the following content to the file.
# Skip checking password set for single mode.

skip-test=AUTH-9308

# Skip checking the PKGS-7392 package.

skip-test=PKGS-7392
3. Save and exit the file by pressing Ctrl + O then Ctrl + X when done. The next time you run a Lynis audit check, it will skip the specified test id as shown below.
sudo lynis audit systemAs you can see, the two warnings above are gone.

Interpreting the Lynis Hardening Index
When a scan finishes, Lynis will provide you with a summary. In that summary, you find an interesting metric called the Hardening Index. The Hardening Index is a number that is calculated based on the overall threat to the host scanned based on the latest scan.
The Hardening index gives you an indication of how secure your system is. If, for example, your system has more critical vulnerabilities than typical, the index will be lower. When you fix warnings or implement suggestions, this Hardening Index will increase accordingly.
The output below tells you the number of performed tests by Lynis and the Hardening index values found by running this audit tool. The number 239 means that it performed 239 tests, and the score is a 60% of the way to being hardened.

Conclusion
By now, you should have a solid understanding of the Lynis vulnerability scanning tool and how it helps you keep your hosts safe. Using Lynis, you can now periodically scan your systems for the latest vulnerabilities and keep your hosts secure!.
If you followed this tutorial, are you happy with the Hardening index you got back? What changes are you going to do to improve it?


