


Are you running out of Jenkins executors or stuck waiting for queued jobs for your Jenkins Windows jobs? If so, you need to set up more Jenkins agents.
Not a reader? Watch this related video tutorial!In this tutorial, you’ll learn how to add a Jenkins agent Windows node to support an ever-growing resource need in your software build environment!
Prerequisites
To follow along with this article, you will need the following.
- Working installation of a Jenkins controller installation equal to or greater than 2.176.1, and in this article, the controller is referred to as the master node.
- Any supported Windows OS installation which will be referred to as the Jenkins agent node.
What are Jenkins Agents and the Jenkins Agent Controller?
A core component of Jenkins is the job. Jobs are instances of build automation that run a defined set of tasks. Supporting different job configurations requires an automation system to distribute build jobs among different nodes, which is simply an environment containing a Jenkins agent or controller.
Jenkins agents run on a variety of different environments such as physical machines, virtual machines, Kubernetes clusters, and Docker images. A Jenkins agent is an executable, residing on a node, that is tasked by the controller to run a job.
Managing the different Jenkins agents is the job of the agent controller, also known as the master node. In a single Jenkins node configuration, the controller, can also act as both a Jenkin agent and run build jobs. As environments become more complex, this configuration becomes limiting.
Preventing the Controller Master Node from Running Jobs
Before you can add an additional Jenkins agent, you must first remove the master node from the build agent pool. Removing the master node from this pool ensures that the controller has adequate resources to coordinate build jobs. Below you will walk through the necessary settings to prevent the master node from running a job.
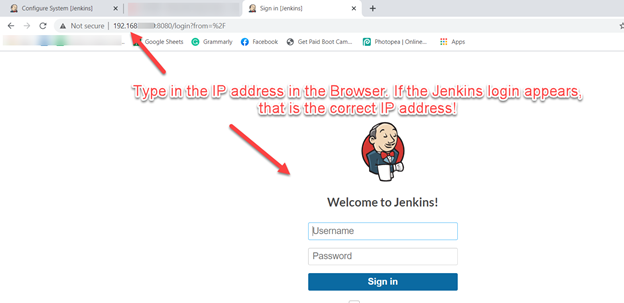
- Navigate to the Jenkins user interface via a browser. In this tutorial, the Jenkins Controller uses the
192.168.x.x:8080address.
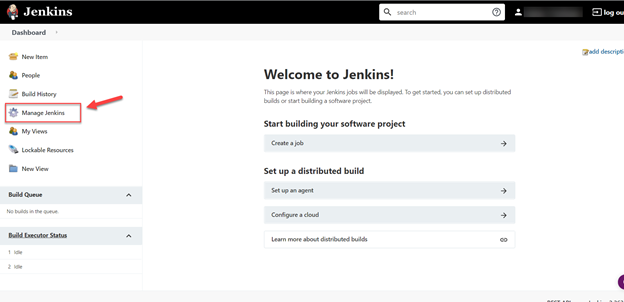
2. Once the Jenkins Dashboard appears, click the Manage Jenkins link.
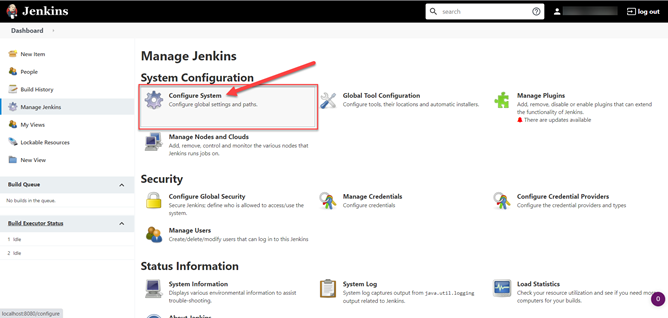
3. Next, click the Configure System link from within the System Configuration section.
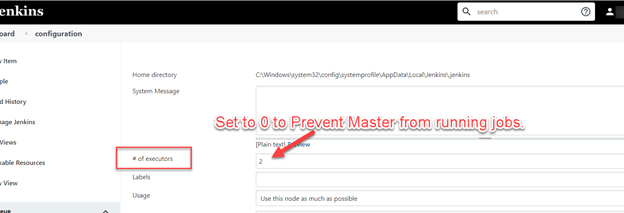
4. Scroll down the page to locate the setting, # of executors, and set the value to 0. This setting forces the master node, or controller, not to run any build jobs.
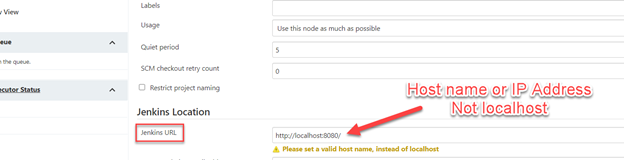
0.5. On the same page, locate the Jenkins URL. Change the URL to the IP address and port as used in the browser, instead of localhost:8080.
An agent node may attempt to use
localhostinstead of the proper IP when communicating to the controller, if incorrectly set. With the proper IP address configured, you can avoid future agent communication problems!
6. Click Save to confirm and apply the updated settings.
Setting the TCP Port for Inbound Agents
To inform Windows Jenkins Agent nodes how best to launch the job service and communicate back to the controller, you must configure the TCP inbound port settings. Defining the TCP inbound port settings ensures that the Jenkins agent knows how to connect to the Jenkins controller via the network.
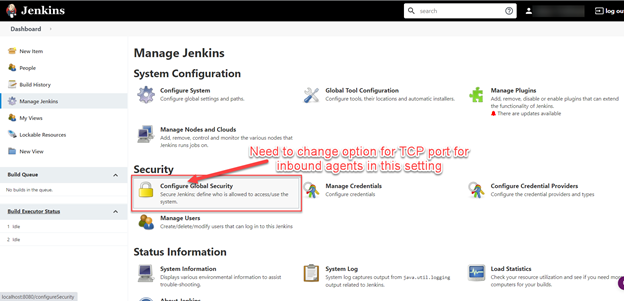
- Once again, navigate to the Manage Jenkins configuration page from the Jenkins dashboard.
2. As shown below, click on the Configure Global Security section to locate the TCP port options.
3. Scroll down to locate the Agents section and the TCP port for inbound agents. Change the option from Disable to Random. With the random setting, Jenkins selects a random available port number and shares that port number with an agent during their initial connection to the Jenkins HTTP port.
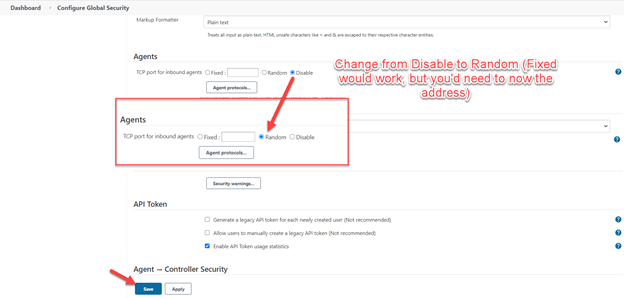
4. Finally, click the Save button apply the updated setting.
Create a New Jenkins Agent Node on the Jenkins Controller
With all the appropriate settings configured, it is time to create your new Jenkins Agent node. Prior to this, create the working directory on the Windows node. On the Windows node, create the directory C:\Jenkins.
Once the working directory has been created, follow the below steps to configure your new node!
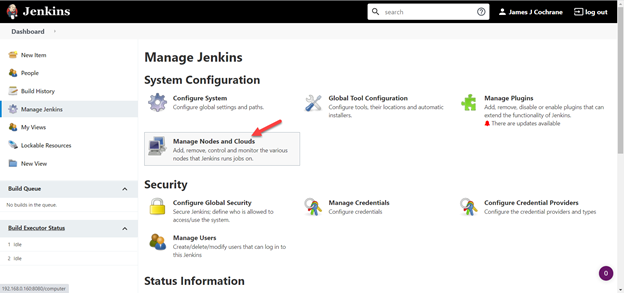
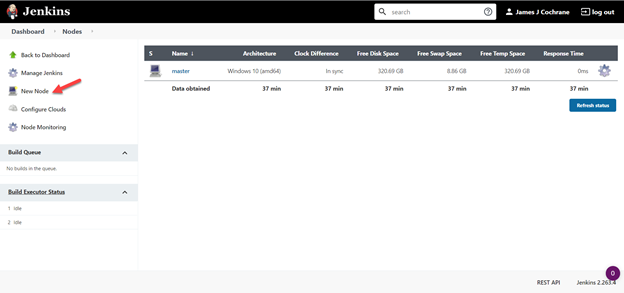
- From the Jenkins dashboard, click the Manage Nodes and Clouds link.
2. Click the New Node link on the left-hand menu. With only the controller as an agent, the Nodes list will only show the master node at first.
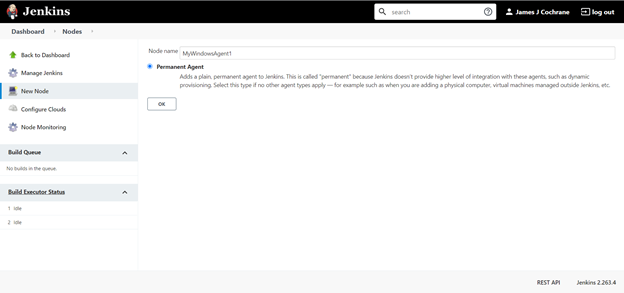
3. Enter a Node name, which is MyWindowsAgent1 for this tutorial but you may use a more appropriate identifier for your environment, and select the option for Permanent Agent. With additional agents, you may see a Copy Existing Node option as well. Finally, click the Ok button.
4. Configure the new agent with the below settings. The green highlighted options are defaults.
- # of executors: Typically corresponds to the # of agent cores. A handy PowerShell snippet to find just that is below.
Get-CimInstance -ClassName Win32_Processor | Select-Object -Property Number*- Remote Work Directory: C:\Jenkins
- Launch method: Launch agent by connecting it to the master.
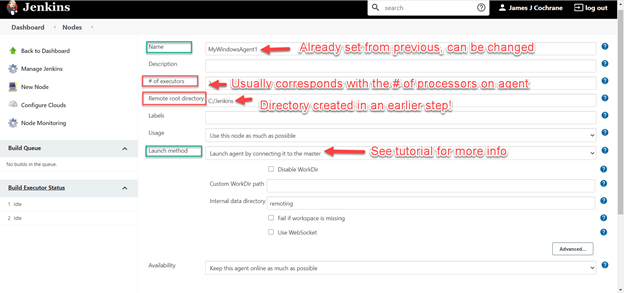
In a recent solutions article from Cloudbees.com, the agent launch options have changed in versions after 2.176.1. The “Launch agent via Web Start” is now “Launch agent by connecting to the master”.
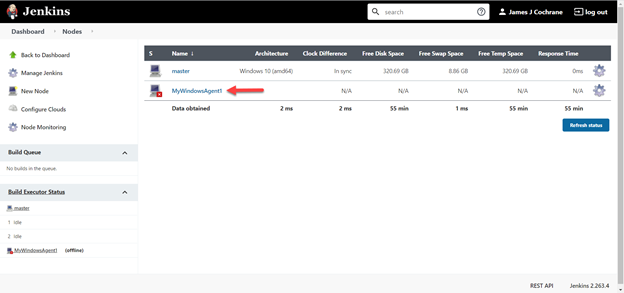
5. Click the Save button and navigate to the Node list screen where the new Windows Jenkins Agent node will be shown.
6. Click on the name of the new node, MyWindowsAgent1 to retrieve the Agent installation links.
7. Now open a remote desktop (RDP) connection to the Windows node where the Jenkins agent will be hosted.
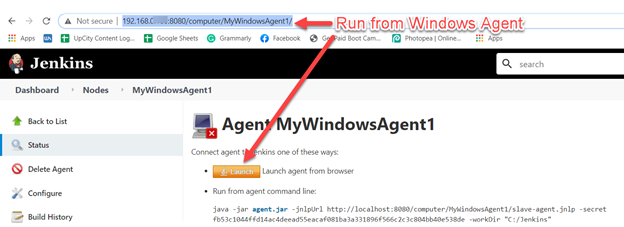
8. Navigate to http://controllerip:port/computer/nodename, via a browser, on the soon-to-be Windows agent.
9. Click on the Launch button to download the agent installer and begin the Jenkins agent installation.
Next Steps
There are many ways to utilize your new-found agents. Between running PowerShell scripts in Jenkins to running Jenkins in Docker you will find that there are many ways to automate your build environment!


