

Are you having trouble switching between different versions of Node.js as your build your project? Let Node Version Manager (NVM) save the day. Install NVM on Windows and save yourself the trouble of managing multiple Node.js versions.
Installing and using NVM can be a bit tricky, especially on Windows. But in this tutorial, you will learn how to install and use NVM on Windows to install different versions of Node.js.
Read on, and switch between Node.js versions without the hassle!
Prerequisite
This tutorial will be a hands-on demonstration. To follow along, be sure you have the following:
- A Windows 10 computer with administrative privileges.
- A code editor – This tutorial uses Visual Studio Code (VS Code), but you can use any code editor you are comfortable with.
How to Download and Install NVM on Windows
Switching between Node.js versions should not be complicated, and NVM is up to the task. But before you can use NVM, you must download and install it on your machine.
To download and install NVM:
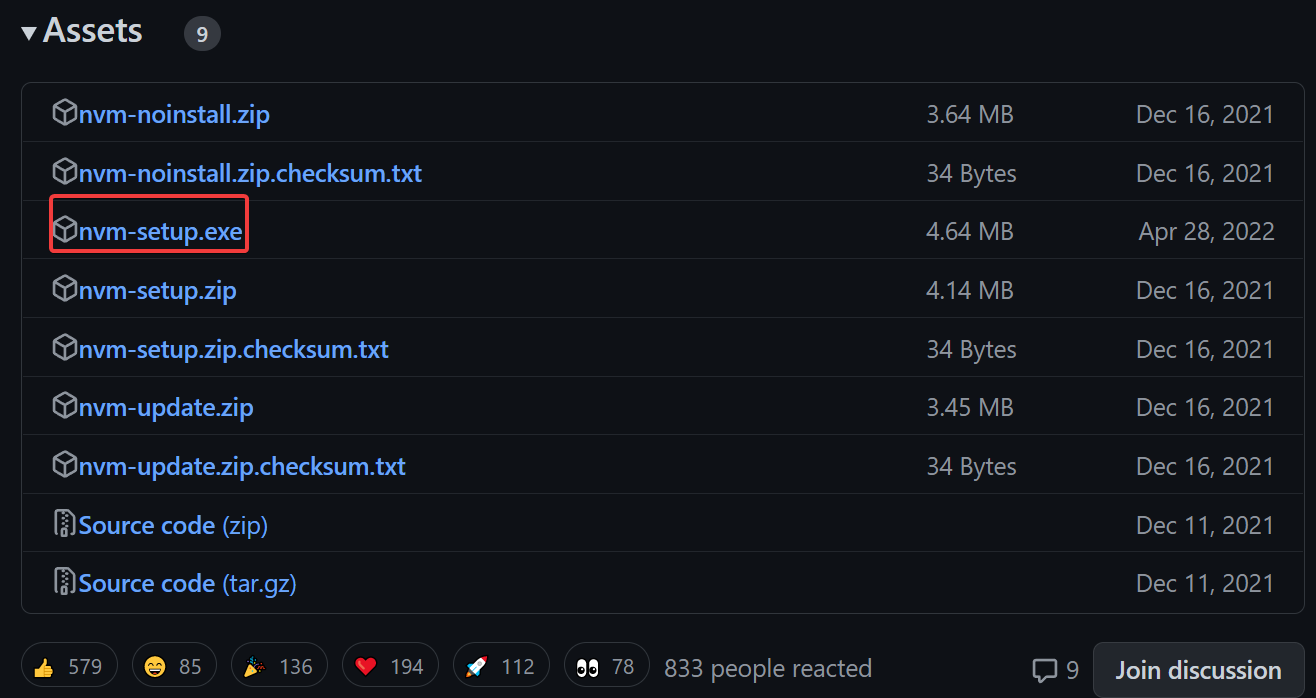
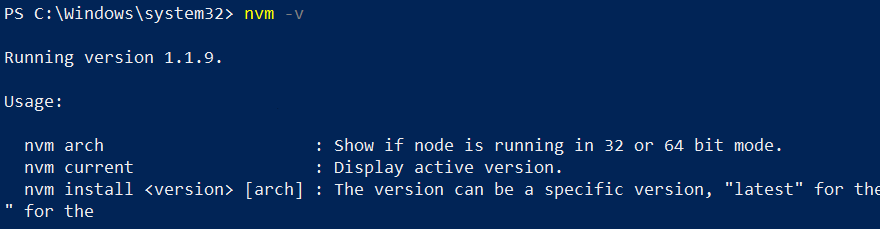
1. Open your favorite web browser, navigate to the official download page on GitHub, and find the latest version of the installer. At this time of writing, the latest version is 1.1.9.
2. Scroll down to the Assets section of the GitHub page, and click nvm-setup.exe to download the NVM installer for Windows.
3. Once downloaded, double-click the installer to run it.
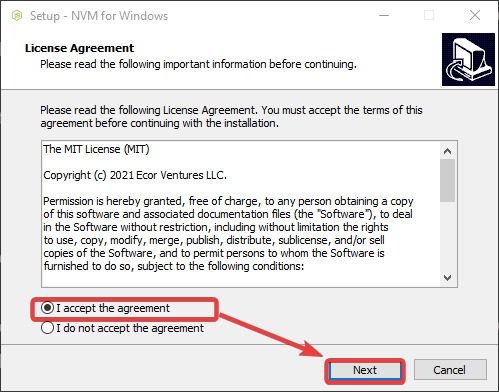
4. Now, choose the I accept in the Agreement option and click Next to accept the license agreement.
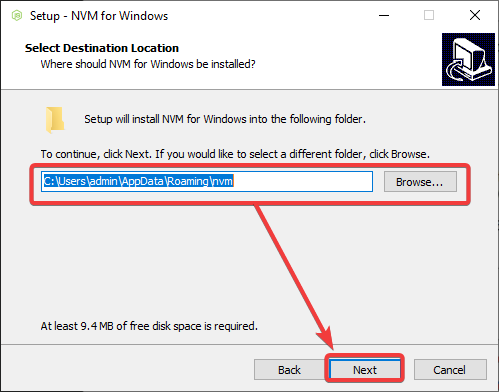
5. Select a location for NVM to be installed, and click Next.
Note the location, as you will need it later if NVM does not work correctly.
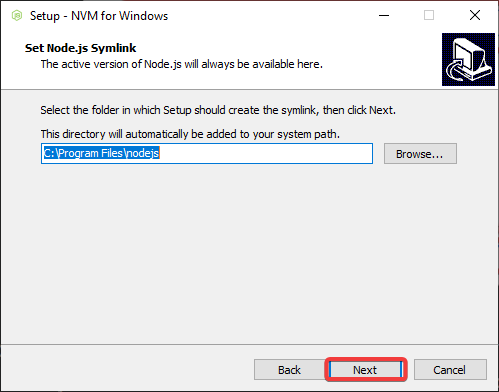
6. On the next screen, keep the settings as is and click Next. This setting lets you set the symlink directory, which is used to access NVM from the command line.
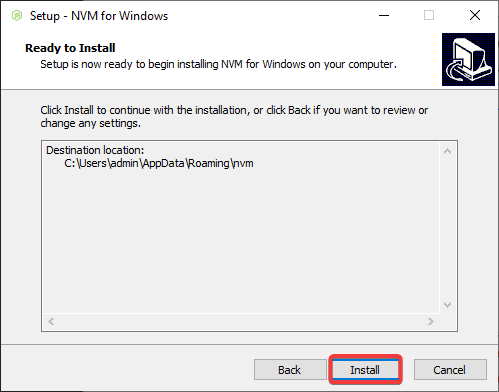
7. Next, click Install to begin installing NVM.
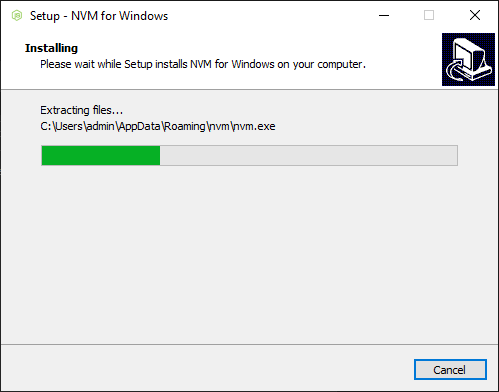
The installation process starts, and a status bar indicates progress.
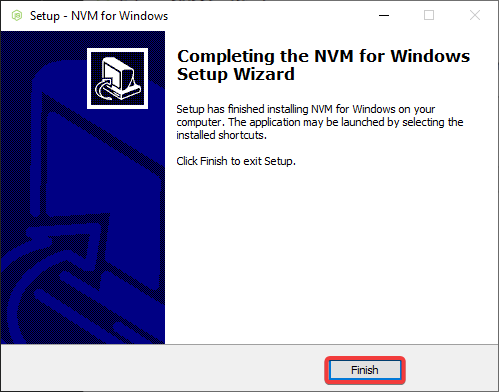
8. Once installed, click Finish to close the installer.
At this point, NVM is now installed on your Windows machine.
9. Lastly, open PowerShell as administrator and run the below command to check NVM’s version installed.
nvm -vIf NVM is installed correctly, you will see the version number of NVM printed on the screen, as shown.
Configuring the PATH Environment Variable for NVM
The nvm command should successfully return NVM’s installed version. But what if you got an error instead, like the one below?

This error indicates the PATH environment variable is not configured correctly. The PATH environment variable is what tells your computer where to look for executable files like nvm.exe.
To fix this error, add the location of the NVM executable file to your PATH environment variable:
1. Run the below command to set the PATH environment variable for NVM.
Replace INSTALL_PATH with the NVM executable file’s path you noted in step five of the “Downloading and Installing NVM for Windows” section.
Setx path "%PATH%;INSTALL_PATH”The output below shows setting the PATH environment variable for NVM is a success.
A restart might be required for the new PATH variable to take effect.

2. Now, run the below command to recheck the version number of NVM.
nvm -vAs you can see below, the nvm command now works in checking your NVM version.
Using NVM to Install Multiple Versions of NodeJS
Now that you have NVM installed and configured, you can use it to install multiple versions of Node.js side-by-side on your machine.
This feature is useful when working with projects requiring different versions of Node.js. For example, you can test a module you are developing without uninstalling the stable version of Node.js.
Installing the Latest Version of Node.js
When installing tools or any packages, typically, you would choose to get the latest version.
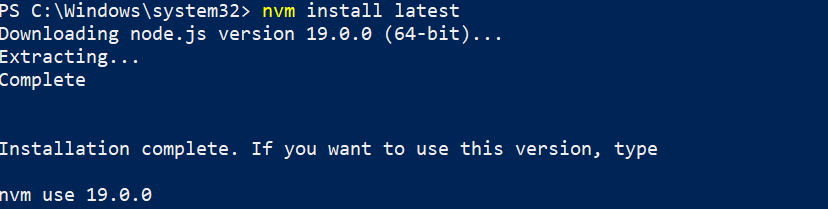
Run the below command to download and install the latest version of Node.js.
nvm install latestYou will see a similar output as below, which shows the latest version of Node.js (19.0.0) installed on your machine.
Installing the Latest LTS Version of Node.js
The latest version of Node.js is not always the best choice for production environments. Why? The latest version might introduce breaking changes or might be unstable.
What are your other choices for installing Node.js? The Long Term Support (LTS) version of Node.js is most recommended for production environments. The LTS version is more stable and well-tested than the latest version.
Run the below command to install the LTS (lts) version of Node.js
nvm install ltsBelow, you can see the latest LTS version of Node.js installed, which is 18.12.0 at this time of writing.

Installing a Specific Version of Node.js
What if you need to install a specific version of Node.js? Worry not. NVM lets you choose which version of Node.js to install without overwriting over ones currently installed on your machine.
Installing a specific version of Node.js is often required when working on an older project that is incompatible with the newer version of Node.js.
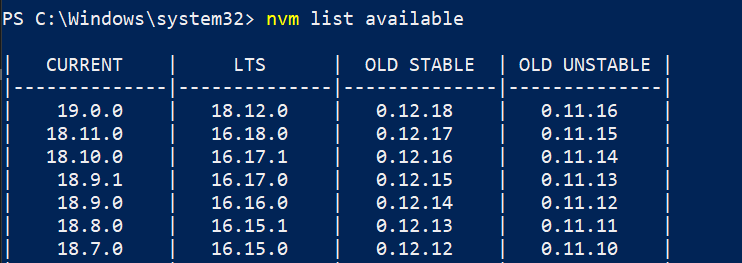
Run the following command to list all versions of Node.js that are available for installation via NVM.
nvm list availableYou will see a list of all the versions of Node.js that are available for installation below. Pick one version you wish to install.
Now, run the below command to install Node.js v16.18.0 on your machine. But you can replace v16.18.0 with your preferred version.
nvm install v16.18.0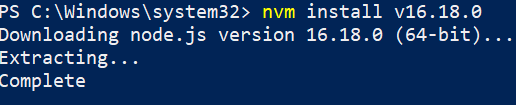
Switching Between Multiple Versions of Node.js
Perhaps you are working on a project that requires Node.js v16.x and another project that requires Node.js v18.x. If so, how do you switch between Node.js versions?
Luckily, you can use NVM to switch between these two versions as needed quickly.
1. Run the below command to see which version of Node.js is currently (current) in use.
nvm currentBelow, the output shows the current Node.js version in use is v16.18.0. Now all you need is the version you want to switch to. But first, you must check if that version is also installed on your machine.

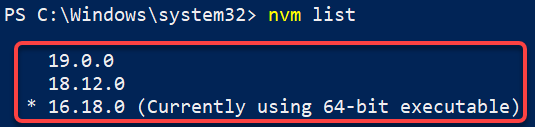
2. Next, run the following command to list all Node.js versions that are currently installed on your machine. nvm list
nvm listYou will get an output like the one below, which shows all versions of Node.js installed.
3. Finally, run the nvm use command below to switch to Node.js version 18.12.0. Replace 18.12.0 with the actual Node.js version number to switch to.
nvm use 18.12.0
Running a Simple Hello World Program
Now that you have Node.js installed on your machine, you can try running a simple Hello World program to verify that everything is working as expected.
Create a new JavaScript file named hello-world.js
New-Item hello-app.js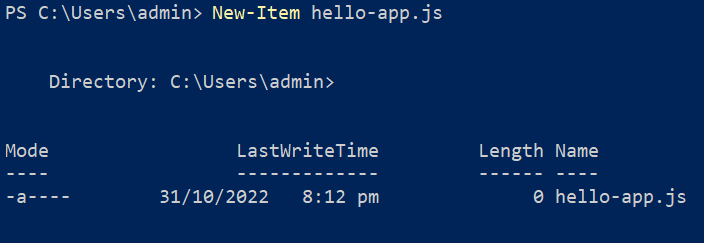
Open hello-app.js in your preferred text editor, add the following code to the file and save and close the editor.
The code below prints the string Hello World to the console.
var msg = 'Hello World';
console.log(msg);
Now, run the node command below to execute the *hello-app.js* script.
node hello-app.jsIf all goes well, you will see the Hello World message printed on the console, as shown below. This output confirms that Node.js has been successfully installed on your machine.

Conclusion
Running and managing multiple versions of Node.js on the same machine can be a pain. But in this tutorial, you learned how to use NVM to install and manage different versions of Node.js on your machine.
Now that you have discovered how quickly you can switch between different versions of Node.js, would you consider NVM to level up your workflow?


