

Trello is a powerful tool that lets you have a personal to-do list or a project management system for your team. But, if you have many tasks to add, manage, and keep track of, you’ll be wasting much of your time creating cards, modifying the fields, and assigning each card to the team. Using the Import2 Wizard and Trello cuts down on this wasted effort dramatically.
Not a reader? Watch this related video tutorial!Using the Import2 Wizard and Trello allows you to use simple CSV files to import data right into Trello!
Say goodbye to the tedious manual card creation and time-consuming task management. Because by the end of this tutorial, you will be able to utilize this powerful tool to work hand-in-hand dynamically with your Trello board.
Prerequisites
There will be step-by-step instructions on each section of this article. So if you’d like to follow along, make sure you have all the requirements below.
- Microsoft Excel or a similar tool to create and view a CSV file
- A Trello account. You can create an account for free if you don’t have one yet.
- A Trello board and with various Lists. Take a look at the board used and make a copy for yourself. if you’d like to follow along step by step.
- Import2 Wizard also requires an account. You can create one and you will be signed up automatically for a 14-day free trial.
Building a CSV File
To import many Trello cards at once using the Import2 wizard, you’ll first have to create a CSV file with rows representing Trello cards. The CSV File can be compiled in an Excel spreadsheet or or Google sheets. You can download an example CSV file template here. This CSV file contains all of the fields you’ll need to send to the Import2 wizard.

Related: Managing CSV Files with PowerShell
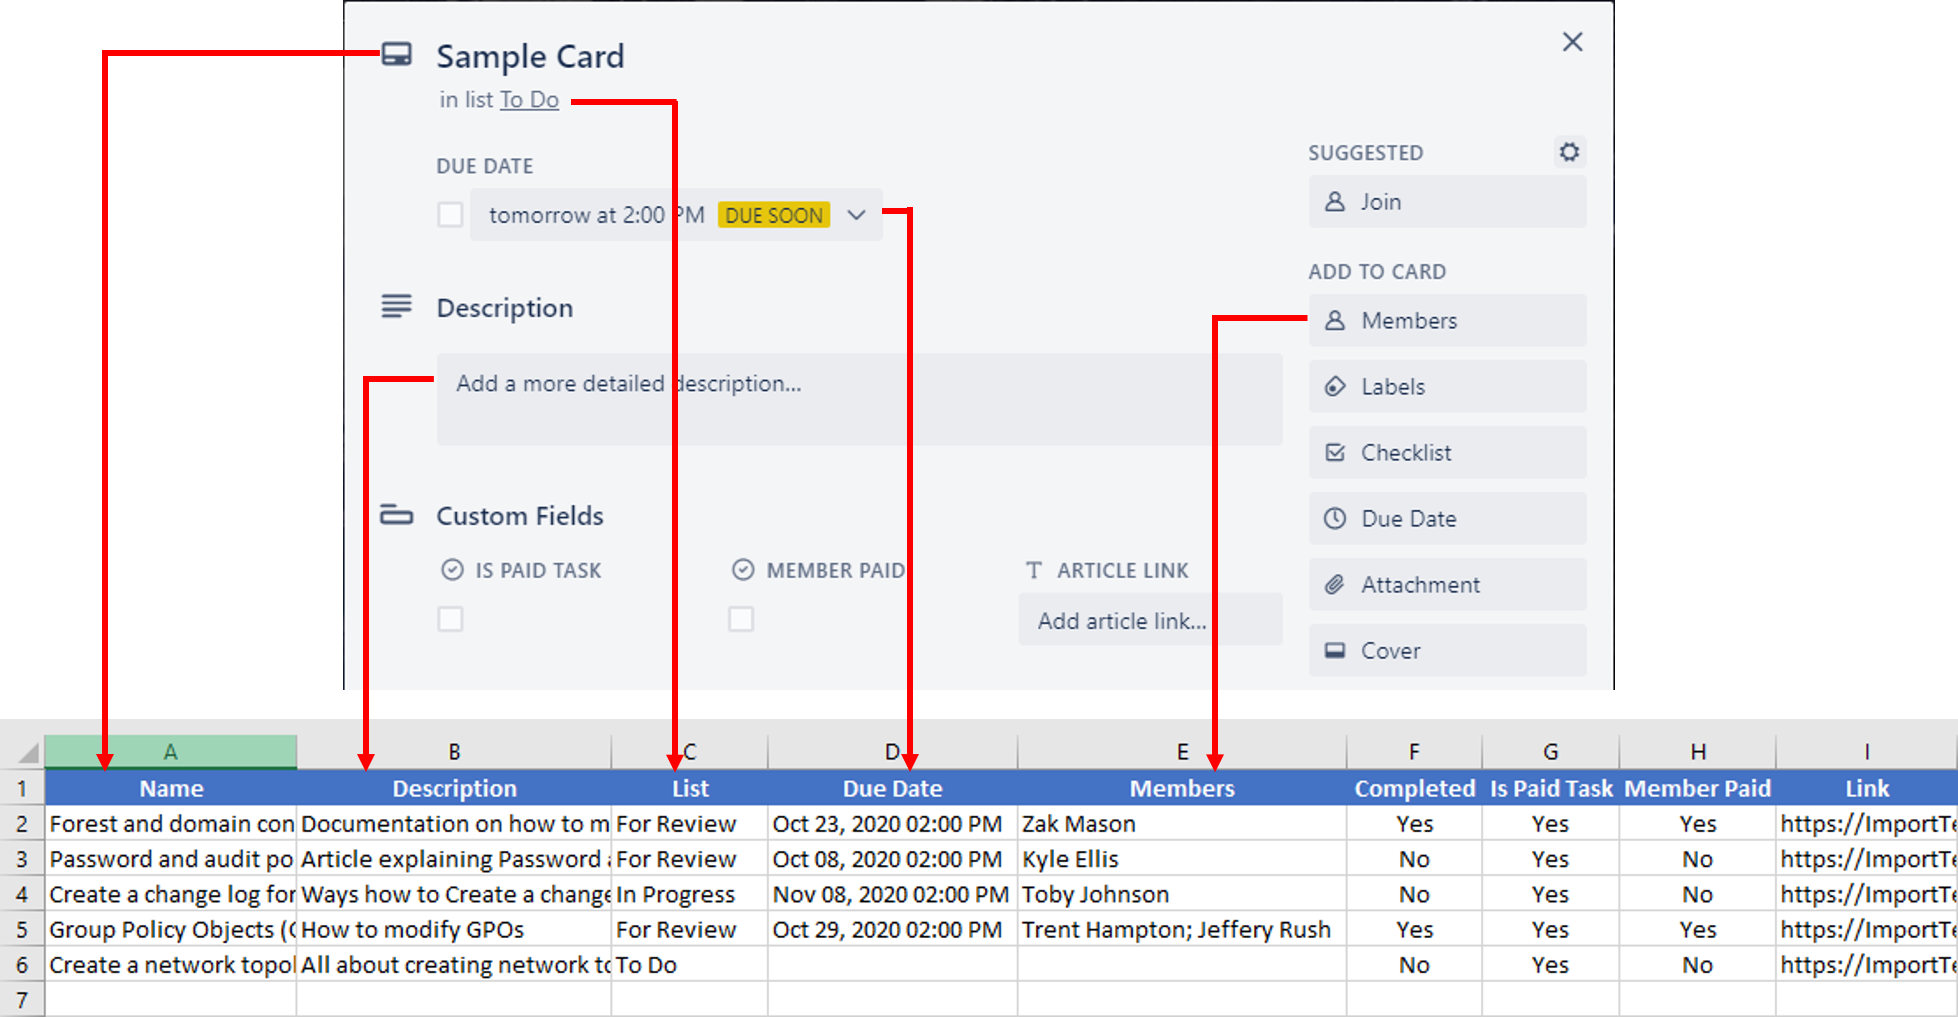
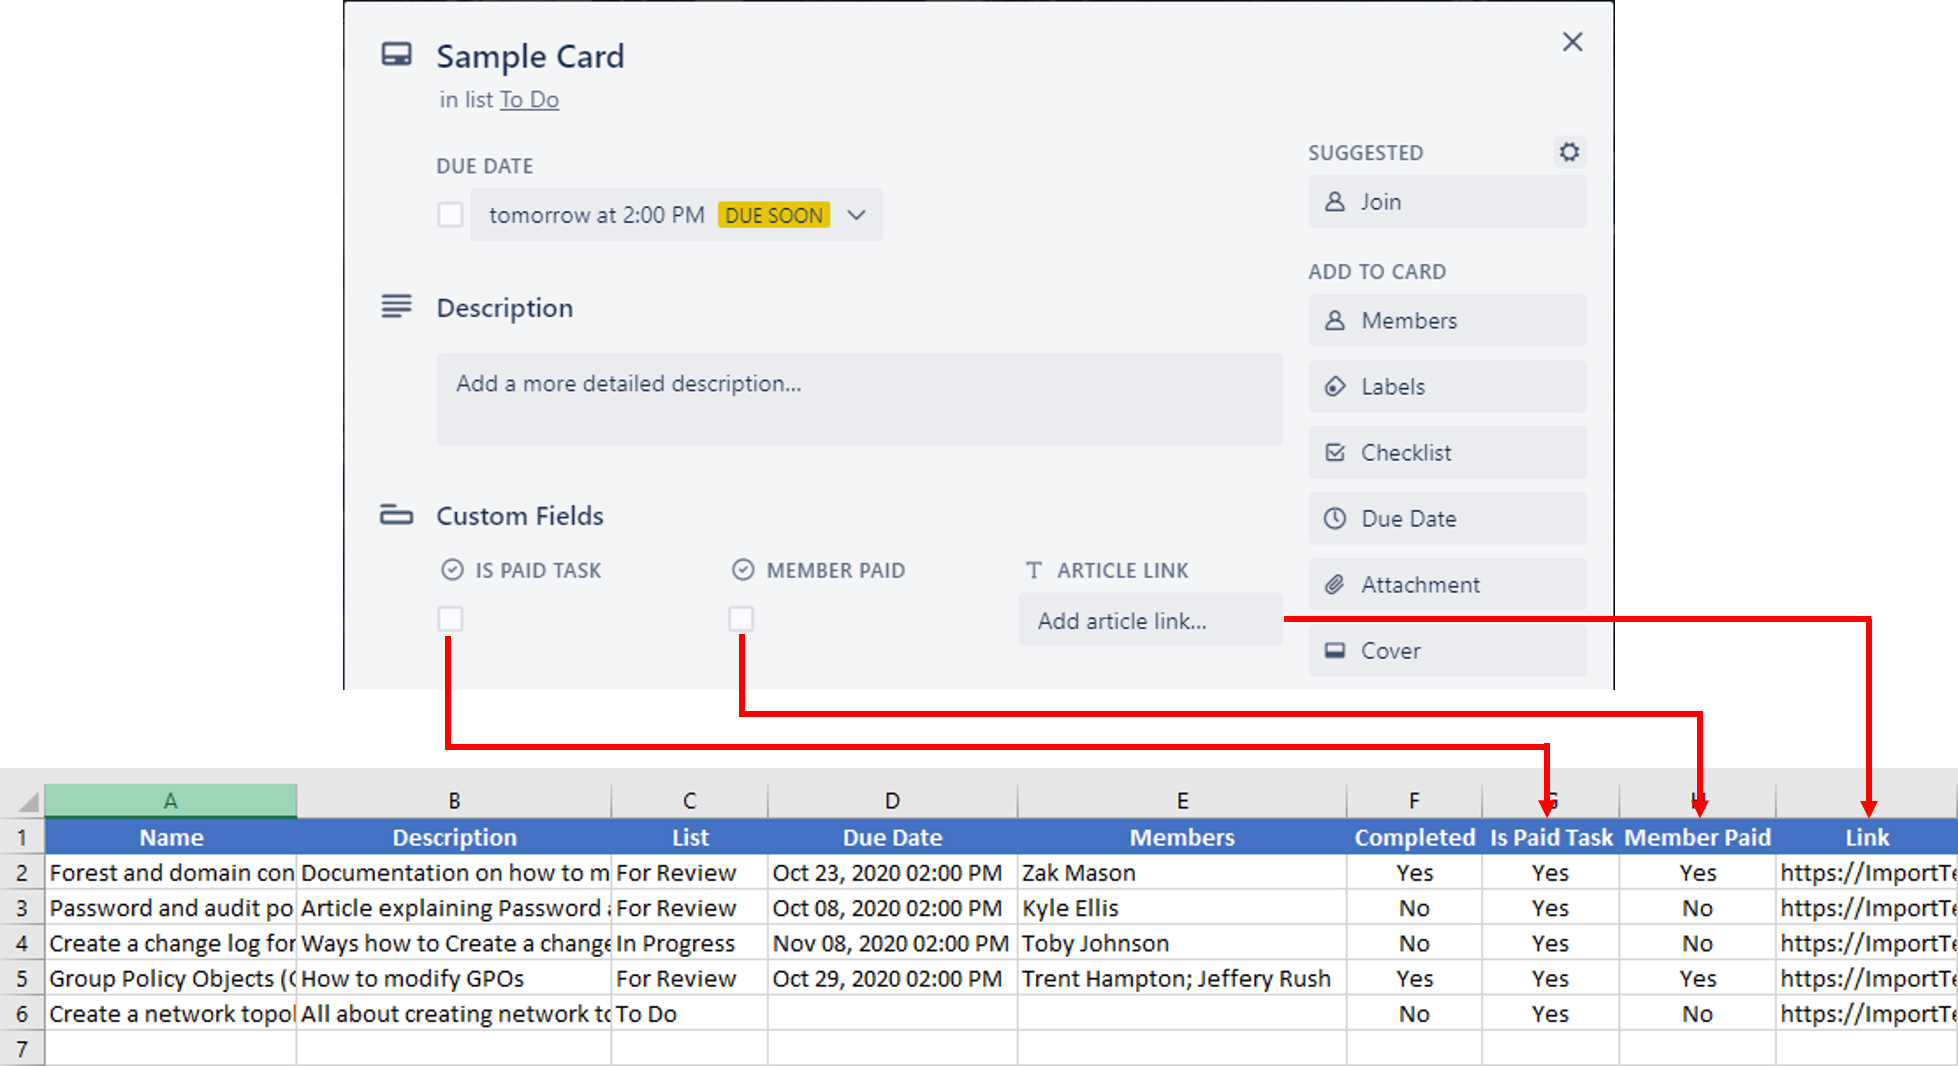
Your CSV file, as shown above, should have the following columns:
- Name – represents the name of the Trello card
- Description – Any additional information you want to add to the card’s description field
- List – This represents the list the card will be created in
- Members – A semi colon-delimited set of one or more full names of the Trello board members to assign to the card.
- Due Date – Take note of its format (MMM DD, YYYY HH:MM AM/PM) to avoid getting errors during the import process like in the screenshot below. A good example of a due date would be, Nov 08, 2020 02:00 PM.

- Completed – This field can either be Yes or True indicating if the card will be archived or not upon import.
- The last three columns in the example above are for the Custom Fields built into the example Trello board you’re working with. The Is Paid and Member Paid columns represent the value of a checkbox while the Link column represents text.
Since you now have collected your data and saved it as CSV File, you can proceed with importing your CSV in the next section.
Related: Exporting CSV Files with PowerShell
Creating a Trello Connection
To start the import process, you’ll first need to add a connection between Import2 Wizard and Trello.
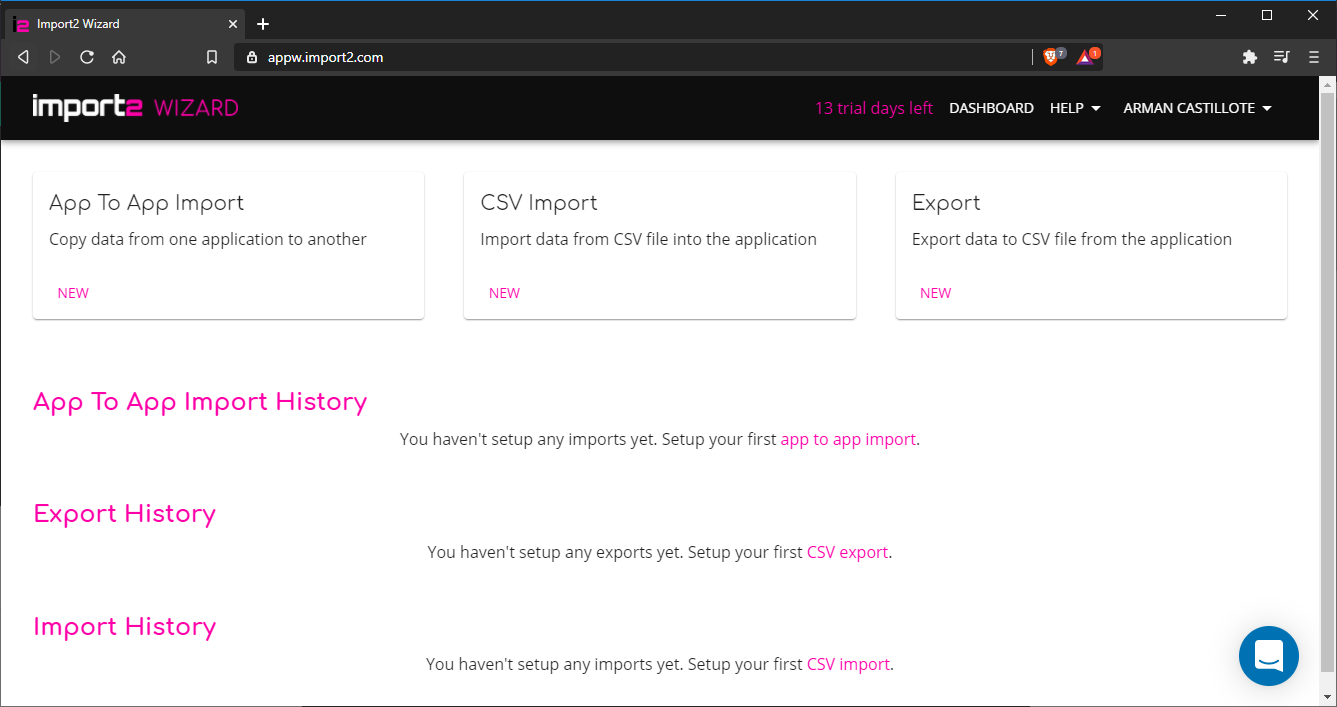
- After logging in to your account on Import2 Wizard, you’ll get to a dashboard that looks like the one in the screenshot below
- Under CSV Import, click on NEW to start linking Import2 Wizard and Trello
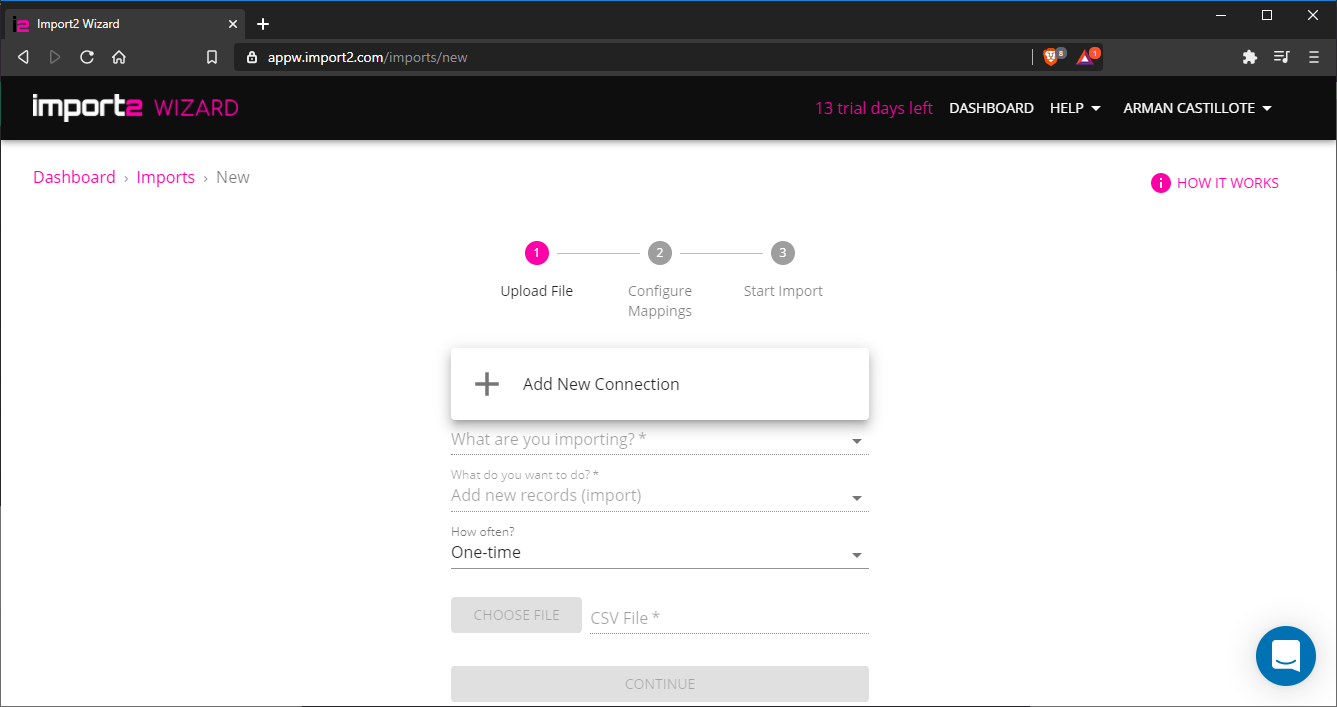
- Next, click on the What are you importing? drop-down box.
- Choose Add New Connection.
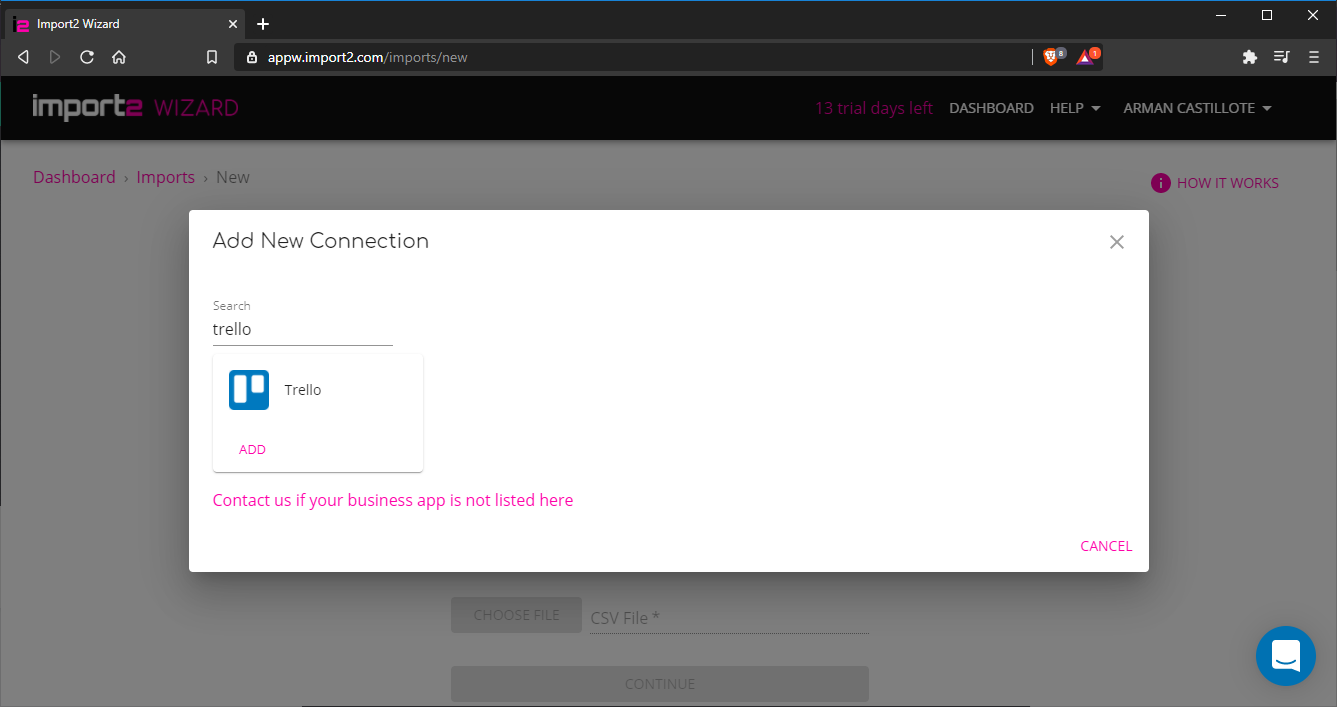
- Next, scroll down and look for Trello or simply search for trello in the search box just like what you see below, then click ADD.
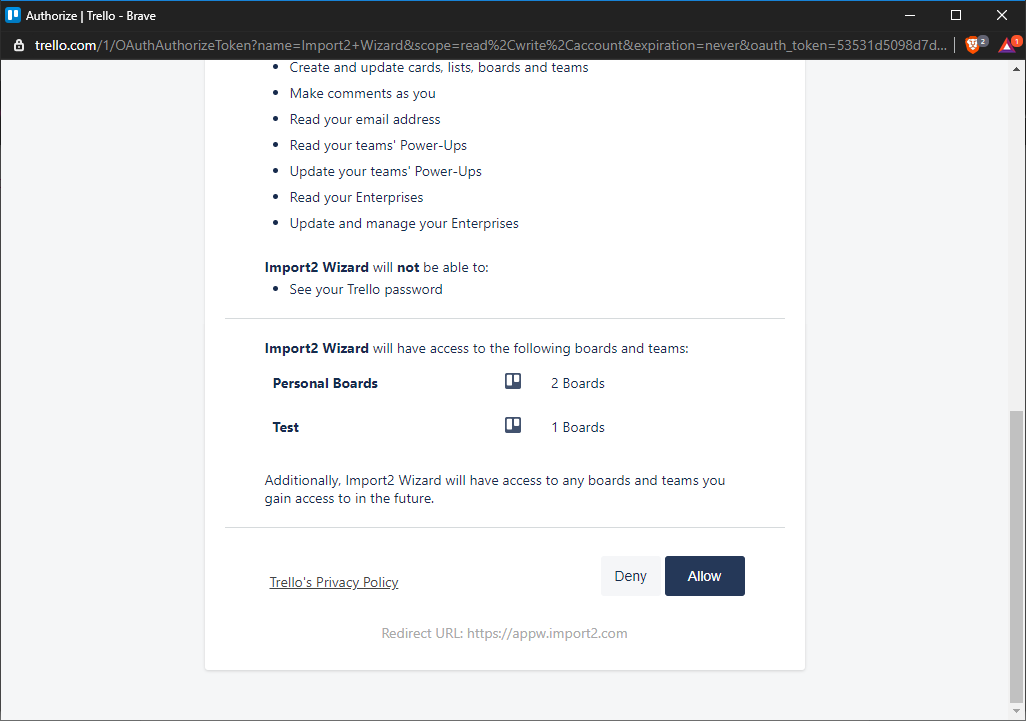
- Now authorize Import2 Wizard’s access to your Trello account by scrolling down and clicking on Allow.
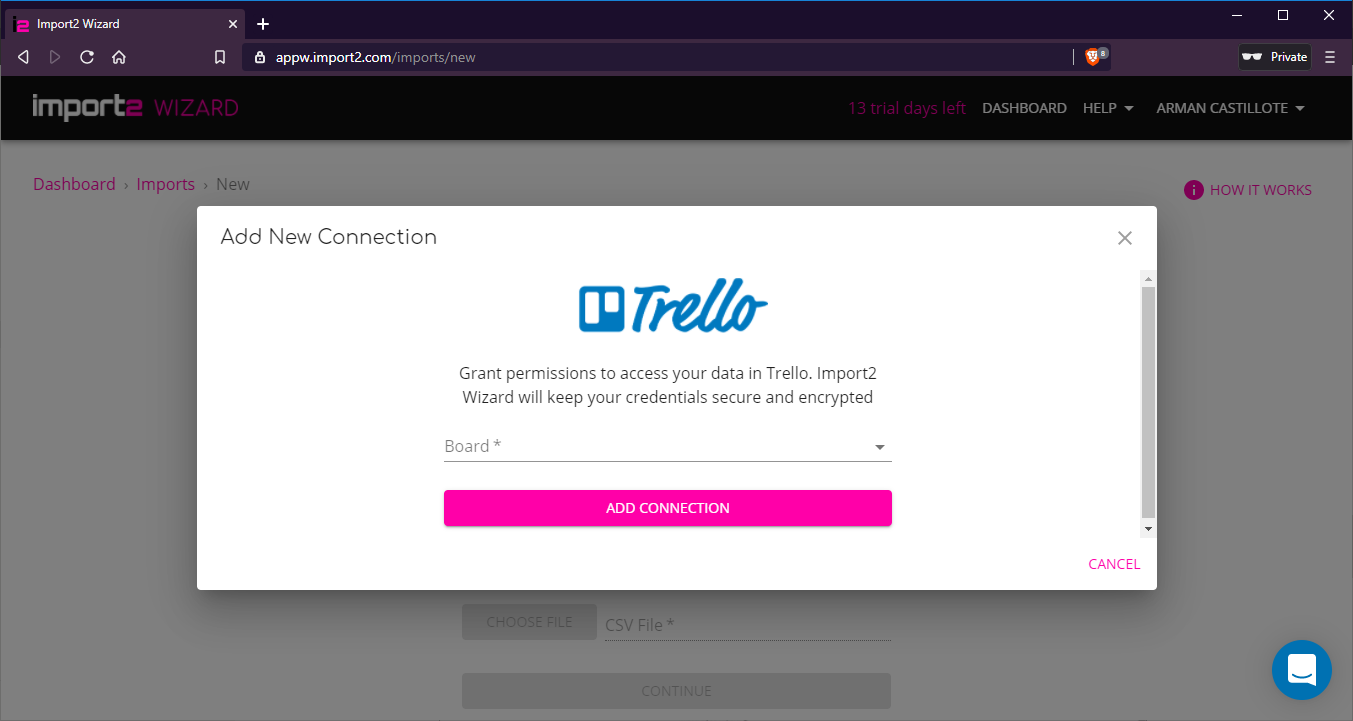
- After adding the Trello connection in the section above, a page will pop-up like what you see in the following screenshot. Click the drop-down box in the middle and choose the Import2 Test Trello board (if you’re using the example Trello board), then click ADD CONNECTION.
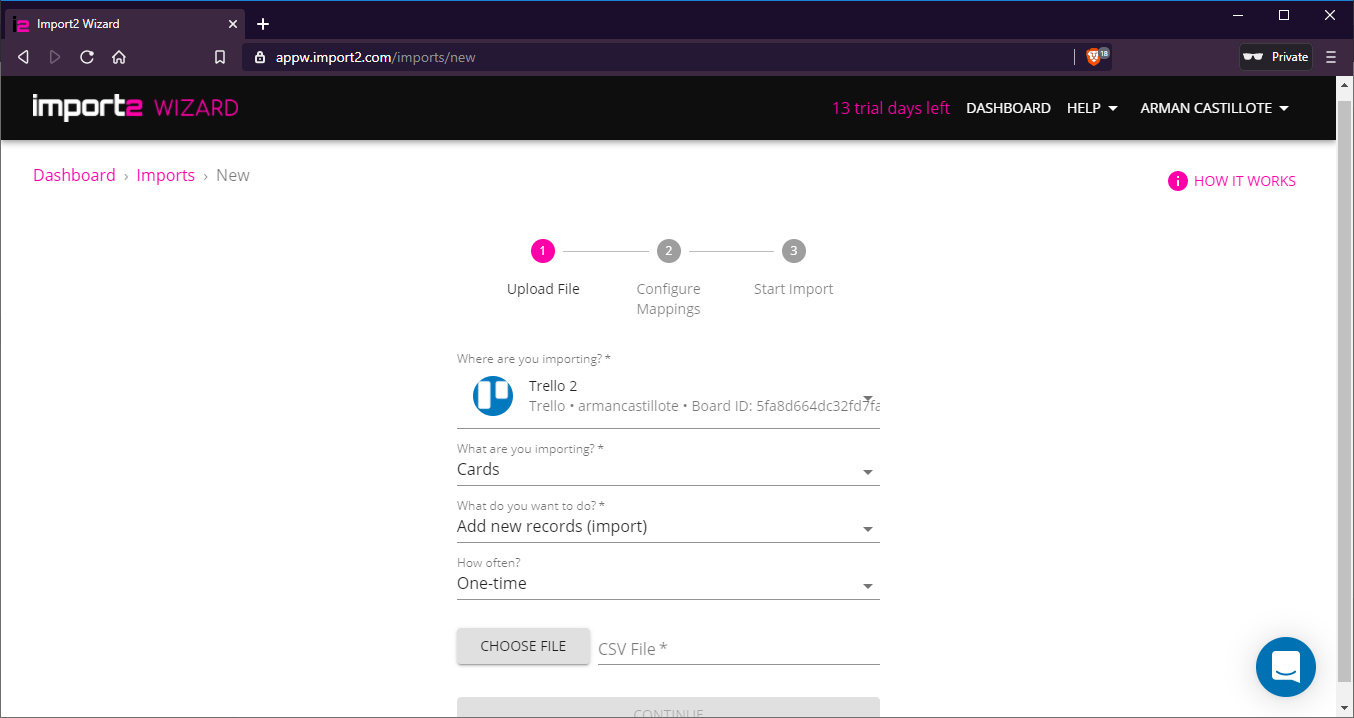
8. On the “What are you mapping?” click the drop-down box and choose Cards.
9. For the “What do you want to do?” option, choose the Add new records.
10. Then for the “How often?” drop-down box, you can choose either One-time or Auto import.
The auto import feature is nice if you need to perform regular uploads of CSV data.
Uploading the CSV File
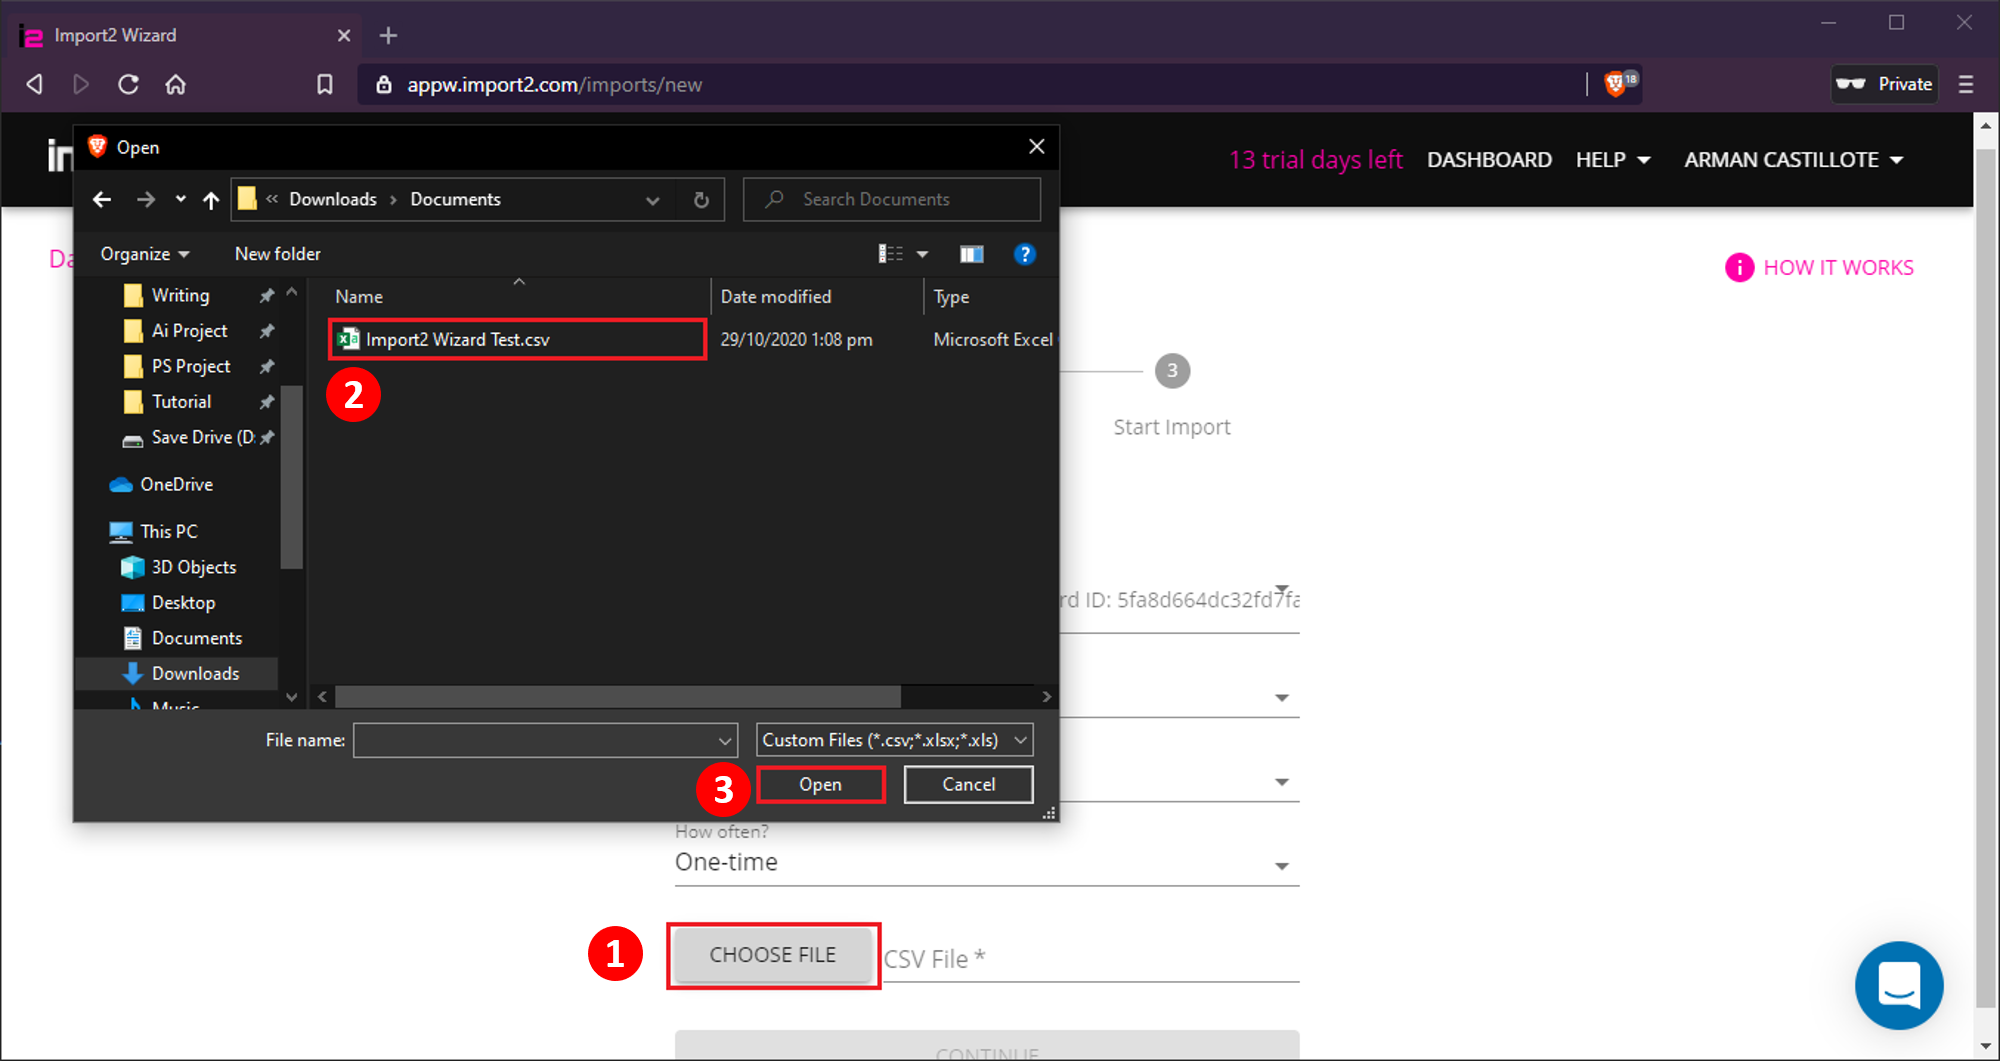
To complete the import settings, you now need to upload the CSV file to Import2 Wizard. Follow these steps by using the screenshot below as a reference.
Click on the CHOOSE FILE button and select the CSV file to upload as shown below.
Once you’re done with the import settings, click on Continue at the bottom of the page.
At this point, you’ve successfully configured the import settings. Proceed with mapping the CSV Columns to their corresponding Fields in Trello.
Field Mapping Using Import2 Wizard and Trello
Now that the CSV file is uploaded, it’s time to map the columns of the CSV file to the corresponding fields of the cards in your Trello board. Take a look at the screenshots below showing where each CSV field maps to on your Trello card.
The Columns in the CSV file are listed in the left-most drop-down box under Field Mappings, while the one next to it represents the Fields for the cards in your Trello board. See the screenshot below for reference. Also, the Fields in the drop-down box on the right are grouped into three; Standard Fields, Lookup Fields and Custom Fields.
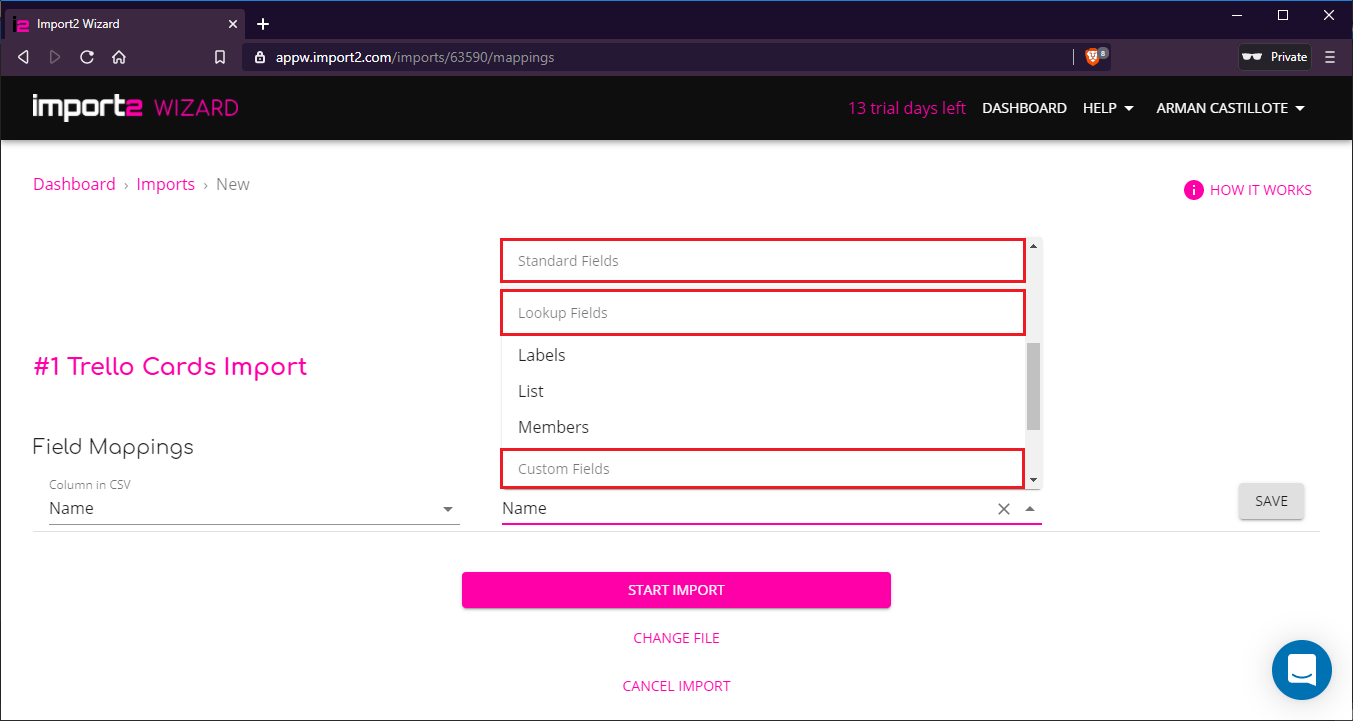
Mapping Name
To map the Name field, click and choose Name on both drop-down boxes, then click the SAVE button to proceed with mapping other data. Keep in mind that the Name option is a Standard Field that represents the name of the cards.
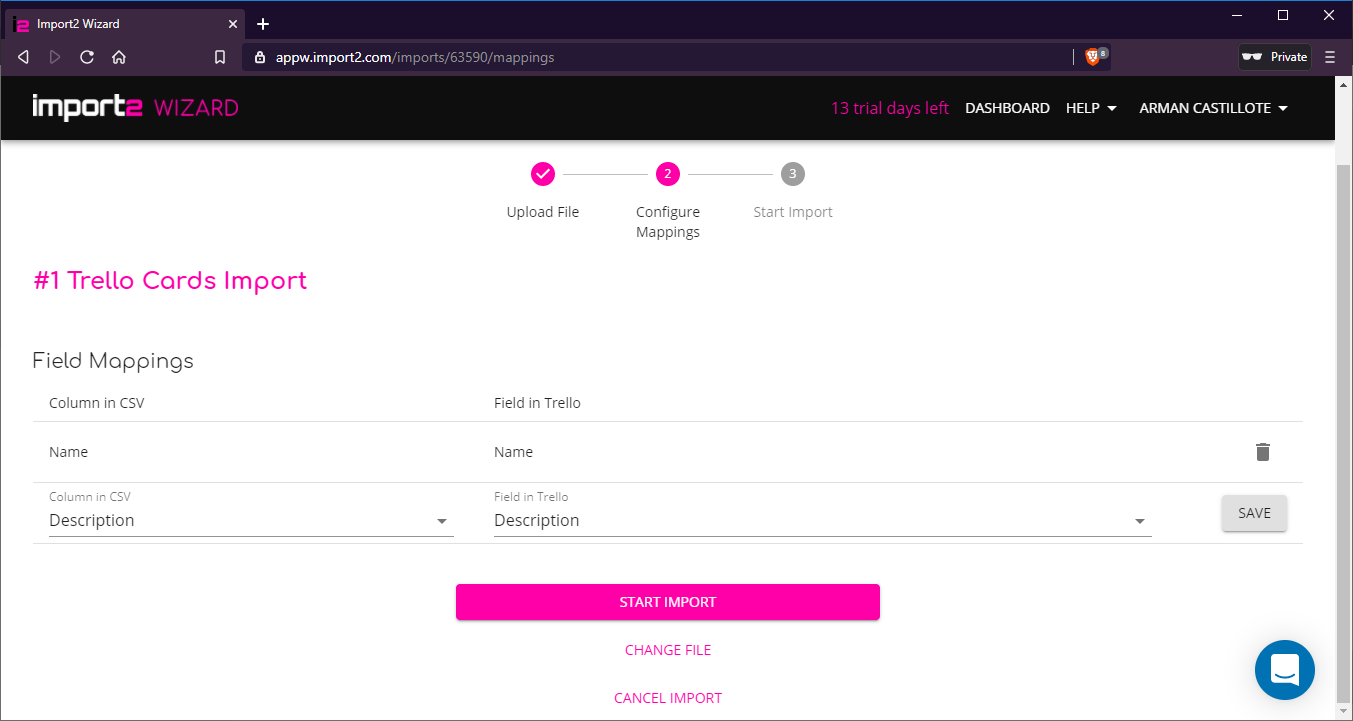
Mapping Description
Next up is the Description field and this is also a Standard Field where you can put in additional information about the card on your Trello board. As illustrated below, choose the Description option from both drop-down boxes and click SAVE.
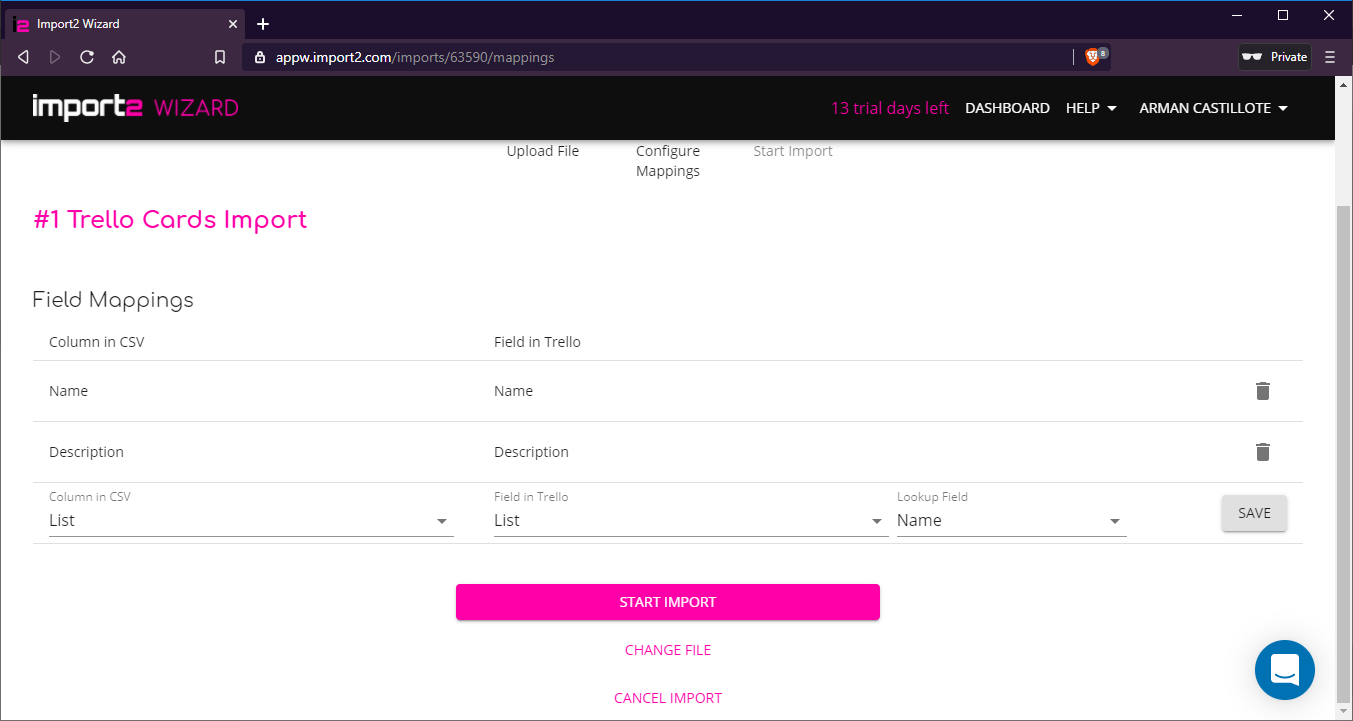
Mapping The List Using Lookup Field
The screenshot below illustrates the third Standard Field we’re mapping, which is the List column from the CSV file. Mapping a list will be a bit different because you will need to use a Lookup Field. The lookup field is a way to ensure that the cards are imported to their corresponding lists in the Trello board.
Choose the List option from the first two drop-down boxes, then select Name as the Lookup Field and click SAVE.
Mapping Members
Just like in the previous section, the Members can also be mapped to each card using Lookup Field. There are three options you can choose from in the Lookup Field; Username, ID and Full Name, and in this case, we used the Full Name because the member’s full name is on the CSV file.
As illustrated below, choose the Members option from the first two drop-down boxes, select Full Name as the Lookup Field and click SAVE.

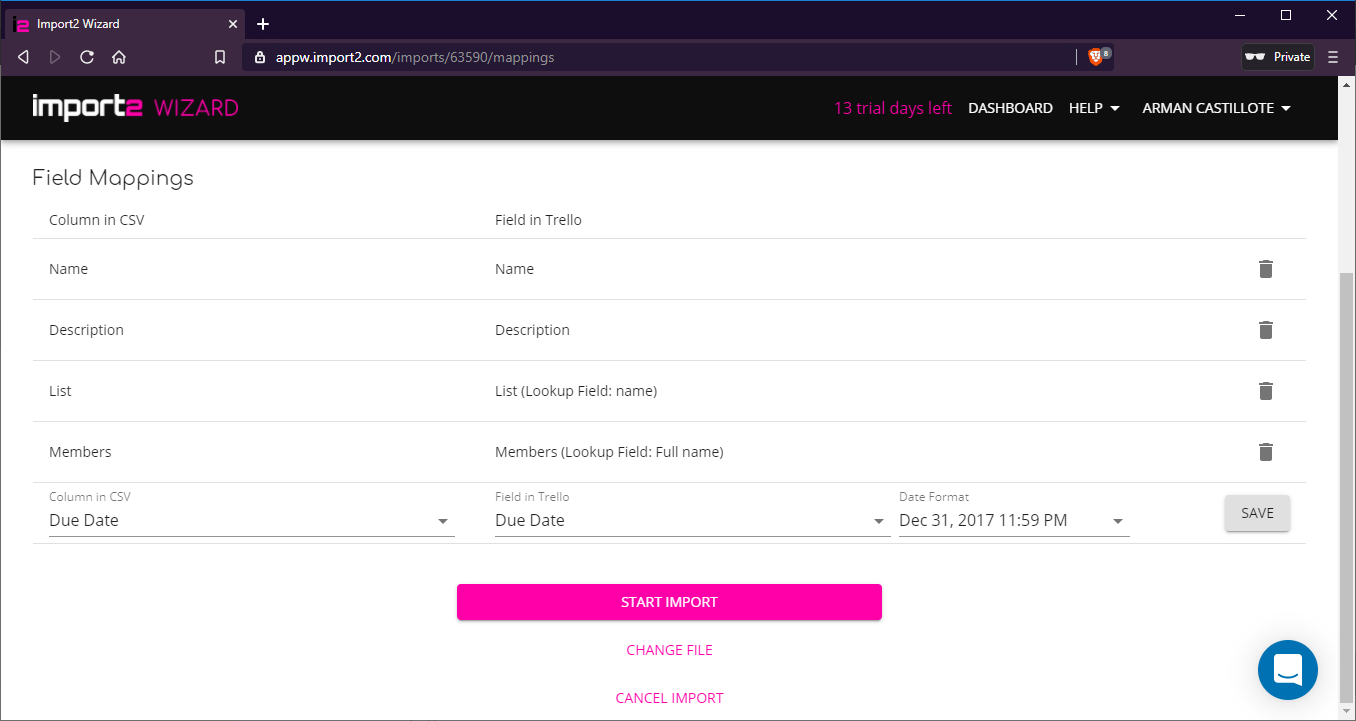
Mapping Due Date
The Due Date field is a bit tricky because the Due Date field’s format in Import2 Wizard should be the same as the Due Date column’s format in the CSV file. The format should be like this (MMM DD, YYYY HH:MM AM/PM). Take a look at the screenshots below for the comparison.

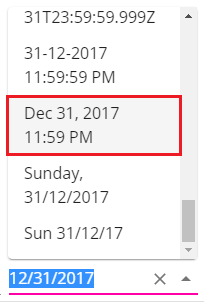
Otherwise, you’ll see an error icon just like in the screenshot below.

To map the Due Date field, perform these steps by using the image below as reference.
- Choose the Due Date option from the first two drop-down boxes
- Make necessary adjustments to the format then click SAVE
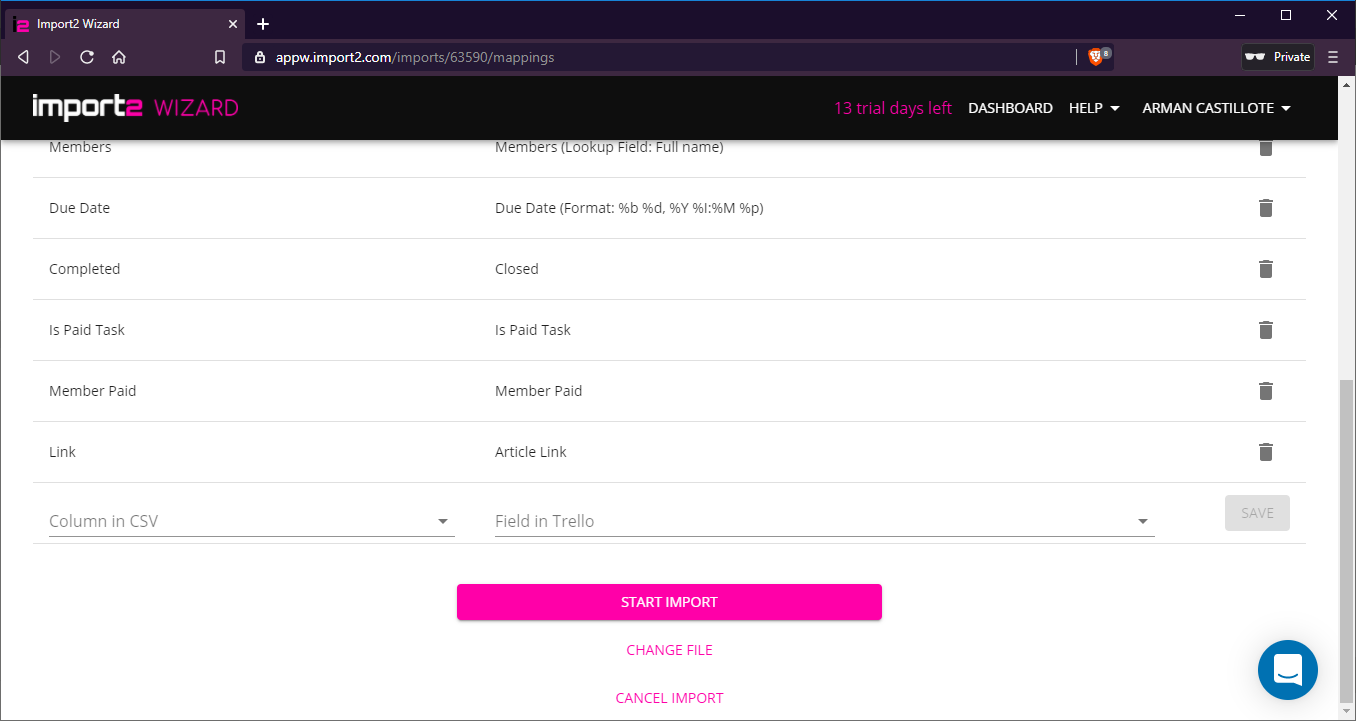
Completed Fields
Just as mentioned in a previous section, marking a Completed field with either a “Yes” or “True” value, will archive the corresponding card.
Follow these steps by using the image below as a reference.
- Choose the Completed option from the first drop-down box
- Then in the drop-down box on the right side, choose Closed and click SAVE

Custom Fields
Mapping Custom Fields is no different than with the Standard Fields. At this point, there are only three fields left to map; Is Paid Task, Member Paid and Link. See the following image as your reference.
Follow these steps for each Custom Field one at a time.
- Choose the CSV column from the first drop-down box
- Then select the corresponding custom field on the second drop-down box and click SAVE.
After mapping all the fields, click on the START IMPORT button to import data into Trello using Import2 Wizard. It will take some time to complete the process depending on the volume of data you’re importing.
The result would look like what you see below, or you can also open up your Trello board to see the cards get automatically imported one after another.
To check the archived cards in Trello, click on the Show Menu button at the right side of the page → More → Archived Items
Import2 Wizard is definitely something that you would want to get your hands on for your business, so make sure to also check the packages that they offer along with the FAQs.


