

Whether you’re just starting out with PowerShell or you already know how to run commands, there are times when you must use PowerShell to ‘run as administrator’ Why? Because sometimes, any activity you do inside of PowerShell will require elevated privileges.
In this tutorial, you’re going to learn just about every way possible to run PowerShell as administrator from the perspective of an end-user, a command-line junkie, or an IT admin!
This tutorial has many sections each showcasing how to run PowerShell as administrator. Feel free to click on whichever method you prefer in the Table of Contents.
Prerequisites
This article will be a hands-on tutorial. If you’d like to follow along, please be sure you have:
- A Windows 10 PC – Although Windows 10 was used as an example for this article, most of the methods provided will work with Windows 7+.
- An account with administrator privileges. If you don’t already have one, learn how to create one here.
- PowerShell – Most of these methods will work with Windows PowerShell 5.1 or PowerShell 7.
Running PowerShell as Administrator with a Right-Click
One of the simplest ways to run PowerShell as administrator is with a right-click. There are a few different areas where you can right click on PowerShell and run it. Let’s run through them.
Using the Search Bar
The Search Bar is practically one of the easiest ways to run most of the programs installed on your computer. It’s also an easy way to run any program as administrator, including PowerShell.
To run PowerShell, specifically, as administrator from the search bar:
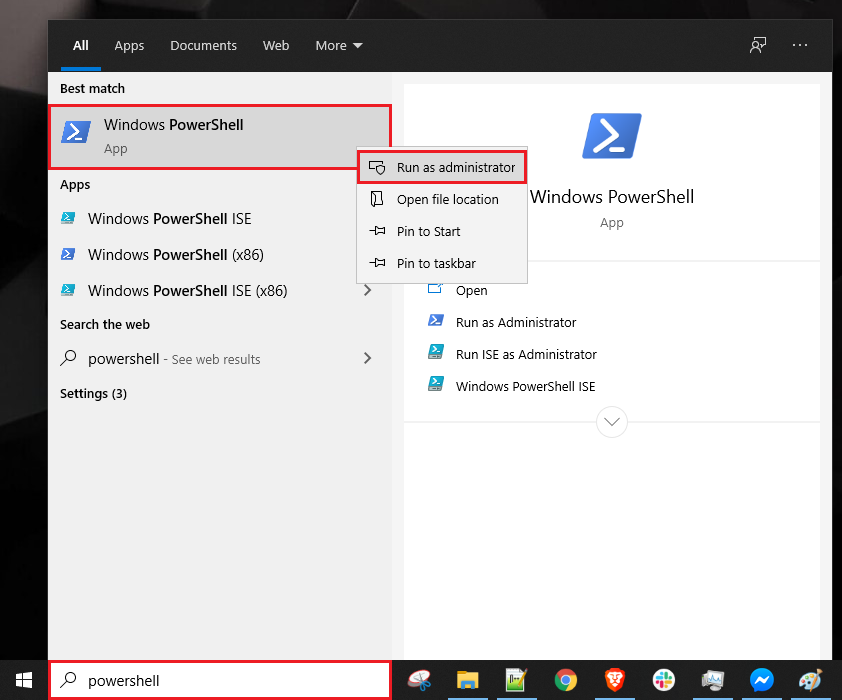
- Click on the search box at the taskbar and type powershell. This action will bring up the PowerShell edition of your preference.
- Look for Windows PowerShell or just PowerShell, if using PowerShell Core, from the search result.
- Right-click on the menu item and select Run as administrator.
You can see these steps demonstrated in the screenshot below.
Using a Pinned Menu Item
If you pin a program to the start menu or taskbar, you can also right-click on the menu item there as well. With this method, Windows 10 creates a shortcut for PowerShell that is more accessible to you at the start menu or the taskbar.
To run PowerShell as administrator on a pinned item:
- Find the PowerShell icon in the search box again.
- Right-click on the PowerShell icon and select Pin to Start or Pin to Taskbar.
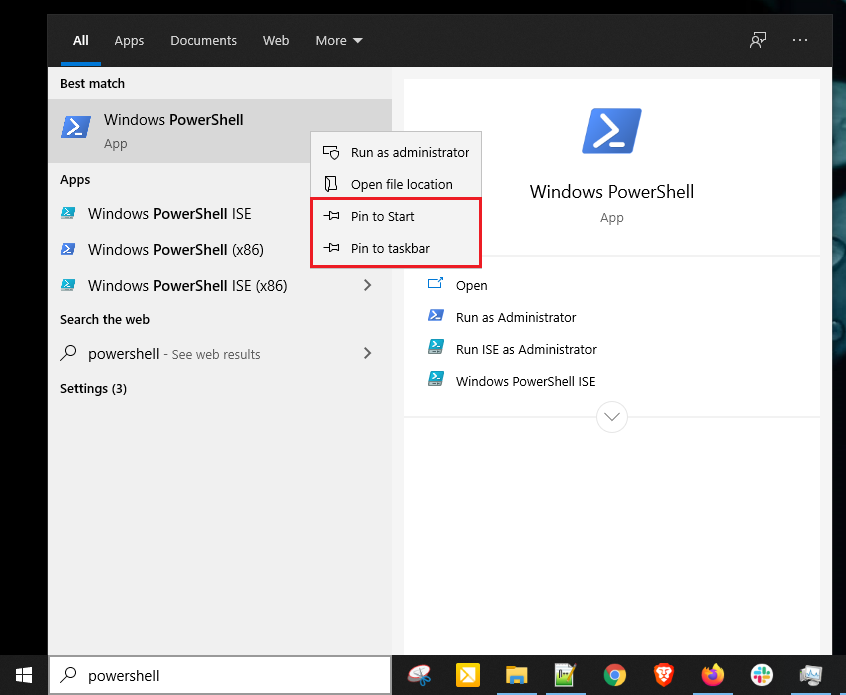
- Click on the Start button
- Look for Windows PowerShell (or PowerShell Core) on the right side of the Start Menu.
- Right-click on the menu item and choose Run as administrator.

Running PowerShell as Administrator Using File Explorer
Are you in Windows’ File Explorer, you can fire up PowerShell as administrator there too!
Using the File Explorer File Menu
- Open up File Explorer by using Win Key + E shortcut keys or by simply clicking the icon at the taskbar as you can see on the screenshot below.

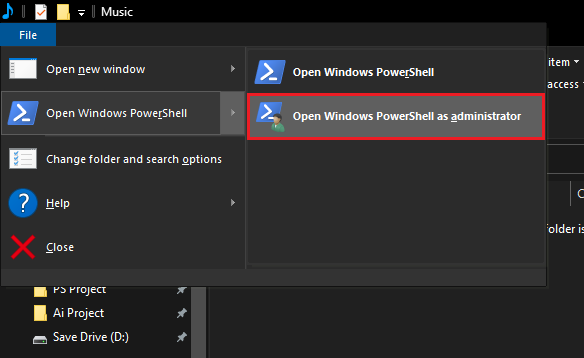
2. Once in File Explorer, click on File → Open Windows PowerShell → Open Windows PowerShell as administrator as shown below.
Using the PowerShell Executable
Whether you’re using a 32-bit or 64-bit operating system, you can run PowerShell as administrator from its respective location.
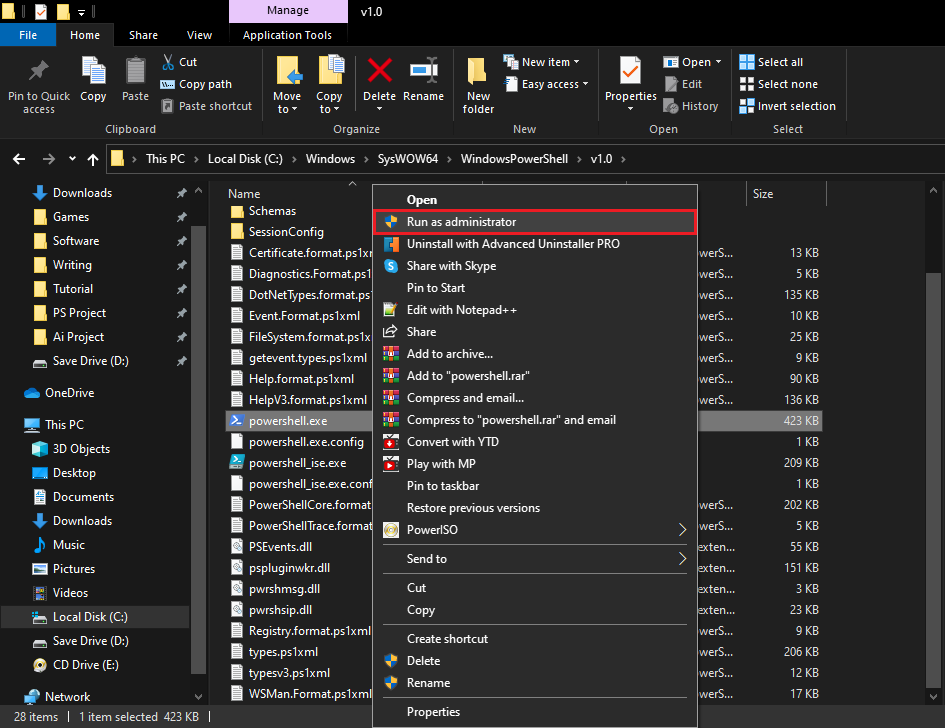
- In File Explorer, navigate to one of the folders below.
- For 32-bit OS: C:\Windows\System32\WindowsPowerShell\v1.0
- For 64-bit OS: C:\Windows\SysWOW64\WindowsPowerShell\v1.0
- Find the powershell.exe file.
- Right-click on powershel.exe and select Run as Adminstrator.
Creating a Shortcut for PowerShell on the Desktop
If you’d like an easy way to invoke PowerShell, you can also create a Windows shortcut for it.
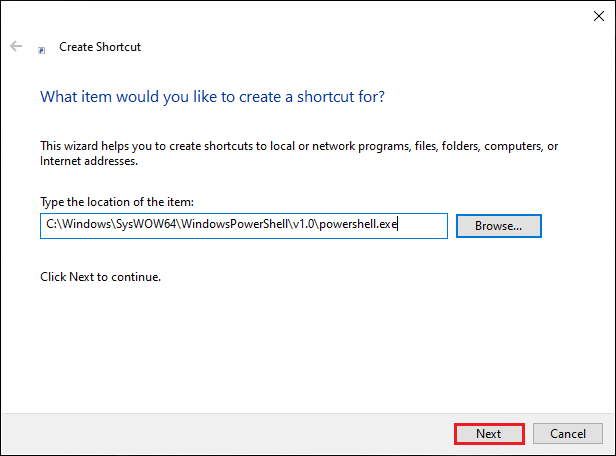
- Once you’ve got the Create Shortcut process started, provide the path to the PowerShell executable. For Windows PowerShell, that path is:
- For 32-bit OS: C:\Windows\SysWOW64\WindowsPowerShell\v1.0\powershell.exe
- For 64-bit OS: C:\Windows\System32\WindowsPowerShell\v1.0\powershell.exe
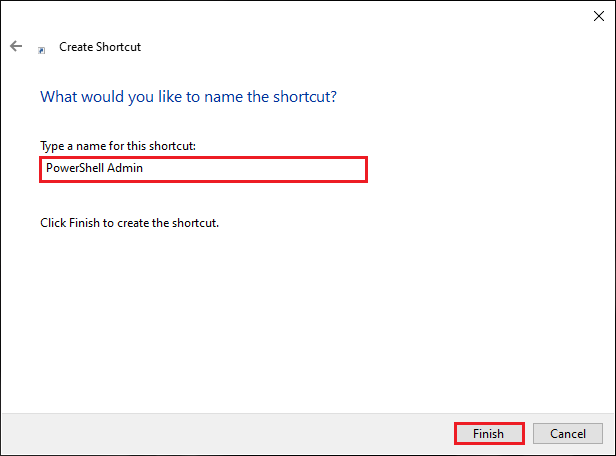
2. Provide the shortcut a handy name (PowerShell Admin for example).
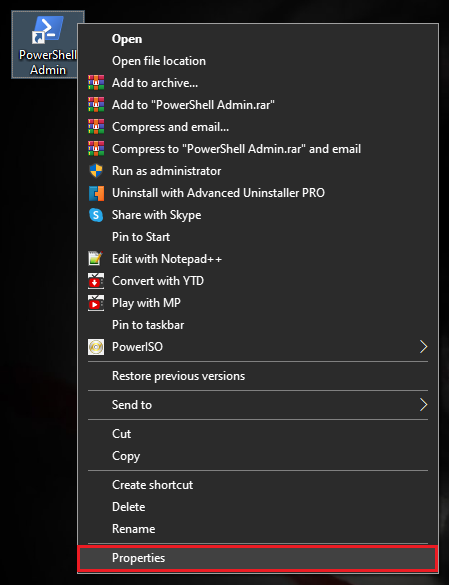
3. Find the shortcut you just created and right-click on it and choose Properties as shown below.
4. Click on Shortcut tab and then on the Advanced button and the Advanced Properties window will pop-up.
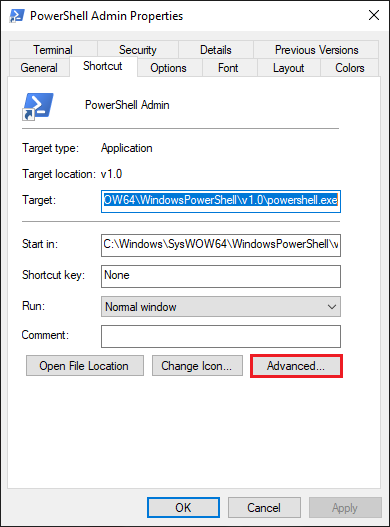
5. In the Advanced Properties window, select the Run as administrator checkbox and click OK.
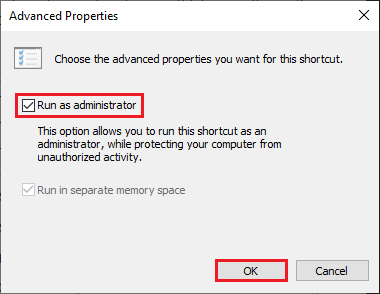
6. Back to the Shortcut Properties, click OK to apply the changes and you’re all set.
Running PowerShell as Administrator Using WinX Menu
Another way to easily access PowerShell is via the Win-X menu as shown in the following screenshot. This menu was never given an official name but was widely referred to as Win-X (or power user menu) as the shortcut to access it is Win Key + X.
Once the menu is up, simply click on Windows PowerShell (Admin) and you’re off to th races.

Using the Run Command Window
The Run Command Window is a powerful tool that lets you run programs without searching for them using the SearchBar, Start Menu or File Explorer. To run PowerShell as administrator via the Run command window:
- Press Win Key + R. A a small window will pop up as shown in the screenshot below.
- Type in powershell and press Ctrl+Shift+Enter or press and hold Ctrl+Shift.
- Click OK to make PowerShell run as administrator.
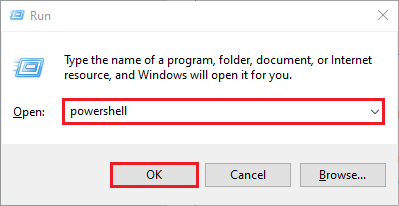
You’re now running PowerShell as administrator.
Using Task Manager
Task Manager is a tool that lets you monitor or end a process of the programs and services that are currently running on your computer. You can also use it to execute a task such as running PowerShell as administrator manually.
To run PowerShell as administrator via the task manager:
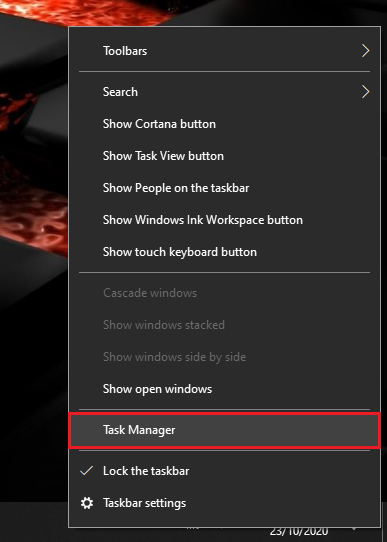
- Open the Task Manager by pressing Ctrl+Shift+Esc keys on your keyboard or as you see in the screenshot below
You can alternatively right-click on the Task Bar and select Task Manager to bring up Task Manager.
2. Once Task Manager opens, go up to File and click on Run new task as shown below.
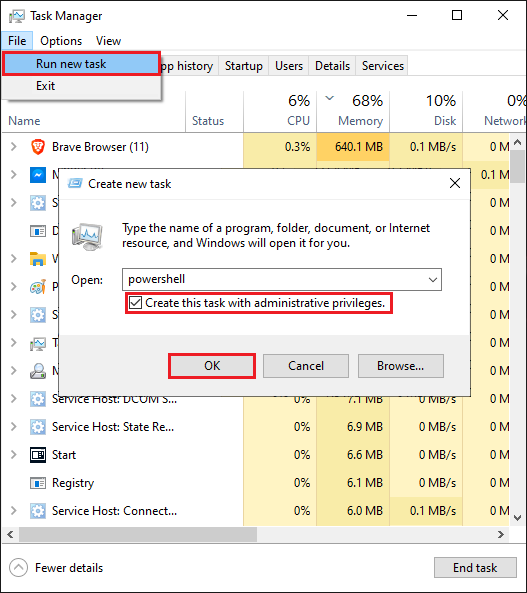
3. You should then see a window pop up that looks similar to the Run window described earlier.
4. Type in powershell ensuring you also check the Create this task with administrative privileges checkbox and click OK to make PowerShell run as administrator.
Running PowerShell as Administrator with the Command Line
If you regularly find yourself on the command line, don’t fret, you can run PowerShell as administrator there too!
If you already have cmd. exe open running as adminstrator using the same techniques described in this article, you can simply run start powershell and it will be running as adminstrator.
If you’re running a command prompt not as administrator yet, that’s not a problem. Invoke the Start-Process cmdlet with PowerShell from cmd. exe using the -Verb runas parameter.
powershell Start-Process powershell -Verb runAsIf you’re already in a PowerShell window, you can run Start-Process powershell -Verb runas directly to open a new PowerShell instance running as administrator
Creating a Batch File to Run PowerShell as Administrator
So you now know how to invoke PowerShell as administrator from a command prompt. If you already know how to do that, you can create a batch file to automate it!
Open up your favorite text editor, paste in the following line and save the file as PowerShell as admin.bat anywhere you’d like.
Powershell.exe -Command "& {Start-Process Powershell.exe -Verb RunAs}"Run the batch file and you’ll notice up comes a PowerShell window running as administrator!
Creating a Scheduled Task to Run PowerShell as Administrator
Task Scheduler is a built-in app on Windows 10 that lets you virtually run automated tasks. Hence, you can also use it to create a task that runs PowerShell as administrator each time you logon to your computer, for example.
Start up the Create Taskbox and specify the file to run as one of the below:
- For 32-bit OS: C:\Windows\System32\WindowsPowerShell\v1.0\powershell.exe
- For 64-bit OS: C:\Windows\SysWOW64\WindowsPowerShell\v1.0\powershell.exe
In the Create Task windows, provide the values to all of the menu items shown below ensuring the Run with highest privileges checkbox is checked.

Now when the scheduled task is invoked, it will execute PowerShell as administrator!


