

Gmail has been around since 2004 and is also one of the most popular email providers. But have you heard that others can potentially read your emails? Yes, and to prevent that, Gmail introduced email encryption to secure your emails.
Gmail is one of the favorites among other email providers. It’s a free web-based email service introduced by Google, allowing people to exchange messages via email. And in this tutorial, you’ll learn how to encrypt email in Gmail and protect your info from prying eyes.
Prerequisites
- For email encryption to work, you must have an account under Google Workspace (formerly Google Suite) with either an Enterprise or Education Fundamentals subscription. If you’re in a business environment and have been provided a Gmail account from your IT admin, chances are you’re already using Google Workspace. If so, you should have all prereqs to follow along.
- Gmail’s Confidential Mode would work whether you’re using the regular @gmail.com account or a Google Workspace account.
Google Workspace is a collection of enterprise-based software and products and is only available for Enterprise, Business, and School organizations. But if email security is your priority as an individual, you may get the Enterprise subscription for yourself.
Encrypting Email with Gmail
When it comes to email encryption, you can either send or receive it. Let’s start out by learning how to send an encrypted email with Gmail.
To learn how to encrypt email in Gmail, assuming you’re on your desktop:
1. Open your favorite web browser.
2. Confirm you have S/MIME encryption enabled. If you’re in an enterprise or school organization, your IT Admin should already have S/MIME encryption enabled for you. But as an individual, you must enable it on your own.
Gmail uses S/MIME (Secure/Multipurpose Internet Mail Extensions) protocol to encrypt emails. S/MIME protects emails from being read by anyone other than the sender and the recipient by encrypting the email’s content. S/MIME only works if both the sender and the recipient have S/MIME enabled in their Google Workspace accounts.
3. After enabling S/MIME, next, log in to Gmail using your Google Workspace account.
Your Google Workspace account is not the regular @gmail.com account but the one given to you by your IT Admin that has a customed email domain, like @business.com or @myschool.com. Or the one you created on your own after getting a Google Workspace Enterprise subscription for yourself, like @myemail.com.
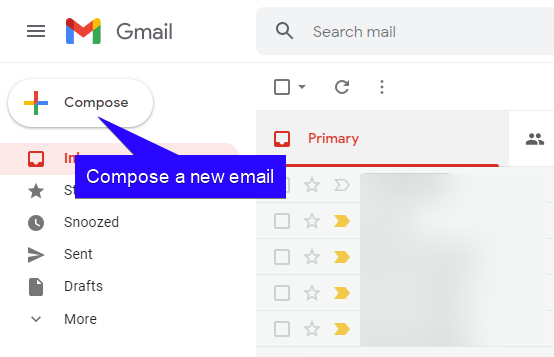
4. As shown below, click on Compose at the upper-left corner of the page to start composing a new email.
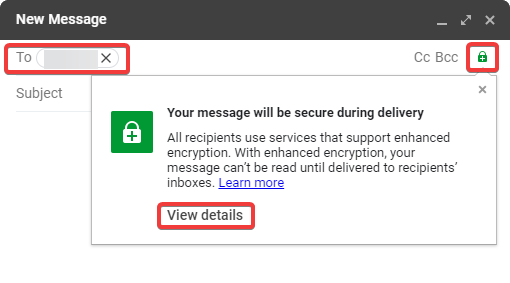
5. Type in the recipient’s email address. If the recipient’s email provider supports S/MIME, the padlock icon beside BCC turns green, as you see in the screenshot below.
Click on the padlock icon, then click on View details to change how the email should be encrypted.
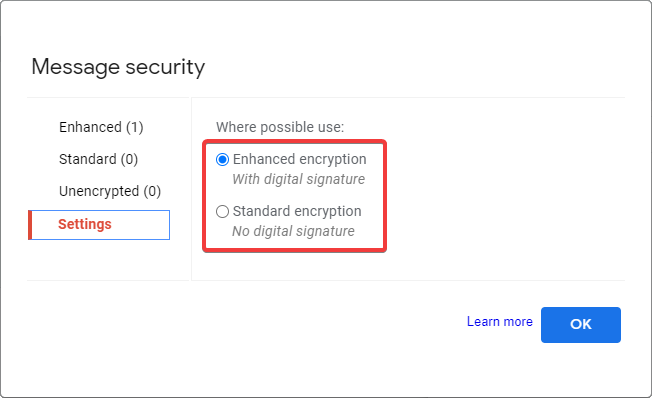
6. As shown below, you have two options to choose from; Enhanced and Standard encryption. Select Enhanced encryption for the highest security option as it will add a digital signature to your email. A digital signature is used to validate if the sender and email message are authentic.
Click OK and continue writing the email content, then send the email.
Receiving Encrypted Email in Gmail
Now that you know how to send encrypted emails, it’s time to learn to read encrypted emails you received in Gmail. Reading encrypted emails is dependent on which email provider the sender used to encrypt the email.
Read on to learn reading encrypted emails whether the sender used Gmail or Non-Gmail email providers.
Reading Encrypted Email When The Sender Used Gmail
If the sender used Gmail to send you an encrypted email, Gmail automatically converts the email back to its readable form. Then you only need to click on that encrypted email in your inbox, and read the email’s content, as shown below.
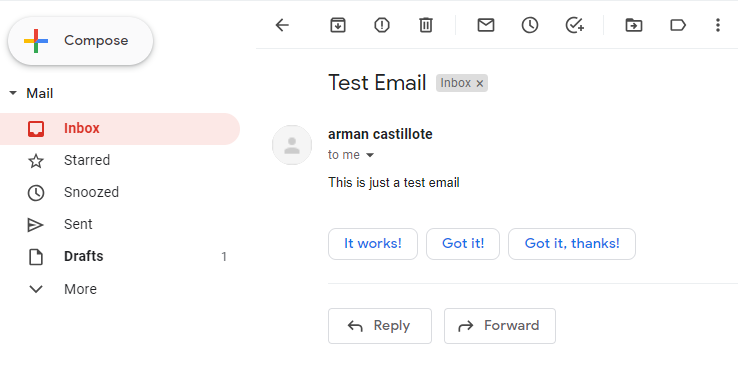
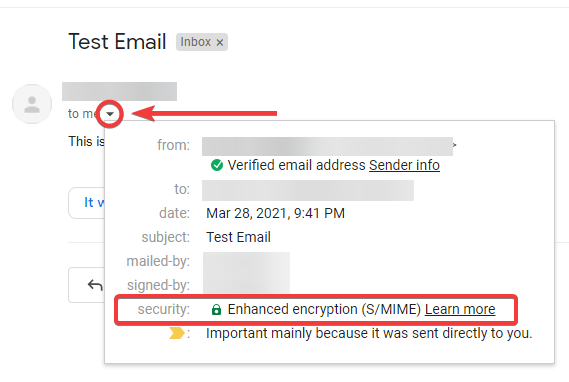
To verify if the email you received was encrypted, click on the email from your Inbox. Then click on the down-arrow button below the sender’s email address, as shown below. Now, you’d see the details indicating the email was encrypted with S/MIME.
Reading Encrypted Email From Non-Gmail Sender
If you received an encrypted email from a different email provider, you’d see instructions on decrypting the email content when you click on that encrypted email.
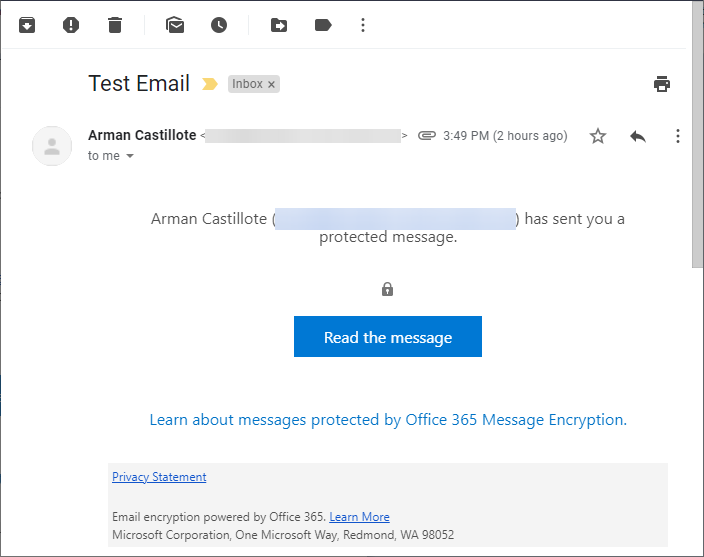
See the screenshot below as an example where the sender used Outlook to send the email, but note that every different email provider will have a unique way to do this.
From your Inbox, click on the encrypted email. Click on the Read the message button in the email preview, then you’ll get to a page that prompts you to sign in to view the email’s content.
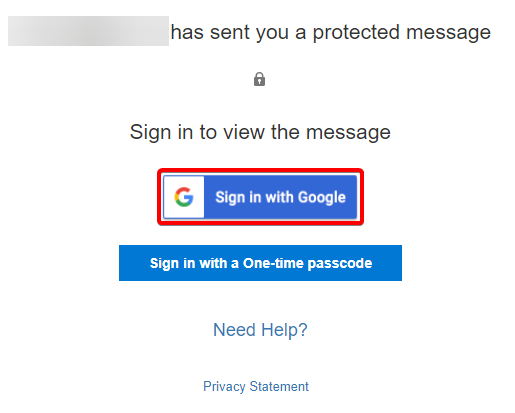
Now, you’ll get to this page where you have two options to view the email’s content; via One-time passcode or Sign in with Google. Since you’re already logged in on your Gmail account, click on Sign in with Google.
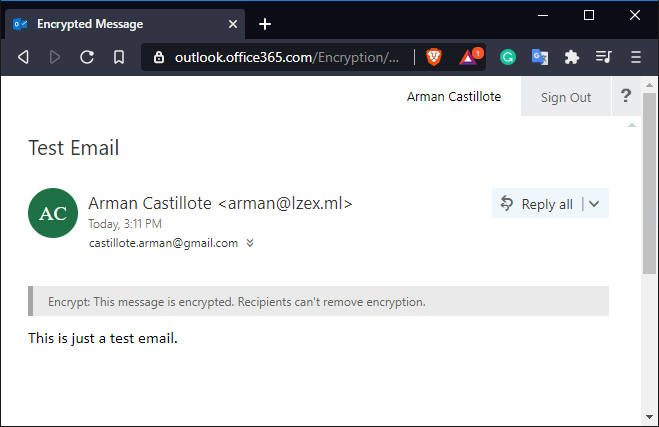
As you see below, you now gained temporary access to the email inside an Outlook environment. The next time you want to reread the email, you must repeat the whole process.
Turning on Confidential Mode in Gmail
Since you’ve now learned how to encrypt email in Gmail, no one else can read it. But to add restrictions on what the recipients can do with the email, that’s where turning on Confidential Mode comes in handy. When Confidential Mode is on, the recipients won’t have the option to forward, copy, print, or download the email.
To turn on Confidential Mode for your email, follow the steps below:
1. Open up your web browser and login to Gmail.
2. Click on the Compose button at the top-left corner of the page to compose a new email.

3. At the bottom of the message composer, click on the padlock with a clock icon on top to turn on the confidential mode.

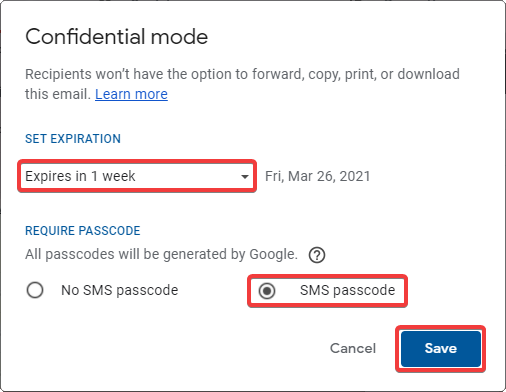
4. When you turn on Confidential Mode, you’ll see the pop-up screen below. Click the drop-down box under the SET EXPIRATION section, then choose an expiration date for the email and whether an SMS passcode is required by the reader. Once the expiry date has passed, the recipient can’t open the email anymore. Click Save to continue.
If the SMS passcode option is selected, the recipient must send an SMS passcode to their phone number for identity verification to open the email. Turning the Confidential Mode on also adds an expiry date option for the email; it’s a timeframe wherein the recipient can still read the email.
You may personally ask for the recipient’s phone number if you’re not aware of it, then continue with the instructions, or you may choose the No SMS passcode option and send the email straight away.
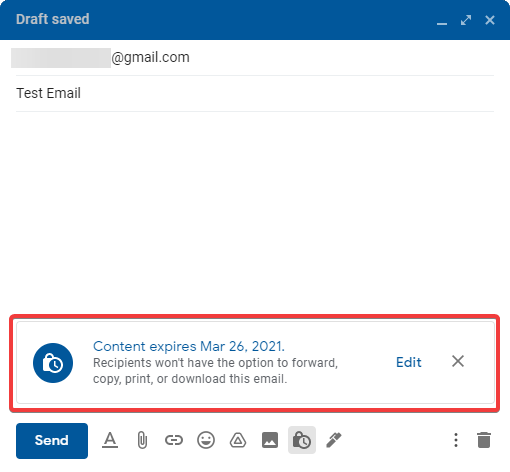
5. As you can see below, before you send the email, Gmail displays confirmation of the expiration date for the mail. Click Send to continue.
If you previously chose the No SMS Passcode option, the email will be sent straight away, and skip the following steps. Otherwise, you must register the recipient’s phone number in the pop-up prompt, as shown in the next step.
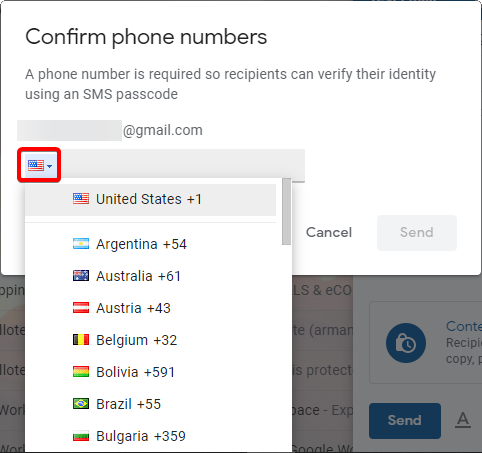
6. To register the recipient’s phone number, click on the drop-down box (with a flag icon) on the left side of the pop-up prompt. Then choose the country that corresponds to the recipient’s phone number from the list.
Doing this process ensures that the recipient will receive the SMS passcode to unlock the email contents.
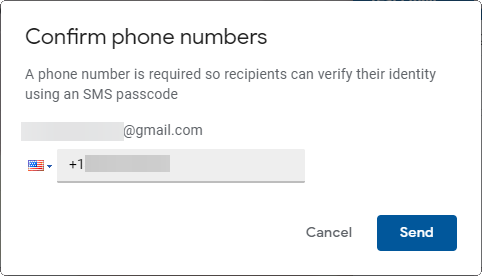
7. Now, enter the recipient’s phone number, then click Send, and that’s it! The email is sent, and the recipient is forbidden to forward, copy, print, or download the email.
When the recipient opens your email, they must confirm their phone number so that Gmail can send an SMS passcode to them. Assuming that the number they enter matches the number that you registered when sending the email, they’ll get the passcode shortly.
You’ll see the SMS verification process in action at the latter part of this tutorial under the Viewing Confidential Email section.
Viewing SMS Passcode Protected Email (Gmail to Gmail)
Gmail’s Confidential Mode is a great way to add another layer of security to your emails, and you’ll experience viewing SMS passcode protected email first hand.
If the sender did not require an SMS passcode to view the email, you only need to click on the confidential email you received, and that’s it. Otherwise, follow the steps below to fulfill the SMS Passcode verification.
1. Open your web browser and login to your Gmail account.
2. Go to your Inbox and click on an encrypted email.
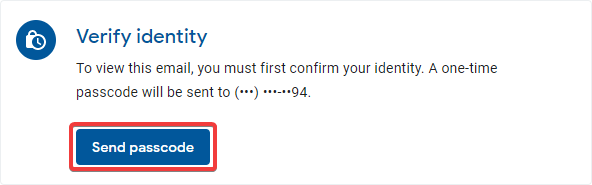
3. You’ll see the instruction below to send the passcode to your phone number. Click on Send passcode.
There’s no way to modify the phone number registered for the SMS passcode verification after sending an email. If the sender registered an incorrect phone number when sending the confidential email, the sender must resend the email with the correct one.
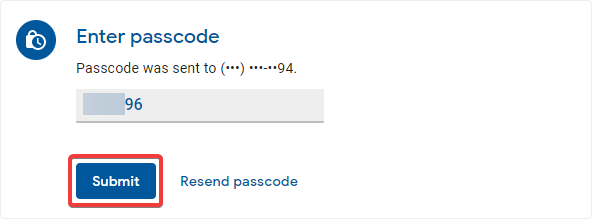
4. Like you see below, enter the passcode that you received on your phone and click on Submit. If successful, the email gets unlocked, letting you view the email’s contents.
Your access to the email content is only temporary upon completing the SMS passcode verification. The next time you open the email, you’d have to go through the same process.
Conclusion
In this article, you’ve learned how to encrypt email in Gmail from prying eyes. You also learned to add an extra layer of security to your email by turning on Confidential Mode. Now take advantage of your Google Workspace account and make it a habit to protect your emails.
The next time you send an email in Gmail, how will you protect it?


