

Serverless computing is becoming increasingly popular in reducing computing costs and improving scalability. And if you are looking for a serverless environment, Google Cloud Platform (GCP) offers its own in the form of GCP Cloud Functions.
Why stress yourself out worrying about infrastructure when you can focus on building applications instead? Let GCP Cloud Functions handle the rest! In this tutorial, you will learn how to create your first serverless function with GCP Cloud Functions.
Read on and get those codes running without relying on a server!
Prerequisites
This tutorial will be a hands-on demonstration. To follow along, ensure you have a GCP account and access to the GCP Console. The free trial account should be sufficient for this tutorial.
Creating a Google Cloud Project
Before setting up a serverless environment in GCP, your first step is to create a Google Cloud project. A project is an organizational unit in GCP that contains related services and resources. Every GCP service will be associated with one or more projects.
💡 Creating a new project for each application you develop is strongly recommended. Using existing projects can make managing resources confusing.
To create a Google Cloud project, follow these steps:
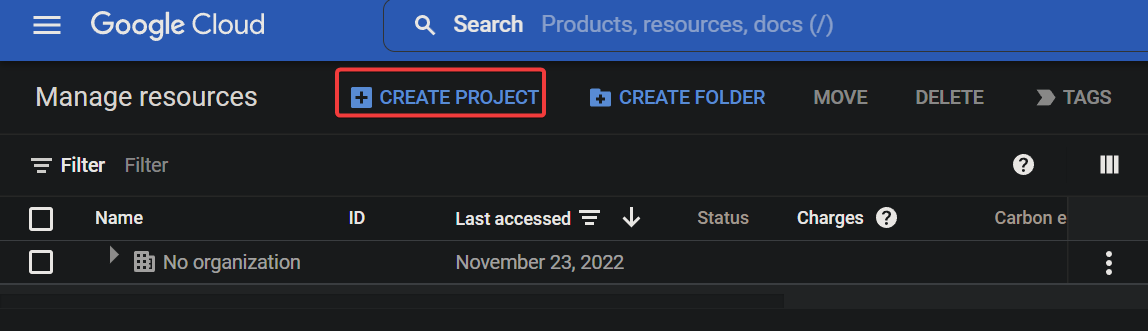
1. Open your favorite web browser, and navigate to the cloud resource manager in the GCP Console.
2. Next, click CREATE PROJECT, as shown below, to create a new project.
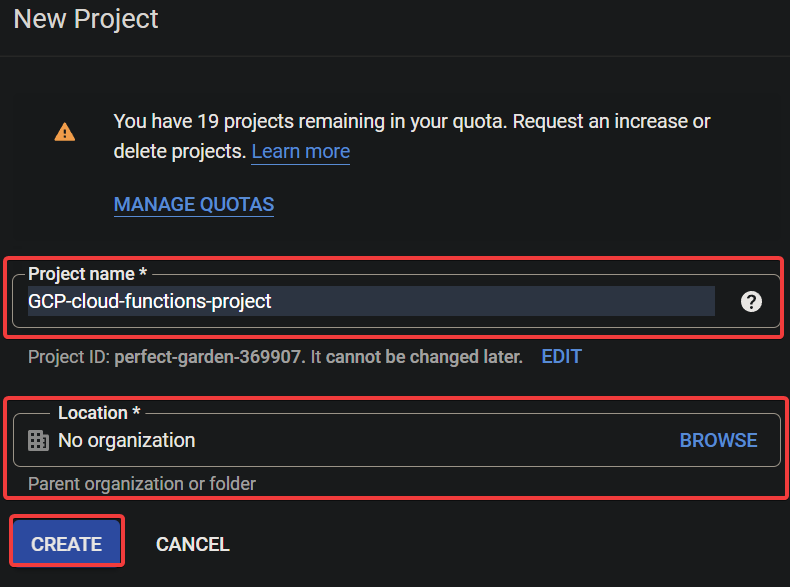
3. On the next screen, configure the new project with the following:
- Project name – Provide a unique name for the project (i.e., GCP-cloud-functions-project).Project ID – GCP will generate a unique ID for your project automatically, and it cannot be changed later. This tutorial goes with the pre-generated ID, but if you prefer a different one, click on EDIT and provide a custom project ID.Location – Select your preferred parent organization or folder for your project if you have one.
Once completed, you will receive a notification indicating that you have successfully created the project.

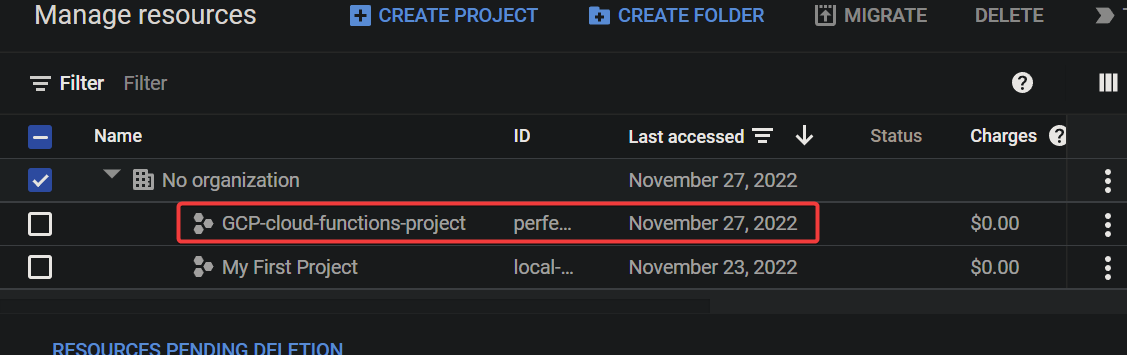
You will also see the newly-created project listed in the projects list, as shown below.
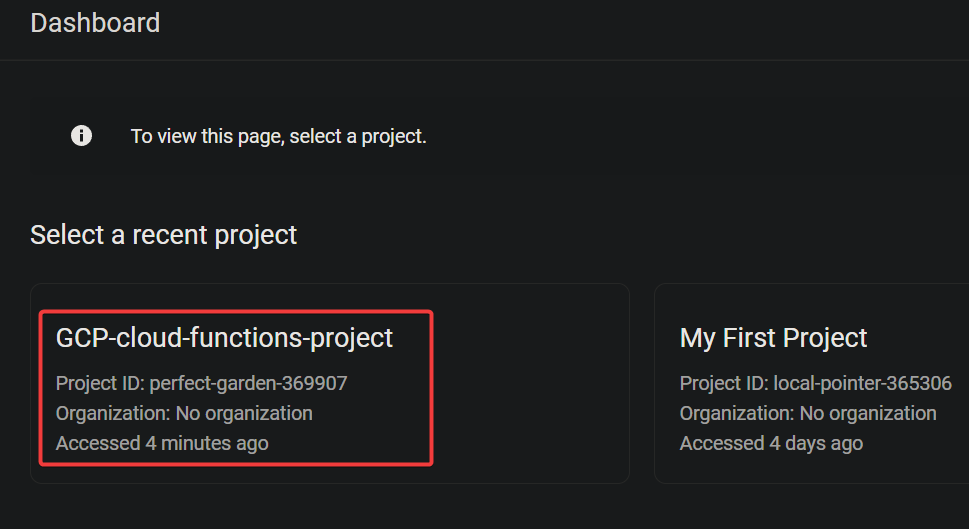
4. Now, navigate to the project selector and select your newly created project as the current project.
Enabling the GCP Cloud Functions APIs
Before creating a cloud function, you will have to enable the required APIs. Enabling the APIs will grant permission to access and use the services.
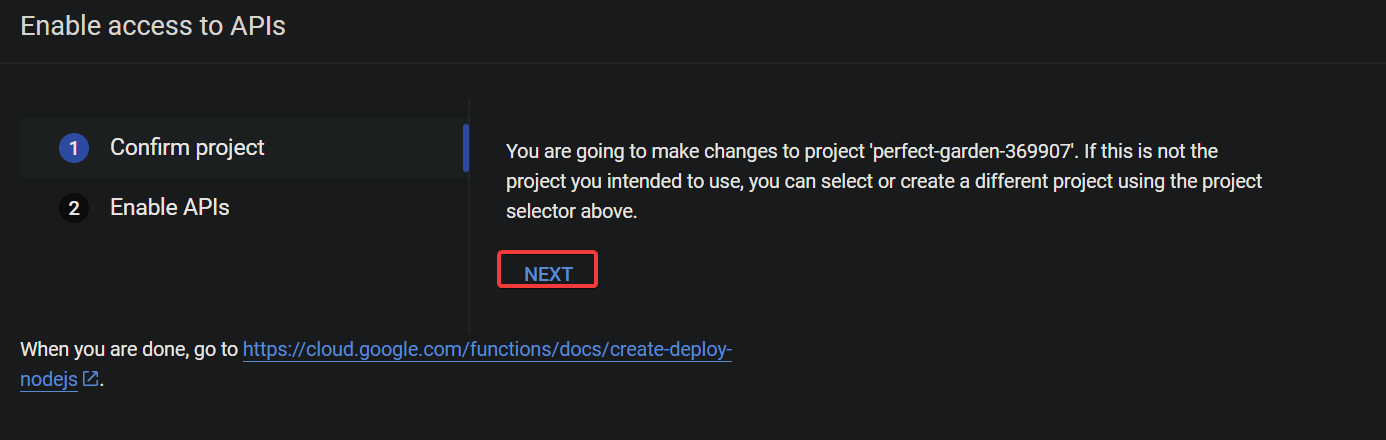
Navigate to Enable API page for Google Cloud Functions, and click Next to confirm making the changes to your project.
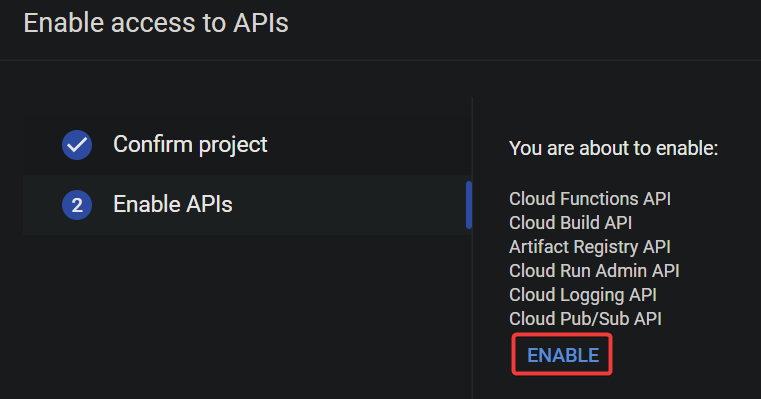
On the next screen, click ENABLE to enable all required APIs, like Cloud Functions API, Cloud Pub/Sub, and others.
Once the required APIs are enabled, you will see a notification like the one below.

Creating and Deploying a GCP Cloud Functions
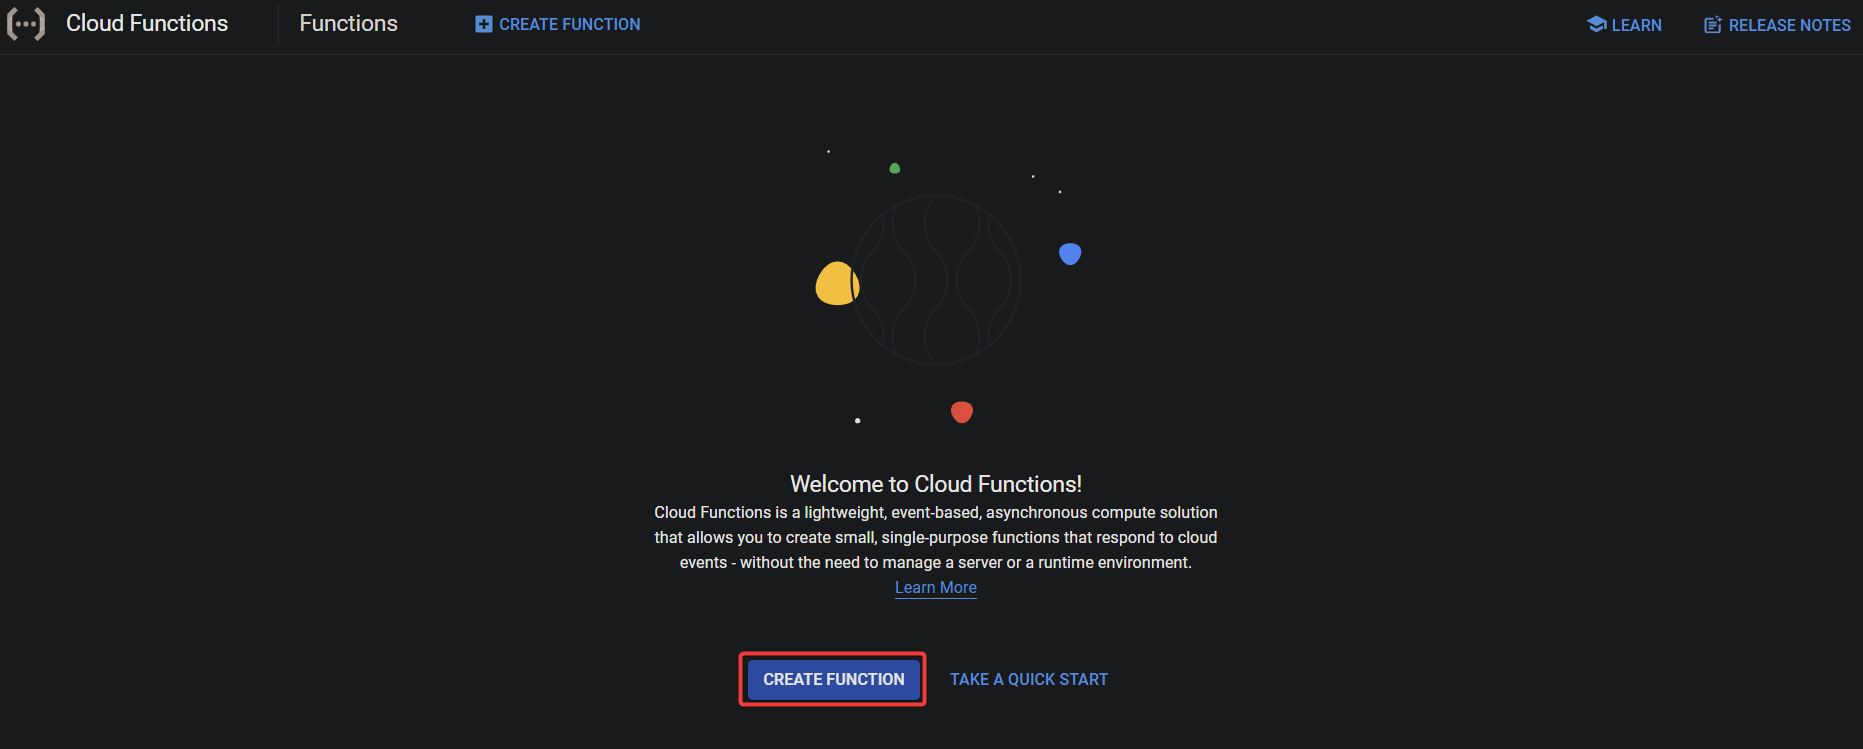
1. Navigate to the Functions Overview page in the GCP Console, and click CREATE FUNCTION to create a new function.
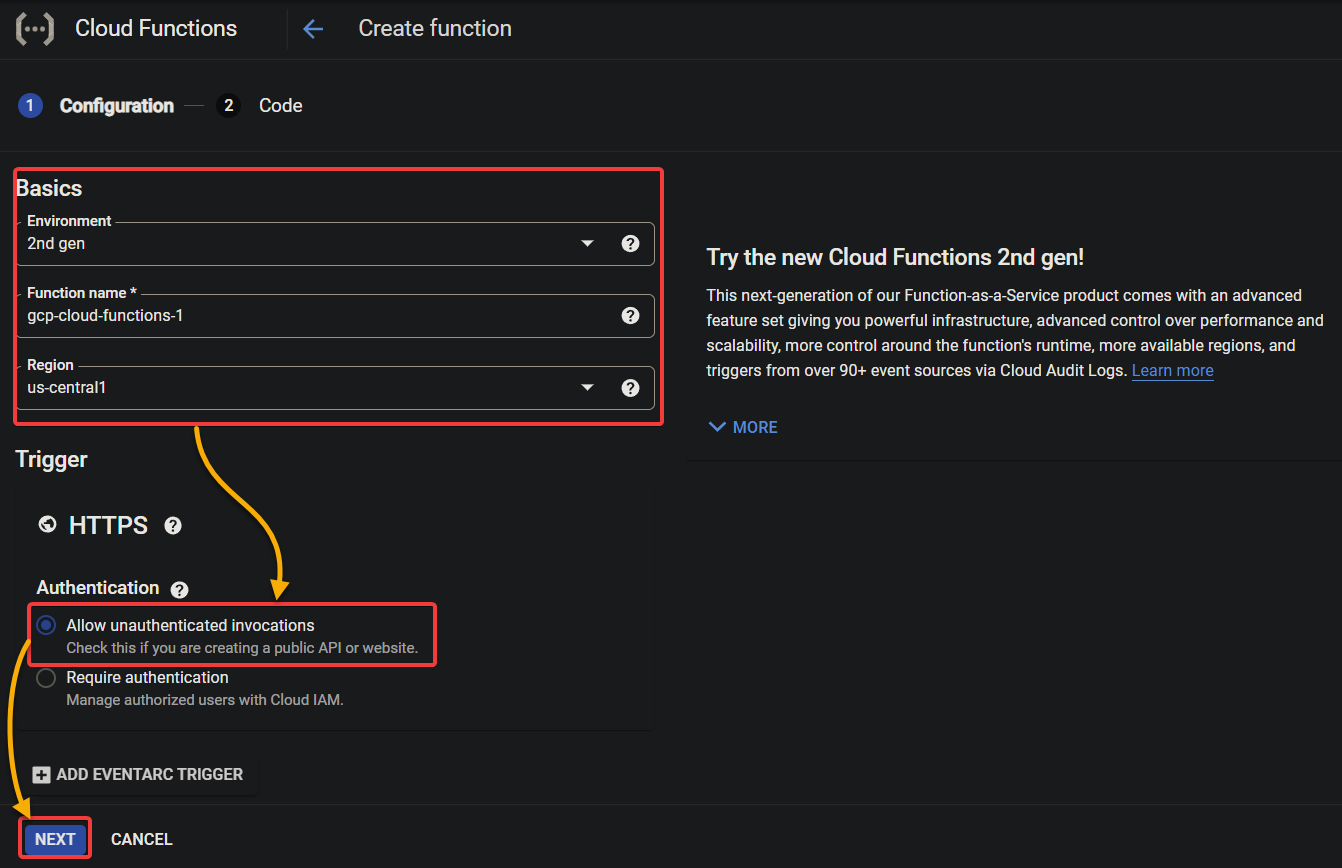
2. On the next screen, configure the new function as follows:
| Environment | Select 2nd gen from the dropdown field. GCP offers two versions of Cloud Functions (1st and 2nd Generation). In this tutorial, you will use the 2nd generation since it provides more enhanced features. One of its most notable features is it supports a stable and secure HTTPS endpoint URL. |
| Function name | Provide a unique name for the function (gcp-cloud-functions-1). The name can only contain lowercase letters, numbers, and hyphens. |
| Region | Select a region closest to you from the dropdown field. |
| Authentication | Select the Allow unauthenticated invocations option for testing purposes. This option allows you to trigger the function without complicated authentication. |
Keep the other settings as is, and click Next.
3. Configure the code for the function with the following:
- Runtime – Select Nodejs 16 version from the dropdown field. This runtime version is stable and secure and supports all the latest features of the Node.js language.Source Code – Select Inline Editor to write the function code.Replace the existing code in the editor with the one below, a basic function to send a “Hello World” output.
# Imports the functions framework library.
const functions = require('@google-cloud/functions-framework');

# Creates a web endpoint that sends a “Hello World” response when triggered.
functions.http('helloHttp', (req, res) => {
 res.send(`Hello ${req.query.name || req.body.name || 'World'}!`);
});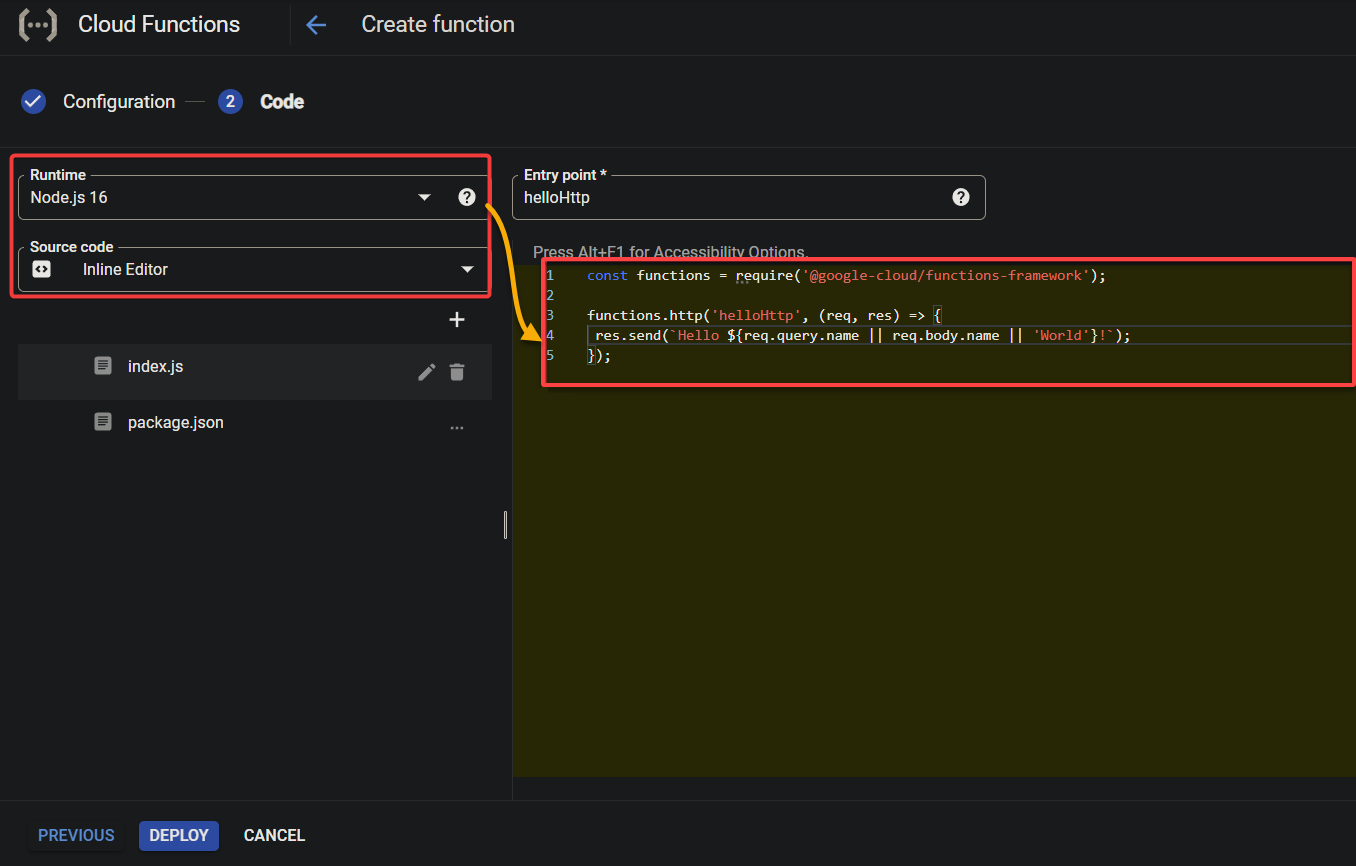
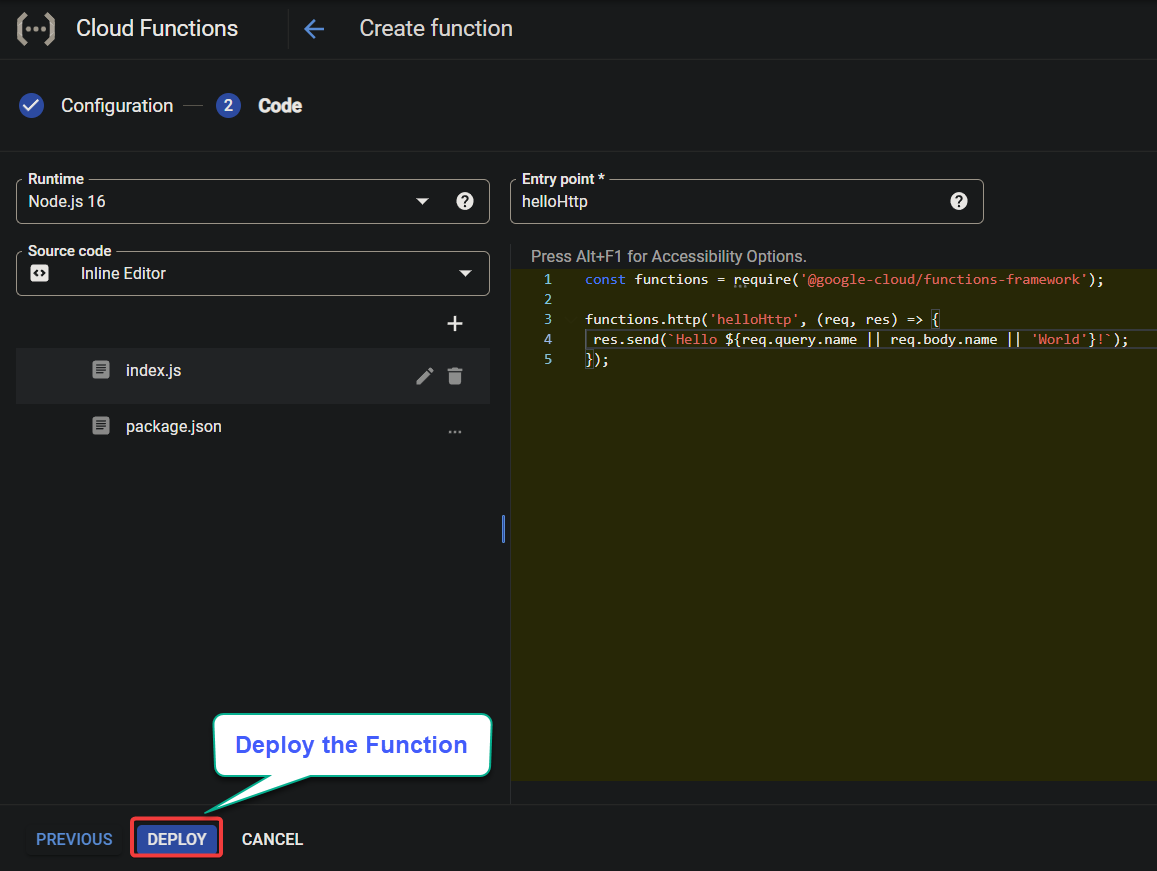
4. Next, scroll down to the bottom, and click Deploy to deploy your Cloud Function, which takes a few seconds to complete.
As you can see, GCP Cloud Functions allows developers like yourself to write code that runs without managing any servers.
5. Now, click REFRESH to reload the list of deployed functions.
Once the deployment completes, you will see a green checkmark next to the Environment column, as shown below. This checkmark indicates your GCP Cloud Functions is active and ready for use.

Testing the GCP Cloud Function
At this point, you have successfully created and deployed the GCP Cloud Function. But how do you know it is working as expected? You will test your deployed function by navigating to the function’s endpoint URL in your browser.
To test your GCP Cloud Function deployment:
1. Click the name (hyperlink) of your Cloud Function to open its Overview page.

2. Next, click the copy icon to copy the endpoint URL, as shown below.
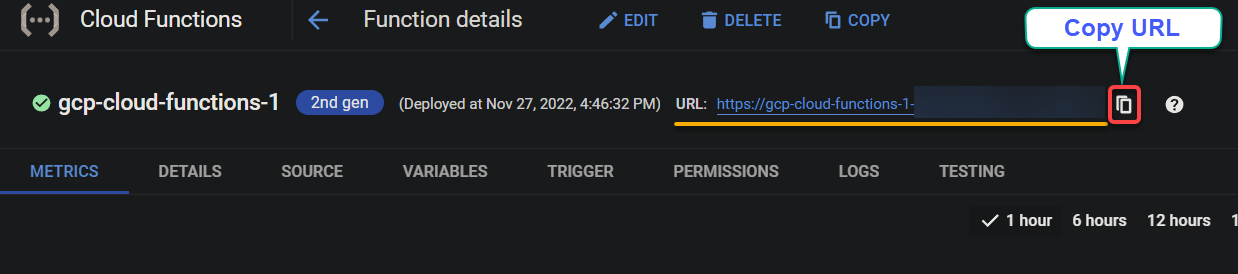
Navigate to the URL you copied in step three to a new tab in your browser.
If all goes well, you will get the Hello World message, as shown below, which indicates your deployed function works.

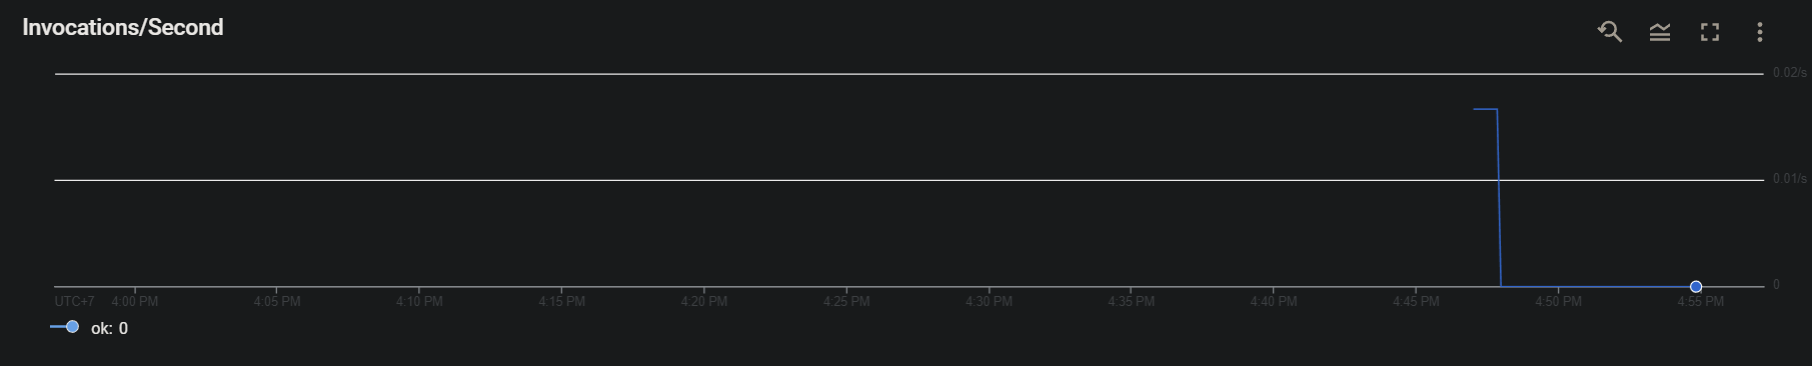
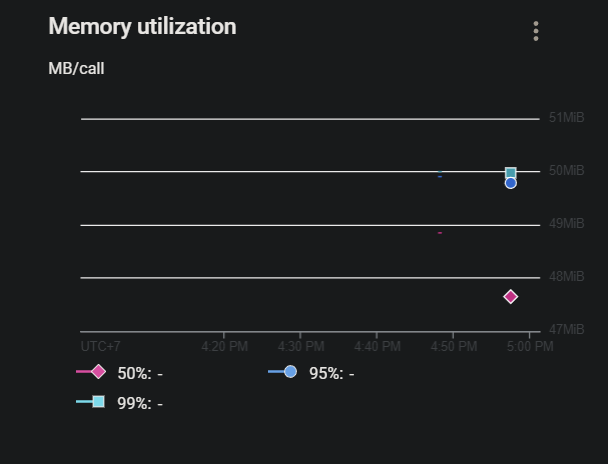
4. Now, scroll down and view the graphs and charts of the function. These graphs will help you to identify any errors or optimize the performance of the functions. The following screenshots show:
- The Invocations/Second graph – This graph shows the number of times your function is called every second.
The Memory utilization (MB/call) graph – This graph shows the average memory used by your function with each invocation. Many more helpful graphs are available, such as Memory usage, Duration time, and Error rate. Feel free to explore them.
Cleaning Up Resources
Now you have tested your deployment works, ensure you avoid incurring charges by cleaning up your resources.
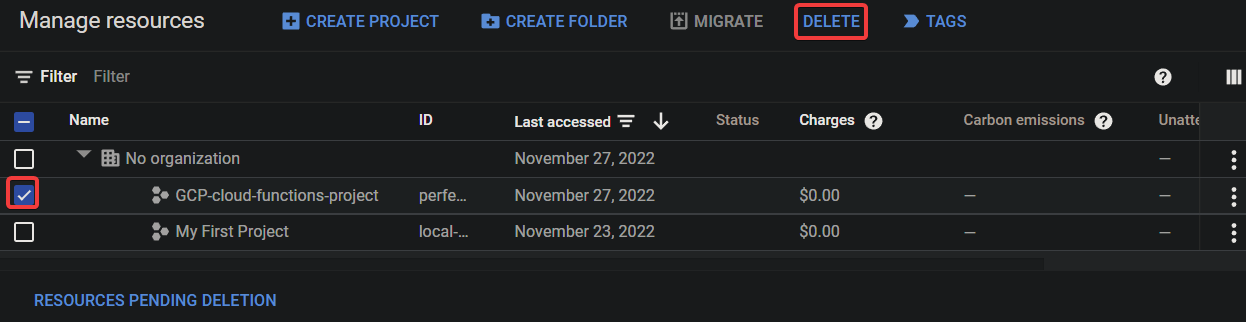
1. Navigate to the cloud resource manager page in the GCP Console.
2. Tick the checkbox next to your project name, and click DELETE to delete the selected project. This action deletes all associated resources of your project, such as cloud functions, APIs, and so on.
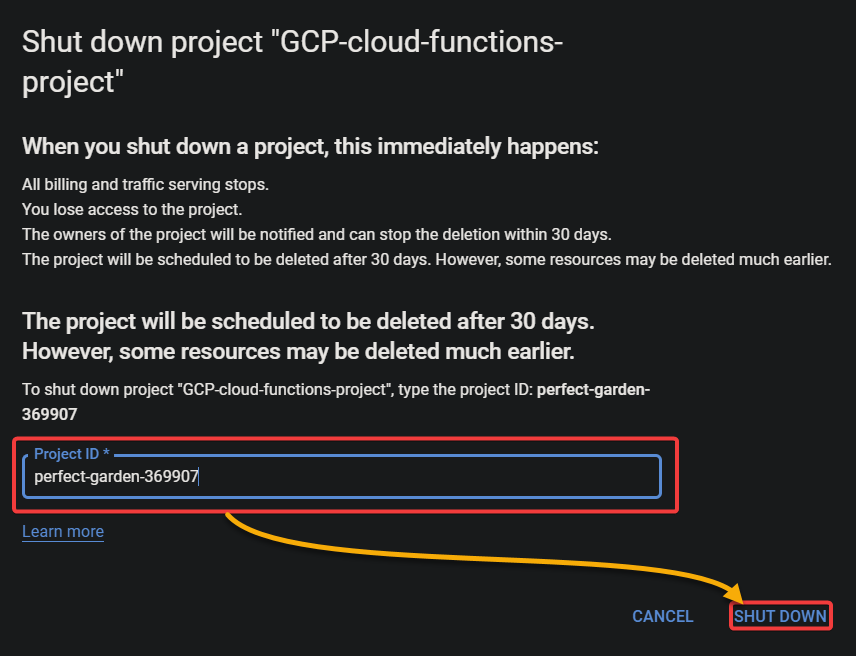
3. Finally, enter the project ID when prompted, and click SHUT DOWN to confirm the deletion.
You have a grace period of 30 days to undo the deletion. But beyond that period, your project and all its resources get permanently deleted.
Conclusion
Serverless computing provides a cost-effective way to develop and scale applications. GCP Cloud Function and AWS Lambda are the two major competitors in cloud technology. And in this tutorial, you have learned how to create and deploy a basic GCP Cloud Function via GCP.
You can use these technologies to quickly deploy code and build powerful applications without server management involved.
With this newfound knowledge, why not use Terraform to automate creating and deploying cloud functions?


