


Have you ever encountered a web page that refused to load? Your Windows 10 computer relies on the Domain Name System (DNS) resolver cache, to turn domain names into IP addresses. Sometimes, you need to flush, or clear, your DNS cache in Windows 10 when a website refuses to load.
In this article, you’re going to learn how to clear a DNS cache as a troubleshooting method in Windows 10 using the built-in ipconfig command and with PowerShell’s Clear-DnsClientCache cmdlet.
Prerequisites
To follow along with the examples in this article, you’ll need to adhere to the following.
- PowerShell – You can use Windows PowerShell 5.1 or PowerShell 7.x. All examples will use PowerShell 7.1.
Related: Upgrading to PowerShell 7: A Walkthrough
- Windows 10 – Any recent version of Windows will work. This tutorial is using Windows 10.
What’s a DNS Cache?
Computer networking uses IP addresses to talk to a remote system. You may remember google.com, but how about 172.217.169.68? A DNS server exists to translate between the two values and make navigation easier.
Instead of requesting an IP address for a website every time, Windows 10 will build a cache mapping an IP address to a domain name as you browse the internet.
Reading the Windows 10 DNS Resolver Cache
Before you begin modifying your system by flushing the DNS cache, you should first know how to read it. You should always see what you’re removing before you remove it!
One way to read a local DNS cache is with PowerShell. PowerShell comes with a built-in cmdlet called Get-DnsClientCache that will return all entries in the cache.
- Open a PowerShell console by first using the key combination Windows Key+R to open the Run window.
Ensure you run PowerShell as administrator.
2. Enter powershell and press enter to open a Windows PowerShell session.
If you are using PowerShell 7.x, use
pwshat the Run prompt instead!
3. Run Get-DnsClientCache with no parameters as shown below. You’ll then see all of the DNS records that Windows 10 has cached.
Get-DnsClientCache 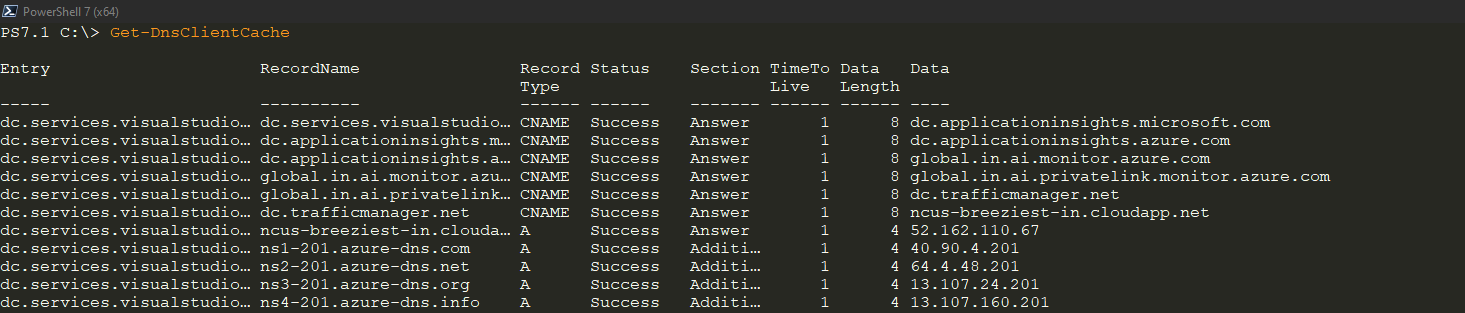
Get-DnsClientCache.4. If, for example, you only want to see specific types of records, use the Type parameter.
Get-DnsClientCache -Type A 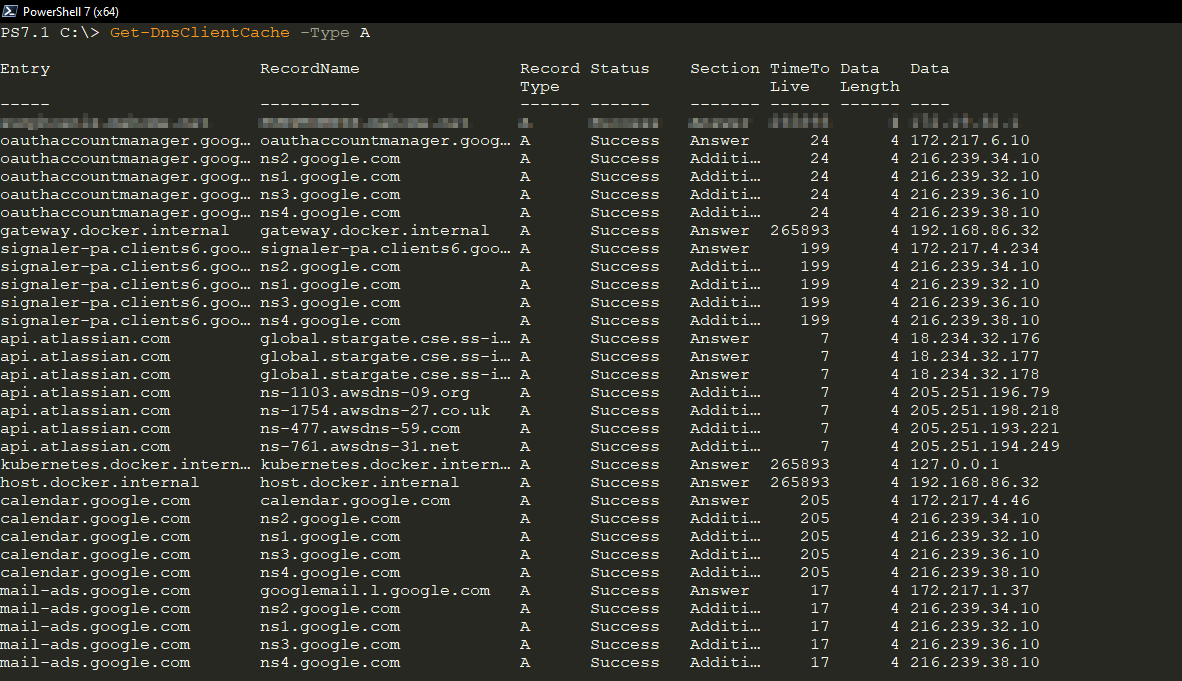
A records using the PowerShell command Get-DnsClientCache.Using ipconfig /flushdns
The original way to flush DNS in Windows 10 (and earlier) is by using the ipconfig command. Although the ipconfig command has been around since Windows NT, it gained the ability to flush the DNS resolver cache in Windows 2000.
Use the ipconfig command to clear the Windows 10 DNS resolver cache by:
- Hit Windows Key+R to open up the Run window.
2. Type cmd to open up a command prompt window.
3. Type ipconfig /flushdns. The flushdns parameter finds the current resolver cache and removes all entries immediately.
ipconfig /flushdns 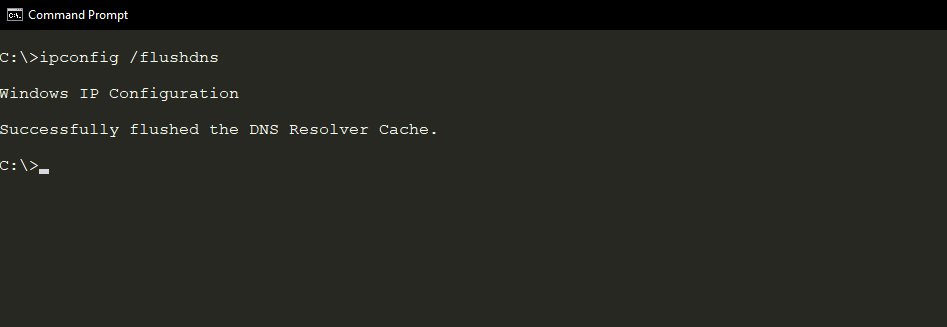
ipconfig.Related: The ipconfig Commands You Need to Know
Clearing the Windows 10 DNS Cache With PowerShell
Perhaps you’re writing an automation script and need to ensure the DNS resolver cache is cleared as part of it. Or maybe you just like PowerShell! Regardless, you can use a cmdlet called Clear-DnsClientCache to perform the exact same task as ipconfig.
To use PowerShell to clear the Windows 10 DNS resolve cache:
- While in PowerShell, run
Clear-DnsClientCacheand hit Enter.
You can also use the
Verboseparameter to displays exactly what the command will do upon completion.
Clear-DnsClientCache # The Verbose parameter outputs user-friendly messages Clear-DnsClientCache -Verbose 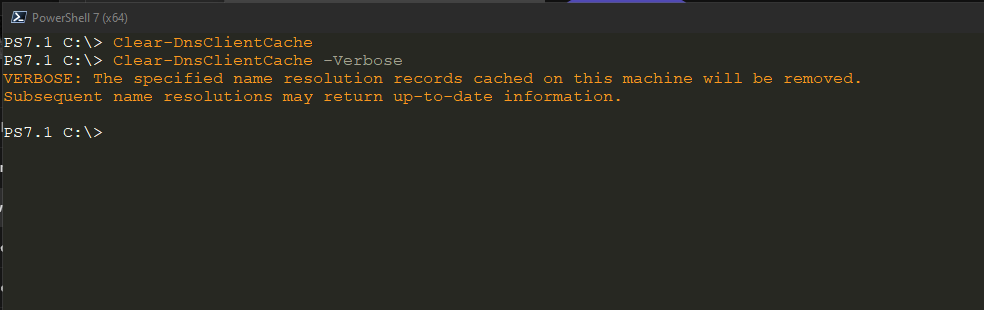
Clear-DnsClientCache.Next Steps
You do not need to understand the DNS system in-depth to quickly fix problems loading websites in Windows 10. In this article, you have learned how to flush, or clear, the Windows 10 DNS Resolver Cache using both ipconfig and the PowerShell command, Clear-DnsClientCache.
Take this one step further and see if you can clear remote system DNS client caches using Clear-DnsClientCache! Hint: Use the Invoke-Command cmdlet.


