


Hundreds of emails flow around your organization daily, even more in larger organizations. Are you confident your users can effectively discern whether that last email from the CEO or just a spoof? You don’t need to take that risk!
You can enable the Office 365 External Email Warning to indicate that the email came from outside your organization. You could configure the native external email warning that adds a callout to the message or create a mail flow rule that prepends a customizable disclaimer.
In this tutorial, you’ll learn to harness the power of Office 365’s External Email Warning feature so your users can stay one step ahead of phishing campaigns.
Prerequisites
This tutorial is a hands-on demonstration. If you’d like to follow along, ensure you have the following items.
- An Office 365 subscription. Sign up for an Office 365 trial tenant if you don’t have one for testing.
- An Office 365 admin account with an Organizational Management role.
- A computer with Windows PowerShell 5.1 or the latest PowerShell 7 (v7.2.5 as of this writing).
- Install the latest Exchange Online module (v2.0.5 as of this writing) on your computer.
- Internal and external email addresses for testing.
Method 1: Configuring the Native External Email Warning
One way to add an external email warning is by turning on the global setting that adds a callout on the email header. You can only enable this method using the Exchange Online PowerShell command Set-ExternalInOutlook.
Turning On the External Email Warning
1. First, open your PowerShell terminal and connect to Exchange Online.
Connect-ExchangeOnline -UserPrincipalName <your_admin_account>
2. Now, run the command below to confirm the current configuration before you make any changes.
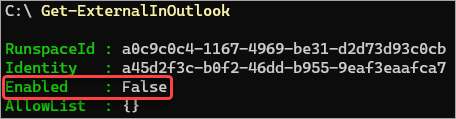
Get-ExternalInOutlookAs you can see below, the Enabled property shows that the external email warning is not enabled so you can enable it in the next step.
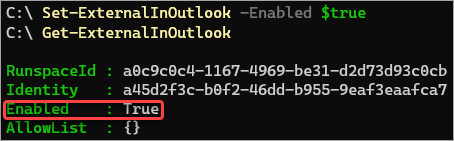
3. Next, enable the external email warning feature by running the below commands in PowerShell.
Set-ExternalInOutlook -Enabled $true4. Finally, confirm that the external email warning status is now enabled.
That’s it. You’ve successfully enabled your Exchange Online organization’s external email warning feature. Before you start celebrating, this setting could take effect after 24 to 48 hours, according to Microsoft. But that assertion is inconsistent and, in reality, could take effect faster.
Testing the External Email Warning
Now that you’ve enabled the flagging feature of Exchange Online, you should do some basic tests to confirm when and where the alert shows and how it looks in your tenant.
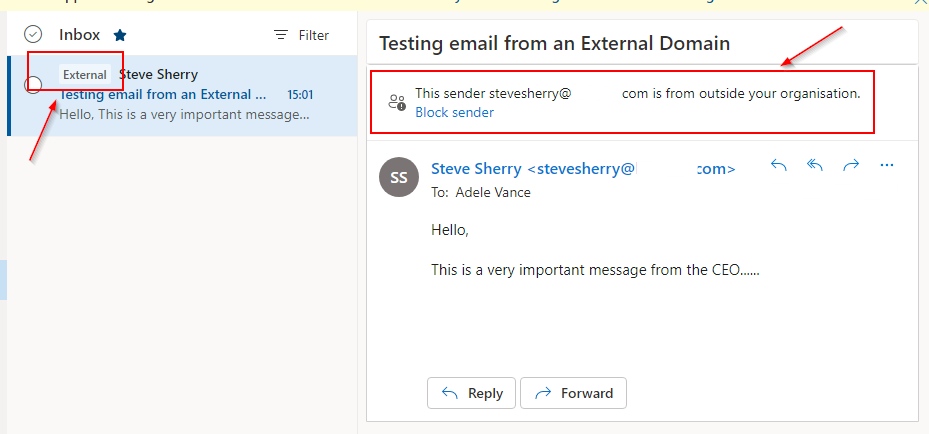
Head over to your external email account, such as Gmail, and send an email to your business email account. The organization’s internal test user is Adele Vance in the example below.
You can see that the email has an EXTERNAL flag in the header saying that the sender is from outside of your organization.
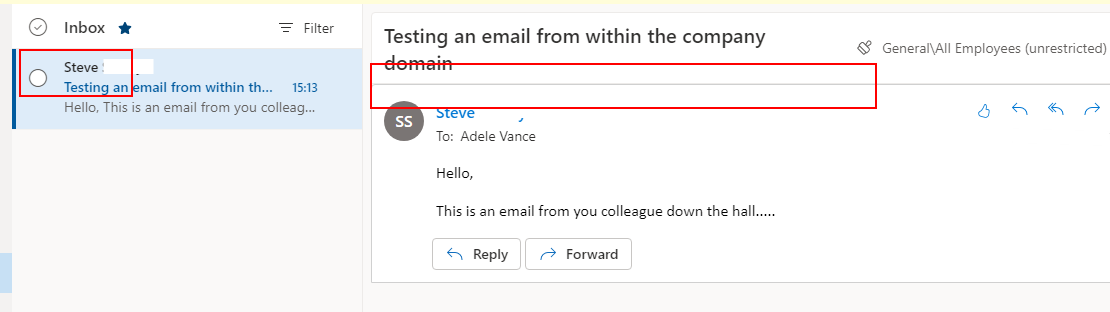
To confirm that the external email warning setting does not affect internal emails, send an email from your internal email account to another user in the organization.
Sure enough, you’ll note the lack of warnings in Adele’s inbox for your internal email test.
Avoiding False Positives for Some Friendly Domains
So, you’ve got internal emails flowing normally as expected and inbound external email warnings showing as you’d like. But what if you’ve got a sister company or a trusted business partner that you’d like to exclude from the external email warning?
Don’t worry; you only need to add those external sender domains in the allow list, and below are the steps you must follow.
1. Switch to your PowerShell window and run the Set-ExternalInOutlook cmdlet with the -AllowList parameter. The @{Add=”stevesherry.com”} is a hashtable containing the Add key, whose value is an array of the domains or specific email addresses.
If you’re adding multiple entries, separate each entry with a comma (i.e. @{Add=”stevesherry.com”,”constoso.com”}
In this example, you only add one domain to the allow list.
Set-ExternalInOutlook -AllowList @{Add="stevesherry.com"}2. Confirm that allow list now contains the entries you added.
Get-ExternalInOutlook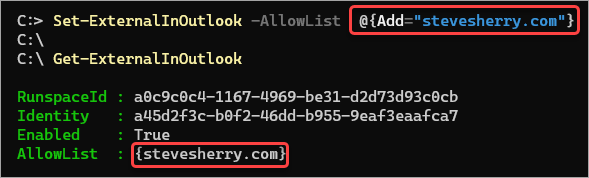
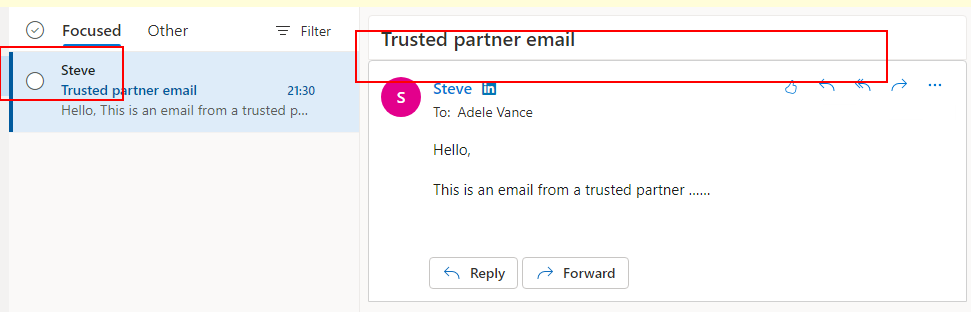
3. Send an email from the external sender in the allow list to your internal test user to test. You’ll notice that the external email warning no longer appears for messages from the excluded domain.
Method 2: Creating a Mail Flow Rule for External Email Warning
Apart from the Native External Email Warning, you can create a mail flow rule that adds a disclaimer at the top of every incoming message. Unlike the previous method, creating a mail flow rule to implement the external email warning is more customizable.
1. Open your favorite browser and navigate to the Exchange Admin Center.
2. Click through (1) Mail Flow, (2) Rules, click the (3) + sign, and select (4) Create a new rule.

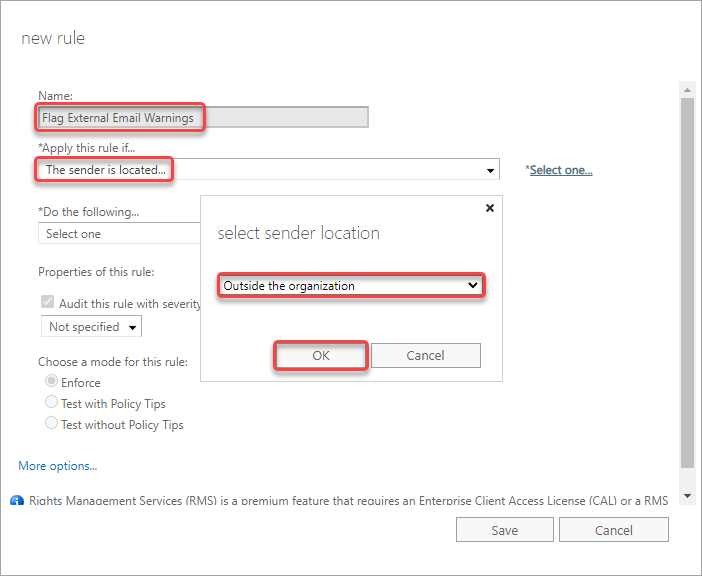
3. Give your rule a sensible name, such as Flag External Email Warnings.
Under the Apply this rule if, choose the sender is located, select Outside the organization, and OK.
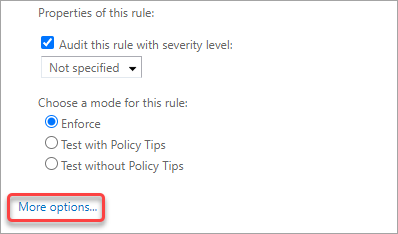
4. Next, click the More options link to reveal more configuration options.
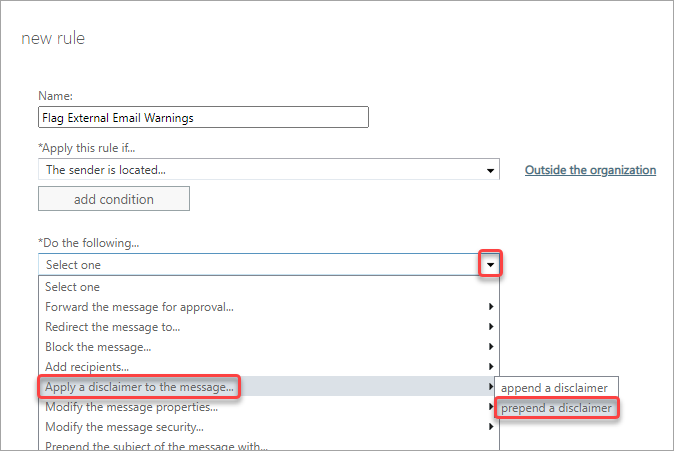
5. Under Do the following, select the Apply a disclaimer to the message → prepend a disclaimer.
6. Click the Enter text link. Paste the code below into the specify disclaimer text box that appears, and click OK.
<!-- Red Banner -->
<table border=0 cellspacing=0 cellpadding=0 align="left" width="100%">
  <tr>
    <td style="background:#ff0000;padding:5pt 2pt 5pt 2pt"></td>

    <td width="100%" cellpadding="7px 6px 7px 15px" style="background:#ff000;padding:5pt 4pt 5pt 12pt;word-wrap:break-word">
      <div style="color:#000000;">
        <span style="color:#000000; font-weight:bold;">Caution:</span>
        This is an external email and may be malicious. Please take care when clicking links or opening attachments.
      </div>
    </td>
  </tr>
</table>
<br />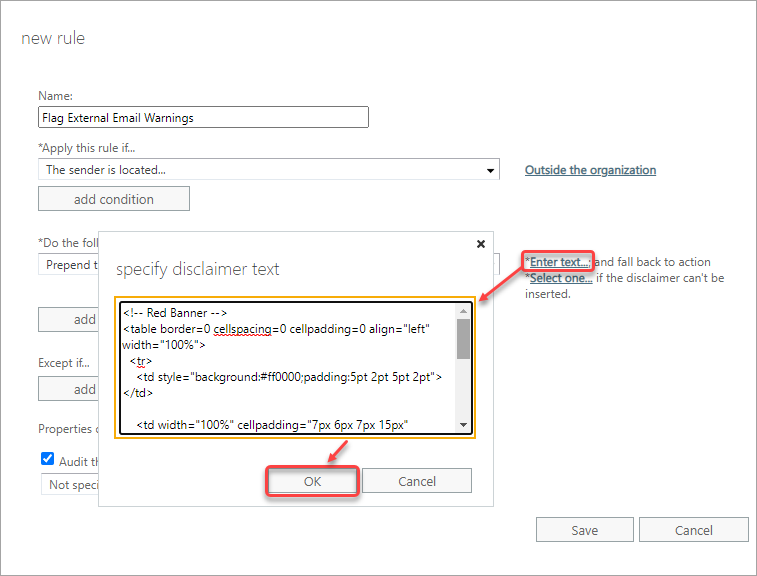
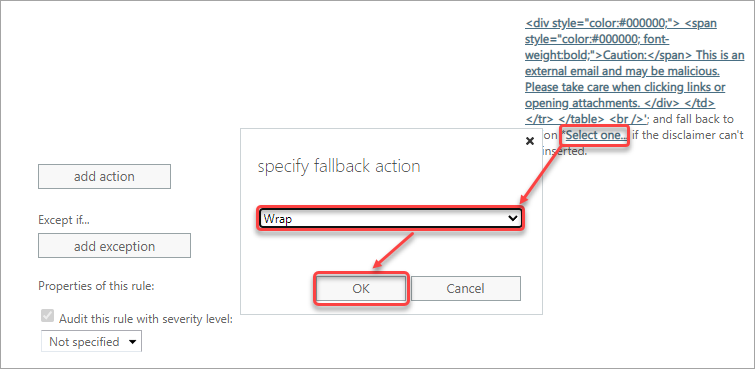
7. Click the Select one link, choose Wrap, and click OK.
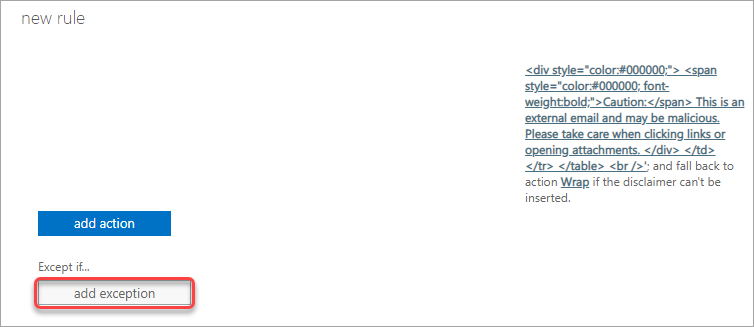
8. Click the add exception button.
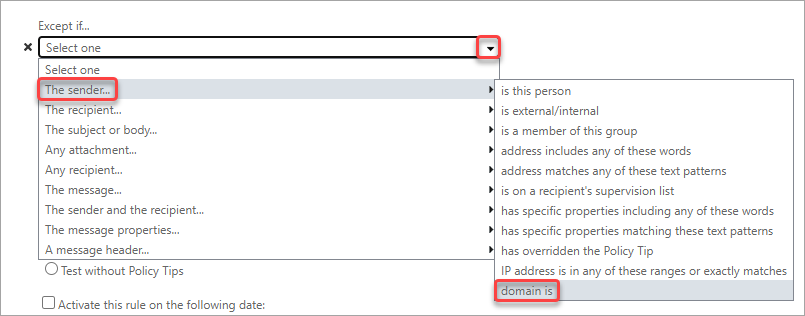
9. Click the dropdown box under Except If, select The Sender → domain is.
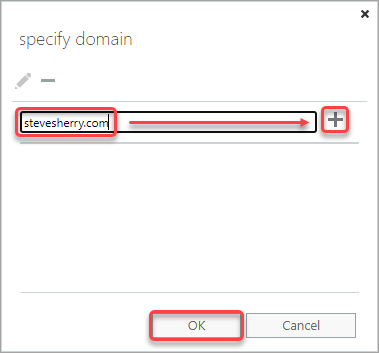
10. Type the domain name of your trusted domain and click the + sign to add it to the list. Repeat the same step to add more domains as needed. Click OK to save.
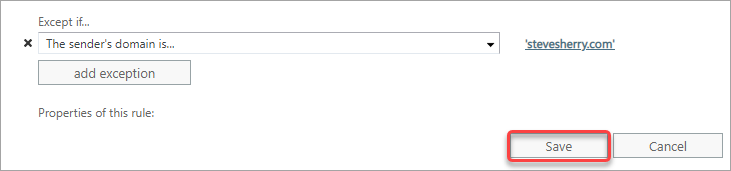
11. Finally, click Save to save and close this new rule.
12. Finally, confirm that the rule is enabled by finding a checkmark next to the rule name.
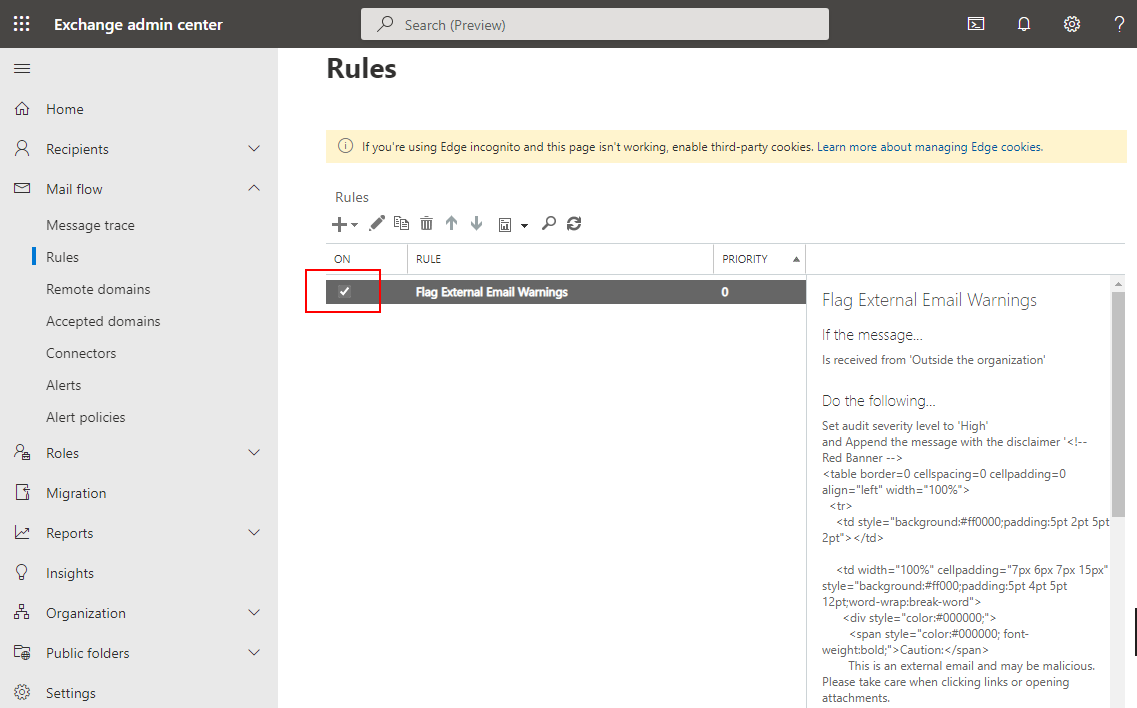
Note: Exchange Online applies the transport rules based on priority, where the smallest number (0) has the highest priority. Make sure to consider the prioritization when you have multiple mail flow rules.
Testing the Mail Flow Rule External Email Warning
The rule you created takes effect after a few minutes, so you can start testing the rule not long after.
Now, send an email from your external sender to your internal user. Open the email, and you should see the custom external email warning banner before the message body, as shown below.
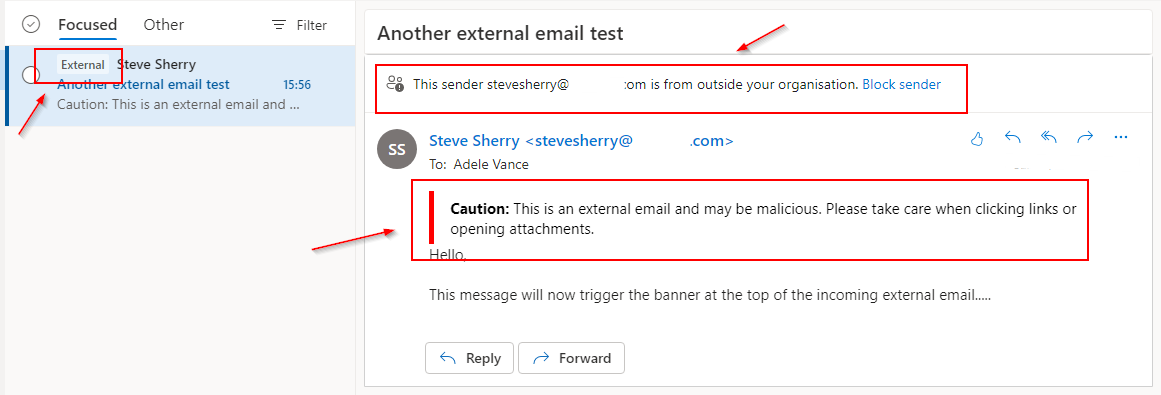
The banner uses a simplistic design at this point. Since the external email warning is pure HTML code, you can customize its appearance further to fit in with your company design or color scheme.
Conclusion
Today you’ve learned how to better protect your email users from falling prey to a phishing or spoofing attempt.
You configured the native external email warning and created a mail flow rule that allows you to customize the warning message. The mail flow rule method has more fine grain control, so you can add more conditions and exceptions as needed.
Sound off in the command if you can think of more use cases for the external email warning!


