


Do you love Docker but can’t settle with the command line? Perhaps you’re looking for the convenience of a front-end GUI. If so, then Docker Rancher Desktop might be the solution for you.
Docker Rancher Desktop is a desktop application that can uncomplicate Docker and Kubernetes on your local machine. The application includes everything you need to run containers on your computer, including a GUI, command-line tools, and an integrated container registry.
Sounds great so far? Don’t go anywhere because this article will teach you how to install Docker Rancher Desktop on your machine. You will also explore some features that make Rancher Desktop an attractive choice for developers and ops engineers.
Prerequisites
This tutorial will be a hands-on demonstration. If you’d like to follow along, be sure you have the following.
- Windows 10 build 1909 or higher, except Home Edition. This tutorial uses Windows 10 21H2.
- The computer CPU must have virtualization capabilities (Intel VT-x or AMD-V).
- 8 GB of RAM and 4 CPUs (may work with lower specs but with reduced performance).
- A code editor such as Visual Studio Code. This tutorial will use Visual Studio Code to demonstrate commands and editing code.
Installing Rancher Desktop
Rancher Desktop is an open-source project that is free and available to any major operating system, such as Windows, macOS, and Linux.
This tutorial will focus on Docker Rancher Desktop on Windows. The functionality and interface will be the same across your platform. The only main difference is with the installation.
Follow the below steps to install Docker Rancher Desktop.
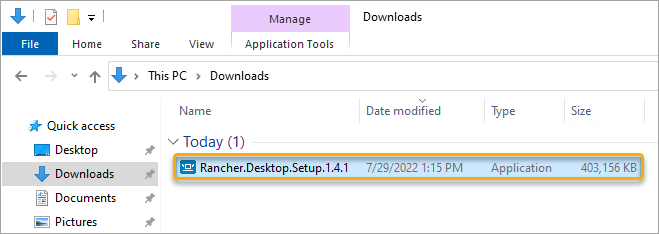
1. Open your web browser and open the Rancher Desktop GitHub releases page. The latest version as of this writing is 1.4.1.
2. Scroll down to the Assets section. Click the Rancher.Desktop.Setup-1.4.1.exe link. This file is a self-extracting executable. Save this file to a convenient location, such as your Downloads folder.

3. Locate and run the setup file to start the installation.
4. On the Rancher Desktop Setup installation wizard that appears, click I agree to accept the license agreement.
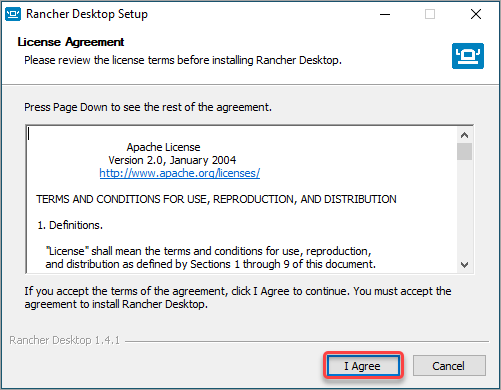
The installation starts right away. Wait a few minutes for the installation to complete.

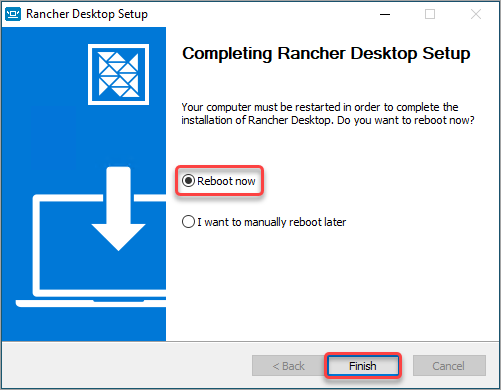
5. After installing, click the Reboot now option and click Finish. The system reboot is necessary to complete the Rancher Desktop installation.
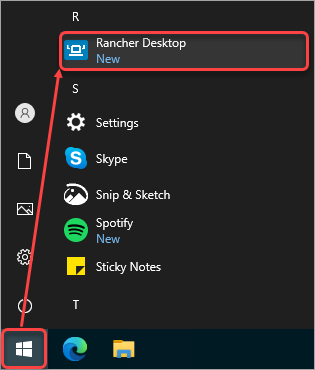
6. Launch the Rancher Desktop application after the reboot, either from the desktop shortcut or the Start menu.
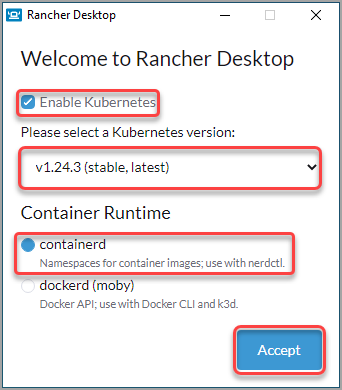
7. The initial launch will show you the Welcome to Rancher Desktop window. Leave the default settings (Enable Kubernetes, select the stable, latest version, and containerd as the Container Runtime) and click Accept.
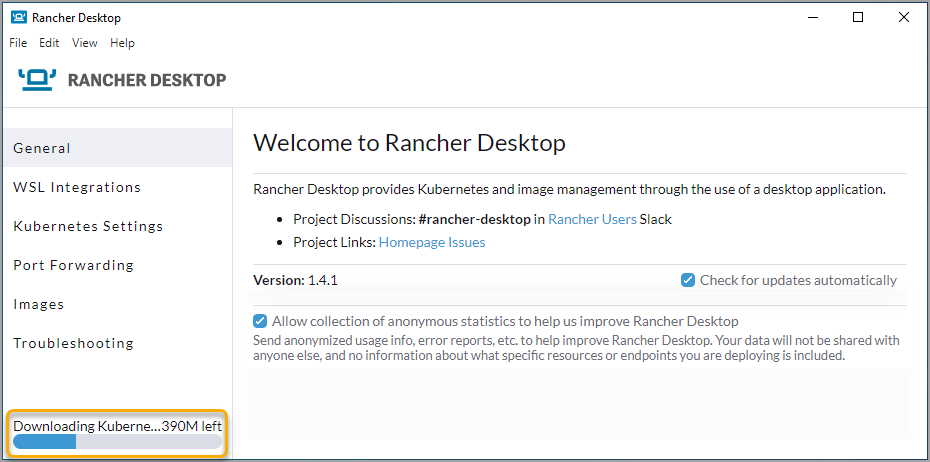
8. Wait for the Rancher Desktop to finish downloading components and starting services, and you’ll be ready to use the application.
Using Rancher Desktop: Building Images
Now that you have Docker Rancher Desktop installed, you can begin using it to build images. This section will teach you how to build a simple hello-world image using a Dockerfile and the nerdctl CLI.
Before diving in deep, familiarize yourself with the tools and names you’ll use as part of Rancher Desktop.
kubectl - the command-line interface for managing Kubernetes.
nerdctl - the command-line interface for managing (build, run, and push) images for Nerd applications.
- Docker Compose – the tool for defining and running multi-container applications.
- Moby – a tool for accelerating the development of containerized applications.
Note: You will use the nerdctl and kubectl throughout this tutorial.
Follow the below steps to build a boilerplate hello-word image.
1. Open a PowerShell window.
2. Run the following command to verify the nerdctl version. This step ensures that nerdctl is available on your machine.
nerdctl -v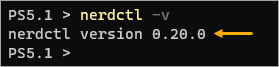
3. Run the below command to create a new hello-world folder in your profile directory. This folder will host the files related to your hello-world application.
mkdir ~/hello-world ; cd ~/hello-world4. Open the current folder in Visual Studio Code.
code $(pwd)5. Once in VSCode, click on the New File icon and create a new file called Dockerfile.

6. Copy and paste the following content into this Dockerfile file. This content defines a hello-world image that prints “Hello, world!” on the screen. Save the file after editing.
FROM alpine

CMD ["echo", "Hello World!!"]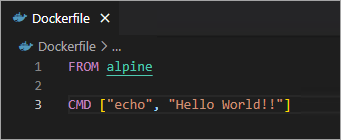
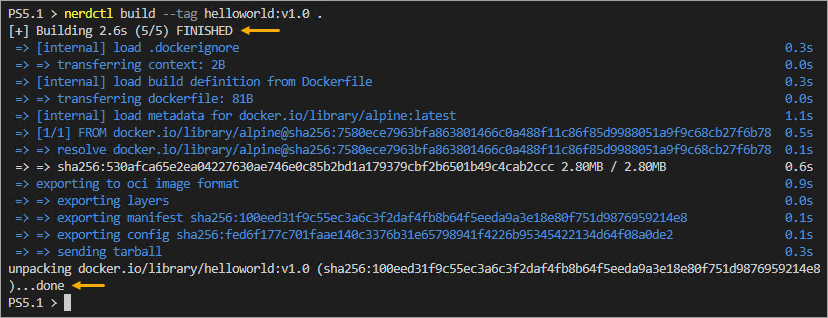
7. Run the below command on the terminal to build the image locally.
- The –tag flag specifies a name and tag for the image (helloworld:v1.0).
- The . (dot) at the end of the command tells nerdctl to look for the Dockerfile in the current working directory.
nerdctl build --tag helloworld:v1.0 .If the build is successful, you will see the following output.
8. List the images in your local registry by running the following command.
nerdctl imagesYou will see the helloworld image in the output. You can also see the image’s ID, Created time, and Size.

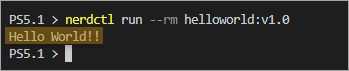
9. Run the following command to run the container. The –rm flag tells nerdctl to remove the container after running. This flag is useful for development and testing as you can quickly create and destroy containers without worrying about disk space.
nerdctl run --rm helloworld:v1.0You will see the following output after successfully running the container.
10. Finally, remove the image from the registry to free up disk space if you don’t use it anymore. To do so, run the below command to untag and delete the image from the registry.
nerdctl rmi helloworld:v1.0
Deploying a Container to Kubernetes
So far, you have built a hello world container image and run the container locally. In this section, you will learn to build and deploy an NGINX image to Kubernetes and expose it locally.
Creating an NGINX Image
1. Create the nginx folder and open that folder in VSCode.
mkdir $env:USERPROFILE\nginx
code $env:USERPROFILE\nginx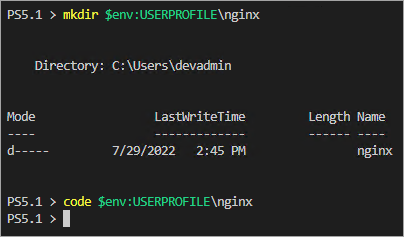
2. Once in VSCode, click the New File icon and create a new file named index.html.
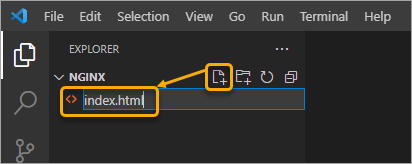
3. Copy the code below, paste it into index.html, and save the file.
<h1>Hello World from NGINX!!</h1>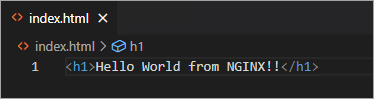
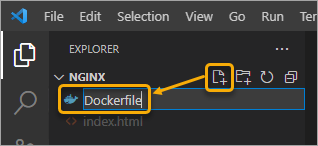
4. Next, create a new file named Dockerfile.
5. Paste the following content into the Dockerfile and save it. This file uses the official NGINX image as a base and copies the index.html file from the local file system into the NGINX container.
FROM nginx:alpine

COPY . /usr/share/nginx/html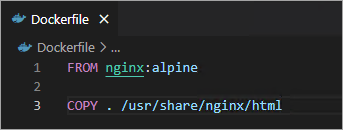
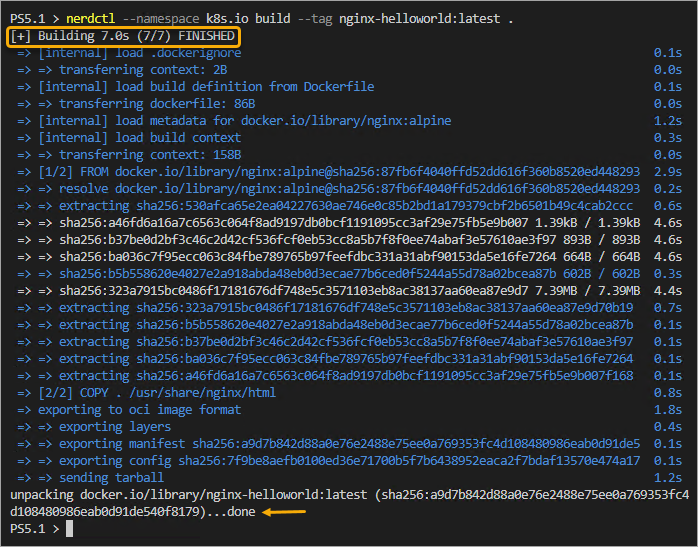
6. Run the following command to build the image. The –tag flag tags the image with nginx-helloworld:latest. The –namespace flag specifies the Kubernetes namespace in which to build the image. The resulting image will be available in the k8s.io namespace.
nerdctl --namespace k8s.io build --tag nginx-helloworld:latest .The screenshot below shows a successful image build.
7. List the images in the k8s.io registry.
nerdctl --namespace k8s.io imagesYou will see nginx-helloworld image in the result.

Deploying the NGINX Container to Kubernetes
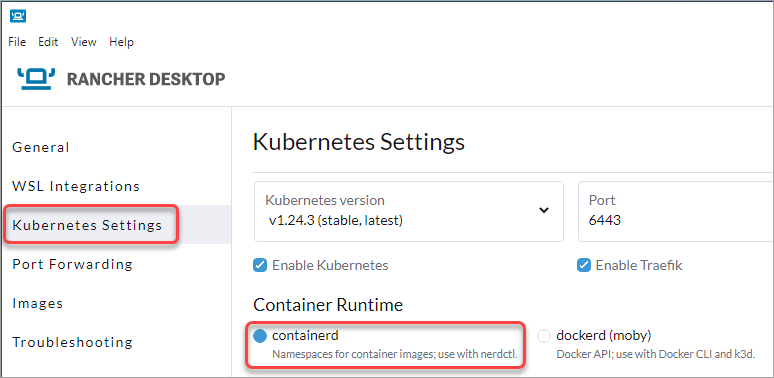
1. Open the Rancher Desktop application, click the Kubernetes Settings, and ensure that the containerd container runtime is selected. Kubernetes requires the containerd runtime to run containers.
2. Switch to the VSCode PowerShell terminal and run the below command to deploy your NGINX container to Kubernetes. This command creates a deployment named hello-world and exposes it on port 80.
The –image-pull-policy=Never flag ensures that kubectl does not pull the image from the remote registry. By default, Kubernetes will try to pull images from a remote registry if unavailable locally. In this case, you’re forcing the local image (nginx-helloworld:latest).
kubectl run hello-world --image=nginx-helloworld:latest --image-pull-policy=Never --port=803. Next, run the following command to forward the container’s port 80 to the host’s port 8080.
kubectl port-forward pod/hello-world 8080:80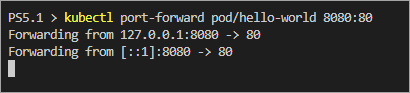
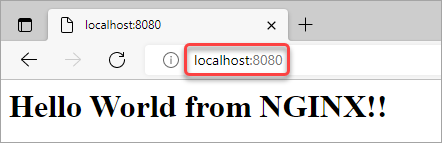
4. Now, open your web browser and access the application by this URL → http://localhost:8080. You will see the following output.
Conclusion
This tutorial taught you how to get started with Docker Rancher Desktop and Kubernetes. You have also learned how to build a simple NGINX image and deploy it to Kubernetes.
At this point, you should have a good understanding of how to use Rancher Desktop and Kubernetes. You can now continue exploring Kubernetes and learn more about its features.
With this newfound knowledge, you can start building more complex applications and deployments. Why not create a Multi-Node Cluster with k3d and deploy a WordPress site on top of it?


