


If you’re a pro at managing databases via the command-line interface, kudos to you. But let’s face it, juggling numerous commands can be cumbersome. With Azure Data Studio, you can manage your databases through an intuitive GUI.
What is Azure Data Studio?
Azure Data Studio stands as a premier tool for data professionals. Whether you’re working with local databases or Azure cloud platforms, this tool has got you covered on Windows, macOS, and Linux. In this tutorial, we’ll guide you through the process of installing Azure Data Studio and connecting it to your database.
So, keep reading to master the essentials of Azure Data Studio’s database management.
Prerequisites for Azure Data Studio
Before diving in, make sure you meet the following prerequisites to get the most out of this hands-on tutorial.
- A Windows 10 computer.
- A Linux computer – This tutorial is compatible with Ubuntu 20.04, but you can use other Linux distributions as well.
- MySQL installed on your Windows and Ubuntu computers – This tutorial assumes that you already have a database ready to manage with Azure Data Studio.
- SSH access to your Linux system.
- A non-root account with sudo privileges – Using a non-root user with sudo access is highly recommended for security reasons.
Step-by-Step Guide: Installing Azure Data Studio on Windows
Azure Data Studio is a multi-platform tool that allows you to manage SQL Server, Azure SQL Database, and Azure SQL Data Warehouse on various operating systems. It incorporates all SSMS (SQL Server Management Studio) features, along with a modern user interface, IntelliSense code-completion, integrated source control, and collaboration tools.
To leverage the power of Azure Data Studio on your Windows system, follow these installation steps:
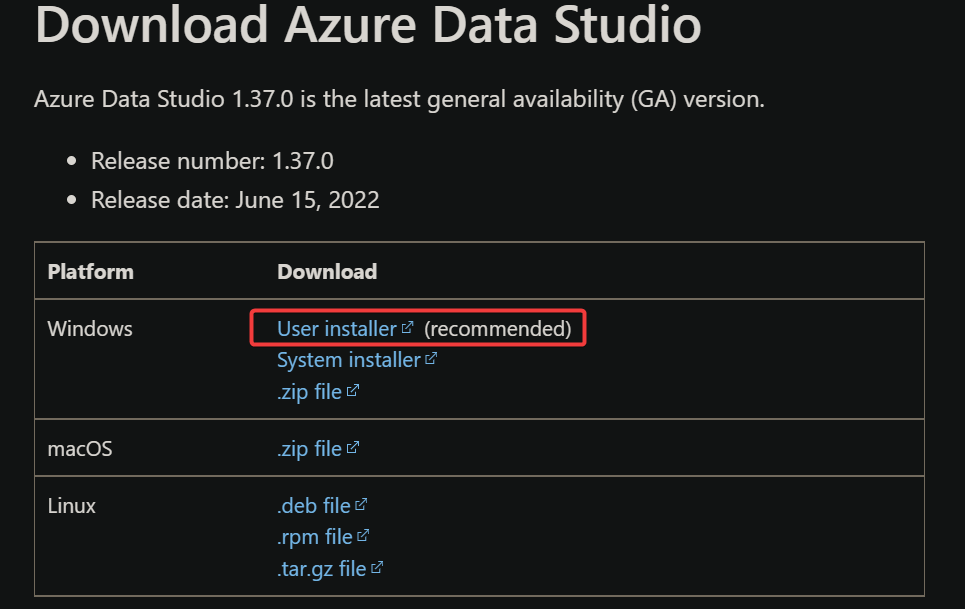
1. Open your preferred web browser and head to the Azure Data Studio download page.
2. Locate and click the ‘User installer (recommended)’ hyperlink to initiate the download.
This User installer package is tailored for individual users. It doesn’t require admin rights, ensuring that other tools on your system remain unaffected.
3. Double-click the Azure Data Studio executable that you downloaded in the previous step to launch the setup wizard.
Continuing Azure Data Studio Installation on Windows
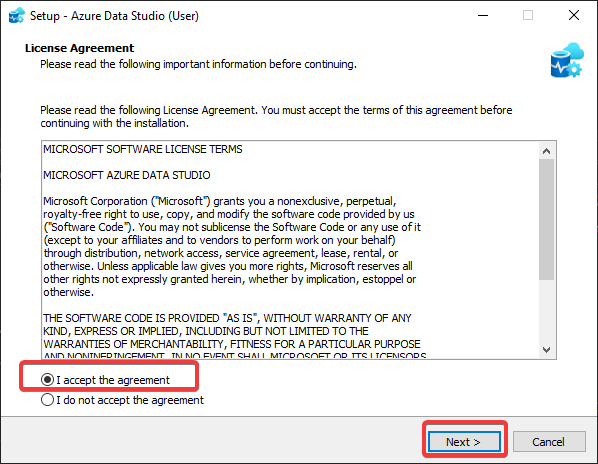
4. Once the Azure Data Studio setup wizard appears, opt for the ‘I accept the agreement’ to agree to the license terms and proceed by clicking Next.
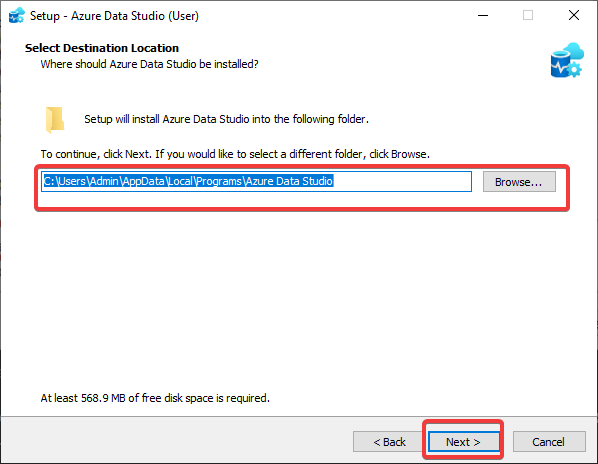
5. The default installation location should suffice for most users. Click Next to continue.
If you prefer, you can select Browse to choose an alternative installation directory for Azure Data Studio.
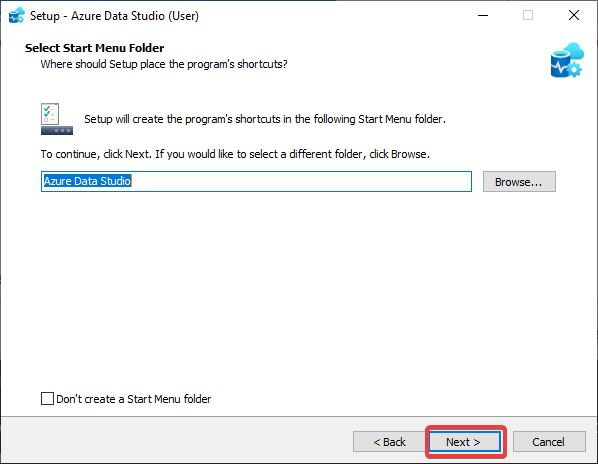
6. The next screen lets you set a location for Azure Data Studio’s shortcut. Click Next to proceed.
Additional Setup Options in Azure Data Studio
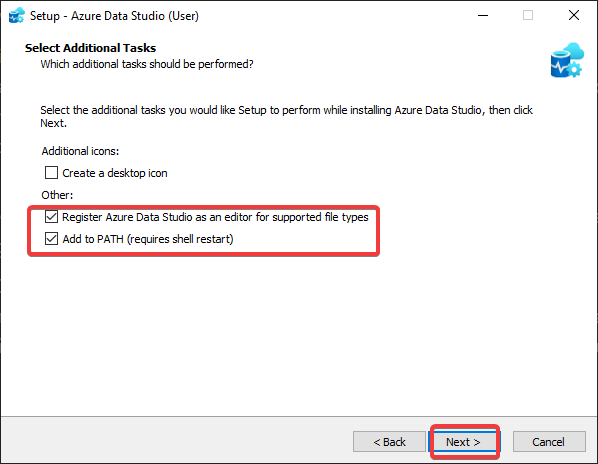
7. You will be presented with additional tasks for Azure Data Studio setup. Make your selections as follows and click Next:
- Enable the ‘Register Azure Data Studio as editor for supported filetypes’ option. This sets Azure Data Studio as your go-to editor for certain file extensions like .sql and .json.
Why choose this option? Consistency is key when you’re juggling multiple file types in your daily tasks.
- Check the ‘Add to path’ box to add Azure Data Studio to your PATH environment variable. This enables you to launch Azure Data Studio directly from the command line, a useful feature when the GUI isn’t available.
Like Ubuntu, Windows has an environment variable called PATH. This tells the OS where to find executables.
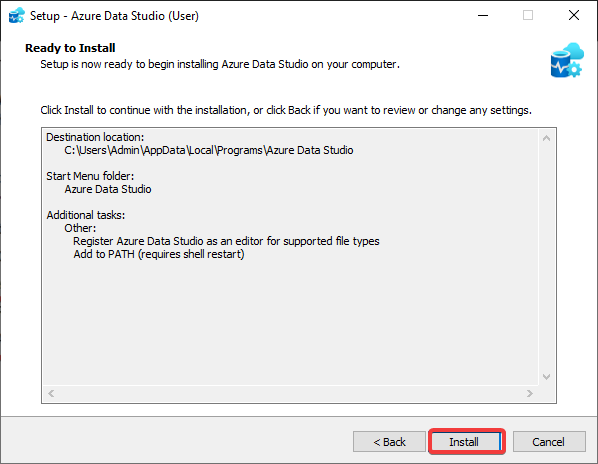
8. Now, click the Install button to begin installing Azure Data Studio.
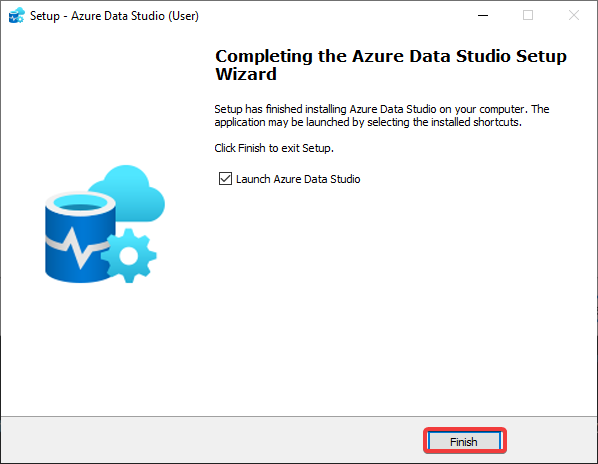
9. After the installation is complete, click Finish to close the setup wizard.
You also have the option to launch Azure Data Studio immediately by ticking the ‘Launch Azure Data Studio’ checkbox before clicking Finish.
How to Install Azure Data Studio on Linux
Linux is another popular platform for Azure Data Studio. Just like on Windows, you’ll need to install Azure Data Studio to get started.
Installing Azure Data Studio on Ubuntu
The best way to get Azure Data Studio up and running on Ubuntu is through the .deb package. This is a container format that neatly packages the application along with all its dependencies.
1. First, log in to your Linux machine and fire up your preferred web browser.
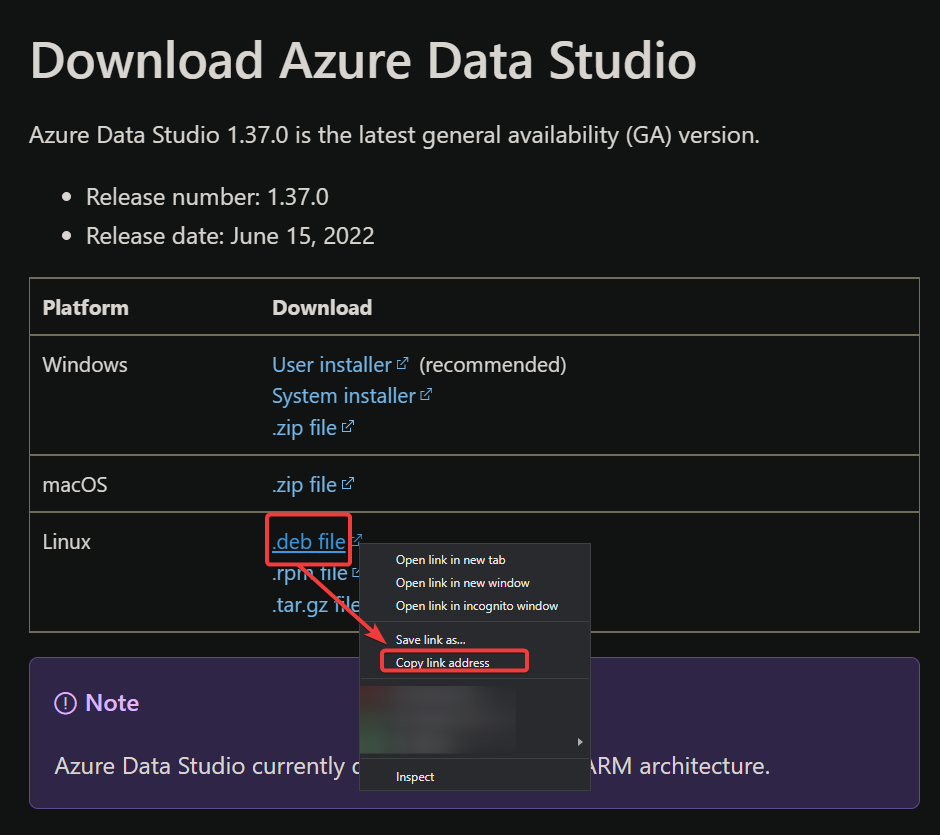
2. Head over to the Azure Data Studio download page, similar to what you did for the Windows installation.
3. Locate the .deb file link and right-click to select ‘Copy link address’, capturing the download URL.
4. Now, switch to your Terminal. Use the wget command to download the Azure Data Studio .deb file. Be sure to replace the URL with the one you copied.
If you’re operating as a non-root user, remember to prepend sudo to commands requiring elevated privileges throughout this tutorial.
wget https://sqlopsbuilds.azureedge.net/stable/d904740d93d7df76a0ba361f20e4351813b57645/azuredatastudio-linux-1.37.0.deb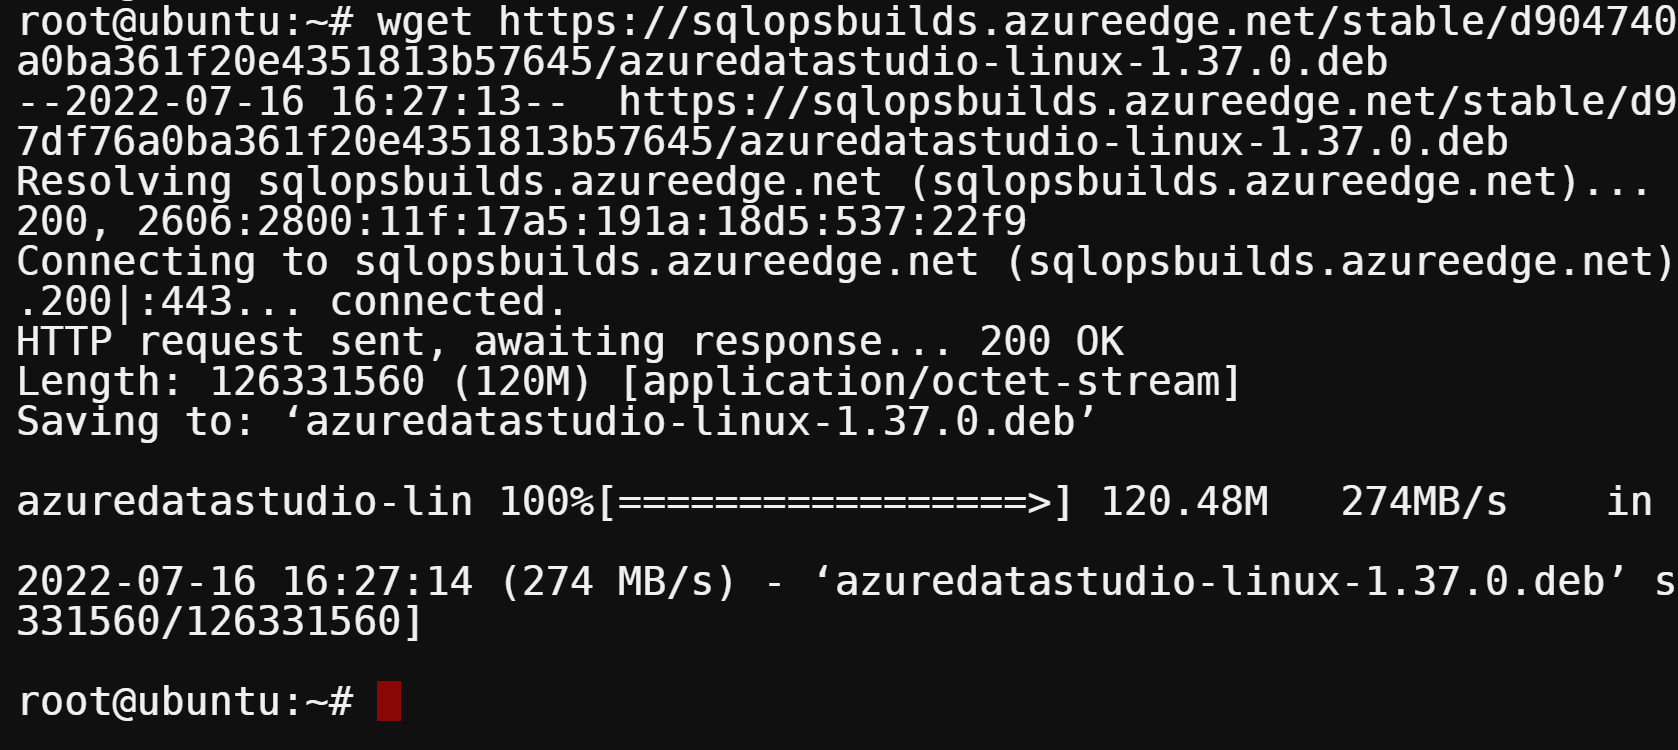
5. To confirm that the Azure Data Studio .deb file is downloaded, execute the ls command.
Replace azuredatastudio-linux-1.37.0.deb with your downloaded .deb file name whenever you refer to it in this tutorial.
ls -la azuredatastudio-linux-1.37.0.debIf you notice an HTML file instead of the .deb file, revisit step four to download the .deb file again.

Updating Package Index and Viewing Dependencies
6. Before installing, it’s good practice to update your package index. Run the apt update command to update the list of available packages and their versions.
apt update -y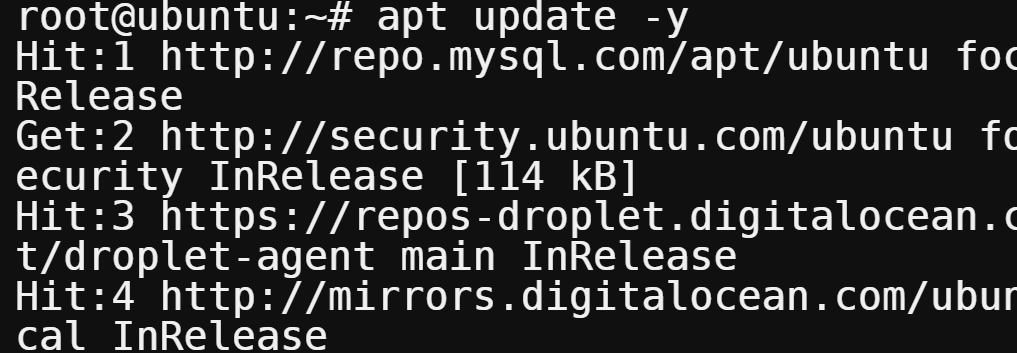
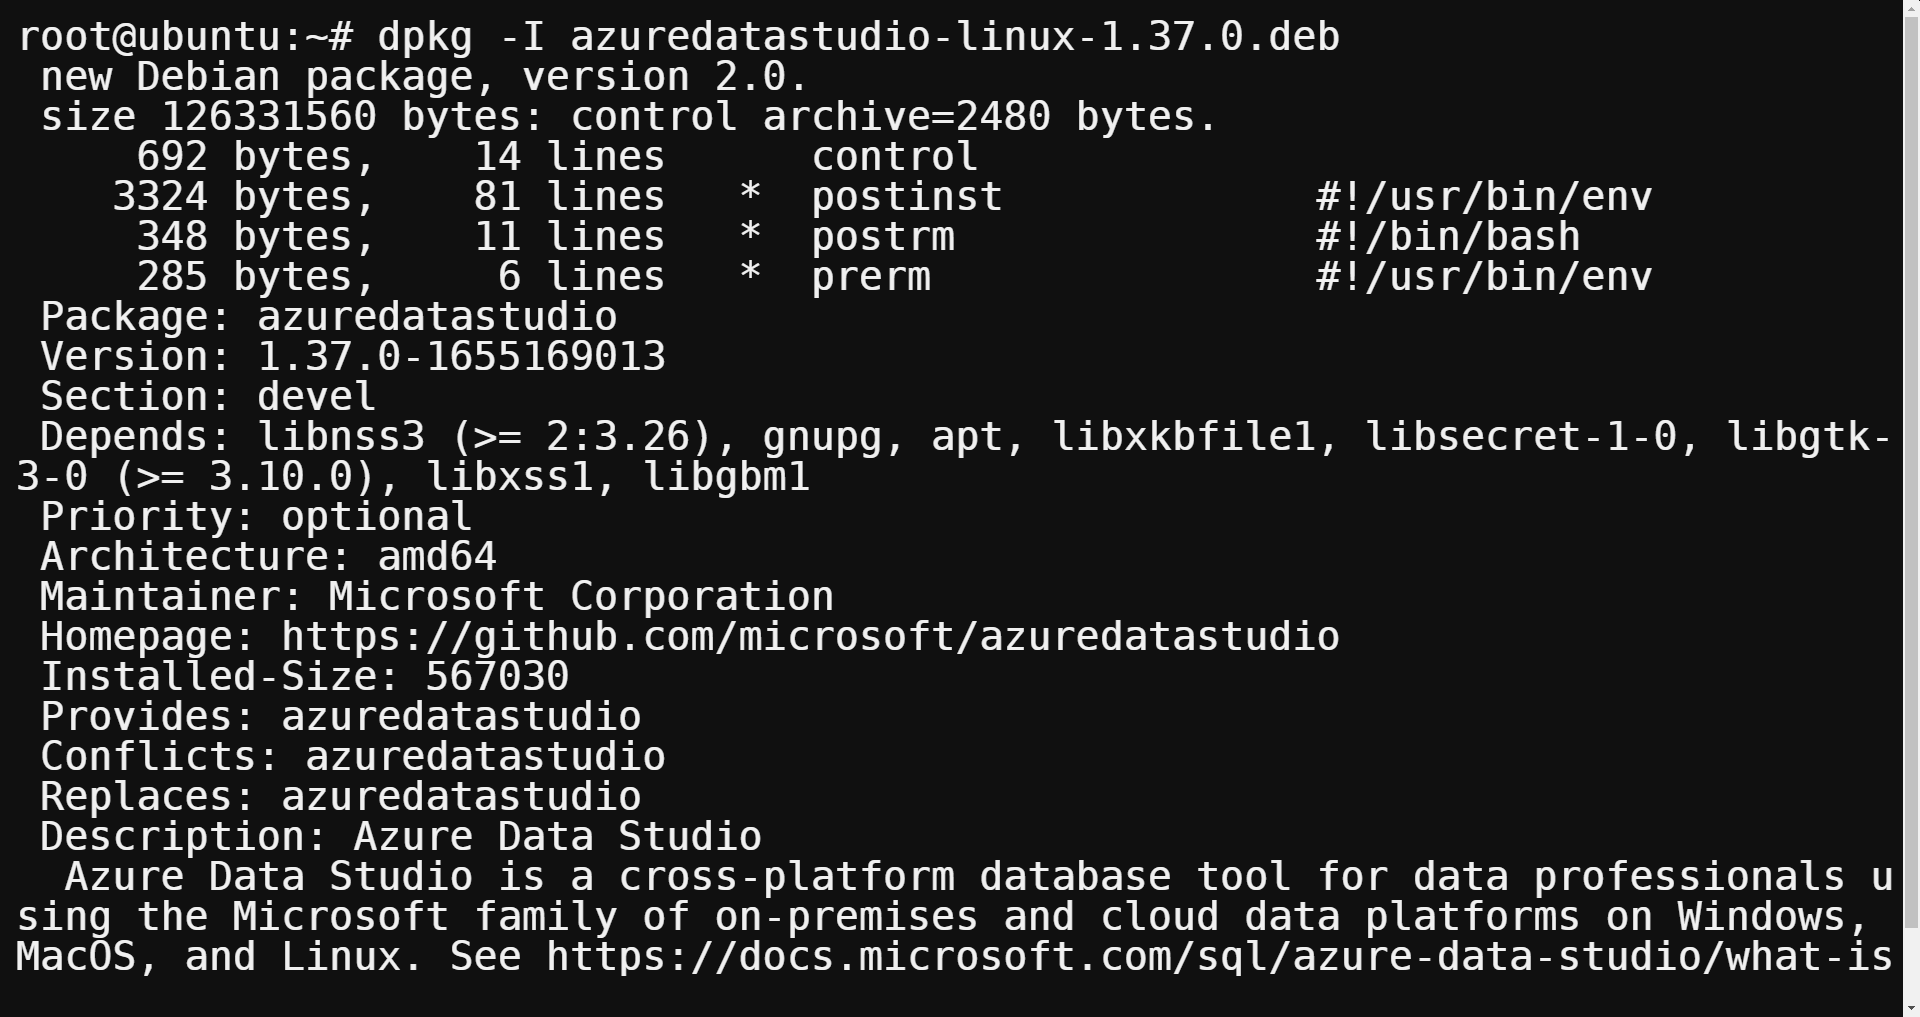
7. After updating, it’s essential to view the contents of the Azure Data Studio .deb package for security reasons. Run the dpkg command to inspect it.
dpkg -I azuredatastudio-linux-1.37.0.debIn the ‘Depends’ section, you’ll find the list of dependencies necessary for Azure Data Studio to function correctly.
8. With the dependencies verified, it’s time to install Azure Data Studio. Run the following command to initiate the installation process.
dpkg -i azuredatastudio-linux-1.37.0.deb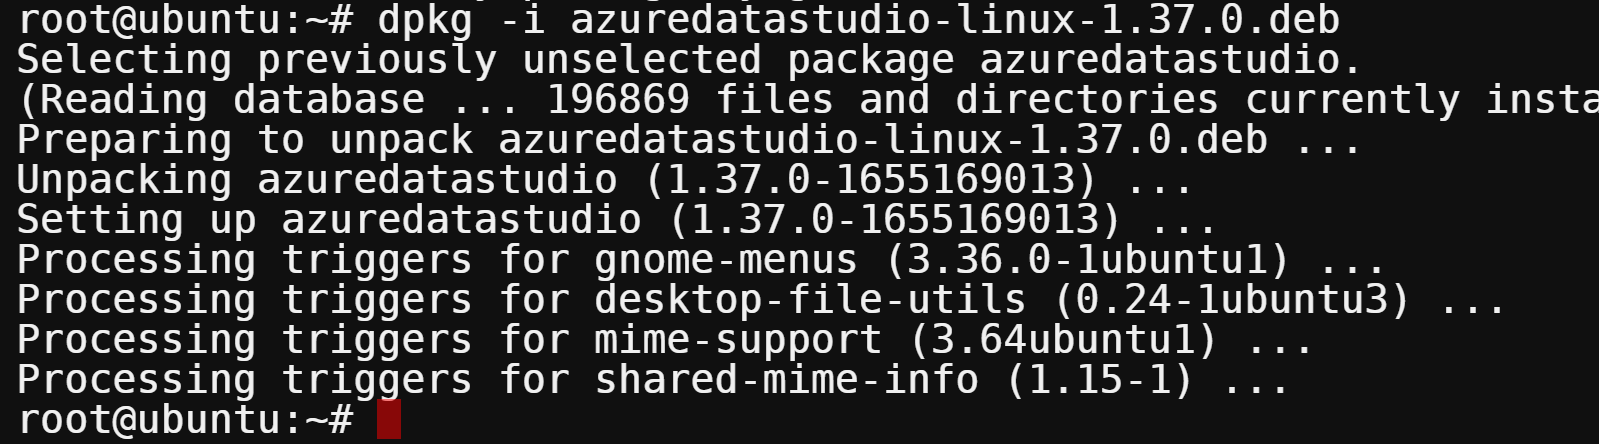
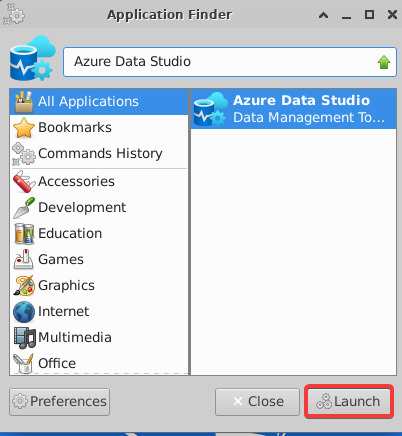
9. After the installation, launch Azure Data Studio from your Application Finder, as shown below.
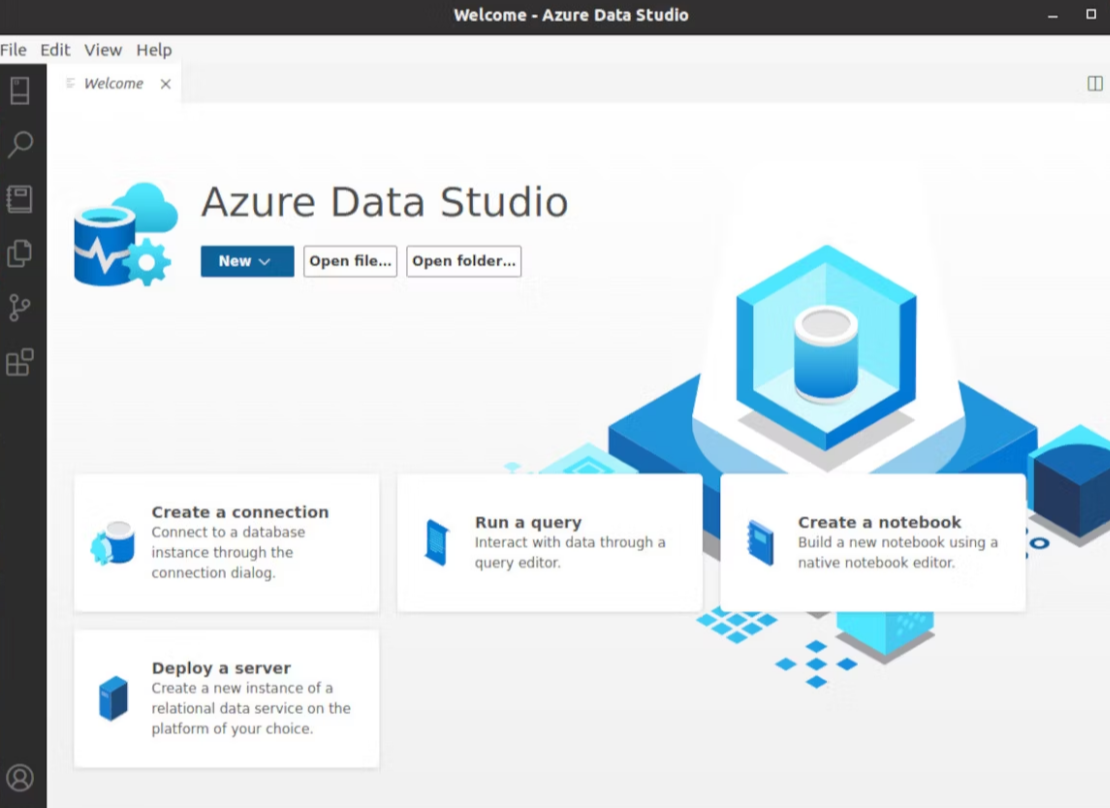
First Look at Azure Data Studio Main Window
Similar to the Windows installation, you’ll be greeted with the main window of Azure Data Studio as shown below.
Verifying SQL Server Instance for Azure Data Studio
Before diving into database management with Azure Data Studio, ensure that the SQL Server instance you plan to connect to is up and running.
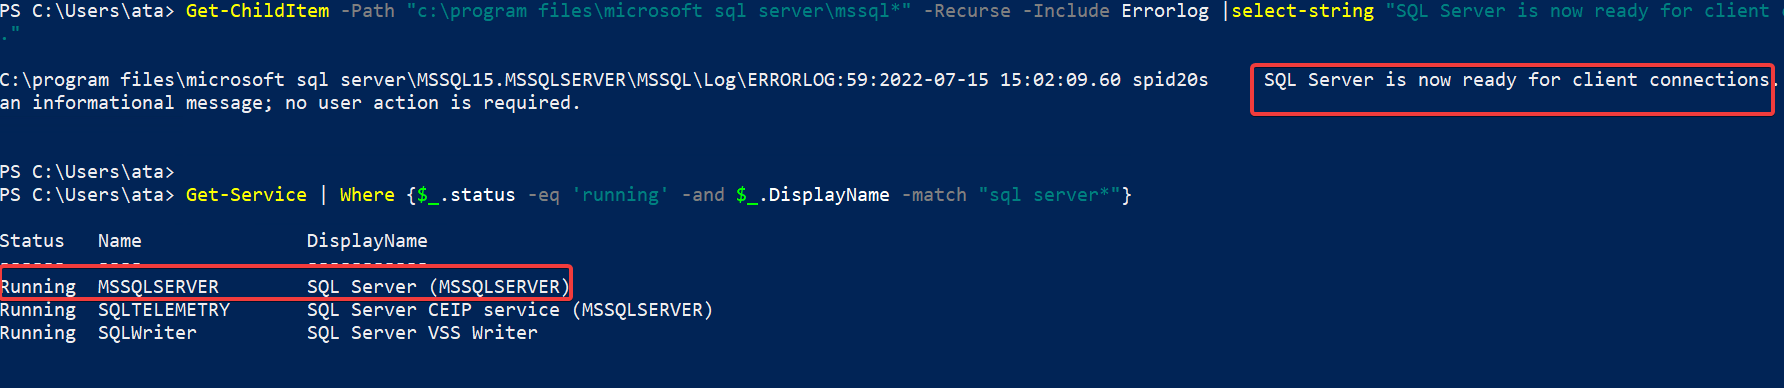
To check, open PowerShell as an administrator and execute the following commands:
- Query all files on your computer for a specific string that indicates SQL Server is ready for connections.
- List all running services and filter for SQL Server services.
Get-ChildItem -Path "c:\program files\microsoft sql server\mssql*" -Recurse -Include Errorlog |select-string "SQL Server is now ready for client connections."
Get-Service | Where {$_.status -eq 'running' -and $_.DisplayName -match "sql server*"}
As shown below, if you see the MSSQLSERVER is running, you are all set to connect your Azure Data Studio to the SQL Server instance.
Connecting to SQL Server Instance with Azure Data Studio
With the SQL Server instance verified, you’re just a few clicks away from managing your databases through Azure Data Studio.
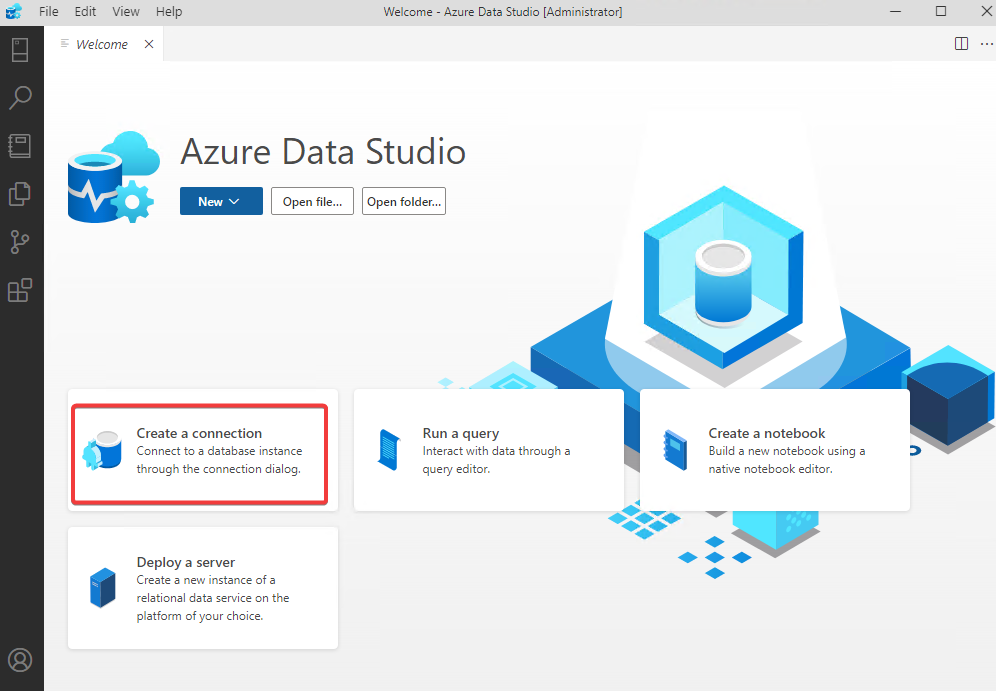
1. Open Azure Data Studio from the Start menu.
2. On the main window, select ‘Create a new connection’ to access the Connection Details window.
Configuring Connection Details in Azure Data Studio
3. To establish a connection, fill in the Connection Details as follows:
- Connection type – Select the Parameters option, the go-to choice for those familiar with SQL Server Management Studio (SSMS).
- Server – Enter the name of the computer running SQL Server. In this tutorial, it’s ‘localhost’ since you’re connecting to a local instance.
- Authentication type – Pick Windows Authentication from the dropdown to use your Windows credentials for SQL Server (recommended).
- Final Step – Click Connect to finalize the connection. Azure Data Studio will open a new tab.

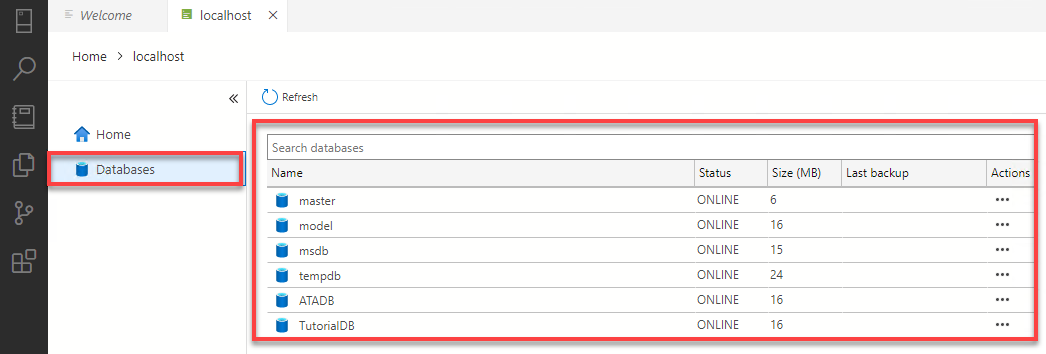
4. To view the available databases, click on ‘Databases’ under the ‘localhost’ tab in the left panel of Azure Data Studio.
Now, you are ready to run queries and undertake other database-related tasks using Azure Data Studio.
Creating Your First Database in Azure Data Studio
With Azure Data Studio, you’re not just limited to managing existing databases. You can also create new ones. Let’s walk through how to create a new database.
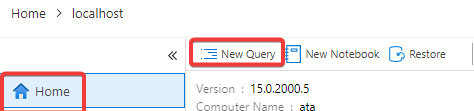
1. In Azure Data Studio, navigate to ‘Home ? New Query’ to open a new query editor.
2. Copy the T-SQL snippet below and paste it into the query editor. This code snippet checks for the existence of a database named ‘AZDATADEMO’ on your connected SQL Server instance.
Azure Data Studio not only creates the database but also enables the Query Store feature, a useful tool for capturing query execution plans and runtime statistics.
The Query Store feature is available in SQL Server 2016 and higher.
USE master
GO

-- Checks if the AZDATADEMO database exists
IF NOT EXISTS (
 SELECT name
 FROM sys.databases
 WHERE name = N'AZDATADEMO'
)
 -- Create the AZDATADEMO database if it doesn't exist
 CREATE DATABASE [AZDATADEMO];
GO
-- Sets the Query Store feature ON
IF SERVERPROPERTY('ProductVersion') > '12'
ALTER DATABASE [AZDATADEMO] SET QUERY_STORE=ON;
GOExecuting Your First Query in Azure Data Studio
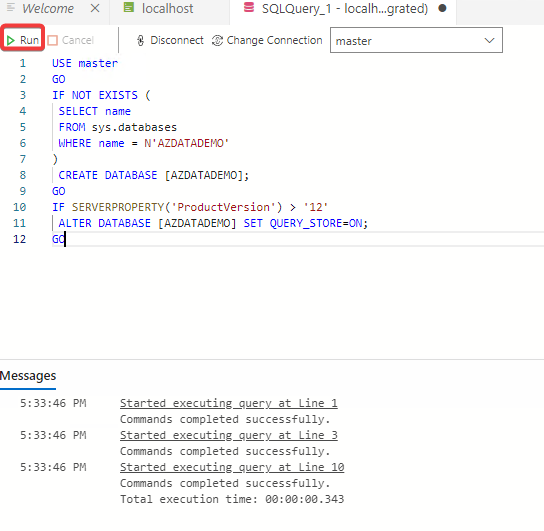
3. Click ‘Run’ to execute the query in Azure Data Studio.
You’ll see a message that says “Commands completed successfully,” indicating that Azure Data Studio has successfully created the database.
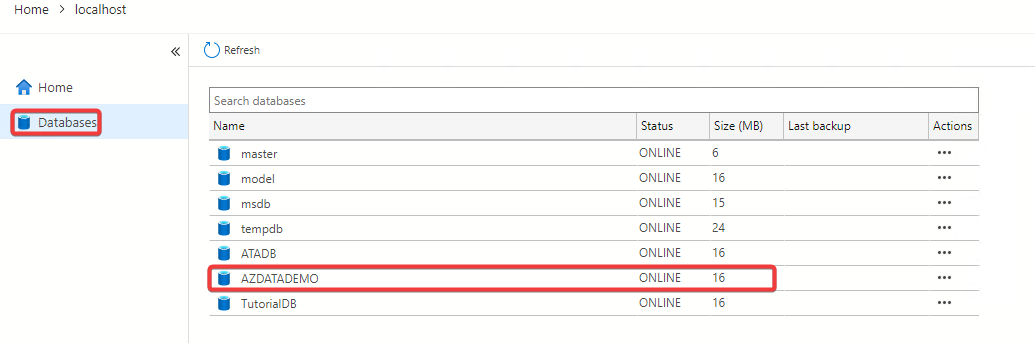
4. Once again, click on ‘Databases’ in the left-panel under the ‘localhost’ tab. You’ll now see your newly-created database listed.
Adding Data in Azure Data Studio
You’ve just crossed the initial hurdle of database management in Azure Data Studio by creating a database. But a database without data is like a car without fuel. So, let’s add some data.
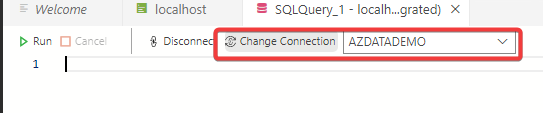
1. In your query editor within Azure Data Studio, locate the ‘Change Connection’ dropdown and switch to your newly-created database, AZDATADEMO.
2. Replace the existing T-SQL snippet in Azure Data Studio’s query editor with the new code snippet below. Click ‘Run’ to execute.
This T-SQL snippet will create a ‘Users’ table in your AZDATADEMO database. The table will include four columns: CustomerId, Name, Location, and Email. Here, CustomerId serves as the primary key.
-- Check if the Users table exists
IF OBJECT_ID('dbo.Users', 'U') IS NOT NULL
 -- If the Users table exists, delete the table
 DROP TABLE dbo.Users;
GO
-- If the Users table doesn't exist, create the table with four columns
CREATE TABLE dbo.Users
(
 CustomerId int NOT NULL PRIMARY KEY, -- primary key column
 Name nvarchar(50) NOT NULL,
 Location nvarchar(50) NOT NULL,
 Email nvarchar(50) NOT NULL
);
GO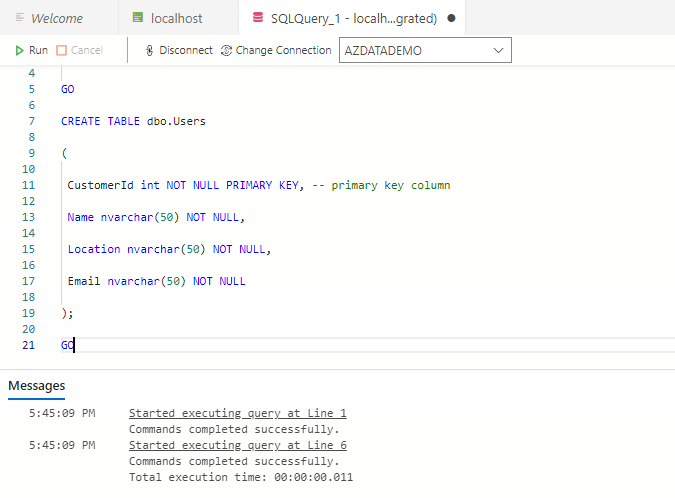
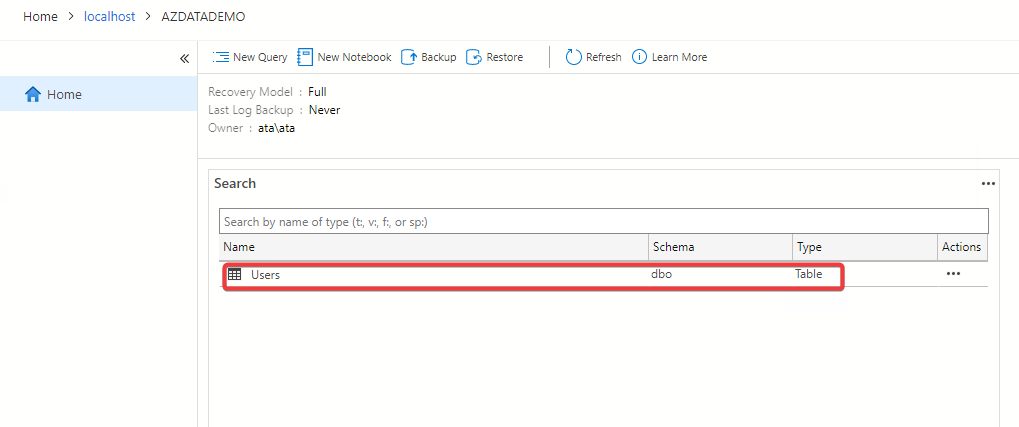
3. To view the data, navigate back to the ‘Databases’ page and double-click on your AZDATADEMO database. This will display all the tables, including your newly created ‘Users’ table.

You can now see your freshly created ‘Users’ table in Azure Data Studio.
VALUES

 ( 1, N'Adam', N'US', N''),
 ( 2, N'Listek', N'US', N'[email protected]'),
 ( 3, N'Donna', N'US', N'[email protected]'),
 ( 4, N'Janet', N'US', N'[email protected]')

GO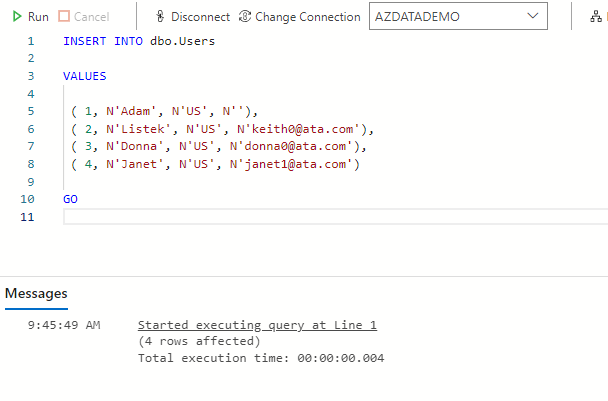
Verifying Data with Azure Data Studio
Great! You’ve successfully populated your Users table in Azure Data Studio. To confirm the data insertion was successful, you can run a simple query. Here’s how:
Replace the snippet in your Azure Data Studio query editor with the following SQL code, and then click ‘Run’.
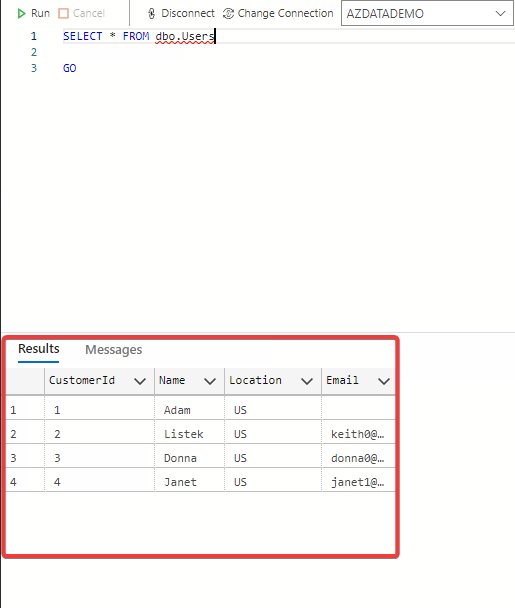
SELECT * FROM dbo.Users

GO
If everything went as planned, you’ll see all the rows from the Users table displayed in the Results pane.
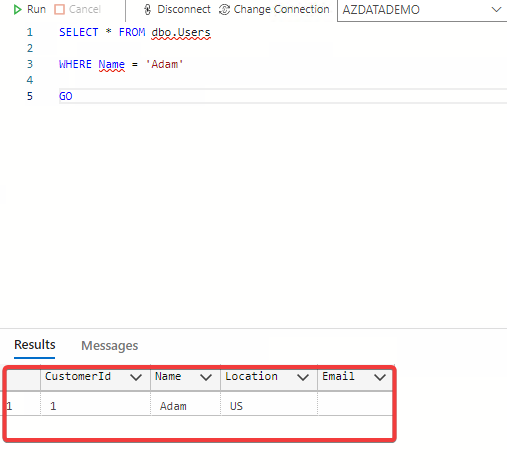
If you’re interested in filtering the data, Azure Data Studio allows for more specific queries. For instance, to fetch data where the user’s name is ‘Adam’, use the following SQL snippet.
SELECT * FROM dbo.Users

WHERE Name = 'Adam'

GO
Executing this query in Azure Data Studio will return only the rows where the name is Adam.
Wrapping Up: Mastering the Basics of Azure Data Studio
You’ve just scratched the surface of what Azure Data Studio can do for your SQL Server database management. In this guide, you’ve learned the steps to install Azure Data Studio, create a new database, insert data into tables, and even run basic queries.
But remember, Azure Data Studio offers far more functionalities. For instance, did you know you can create a Jupyter notebook in Azure Data Studio to run Python code? Time to explore!


