

Are you looking to get started with cloud-based NoSQL management and data storage? With Azure Cosmos DB, you can quickly build scalable applications that process large volumes of data like never before.
This tutorial will walk you through a real-world use case, with a step-by-step process of building a simple application that uses Cosmos DB to store and manage data.
Read on to build scalable applications using Cosmos DB today!
Prerequisites
This tutorial will be a hands-on demonstration. If you’d like to follow along, be sure you have an Azure account with an active subscription – You can create a free trial Azure account if you don’t have one already.
Creating a Cosmos DB Account
Whether you’re just getting started with NoSQL databases or have some experience under your belt, Azure Cosmos DB is one of the best options out in the market. But before you get started managing your databases, you’ll first have to create your Azure Cosmos DB account.
1. Open your favorite web browser, navigate to Azure’s portal and log in with your Azure account.
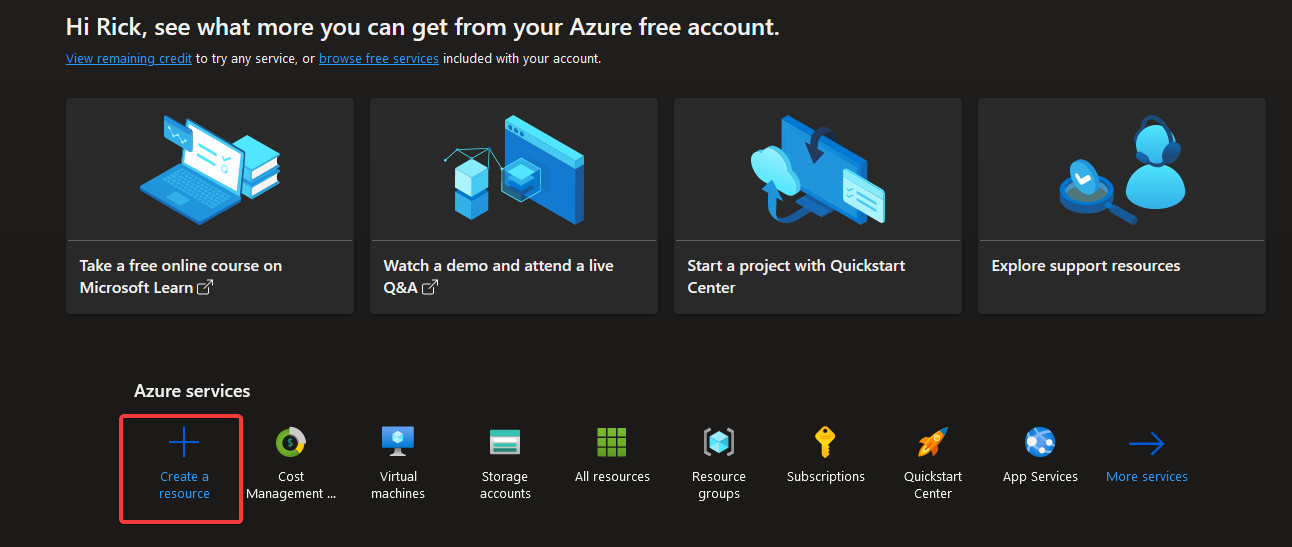
2. Look for and select Create a resource to open the Azure Marketplace on your dashboard.
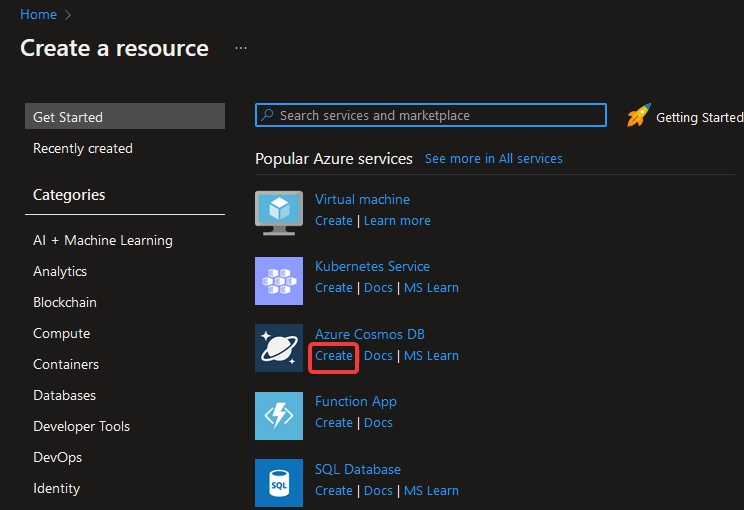
3. Next, click on Create below the Azure Cosmos DB heading under the Popular Azure services to initialize creating your Azure Cosmos DB account. Your browser redirects to a new page where you’ll choose an API option (step four).
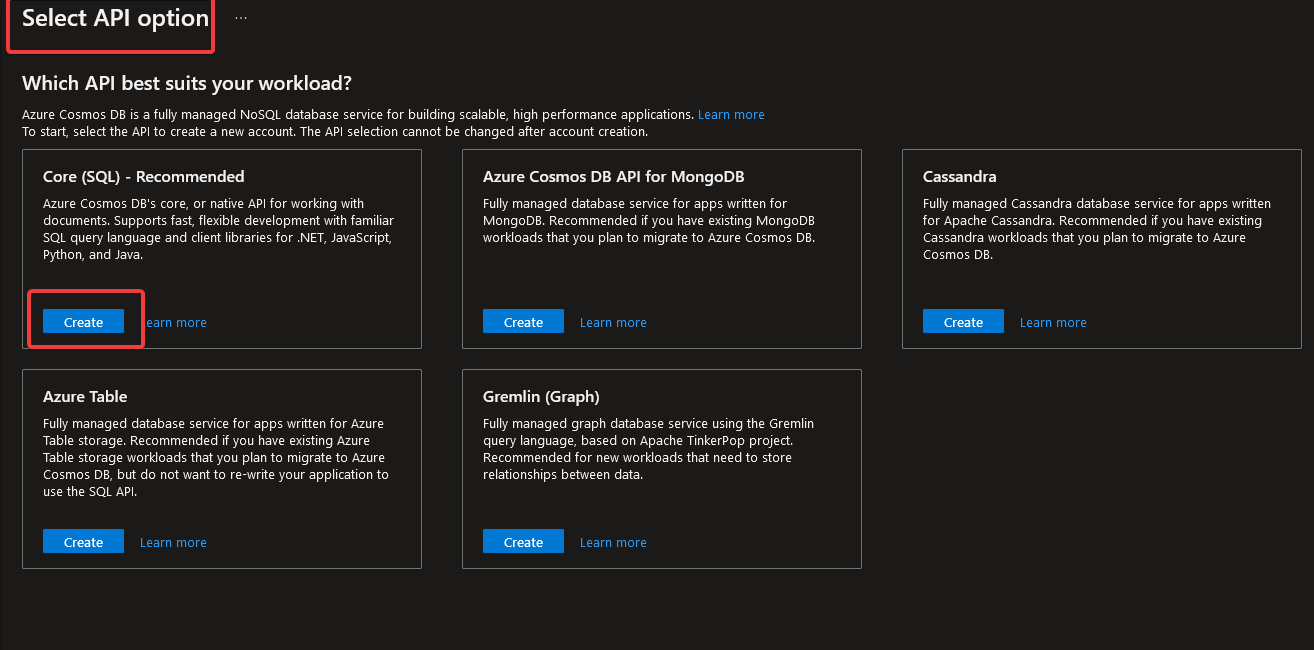
4. Now, click on Create inside the Core (SQL) API option in the Select API option screen.
Core (SQL), aka SQL API on the Select API option screen, is an officially supported API that provides the flexibility of a NoSQL schema-less design combined with rich query support with SQL syntax.
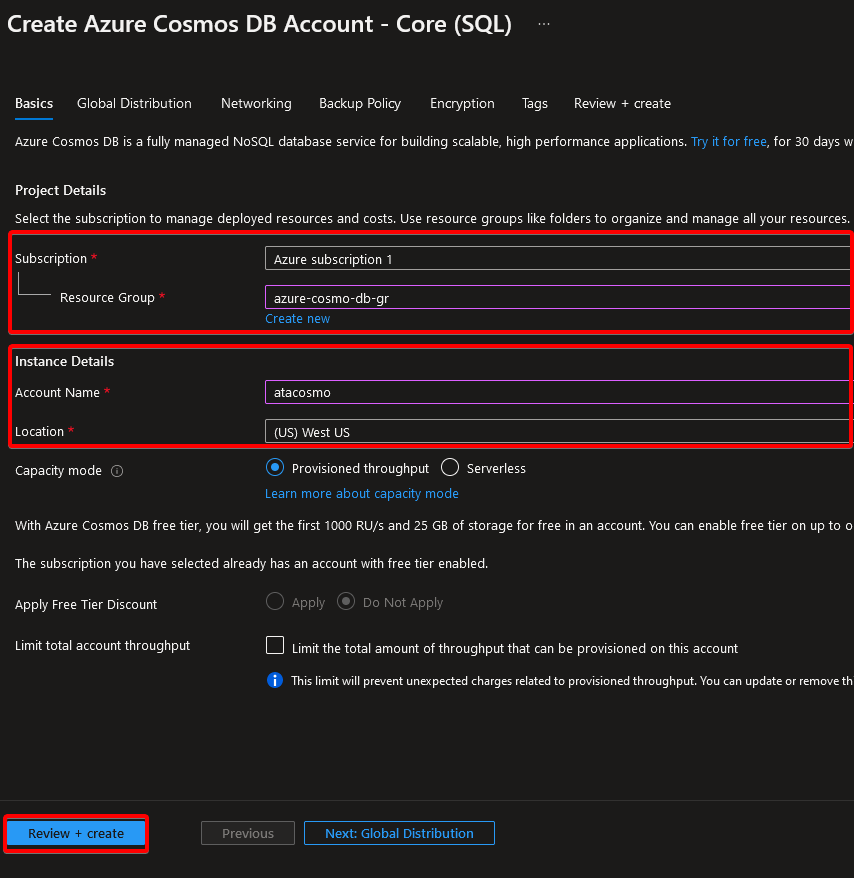
5. On the next screen, configure your project details with the following:
- Subscriptions: Select your subscription from the list if you have more than one.
- Resource group: If you have an existing resource group that you’d like to use for this Cosmos DB account, select it from the dropdown. Otherwise, leave this as Create new and give your resource group a name under Resource Group Name.
- Account Name: Enter a name for your Cosmos DB account.
- Location: select the closest data center to you. This data center will typically be used with the most geographical coverage in terms of countries/regions.
- Keep other settings as default since the defaults are mostly fine in most cases, then click Review + create to validate your settings.
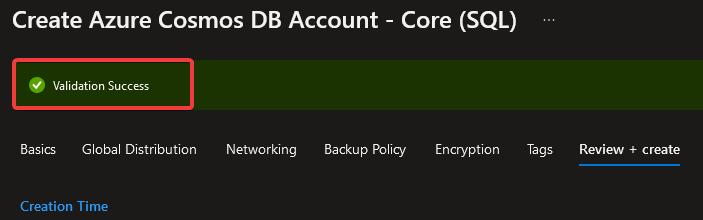
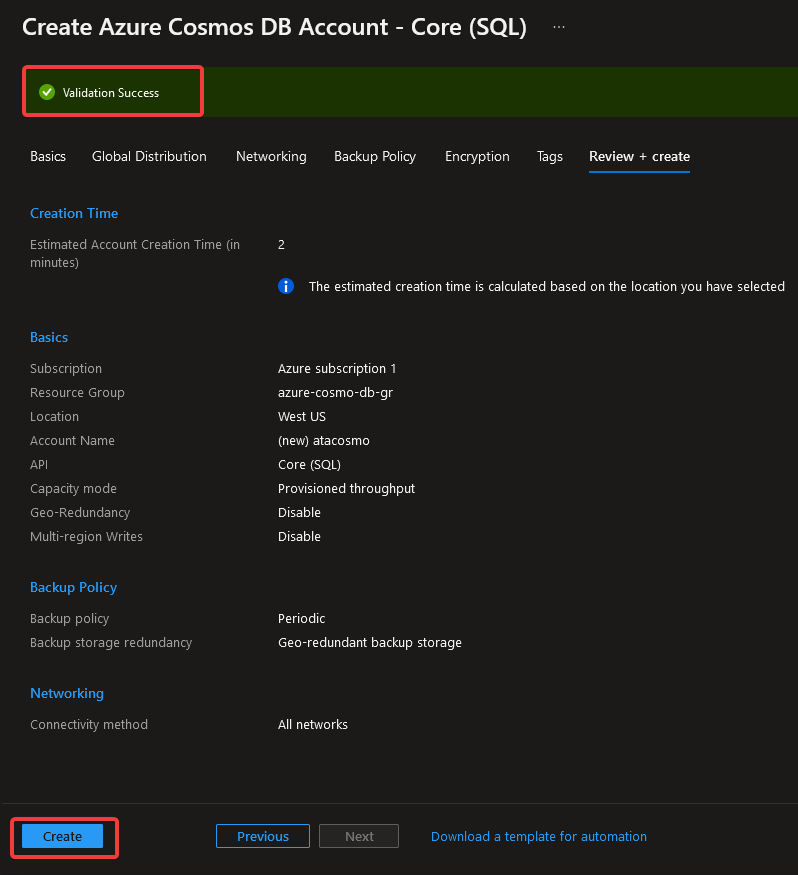
You’ll get a Validation Success message if your settings are all good, as shown below.
6. Now, click on the Create button (bottom-left corner) to provision and create your Azure Cosmos DB account.
You’ll see the Deployment is in progress message shown below as the account creation may take a few minutes.
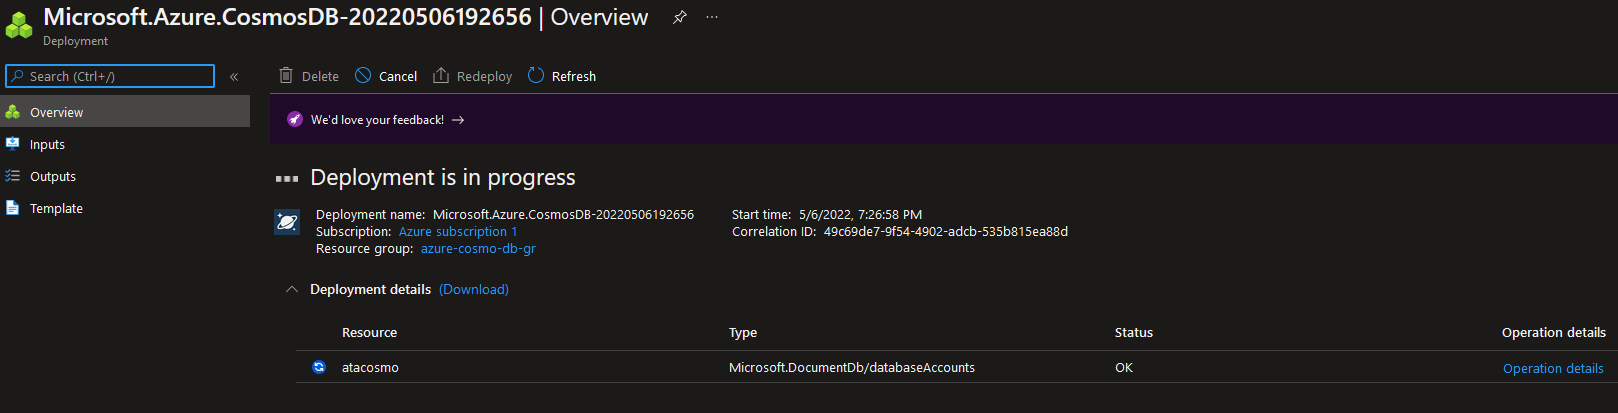
7. Lastly, click on the Go to resource button to view your newly created Cosmos DB account when the process completes.
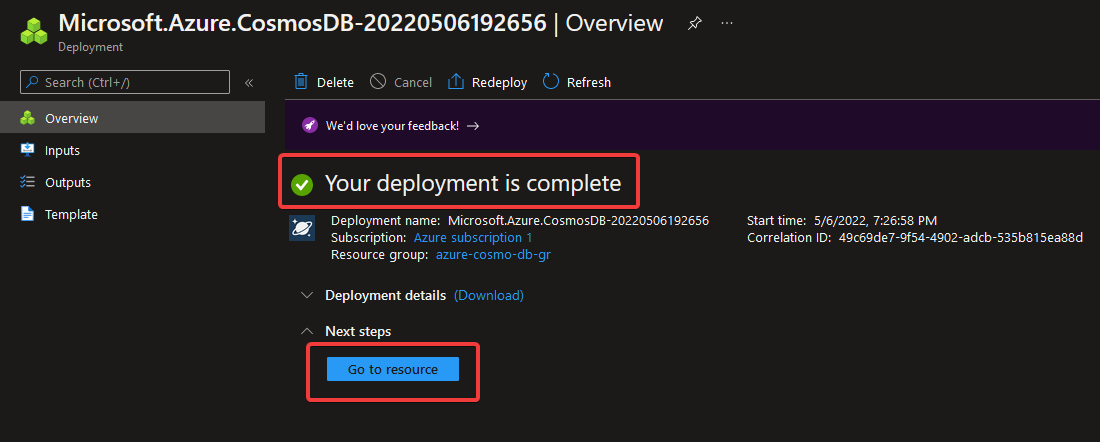
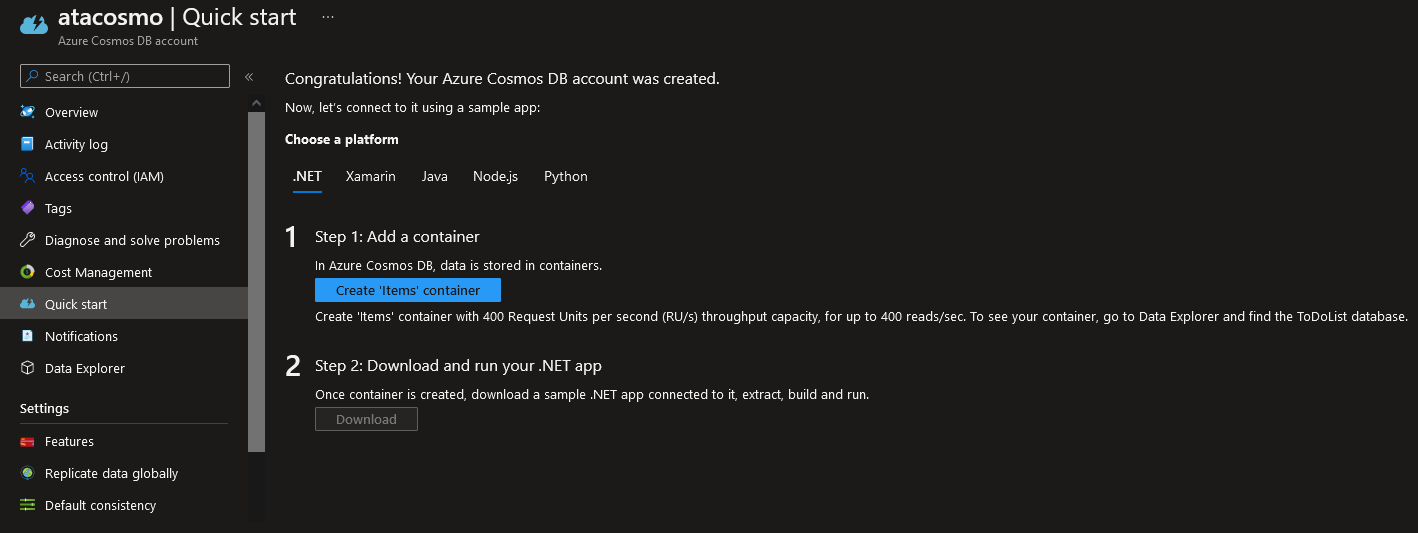
The first time you access your newly-created Azure Cosmos DB account, you’ll be on the Quick start page, as shown below.
Accessing the Azure Cosmos DB Account Keys
Now that you have a Cosmos DB account, you need to retrieve the account keys to work with the account in real-life use cases. The account keys let you connect to the Cosmos DB service from your application code.
Scroll down on the left navigation panel, and click on the Keys blade to view your Cosmos DB account keys, as shown below. You’ll need these keys to connect to your Cosmos DB account from your application.
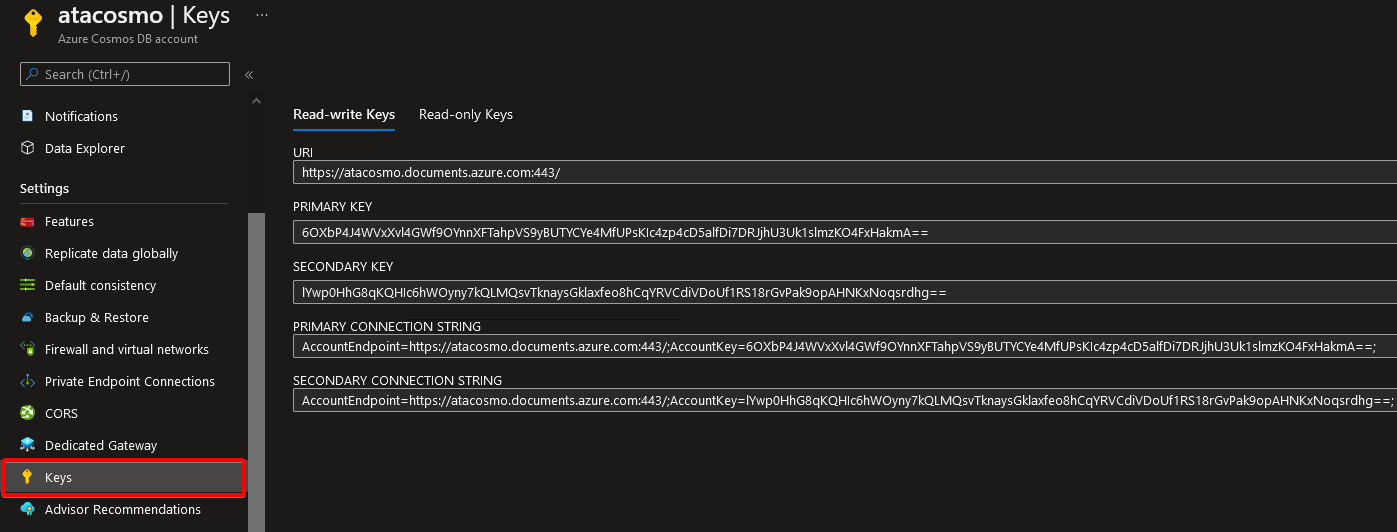
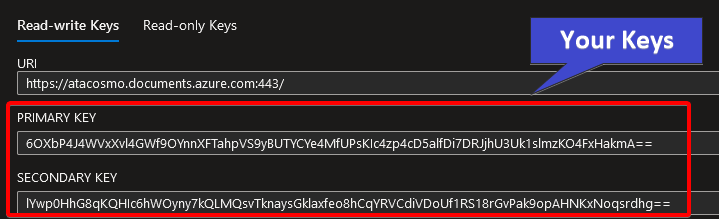
You can see in the screenshot below that you have two keys:
- PRIMARY KEY – You can use this key to perform operations (read, write, delete) on any data within your account. Your app typically uses this key to make authenticated requests against your Cosmos DB account.
- SECONDARY KEY – If you believe that your primary key has been compromised. Or, if you like to rotate your keys to increase security, you can use this key as a backup to replace your primary key.
These keys provide unlimited access to your account. Note that anyone who has access to these keys can access any data within this Cosmos DB account; without any permissions or restrictions. So, keep these keys in a safe and secure location.
At the bottom, you can also see two connection strings (PRIMARY and SECONDARY). Combining the key with the endpoint gives you the complete connection string to your Cosmos DB account.
Your application uses this connection string and key to connect to your account and perform any CRUD operations. Again, you normally use the primary string to connect to your account and the secondary as a backup.

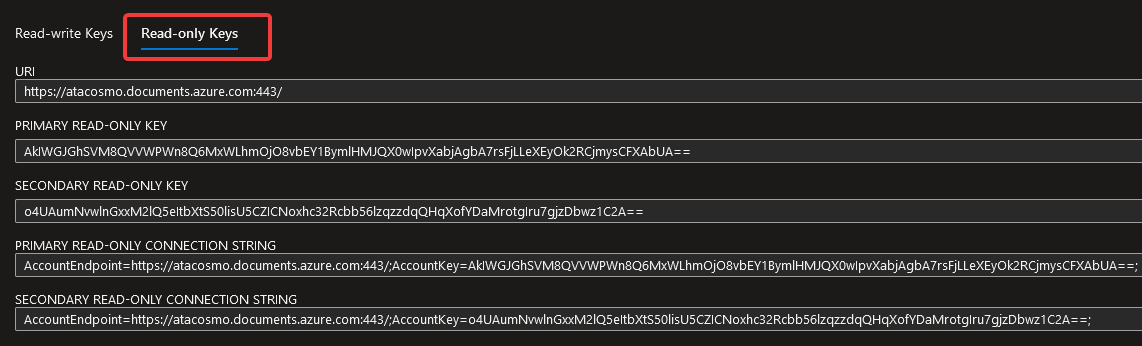
Now, click on the Read-only Keys tab to see the read‑only versions of your keys and strings.
These keys and strings work the same as their read‑write counterparts, except that they cannot be used to write data into your account. You can use read‑only keys and strings to secure the data you don’t want your users to write.
Creating a New Container
A container is a logical component of an Azure Cosmos DB database, which can be thought of as a table in a relational database or as a collection in MongoDB. In Azure Cosmos DB, every container must have a partition key so that the service can distribute data evenly across partitions and offer high availability and performance guarantees.
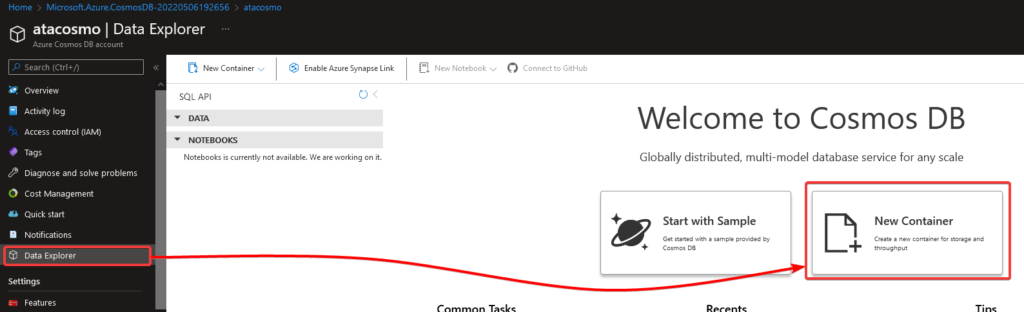
Click on Data Explorer on the left navigation panel to open the Data Explorer blade, then click on New Container to open a new container.
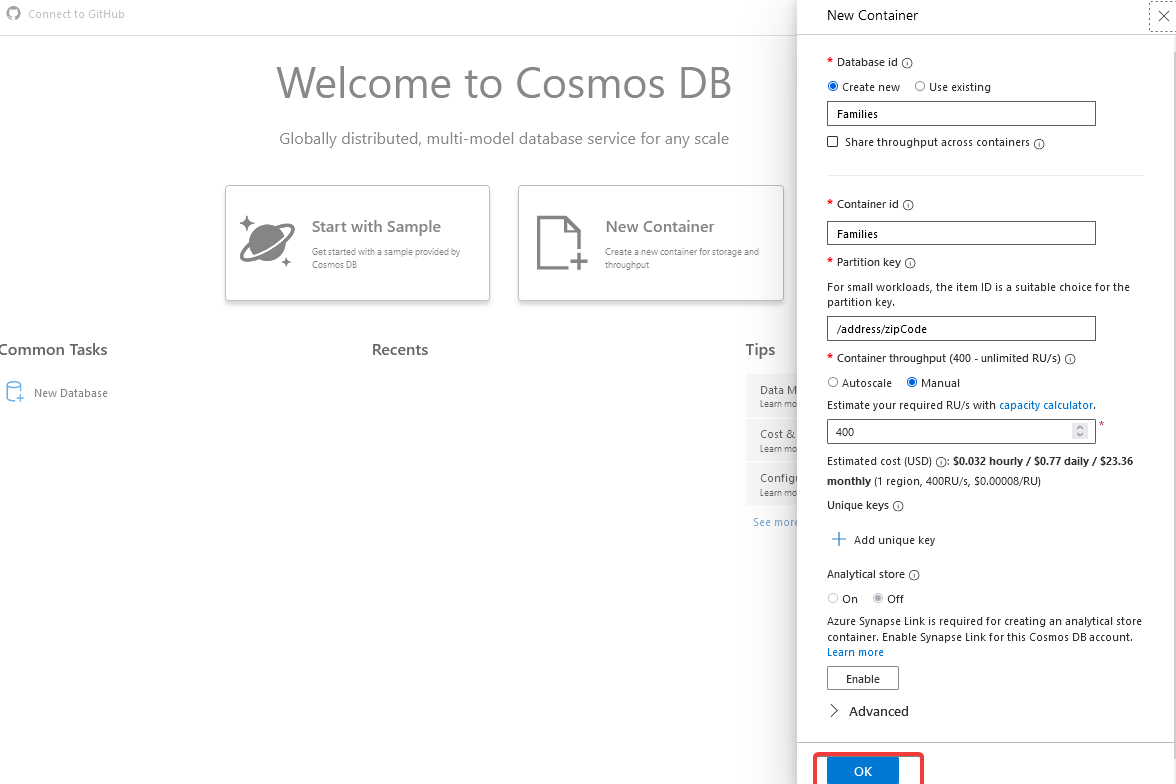
Now, on the right pop-up panel, specify some essential information about your container as follows:
- Database id – Enter a database ID for your container. This tutorial sets the database ID as Families.
- Share throughput across containers – Uncheck this option since you’ll want to control throughput independently for each container. Cosmos DB will automatically balance all throughput across your containers when this option is enabled.
- Container id – Enter a container ID. This tutorial uses the same value as the database ID (Families).
- Partition key – Enter a partition key (/address/zipCode) to determine your container’s data placement strategy and the replication factor.
- Container throughput (autoscale) – Select the manual option to control the throughput for your container easily. The default value is fixed at 400 RU/s, which you can see in the calculation in the preview pane. This autoscale costs about 77 cents daily, about $24 a month. This value is below the 1000 RU/s free trial threshold so that this container does not accrue any charges during the free trial.
- Keep all other options as the default values, and click OK to create the container with these settings.
Creating the container might take a few minutes, depending on your account size and your chosen throughput settings.
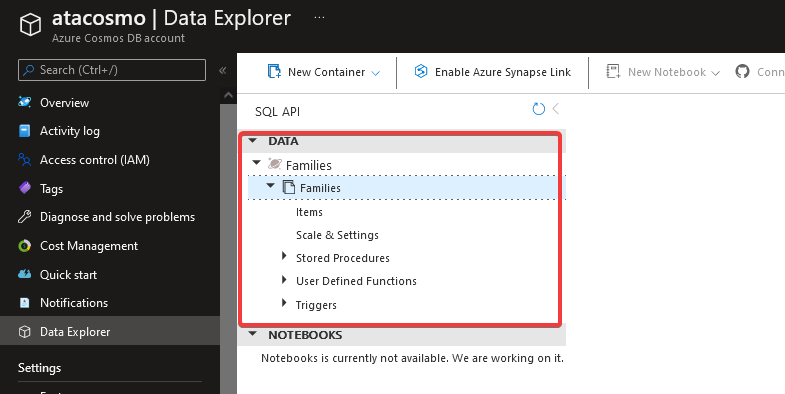
Once the process completes, your container will be automatically added to the Data Explorer blade on the left, as shown below.
Creating Documents as Data in Azure Cosmos DB
Now that you have a new container (Families) set up with a database (Families), it’s time to start adding some data. Your container is useless without any data, after all. In Cosmos DB, this data is represented as documents stored within collections.
Items, aka documents, in Cosmos DB are JSON documents, which don’t need to have the same schema. You can have a mix of complex and simple data types. For example, you might want to store an instruction document and a user record with a first name, last name, and age.
1. Click on Items —> New Item on the Data Explorer blade to open the New Item blade. This blade allows you to specify the document you want to add to your container.
The left side of the documents pane is blank since there is no document yet, while the right side has a JSON editor where you can specify the document.
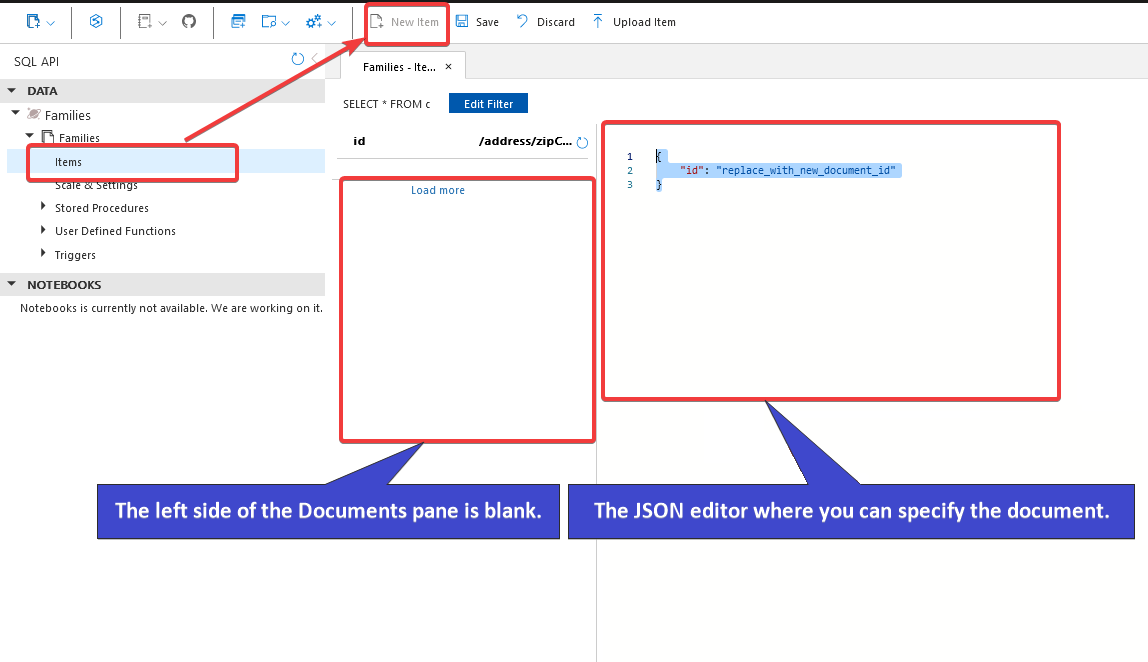
2. Next, copy and paste the code below into your JSON editor.
This code block defines a record for a Smith family with the last name, address information, and children without any ID values/properties. The zipCode is the partition key value you set in the “Creating a New Container” section.
{
"familyName": "Smith",
"address": {
"addressLine": "123 Main Street",
"city": "Chicago",
"state": "IL",
"zipCode": "60601"
},
"parents": [
"Peter",
"Alice"
],
"kids": [
"Adam",
"Jacqueline",
"Joshua"
]
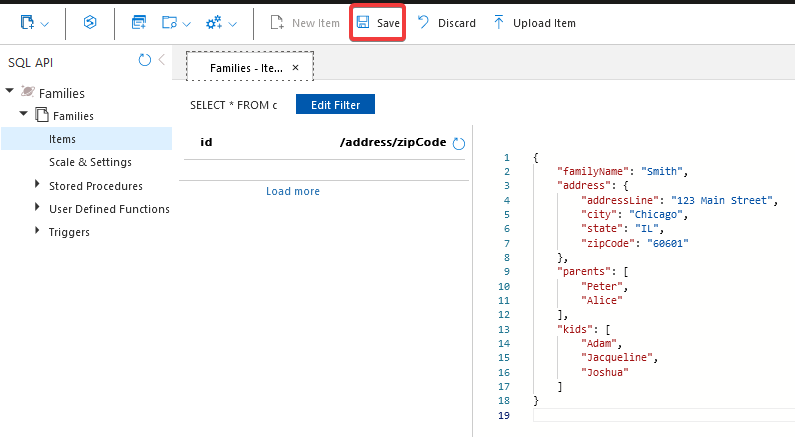
}3. Click on Save at the top to create your first document in your container.
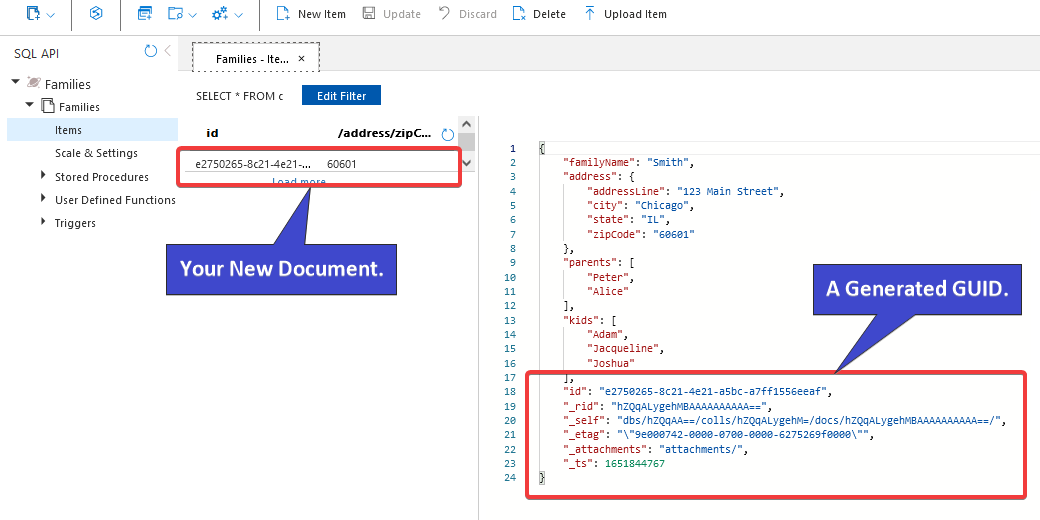
Once the document is created, a Globally Unique Identifier (GUID) is automatically generated and assigned as the id property for the document, as shown in the screenshot below.
The great thing about Cosmos DB is that it automatically creates an id property and sets its value to the partition key you specified for your container in Azure. This behavior allows for the creation of unique IDs for each document.
Since the id property is also the partition key for your container, each document is stored in different partitions based on its id value. As a result, you enable efficient querying and scaling of your data within Cosmos DB.
As you see can below, the left side of the documents pane will now show your new document, while the right side shows the document content with the generated GUID.
At this point, you can see two significant differences between the world of traditional relational databases and that of NoSQL document stores like Cosmos DB:
- First, you never defined a schema for your database upfront like you would for a relational table because, under the hood, Cosmos DB has no enforced schema.
- Second, JSON documents are inherently denormalized. As a result, a single document in your database can represent what would typically be stored as multiple rows. And in separate relational tables joined by related keys.
In this case, the nested address object would be a separate row in an address table joined to the family via a one-to-one relationship.
Getting used to the shift in thinking required when modeling data for a document store like Cosmos DB can take you a while. But with a bit of practice, you’ll get the hang of working with denormalized data in JSON format.
And with no enforced schema, you can always add new family properties as they come up in the future without going through a lengthy schema migration process.
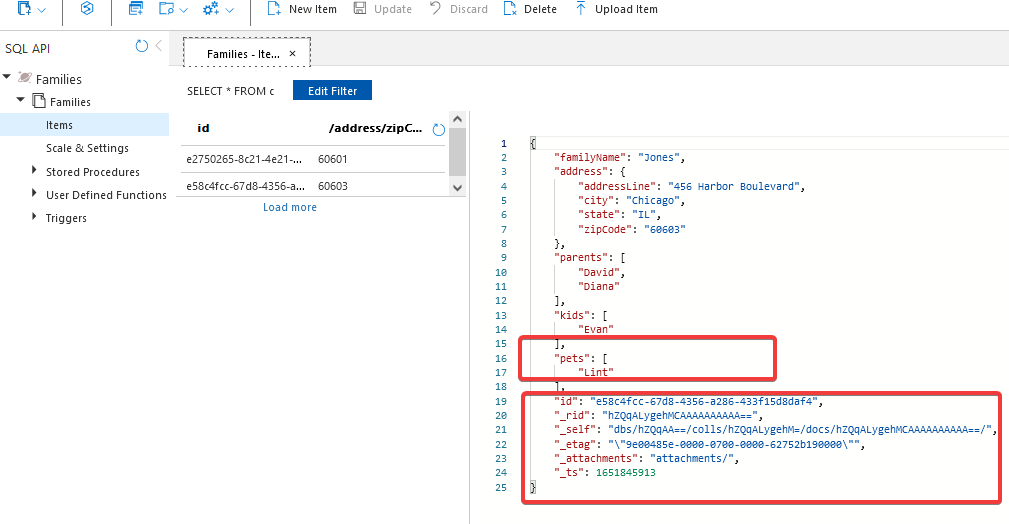
4. Now, click New Items again to add a new document. Copy and paste the JSON snippet below to the JSON editor.
This code block defines a record for a Jones family with the last name, address information, and children without any ID values/properties. You’ll notice that this document includes an extra pets object with an array of animal names.
{
    "familyName": "Jones",
    "address": {
        "addressLine": "456 Harbor Boulevard",
        "city": "Chicago",
        "state": "IL",
        "zipCode": "60603"
    },
    "parents": [
        "David",
        "Diana"
    ],
    "kids": [
        "Evan"
    ],
    "pets": [
        "Lint"
    ]
}
5. Click the Save button as you did in step three to create the document in your container for the Jones family.
With this second document added to your container, a new ID is added and automatically assigned to this document. You can now add as many documents to this container as you like without defining a schema upfront.
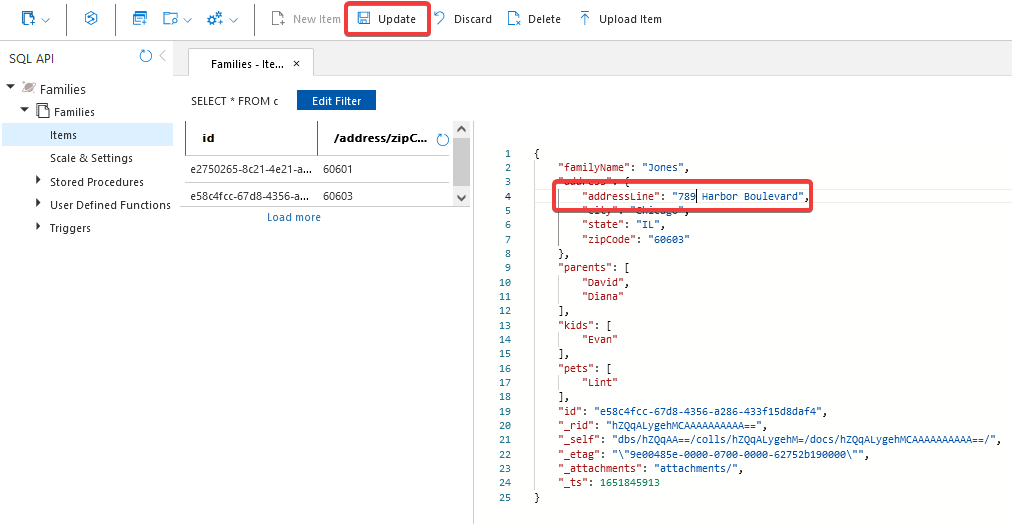
6. Next, click on your second document for the Jones family in the left document explorer to edit the record as follows:
- Change the addressLine property value from 456 Harbor Boulevard to 789 Harbor Boulevard.
- Click Update at the top of the blade to save your changes.
7. Click on Open New Query on the top navigation bar to open the JavaScript query editor.
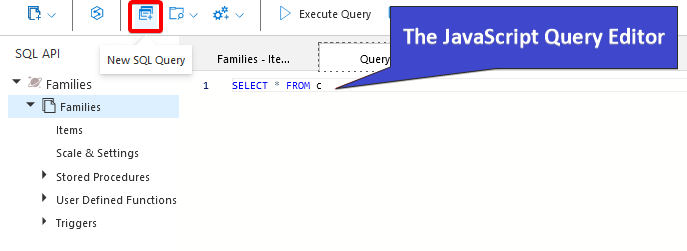
8. Copy and paste the following JavaScript code into the editor and click Execute Query shown below to find all families in Chicago.
- The
c.address.cityproperty access is enabled by Cosmos DB’s automatic indexing of all JSON paths, just like you index columns in a relational database.
- C is the alias for the Families container.
- The dotted notation inside the WHERE clause filters the query by city property, which is nested in the address property.
SELECT * FROM c
WHERE c.address.city = 'Chicago'
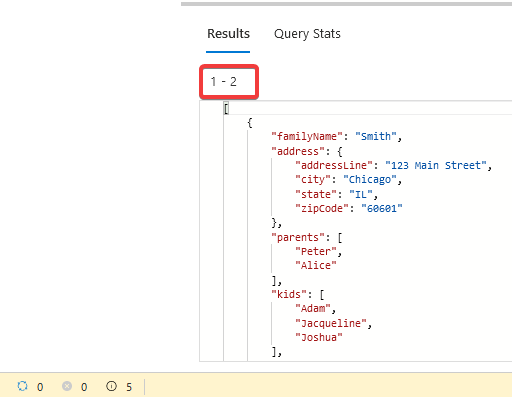
The query editor results pane returns the two documents for the Smith and Jones family, as shown below. Both documents have the city property set to Chicago, but the zipCode properties are different (each document is stored in separate partitions internally).
This output confirms that your query is a cross-partition query scanning all documents in your container. As you realize, this behavior is helpful to know about how you’d structure your future data and queries for optimal performance.
In real life, of course, you don’t have to create and edit documents by copying and pasting them in the Azure Portal by hand. You’ll typically create documents programmatically using a library or an SDK like JavaScript. But this workflow can still help get a sense of how you might go about working with documents in Cosmos DB.
Implementing a Geo/Global Distribution
Suppose you are looking to implement a global distribution strategy for your products. Your company infras will rely heavily on the cloud. So you typically want to make sure your data is accessible regardless of where your customers are around the globe.
Your application requires the database account to have replicas in both US and Asia capable of accepting writes to ensure high availability — a complex task.
Luckily, Azure Cosmos DB offers a “multi-master” capability to geographically distribute your data around the globe while maintaining low-latency reads and writes (Geo-Replication).
To enable Geo-Replication for your application in a few clicks.
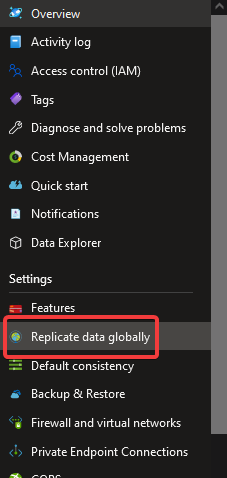
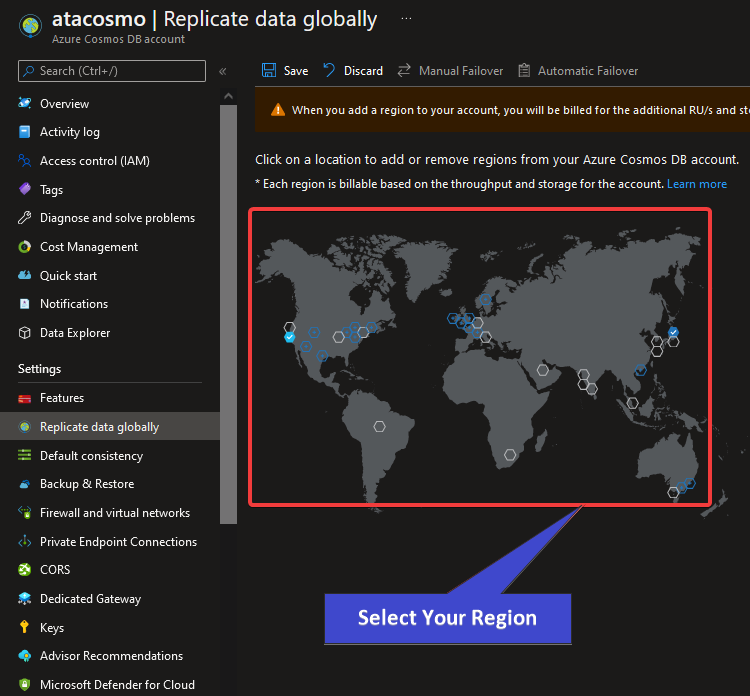
1. Click on Replicate Data Globally on the left-hand menu to initialize global data replication.
2. On the next screen, select the region where you’ll replicate your data, and there are many regions to choose from, as shown below.
Since you’ve created your database account in the US East region, you can choose the Japan East region to replicate your data. Doing so fulfills the global distribution requirement (Replicas in both US and Asia).
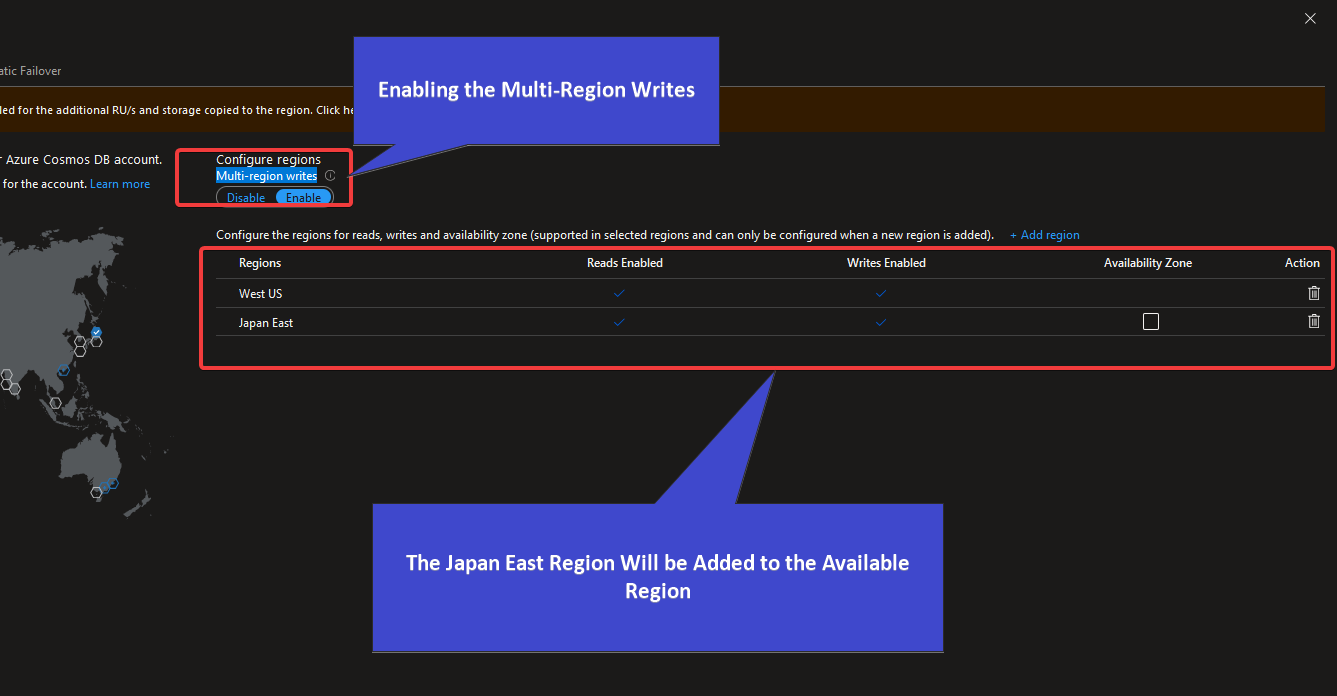
The Japan East region will be added to the available region within the account. But you need to enable Geo-Replication to be writable before you can start replicating data to it.
Azure has data centers in different geographical locations worldwide called “regions.” Azure Cosmos DB Geo-Replication takes advantage of these regions and allows you to place database accounts, containers, or collections in different regions.
3. Lastly, click on the Enable Multi-region writes button to confirm the replication settings, enabling Geo-Replication to be writable. Your selected region becomes available immediately, and your data is regularly replicated in the other region.
You can now use your app for the global distribution of your data! With Azure Cosmos DB, rest assured that your data will always be available, no matter where your users may be.
Azure Cosmos Geo-Replication guarantees your application unlimited writes and scalability. Your writes become available in all replicas with an SLA of less than 10ms.
The requests to the database account are automatically routed to the appropriate region based on the user’s location. Nearer users experience lower latency when routed to the region closest to them.
Conclusion
In this tutorial, you’ve learned the basics of Azure Cosmos DB and how to use it to manage your NoSQL data in the cloud. You’ve touched on enabling Geo-replication to implement a global distribution strategy for your data.
At this point, you can now have a global distribution strategy for your data that is always available and highly scalable, no matter where your users are located. With powerful global replication capabilities and unlimited scalability, Azure Cosmos DB is the perfect choice for managing your NoSQL data in the cloud.
Why not try out some of the other capabilities Azure Cosmos DB offer? Such as automatic indexing and server-side scripting, to get even more out of your data!


