


Services like Remote Desktop Protocol (RDP) and Secure Shell (SSH) have been around forever to control Azure virtual machines. But, to access them, you’ve traditionally had to either expose VM ports to the public Internet or set up a VPN. You can now use Azure Bastion instead!
Not a reader? Watch this related video tutorial!In this tutorial, you’ll learn how to protect both RDP and SSH access on your Azure VMs with Azure Bastion.
Let’s get going!
Why Azure Bastion?
Before Bastion, to connect to an Azure VM with RDP or SSH, you either had to:
- Connect to the machine directly exposing direct host ports.
- Use an intermediary like an RDP gateway to “tunnel” through but still exposed ports to the outside.
- Connect to a “hop server” or “jump host” and make another connection to the host.
- An existing virtual network to connect the Bastion host to.
These options weren’t ideal because you either had to create a security risk or go through a convoluted connection process. Bastion changed all of that.
Using the managed Azure Bastion service, you can now set up a Bastion host that only exposes an HTTPS port to the outside but can transparently tunneling RDP or SSH traffic to an Azure VM.
Azure Bastion is a limited and secured Azure VM with the sole purpose of remote connectivity.
Bastion Drawbacks
Before you start getting excited about Azure Bastion, you should first understand some of its drawbacks before you dedicate a lot of time to set it up. As of this writing, Azure Bastion has a few limitations you should be aware of.
Periodically check Azure’s Networking feedback page to discover all issues and features Microsoft may be working on.
- Shared Clipboard Limitations – When using RDP, you may be used to its handy shared clipboard feature. Using the shared clipboards allows you to copy text, images, and files from your local computer to a remote host over RDP. This feature does not exist in Bastion. If you need to use RDP to transfer files from your local computer to a remote host, Azure Bastion is not for you.
- IPv4 Only – IPv6 is currently not available.
Prerequisites
The remainder of this article will be a tutorial on setting up Azure Bastion. If you’d like to follow along with the step-by-step tutorial, be sure you have the following:
- At least one Azure Windows virtual machine with a private IP address with port 3389 allowed on the Windows firewall. You will connect to this VM through the Bastion host.
- The Azure Reader role or greater assigned to the Azure VM and to the VM’s vNic.
- Access to a local (or domain) account on the VM host.
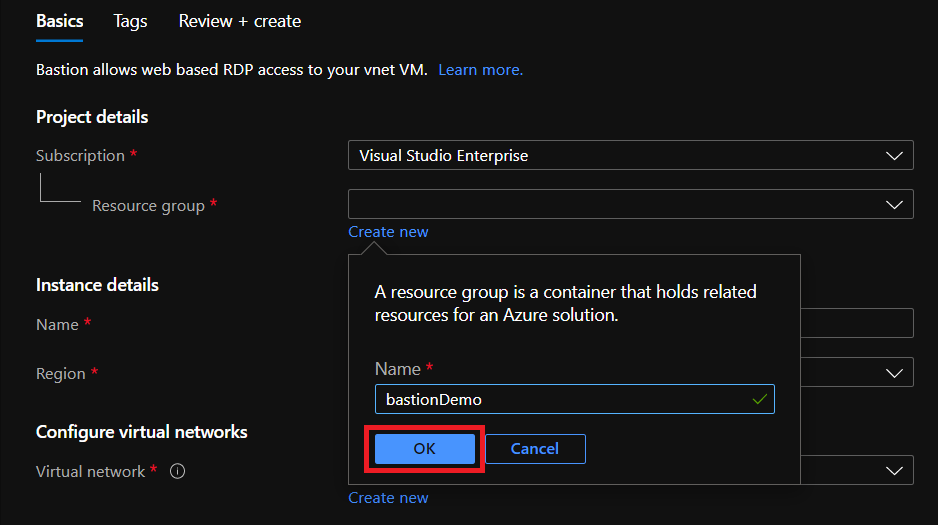
- An Azure resource group. If you don’t have one, the tutorial will walk you through creating one.
- A public IP address to assign to the Bastion host. If you don’t have one, the tutorial will walk you through creating one
Creating the Azure Bastion Resource
Azure Bastion is, under the covers, a locked-down VM but is not exposed as a VM but as a unique Azure resource. To get started, you must first create the Bastion resource. In this tutorial, you’re going to walk through using the Azure Portal to do so.
You can also set up a Bastion host via PowerShell using the Azure PowerShell modules.
1. First, open your favorite web browser and navigate to the Azure Portal.
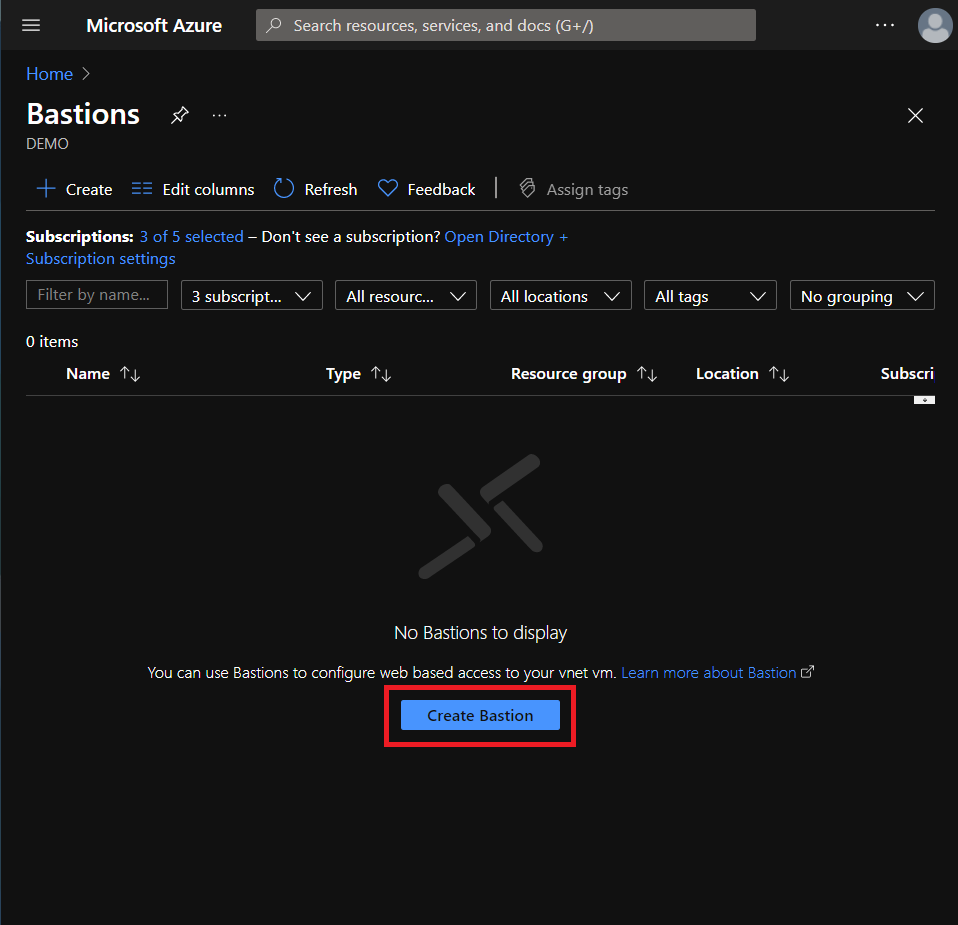
2. Click on All Services —> Networking —> Bastions to view the overview page where all of your configured Bastion hosts will be shown.
3. On the Bastions overview page, click Create Bastion.
4. Next, select your subscription and assign a resource group to create the Azure Bastion host in, or click Create new to create your own.
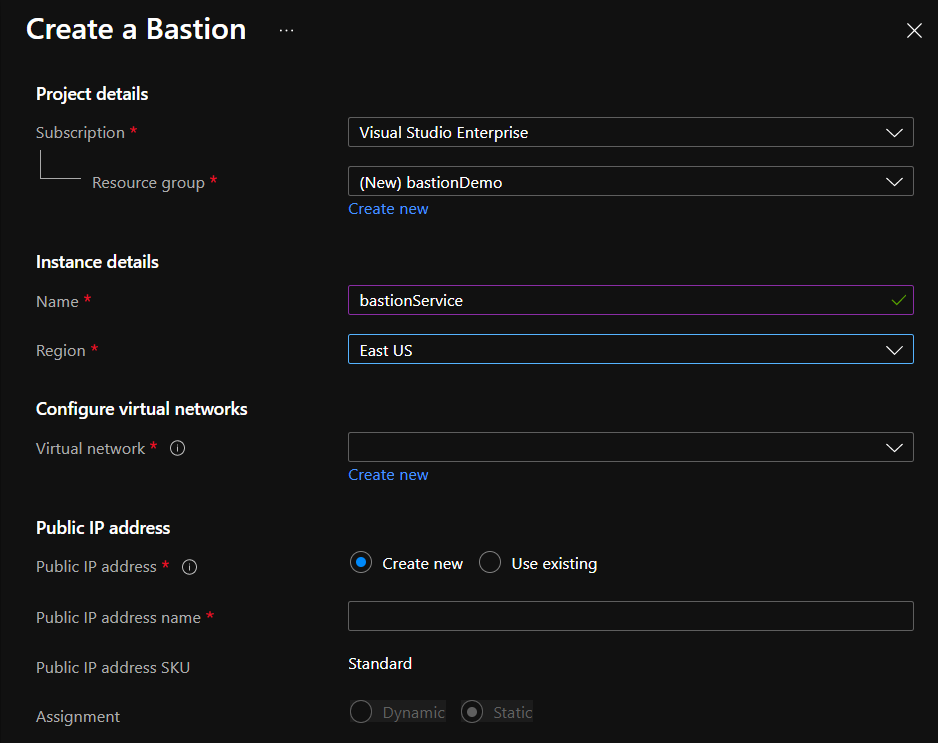
5. Now, assign:
- A name to the Bastion host of your choosing.
- The region to create the Bastion host in typically choosing the location closest to you.
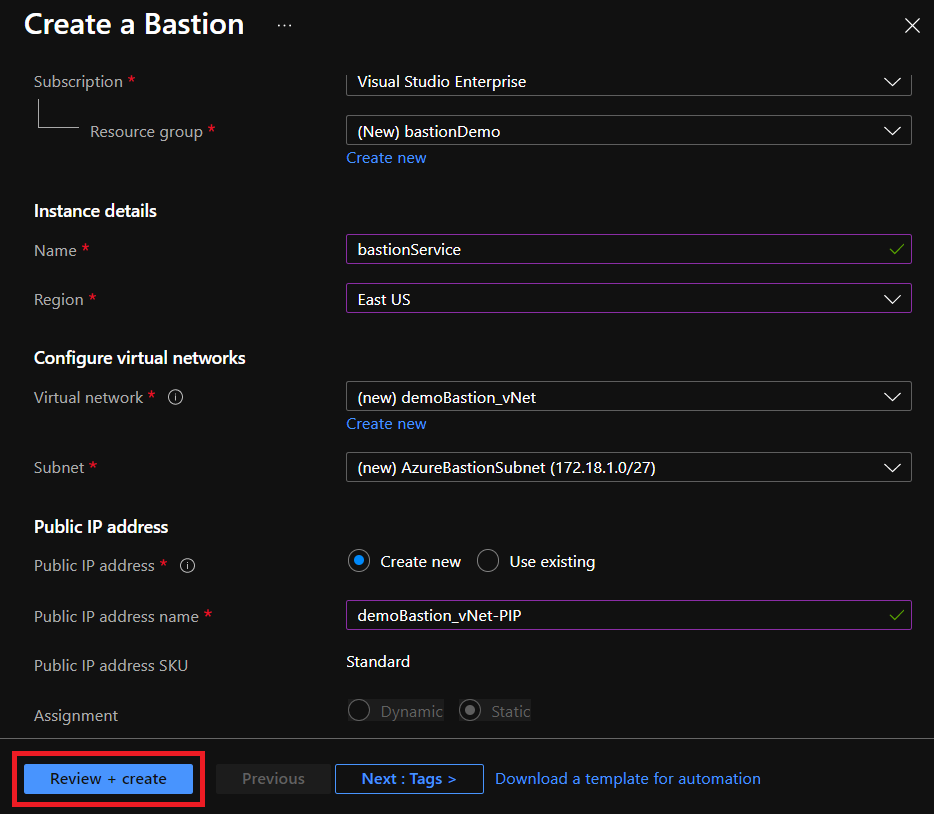
- The virtual network to assign the Bastion host to. If you don’t have one already, click Create new to create a new one.
IMPORTANT: If you create your own virtual network, be sure to call the associated subnet exactly “AzureBastionSubnet” with a vNet address space using a /27 subnet mask. This requirement may change as Bastion matures but for now, you must set up the subnet in this manner.
- A name for the public IP address if you’d like Azure to create one for you. You can use any name you’d like.
You’ll need a public IP address for the initial configuration but only for initiating a connection. Once connected, you’ll use the destination VM’s private IP address to connect.
6. When you’re done assigning all of the required Bastion attributes, click on the Review + create button.
7. Once validation passes, click on the Create button to instruct Azure to begin creating the Bastion resource.
Connecting to an Azure VM with Azure Bastion
Once you’ve deployed a Bastion resource, it’s time to actually see how you can use it to secure access to your Azure VMs. Assuming you already have an Azure VM set up as defined in the prerequisites, let’s now see how to use Azure Bastion to connect to a Windows VM via RDP.
While in the Azure portal:
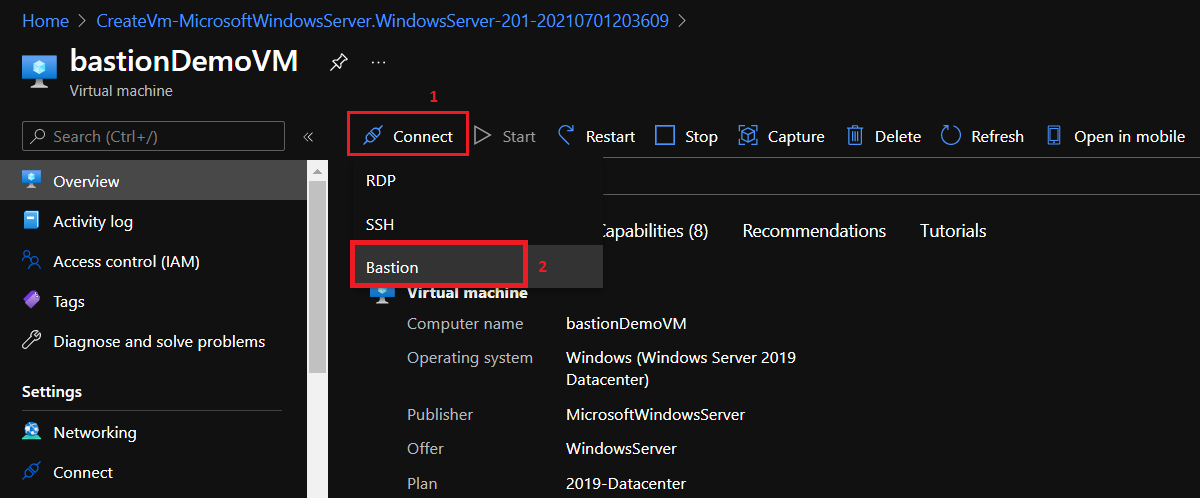
1. Find the Azure VM you’d like to connect to through Azure Bastion.
2. Click on the Connect button and choose Bastion.
3. On the Connect page, click on the Use Bastion button providing the username and password to a local (or if domain-joined, a domain account) to connect to the VM.
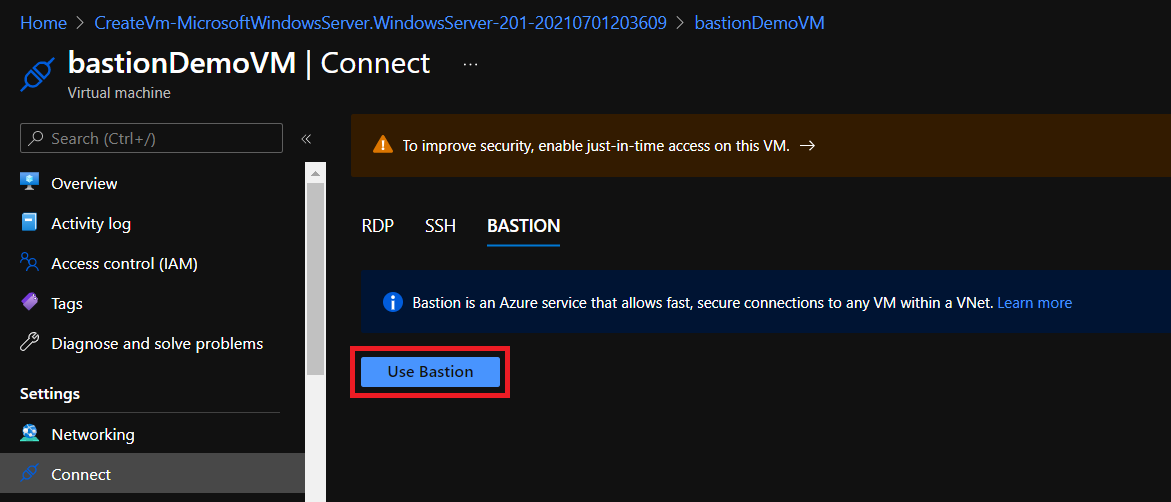
4. Select Connect and Azure will open a new tab in your browser that will display your VM’s desktop.
That’s it! You are now securely connected via RDP through your Azure Bastion host to your VM all in your browser.
Handy Shared Clipboard Functionality
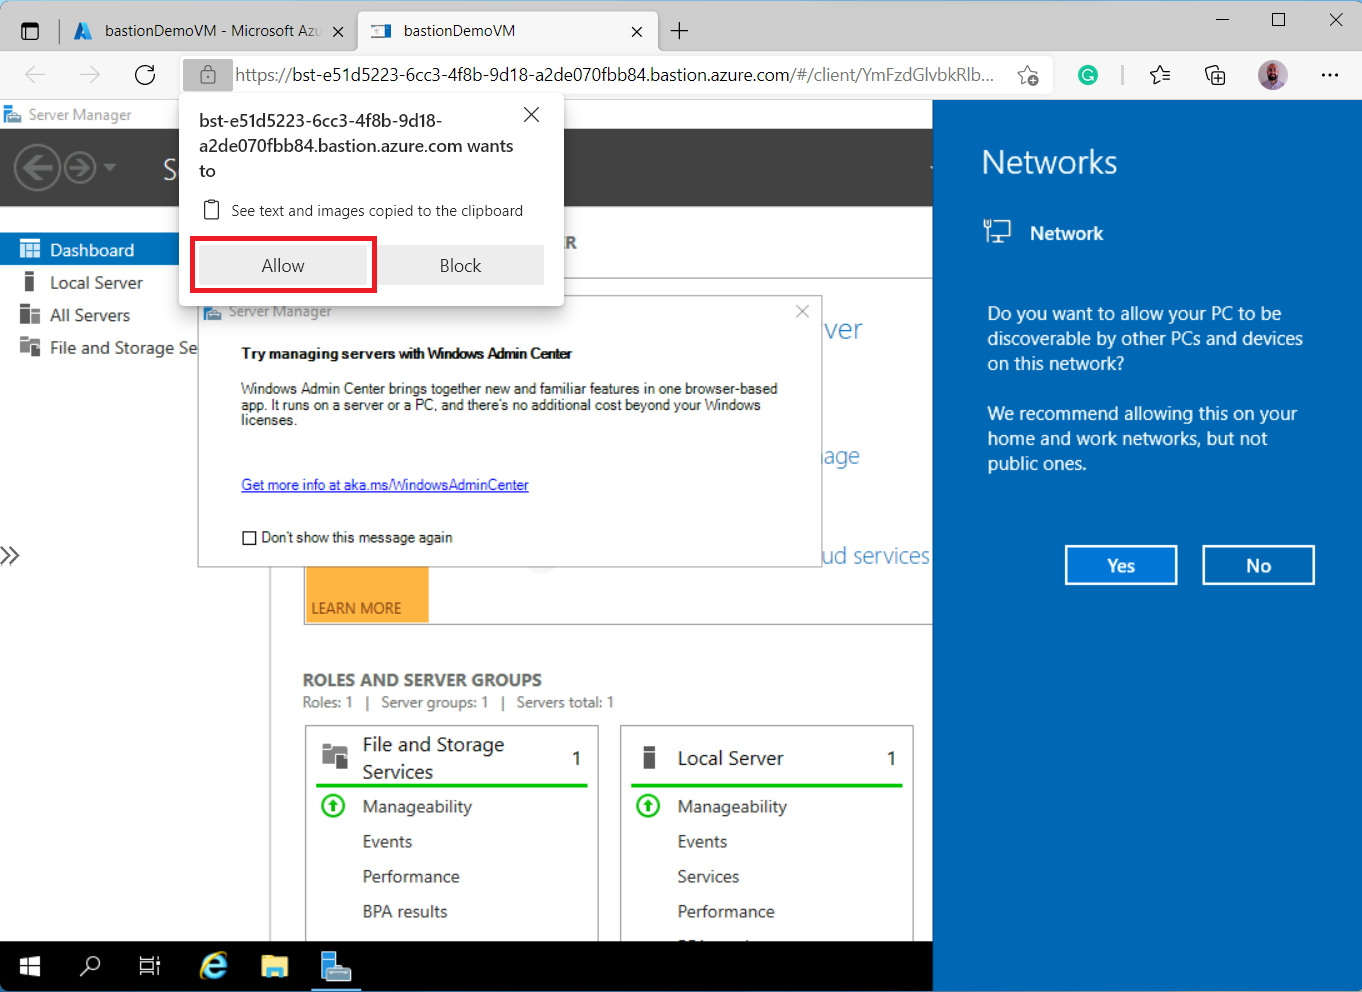
If you’re directly connected to a Windows machine via RDP, you always have a shared clipboard allowing you to copy/paste back and forth. That same functionality also exists via Azure Bastion but looks a little different.
While you have the Bastion console tab open, to enable the shared clipboard, click on the padlock in the URL bar and click on Allow, as shown below.
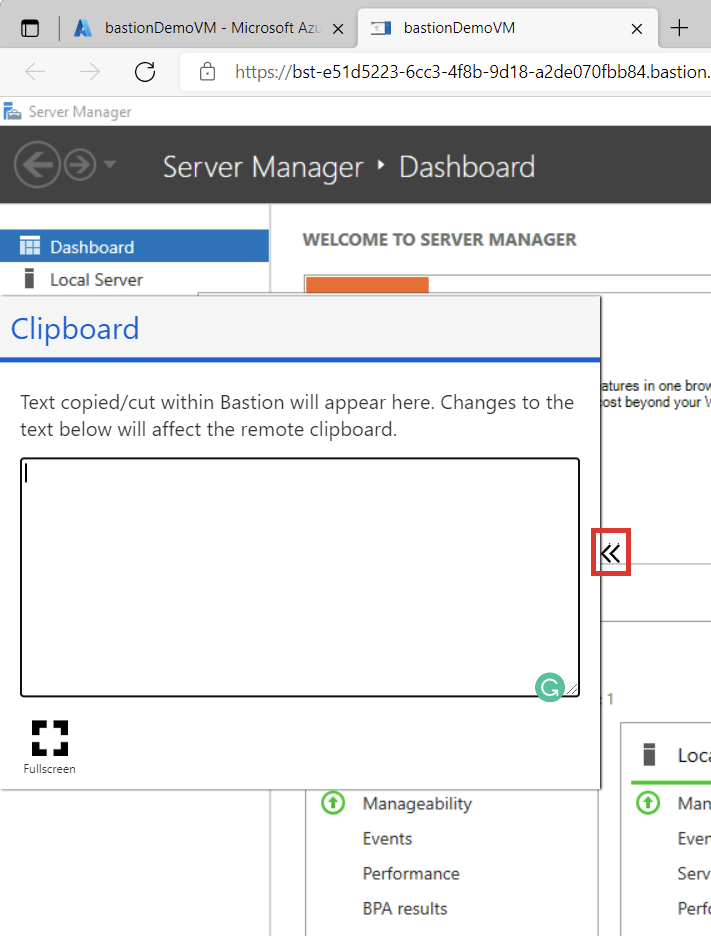
Once you’ve enabled the shared clipboard, you can see below that a separate Clipboard box comes up, allowing you to paste in contents to make available in your VM and vice versa.
Conclusion
Azure Bastion is a good solution to help secure RDP or SSH access. But it may not be the right solution for every organization. Some crucial features are not yet available, such as shared clipboard images, shared files, or lack of IPv6 support. But, the security aspect may outweigh the drawbacks for you.
Have you been using Azure Bastion for a while? What do you think? What are some features of Azure Bastion you’d like to see in the future?


