


Need to automate Docker container deployment? Have you heard about AWS Elastic Beanstalk? The AWS Elastic Beanstalk is another excellent service for deploying and scaling web applications and services.
Not a reader? Watch this related video tutorial!In this tutorial, you learn how to deploy an application to AWS Elastic Beanstalk using EB CLI and GitHub Actions.
Ready? Read on and start scaling your applications!
Prerequisites
This tutorial will be a hands-on demonstration. If you’d like to follow along, be sure you have the following:
- AWS Command-Line Interface (CLI) – This tutorial uses AWS CLI v2.
- AWS User with Elastic Beanstalk permission.
- EB CLI v3.14.6 installed
- A GitHub account and a GitHub repository that is already set up.
Creating a Docker Static Web Host
For demonstrating how to deploy a Docker container, you’ll first need an app to deploy. And for this demo, you’ll make use of an HTML file.
1. Run the git clone command below to clone an HTML file from a GitHub repository.
git clone [email protected]:Adam-the-Automator/aws-elastic-beanstalk.git2. Next, create a Dockerfile with your preferred text editor at the root of the repository you cloned (step one), and populate the file with the code below.
The code below displays the output of the HTML code (index.html).
# Get NGINX base image
FROM nginx

# Add the index file to nginx
ADD index.html /usr/share/nginx/html/

# Expose port to enable elastic beanstalk and connect to the Docker container
EXPOSE 803. Run the docker build command below to build a Docker container of your HTML file called html in the working directory.
docker build -t html .4. Now, execute the docker run command below to run the Docker container (html) you built previously (step three).
The --name flag tells Docker the name (justhtml) to use when referencing the container within the network. While the -p flag maps the port of your localhost (8080) to the port of the Docker container (80).
docker run --name justhtml -p 8080:80 html5. Finally, open your web browser and navigate to http://localhost:8080/ to verify you can access the Docker container (HTML).
If all works well, you’ll see the HTML page shown below.

Deploying Application to Elastic Beanstalk via the AWS CLI
You’ve verified your Docker container is accessible on your host, so it’s time to deploy your application to the AWS Elastic Beanstalk. You’ll use the EB CLI to deploy your Docker container (html) to AWS Elastic Beanstalk.
Assuming you have AWS CLI set up already, you don’t need to do anything to set up the EB CLI. Why? EB CLI uses the same credentials as AWS CLI.
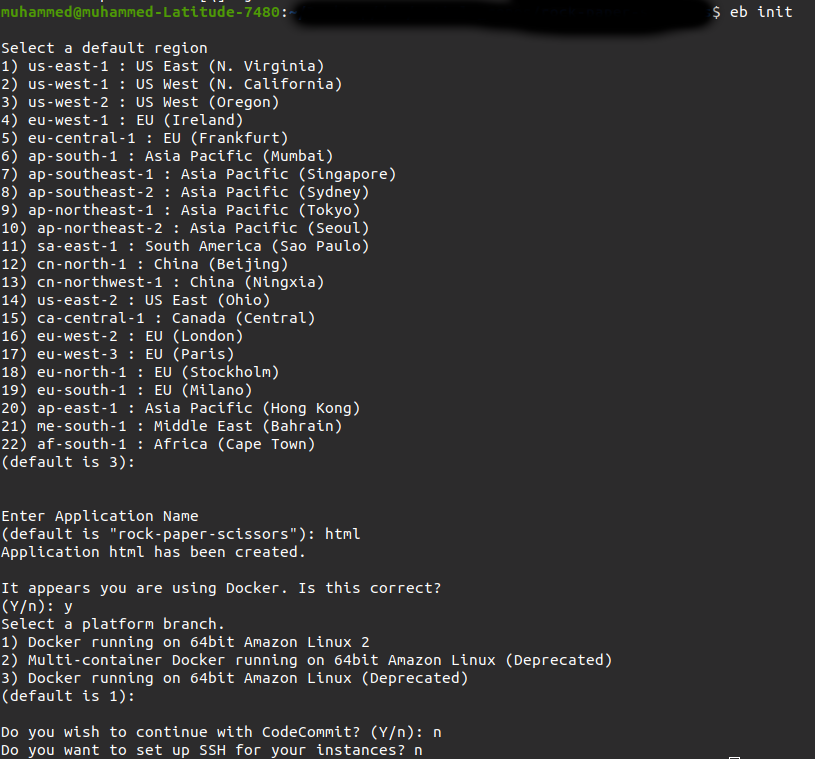
1. Run the eb init command below to initialize the AWS Elastic Beanstalk environment for your project. The environment enables Elastic Beanstalk to identify the kind of application you want to deploy.
eb initAfter running the command, you will receive a prompt to fill in the details. Below, the following options were used for this example.
- Default Region:
3
- Application Name:
html
- It appears you are using Docker. Is this correct?
Y
- Select a Platform Branch:
1
- Do you wish to continue with CodeCommit?
N
- Do you want to set up SSH for your instances?
N
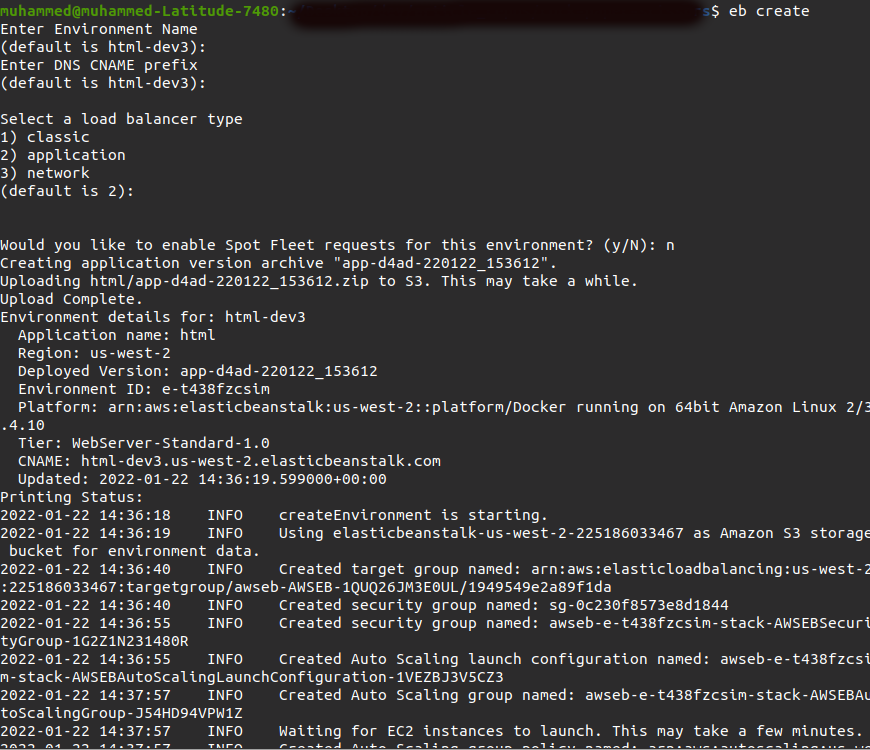
2. Next, run the eb create command below to create an environment for your application on Elastic Beanstalk. Basically, you deploy your application and Elastic Beanstalk will handle the rest like load balancing
If you have Git initialized in your project, make sure you commit all the changes first before you create an application on the Elastic Beanstalk. Why? EB CLI uses the Git archive of the most recent commit.
eb createPress Enter to use the default for an Environment Name, DNS CNAME prefix, and load balancer type since you’re only working on an HTML app.
But when prompted to enable Spot Fleet requests, type n, as this option provides optional On-Demand Instances which are not necessary here, and finally press Enter.
An auto-scaling group is automatically provisioned when you first ran the
eb createcommand.The default triggers scale up when the average outbound network traffic from each instance is higher than 6 MB and scales down when the outbound network traffic is lower than 2 MB over a period of five minutes.
As your application is only HTML, triggering application scaling is unlikely to occur.
3. Finally, run the eb open command below to open your application on your default web browser directly from Elastic Beanstalk.
eb open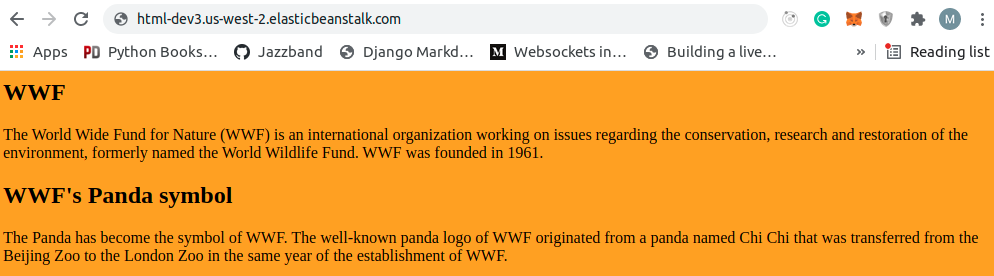
Verifying the AWS Elastic Beanstalk Application
Now you’ve deployed your application, you’ll see all the handy functionalities added to your application. You’ll first verify where Elastic Beanstalk stored the application file.
To have access to the application file:
1. Log into AWS console with the user added in AWS CLI configuration.
2. Click the All Services drop-down, click the Storage tab, then select S3.
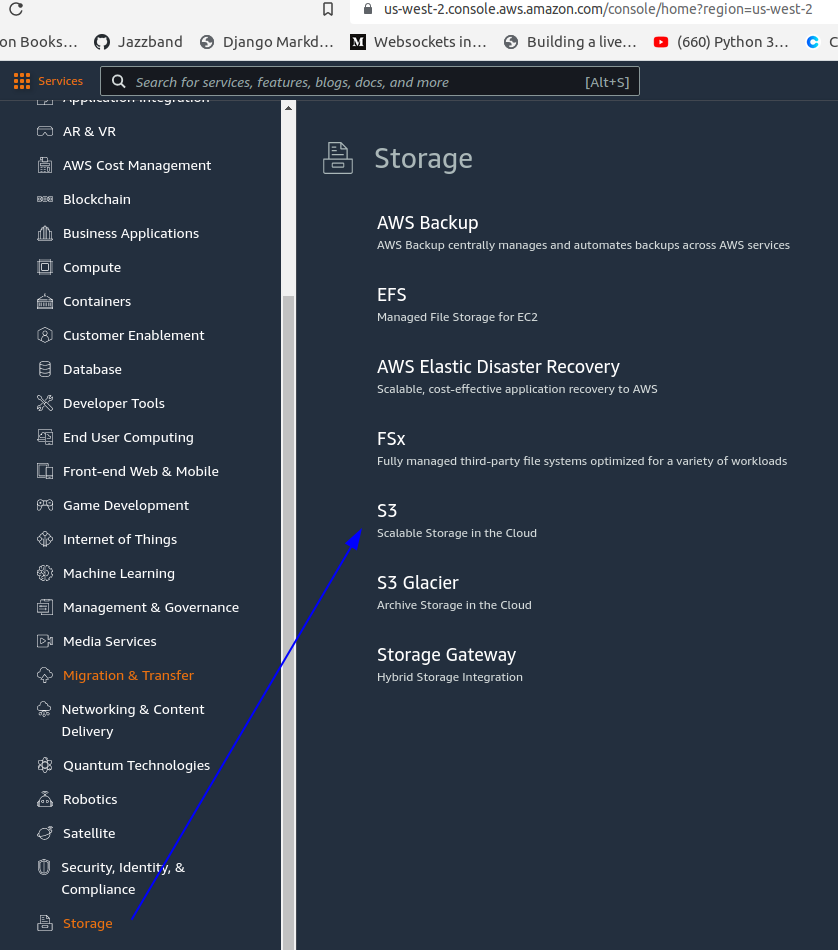
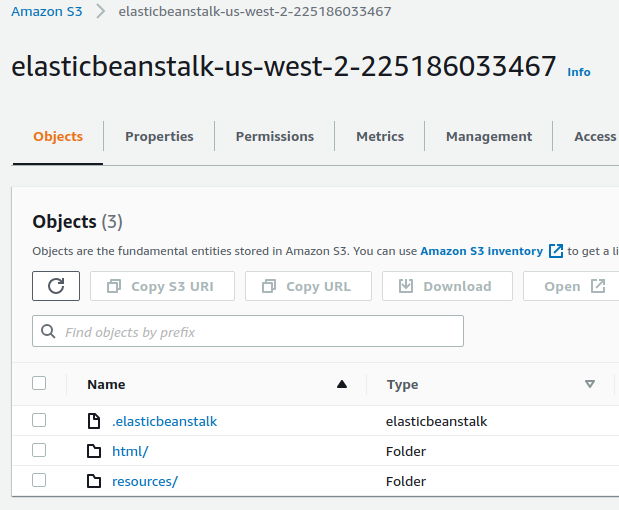
3. On the S3 dashboard, click on your project to see your application information.
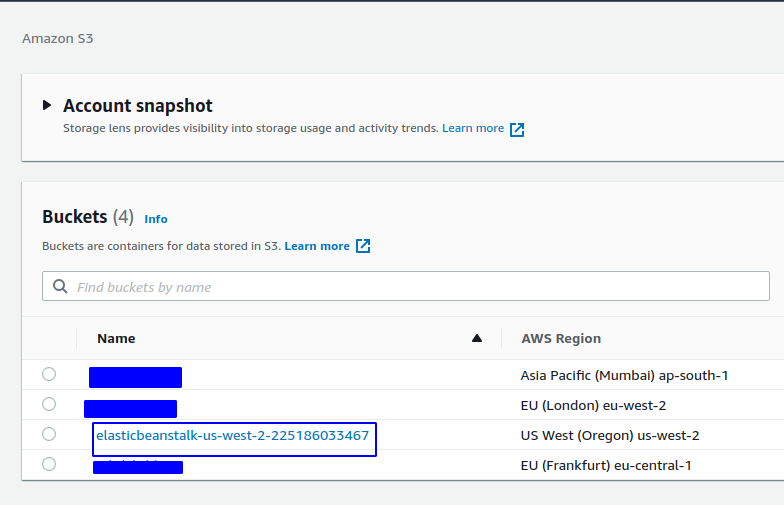
As shown below, you see your application in the Objects list.
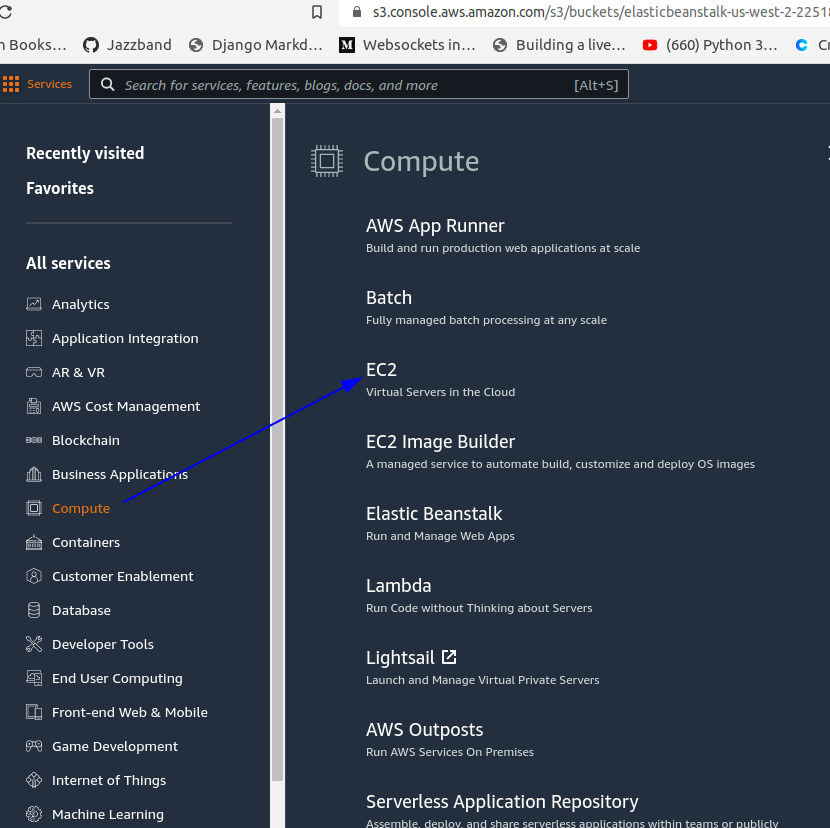
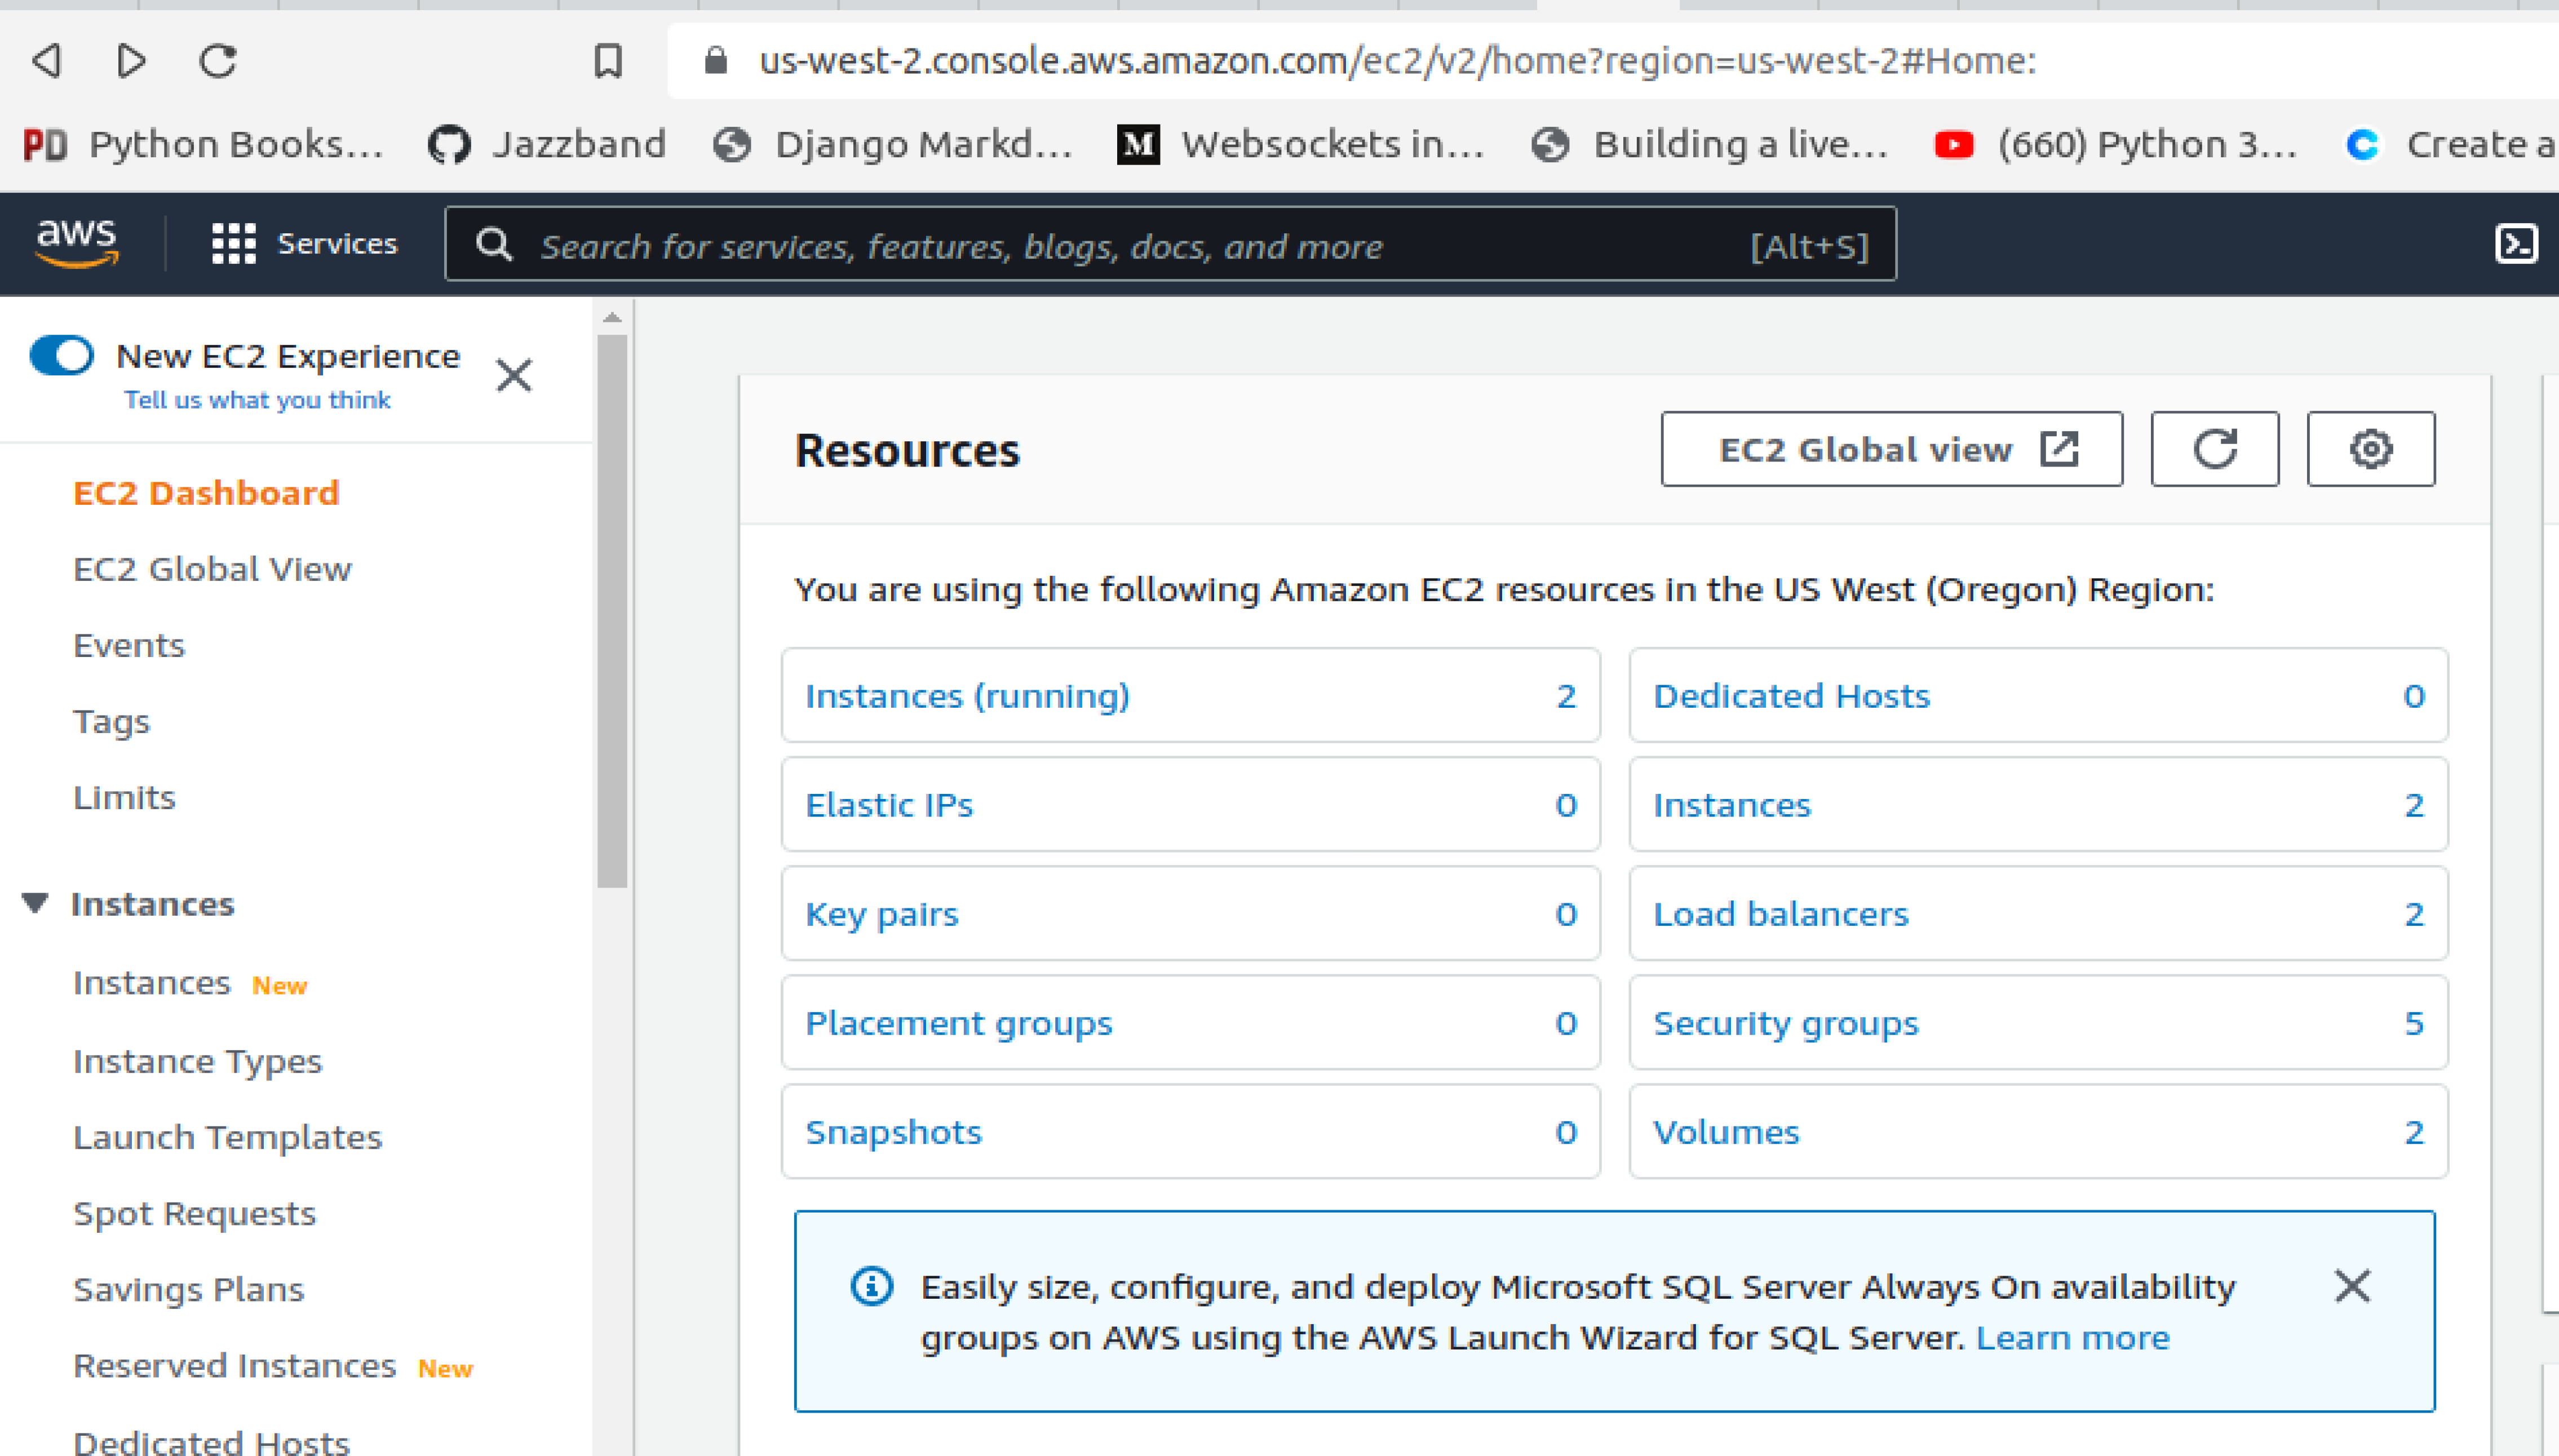
4. Finally, click the All Services drop-down and click the Compute tab, then select EC2 to access the EC2 dashboard.
On the EC2 dashboard, you can see the EC2 resources that are running your application, similar to the one below. But mind you, the data below may differ from yours.
Additionally, you can run the eb status command below to see more details about your application.
eb status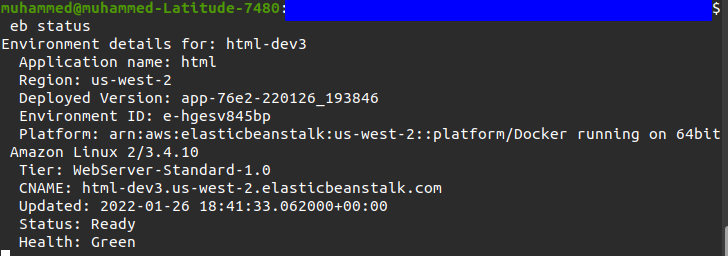
Updating an AWS Elastic Beanstalk Application
When changes have been made in your application, you’ll need to run the eb deploy the command to create and deploy another version of your application.
Open your HTML file (index.html) and replace what you have in the <style> tag with the one below. The code below changes the background color of your application .
<style>
    body{
        background-color: rgb(0, 255, 55);
    }
</style>
Now, run the following commands to deploy the changes and open your application on your web browser.
eb deploy
eb open
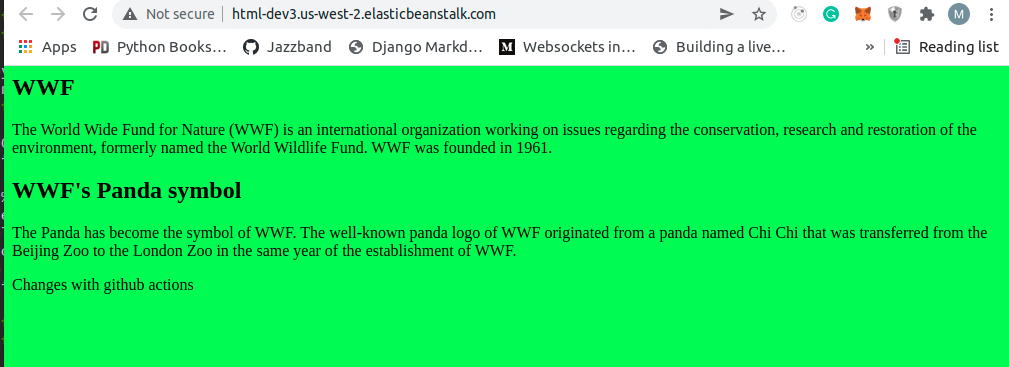
When the deployment is complete, your application opens automatically in your browser with the new changes you made.

Deploying Application to Elastic Beanstalk with GitHub Actions
Apart from using EB CLI, using GitHub Actions is another convenient way of deploying your Docker container to Elastic Beanstalk. GitHub Actions enables you to automate repetitive stuff during development. With GitHub Actions, you set up the instructions and push them to GitHub.
At the moment, when you make changes, you run the deployment command yourself. But in this demo, you’ll set up GitHub Actions to run the deployment commands for you.
This setup is beneficial if you are developing a pipeline that runs tests and performs other checks.
1. Create a directory named .github/workflows in the root directory of your project. This directory is where you’ll store your workflow file.
2. Next, create a file with your preferred name in the .github/workflows directory. But for this example, the file is named main.yml.
Copy and paste the code below to the main.yml file, which performs the following:
- Creates a job that gets the latest push to your repository and zips the repository (Elastic Beanstalk requires you to zip your project folder).
- Formats the timestamp, and uses the formatted timestamps as the version label.
- Deploy the repository to Elastic Beanstalk.
name: Deployment From Github To AWS
on:
  # activates the workflow when there is a push on the main branch
  push:
    branches:
      - main
jobs:
  deploy:
    runs-on: ubuntu-latest # the operating system your job will run on
    steps:
      - name: Checkout Latest Repo
        # checks out your repository under the GitHub workspace so that your workflow can access it
        uses: actions/checkout@master

      - name: Generate Deployment Package
        # zip all files except .git
        run: zip -r deploy.zip * -x '*.git*'

      - name: Get timestamp
        uses: gerred/actions/current-time@master
        id: current-time

      - name: Run string replace
        uses: frabert/replace-string-action@master
        id: format-time
        with:
          # replaces '[:\.]+' in the timestamp with '-'
          pattern: '[:\.]+'
          string: "${{ steps.current-time.outputs.time }}"
          replace-with: '-'
          flags: 'g'

      - name: Deploy to EB
        uses: einaregilsson/beanstalk-deploy@v14
        with:
					# Input the credentials you used to setup AWS CLI and credentials for the application environment
          aws_access_key: AKIATI3RC11111YQ3TAU
          aws_secret_key: Urr46HfaaaaaabbbbbcccaC/+YpWFtJFbRQN27xF
          application_name: html
          environment_name: html-dev3
          version_label: "${{ steps.format-time.outputs.replaced }}"
          region: us-west-2
          deployment_package: deploy.zip
Typically, in a live project, you would want to put the credentials in GitHub Secrets.
3. Run the following commands on your project’s root to commit and push the code to your GitHub repository.
git add . # adds changes to staging area
git commit -m "update" # commits your changes
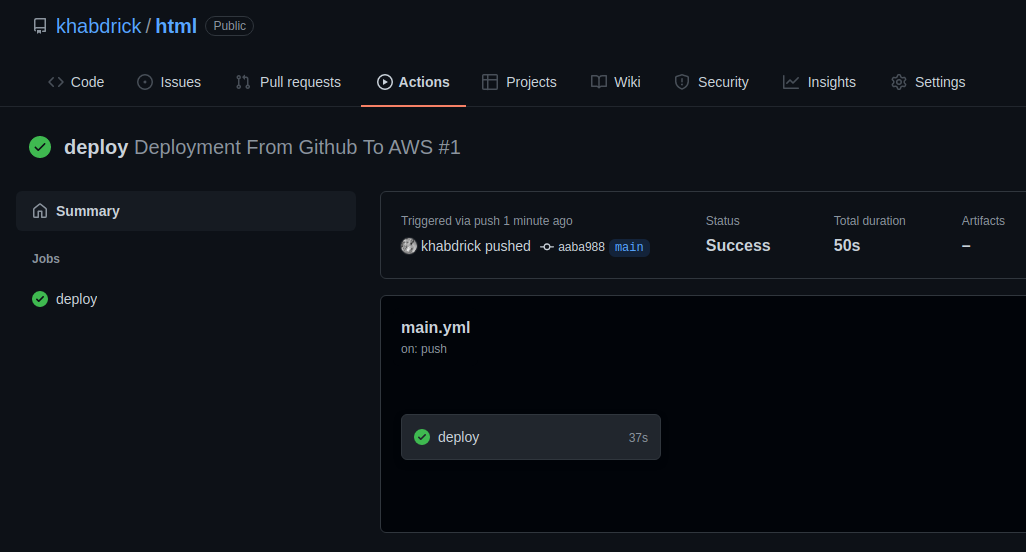
git push # Push to GitHub4. Now, open your web browser and navigate to your project on GitHub. Click on the Actions tab, then click on your current commit.
Similar to the image below, you can confirm that your application is deployed.
5. Finally, execute the command below to run your application.
eb openBelow, you can see that the GitHub Actions successfully deployed the changes.
Conclusion
Throughout this tutorial, you’ve learned how to deploy an application to Elastic Beanstalk through the terminal with EB CLI and GitHub Actions.
By now, you already know different ways to deploy your application to Elastic beanstalk, so you can pick which one suits your needs the most.
How do you plan to build on this newfound knowledge? Perhaps deploying a full-fledged application?


