


Manual application deployments to an AWS EC2 virtual machine contribute to toil. Toil is the result of repetitive manual operations when you manage services in production. So how to avoid toil? AWS CodeDeploy is the key.
Not a reader? Watch this related video tutorial!In this tutorial, you will learn about deploying applications to an Amazon EC2 instance with the AWS CodeDeploy service and eliminating unnecessary toil.
Read on to learn more!
Prerequisites
This tutorial will be a hands-on demonstration. If you’d like to follow along, be sure you have the following:
- An AWS account. If you don’t have an AWS account, a free tier account is available.
- An installed and configured AWS CLI.
- Docker Desktop installed, this tutorial uses Docker 20.10.18 on a supported Linux or Windows operating system.
Understanding CodeDeploy
CodeDeploy is a deployment service that automates software deployments to AWS compute services. These AWS compute services are Elastic Compute Cloud (EC2), Fargate, Lambda functions, Elastic Compute Service, and even on-premise servers.
The deployment process of an application deployed via CodeDeploy is primarily configured through an AppSpec configuration file in either YAML or JSON format. AppSec specifies the type of AWS resource to operate on and is placed within the application’s folder to deploy.
Creating IAM Roles and Policies via the AWS Console
Before deploying an application with AWS CodeDeploy you must create an Identity and Access Management (IAM) role and policies to be used by CodeDeploy. An IAM role on AWS is a set of policies that grant users access to your AWS resources whereas an IAM policy contains the specific set of permissions to grant to a resource.
In this section, you will create a custom IAM Policy that allows EC2 to connect to AWS S3 and the Systems Manager services. Next, you will create two IAM roles with the appropriate trust policies via the AWS console to attach the necessary policies and allow access to CodeDeploy.
Creating the Custom IAM Policy to Manage an EC2 Instance
First, you must create a custom policy that grants access to AWS S3 and Systems Manager services that will be attached to an EC2 instance running the application, python-shortner-application.
You may also create the policy via the AWS CLI, but in this tutorial, the GUI method is shown.
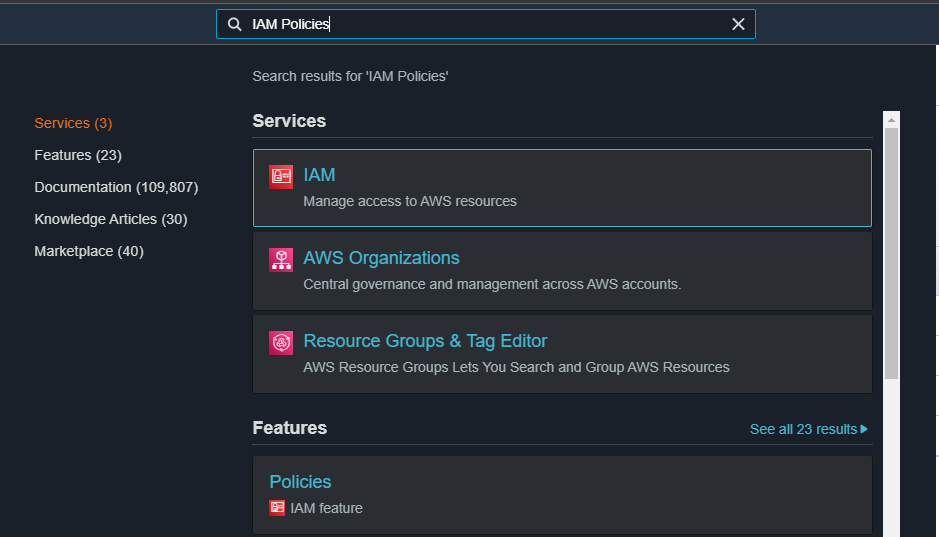
1. Locate and open the IAM Policies section within your AWS management console by entering “IAM Policies” in the search box and clicking on Policies under Features.
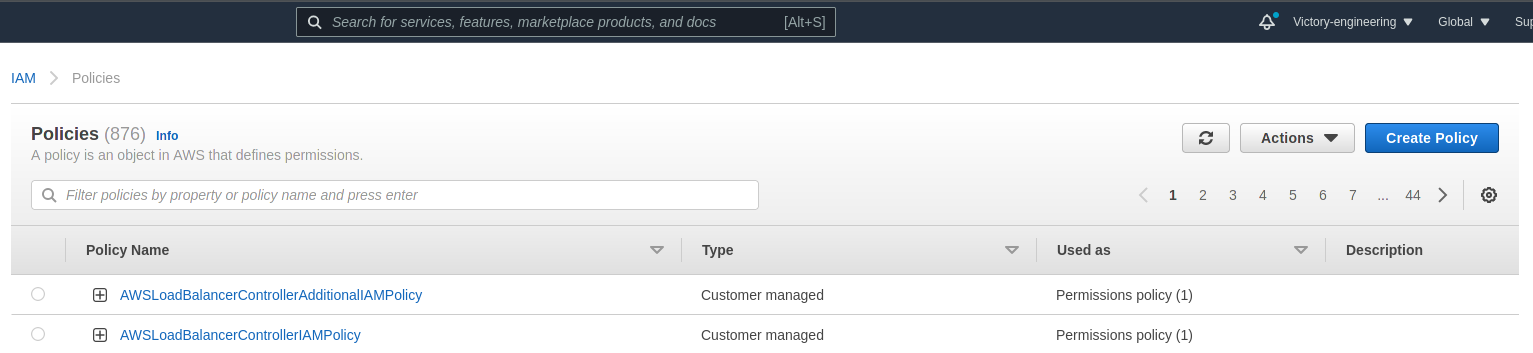
2. From the Policies page, click the Create Policy button positioned at the top-right corner of the page to begin the three-step process of creating a new policy.
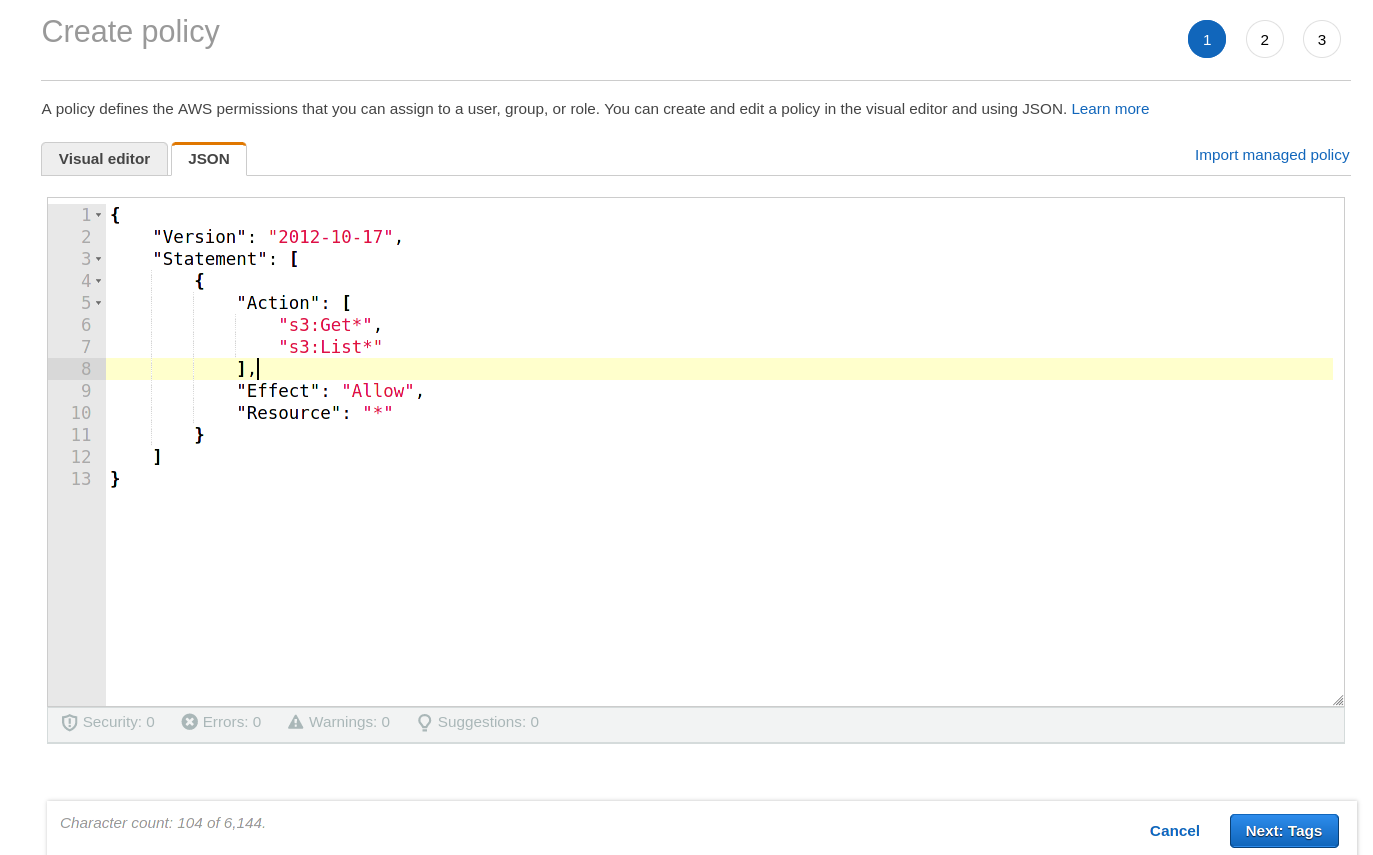
3. Within the Create Policy page, click the JSON tab to switch to the JSON editor and paste the JSON object below into the editor. The policy object below allows for data retrieval from the S3 service on AWS via the s3:Get* and s3:List* actions.
{
    "Version": "2012-10-17",
    "Statement": [
        {
            "Action": [
                "s3:Get*",
                "s3:List*"
            ],
            "Effect": "Allow",
            "Resource": "*"
        }
    ]
}
Click on the Next: Tags button to proceed to the tags screen (no tags are necessary to assign) and then click the Next: Review button to proceed to the final step where you would review and name the new policy.
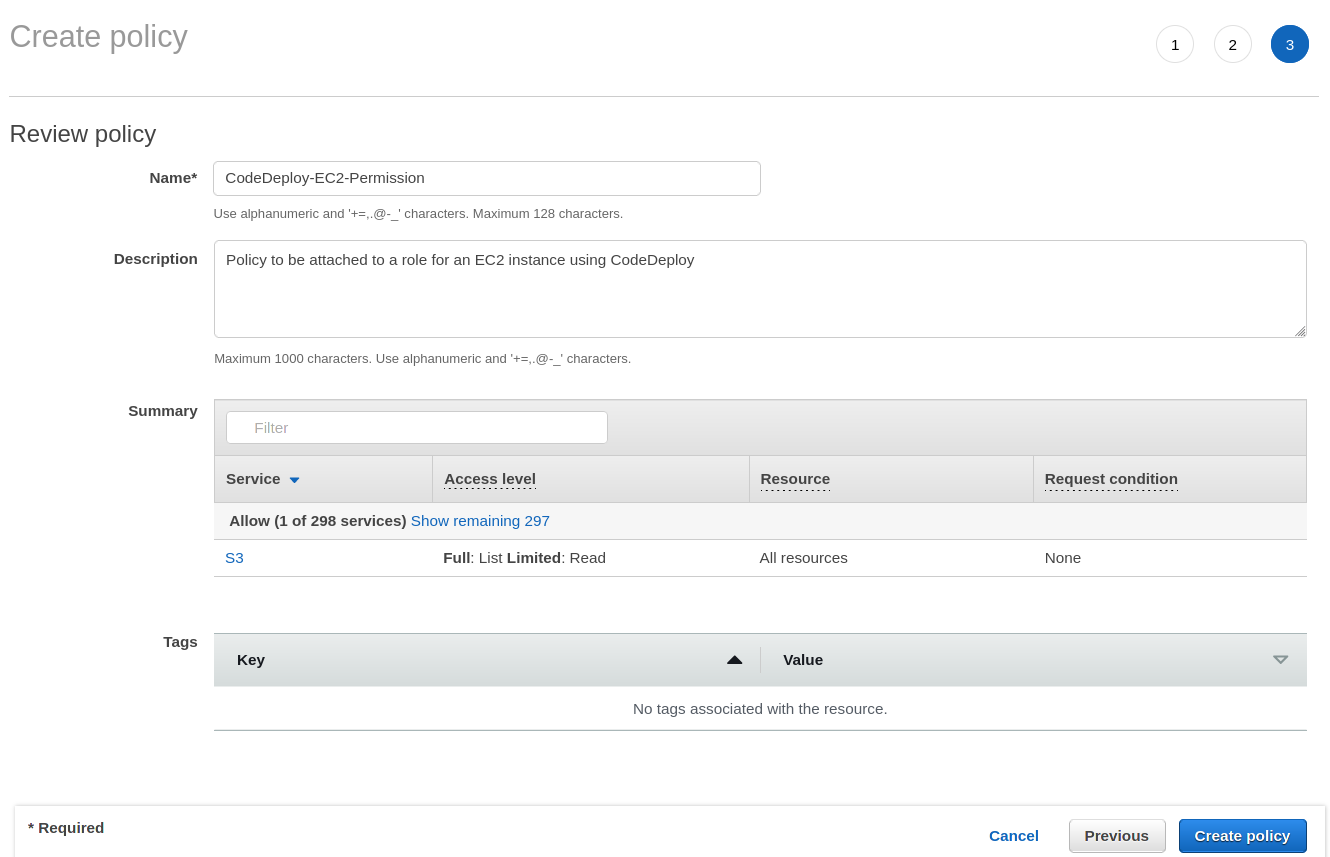
4. In the Review Policy step, specify a name, and description in the Policy Name and Description input fields, then click the Create Policy button to save the policy.
- Policy name: CodeDeploy-EC2-Permission
- Policy description: Policy to be attached to a role for an EC2 instance using CodeDeploy.
Creating the CodeDeploy-EC2-Permission IAM Role
Now that you have a newly created policy necessary for the correct EC2 permissions, you must create and then attach the policy to the role CodeDeploy-EC2-Permission that will be created below.
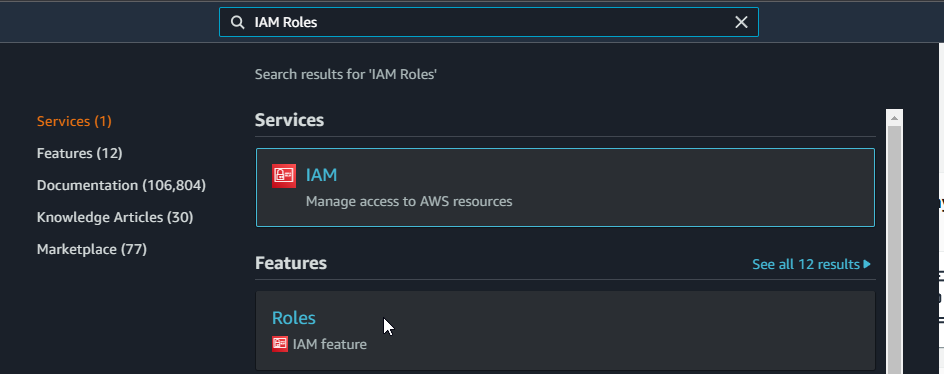
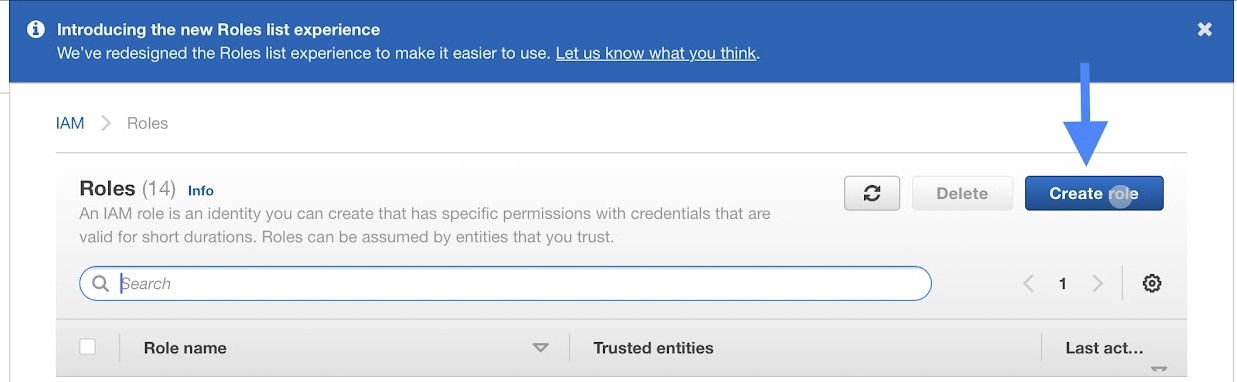
1. Locate and open the IAM Roles service section within your AWS management console by entering “IAM Roles” in the search box and clicking on Roles under Features.
2. Navigate back to the Roles page within the IAM console, and click the Create Role button at the top-right corner of the page to begin the process of creating a new role.

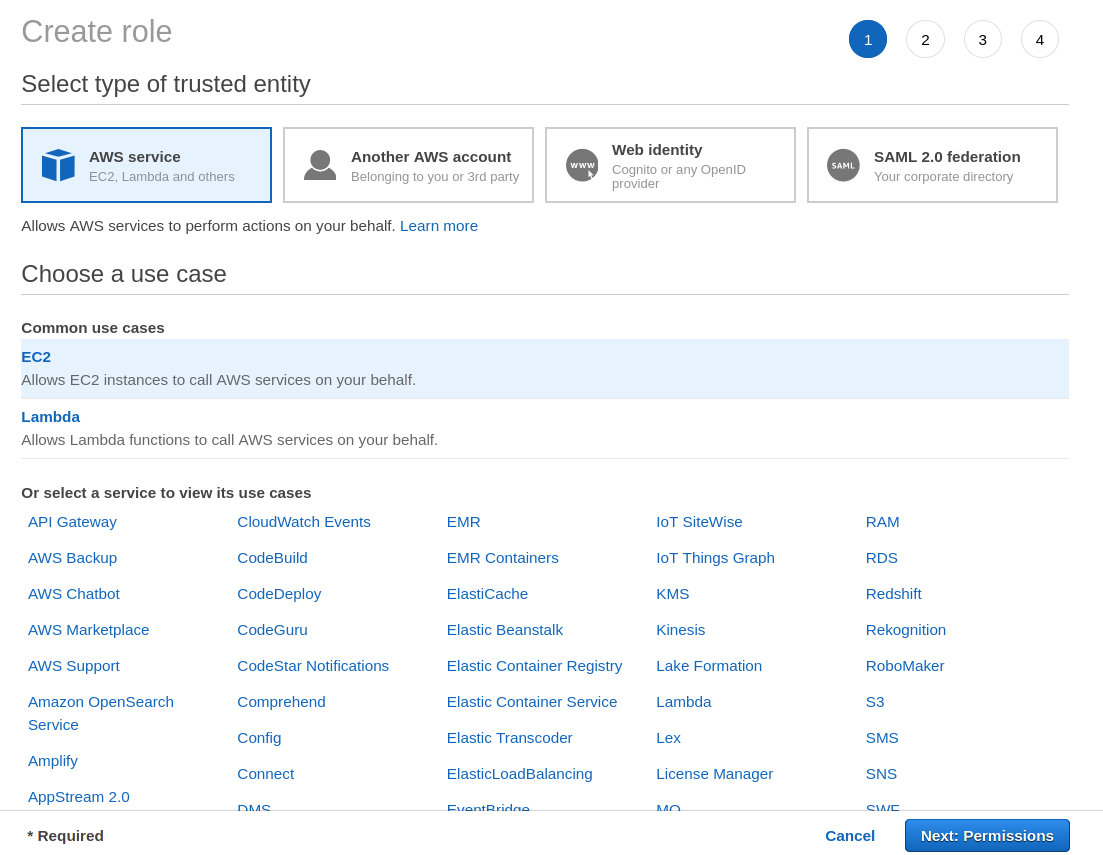
3. On the Create Role page, select the EC2 option as a common use case and click the Next: Permissions button at the bottom of the page. Selecting EC2 as a common use case allows the EC2 instance to call other AWS services on your behalf.
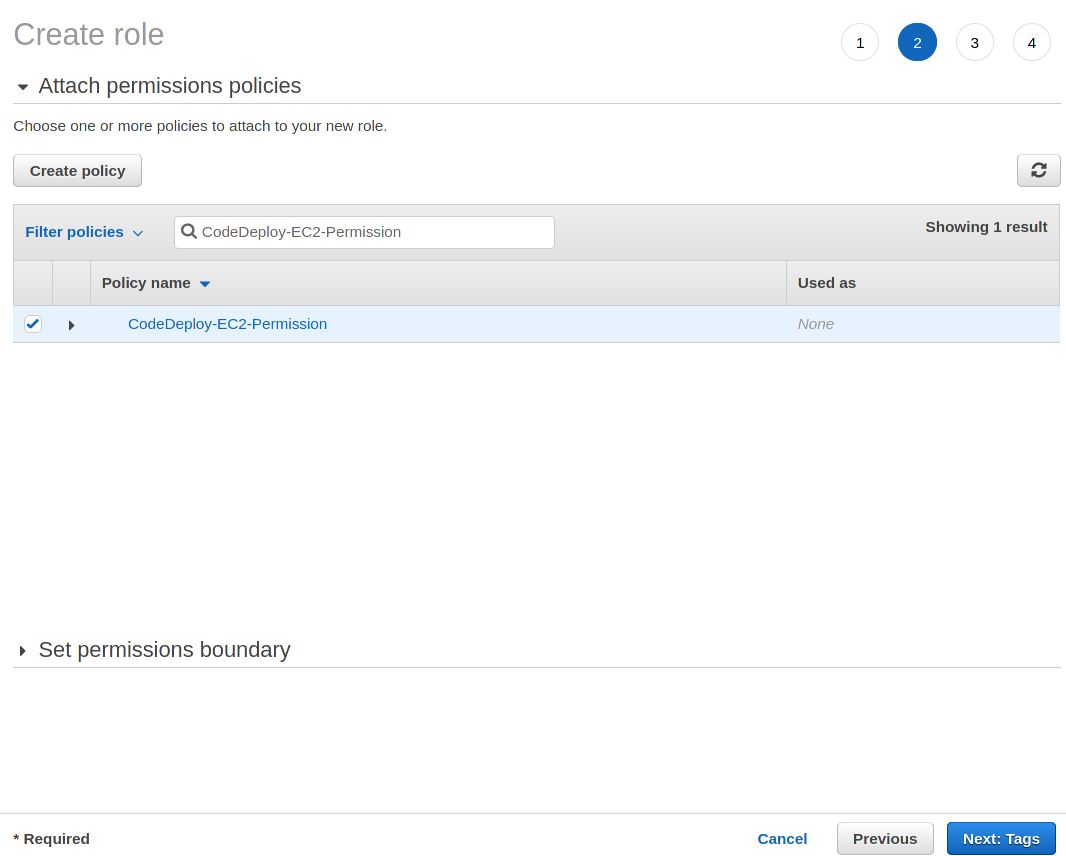
4. At the Attach permissions policies page, enter CodeDeploy-EC2-Permission in the policies search bar and select the checkbox to add the CodeDeploy-EC2-Permission policy. Selecting the CodeDeploy-EC2-Permission policy gives the role access to the permissions object previously defined.
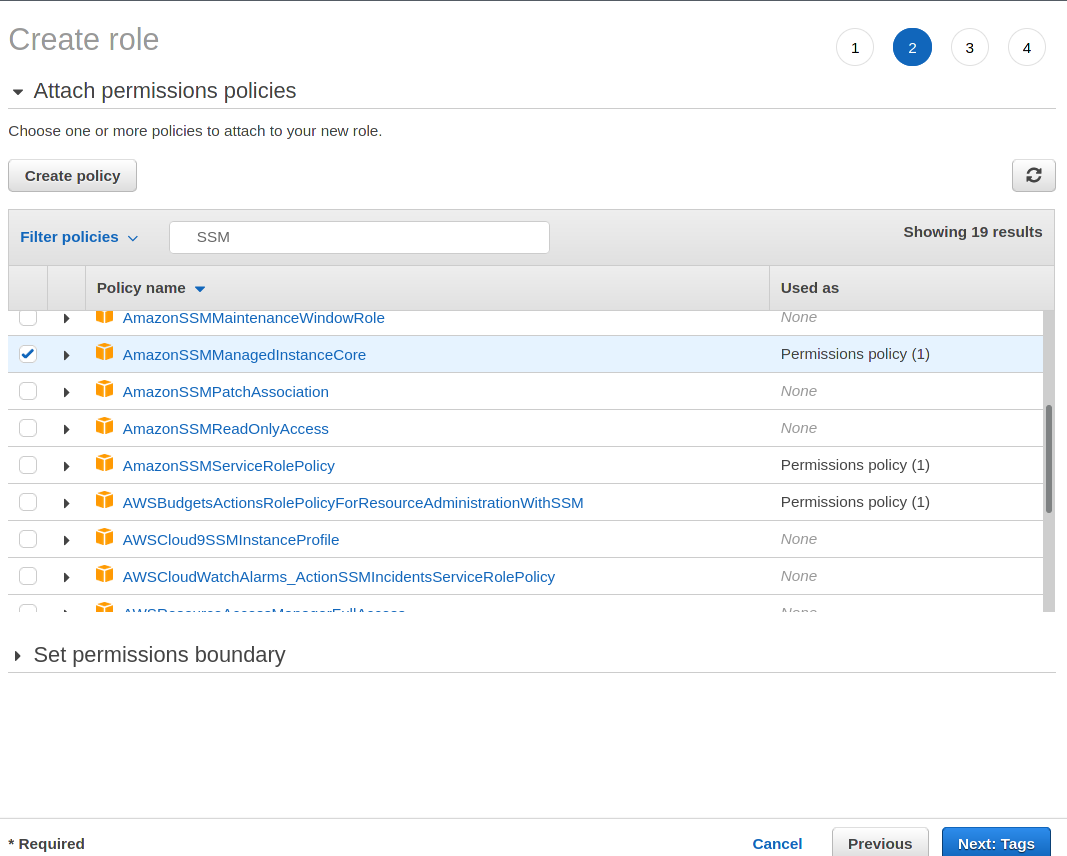
5. Next, enter SSM in the permissions search bar and click the checkbox next to the AmazonSSMManagedInstanceCore policy. The AmazonSSMManagedInstanceCore policy provides the IAM role access to the core functionality of the AWS Systems Manager, used to assist in managing EC2 instances.
Click the Next: Tags button to proceed to the Tags step (no tags are necessary to assign), and then click the Next: Review button to proceed to the last step where you would review and name the new role.
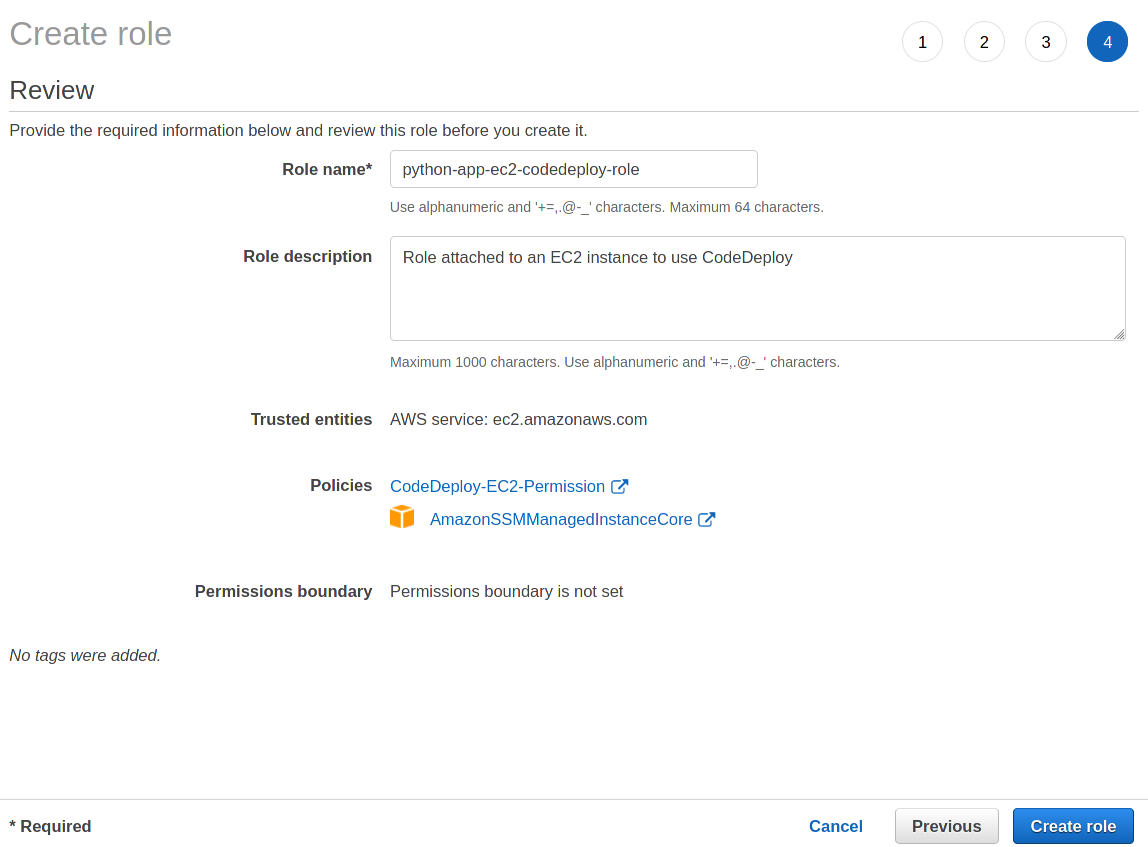
6. At the Review page, specify a Role name and Role description for this new role as defined below and click the Create Role button to save the role.
- Role name: python-app-ec2-codedeploy-role
- Role description: Role attached to an EC2 instance to use CodeDeploy.
Creating the IAM Role for CodeDeploy
After you have created the necessary role to allow an EC2 instance to access AWS S3 and SSM, you must create the IAM Role needed to allow CodeDeploy access.
1. From the same Roles page as used previously, click the Create Role button positioned at the top-right corner of the page to begin the four-step process of creating a new role.
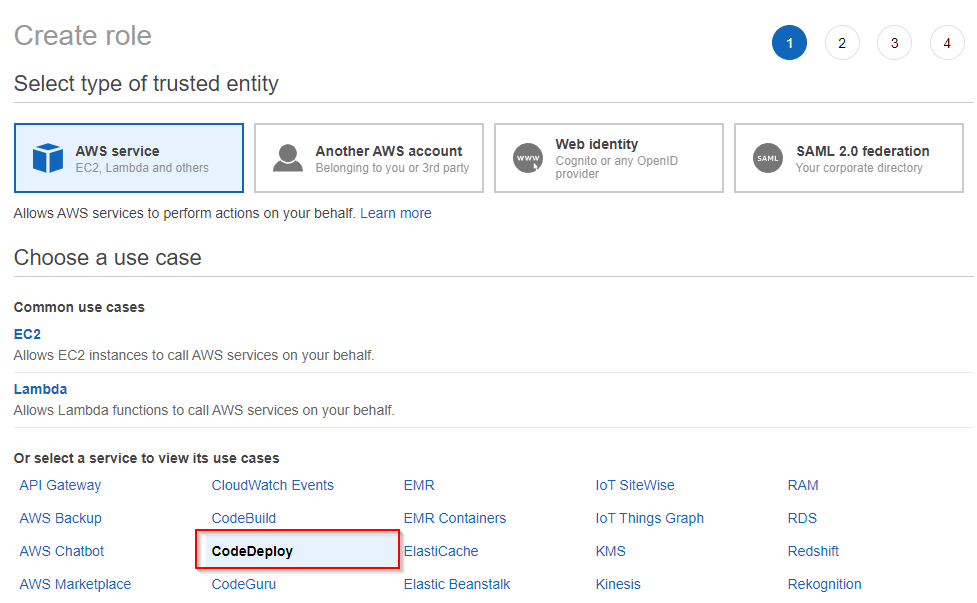
2. On the Create role page, select the CodeDeploy option at the bottom as a common use case and click the Next: Permissions button at the bottom of the page. Selecting CodeDeploy grants the CodeDeploy the ability to call other AWS services on your behalf.
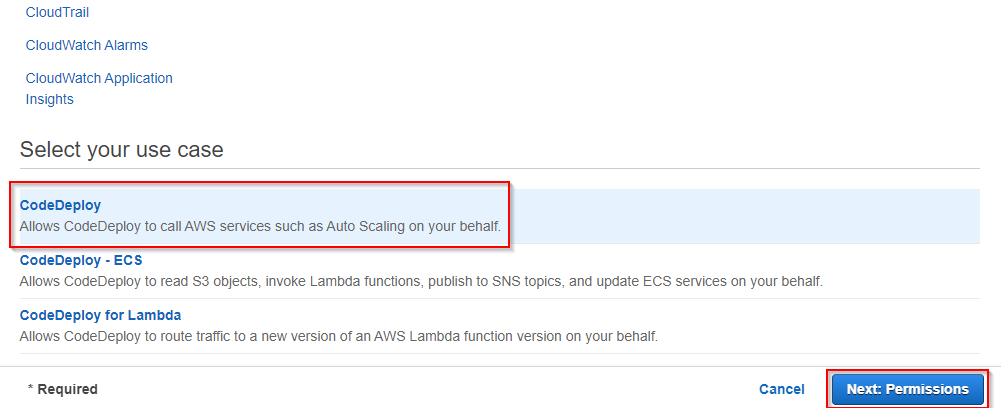
3. With the CodeDeploy common use case selected, the AWSCodeDeployRole is automatically attached to the new role. The CodeDeploy agent uses the AWSCodeDeployRole policy to make deployments to an EC2 instance on your behalf.
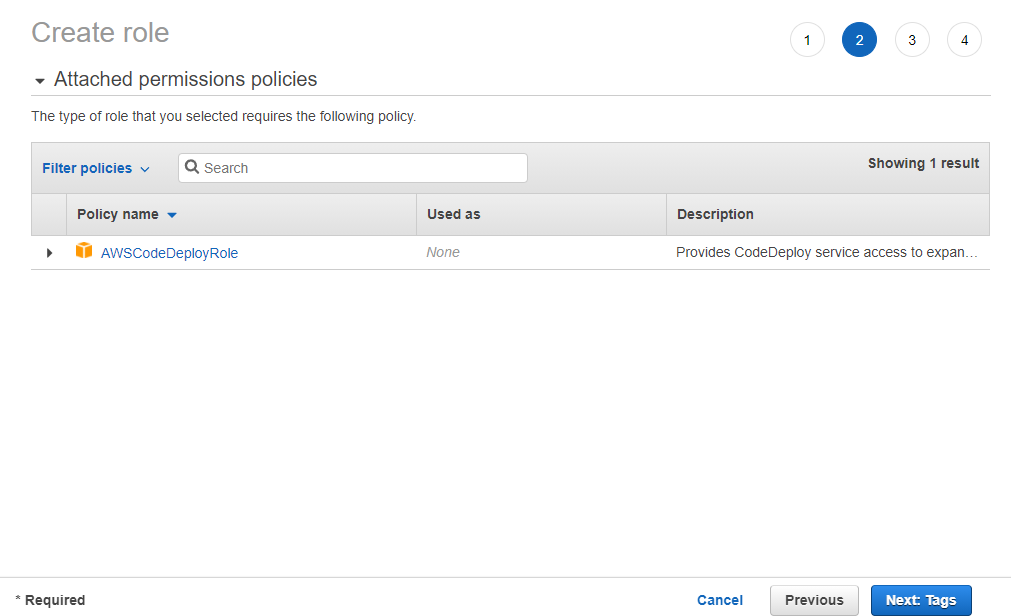
Click the Next: Tags button to proceed to the Tags step (no tags are necessary to assign), and then click the Next: Review button to proceed to the last step where you would review and name the new role.
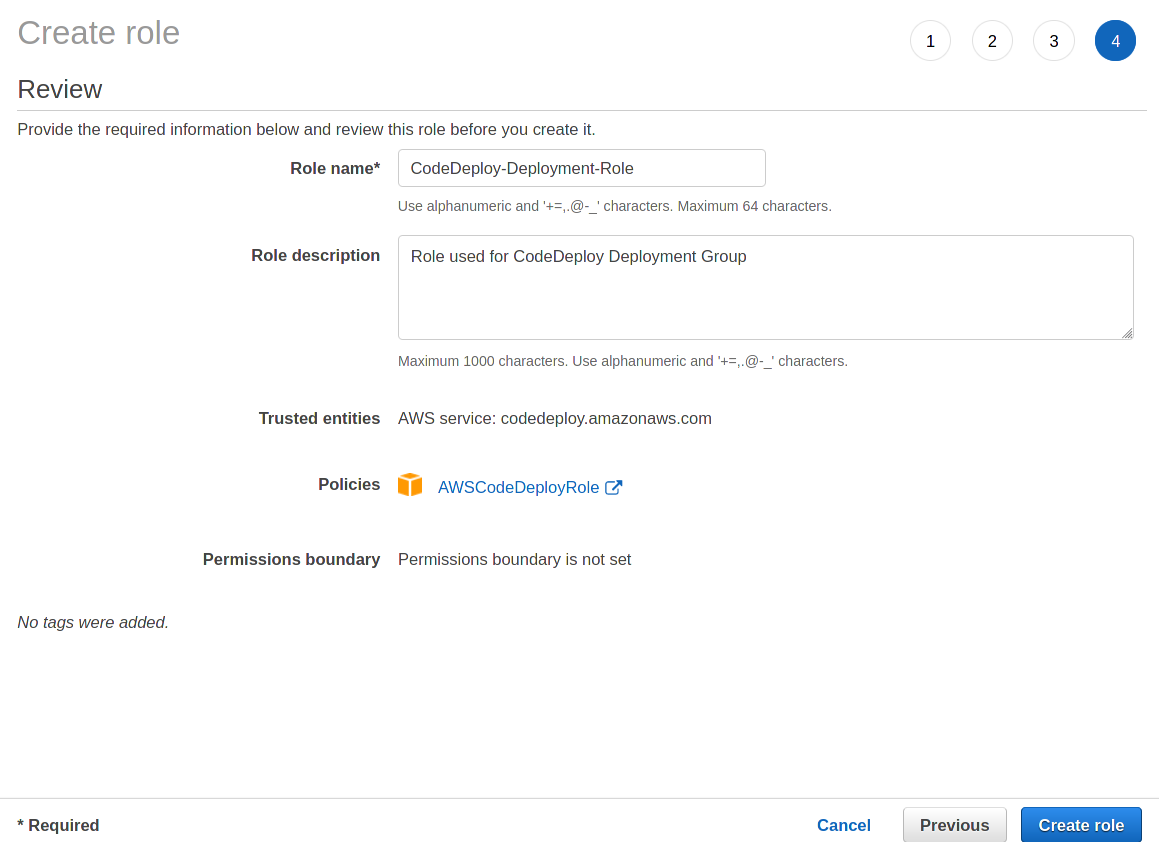
4. Finally, specify a name, and description for this new role in the Role Name and Description input fields, then click the Create Role button to save the role.
- Role name: CodeDeploy-Deployment-Role
- Role description: Role used for CodeDeploy Deployment Group.
Creating an AWS EC2 Instance
With an IAM role created, you will now create a t2.micro instance running an Ubuntu-based Amazon Machine Image. You’ll create an EC2 instance to run the python-shortner-application to be deployed later in this tutorial. After creating the instance, you’ll also attach the IAM role you created to the instance.
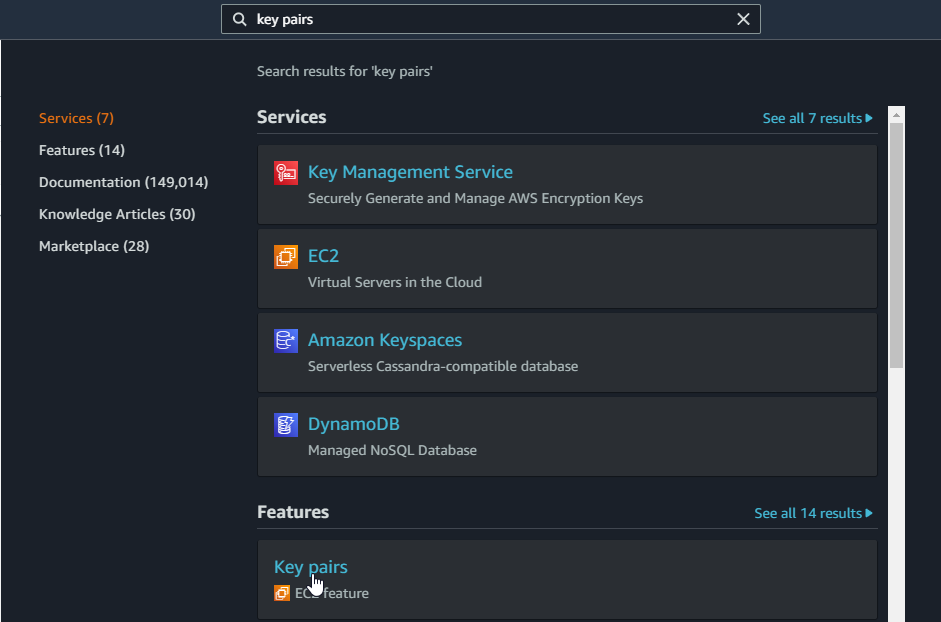
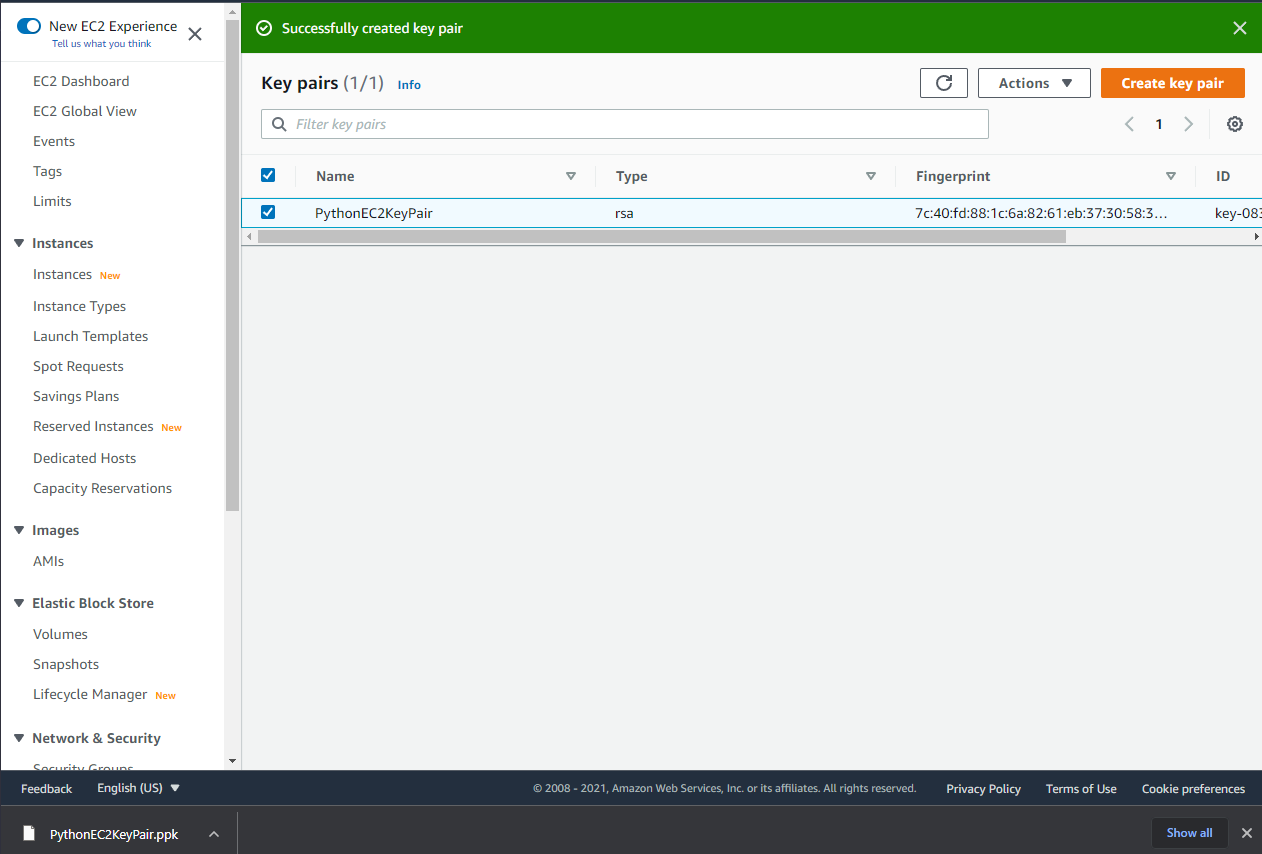
1. Before creating the EC2 instance, you must first create a key pair. In the AWS Console, search for “key pairs” and click on Key pairs under Features.
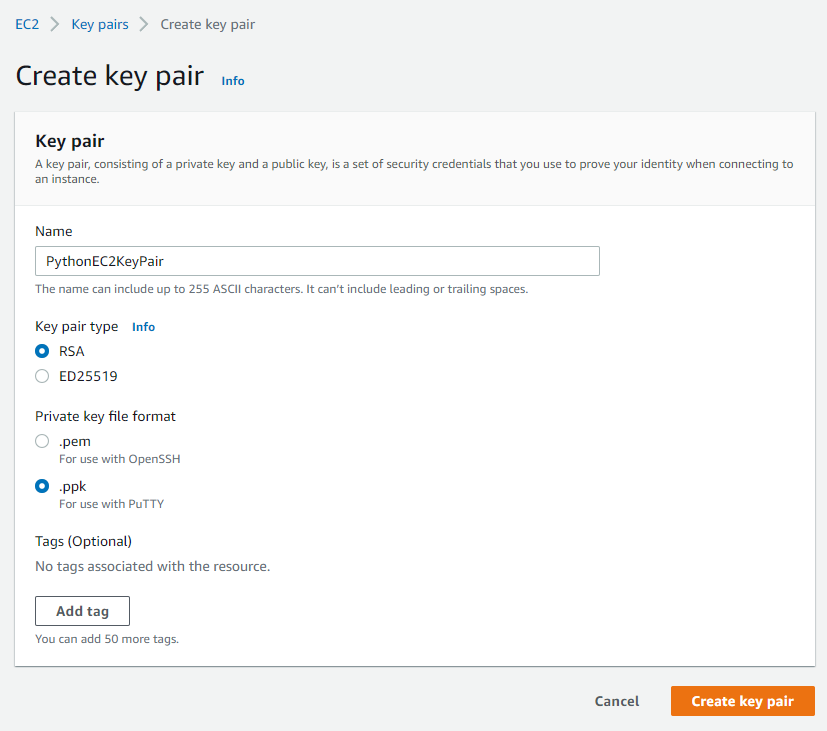
2. Once there, click on Create key pair.

3. Enter the name, “PythonEC2KeyPair” and choose either .ppk (PuTTY) or .pem (OpenSSH) key format to download the Private Key in. Click on Create key pair and the private key will be immediately downloaded.
4. In a terminal, with a connected AWS CLI, run the create-security-group command below to create a security group for the EC2-Classic instance named, python-app-ec2-sg, which acts as a firewall.
aws ec2 create-security-group --group-name python-app-ec2-sg --description "Security group for EC2 instance running python application."
5. Now, execute the authorize-security-group-ingress command below to enable a rule for the security group you created, python-app-ec2-sg, previously.
The rule created by the command below enables incoming traffic from all sources (--cidr 0.0.0.0/0) that reach --port 8000 opened by python-shortner-application.
aws ec2 authorize-security-group-ingress --group-name python-app-ec2-sg --protocol tcp --port 8000 --cidr 0.0.0.0/0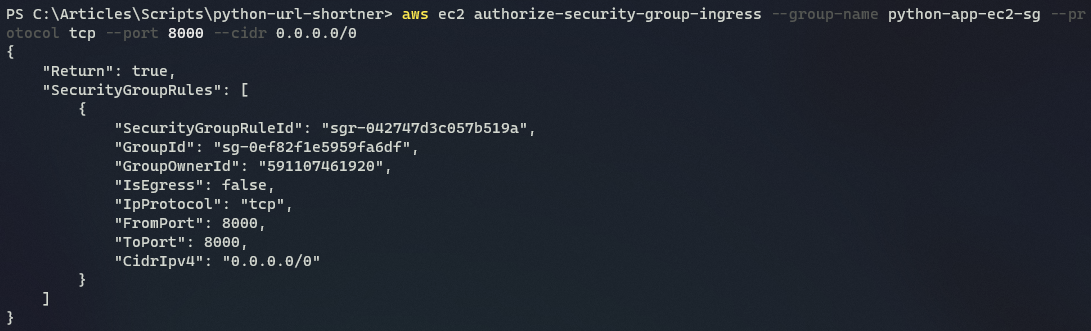
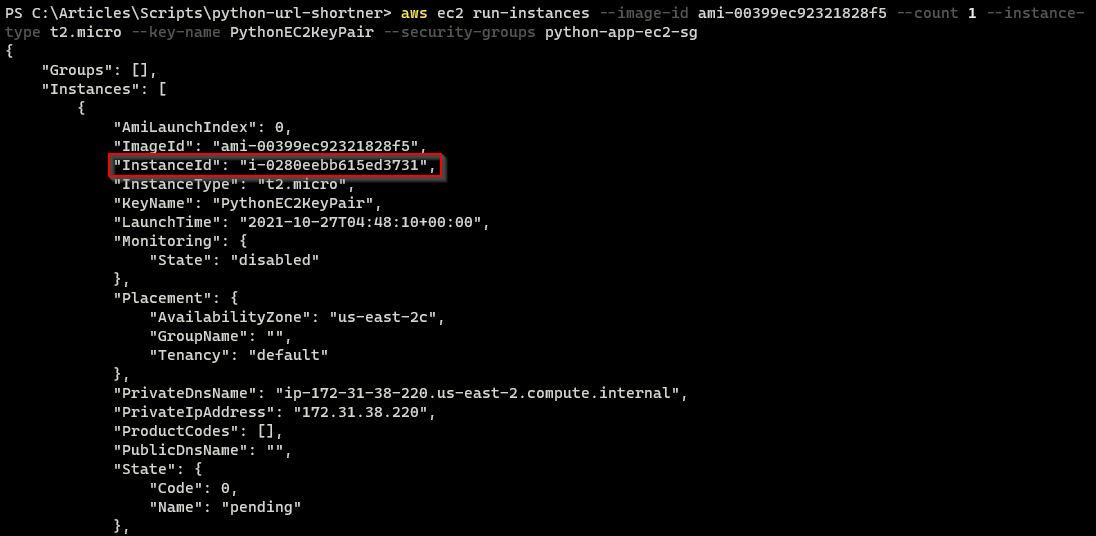
Execute the command below to launch an EC2 instance (aws ec2 run-instances) that runs the python-shortner-application.
The EC2 instance uses the Ubuntu Server 20.04 LTS image, --image-id ami-00399ec92321828f5, and the security group, --security-groups python-app-ec2-sg, previously created to manage incoming traffic to the instance.
The ID supplied to the
--image-idparameter in the command below belongs to the Ubuntu Server 20.04 LTS (HVM), SSD Volume Type Amazon Machine Image. You can execute theaws ec2 describe-imagescommand to get a list of all available AMIs.
aws ec2 run-instances --image-id ami-00399ec92321828f5 --count 1 --instance-type t2.micro --key-name PythonEC2KeyPair --security-groups python-app-ec2-sgNote the instance-id that the command returns as you’ll need it in the next step.
7. Execute the create-tag command below, using the InstanceId previously noted after the --resources parameter.
The tag added, --tags Key=used_by,Value=python-app, to the instance will later be used to match the instance when you create a deployment group within a CodeDeploy application.
aws ec2 create-tags --resources "i-0280eebb615ed3731" --tags Key=used_by,Value=python-app
8. Run the series of commands below to create an instance profile, add a role to that instance profile, and associate that instance profile to the EC2 instance
At this point, you’ve fully created the EC2 instance with a role containing all policies needed to use CodeDeploy and Azure Sessions Manager.
# Creates an instance profile used to pass role, information to the EC2 instance
aws iam create-instance-profile --instance-profile-name Python-app-ec2-instance-profile
# Adds the previously created instance profile to the python-app-ec2-codedeploy-role
aws iam add-role-to-instance-profile --role-name python-app-ec2-codedeploy-role --instance-profile-name Python-app-ec2-instance-profile
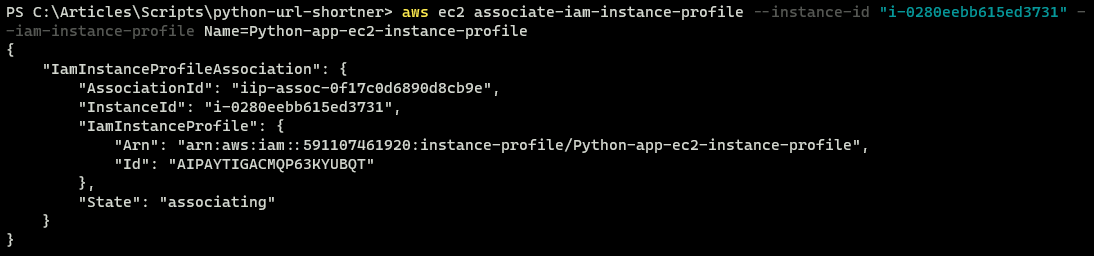
# Associates the instance profile to the EC2 instance
aws ec2 associate-iam-instance-profile --instance-id "i-0280eebb615ed3731" --iam-instance-profile Name=Python-app-ec2-instance-profile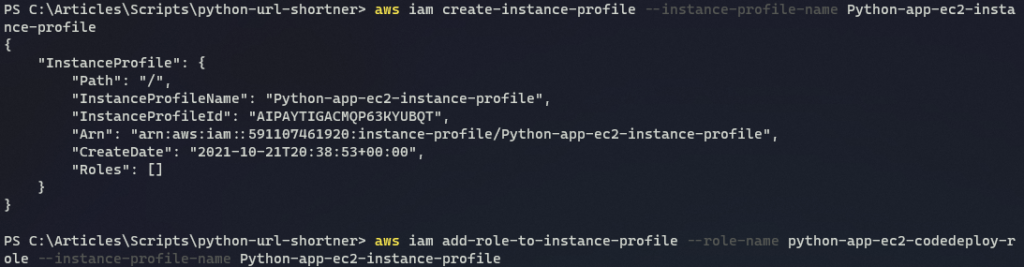
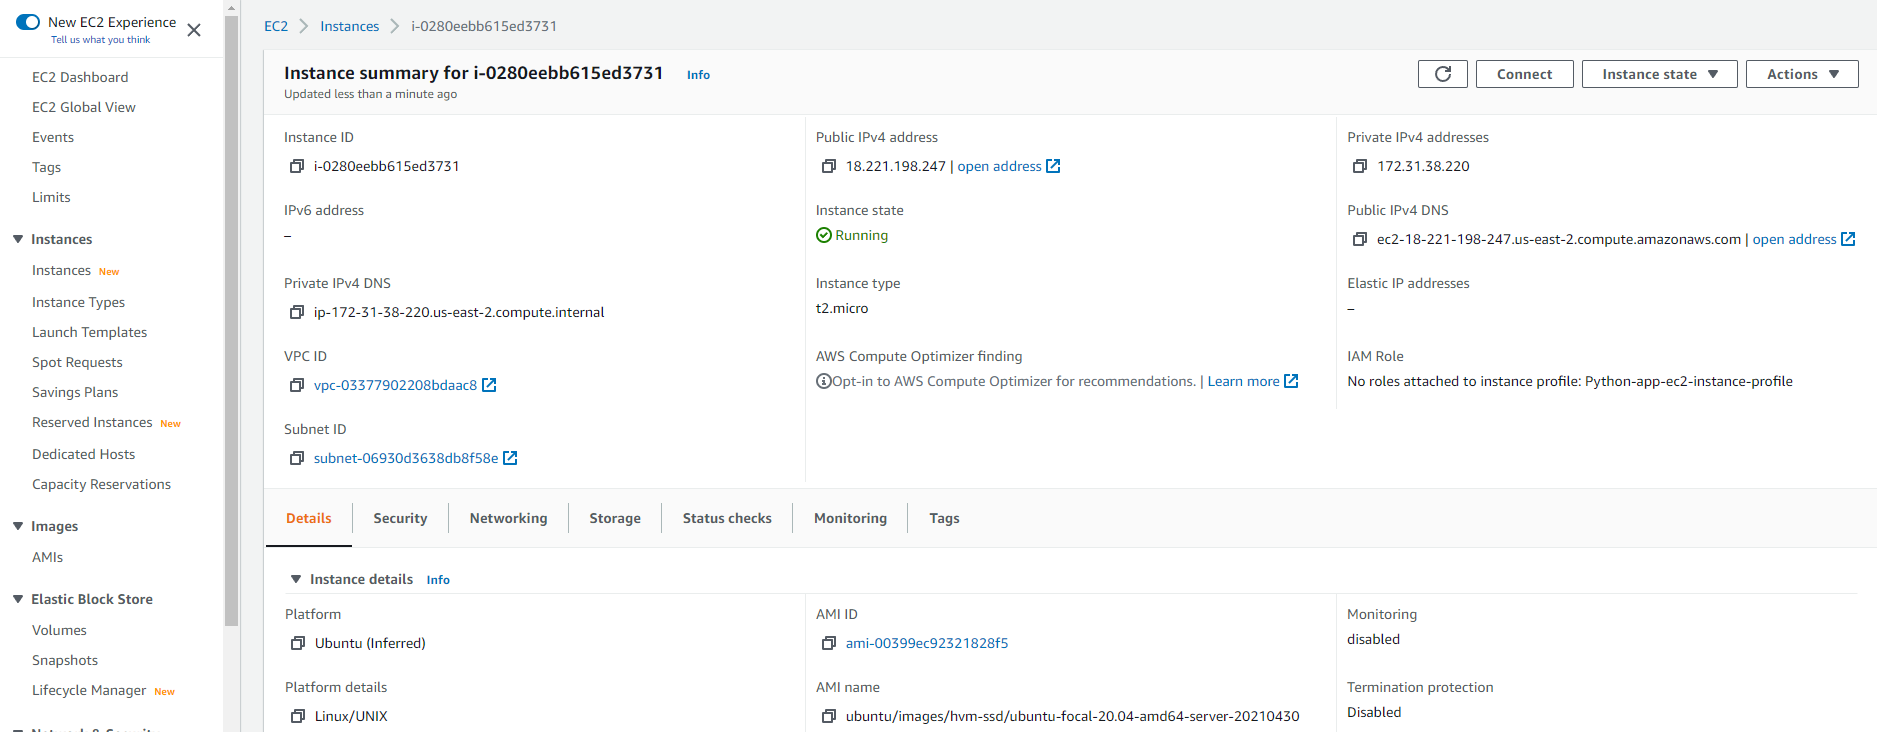
9. Finally, in the AWS console, view the summary of the EC2 instance you have created.
Retrieving the python-shortner-application Code for Deployment
Although you will have your own application to deploy, in this tutorial an example Python application is provided for testing. A completed version of this sample Python application called python-shortner-application, including the deployment files, can be found in the linked GitHub repository.
The python-shortner-application exposes a GET and POST endpoint for shortening a URL and is pre-built using the FastAPI Web Framework. FastAPI is a highly performant framework for building Python APIs.
Below, you can see the files that come along with the python-url-shortner folder.
- A Dockerfile and docker-compose.yml file – These two files contain the configurations needed for building a container of this application in Docker. The docker-compose.yml file contains two services: a database service for the MongoDB database and the Python API service for the
python-shortner-application. MongoDB is a document-based and open-source NoSQL database used for high-volume data storage. - A routes.py file – Utilizes the FastAPI client class to create a GET and POST API endpoint for shortening a URL.
- A requirements.txt file – Contains a list of all Python packages installed within the virtual environment created for
python-shortner-application.
Before moving on and uploading these files to an AWS S3 bucket for deployment (where AWS CodeDeploy pulls source files from), you must first download the files or clone the ATA Scripts repository and use the files in the python-url-shortner directory.
# Clone the ATA Scripts Repository
git clone https://github.com/Adam-the-Automator/Scripts.git
# Change to the python-url-shortner directory
cd .\Scripts\python-url-shortner\
# List the files in the directory
ls
If you have Docker locally installed, you can test the application locally by running
docker-compose upin the python-url-shortner directory.
Uploading Source Code To An AWS S3 Storage Bucket
Before the code can be deployed, the code must first be uploaded and stored in an AWS S3 bucket. The source code will serve as the source for the two deployments you will perform within this tutorial.
1. In a terminal, with a connected AWS CLI, run the following s3api create-bucket command to generate the necessary bucket to store the code. In this example, the bucket is named python-app-bucket set to be publicly readable via the public-read ACL and configured to be set in the same region as your EC2 instance.
Since bucket names are shared across all users of AWS, it must be unique. In this case, the date has been appended for uniqueness, but you will have to change yours appropriately.
aws s3api create-bucket --bucket python-app-bucket-10212021 --acl public-read --create-bucket-configuration LocationConstraint=us-east-2
2. Next, execute the tar command below to compress the files for python-shortner-application located in the codedeploy-files sub-directory into a GZIP TAR file named python-app.tar.gz. CodeDeploy will download and extract the file on each deployment.
cd .\codedeploy-files\
tar -czvf python-app.tar.gz .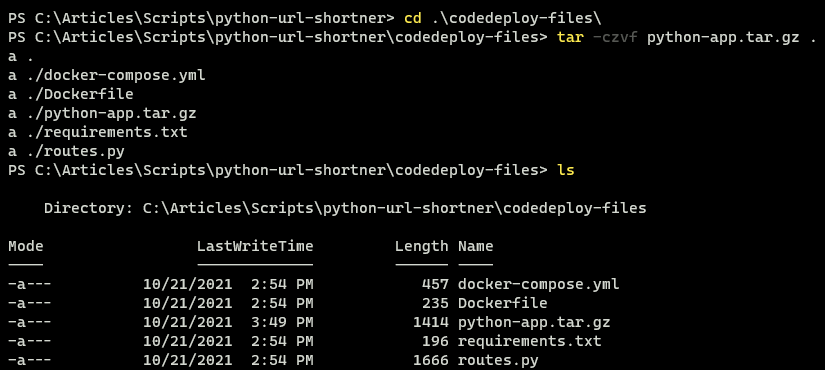
3. Finally, execute the cp command below to upload the compressed file (python-app.tar.gz) into the previously created AWS S3 bucket (s3://python-app-bucket-10212021).
aws s3 cp python-app.tar.gz s3://python-app-bucket-10212021
Creating an AppSpec.yml and Additional Deployment Files for AWS CodeDeploy
At this point, you now have a good understanding of the necessary setup and prerequisites. Now it’s time to focus on deploying the example application into production using CodeDeploy. But first, you’ll need to create AppSpec and the container start and stop script files.
1. With your preferred code editor, create an appspec.yml file in the root directory of python-shortner-application folder. The appspec.yml file will contain the AppSpec configurations for CodeDeploy.
This is all provided in the linked GitHub directory, but covered in this tutorial as well.
When the three lifecycle event hooks defined in the code below are executed individually during the deployment process, they will install Docker and docker-compose. Docker and docker-compose are further used to build a Docker image of the application on the EC2 instance.
# The deployment version, with a default value of 0.0, CodeDeploy will automatically increment this value on each successful deployment
version: 0.0

# The operating system running on the target compute resource.
# For EC2 instances using Ubuntu, RHEL, or Linux Amazon Machine Images (AMI) use Linux as the value.
os: linux

# A list of files to copy on each deployment.
files:
  # A directory to copy in each application revision, if only a "/" is used for the source, all files in that directory are copied.
  - source: /
    destination: /app

# The "hooks" section defines the scripts to be run on each Lifecycle event.
# The hook events are run in the following order: "BeforeInstall", "ApplicationStop", "ApplicationStart", "ValidateService"
hooks:
  # Prior to installation steps, run the following actions.
  BeforeInstall:
    # The location for the "install_docker.sh" script to install Docker and docker-compose.
    - location: install_docker.sh
      # Run the CodeDploy agent with root permissions.
      runas: root

  # Run the lifecycle event to stop the application via the defined script.
  ApplicationStop:
    - location: stop.sh
      timeout: 2000
      runas: root

  # Run the lifecycle event to start the application via the defined script.
  ApplicationStart:
    - location: start.sh
      timeout: 3600
      runas: root
2. Now create an install_docker.sh file in the root directory of python-shortner-application, and copy the code below into the install_docker.sh file. The install_docker.sh file is referenced to the BeforeInstall event in the previous code inside the appspec.yml.
The code below updates the apt repository and installs all packages needed for installing Docker and Docker Compose on the host virtual machine.
#!/bin/bash

# Update container Linux image APT repository data
apt-get update

# Install Docker required packages
apt-get -y install apt-transport-https ca-certificates lsb-release

# Add the Docker GPG key to trust the Docker APT repository
curl -fsSL https://download.docker.com/linux/ubuntu/gpg | sudo gpg --dearmor -o /usr/share/keyrings/docker-archive-keyring.gpg

echo "deb [arch=amd64 signed-by=/usr/share/keyrings/docker-archive-keyring.gpg] https://download.docker.com/linux/ubuntu $(lsb_release -cs) stable" | sudo tee /etc/apt/sources.list.d/docker.list > /dev/null

# Update container Linux image APT repository data again after adding the Docker repository
apt-get update

# Install the Docker community edition and cli
apt-get -y install docker-ce docker-ce-cli containerd.io

# Download docker-compose executable file, replace the 1.29.2 listed below with the latest version you intend to use.
curl -L "https://github.com/docker/compose/releases/download/1.29.2/docker-compose-$(uname -s)-$(uname -m)" -o /usr/local/bin/docker-compose

# Change permission of docker-compose to become executable
chmod +x /usr/local/bin/docker-compose
3. Within the root directory, create another file named start.sh. Copy the code below and paste it into the start.sh file. The start.sh file is referenced to the ApplicationStart lifecycle event in the appsec.yml file.
The code below changes the directory into the app folder where the application revision is copied to and creates a container image of the application each time a new application deployment is made.
#!/bin/bash

cd /app

docker-compose up --build -d
The
-dparameter instructs docker-compose to run in detached mode, the background, and to always build (--build) the container before running the container.
4. Finally, create a file in the root directory named stop.sh, and add the code below into that file. Like the previous files you created, the stop.sh file is referenced to the ApplicatonStop lifecycle event in the appsec.yml file.
When the code below is executed, it changes the directory into the app folder and runs the docker-compose command to stop (down) the running compose container.
#!/bin/bash

cd /app

docker-compose down
Deploying Applications
With an EC2 instance created while having the python-app-ec2-codedeploy-role attached, it is time to deploy the python-shortner-application to the EC2 instance via CodeDeploy.
To deploy the python-shortner-application, you’ll first need to create an application on the CodeDeploy service.
1. Execute the create-application command below from your terminal to create an application on the CodeDeploy service (--application-name python-url-codedeploy-app). The created application will make deployments to your EC2 instance ( --compute-platform Server ).
Notice a tag is also added to identify the EC2 instance ( -tags Key=user,Value=python-url-shortner).
aws deploy create-application --application-name python-url-codedeploy-app --compute-platform Server --tags Key=user,Value=python-url-shortner
2. Retrieve the role ARN value for use in the CodeDeploy command.
aws iam get-role --role-name CodeDeploy-Deployment-Role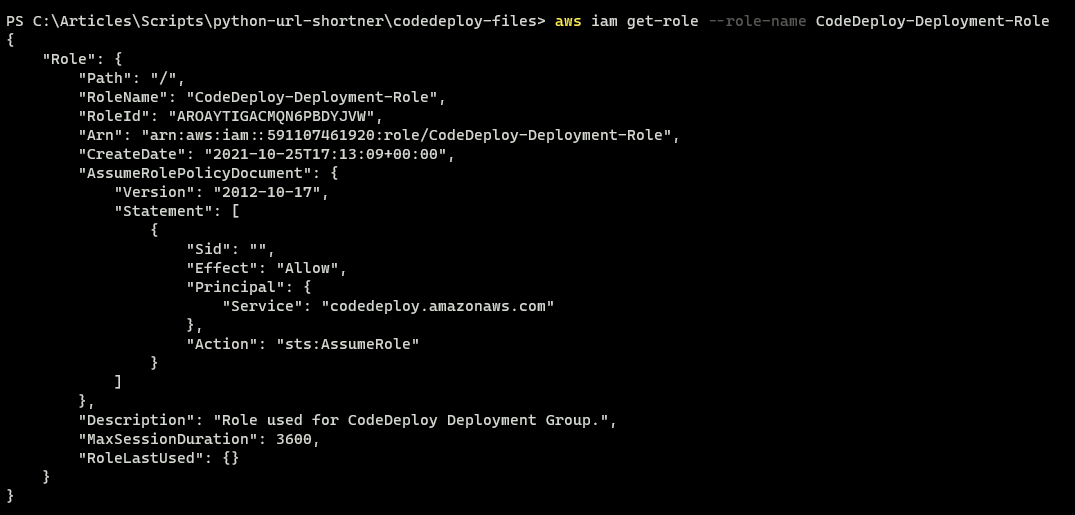
3. Execute the create-deployment-group command to create a deployment group (--deployment-group-name python-url-app-deploygroup). The command creates the deployment group within the created CodeDeploy application earlier (--application-name python-url-codedeploy-app).
An Amazon Resource Name ( ARN ) is used to identify an AWS resource, and it consists of your AWS Account ID (aws:iam::591107461920) and the role name (role/CodeDeploy-Deployment-Role).
Your AWS Account ID will differ from the one shown here, make sure to replace with yours.
aws deploy create-deployment-group --deployment-group-name python-url-app-deploygroup --application-name python-url-codedeploy-app --service-role-arn arn:aws:iam::591107461920:role/CodeDeploy-Deployment-Role --ec2-tag-filters Key=used_by,Value=python-app,Type=KEY_AND_VALUE
Creating the application deployment group
4. Next, execute the create-deployment command below to create a deployment of the CodeDeploy application (--application-name python-url-codedeploy-app) from an S3 bucket (--s3-location bucket=python-app-bucket-10212021), your bucket will be named differently.
The command below also specifies the deployment group ( --deployment-group-name python-dg), and bundle type of the files ( bundleType=tgz )
aws deploy create-deployment --application-name python-url-codedeploy-app --deployment-group-name python-url-app-deploygroup --s3-location bucket=python-app-bucket-10212021,bundleType=tgz,key=python-app.tar.gz
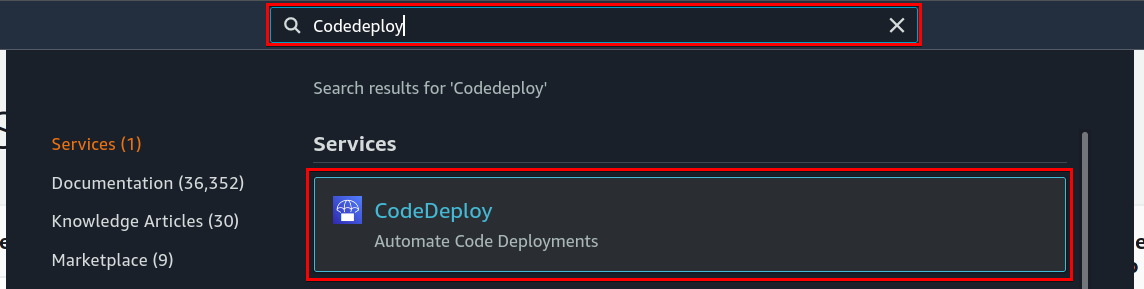
5. In the AWS console, enter “CodeDeploy” into the search input field, and choose CodeDeploy. Doing so redirects the page to the CodeDeploy service section.
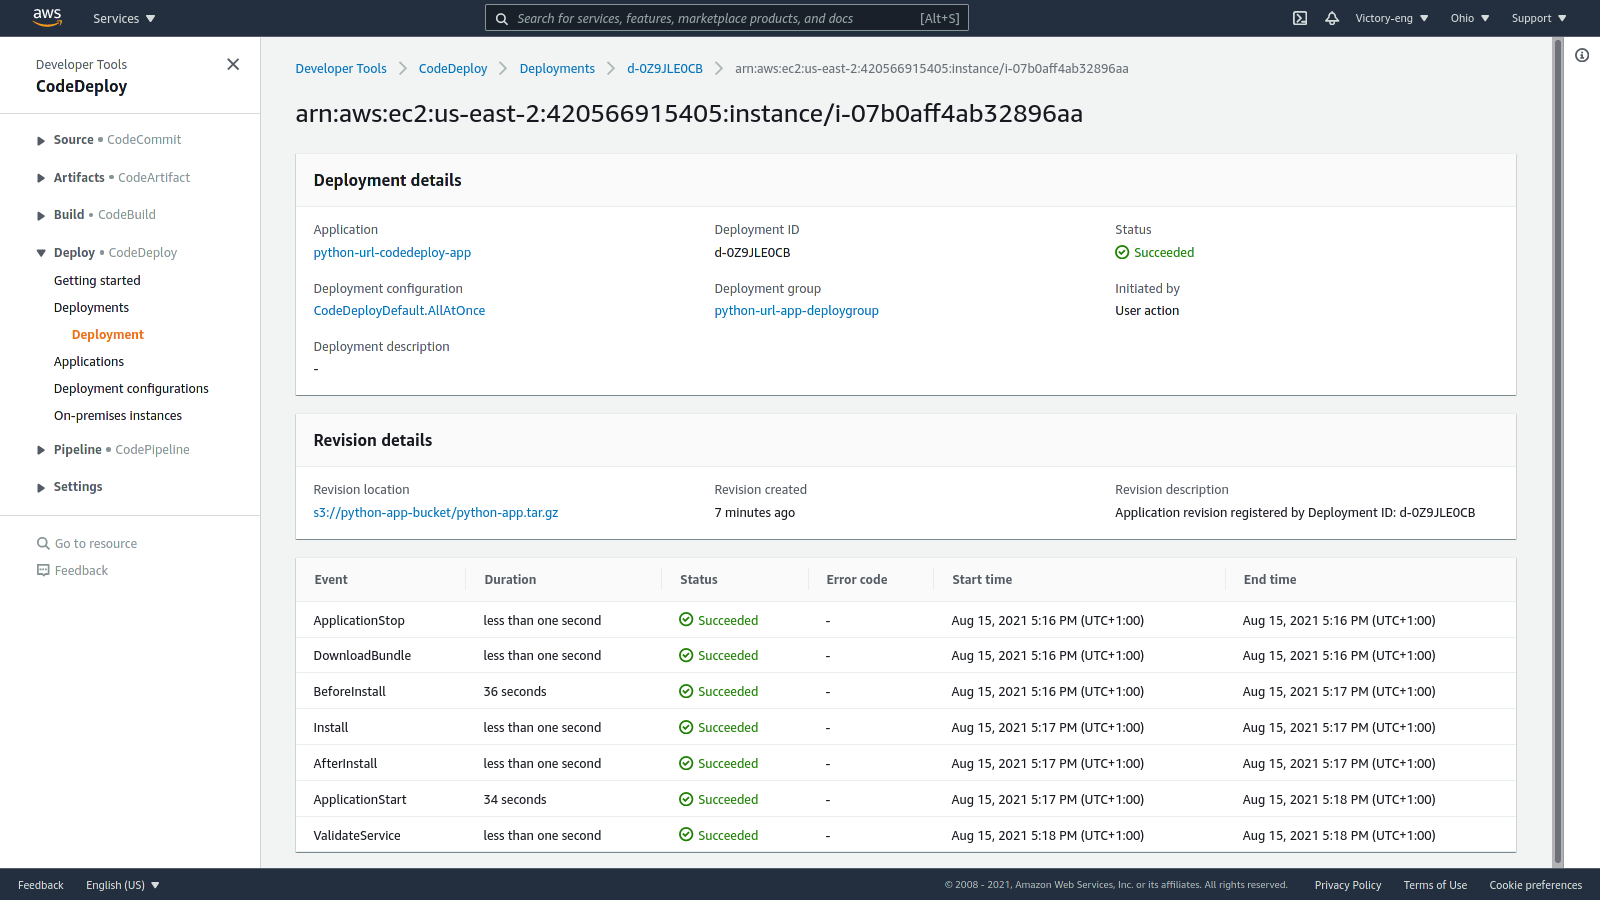
From the CodeDeploy section of the AWS Console, you can view the deployment status created above.
6. Now make a POST request to the instance through the public IPv4 address to confirm that python-shortner-application runs within the EC2 instance.
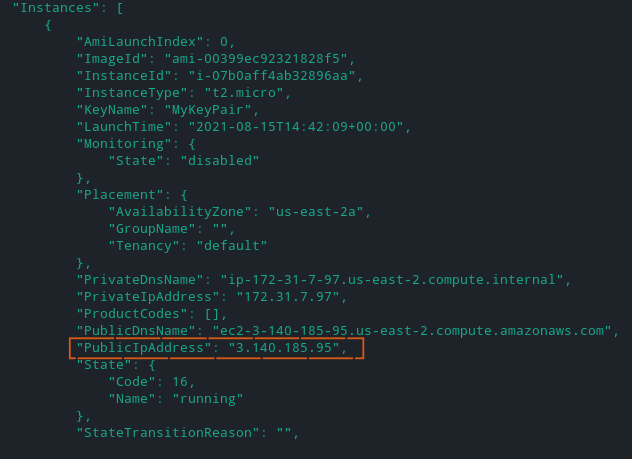
Execute the describe-instances command below to list all EC2 instances (ec2) created within your AWS Account.
aws ec2 describe-instancesYou can see below the command returns the PublicIpAddress of the EC2 instance. Note the PublicIpAddress as you’ll need it in the next step.
7. Finally, execute the curl command below to make a POST request to the instance from your local terminal to shorten the URL you specified. Replace the PUBLIC-IP placeholder with the PublicIpAddress you took note of previously (step five).
curl -X POST -H "Content-Type: application/json" http://PUBLIC-IP:8000/shorty -d '{"url":"https://docs.aws.amazon.com"}'The command returns a short URL in JSON format, as shown below.

Redeploying the API using AWS CodeDeploy
With the python-shortner-application deployed to the EC2 instance, let’s modify the application to learn how CodeDeploy applies new changes in the application to the EC2 Instance.
You’ll make a slight change to the python-shortner-application, upload the new changes to the storage bucket, and apply the changes to the EC2 instance.
1. In your code editor, open the routes.py file within the python-shortner-application, and add the code below into the routes.py file.
The code below contains a GET endpoint handler that returns a JSON response containing details about the application.
# Create GET /detail endpoint
@app.get("/detail")
async def detail():
		# return string describing entire API
		return {"message":"REST API for generating short URLs"}
2. Execute the commands below to delete the previous zip folder, create a new one, and upload it to the S3 bucket.
# Remove the old ZIP file
rm -rf python-app.tar.gz

# Create new ZIP file, excluding the .git VCS directory
# and python virtual environment ( venv )
tar -czvf python-app.tar.gz . --exclude=/url/venv --exclude=/url/.git

# Upload the new ZIP file to the AWS S3 Bucket
aws s3 cp python-app.tar.gz s3://python-app-bucket
3. Now run the create-deployment command below to trigger a redeployment of the CodeDeploy application (python-url-codedeploy-app) within the deployment group ( python-dg ). Doing so will pull the new code from the S3 bucket (--s3-location bucket=python-app-bucket-10212021) apply the new code changes to the running container within the EC2 instance.
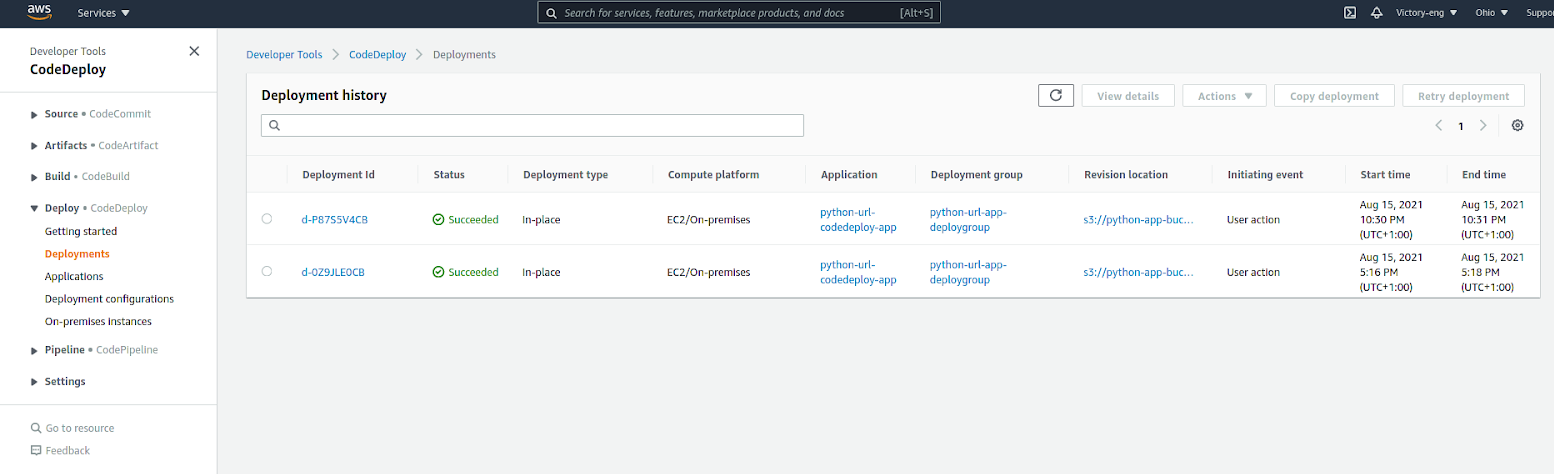
aws deploy create-deployment --application-name python-url-codedeploy-app --deployment-group-name python-dg --s3-location bucket=python-app-bucket-10212021,bundleType=tgz,key=python-app.tar.gz4. Click the Deployments item within the Deploy dropdown in the console sidebar to navigate to the Deployments section.
In the Deployments section, you’ll see the list of all deployments made via CodeDeploy. The list includes your recent deployment to apply the code changes uploaded to the AWS S3 bucket, as shown below.
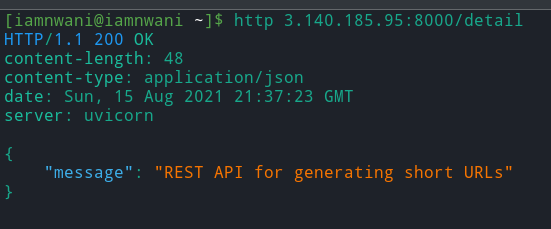
5. Finally, execute the curl command below to test the new endpoint.
The command sends a GET request to the python-shortner-application running within the EC2 instance. Replace the PUBLIC_IPV4_ADDRESS placeholder in the command below with the public IPV4 address of your EC2 instance.
curl http://PUBLIC_IPV4_ADDRESS:8000/detailThe response returned by the curl command contains the details of the REST API, as shown below. The details indicate that the new change to the API was deployed successfully by CodeDeploy to the EC2 instance.
With this setup in place, you can make more changes to the python-shortner-application, make an application revision. Apply new changes to the EC2 instance by triggering a deployment from CodeDeploy as done previously (step three).
Conclusion
This tutorial aimed to teach you how to automate deployments to an EC2 instance on AWS by using CodeDeploy. Did it succeed? In this tutorial, you learned about CodeDeploy, and you’ve put together an AppSpec configuration file to organize the deployment process.
With this newfound knowledge, why not learn how you can use AWS Lambda functions and Amazon S3 buckets to automate actions in CodeDeploy further?


