

In the dark past of physical servers, infrastructure was provisioned using screwdrivers and cables in humid basements. These dark times became lighter when public cloud solutions started taking over from on-premises infrastructure as the preferred way to provision and run servers. In this blog post, learn how to deploy cloud solutions with AWS CLI and CloudFormation.
Not a reader? Watch this related video tutorial!This is a guest post by Karl Eriksson, cofounder of Mocki – a tool that lets you create mock APIs in minutes.
If you’re running one environment for your application then you can easily manage things through a graphical user interface (GUI) such as the AWS Console. But when you have multiple environments like development, staging, and production things become harder. Human error and time enter the mix. AWS CLI and CloudFormation can help.
You need to manage your infrastructure as code. In the AWS world, the way to do that is with CloudFormation stacks.
When deploying a CloudFormation stack for the first time, AWS will create everything from scratch. If you deploy the stack as an update, it will detect any changes to the infrastructure and deploy those changes only.
CloudFormation stacks ensure the same changes are applied throughout your different environments.
CloudFormation: AWS Infrastructure as Code
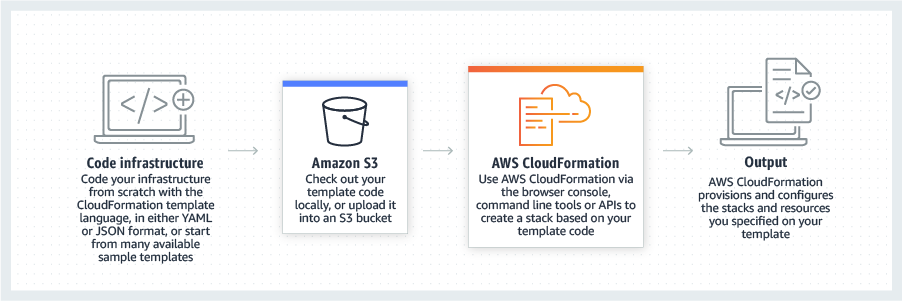
AWS CloudFormation is a tool for writing and provisioning infrastructure as code in an AWS environment. Most services from AWS are supported by CloudFormation. Most of what you can create using the AWS Console like virtual servers, databases, load balancers, and file storage can be added to a CloudFormation stack. Once added, all of those resources can then be deployed from a command line or some other automated process.
For updates, CloudFormation makes sure that the operations are performed in the most efficient way and even rolls back changes automatically if something goes wrong.
Let’s now learn how to create infrastructure using the AWS CLI and CloudFormation.
Prerequisites
To follow along with the CloudFormation tutorial in the rest of this article, be sure you have the following:
- An AWS account
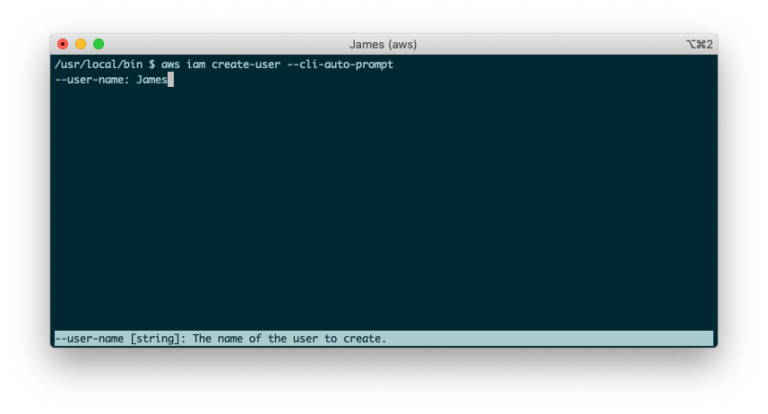
- AWS CLI – Learn how to download and set up here. You can confirm the CLI was set up successfully by running
aws s3 ls. If the command returns successfully all is well.
If you have multiple AWS profiles configured via the AWS CLI, please use one that is suitable for development or testing purposes for use in this tutorial.
Creating Your First CloudFormation Stack
Enough background information, let’s get down to business and use the AWS CLI and CloudFormation to create a stack!
In this example, you will create a stack containing the infrastructure needed to deploy a static website hosted on the static file hosting service AWS S3.
To get started create a new file called template.yaml and fill it with the below content:
AWSTemplateFormatVersion: 2010-09-09
Description: A simple CloudFormation template
Resources:
    Bucket:
        Type: AWS::S3::Bucket
        Properties:
BucketName: your-bucket-name # use your own unique nameAWSTemplateFormatVersion– determines the format version for the template so that AWS can interpret it correctly when deploying it.Description– contains a description of the template which will show in the AWS Console once you have deployed it.Resources– contains all of the infrastructure that you’re adding to the template. In this case, the resources will create a simple S3 bucket that will host a static site.
The
BucketNameproperty has to be unique so try to come up with something other than your-bucket-name.
Deploying the Stack with AWS CLI and CloudFormation
Now that you have a simple template created to deploy, deploy it to AWS using the AWS CLI and CloudFormation via the below command:
aws cloudformation deploy --template-file template.yaml --stack-name static-websiteAfter running the command, navigate to the AWS Console then go to Services → CloudFormation. You should then see the deployment running. After a few minutes, you should then see it enter the CREATE_COMPLETE state. If so, it’s complete!
If there were any errors you should be able to see them in the Events section when viewing the details of your stack.
By navigating to Services → S3, you should now see a brand new S3 bucket created.
Building the Simple Website
Once you have an S3 bucket in place to store a website, create an index.html file that will serve as the site.
If you don’t have something of your own in mind you can use the below content in your index.html file:
<html>
  <body>
    <h1>Static Site Deployed Using CloudFormation</h1>
    <p>Hello! This site was deployed using CloudFormation. Go cloud!</p>
  </body>
</html>
Save the index.html file and upload it to your S3 bucket through the AWS Console.
Make sure to grant public read access to the index file since it will be accessible to everyone visiting the site.
Updating the Template
Right now, the S3 bucket just created is not configured to host a website. Let’s change that. You can currently download the index file through the AWS console but it’s not accessible through the public internet. Using the AWS CLI and CloudFormation, change the configuration to enable static website hosting.
Change the template.yaml file as below to enable it. Below we introduce a few new properties to our template.
AWSTemplateFormatVersion: 2010-09-09
Description: A simple CloudFormation template
Resources:
    Bucket:
        Type: AWS::S3::Bucket
        Properties:
            BucketName: your-bucket-name # use your own unique name
            AccessControl: PublicRead
            WebsiteConfiguration:
                IndexDocument: index.html
Outputs:
    WebsiteURL:
        Value: !GetAtt [Bucket, WebsiteURL]
Description: URL for website hosted on S3AccessControl– sets the access rights to the S3 bucket to public read so that any user that visits the site can see theindex.htmlfileWebsiteConfiguration– configures the S3 bucket to act as a website that will serve the index.html file uploaded when users go to the bucket URLOutputs– can be different properties for resources that are part of the stack. In the example above, theWebsiteURLis the stack output. When you deploy the template again, you should see the website URL as an output in the AWS CloudFormation Console.
Now deploy the changes to the existing stack using the same command as in the previous step:
aws cloudformation deploy --template-file template.yaml --stack-name static-websiteTo confirm the result, navigate to the CloudFormation console. After a few minutes, you should notice the stack is in the UPDATE_COMPLETE state. When the stack enters this state, go to the Outputs tab where you should see the WebsiteUrl added as an output in the template.
Click the URL provided and you should see your site in your browser.
Congratulations! With the AWS CLI and CloudFormation, you’ve now deployed your first stack using infrastructure as code! At this point, keep adding to your template file to deploy new changes or create a new one according to your needs.
Conclusion
In this tutorial, you have learned about the concept of infrastructure as code and the advantages it has over manual provisioning of infrastructure. Using the infrastructure as code approach with the AWS CLI and CloudFormation, you then deployed a stack to create a static website.
Using the principles learned in this tutorial, you can deploy a production-ready system completely using CloudFormation.
Further Reading
If you want to read more on infrastructure as code as a phenomenon, check out Infrastructure as Code in the Real World by HashiCorp.
If you want to learn more about how to integrate CloudFormation into your development flow and manage all of your infrastructure using CloudFormation, be sure to check out:
- Create a Pipeline With AWS CloudFormation by AWS
- Building a Pipeline for Test and Production Stacks by AWS
Good luck in your journey deploying all of your infrastructure using infrastructure as code in AWS!


