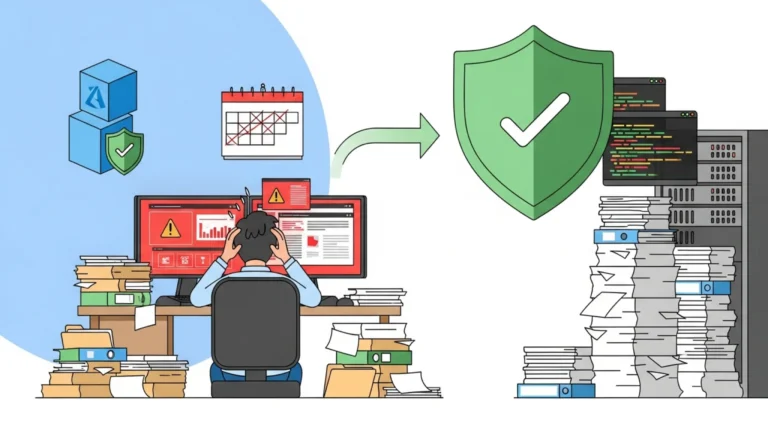


Your SOC 2 audit is in eight weeks. You pull up the compliance dashboard in Microsoft Defender for Cloud, and it shows 214 non-compliant resources across three subscriptions. Nobody knows who owns half of them. The spreadsheet your team used to track evidence last year is stale, the MFA report someone ran in January already expired, and your auditor wants 12 months of data — not 90 days. That sinking feeling? That’s what compliance-by-spreadsheet feels like at scale.
The good news: you don’t have to live there. Azure Policy, the Enterprise Policy as Code (EPAC) framework, and a handful of PowerShell scripts can shift your compliance posture from reactive fire-fighting to a continuously enforced baseline. This walkthrough shows you how to build that system — from assigning the SOC 2 initiative to automating evidence collection before your next audit window opens.
What SOC 2 Actually Requires from Your Azure Environment
SOC 2, developed by the American Institute of Certified Public Accountants (AICPA), is a security and availability attestation standard. A SOC 2 Type 2 report — the version auditors care about — doesn’t just verify that controls exist. It verifies that controls operated effectively over a defined observation period, typically six to twelve months. That distinction matters. One-time screenshots don’t cut it. You need continuous, dated, reproducible evidence.
SOC 2 organizes requirements around Trust Services Criteria (TSC), which map to areas like logical access, system monitoring, and change management. For your Azure environment, the most relevant criteria look like this:
| SOC 2 Criteria | What It Covers | Azure Feature That Addresses It |
|---|---|---|
| CC6.1 — Logical Access | Who can access what, and is MFA enforced | Microsoft Entra ID, Role-Based Access Control (RBAC), Privileged Identity Management |
| CC7.1 — Configuration Management | Resources configured to baseline standards | Azure Policy |
| CC7.2 — Monitoring | Alerts, anomaly detection, and ongoing review | Microsoft Defender for Cloud, Azure Monitor |
| CC6.8 — Change Management | Controlled deployments with audit trails | EPAC via CI/CD pipelines |
| A1.2 — Availability | Backup and recovery configurations | Azure Backup policies via Azure Policy |
Here’s the critical thing your auditor won’t say outright: Microsoft’s own SOC 2 report covers the physical data center, network layer, and hypervisor. It does not cover what you build on top of it. Identity management, encryption configuration, and network security groups — those are your responsibility. Showing the auditor Microsoft’s report and expecting that to close a finding won’t work. Your auditor knows exactly where Microsoft’s scope ends and yours begins.
Reality Check: Azure Policy compliance state only reflects technical configuration. A resource marked “Compliant” means the policy definition passed — it does not mean your application is SOC 2 certified. Policy handles the infrastructure layer. Procedural controls, like your employee offboarding process, still need separate documentation.
Setting Up the SOC 2 Initiative in Azure Policy
Azure provides a built-in initiative named “SOC 2 Type 2 Regulatory Compliance” that maps dozens of individual policy definitions to TSC controls. This is your starting point.
Before you assign it, confirm you have the Az module installed and a connection to your Azure subscription:
Install-Module -Name Az -Scope CurrentUser -Force
Connect-AzAccount
To assign the SOC 2 initiative to a subscription, find the built-in definition and create the assignment:
# Get the built-in SOC 2 Type 2 initiative
$initiative = Get-AzPolicySetDefinition |
    Where-Object { $_.Properties.DisplayName -like "*SOC 2*" }

# Assign to the current subscription
$scope = "/subscriptions/$($(Get-AzContext).Subscription.Id)"

New-AzPolicyAssignment `
    -Name "soc2-compliance-assignment" `
    -DisplayName "SOC 2 Type 2 Compliance" `
    -Scope $scope `
    -PolicySetDefinition $initiative
After assignment, Azure Policy runs a compliance scan against all existing resources. One important gotcha: that initial scan takes approximately 24 hours to complete. Don’t panic when the dashboard shows “Not Started” for the first half of the day.
Once the scan finishes, the Regulatory Compliance Dashboard in Microsoft Defender for Cloud shows your compliance state organized by TSC control. You can export the results as a PDF or CSV — which is useful as a snapshot, but not a substitute for automated ongoing collection.
Pro Tip: If you’re assigning this initiative to multiple subscriptions, do it from the Management Group scope instead of per-subscription. That single assignment covers everything beneath it and gives you one compliance view across your entire hierarchy.
Managing Policies as Code with EPAC
Clicking through the Azure portal to assign policies works fine for one subscription. It falls apart when you have five subscriptions, a staging environment, and a security team that wants to know what changed and why. That’s where Enterprise Policy as Code (EPAC) comes in.
EPAC is an open-source PowerShell module that treats Azure Policy like infrastructure code. Policies, assignments, and exemptions all live in JSON files in a Git repository. Changes go through pull requests. CI/CD pipelines deploy them. If someone manually adjusts a policy in the portal, the next pipeline run detects the drift and reverts it.
Install the module and scaffold the directory structure:
Install-Module -Name EnterprisePolicyAsCode -Scope CurrentUser -Force
New-EPACDefinitionFolder -DefinitionsRootFolder "./Definitions"
That generates a folder structure like this:
“`plain text
Definitions/
├── global-settings.jsonc # Tenant scopes and environments
├── policyDefinitions/ # Custom policy definitions
├── policySetDefinitions/ # Initiatives (including your SOC 2 mapping)
├── policyAssignments/ # Where policies are assigned to management groups or subscriptions
└── policyExemptions/ # Documented exceptions with reasons
The `global-settings.jsonc` file is where you define which tenants and management group scopes EPAC manages. The `policyAssignments/` folder contains JSON files that describe which initiatives are assigned to which scopes — including the SOC 2 initiative you applied earlier.

EPAC follows a two-step deployment model. First, build the plan:
Build-DeploymentPlans -DefinitionsRootFolder “./Definitions” -OutputFolder “./Output”
This analyzes your JSON files against the live Azure environment and generates a plan showing what will be created, updated, or deleted — similar to `terraform plan`. Review it before you apply anything.

Second, deploy:
Deploy-PolicyPlan -OutputFolder “./Output”
Deploy-RolesPlan -OutputFolder “./Output”
`Deploy-RolesPlan` handles one of EPAC's more useful features: when a policy uses `DeployIfNotExists` effects (like automatically enabling Azure Backup), it calculates and assigns the Managed Identity roles that policy needs. Without this step, those policies would fail silently.

| EPAC Command | What It Does | When to Run |
| --- | --- | --- |
| `Build-DeploymentPlans` | Compares JSON definitions to live Azure state, generates a plan | Every PR, before any deployment |
| `Deploy-PolicyPlan` | Applies policy definitions, set definitions, and assignments | After plan review and approval |
| `Deploy-RolesPlan` | Assigns roles needed by DeployIfNotExists policies | After `Deploy-PolicyPlan`, same pipeline |

The exemptions feature is worth noting specifically for SOC 2. Your auditor will ask why certain resources show non-compliant. With EPAC, the answer lives in your `policyExemptions/` folder — a JSON file with the exemption reason, who approved it, and when it expires. That's the audit trail your auditor wants. "We turned it off in the portal" is not.

## Collecting Evidence with PowerShell

Azure Policy tells you what's compliant or not. But auditors want evidence in a format they can review — typically CSV exports that show a point-in-time state for specific criteria. Not all compliance data maps cleanly to a policy definition. MFA status, for example, doesn't surface in Azure Policy at all. For that, you need the [Microsoft Graph PowerShell SDK](https://learn.microsoft.com/en-us/powershell/microsoftgraph/overview).

### Exporting Non-Compliant Resources

For any TSC control backed by an Azure Policy definition, `Get-AzPolicyState` gives you the current compliance state across your subscription. Export non-compliant resources to CSV for your auditor packet:
Connect-AzAccount
Get-AzPolicyState -Filter “ComplianceState eq ‘NonCompliant’” |
Select-Object `
ResourceGroup,
@{N=’ResourceName’; E={ $.ResourceId.Split(‘/’)[-1] }},
PolicyDefinitionName,
ComplianceState,
Timestamp |
Export-Csv -Path “SOC2_NonCompliance$(Get-Date -Format ‘yyyyMMdd’).csv” -NoTypeInformation
Run this as part of a scheduled [Azure Automation](https://learn.microsoft.com/en-us/azure/automation/overview) runbook or a CI/CD pipeline step so the output is generated consistently throughout your observation period — not just the week before an audit.

### Auditing MFA Status for CC6.1

Logical access control (CC6.1) requires evidence that all users have multi-factor authentication enforced. The `Get-MsolUser` cmdlet is deprecated. The correct approach is the [Microsoft Graph PowerShell SDK](https://learn.microsoft.com/en-us/powershell/microsoftgraph/overview), querying the `authenticationMethods` endpoint:
Install-Module -Name Microsoft.Graph -Scope CurrentUser -Force
Connect-MgGraph -Scopes “User.Read.All”, “UserAuthenticationMethod.Read.All”
$report = Get-MgUser -All | ForEach-Object {
$methods = Get-MgUserAuthenticationMethod -UserId $.Id
$strongMethods = $methods | Where-Object {
$.AdditionalProperties[‘@odata.type’] -notlike “password”
}
[PSCustomObject]@{
DisplayName = $.DisplayName
UserPrincipalName = $.UserPrincipalName
MFARegistered = ($strongMethods.Count -gt 0)
MethodCount = $strongMethods.Count
}
}
$report | Export-Csv -Path “MFA_Status_$(Get-Date -Format ‘yyyyMMdd’).csv” -NoTypeInformation
A Graph query with `User.Read.All` and `UserAuthenticationMethod.Read.All` scopes returns each user's registered authentication methods. If only `PasswordAuthentication` is present, MFA is not registered — that user shows up as a finding.

---

***Warning: The ******`Get-MgUser -All`****** call can be slow in large tenants. For tenants with thousands of users, consider filtering by a specific group or using the ******`$filter`****** parameter to scope the query. Running an unfiltered query against 50,000 accounts will time out.***

---

### Querying Infrastructure with Azure Resource Graph

For broader infrastructure evidence — like "list all SQL servers with public network access enabled" — [Azure Resource Graph](https://learn.microsoft.com/en-us/azure/governance/resource-graph/overview) is faster than looping through `Get-AzResource` across subscriptions. The `Search-AzGraph` cmdlet queries the Resource Graph API directly:
$query = @”
Resources
| where type =~ ‘microsoft.sql/servers’
| where properties.publicNetworkAccess =~ ‘Enabled’
| project name, resourceGroup, subscriptionId, location
“@
$results = Search-AzGraph -Query $query -First 1000
Handle pagination for large environments
while ($results.SkipToken) {
$nextPage = Search-AzGraph -Query $query -First 1000 -SkipToken $results.SkipToken
$results += $nextPage
}
$results | Export-Csv -Path “SQL_PublicAccess_$(Get-Date -Format ‘yyyyMMdd’).csv” -NoTypeInformation
Note the explicit pagination handling. By default, `Search-AzGraph` returns up to 1,000 records. In an enterprise environment with hundreds of SQL servers across dozens of subscriptions, you will hit that limit and silently miss resources without the `SkipToken` loop.

| Evidence Script | TSC Criteria | PowerShell Module Required |
| --- | --- | --- |
| `Get-AzPolicyState` export | CC7.1, CC7.2, A1.2 | Az.PolicyInsights |
| MFA status report | CC6.1 | Microsoft.Graph |
| Resource Graph queries | CC6.1, CC7.1 | Az.ResourceGraph |

## Retaining Evidence for the Full Observation Period

Default Activity Log retention in Azure is 90 days. SOC 2 Type 2 auditors want 6-12 months of data. Those two facts in combination have ended more than a few audits badly.

[Microsoft Defender for Cloud's Continuous Export feature](https://learn.microsoft.com/en-us/azure/defender-for-cloud/continuous-export) streams security alerts, compliance recommendations, and secure score data to an Azure Log Analytics Workspace or Event Hub. That data persists as long as your workspace retention policy allows — which you should set to at least 365 days for any workspace receiving compliance evidence.

Configure Continuous Export via Azure Policy so it can't be accidentally disabled:
Assign the built-in policy to enforce Continuous Export to Log Analytics
$continuousExportPolicy = Get-AzPolicyDefinition |
Where-Object { $_.Properties.DisplayName -like “Continuous exportLog Analytics*” }
New-AzPolicyAssignment -Name "enforce-continuous-export"
-DisplayName “Enforce Defender for Cloud Continuous Export” -Scope $scope
-PolicyDefinition $continuousExportPolicy `
-PolicyParameterObject @{
workspaceResourceId = “/subscriptions/
}
“`
With Continuous Export running, your Log Analytics Workspace accumulates a queryable, immutable record of compliance state changes over time. When your auditor asks “show me that MFA was enforced throughout the observation period,” you have Kusto Query Language (KQL) query results — not a spreadsheet from last Tuesday.
One cost consideration worth being upfront about: Log Analytics data ingestion and long-term retention are billable. Defender for Cloud’s Foundational CSPM tier is free, but streaming high-volume log data to a workspace adds up. Review the Log Analytics pricing before you enable this across all workspaces in a large environment.
Putting It Together
Build this out in stages rather than trying to configure everything at once. A reasonable sequence:
-
Assign the SOC 2 initiative to your management group scope and let the first scan complete
-
Install EPAC and migrate the assignment to code so it’s version-controlled
-
Set up Continuous Export to Log Analytics with a 365-day retention policy
-
Add the PowerShell evidence scripts to an Azure Automation runbook on a weekly schedule
-
Wire the EPAC deployment into your CI/CD pipeline so policy drift is caught automatically
By the time your next audit window opens, you’ll have months of clean evidence logs, a git history showing who changed what policy and when, and a compliance dashboard that reflects actual infrastructure state — not a hopeful guess. Your auditor gets a package of dated CSV exports and a well-documented exemption record. You get to skip the eight-week scramble.
The spreadsheet that tracked everything last year can finally retire.


