


Ansible is becoming one of the most, if not the most configuration management tool out there today. Ansible is a handy (and free in most cases) tool that allows DevOps engineers, and system engineers/administrators to build and maintain infrastructure across all environments in an idempotent, infrastructure-as-code manner. But, configuring it to talk to Windows via WinRM for Ansible can be a challenge.
Like many other infrastructure components, Ansible can deploy and maintain configuration states across Windows hosts. Ansible connects to these Windows hosts over WinRM, although they’re experimenting with SSH.
When you configure WinRm for Ansible, you have a few different options ranging from ease of setup to security implications. A lot of people choose the easy approach; basic authentication using HTTP. Although you forego the extra work involving certificates, it’s never a good idea to send unencrypted data over a network unless you have to.
In this article, you’re going to learn how to set up WinRm for Ansible using certificate-based authentication using self-signed certificates so that Ansible can talk to them.
The setup you’ll learn in this tutorial doesn’t just apply to Ansible as the client. This certificate-based authentication can apply just as much to other WinRm clients like other Windows hosts.
Assumptions
This article is going to be a tutorial-based walkthrough. If you intend to follow the steps presented here to configure WinRm for Ansible, the tutorial will assume:
- You already have Ansible installed on a Linux host.
- You’ve set up an Ansible inventory based on your Windows hosts.
- You have a Windows Server 2016 or later to manage. Some cmdlets used in this tutorial will not work with older versions of Windows.
- The Windows host is not in a domain. Although the examples were performed on a non-domain-joined host, this configuration should still work on domain-joined hosts too.
- You have RDP or console access to the Windows host and are logged in as a local administrator.
- You’re familiar with PowerShell. Nearly all examples will use PowerShell code to make changes on the Windows host.
Each section will use a code snippet that depends on the last. Some snippets will reference variables defined earlier. Be sure to leave your console open as you copy/paste this code if you’re planning on following it exactly.
If you just want the code without all of the explanation, feel free to download this GitHub gist.
Enable PowerShell Remoting for WinRm for Ansible
Although all servers Windows Server 2016 or later have PowerShell Remoting enabled, it’s always a good idea to confirm that.
On the Windows host to manage, open up a PowerShell console as an administrator and run the following code snippet. This code snippet ensures the WinRm service is started and set to automatically start upon system boot.
Set-Service -Name "WinRM" -StartupType Automatic
Start-Service -Name "WinRM"
Next, ensure that PowerShell Remoting is enabled by first checking if it has any session configurations active. If not, then ensure it does not have any listeners available. WinRm for Ansible must have at least one listener. If either of these conditions comes back with nothing, run Enable-PSRemoting.
if (-not (Get-PSSessionConfiguration) -or (-not (Get-ChildItem WSMan:\localhost\Listener))) {
    ## Use SkipNetworkProfileCheck to make available even on Windows Firewall public profiles
    ## Use Force to not be prompted if we're sure or not.
    Enable-PSRemoting -SkipNetworkProfileCheck -Force
}
Enable Certificate-Based Authentication
By default, WinRM is not configured for certificate-based authentication. You must enable that by configuring WSMan as shown below.
#region Enable cert-based auth
Set-Item -Path WSMan:\localhost\Service\Auth\Certificate -Value $true
#endregion
Create a Local User Account
To use certificate-based WinRM for Ansible authentication, you must “map” a local user account to a certificate. You could use the local administrator account to do this but it’s always a good idea to create a specific account to make management easier.
The following code snippet is creating a local user account for WinRm for Ansible called ansibletestuser with a password of p@$$w0rd12 if it doesn’t exist. To ensure it always remains active, that account’s password will never expire.
$testUserAccountName = 'ansibletestuser'
$testUserAccountPassword = (ConvertTo-SecureString -String 'p@$$w0rd12' -AsPlainText -Force)
if (-not (Get-LocalUser -Name $testUserAccountName -ErrorAction Ignore)) {
    $newUserParams = @{
        Name                 = $testUserAccountName
        AccountNeverExpires  = $true
        PasswordNeverExpires = $true
        Password             = $testUserAccountPassword
    }
    $null = New-LocalUser @newUserParams
}
Create the Client Certificate
WinRm for Ansible (securely) must have two certificates; a client cert and a server cert.
You can use the same certificate for both client/server but I ran into problems with this approach. In the Ansible docs and many other sources, you will find instructions for generating the client certificate via PowerShell’s
New-SelfSignedCertcmdlet. Although this method may work, I couldn’t easily get this working.
To create the client certificate for WinRM for Ansible, you must create a private and a public key. Start by SSHing to the Ansible host and run the following openssl command. This command creates a private key in a file called cert_key.pem and a public key called cert.pem. The key usage will be client authentication (1.3.6.1.4.1.311.20.2.3) “mapped” to the local user account you created earlier called ansibletestuser.
## This is the public key generated from the Ansible server using:
cat > openssl.conf << EOL
distinguished_name = req_distinguished_name
[req_distinguished_name]
[v3_req_client]
extendedKeyUsage = clientAuth
subjectAltName = otherName:1.3.6.1.4.1.311.20.2.3;UTF8:ansibletestuser@localhost
EOL
export OPENSSL_CONF=openssl.conf
openssl req -x509 -nodes -days 3650 -newkey rsa:2048 -out cert.pem -outform PEM -keyout cert_key.pem -subj "/CN=ansibletestuser" -extensions v3_req_client
rm openssl.conf
One step closer to Ansible WinRM authentication!
Import the Client Certificate
Once you have created the client certificate for WinRm for Ansible, you’ll have to import it into two certificate stores on the Windows host for WinRm on Ansible to work. To do that, first transfer the cert.pem public key to the Windows host. The example below assumes the key exists at C:\cert.pem.
Once you have the public certificate on the Windows host, import it into the Trusted Root Certification Authorities and Trusted People certificate stores using Import-Certificate as shown below.
$pubKeyFilePath = 'C:\cert.pem'

## Import the public key into Trusted Root Certification Authorities and Trusted People
$null = Import-Certificate -FilePath $pubKeyFilePath -CertStoreLocation 'Cert:\LocalMachine\Root'
$null = Import-Certificate -FilePath $pubKeyFilePath -CertStoreLocation 'Cert:\LocalMachine\TrustedPeople'
Create the Server Certificate
WinRM for Ansible needs a certificate defined with a key usage for server authentication. This certificate will be stored in the Windows host’s LocalMachine\My certificate store. Create the self-signed certificate using the code snippet below.
$hostname = hostname
$serverCert = New-SelfSignedCertificate -DnsName $hostName -CertStoreLocation 'Cert:\LocalMachine\My'
Create the Ansible WinRm Listener
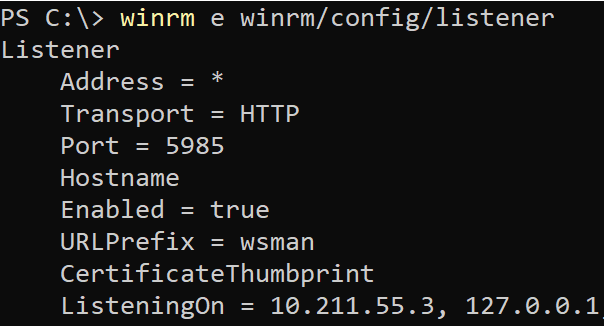
Once you’ve created both certificates, you must now create a WinRm listener on the Windows host. This listener begins listening on port 5986 for incoming connections. Once created, this listener accepts incoming connections and will attempt to encrypt data using the server certificate created above.
PowerShell Remoting uses this WinRM listener as transport once authentication has taken place.
In the code snippet below, you can see a great example of checking for an existing HTTPS listener. If no listener is found using the server certificate created above, it will create a new one.
## Find all HTTPS listners
$httpsListeners = Get-ChildItem -Path WSMan:\localhost\Listener\ | where-object { $_.Keys -match 'Transport=HTTPS' }

## If not listeners are defined at all or no listener is configured to work with
## the server cert created, create a new one with a Subject of the computer's host name
## and bound to the server certificate.
if ((-not $httpsListeners) -or -not (@($httpsListeners).where( { $_.CertificateThumbprint -ne $serverCert.Thumbprint }))) {
    $newWsmanParams = @{
        ResourceUri = 'winrm/config/Listener'
        SelectorSet = @{ Transport = "HTTPS"; Address = "*" }
        ValueSet    = @{ Hostname = $hostName; CertificateThumbprint = $serverCert.Thumbprint }
        # UseSSL = $true
    }
    $null = New-WSManInstance @newWsmanParams
}
“Map” the Client Certificate to the Local User Account
The next step is to ensure when Ansible connects to the Windows host using the server certificate, it will then carry out all instructions as a local user. In this case, all activity performed by WinRm for Ansible will use the local user account, ansibletestuser.
$credential = New-Object -TypeName System.Management.Automation.PSCredential -ArgumentList $testUserAccountName, $testUserAccountPassword

## Find the cert thumbprint for the client certificate created on the Ansible host
$ansibleCert = Get-ChildItem -Path 'Cert:\LocalMachine\Root' | Where-Object {$_.Subject -eq 'CN=ansibletestuser'}

$params = @{
	Path = 'WSMan:\localhost\ClientCertificate'
	Subject = "$testUserAccountName@localhost"
	URI = '*'
	Issuer = $ansibleCert.Thumbprint
  Credential = $credential
	Force = $true
}
New-Item @params
Allow WinRm for Ansible with User Account Control (UAC)
If using a local account to map a certificate to, you must also set the LocalAccountTokenFilterPolicy to 1 to ensure UAC doesn’t get in the way. The LocalAccountTokenFilterPolicy applies to all local account (not domain accounts) and causes your Network logon to be the limited part of your token. This will stop it from logging on as Windows does not see it as an Administrator and WinRM by default requires the user to be a local admin.
By setting the LocalAccountTokenFilterPolicy , you are telling Windows to not create a limited token for network logons by a local account and use its full token.
$newItemParams = @{
    Path         = 'HKLM:\SOFTWARE\Microsoft\Windows\CurrentVersion\Policies\System'
    Name         = 'LocalAccountTokenFilterPolicy'
    Value        = 1
    PropertyType = 'DWORD'
    Force        = $true
}
$null = New-ItemProperty @newItemParams
Open Port 5986 on the Windows Firewall
WinRm over HTTPS uses port 5986. If you have the Windows Firewall enabled, you must open up this port. You can do so by running the following PowerShell code snippet. This code snippet is overly lax allowing all computers to use it. If you’d like to lock this down further, be sure to use the LocalAddress parameter and specify Ansible’s IP.
#region Ensure WinRM 5986 is open on the firewall
 $ruleDisplayName = 'Windows Remote Management (HTTPS-In)'
 if (-not (Get-NetFirewallRule -DisplayName $ruleDisplayName -ErrorAction Ignore)) {
     $newRuleParams = @{
         DisplayName   = $ruleDisplayName
         Direction     = 'Inbound'
         LocalPort     = 5986
         RemoteAddress = 'Any'
         Protocol      = 'TCP'
         Action        = 'Allow'
         Enabled       = 'True'
         Group         = 'Windows Remote Management'
     }
     $null = New-NetFirewallRule @newRuleParams
 }
 #endregion
Add the Local User to the Administrators Group
You may be asking why this tutorial didn’t just add the local user to the Administrators group earlier. The reason is that for some unknown reason when you attempt to map the client certificate to the user, the user account cannot be a local admin.
Run the following code snippet to add the ansibletestuser local user account to the administrators group.
## Add the local user to the administrators group. If this step isn't doing, Ansible sees an "AccessDenied" error
Get-LocalUser -Name $testUserAccountName | Add-LocalGroupMember -Group 'Administrators'
Conclusion
If you’ve followed each of these steps as shown, you should now be able to execute Ansible commands against a Windows host. Use the win_shell module to perform your testing. If this module succeeds, you have successfully configured WinRM for Ansible and cert-based authentication!


