

In Windows, the explorer window is an incredibly useful tool. It lets you visualize your files, browse them, open up zip files, run commands out of the context menu, and more. The explorer window is so ingrained within Windows that some people just get lost if they don’t have an explorer window to visualize the filing system. In Linux (OpenSUSE), you not only have one explorer program: you also have one built into the command-line, called Midnight Commander! Let’s dig in and find out how to use Midnight Commander on Linux!
This is Part III in the blog post series: A Windows Guy in a Linux World. Be sure to check out Parts I and II !
Using the Midnight Commander on Linux Terminal Explorer
If you read Part I of this series, part of that process was installing mc, a program called Gnu Midnight Commander.
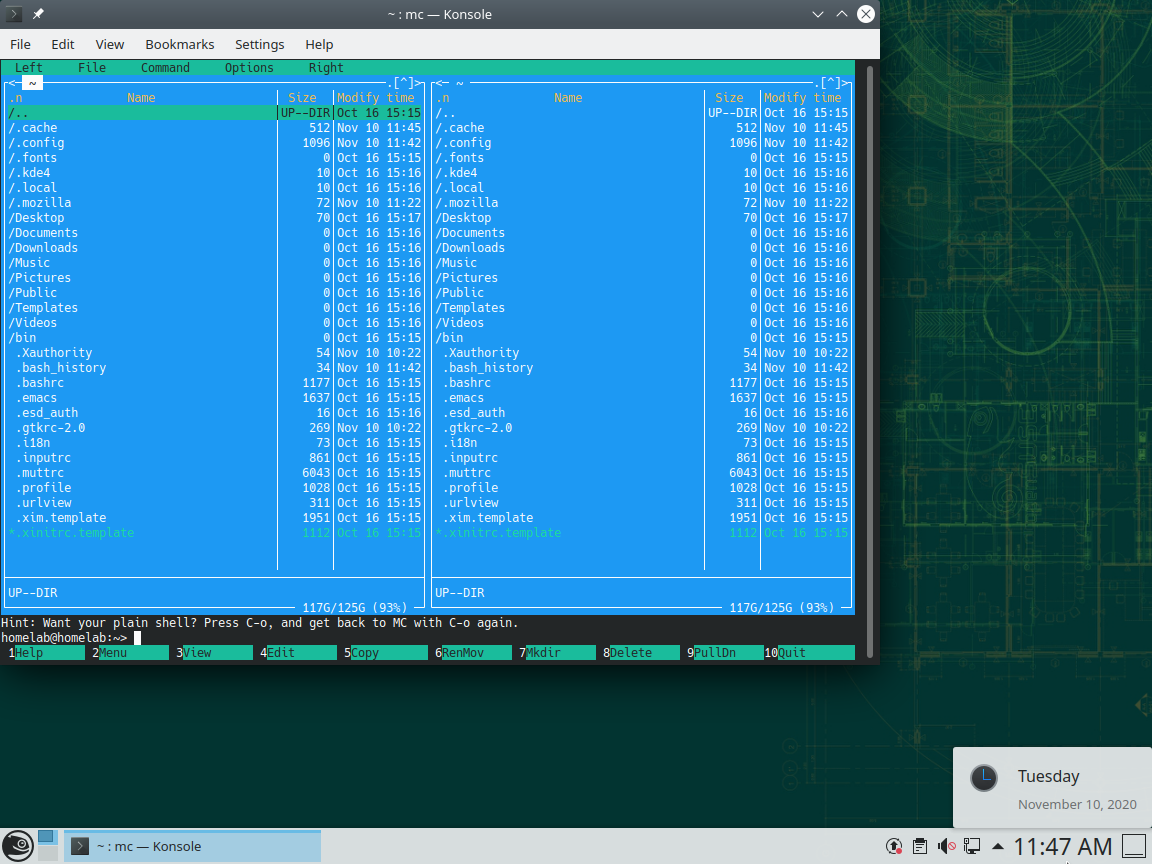
Midnight Commander doesn’t look like much on the surface. In fact, it looks like it came straight out of the 1990s. Despite that, it is an incredibly powerful and useful tool. In fact, Midnight Commander on Linux is one of the most useful tools you will find on a command line. It is one of the few tools you should always include on your Linux servers.
You may notice more folders and files listed in your home directory compared to viewing files via the GUI. You’re seeing this because Midnight Commander shows hidden files by default. Hidden files and folders in Linux are simply files/folders that start with a dot (.).
The real cool feature about midnight commander can be seen below:
It supports using a mouse! Inside of a command-line interface. That’s mind-blowing. You can see that below.
If you initially do not get mouse support, you may need to reboot first.
How freaking cool is that?! This elevates it from a handy utility, to being an invaluable tool for navigating the command line.
It also has a ton of other useful utilities hidden beneath the surface. Despite the retro look, it’s an extremely powerful tool for navigating Linux on the command line.
Midnight commander, just like other text user interface (TUI) tools, is keyboard-focused. You can do the essentials with a mouse, but it’s worth learning some of the more useful keyboard shortcuts over time. You can look for articles that covers some of its more advanced features, as well as keyboard shortcuts.
You can find the full shortcut list here (in typical midnight commander 1990’s style). You can find the keyboard shortcuts to the integrated text editor here.
Using the Text Editor
Another feature heavily used in Linux (yet unheard of in Windows) is the command-line text editor. It is assumed in Linux that if you need to edit a text file, you are going to be doing it remotely: over the command line (of course).
There are dozens of text editors designed to work entirely within the command line. The good news is that Midnight Commander has a built-in, syntax aware text editor.
As an example, edit a text file; take the vconsole.conf text file, for example. Let’s see if you can navigate to it and change it to use the British keyboard. To do so:
- Open up a terminal on your OpenSUSE Linux machine or click on the Start menu.
- Open up Midnight Commander by typing mc.
- In Midnight Commander, navigate out of your home folder by clicking on the .. (representing the parent folder) twice which should leave you at the root folder.
- Navigate to the /etc folder and click on the vconsole.conf file.
- Click Edit to bring up the text editor.
- Change the KEYMAP value to gb.
- Click on Save or press F2 to save the file. You won’t be able to save it. Check out the next section to learn how to handle this.
You can see a visual representation of this steps below.
Midnight Commander offers many other features only seen on more advanced editors such as regex text replacement or changing file encoding. At its core though, the basics work just like Windows Notepad.
Setting Themes and sudo mode
If you end up editing or changing protected files, you need to run the text editor as an administrator or what Linux calls as sudo.
Using Sudo in Midnight Commander
In the last section, you edited a file located at /etc/vconsole.conf. If you had tried to save that file after editing, you would actually find that you can’t: it’s protected. If you really wanted to change that file you would need sudo rights.
Although you can modify any file on your system with sudo rights, that doesn’t mean you should. Any actions you perform as sudo are done as the root user. Why is this scenario a bad thing? There are two main reasons:
- Creating a folder in Midnight Commander while running as
sudomeans that the folder belongs to the root user. That’s generally a problem if you are working inside your home directory. - Running
sudo mcis dangerous as you can easily render your system inoperable by editing or delete files that you don’t mean to, with no confirmation required.
However, if you still must run Midnight Commander with sudo, you should at least create a separate theme that makes it clear that you’re running Midnight Commander as sudo by applying a theme.
Shifting between Midnight Commander and Command Line
As useful as Midnight Commander is, it’s not going to replicate everything you need to do on the command line. The good news is you don’t have to open a separate CLI instance. Instead, you still have full command line access in a small “window” at the bottom as seen below.
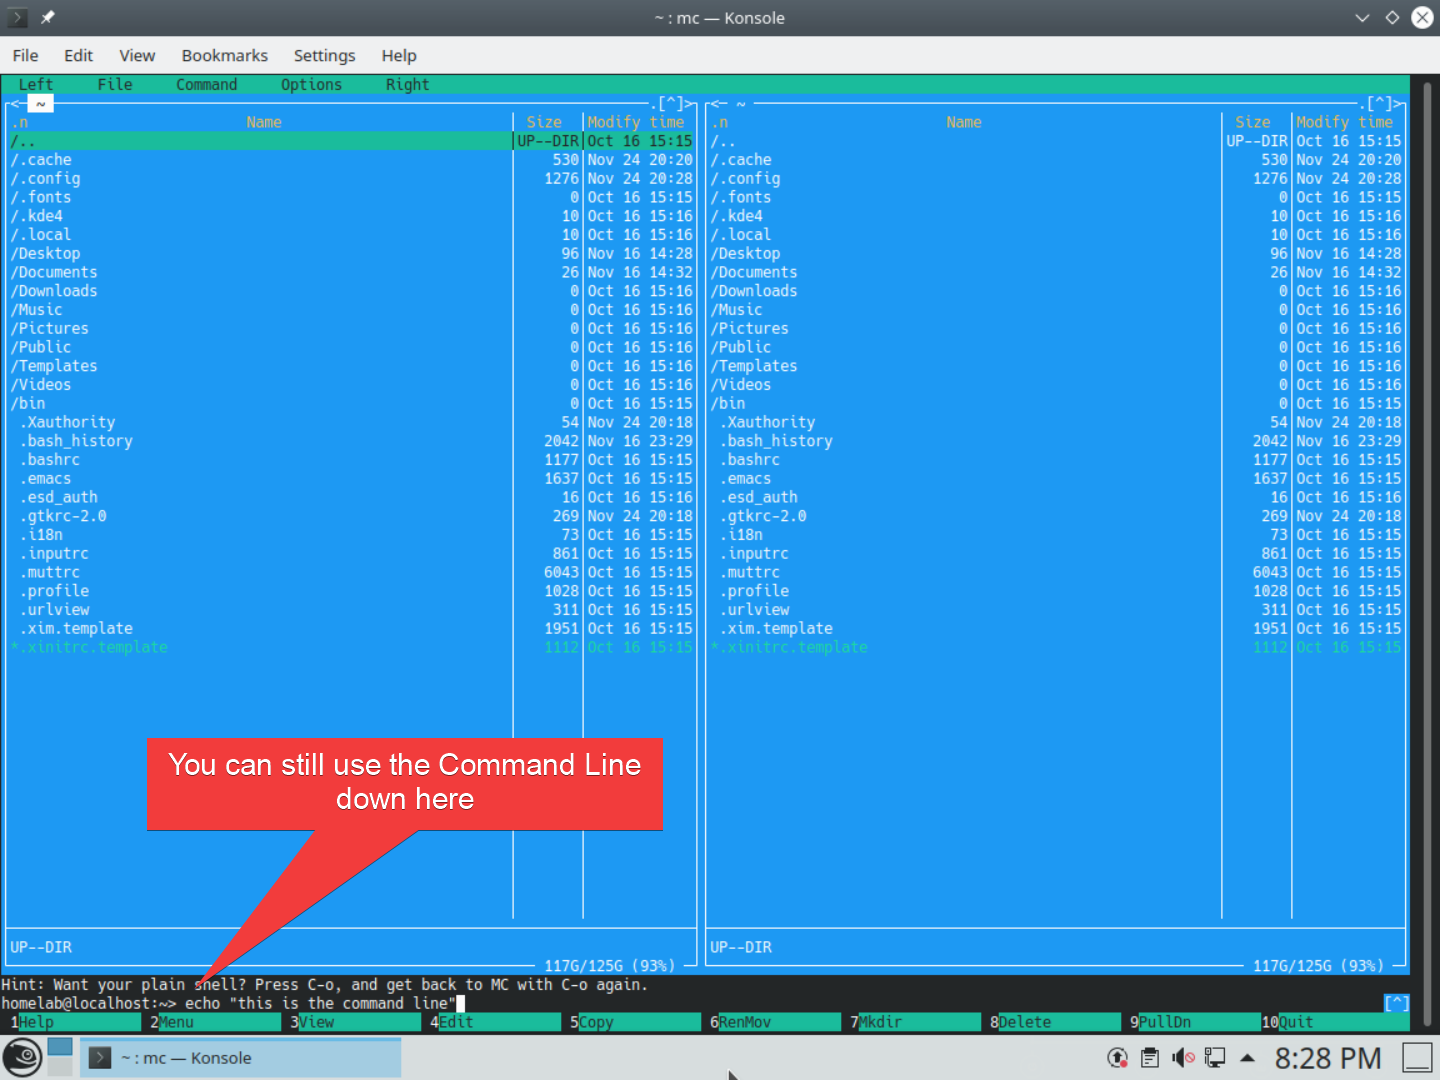
As you navigate the file system in the window panes above, you’ll notice the working directory for the command line follows. This CLI working directory/filesystem navigation sync makes it easy to quickly move back and forth between the filesystem explorer and the command line.
If one line of Midnight Commander’s command-line window isn’t enough, you can switch between full command line mode and Midnight Commander using the control+o keyboard shortcut. This scenario lets you use Midnight Commander to visualize where you are and still take advantage of the command line.
Setting Midnight Commander Skins
Midnight Commander has various skins (themes) that allow you to change the colors of this tool. You have many different options but in this case, you’d like to set a scary-looking skin only when you have to run Midnight Commander as sudo.
To set a skin when running Midnight Commander as sudo:
- Open up the KDE terminal (Konsole) from the start menu.
- Run
sudo mcto open Midnight Commander with sudo rights. - Click on Options —> Appearance.
- Click on Default and click on Seasons-Autumn16M (or your preferred scary-looking choice). You’ll see the appearance change immediately.
- Click on OK to confirm the change.
- Now exit Midnight Commander by clicking on the command-line window at the bottom and typing exit.
You can see a visual representation of these steps below.
Now, when you open up midnight commander as administrator, it’s really obvious that you’re working as an admin. While in this mode, you can edit protected files or run administrative commands without issue.
You can also change your non-
sudotheme to be a bit more modern if you prefer. Nice-dark, instead of the default, is a good choice.
Changing File Permissions with Midnight Commander
Let’s jump into another use-case; changing file permissions. Let’s demonstrate this with an example.
Perhaps you have a folder called owned-by-root in your user’s Documents folder.
If you’ve already followed along in Part II of this series, you should already have this folder.
In Part II, you changed the folder permissions to the numeric value 700. This value represents the owner having read/write/execute permissions, but nobody else. Let’s demonstrate how to change that using Midnight Commander.
- Open midnight commander by typing
mcin the terminal. - Navigate to the owned-by-root folder in the Documents folder.
- Go up to File and click on Chmod.
- Check the read by group, write by group and execute/search by group options and click OK.
You can see a visual representation of this steps below.
Once the above steps are complete, the owned-by-root folder now has the equivalent permissions of 770 (read/write/execute from owner and group, but not others).


