

When running a business, customers often expect a fast response to their questions. This is as true in-person as it is online. Many consumers are daily users of chat services, in lieu of calling via the phone. How do you, as a website operator, take advantage of this trend to offer fast and efficient customer service online?
Though there are many website chat services, for those businesses needing a phone PBX (private branch exchange) system, there are not as many integrated solutions. One of those is 3CX, which offers an easy-to-use solution with its website 3CX Live Chat.
In this review, I take a look at if and how easy it really is to integrate this live chat solution into a WordPress website, what functionality it offers, and how one might use this in a small business.
3CX has sponsored this post. If you’d like to learn more about 3CX, check them out!
Integrating 3CX Live Chat into WordPress
Before installing, I first needed to create a 3CX account. Recently, 3CX started offering its 10-user StartUP plan for free. Many small businesses may find this has plenty of users with the option to upgrade to a more advanced plan later. For the purposes of a Live Chat service, this plan offers everything necessary.
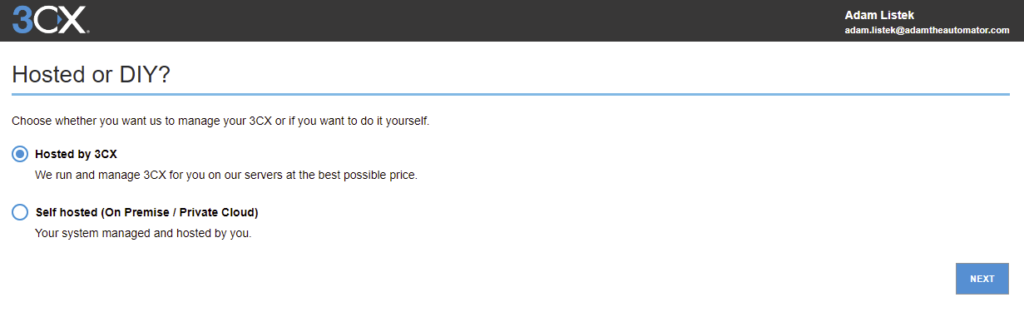
Once I opted to create a new account, I was prompted to enter the site URL where the 3CX install would be. To take advantage of the StartUP plan, I opted for Hosted which subsequently asked for the StartUP option (under 10 users) or the dedicated option (over 10 users).
I choose StartUP which automatically enrolled me in a 3-month free trial for the StartUP Pro which includes 2 users and additional features such as a choice of SIP Trunk, multi-level IVR, call queues, call and chat reporting. I would have preferred that it is clear that you begin on a trial plan and what would happen after 3 months. In addition, it would be ideal if you could proactively downgrade the product instead of waiting it out.
Currently, at the end of three months and with no further action, the trial will be automatically downgraded to the free plan. Starting August 10th, new sign-ups will start as free instead of pro.
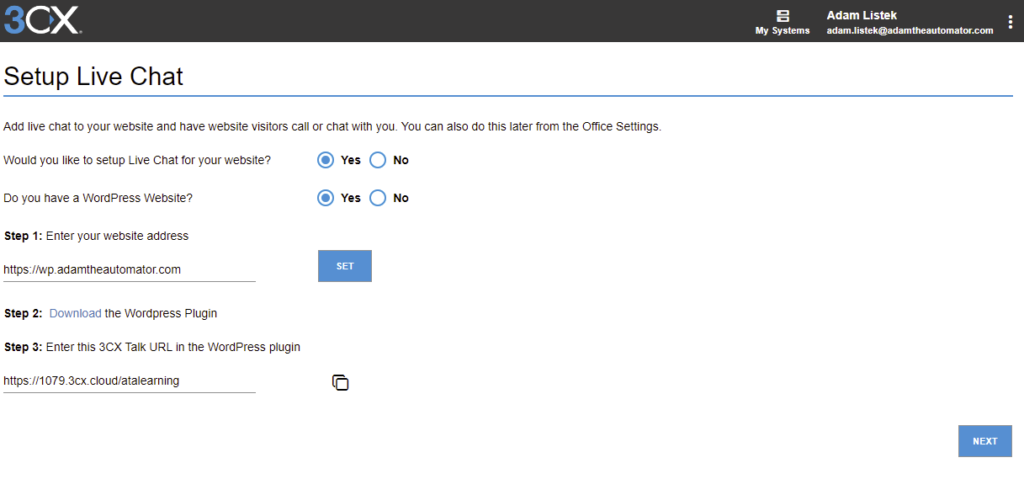
Once the system is created, you will be presented with your unique portal details, initial user creation, and the option to set up Live Chat. If you have a WordPress site you will simply follow the instructions to download the WordPress plugin and enter the necessary configuration. For non-WordPress sites, the required HTML code will be available to add to your website’s source.
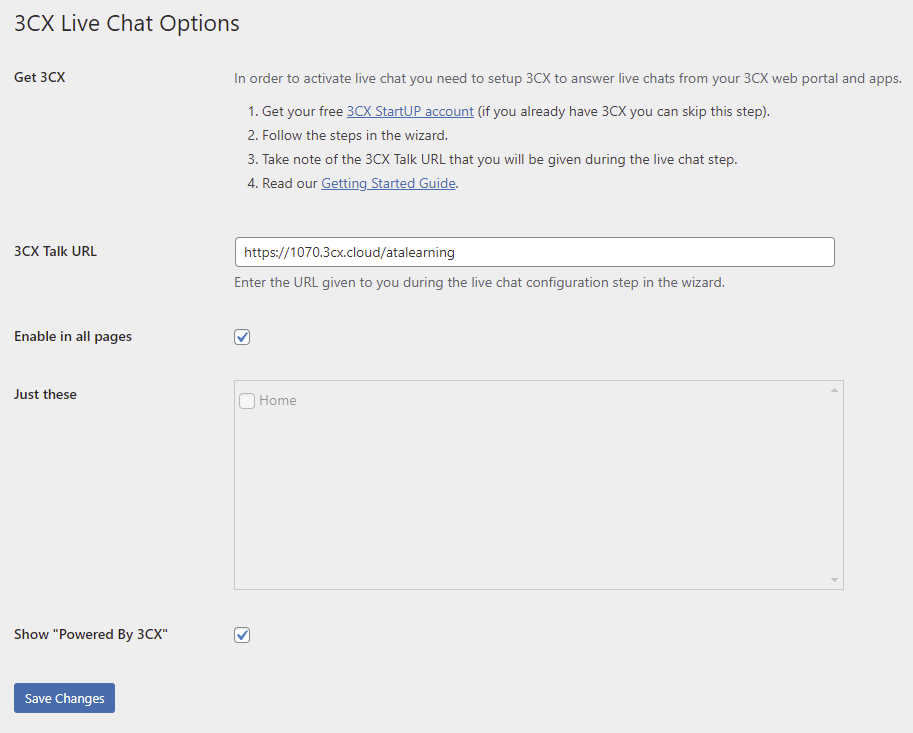
Install the WordPress plugin and navigate to the 3CX Live Chat Options page. Enter the given 3CX Talk URL, set the required options, and click Save Changes. One nice option is the ability to enable the live chat option on all pages or only specific pages.
One limitation to this user interface (UI) is the lack of ability to configure custom post types. For example, I may have a “book” custom post type that I would like to allow the live chat on. Here, it’s either all pages or just certain pages. This also goes for taxonomies, such as a specific category. Though useful, it is very limited in customization. In future iterations, I would like to see the ability to customize where and when the plugin is available.
Configuring Live Chat in 3CX
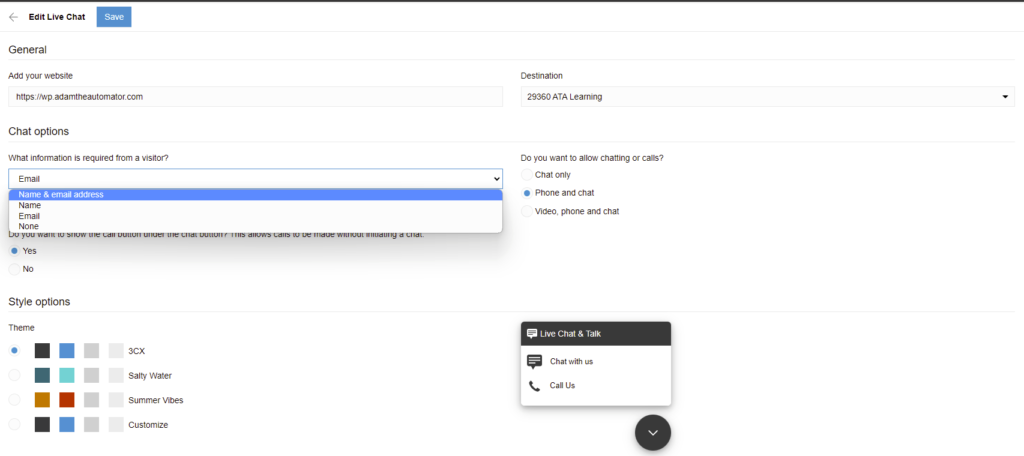
Before offering the live chat to your visitors, there are a few settings you may want to consider. By default, both “Chat with us” and “Call Us” are available. You may only want the chat option and not that of a phone or video call. Despite my selecting the option for “Chat only” selected, if you do not also click the No radio button to display the call button, website visitors will still be able to call.
This behavior is currently a bug and slated to be fixed in the next update due out in a couple of weeks.
Along with the contact options, you can optionally require additional information from a visitor, such as a name and an email, or nothing at all. But, this option is limited, and I would much like to see customizable fields, both mandatory and optional.
Make sure to set the Destination to be either a specific person or a Ring Group (which contains multiple users), to ensure the right individuals are notified. Finally, you can choose a specific theme, or choose your own colors, though it would be ideal for a few more theme options such as high contrast.
Using and Interacting with Visitors
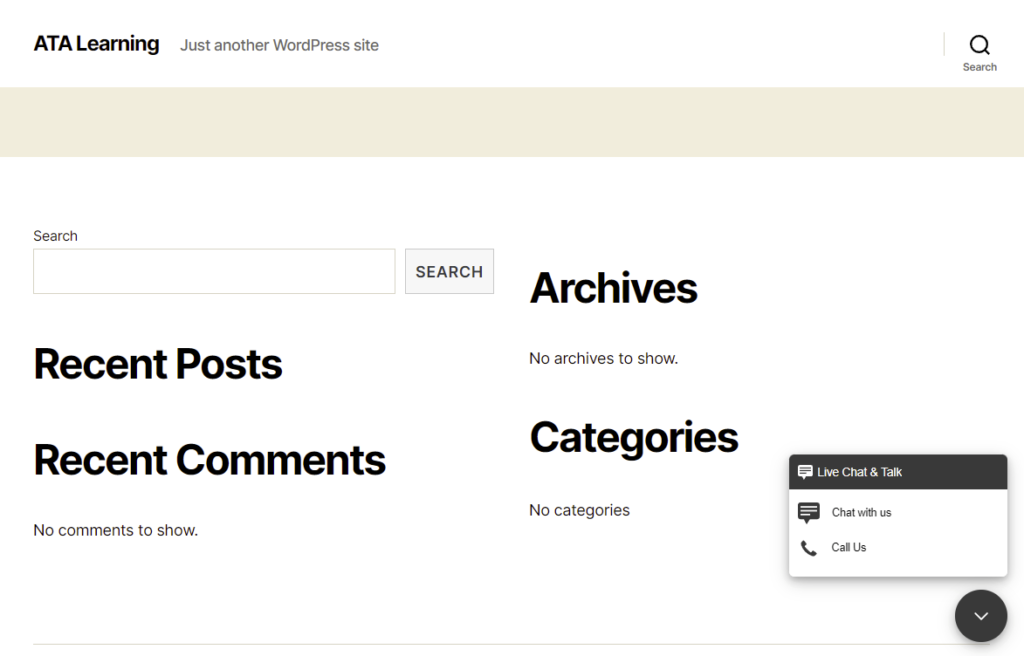
With the 3CX Live Chat WordPress plugin installed, how well does this work for visitors and for the system users? Once integrated, a floating button in the lower right shows a chat icon that opens with the configured options. Below, you can see that both chatting and calling are options.
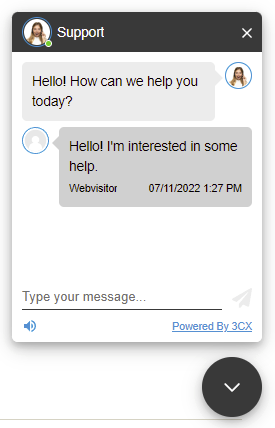
Once a chat is initiated, a standard chat window opens and you are able to interact. There is a built-in message and user profile picture. Neither of these appears to be customizable, but both of these should be. Depending on the market, you may want a different message and/or picture to better suit your demographics. The “Powered By 3CX” is optional, and the ability for a visitor to disable sounds is available as well.
Additional customization functionality is slated to be available in the upcoming release, due out in a couple of weeks.
On the 3CX Web Client, a notification will show, along with an indicator in the chat section. This indicates that a chat has been received, but has not been assigned to anyone. This notification will show up for either the specific person assigned to Live Chat or to all users within the Ring Group. Once opened, you will have the ability to respond and once you do, your profile picture and name will show to the visitor, instead of the generic option.
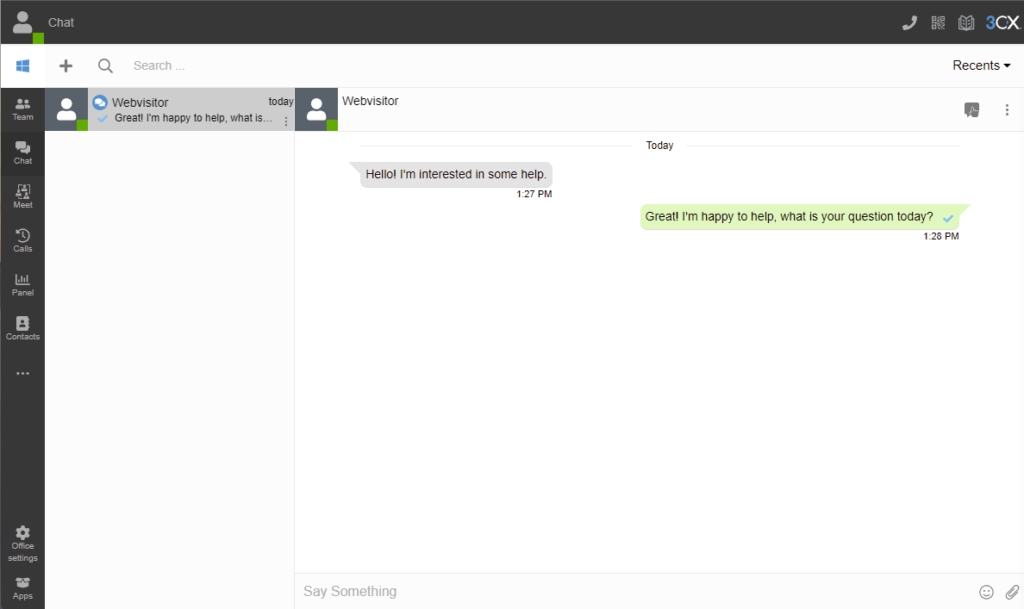
Of course, you are able to archive, end a chat session, or block an anonymous user if you need to. With spam and potential malicious visitors, this is important to keep the chat inbox clean and worry-free.
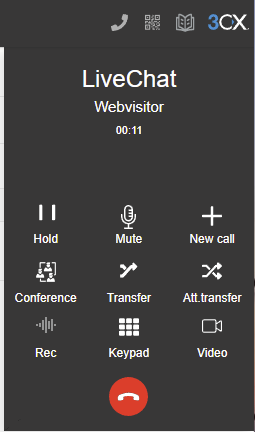
A very cool feature is that if you offer phone chatting via the site, you can receive the call via the web client, as shown below. All of the features you would expect exist, such as conferencing, transferring, and recording! If you want to take it a step further and view video, you can do that as well.
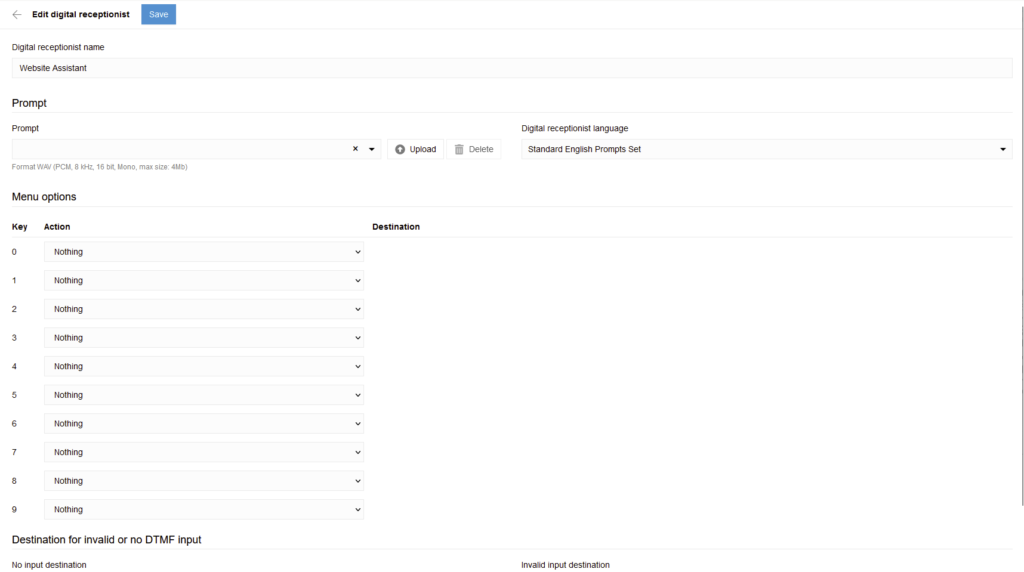
Auto-Attendant with 3CX Live Chat
Unfortunately you cannot create a bot attendant that responds to text messages, but you do have the ability to create a typical phone attendant provided that you allow calls. This does allow you to somewhat direct calls that come in, and this can be made specific to the website’s live chat, instead of just reusing your typical attendant.
You are able to create a custom audio prompt, up to 10 options for routing which can be sent to a variety of places such as ring groups, extensions, another digital attendant, or straight to voicemail. Though this is not a proper substitute for a bot like interface, this does offer some customization for an automated prompt and may reduce some of the calls depending on how this is structured.
Impressions on 3CX Live Chat
There are many live chat services out there, but not quite as many that directly interface with PBX systems as well. With the customization and utility that 3CX Live Chat offers, it was an easy-to-use and quick-to-integrate solution. With the ability to create multiple live chats, customized to each website, you can offer a convenient way to talk to potential clients as well.
I would like to see more customization options, such as the ability to customize the initial chat agent picture and name. In addition, options to create an automated attendant that has at least some predefined chat options and greetings would also go a long way to helping to create a more customized experience per site. I have been informed that more customization options are on the roadmap, but this review focused on what was available.
Overall, I found that 3CX with its 10 free users plan would fit most small sites and those that are looking to expand further would be well-served by the already integrated PBX system and advanced features.
Conclusion
Being able to chat with prospective clients that come to the site and offer a level of quick service to answer questions sets a site apart. With 3CX Live Chat, creating a live chat service is quick and easy. Though a bit light on customization features at the moment, not too many are needed to offer this type of service and especially to integrate into your PBX system!


