
Every cowboy needs a horse, every Batman needs a Robin, and every coder needs a great code editor. When you work with code every day, you must have a go-to code editor. For many developers out there, Visual Studio (VS) Code is their editor of choice. Stick around for this Visual Studio Code tutorial.
Not a reader? Watch this related video tutorial!In this post, you’re going to learn all about VS Code and each of its powerful features. If you’re looking for an in-depth review of VS Code, including thorough explanations of everything it’s capable of, keep reading.
This blog post is a snippet of a chapter from the eBook From Admin to DevOps: The BS Way to DevOps in Azure. If you like this chapter and want to learn about doing the DevOps in Azure, check it out!
The Interface
This Visual Studio Code tutorial will be using VS Code 1.53.2. If the instruction and screenshots look a little different, chances are you’re using a new version. All effort has been made to focus on the less version-specific aspects of VS Code, though.
When you open up VS Code for the first time, you will see a user interface that looks like the following screenshot. You’ll see that VS Code has a few main areas you’ll be staring at day in and day out.
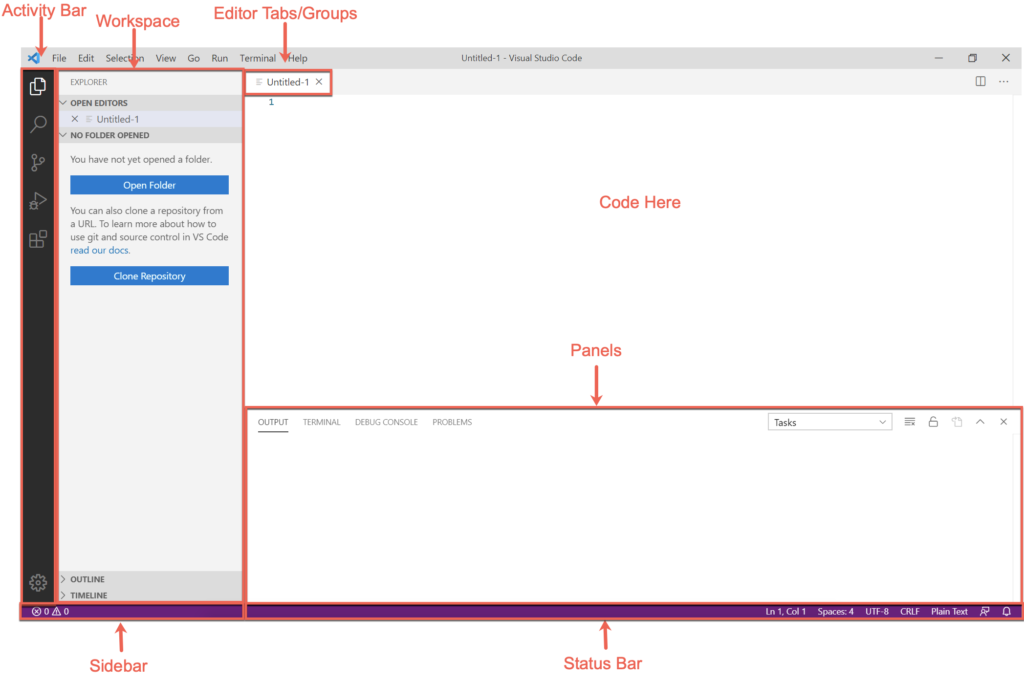
The main VS Code interface can be broken down into five distinct areas:
- Editor Window (Tabs/Groups) – The editor window is where you’ll be doing most of your work. This pane is where you will view and edit all of the code you’re working on. Whenever you open a new file or edit an existing file, the editor window is where you’ll the code will show up. VS Code has tabs in this editor pain that allow you to open up multiple files at once and editor groups that group various tabs.
- Workspace – The workspace will be the next most common part of the UI you’ll be using. The workspace is where any files you have open in tabs will show up. You’ll commonly open entire folders too to see all files in a particular folder at once here.
- Sidebar – The sidebar is where you’ll see information such as the Git repo you have open, the name of a Git branch you’re working under, and the ability to push Git changes to a remote repo.
- Panels – The panels section is the “output” section. You will find various “tabs” with information returned by VS Code and its extensions under this pane. Here is where you will also find the handy integrated terminal. The integrated terminal is a built-in Bash terminal (with other shells included via extensions) that allows you to run code directly in VS Code without having to open a separate shell.
- Status Bar – The status bar provides information about the open editor tab. The status bar shows cursor position, encoding, the format VS Code recognizes the file format to be, among other things. The status bar is where VS Code and its extensions will also display information as they run.
Commands and the Command Palette
There’s a lot to do in VS Code, especially if you have installed many extensions (covered later). You can control a lot of that functionality via the typical File, Edit, and View menus at the top of the window but not everything.
The easiest way to make things happen in VS Code is via commands found in the command palette. The command palette is a menu that appears at the top of the screen when you click on the View menu and select Command Palette, or you hit Ctrl-Shift-P on your keyboard.
In the following screenshot, you can see an example of the command palette.
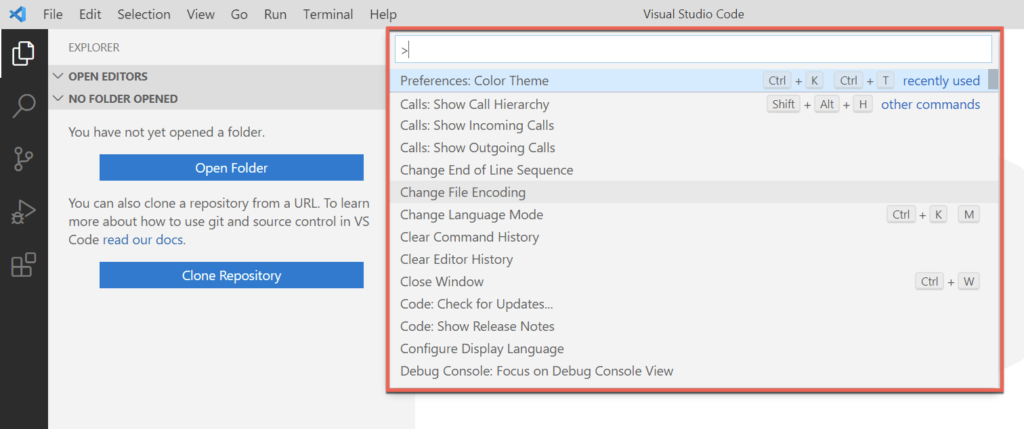
The command palette is where you will find all functionality of VS Code. The command palette is great because all functionality for managing tasks, settings, snippets, and more are located in a single menu (covered later).
The command palette is where you will find everything you can do in both a default VS Code installation and configure any extension you have installed.
Settings
You can customize just about every aspect of VS Code using settings. Settings control both default VS Code functionality and installed extensions. Settings are stored as JSON files, and VS Code defines many of them out of the box.
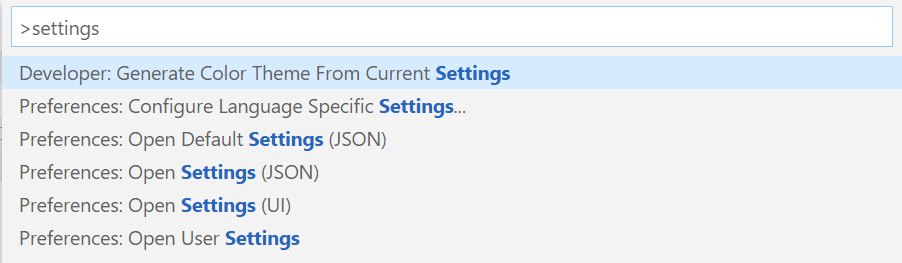
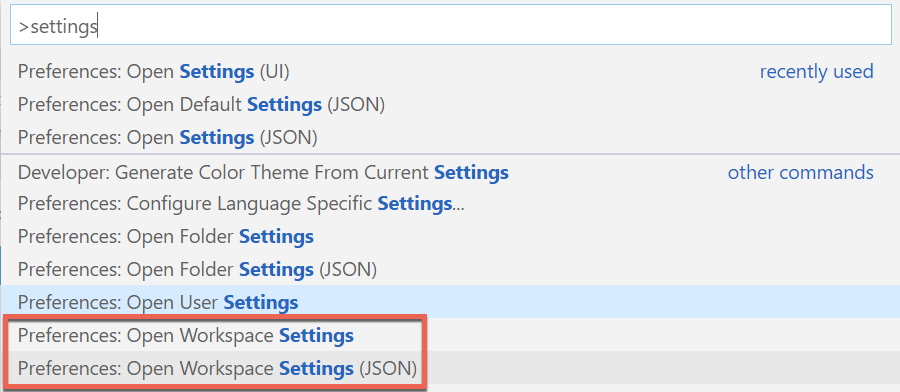
To manage settings, open the Command Palette with Ctrl-Shift-P. Type “settings” and choose Preferences: Open Settings (JSON) as shown below. Be warned though, there are a lot of settings!
VS Code will then open up a JSON file displaying all of its currently-defined settings.
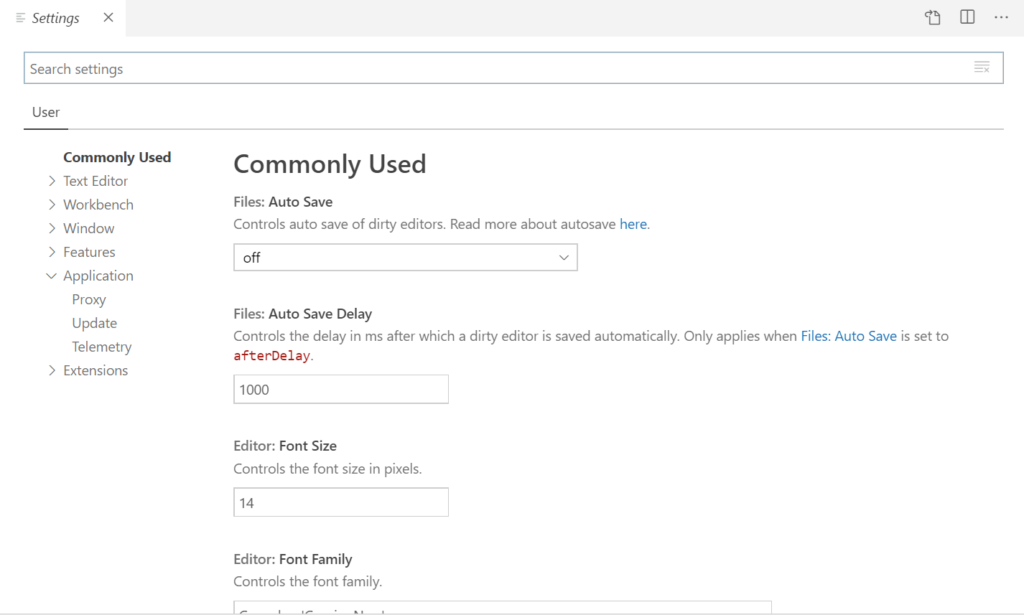
There’s an easier way to manage settings, though, via the VS Code UI. VS Code provides a UI to browse settings, as you can see in the following screenshot. You can find this UI by opening the command palette again and choosing Preferences: Open Settings (UI).
The UI for VS Code settings allows you to search for settings and break them down by categories along the screen’s left side.
There’s absolutely no way this Visual Studio Code tutorial will come close to explaining all of the settings available. Take a minute to browse around and see what tweaks you can make to VS Code.
Extensions
One of the most important features of VS Code is its extensions. Out of the box, VS Code supports common code editor features like syntax highlighting, Intellisense, etc. It understands the type of code you’re writing and adapts to that in many different ways. But it doesn’t understand all languages.
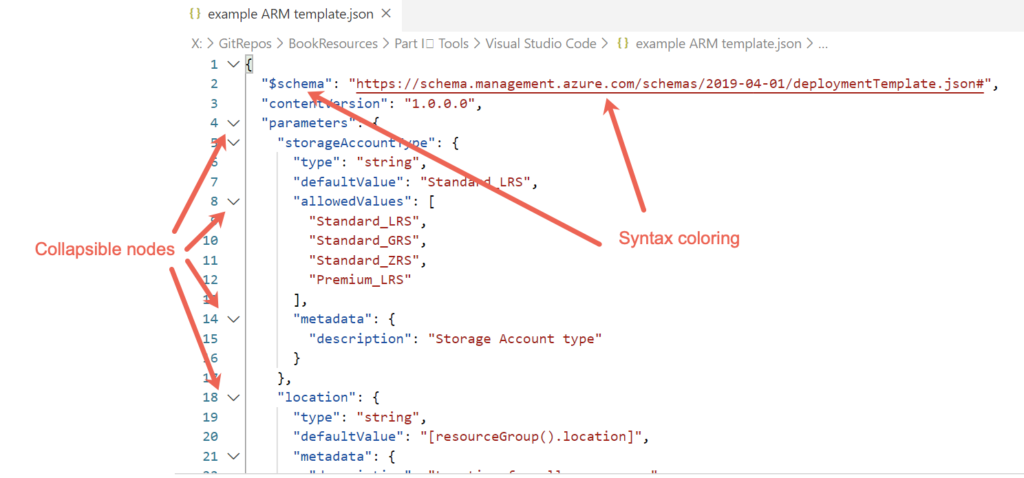
For example, perhaps you’re working on an ARM template. An ARM template is JSON. Lucky for you, VS Code understands JSON out of the box. If you open up a file with a JSON extension, VS Code assumes it’s a JSON file and applies all its features accordingly. In the following screenshot, you can see a couple of these features.
JSON is just plain text, after all. For VS Code to know when a section should be collapsible and what text to change colors, it must understand JSON’s structure. VS Code applies these features differently depending on the type of file opened.
Even though an ARM template is created in JSON and VS Code understands JSON doesn’t mean VS Code understands ARM templates.
An ARM template isn’t just JSON. An ARM template has functions and a specific structure and schema. VS Code doesn’t know that a particular JSON file needs to have $schema defined as the first element. This is where VS Code’s extension ecosystem comes in handy.
Even though VS Code doesn’t natively understand ARM templates doesn’t mean it can’t. Developers can add functionality to VS Code. In this case, developers can add functionality around ARM templates via an extension.
An extension is a small package you can load into VS Code that makes working with various resources easier.
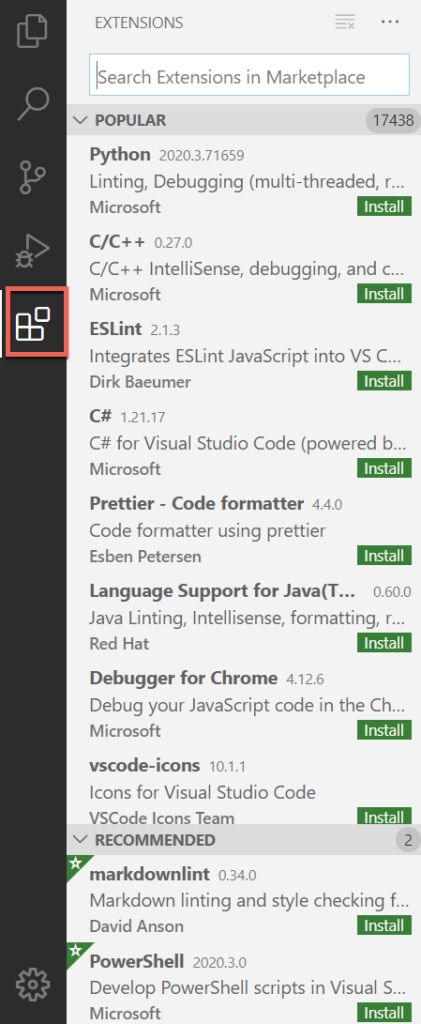
You can manage extensions via the extension icon in the Activity Bar, as shown below. Once you click on the icon on the left, you should immediately see a list of the most popular extensions in the Extension Marketplace.
The Extension Marketplace is where developers store extensions that you can download and install at will.
You can see in the following screenshot extensions aren’t just language-specific either. Extensions extend VS Code functionality across a wide range of features. If you’re developing code around a specific product, always search the Extension Marketplace to see if any extension is available.
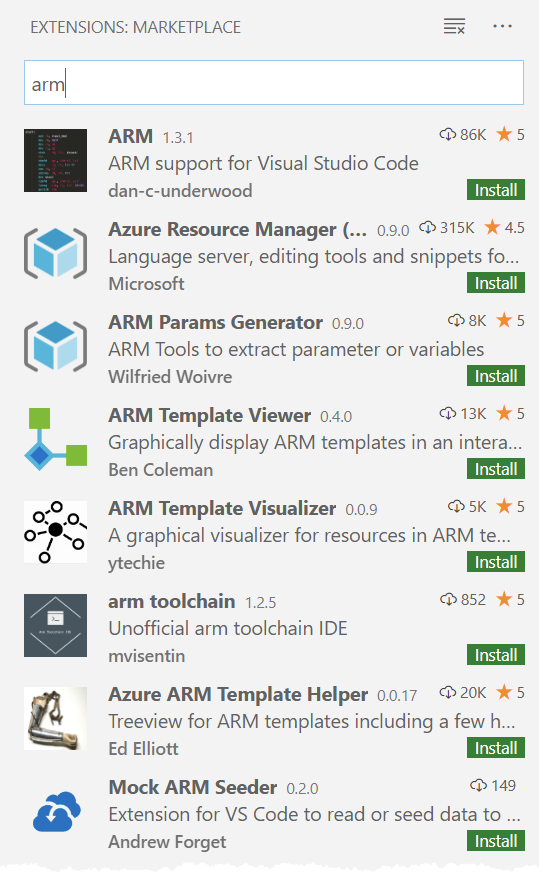
For the ARM template example, search for “arm,” as shown below, and see what comes up. Notice that there are many different extensions for ARM templates, some by Microsoft and third-party developers. Clicking on the green Install button beside each extension will immediately download and install the extension.
Extensions are what make VS Code truly shine. Extensions allow you to do so much with VS Code and remove the need to leave the application to do other related tasks.
Snippets
Have you ever typed the same code snippet over and over again? As with software development, you should always strive to work via the Don’t Repeat Yourself (DRY) principle.
Sure, you could accomplish the same thing by typing up that function declaration snippet for the 50th time, but what’s the point? And who’s to say you’re actually going to write it the same way every time anyway? If you need an automated way to create text blurbs, you need to use snippets.
VS Code snippets are a handy feature everyone should be using no matter what kind of development you’re doing. Snippets allow you to type a few characters in a code editor tab that quickly expands to whatever you need.
Snippets exist by language or extension and are stored in JSON files. For example, you can have a set of PowerShell, ARM template, Python, C#, and Javascript snippets installed simultaneously.
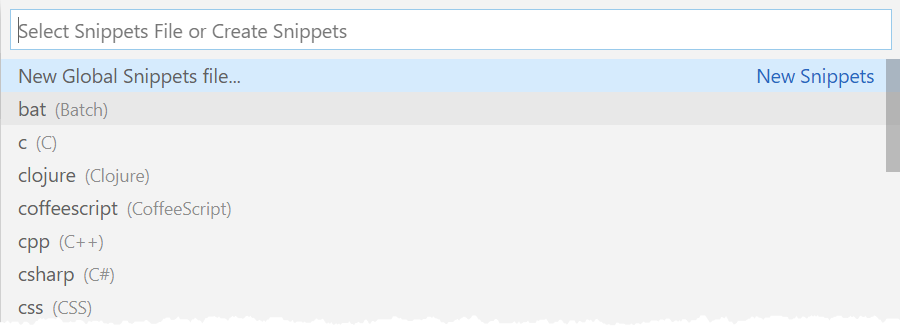
You can find snippets by opening up the command palette with Ctrl-Shift-P, typing “snippets” and hitting Enter.

The snippets menu will appear where you can edit all of the default language snippets. If you’ve installed extensions that come with a set of snippets, they will show up here as well.
If you navigate to a particular snippet with the arrow keys and hit Enter or click on one, VS Code will bring up the JSON snippets files in an editor tab. In the following screenshot, you can see that many will have a single JSON element commented out with instructions on creating a snippet of your own.

Each snippet is a single JSON element that matches a particular syntax. You can learn more about snippet syntax on Microsoft’s VS Code snippets page.
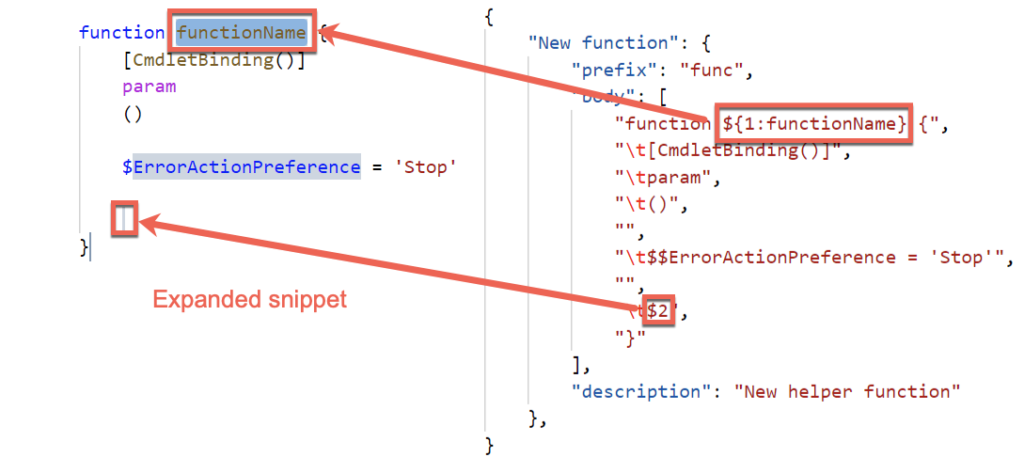
In the following code snippet, you can see a typical snippet to create a PowerShell function. This snippet is using the PowerShell extension, which creates a powershell.json snippets file. When you type the snippet “func” in an editor window, VS Code will automatically remove that piece of text and replace it with the code in the body.
Notice the ${1|functionName} and $2 strings below. VS Code snippets allow you to not only replace a code snippet via a few characters but also edit that code once it expands. In this example, this snippet has tab stops.
Tab stops allow you to hit the Tab key, edit the placeholder text (functionName for the first (1|)) tab stop, hit Tab again, and begin typing at line eight of the body.
"New function": {
    "prefix": "func",
    "body": [
        "function ${1:functionName} {",
        "\t[CmdletBinding()]",
        "\tparam",
        "\t()",
        "",
        "\t$$ErrorActionPreference = 'Stop'",
        "",
        "\t$2",
        "}"
    ],
    "description": "New helper function"
}
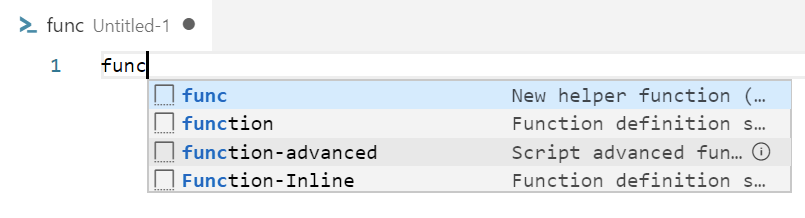
Once you create the snippet, you can then call the snippet in the editor. In the following screenshot, you can now see if you type “func” in a PowerShell script, VS Code provides you with a list of options available to you.
By default, VS Code comes with some built-in snippets, and some extensions install some snippets too. Below you’ll notice the snippets function, function-advanced and function-Inline. These snippets came with the PowerShell extension.
Once you select func in the editor window and hit Enter, func will turn into the code snippet on the left in the image below. You can see that VS Code highlights functionName and has a cursor on line eight. These tab stops allow you to edit these parts of the expanded snippet.
Snippets are huge time-savers if you spend the time to build out all of the common routines you find yourself doing day in and day out. The snippets shown in this Visual Studio Code tutorial were just a taste of what you can do.
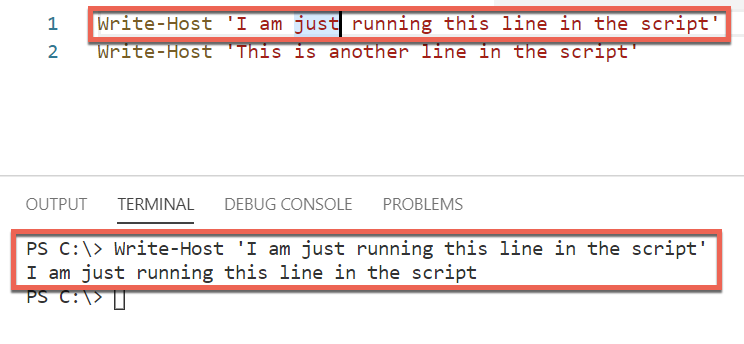
The Integrated Terminal
When you’re developing scripts or software, you don’t just write a bunch of code at once, and it works perfectly. If only that were true. Instead, you write a little code, test it out to see if it works, tweak and repeat until you’ve accomplished your task.
To run code in development, you’d typically have to Alt-Tab to another window like a console or other external tool. If that external tool is available via the command-line or you’re writing PowerShell code, you don’t have to leave VS Code and use the integrated terminal instead.
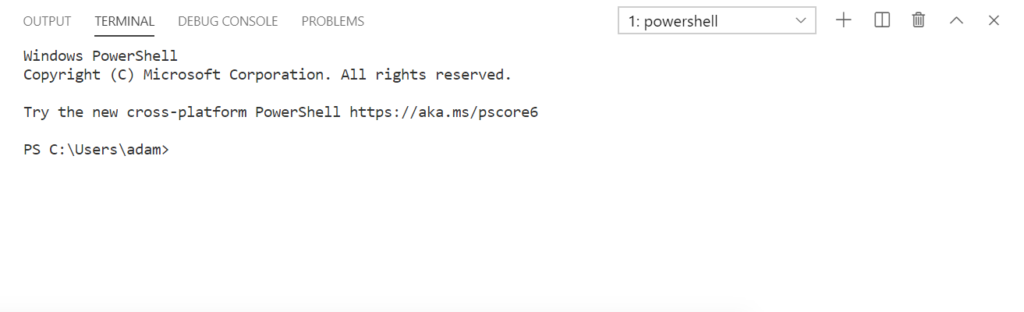
The integrated terminal is integrated directly into VS Code. It isn’t an external console or window. It sits below your editor tabs at all times (unless you close it). By default, the terminal is a legacy command prompt (cmd.exe) on Windows or Bash on Linux and macOS. However, as you can see below, once you install the PowerShell extension, VS Code defaults to a PowerShell console.
You can use the integrated terminal just like you would a typical console by typing commands, getting output, etc. But the integrated terminal provides a few additional benefits. For starters, one of the most useful benefits is the ability to run pieces of code while in development.
For example, let’s say you’re working on a PowerShell script and you’d like to test a single line. Instead of copying out the code and pasting it into another PowerShell window, click on any position on that line and hit the F8 key. VS Code then reads the entire line and executes it in the integrated terminal (if you have the PowerShell extension installed).
In this Visual Studio Code tutorial, you’re only going to learn the integrated terminal basics. To learn more about the integrated terminal, be sure to check out Microsoft’s documentation.
Working as a Team with Workspaces
This tutorial has, so far, assumed you have been using VS Code independently. It’s assumed that it’s just you typing away at your keyboard. But that doesn’t reflect the real world. In the real world, chances are you’ll be working on a team.
While you were digging through the settings, installing extensions, and creating some snippets, you were changing VS Code’s configuration for you. What if you’re on a team that could also use the tweaks you made to your VS Code installation? In that case, you need to share those settings. One way to do that is with a workspace.
In VS Code, a workspace is a collection of folders and settings that control behavior, typically for a single project.
Think of an app your team is developing that contains many folders, a Git repo, and perhaps a certain coding standard everyone on the teams needs to abide by. A single “project” is a good use case for a workspace.
To create a workspace, open one or more folders, go up to the File menu, click on Save Workspace As, and save the file. VS Code saves the workspace to a file with a code-workspace file extension. This file contains everything saved to the workspace.
Workspace and Settings
Workspaces come into play, especially when it comes to settings. When you define settings in VS Code, you do so at either the user-level or workspace-level. When working on a team project where everyone uses VS Code, you’ll probably want to create a shared workspace. To do that, open up the folders involved and save the workspace.
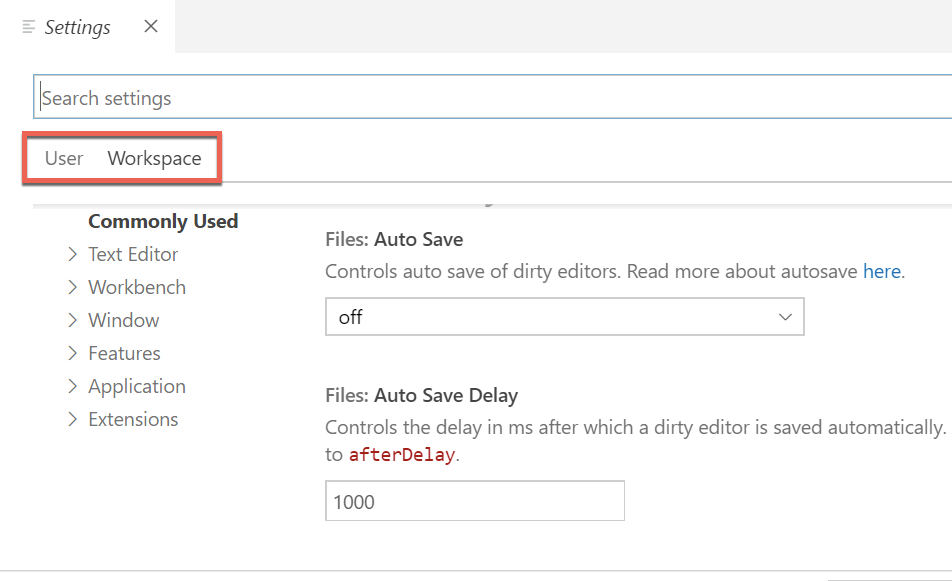
Once you’re working within a workspace, open the command palette, type “settings,” and you’ll now see another option for Workspace Settings, as shown in the following screenshot.
Selecting the Open Workspace Settings option will then bring you back to a familiar Settings screen. This time though, you’ll have two groups of settings; User and Workspace. Selecting Workspace and making a change here will save that setting change to the workspace file instead of your own VS Code installation.
Workspaces are a great way to group snippets, settings, and other items to share across a team to ensure a consistent experience.
Conclusion
This Visual Studio Code tutorial was meant to give beginners a jumpstart with this IDE. Even though it’s impossible to cover the VS Code’s extent in 3,000 words, this tutorial has covered the main features.
If you’d like to learn more about Visual Studio Code and dig into any of the features covered here, be sure to check out the Microsoft documentation.


