

Constantly worrying about losing your files in case your local disk decides to kick the bucket? Why not opt for cloud storage? Syncing files with cloud storage has become a non-negotiable part of digital lives. And for Ubuntu enthusiasts, here’s some good news — integrating OneDrive Linux GUI lets you experience the magic file cloud-syncing.
This tutorial is your guide to setting up OneDrive on Ubuntu for seamless file syncing. Who wants the hassle of toting around an external drive whenever you switch devices anyway?
Bridge the gap between Linux and Microsoft’s cloud service and keep your files safe!
Prerequisites
This tutorial houses step-by-step demonstrations for integrating OneDrive Linux GUI. Before proceeding, ensure you have the following in place:
- A machine with Ubuntu 20.04 Desktop or later – This tutorial uses an Ubuntu 22.04 Desktop.
- cURL installed on your Ubuntu system.
Updating the System for Integrating OneDrive Linux GUI
With the prerequisites out of the way, it’s time to prepare your system for integrating OneDrive on Ubuntu—updating your system. This process involves creating a reusable executable script to update your system.
To update your system for OneDrive integration, carry out the following:
1. Create a script called os-update.sh with your preferred editor, populate the following, save the file, and close the editor.
This script aims to perform crucial updates in your system to ensure a smooth OneDrive integration.
#!/bin/bash

# Remove dpkg lock files to ensure package manager availability
rm -rf /var/lib/dpkg/lock-frontend
rm -rf /var/lib/dpkg/lock

# Update package information
apt-get update

# Upgrade installed packages to the latest versions
apt-get upgrade -y

# Perform a distribution upgrade
apt-get dist-upgrade -y

# Remove obsolete packages
apt-get autoremove -y

# Clean up cached package files
apt-get autoclean -y
2. Next, run the following commands to make your script (os-update.sh) executable, and run it to roll the system update.
sudo chmod +x os-update.sh
sudo ./os-update.sh
3. Lastly, reboot your system for the changes to take effect.
sudo rebootInstalling the OneDrive Client for Linux
With your updated Ubuntu system, you now focus on ensuring your system is ready to understand and effortlessly communicate with OneDrive.
You’ll install the OneDrive Client for Linux from a dedicated repository in this example. But for installations on distributions other than Ubuntu, consult the official OneDrive Client for Linux repository.
To install the OneDrive Client for Linux, follow these steps:
1. Execute the following command to store your Ubuntu system’s current version to the ubuntu_id variable the subsequent commands can use.
source /etc/os-release; ubuntu_id=$VERSION_ID; echo $ubuntu_idNote down the system’s current version, which, in this case, is Ubuntu 22.04.

2. Next, run the wget command below, which has no output, but adds the OpenSuSE Build Service repository release key to your system’s keyring (/usr/share/keyrings/obs-onedrive.gpg).
wget -qO - <https://download.opensuse.org/repositories/home:/npreining:/debian-ubuntu-onedrive/xUbuntu_$ubuntu_id/Release.key> \
| gpg --dearmor \
| sudo tee /usr/share/keyrings/obs-onedrive.gpg > /dev/null3. Once the release key is added, run the below command to add the OneDrive repository to your package source list (/etc/apt/sources.list.d/onedrive.list).
This command provides no output, but the configuration includes information about the package architecture, the GPG key used for verification, and the repository URL.
echo "deb [arch=$(dpkg --print-architecture) signed-by=/usr/share/keyrings/obs-onedrive.gpg] \
<https://download.opensuse.org/repositories/home:/npreining:/debian-ubuntu-onedrive/xUbuntu_$ubuntu_id/> ./" \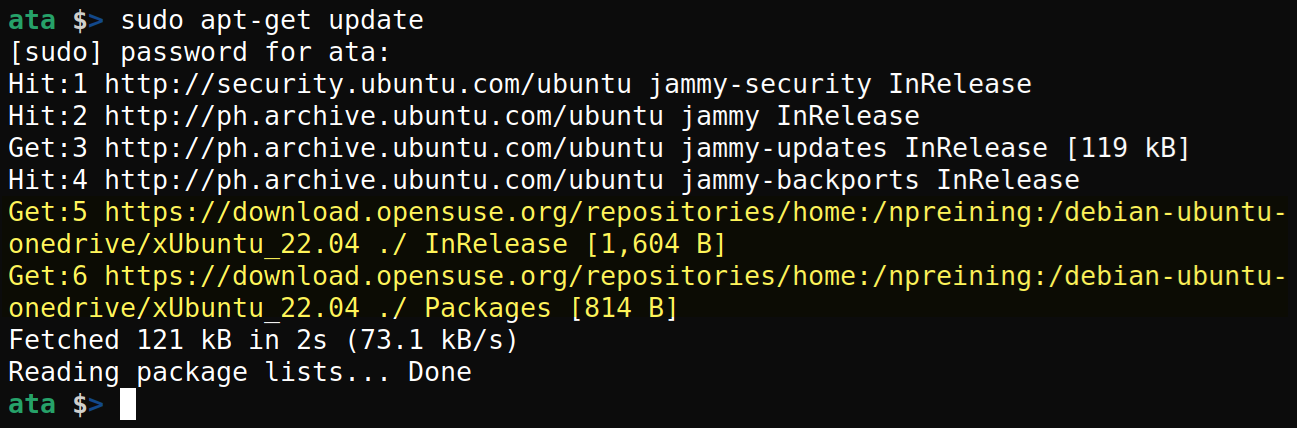
| sudo tee /etc/apt/sources.list.d/onedrive.list4. Now, execute the following apt-get command to update the package cache since you’ve added the OneDrive repository.
sudo apt-get updateNotice the output signifies that the OneDrive repository is now added and working (highlighted in yellow).
5. After the update, run the apt install command below to install the OneDrive Client for Linux.
This command excludes installing recommended (--no-install-recommends) and suggested (--no-install-suggests) packages to keep the installation minimal.
sudo apt install -y --no-install-recommends --no-install-suggests onedrive
6. Finally, execute the onedrive command below to confirm the installed --version of OneDrive Client for Linux.
onedrive --versionBelow, the output shows the latest version of OneDrive Client for Linux, v2.4.25, as of this time of writing.

Installing the OneDriveGUI on Ubuntu
Having laid the groundwork by installing the OneDrive Client for Linux, you now focus on the user-friendly side of the integration process — installing the OneDriveGUI on Ubuntu.
The OneDrive Client for Linux you installed operates through the command line. So yes, you’ll have to run commands to use it. But the good news is that OneDriveGUI enhances your OneDrive experience by providing intuitive and visually accessible means of cloud-syncing your files.
To install the OneDriveGUI, proceed with these steps:
1. Run the following curl command, which produces no output, or visit the OneDriveGUI releases page to download the latest AppImage file.
curl -s <https://api.github.com/repos/bpozdena/OneDriveGUI/releases/latest> \
| grep "browser_download_url.*x86_64.AppImage" \
| head -1 | cut -d : -f 2,3 | tr -d \" | wget -qi -
2. Next, confirm the downloaded AppImage in the current directory.
ls
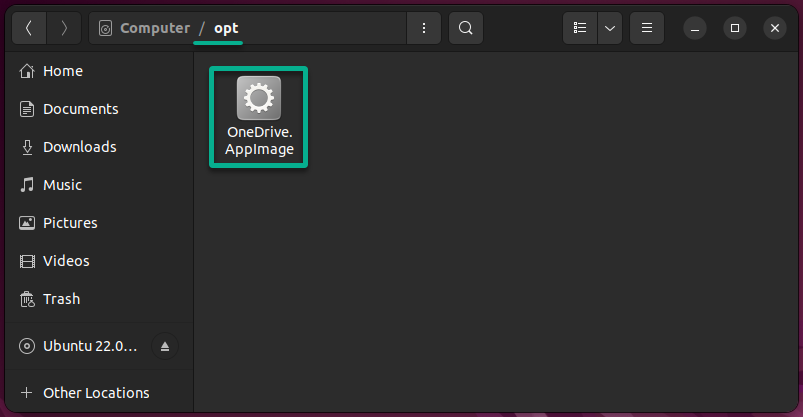
3. Execute each command below to move (mv) the OneDrive AppImage to the /opt directory while renaming it as OneDrive.AppImage, and verify the AppImage.
Placing the OneDrive AppImage in the /opt directory keeps the AppImage separate from the system’s core files and makes it system-wide accessible.
sudo mv OneDrive*.AppImage /opt/OneDrive.AppImage
ls -l /opt/OneDrive.AppImage
4. Once the AppImage is moved, run the following commands to make OneDrive.AppImage executable.
chmod +x /opt/OneDrive.AppImage
ls -l /opt/OneDrive.AppImage
5. Now, run the following command to install the libfuse2 package. This package is a library required for applications and tools interacting with the FUSE interface for user-space file systems.
For Ubuntu 22.04 systems and later, OneDriveGUI won’t launch without this package.
sudo apt install -y libfuse2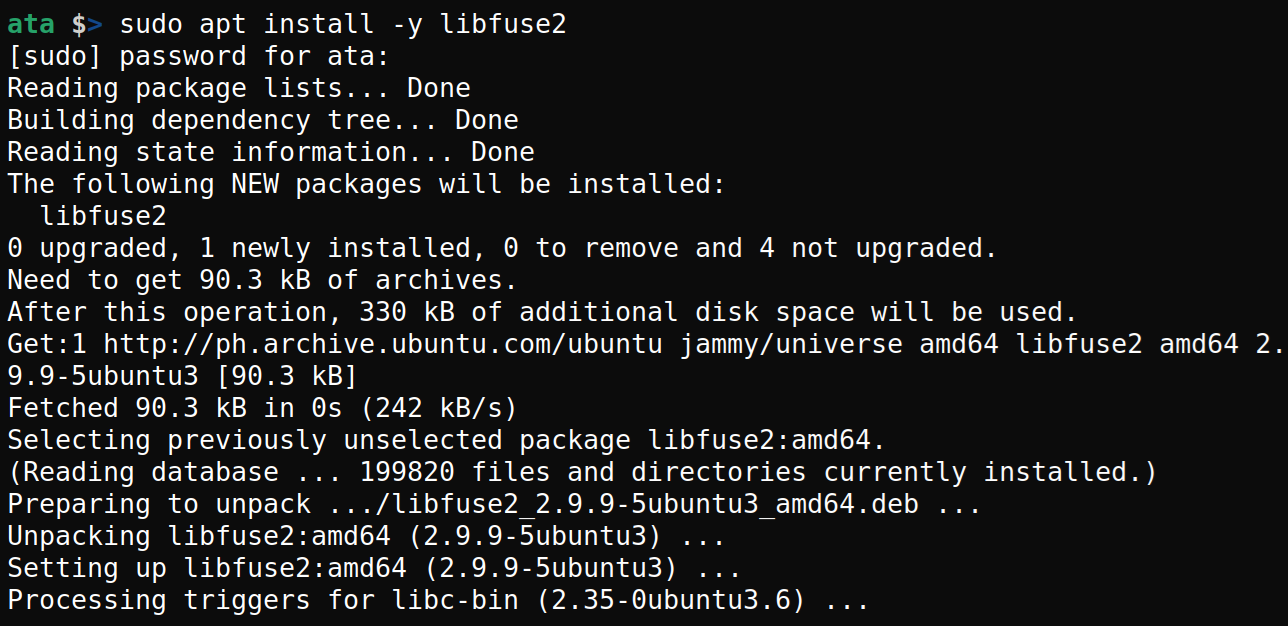
Placing Shortcuts for OneDriveGUI on Dash and Desktop
You’ve successfully installed OneDriveGUI to your Ubuntu system. But you might be wondering, “How do I launch it?” If you’ve been following along, the OneDriveGUI app should be sitting comfortably in the /opt directory, as indicated below.
But why bother digging into the /opt directory whenever you want to open the OneDriveGUI app? In this example, you’ll create shortcuts to launch the OneDriveGUI app from your dash and desktop conveniently.
To place shortcuts for OneDriveGUI, perform the following:
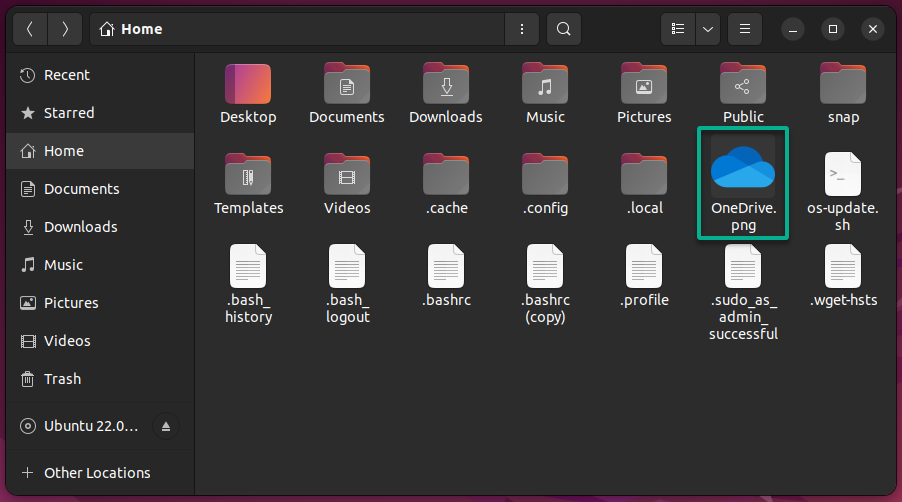
1. Execute the following command to save the OneDrive logo from a Base64 string to the working directory as OneDrive.png.
Base64 encoding mitigates file corruption, representing the binary data as a text string. But If you have an existing OneDrive logo saved on your computer, you can skip this step and use that logo instead.
This command has no output to the terminal when successful, but this OneDrive logo is what you’ll set for the shortcut’s default icon.
echo -n iVBORw0KGgoAAAANSUhEUgAAAUAAAAFACAMAAAD6TlWYAAAAG1BMVEVHcEwMg9QZmuIAbcUXnecjqesMkeAAedUAZLk63UiTAAAABXRSTlMAPYfIylzCXSAAAAUrSURBVHja7dgLcttIEATR6o8I3v/EayHWGntFS8QMo7Fo5ztCRjWGkgAAAAAAAAAAAAAAAAAAAAAAAAAAAAAAAAAAwP+CvXPzd7ajyVPMPCLuj0S40/EL5qPcF8Kdio/i3Y8IIj6MR8T5ejRcqUfDGRb31whjfKvcGB8zPJiPhEv5SLiUj4STzO8/kHCW3ys418sIz5nfEMxvlTE/Rvin+fElPMrun/AcHxD3HSOcP18KvvJ8eY0nX18+hHP9KPjq54NfhEf6UXCtHwXX+lFwrR8F1/pRcK0fBdf6UfC1v5/5RX2sHwUX2P2P+M/Cc/0o+JIHhIdkth8FX/GA8JCsfAD5DC4dMEe8csAUXD1gjniC7Tz+xUv8tL3a9kC84yX+knls34ngiKfjjS1yxL8z3w6K4Ih/stimRHDEkmwbrtzQTzzdHgntrHxdEsY5n75GCe1y6xvir5vgyNdohFb/8vZaYVTOr2VCK5tf04JRP79mn0Ir++3SdIVecb6tC174fIeIrjcc29B0hVHw+etd0Ao+f63v2Av6tU4YBf1637EV9Gs9Qi/o13qFUdCvd0Er+P3X+o69oF/rFUbB32+9Cxb0a3jHMbhZwQPSZoURkbfP0t30CrE1Lri3+4pbQb+r3nHE7RnpVvABLBOV9dYb2ra1LBh5Oyht6YB73XHcZqQVHHCRKB3fYBMH3Kxg3NbY1AF3ueOI27K0DgPcxdTtrvOJATYoGLfXsQYD3EVMjK9uhNsVxEy+mi+hbw0KjtutLxjbNURMjK/gjG27jjiQr6zgdiUx8aNvXfYY4C6ibnxDFn0B61cYtxrZYIBDjPHVKfgNUydi5KuSHS54yLhVyx4XvIt8e8tbNe8ywMy3XXlC02dXHN+HzOqC17/gke+UEV78Dc58++TkpziuOr4h88QjtguPbzixoF96fEOedcRxkXf3W5nnTDCud7vnj1CDNRhffULXB+swviGz+oi9R74hiycYF3h3D8rSCfYZ35BZOMFO4xuybIJ2gXd3ShZN0Lrcbv0da+ftxjdkxQ17l09ffcLUu2hzu/V3bCNgh/HVj9BHwA7jq0+YktRofPV3bJKiz7tbP0KT1Oh26xOmpE7jq79jSZ3GVz9Ckzrlq0/oUqd3t/6OU4pO46sfodRqfPUJpej07tbfsSk63W79CE1RPL5mCV3eaXz1d+zy0nztRpiyqne3Z8KUlY6v3x1LNePrOsKUCt7dzgmlKLndtncsecH4Go9QsoLxNU4oGflW7lhSFLy7bUeYkqJgfH0TSvKC8bW945Rkbd7ddTkTUFFwu10TuiQ545u54xHQGN/0CE3vyDeVcASMgne36R1rZ4xvdoTSjvFNJkxp5wXvbss7Nmln3O5D+WxABeObSqifjPHN3HHqA/lmRmj6YLy7EwlNA+ObuGNpcMZ3eISuX/HuHk5o+pVxuwcTpn4XjO9YQdPvjPEdSyh9NcEg3zfvseu/jHf3yAhNnxi3+3xC1wPB+J6+Y9MDxrv77AhdDxltnmR6jAE+xyUKrpAkjnie6c+cPN9KiYLrA+QzuNCPggtS3zEKPjVAnuLZfhRc60fBBS5R8CUPCC/Jej9+zUz0o+Cr+/FX3VQ/npK1fjwl879fOOO1fpzxHNM7RjgpTR/4Ek6fLyNcmB8JXzE/7vic+Q3m5CPhbD4ueT4fM5zOR8Mp6Spgnk3rmaqYeXaLZ6pm5p4d2rnpTLbzC7IfBAAAAAAAAAAAAAAAAAAAAAAAAAAAAAAAAAAAnvEPhGrBOme3lBQAAAAASUVORK5CYII= | base64 --decode > OneDrive.pngBelow, you can see the OneDrive logo exists.
2. Next, run the command below to move (mv) the OneDrive.png file to the same /opt directory as OneDrive.AppImage.
This command doesn’t produce output, but placing both files in the same directory keeps them organized and easily accessible.
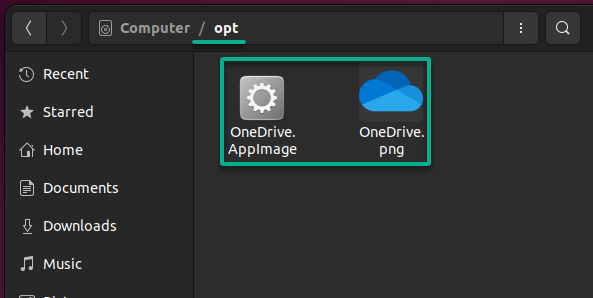
sudo mv OneDrive.png /opt/OneDrive.png3. Verify that the OneDriveGUI AppImage and logo are in the same location, as shown below.
4. Now, create a file called /usr/share/applications/OneDrive.desktop in your text editor (i.e., nano or vim).
sudo nano /usr/share/applications/OneDrive.desktop5. Populate the following configuration to the OneDrive.desktop file, save it, and close the editor.
This configuration creates a shortcut for OneDrive in your dash, complete with a name, icon, and other properties.
[Desktop Entry]
# The character encoding of the desktop entry file
Encoding=UTF-8

# The display name of the application
Name=OneDrive

# A brief description or comment about the application
Comment=OneDrive Client

# The command that is executed when the application is launched
Exec=/opt/OneDrive.AppImage

# The path to the icon file representing the application
Icon=/opt/OneDrive.png

# The type of the desktop entry, in this case, an application
Type=Application

# Specifies whether the application should run in a terminal
Terminal=false

# Categories to which the application belongs (Utility category in this case)
Categories=Utility;
6. Navigate the dash and confirm OneDrive’s shortcut, as shown below.

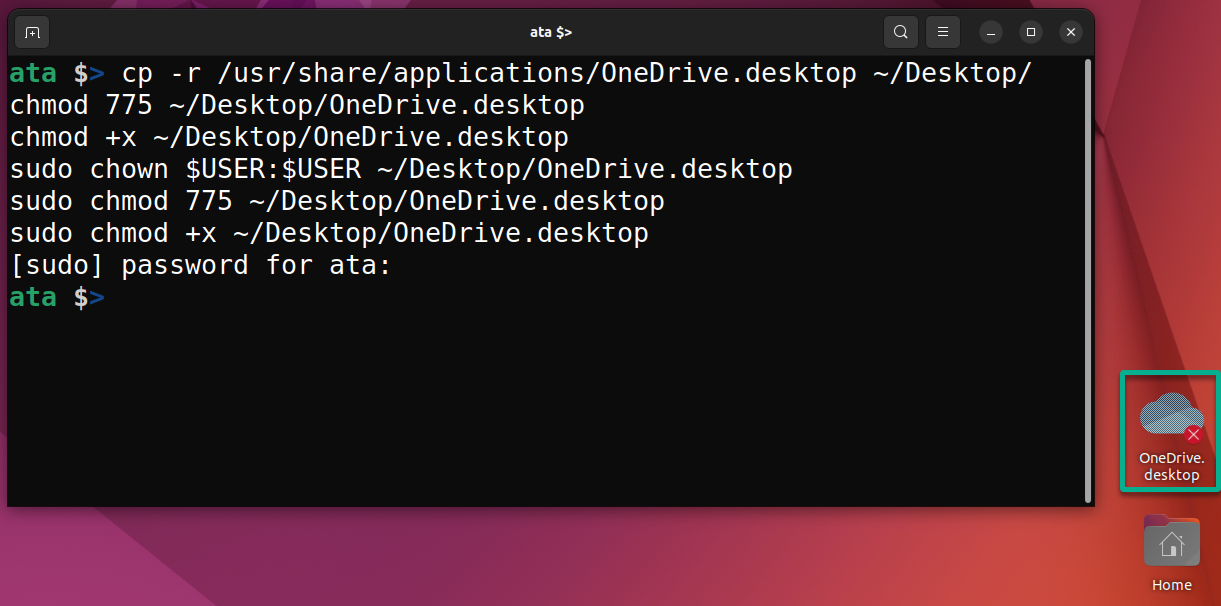
7. Next, execute each command below, which has no output, to create the same OneDrive shortcut on your desktop.
# Copy the OneDrive.desktop file from system applications to user's Desktop
cp -r /usr/share/applications/OneDrive.desktop ~/Desktop/

# Set read, write, and execute permissions for the user on the desktop file
chmod 775 ~/Desktop/OneDrive.desktop

# Make the desktop file executable for the user
chmod +x ~/Desktop/OneDrive.desktop

# Change the ownership of the desktop file to the user
sudo chown $USER:$USER ~/Desktop/OneDrive.desktop

# Set read, write, and execute permissions for the user on the desktop (sudo)
sudo chmod 775 ~/Desktop/OneDrive.desktop

# Make the desktop file executable for the user (sudo)
sudo chmod +x ~/Desktop/OneDrive.desktop
Notice the new shortcut appears on the desktop (lower-right) for OneDrive.
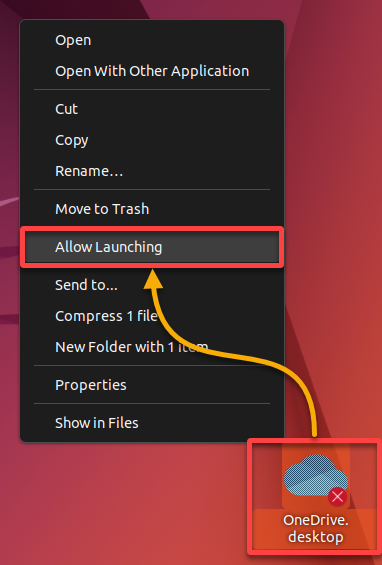
8. Finally, right-click on the new OneDrive shortcut and select Allow Launching from the context menu, enabling the execution of OneDrive.
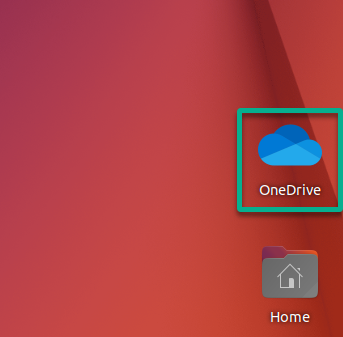
If successful, the shortcut becomes enabled, as shown below.
Configuring a OneDrive Profile on Ubuntu
With your OneDriveGUI shortcuts neatly in place, you can tailor your OneDrive experience to suit your needs and preferences perfectly. But first, you must create a OneDrive profile on your Ubuntu system.
Creating a OneDrive profile doesn’t impact your actual OneDrive account but rather determines how the OneDriveGUI app interacts with that account.
To configure a OneDrive profile on your system, accomplish the following:
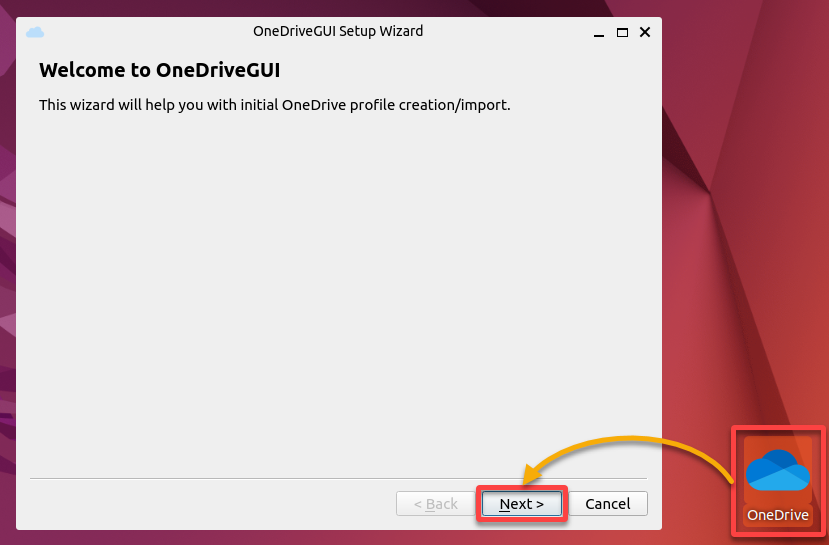
1. Double-click the OneDrive shortcut on your desktop to launch the OneDriveGUI, and click Next on the welcome screen to continue.
On launching the OneDriveGUI for the first time, the setup wizard appears where you can configure your OneDrive profile.
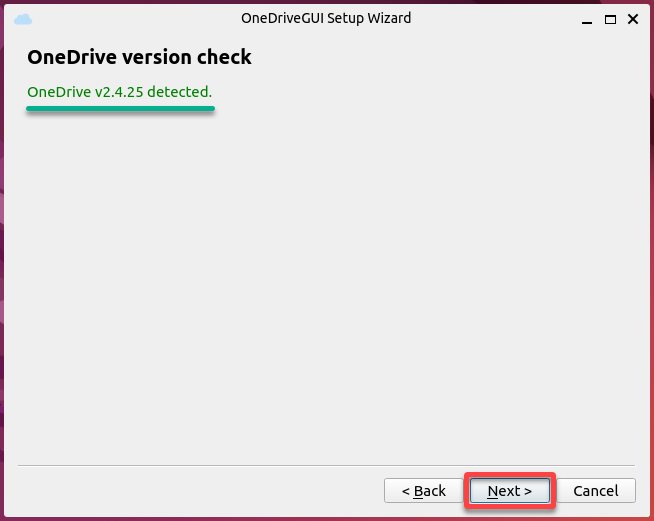
2. Click Next once the wizard verifies the installed OneDrive Client for Linux is a supported version.
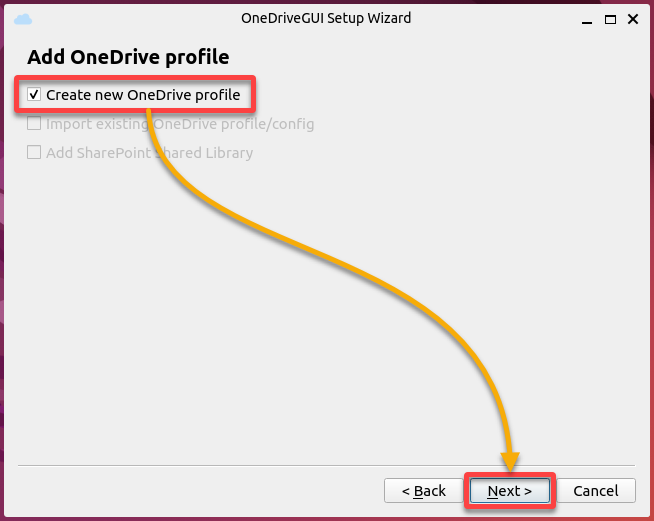
3. Tick the first option to Create new OneDrive profile, and click Next.
This option lets you configure a new set of settings and preferences for the OneDriveGUI app.
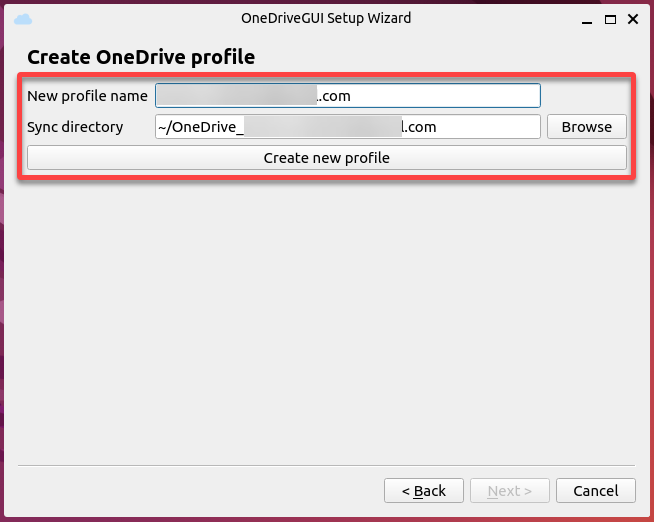
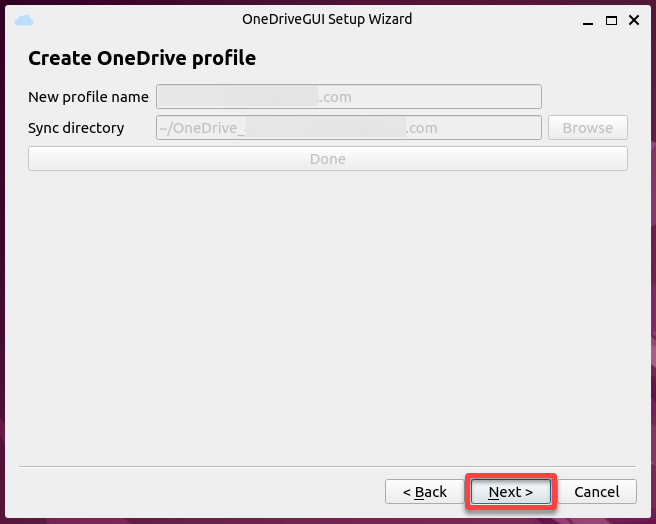
4. Now, configure the new OneDrive profile as follows:
- New profile name – Provide a profile name, which is your OneDrive account’s email address.
- Sync directory – This field automatically populates as you type a profile name, but you can Browse for a different location.
Once configured, click Create new profile to finalize creating your OneDrive profile.
💡 Unlike the OneDrive Client in Windows, one of the great features of OneDriveGUI is that it supports setting up multiple OneDrive profiles.
5. Once created, click Next to continue.
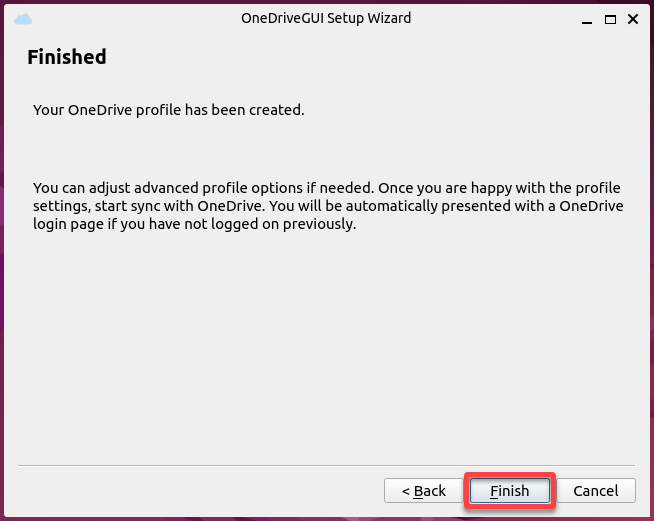
6. Subsequently, click Finish to close the setup wizard.
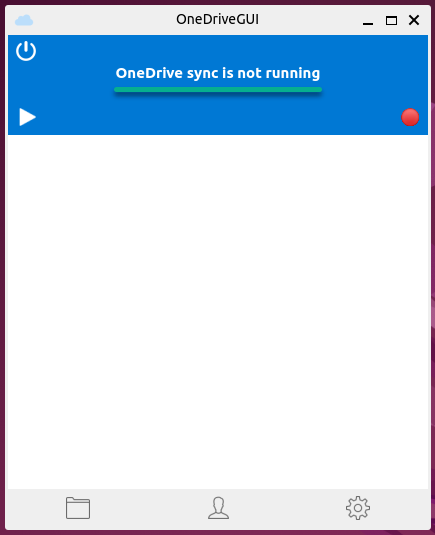
The OneDriveGUI window appears after you close the setup wizard, as shown below.
Since you only created a profile, OneDrive sync is not running, which you’ll work on in the following section.
Authenticating and Cloud-Syncing Files to OneDrive
Configuring a OneDrive profile on your Ubuntu system doesn’t automatically enable OneDrive syncing. You must authenticate the OneDrive Client for Linux’s access to your OneDrive account before you can cloud-sync your files.
To authenticate and cloud-sync your files to OneDrive, execute these steps:
1. Click the start sync button on the OneDriveGUI main window to initiate OneDrive syncing.

2. Follow the instructions on the pop-up window, starting with clicking the hyperlink. The link opens the Microsoft login page on your browser (step three).
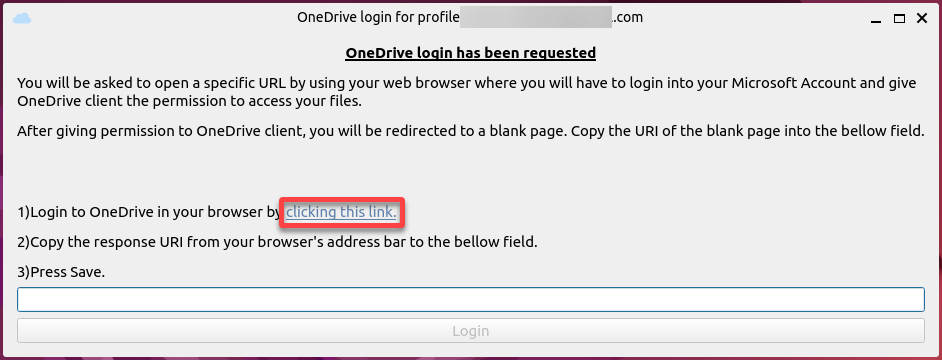
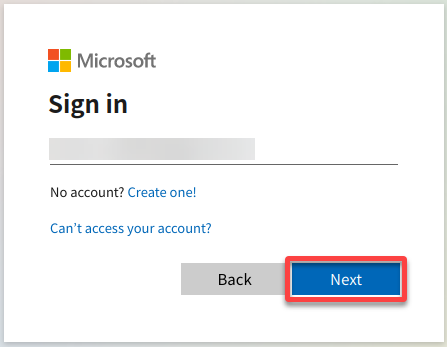
3. Sign in with your Microsoft account credentials using the same email address you set for your OneDrive profile on Ubuntu.
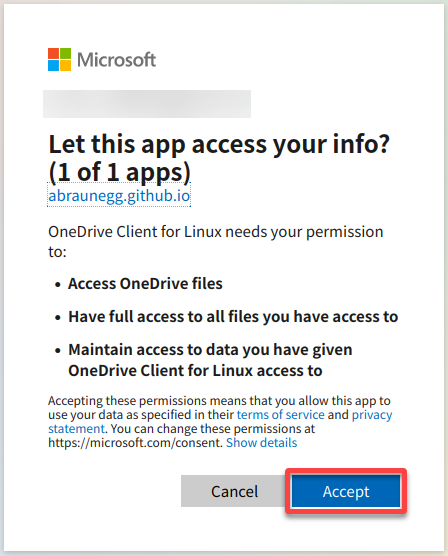
4. Now, click Accept to authorize OneDrive Client for Linux access to your info.
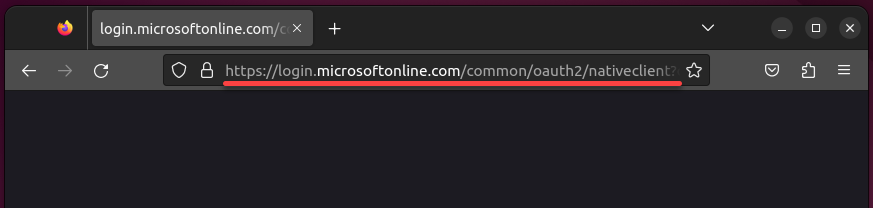
5. Once authorized, copy the entire response URI from your browser.
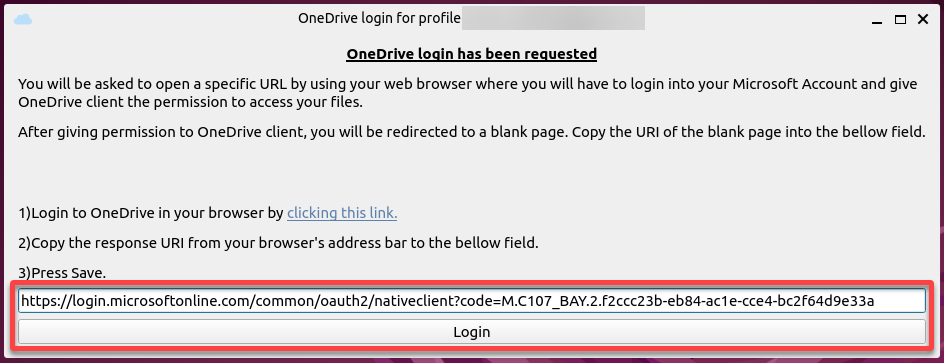
6. Switch back to the pop-up window, paste the response URI you copied in step five to the empty field, and click Login.
This process triggers an authentication process with the Microsoft OneDrive service. When successful, the OneDriveGUI app acquires the credentials to access your OneDrive account.
7. Once successful, click OK to close the pop-up window.
8. Back to the OneDriveGUI window, sync OneDrive with the following:
- Click the play button again to start OneDrive syncing.
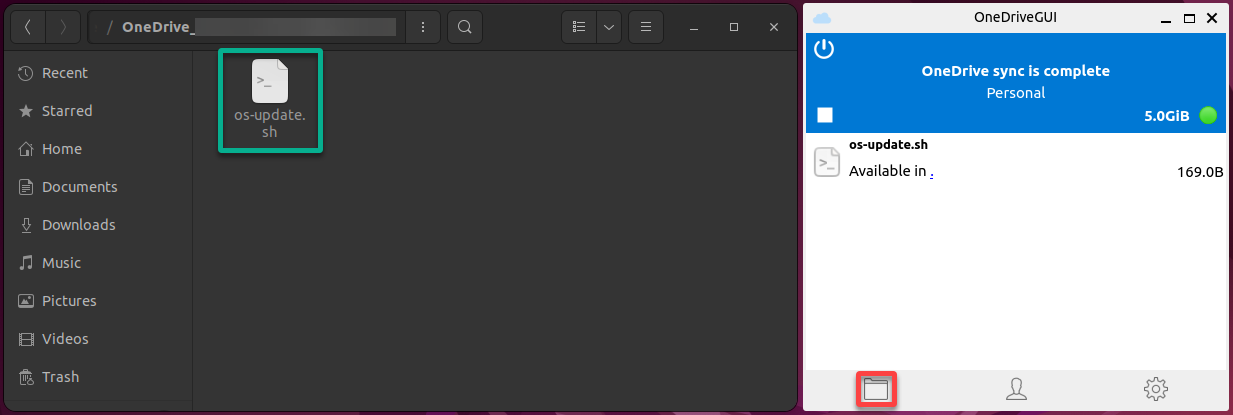
- Click the folder icon at the bottom-left of the OneDriveGUI window to open your OneDrive’s local directory.
If successful, your synced files appear, as shown below.
9. Now, copy some files to your OneDrive local directory to further test if the syncing works.
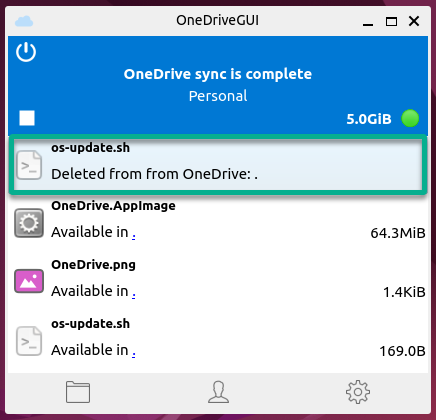
Below, what you see in the OneDriveGUI app are not the actual files but the syncing progress for each file.
If you delete a file from your local OneDrive directory, you’ll see an entry in the OneDriveGUI app saying the file has been deleted from OneDrive.
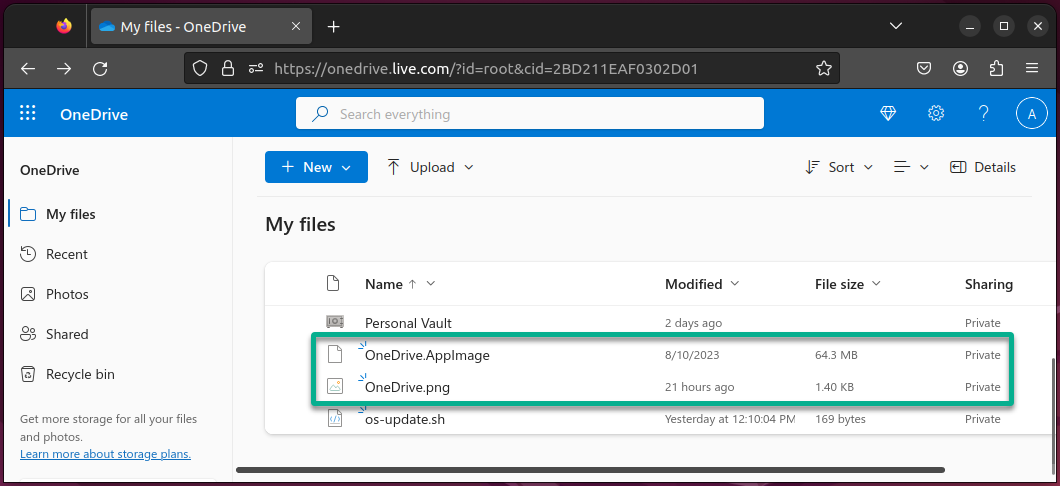
10. Finally, verify if the new files synced to your OneDrive account, as demonstrated below.
Conclusion
Following this tutorial, you’ve successfully integrated OneDrive on Ubuntu with a combined OneDrive Client for Linux and OneDriveGUI. With a personalized OneDrive profile and shortcuts for quick access, you’ve mastered authenticating and cloud-syncing your files to OneDrive.
At this point, your Ubuntu system is now harmoniously connected to the cloud, bringing convenience and efficiency to your digital life.
As you reflect on bridging Ubuntu and OneDrive, why not explore advanced features within OneDriveGUI? Consider enabling auto sync when the GUI starts or fine-tune the monitoring interval to ensure your files are consistently up-to-date.
Remember, technology evolves, and so does your proficiency. Stay curious, keep exploring, and maximize your integrated OneDrive experience on Ubuntu!


